These soft pretzel bites are exactly like regular homemade soft pretzels, but shaped into smaller pieces. The dough requires just 6 ingredients and there’s hardly any rise time, so this is a wonderful recipe for yeast beginners. Have fun shaping the bites (they don’t need to be perfect!) and enjoy warm flavorful homemade pretzels within an hour. Serve plain, cinnamon sugar style, or with your favorite dip such as spicy cheese sauce or stone ground mustard.

I’m writing this over 7 years after this recipe was first published and say with 100% honesty that kids and adults alike FLOCK to these pretzel bites. They’re always a massive hit, a favorite party snack, and the fact that they’re surprisingly easy is music to the ears!
Tell Me About These Soft Pretzel Bites
- Flavor: If you enjoy soft pretzels, you’ll love these smaller bites. They’re completely homemade, so unlike store-bought frozen soft pretzels, each has that soft, warm, and fresh-from-the-oven taste and texture. You can keep the pretzels traditional with a sprinkling of coarse salt or try the cinnamon sugar version detailed in the recipe notes.
- Texture: The difference between bread and soft pretzels/soft pretzel bites is an alkaline bath. Do you know what that is? I promise it’s a very easy step. This is when shaped soft pretzel dough takes a dip in boiling water and baking soda, a quick step that provides the iconic chewy pretzel texture and adds a deeper, richer color to the baked pretzels. The boiling water also locks in the shape so the pretzels don’t over-puff in the oven. (Without the baking soda bath, you lose texture, that deep brown color, and flavor. So, basically, you will have bite-size bread instead of pretzels.) We do this key step when making regular soft pretzels, pretzel rolls, jalapeño cheddar soft pretzels and soft pretzel knots, too.
- Ease: Have you ever made my recipe for regular homemade soft pretzels? It was one of the first recipes I ever published, only to be republished with step-by-step photos a few years later. It’s become a “famous” & popular recipe on this website because the pretzels are relatively quick, extremely easy, and deliver great taste. Same story with these pretzel bites! Though the recipe requires yeast, I always say that this pretzel dough is a terrific starting point for yeast beginners because there’s very little rise time. And shaping the dough into bite-size pieces is easier than shaping into pretzels. Lots of perks about today’s recipe!

Dough for Soft Pretzel Bites
I never stray from my original soft pretzel dough, so that’s what you’ll use for these pretzel bites. You need just 6 basic ingredients to get started including warm water, yeast, a little sugar to feed the yeast, melted butter, salt, and all-purpose flour. (If you have it, the same amount of bread flour works too!). You can use either instant (quick rise) or active dry yeast in this dough. I usually use Platinum Yeast from Red Star, which is an instant yeast.
The dough doesn’t require extended rise time and the baking soda bath is pretty quick, so besides the baking step, the longest stretch of time this recipe requires is shaping.
Baking with Yeast Guide
Reference this Baking with Yeast Guide whenever you work with baker’s yeast. I include practical answers to all of your common yeast questions.
Step-By-Step Pictures
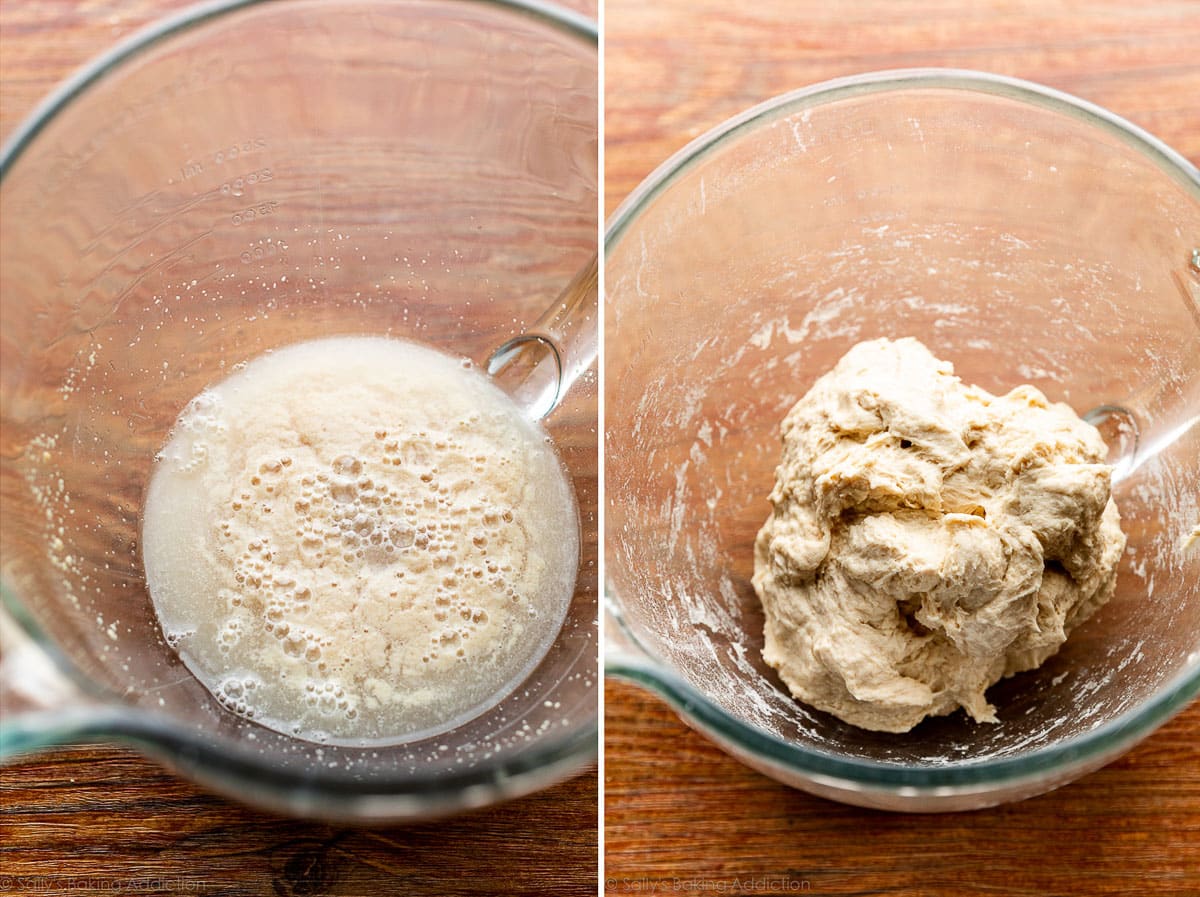
Whisk the warm water, yeast, and sugar together. Cover and let the mixture sit for a few minutes until foamy on top. Waiting for it to foam isn’t totally necessary, but it helps us see that the yeast is ready and active. The right photo below shows the dough before kneading. Review my How to Knead Dough video tutorial if needed before starting the next step.
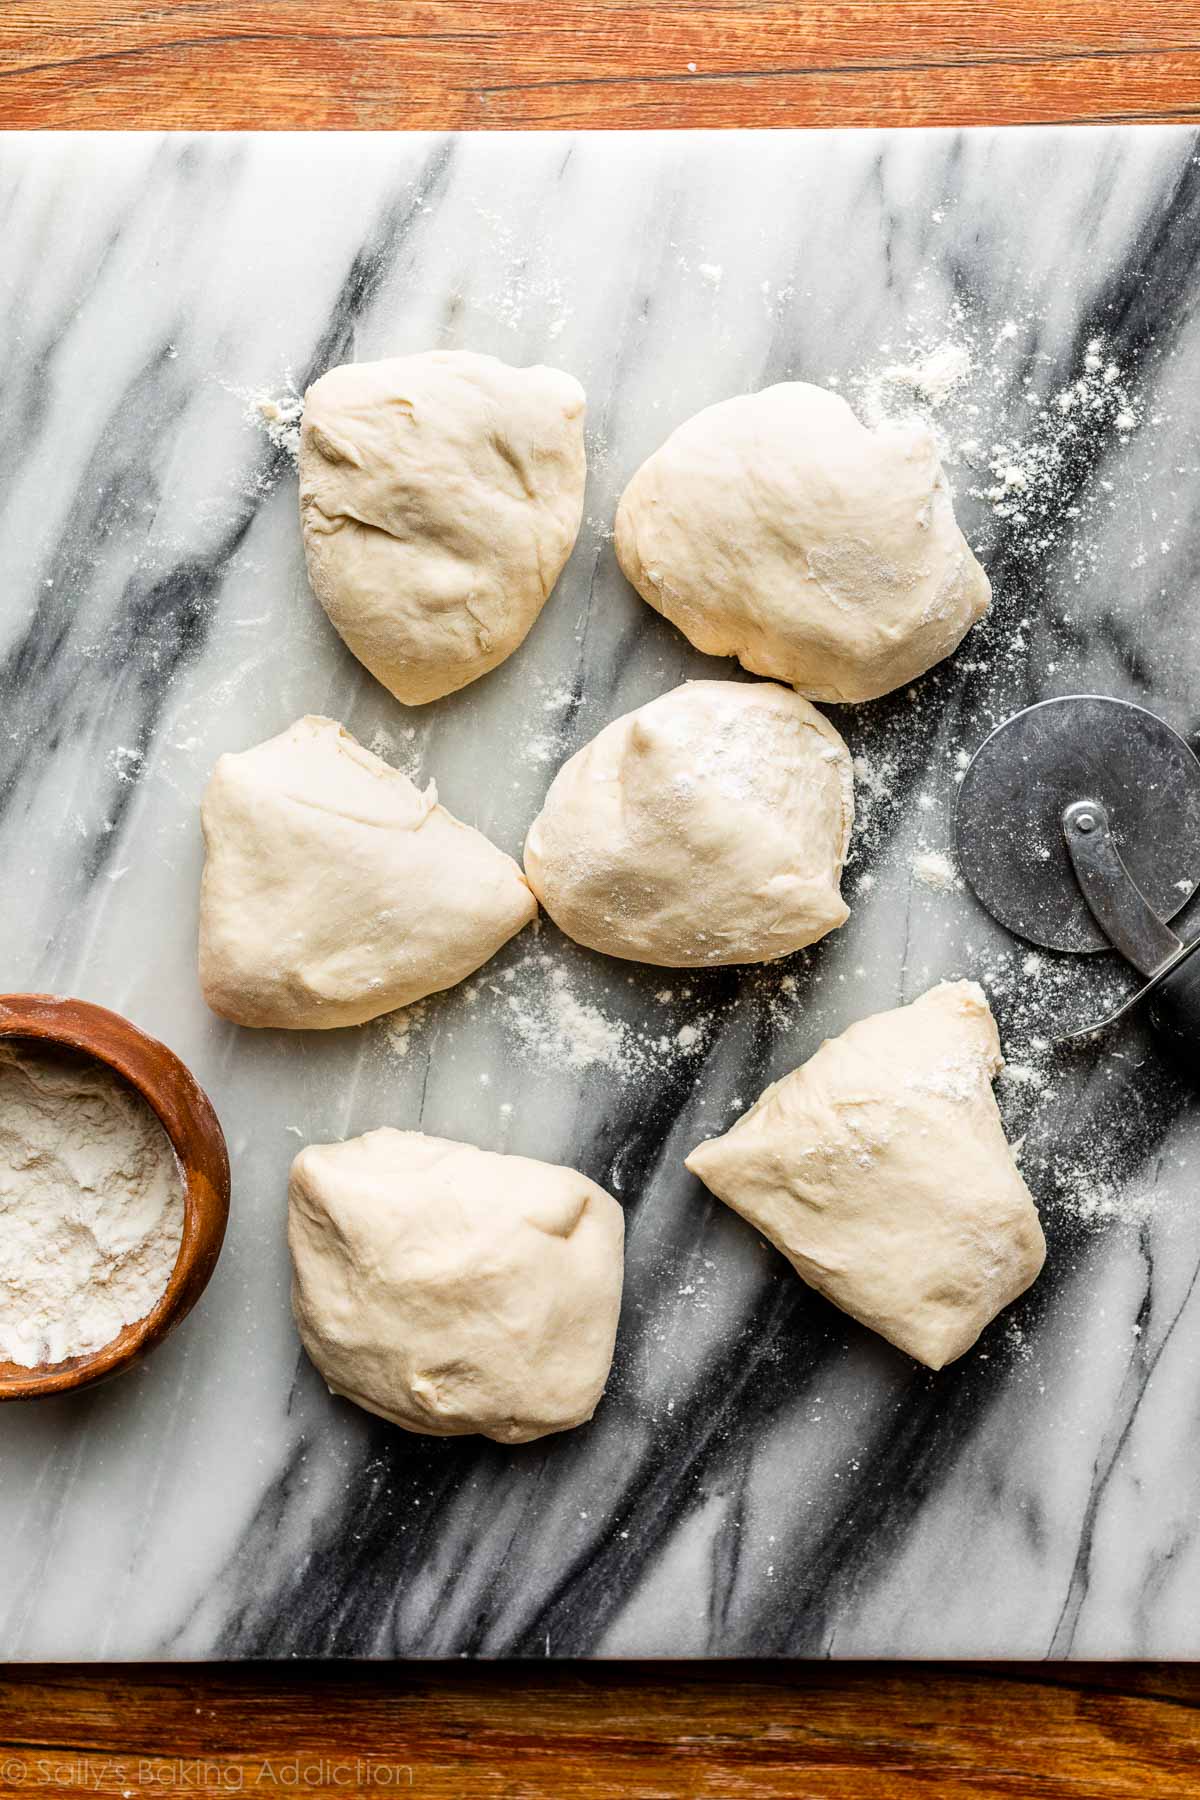
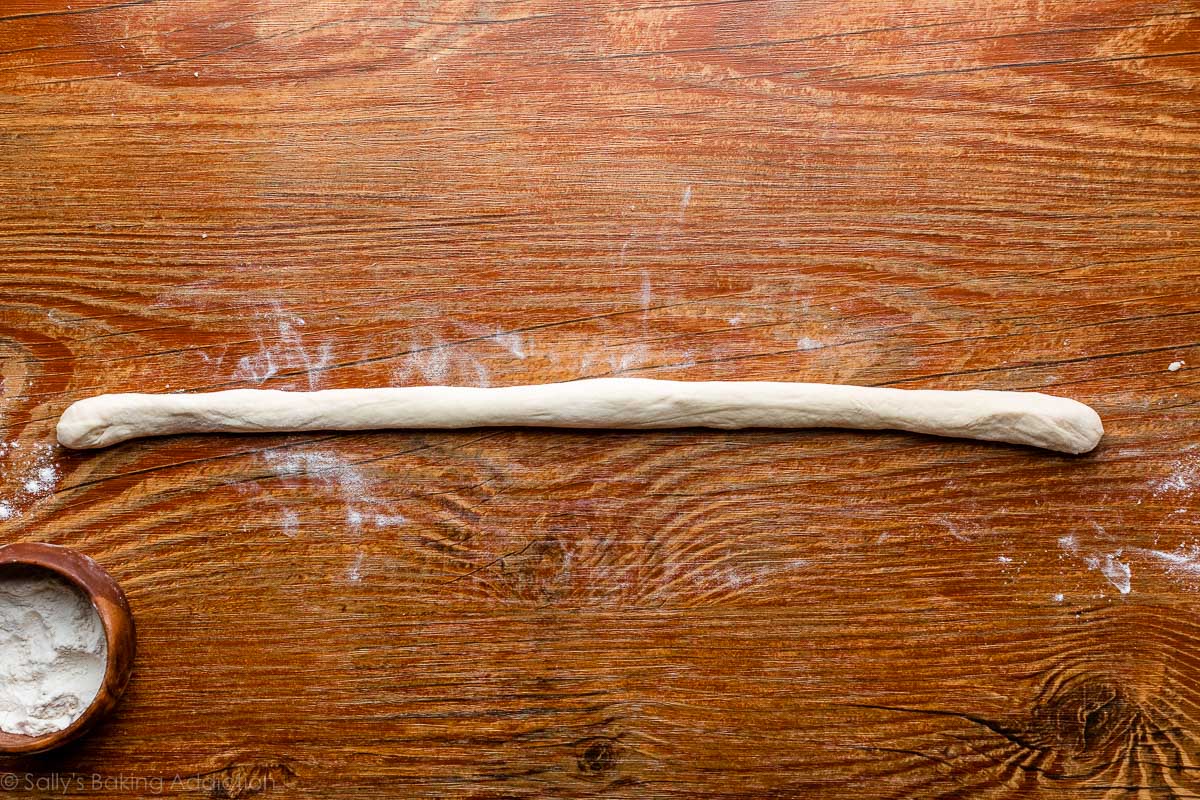
Knead the dough, divide into 6 sections, and then roll into six 20-inch ropes. The video tutorial located in the recipe shows these steps as well. Cut each rope into 1.5 – 2 inch pieces to make bites. I like to use a (affiliate links) pizza cutter or bench scraper for cutting this dough, but a sharp knife works perfectly fine too. Use what you have.
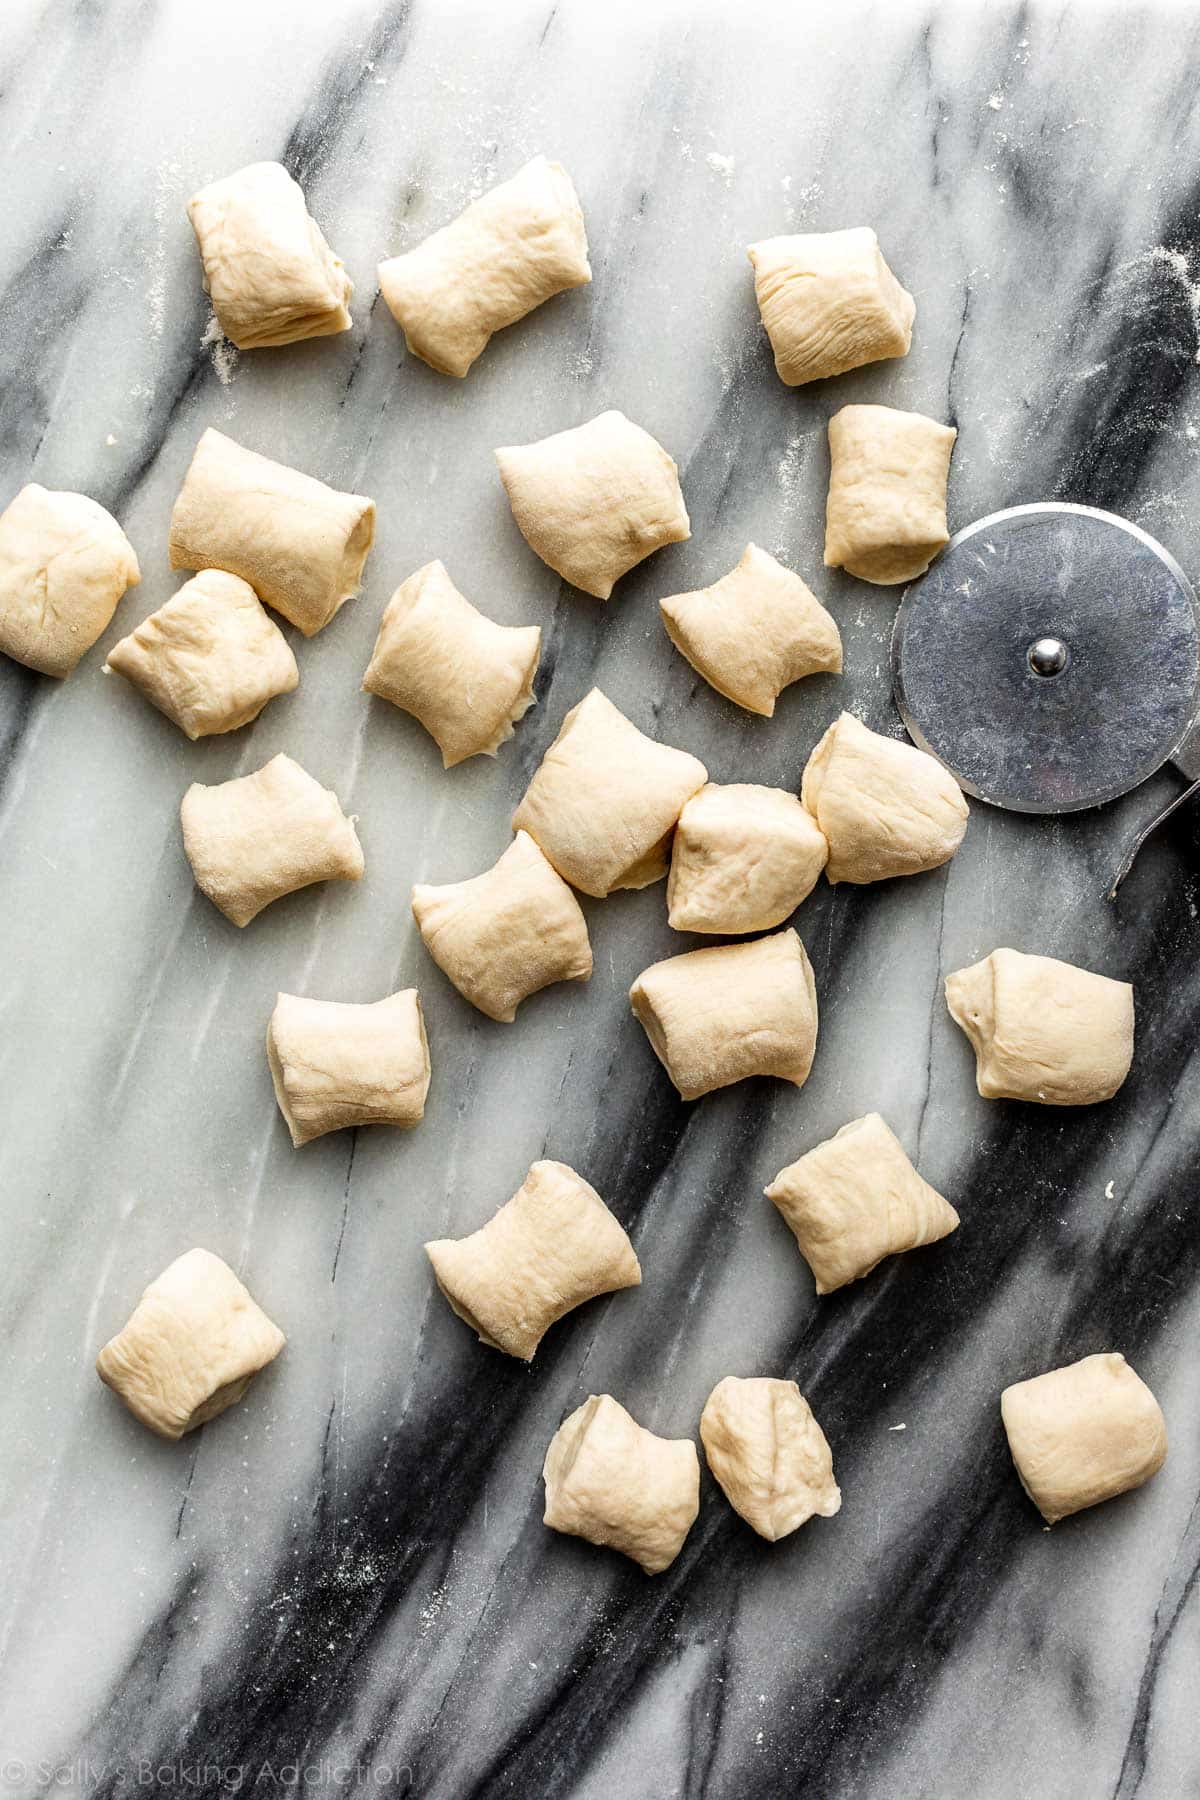
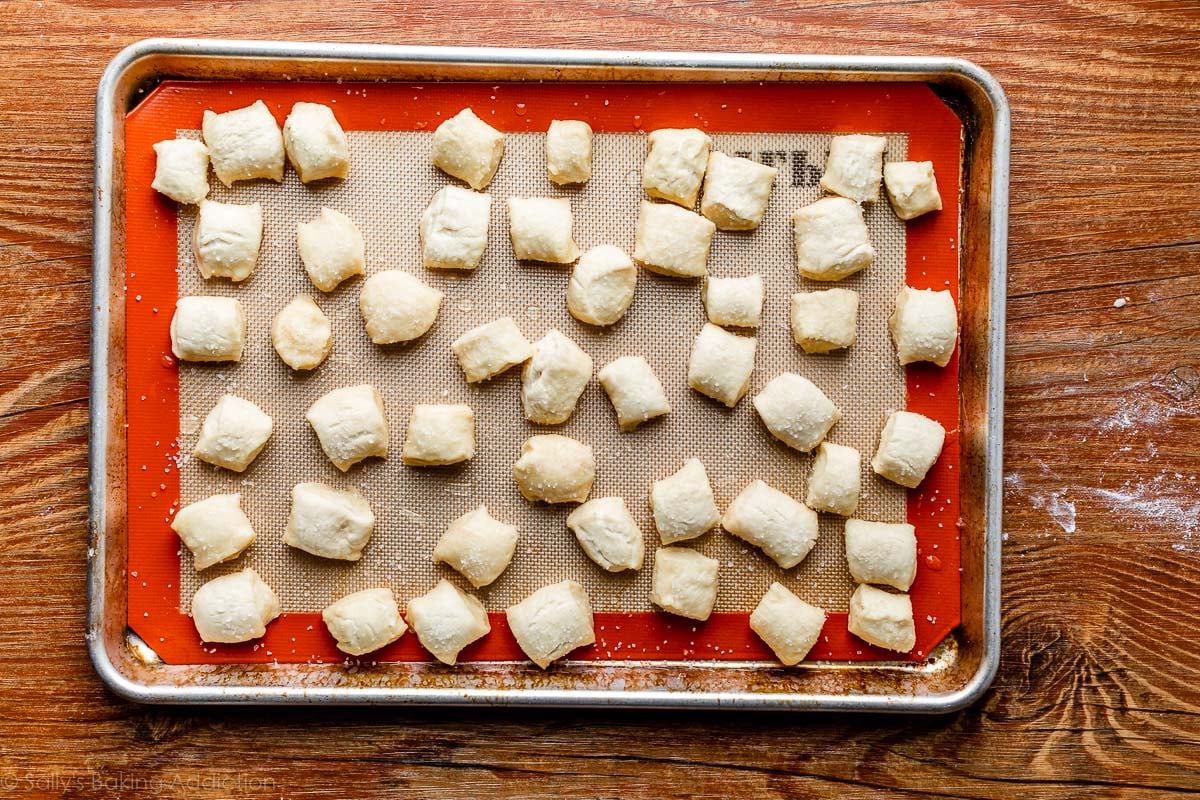
The photo above shows the pretzel bites after the baking soda bath. At this point, they are ready to bake.
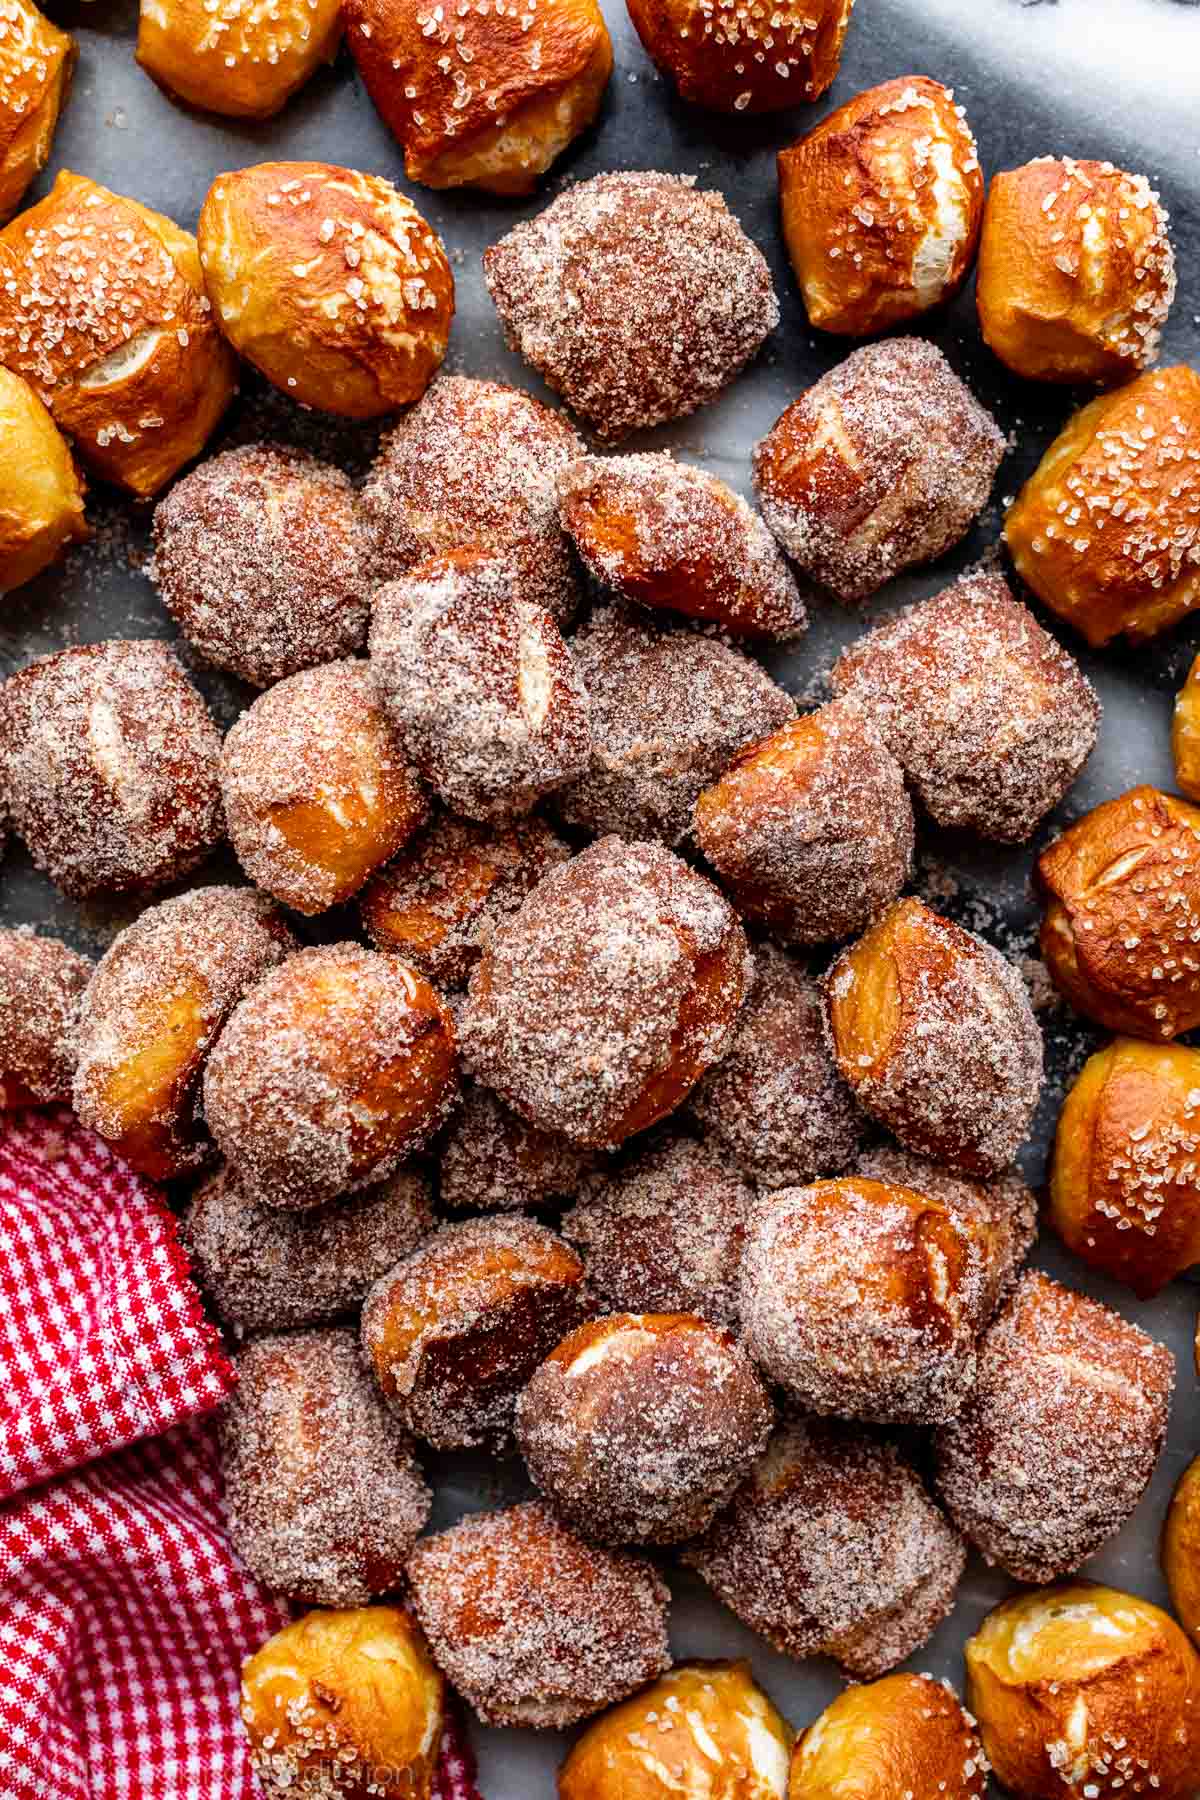
Try Cinnamon Sugar Pretzel Bites
Immediately after the baking soda bath while the soft pretzel bites are still wet, sprinkle with coarse salt. Or if you’d like a different topping, skip the coarse salt and try the cinnamon sugar version. Bake the pretzels completely plain without salt. Once done and still warm out of the oven, brush with melted butter then dip into a mix of cinnamon and granulated sugar. See specific instructions in the notes below.
By the way, you can have fun with even more toppings such as everything bagels seasoning instead of coarse salt. Heavily sprinkle on the pretzels while they’re still wet from the baking soda bath before baking.
For a larger version, try these soft pretzel rolls. Great for sandwiches!
More Appetizers & Snacks
- Pepperoni Pizza Dip
- Roasted Garlic & Bacon Spinach Dip
- Sweet Potato Skins
- Crab Dip
- Bacon Wrapped Cheesy Stuffed Jalapeños
- Honey BBQ Popcorn Chicken
- Cranberry Pecan Cheese Ball

Soft Pretzel Bites
- Prep Time: 40 minutes
- Cook Time: 15 minutes
- Total Time: 1 hour
- Yield: 5 dozen
- Category: Appetizer
- Method: Baking
- Cuisine: American
Description
These soft pretzel bites are always a crowd favorite! The easy dough requires just 6 ingredients and there’s hardly any rise time, so this is a wonderful recipe for yeast beginners. Have fun shaping the bites (they don’t need to be perfect!) and enjoy warm flavorful homemade pretzels within an hour. Review recipe notes and watch the video tutorial before starting.
Ingredients
- 1 and 1/2 cups (360ml) warm water (lukewarm–no need to take temperature but around 100°F (38°C) is great)
- 2 and 1/4 teaspoons (7g) instant or active dry yeast (1 standard packet)
- 1 Tablespoon brown sugar or granulated sugar
- 1 teaspoon salt
- 1 Tablespoon (14g) unsalted butter, melted and slightly cool
- 3 and 3/4 – 4 cups (469-500g) all-purpose flour (spooned & leveled), plus more for hands and work surface
- topping: coarse salt/coarse sea salt
Baking Soda Bath
- 1/2 cup (120g) baking soda
- 9 cups (2,160ml) water
Optional for Serving
- spicy cheese sauce or your favorite mustard
Instructions
- Make the dough: Whisk warm water, yeast, and sugar together in the bowl of your stand mixer fitted with a paddle or dough hook attachment. (If you do not have a stand mixer, just use a regular large mixing bowl and a wooden spoon or silicone spatula.) Cover yeast mixture and allow to sit for 5 minutes or until foamy on top. Add salt, melted butter, and 3 cups (375g) of flour. Beat on low speed for 1 minute, scrape down the sides of the bowl with a rubber spatula if needed, then add 3/4 cup (95g) of flour. Beat on low speed until the dough comes together and pulls away from the sides of the bowl, about 2 minutes. If dough is extremely sticky after 1 minute of mixing, add remaining 1/4 cup of flour and continue to beat for 1 more minute. (You can see in the video that I add the remaining flour.)
- Knead the dough: Keep the dough in the mixer (and switch to the dough hook if using the paddle) and beat for an additional 5 full minutes, or knead by hand on a lightly floured surface for 5 full minutes. (If you’re new to bread-baking, my How to Knead Dough video tutorial can help here.) If the dough becomes too sticky during the kneading process, sprinkle 1 teaspoon of flour at a time on the dough or on the work surface/in the bowl to make a soft, slightly tacky dough. Do not add more flour than you need because you do not want a dry dough. After kneading, the dough should still feel a little soft. Poke it with your finger—if it slowly bounces back, your dough is ready to rise. You can also do a “windowpane test” to see if your dough has been kneaded long enough: tear off a small (roughly golfball-size) piece of dough and gently stretch it out until it’s thin enough for light to pass through it. Hold it up to a window or light. Does light pass through the stretched dough without the dough tearing first? If so, your dough has been kneaded long enough and is ready to rise. If not, keep kneading until it passes the windowpane test.
- Cover lightly with a towel and allow to rest for 10-30 minutes. (Meanwhile, I like to get the water + baking soda boiling as instructed in step 5.)
- Preheat oven to 400°F (204°C). Line 2 baking sheets with parchment paper or silicone baking mats. Silicone baking mats are highly recommended over parchment paper. If using parchment paper, lightly spray with nonstick spray or grease with butter. Set aside.
- Shape: With a sharp knife, pizza cutter, or bench scraper, cut dough into 6 equal pieces (just eyeball it, doesn’t have to be perfect). Sprinkle work surface very lightly with flour. (Tip: The heavier you flour the work surface, the harder it is to roll the dough. A little stickiness actually helps. You only need *a very light* dusting of flour.) Roll each piece of dough into a 20-inch rope. If the ropes keep shrinking and stretching the dough becomes difficult, stop what you’re doing, lightly cover all of the dough, and let it rest for 10 minutes so the gluten can relax. Then, return to rolling it into ropes. Cut each rope into 1.5 – 2 inch pieces to make bites.
- Baking Soda Bath: Mix water and baking soda together in a large pot. Bring to a boil. Place 8-10 pretzel bites into the boiling water for a quick 10-15 seconds. (Any longer and your pretzels could take on a metallic taste.) Using a slotted spatula or spoon, lift the pretzel bites out of the water and allow as much of the excess water to drip off. Place bites onto prepared baking sheets. Sprinkle each with coarse sea salt while they are still wet or leave plain if using cinnamon sugar topping listed in the notes. Repeat baking soda bath with remaining pretzel bites. If needed, you can cover and refrigerate the boiled/unbaked bites for up to 24 hours before baking.
- Bake for 15 minutes or until golden brown. Remove from the oven and serve warm.
- Cover and store leftover pretzel bites at room temperature for up to 3 days. They lose a little softness over time. To reheat, microwave for a few seconds or bake in a 350°F (177°C) for 5 minutes.
Notes
- Make Ahead & Freezing Instructions: Baked and cooled pretzel bites freeze well up to 2-3 months. To reheat, bake frozen bites at 350°F (177°C) for 10 minutes or until warmed through or microwave frozen bites until warm. The prepared pretzel dough can be refrigerated for up to one day or frozen in an airtight container for 2-3 months. Thaw frozen dough in the refrigerator overnight. Refrigerated dough can be shaped into bites while still cold, but allow some extra time, about 1 hour, for the pretzels to puff up before the baking soda bath and baking.
- Special Tools (affiliate links): Electric Stand Mixer | Baking Sheets | Silicone Baking Mats or Parchment Paper | Pizza Cutter or Bench Scraper | Large Pot
- Flour: If you have it, the same amount of bread flour works instead of all-purpose flour. Do not use whole wheat flour.
- Cinnamon Sugar: Bake the pretzel bites completely plain without salt in step 6. As the pretzel bites bake, melt 4 Tablespoons (60g) unsalted butter. Set aside. Combine 3/4 cup (150g) granulated sugar and 1 and 1/2 teaspoons ground cinnamon. Set aside. Once the pretzels are done and still warm out of the oven, brush each with melted butter then generously dip into cinnamon sugar. Cinnamon sugar pretzels are best served that day because due to the melted butter topping, they become soggy after a few hours.
- Reference my Baking with Yeast Guide for answers to common yeast FAQs.
- Egg? This recipe used to call for brushing the boiled pretzel bites with a beaten egg before sprinkling with coarse salt. Now you can skip the egg and sprinkle the salt on the pretzels while they are still wet from the boiling step. If you prefer them the old way, feel free to continue brushing with the beaten egg before salting and baking. I skip it these days.


These were great! Never made pretzels before, but these instructions made me feel like a pro! Everyone loved them. I will say, I did make the recommended nacho cheese recipe.. and it was not good. SO bland, and no one liked it. I tried to spice it up afterward with seasonings like the beer cheese recipe, but it was still terrible. No flavor. Will make pretzel bites over and over again, but definitely not the cheese.
These came out perfect! Even improvising with instant yeast because the store was out of the normal stuff! Thank you!
Can I make the dough in the morning and boil/bake later in the day?? If so, any tips?
Hi RB, yes, and there are instructions for this in the Notes section of the recipe card (“Make Ahead Instructions”)–just scroll down past the recipe instructions. Enjoy!
Hi Sally, thank you so much for sharing such awesome recipes in an easy to follow manner. My recipes are always a hit with my friends and family and have established some credibility for me as a budding baker 🙂 🙂
I’m planning to make these for the Super Bowl tomorrow. Can we add/stick jalapeños to the top of the pretzel to make it a little spicy and complement the spicy cheese dip? Any additional instructions if we want to try this?
Hi Sayali, so glad to hear you’ve had success with Sally’s recipes! You can definitely try adding jalapenos, but we haven’t actually tested this, so I’m afraid I can’t offer specific advice on how to do it. If you try it, please let us know how they turn out!
I have made these maybe a dozen times and this recipe is perfect. My parents demand I make these every time I see them now, I think they like these pretzels more than me!
Never made pretzels or pretzel bites before but this recipe was so easy and tasty. They were a big hit at our potluck get together today.
I’m one of the folks who have never made pretzel bites and once again – Sally comes through! This is such a foolproof recipe, I wasn’t even that careful rolling/cutting and they were just perfect. A big hit to help us celebrate a chiefs win! Thank you so much Sally!
This was my first time making pretzel bites and they came out amazing! Thank you
These were so much fun to make, they turned out perfectly! We used them to dip into fondue, so good
I have a question, our baking soda bath was foaming a lot, and it ended up overflowing and we had to scoop the foam out with a mug, why was this happening and if we do the recipe again how do we fix it?
Hi Anna! Try turning the heat down a bit next time or using a larger pot – that should solve your problem. Hope you enjoyed the bagels!
Thank you they were still delicious!
Made them this morning. Easy and taste good!! Much lighter than the commercial variety. If you want them to be shiny however, you do need to use the egg wash.
Made the pretzel bites, loved them..I noticed the recipe said to use brown sugar, or white sugar..how would it alter the taste
Hi Donna, so glad you enjoyed these. There really isn’t much of a taste different since it’s such a small amount of sugar; you can use either.
i just finished making the pretzels, but whenever i checked on them when the oven beeped, and they were not brown. So i kept putting them in for longer, but they never got golden brown. Wht did i do wrong???
Hi Clare! The baking soda bath is what gives the pretzels their signature chewy texture and golden brown exterior. Did you let them sit in the boiling baking soda bath for a quick 10 seconds or so?
A trick is to use homemade BAKED baking soda which is actually sodium carbonate and much more caustic, so caution is needed but not near as bad as Lye which is what the commercial pretzel companies use. This will lend to a much better color and texture.
Great recipe though, we use a lot of your recipes!
how much of the red star yeast from the jar would you use?
Hi Clare, 2 and 1/4 teaspoons (7g) of dried yeast.
Thank You so much!❤
I have tried two of your bread recipes in the last week, I am hooked. I do have a question about this recipe though. If using instant yeast, do I still need to let mix it with the water and sugar and let it set for 5 minutes? Or do I skip that part? Thank you for all of the great recipes!
Hi Dee, yes, we do recommend still proofing the yeast. Hope you love these pretzel bites, and we’re so glad to hear you’ve been enjoying our bread recipes!
This is the perfect recipe for making pretzels the first time. They were no-fail and delicious!
My husband and put 5 sons ate these as quickly as I could make them! My husband is already saying these are going to be perfect for every get together! Plus, my youngest loved learning to make them too… we call him the Pretzel King already because pretzels are his go-to snack. SO EASY! Thanks for sharing!
These were so fun to make and such a hit as a potluck appetizer! Thank you, Sally, for being my go-to recipe site. Getting ready to make triple chocolate cake right now 🙂
Would the texture become tougher if I used white whole wheat flour in place of all purpose?
Hi Kathryn, you can use the same amount of white whole wheat flour as a replacement for the all-purpose flour, but the pretzels will be a little denser. Do not use regular whole wheat flour, as the pretzels will be very very dense. And I saw your other inquiry about using an air fryer. I’m unsure; I haven’t tried it.
I am just getting over my fear of yeast recipes. I started with and finally got your cinnamon rolls down just in time for Christmas. I decided to give these pretzel bites a try and they were super easy and turned out awesome!!!
These turned out great! Will definitely make again. Can’t wait to make the cheese sauce tonight for New Years Eve gathering! Happy New Year!
Delicious! Sally, thank you for another amazing recipe. These pretzel bites are so quick and easy to make. Definitely will be making them again!
This was a very simple and easy-to- follow recipe. I omitted the egg wash before baking, and they stilled turned out gorgeous. I will definitely make these again and often.
These were so easy and absolutely delicious!
I was wondering how to transfer these because I’d love to bring them to Christmas! I’ve made this recipe over and over again and want to share it!
Hi Irene, you can cover and store leftover pretzel bites at room temperature for up to 3 days. A tupperware container works great. They lose a little softness over time. To reheat, microwave for a few seconds or bake in a 350°F (177°C) for 5 minutes. Hope they’re a hit!
What’s the best way to freeze these little guys?
Hi Stephanie, here are the freezing directions for this recipe: Baked and cooled pretzel bites freeze well up to 2-3 months. To reheat, bake frozen bites at 350°F (177°C) for 10 minutes or until warmed through or microwave frozen bites until warm. The prepared pretzel dough can be refrigerated for up to one day or frozen in an airtight container for 2-3 months. Thaw frozen dough in the refrigerator overnight. Refrigerated dough can be shaped into bites while still cold, but allow some extra time, about 1 hour, for the pretzels to puff up before the baking soda bath and baking.
Not a easy recipe for a disabled person. But so good. Half I did with coarse pink sea salt. Half with Mrs. Dash garlic herb powder. Glad I made them. Hard with my arthritic hands. PSA
This was so good and quick.. We will be making them again!,,
Such a fun and easy recipe. This is the first “bread” recipe I’ve tried that worked out exactly as it should. Per the internet soft pretzels are a great way to use up expired/ less active yeast and they still turned out perfect!!! Can’t wait to try the sweet version… my kids are gonna freak!!!
I made these and my hubby loved them. I thought they had a bit of alkaline taste to them. How do you you get them on and out in 8 seconds?
Hi Janet, we’re glad they were a hit! The 10-15 seconds in the baking soda bath is quick, but we find a large slotted spoon helps to quickly remove the bites while allowing the excess water to drip off. Thank you for giving these a try!
My husband is a pediatric emergency nurse. I send him with baked goods every shift. Today I sent these pretzel bites. They were a huge hit. The recipe was easy to follow and didn’t take long.
What does the sugar do for the pretzel bites? Does it matter if you use brown sugar or granulated sugar?
Hi Claire! A little sugar feeds the yeast. You can use brown or granulated sugar!