With a video tutorial and in-depth descriptions, learn about my top 10 baking tips and why each are crucial to the success of your next baking adventure.

With every baking recipe I publish, my goal is to help you become a better and more confident baker. Baking from scratch doesn’t have to be intimidating or difficult. Let’s reverse that connotation and put the FUN back into our kitchens. Dirty mixing bowls and all!
I’ve Made the Mistakes: As a cookbook author, home baker, and food blogger, I’ve made THOUSANDS of mistakes in the kitchen and here’s what I’ve learned along the way.
Top 10 Baking Tips
Let’s dive into the baking tips a little further.
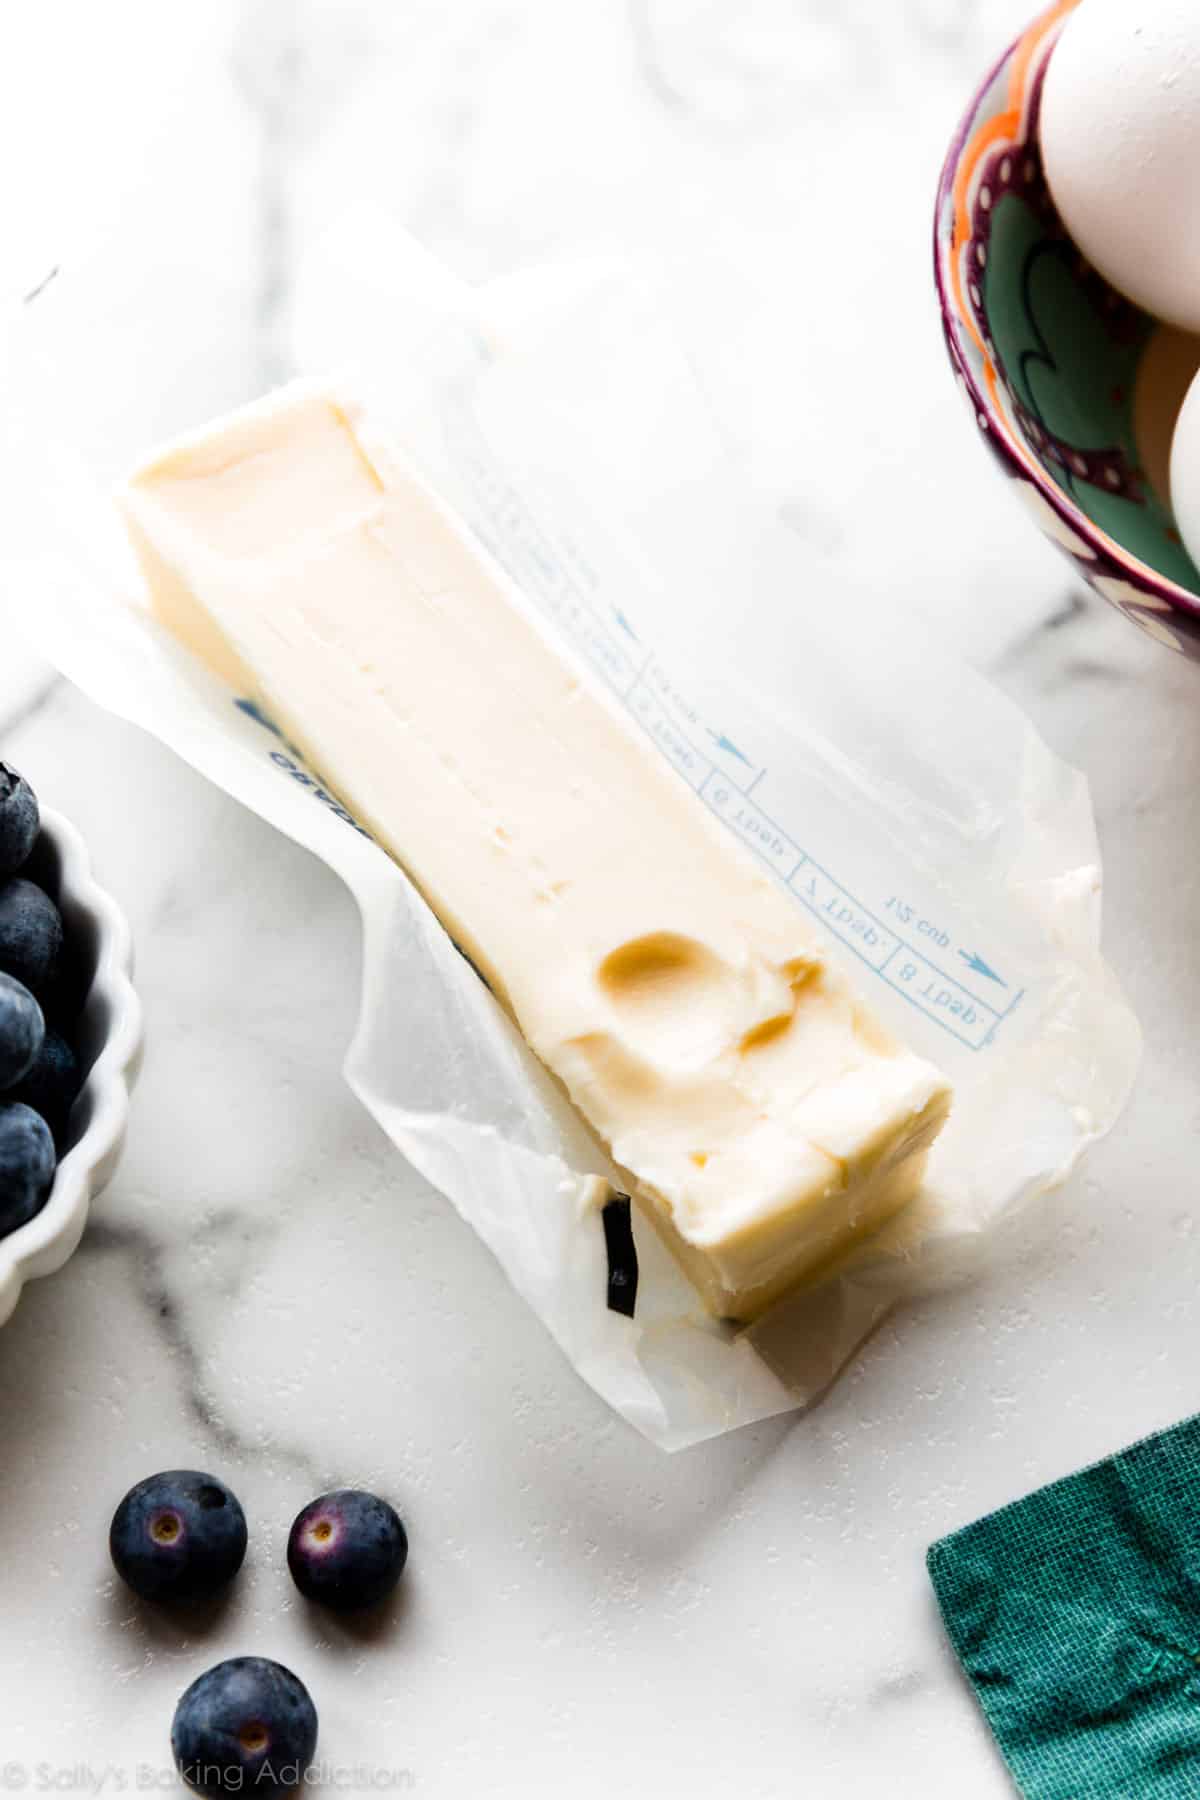
1. Always Have the Correct Butter Consistency
Butter is the starting point for an immense amount of baked goods, so it’s important to have it prepped as the recipe suggests. The temperature of butter can dramatically affect the texture of baked goods. There are three different consistencies of butter that baking recipes typically call for: softened, chilled (or frozen like in scones), and melted.
- Most recipes calling for butter call for room temperature/softened butter. Room temperature butter is actually cool to touch, not warm. When you press it, your finger will make an indent. Your finger won’t sink down into the butter, nor will your finger slide all around. To get that perfect consistency and temperature, leave butter out on the counter for around 1 hour prior to beginning your recipe. I prefer to use room temperature butter in favorites like peanut butter cookies and snickerdoodles.
- Chilled butter is butter that has been well chilled in the refrigerator or freezer so that it does not melt during mixing. This helps create flaky pockets in recipes like pie crust, scones, and biscuits.
- Unless otherwise noted, melted butter should be liquified and lukewarm. If melted butter is too hot, it can cook the eggs in your batter. I prefer to use melted butter in homemade brownies and my chewy chocolate chip cookies.
Short on time? Here’s my trick to soften butter quickly!
Further Reading: Here’s What Room Temperature Butter Really Means
2. Room Temperature is KEY
Speaking of temperature, if a recipe calls for room temperature eggs or any dairy ingredients such as milk or yogurt, make sure you follow suit. Recipes don’t just do that for fun—room temperature ingredients emulsify much easier into batter, which creates a uniform texture throughout your baked good. Think of cold, hard butter. It’s impossible to cream cold butter into a soft consistency necessary for some recipes. Same goes for eggs—they add much more volume to the batter when they’re at room temperature.
So yes, temperature is imperative. There’s legitimate science involved!
- Further Reading: Why Room Temperature Ingredients Make a Difference
3. Read the Recipe Before Beginning
I feel silly typing this, but I can’t tell you how many times I’ve had a complete recipe disaster because I didn’t realize a certain step was coming up. Reading ahead will help you know the how, why, where, and when of what you are about to do. It will take you 1-5 minutes and could save you from wasting your ingredients (and money!) on a failed recipe.
4. Always Have Ingredients Prepped
Measure your ingredients before starting a recipe. Read through the ingredients, then get them prepared on your counter. There’s very little room for error when you begin recipes this way; you’re not scrambling and rushing during the recipe process.
And avoid making ingredient substitutions. Remember, baking is chemistry. Make the recipe as written first then if you feel confident, make substitutions as you see fit.
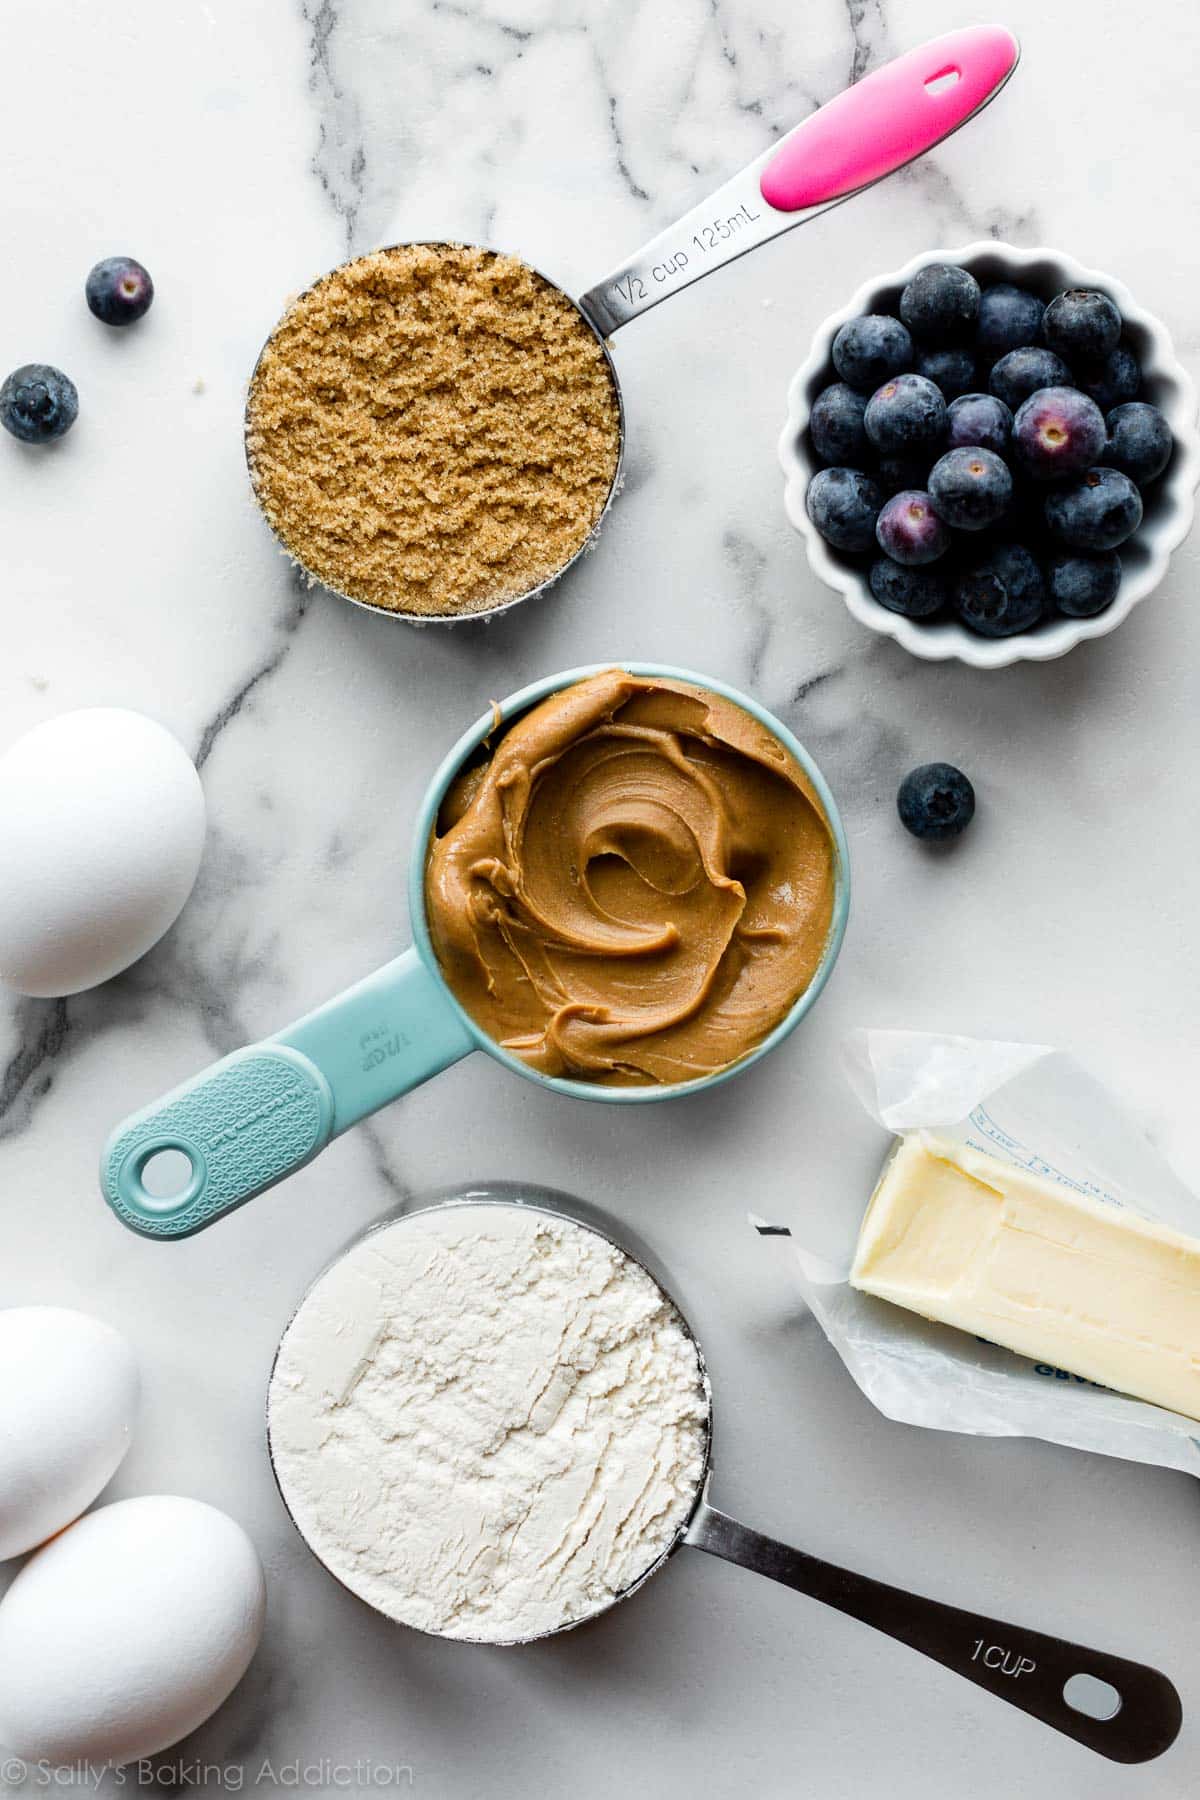
5. Learn How to Measure
This is actually one of the most important baking tips on this page. As you know, baking is science. Excellent baking requires precise ratios, proven techniques, and well-tested recipes. Unlike cooking, you can’t just bake something by throwing some ingredients together, mess it up, then eat it anyway. (Well, most of the time you can’t!)
One of the most crucial baking tips is measuring ingredients properly.
- Problems are common if measurements are incorrect. Having a firm grasp of measuring techniques is essential.
- Measure dry ingredients in measuring cups or spoons because these are specially designed for dry ingredients. Spoon and level (aka “spoon and sweep”) your dry ingredients. This means that you should use a spoon to fill the cup and level it off. This is especially important with flour. Scooping flour (or any dry ingredient) packs that ingredient down and you could be left with up to 150% more than what’s actually needed. A recipe calling for 1 cup of flour and baked with 2 or more cups instead will surely result in a fail. And a rather dry baked good!
- And for liquid ingredients, use clear liquid measuring cups.
Further Reading: How to Properly Measure Baking Ingredients
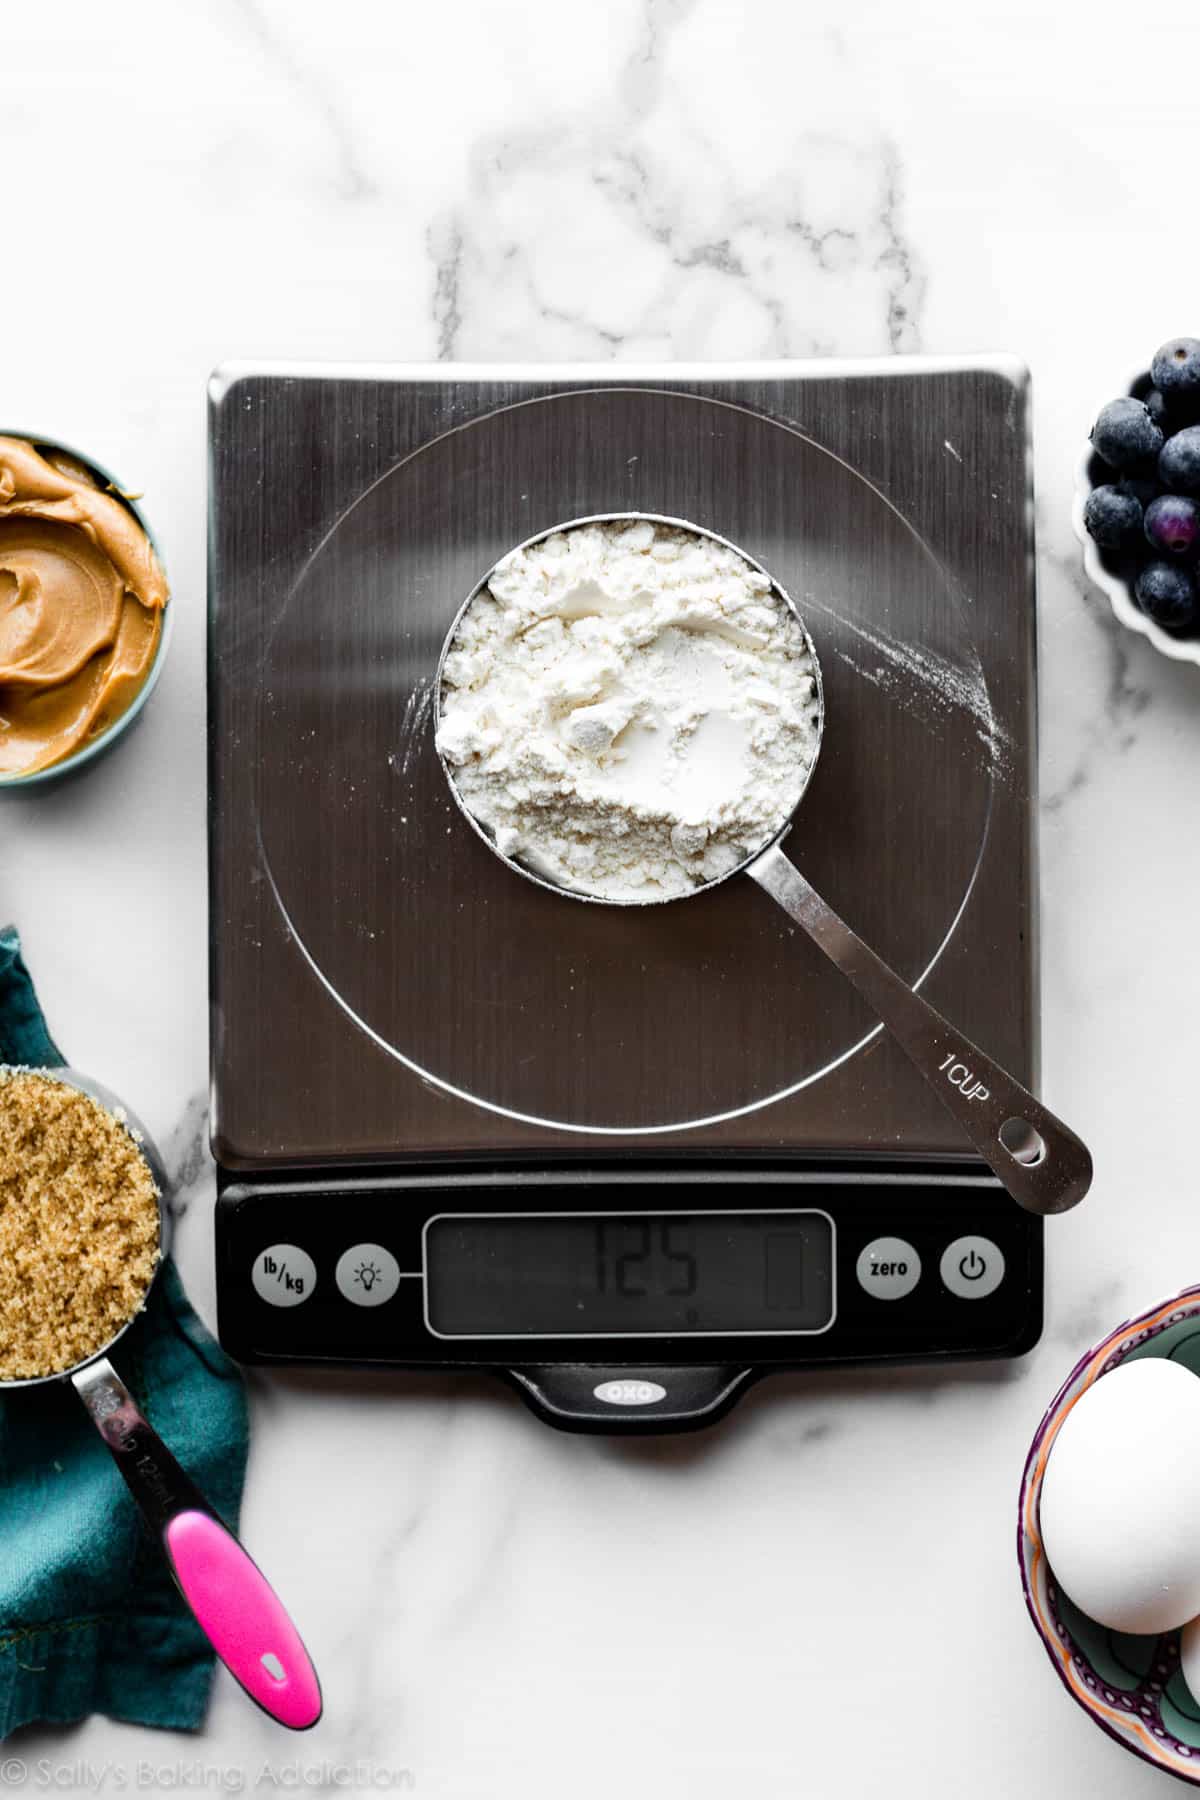
6. Weigh Your Ingredients
A small kitchen scale is priceless! It is, by far, the most used tool in my kitchen. A gram or ounce is always a gram or an ounce, but a cup isn’t always a cup. This is why I offer gram measurements with my recipes. Again, precision is everything. A kitchen scale is included in my 14 Best Baking Tools roundup, Best Cake Decorating Tools list, as well as the Gifts for Bakers page. It’s undoubtedly handy!
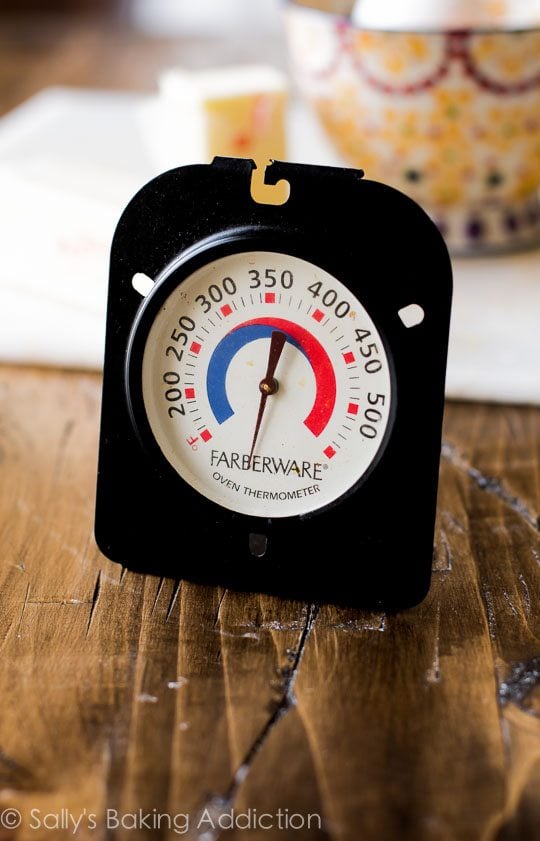
7. Get an Oven Thermometer
I use my ovens so much that the temperatures are sometimes off. Yes, the actual oven temperature can be much higher or lower than what the controller says. I’ve worked with 6 different sets of ovens in the past 10 years (all different brands) and after a period of time, each have been slightly off.
No ovens are safe from this!
Use an oven thermometer. Place it in the center of your oven. Some hang from the racks or can be placed directly on the bottom of the oven. While inexpensive, they’re irreplaceable in a baker’s kitchen. Place it in your oven so you always know the actual temperature.
- Unless you have a brand new or regularly calibrated oven, your oven’s temperature is likely inaccurate. When you set your oven to 350°F, it might not really be 350°F inside. It could only be off by a little—10 degrees—or more—100 degrees! Do you know what that will do to your cookies, cinnamon rolls, and cakes? While this might not seem like a big deal to you, it is a LOADED problem for baked goods.
- An inaccurate oven can ruin your baked goods, the hours spent on the recipe, the money spent on ingredients, and leave you hungry for dessert.
- If you use a convection oven, reduce the oven temperature by 25°F. Best to reduce the baking time as well. Your eyes are the best tools for determining when a baked good is done.
I just saved a cake from a baking fail last week using my oven thermometer!
8. Keep Your Oven Door Closed
You now know how the oven’s temperature can ruin a recipe. But what can completely throw off the oven temperature is constantly opening and closing the oven door to peek inside. I know you’re excited about what’s baking! It’s so tempting to keep the oven ajar to see your cake rising, cookies baking, and cupcakes puffing up. But doing so can let cool air in, which interrupts the baked good from cooking and/or rising properly.
- Rely on the light feature in your oven if it has one.
- If you need to test your cakes for doneness with a toothpick, do so quickly. Remove it from the oven, close the oven immediately, test for doneness, then put it back in as quickly as you can if more oven time is required.
9. Chill Your Cookie Dough
Chilling cookie dough in the refrigerator firms it up, decreasing the possibility of over-spreading. Chilling cookie dough not only ensures a thicker, more solid cookie but an enhanced flavor as well. Not only this, cold cookie dough is much easier to handle and shape. In chewy chocolate chip cookies, for example, it helps develops a heightened buttery, caramel-y flavor. After chilling, let your cookie dough sit at room temperature for about 10 minutes (or more, depending how long the dough has chilled) before rolling into balls and baking. Sometimes after refrigeration, cookie dough can be too hard to roll/handle.
- If a recipe calls for chilling the cookie dough, don’t skip that step.
- If a recipe yields super sticky cookie dough, chill it before rolling and baking.
This tip is so important that I wrote a separate post about it!
Further Reading: How to Prevent Cookies from Spreading
Don’t Have Time? Here are my No Chill Cookie Recipes, including favorites like snickerdoodles, giant chocolate chip cookies, and shortbread cookies. Or try my M&M cookie bars.
10. Here is my Cookie Trick
Last baking tip and it’s all about cookies. To keep leftover cookies extra soft, store them with a piece of bread. Have you heard of this before? If storing cookies in a container or cookie jar, stick a regular piece of bread in there as well. The cookies will absorb all of the bread’s moisture, leaving the bread hard and the cookies extra soft. And they’ll stay soft FOR DAYS!
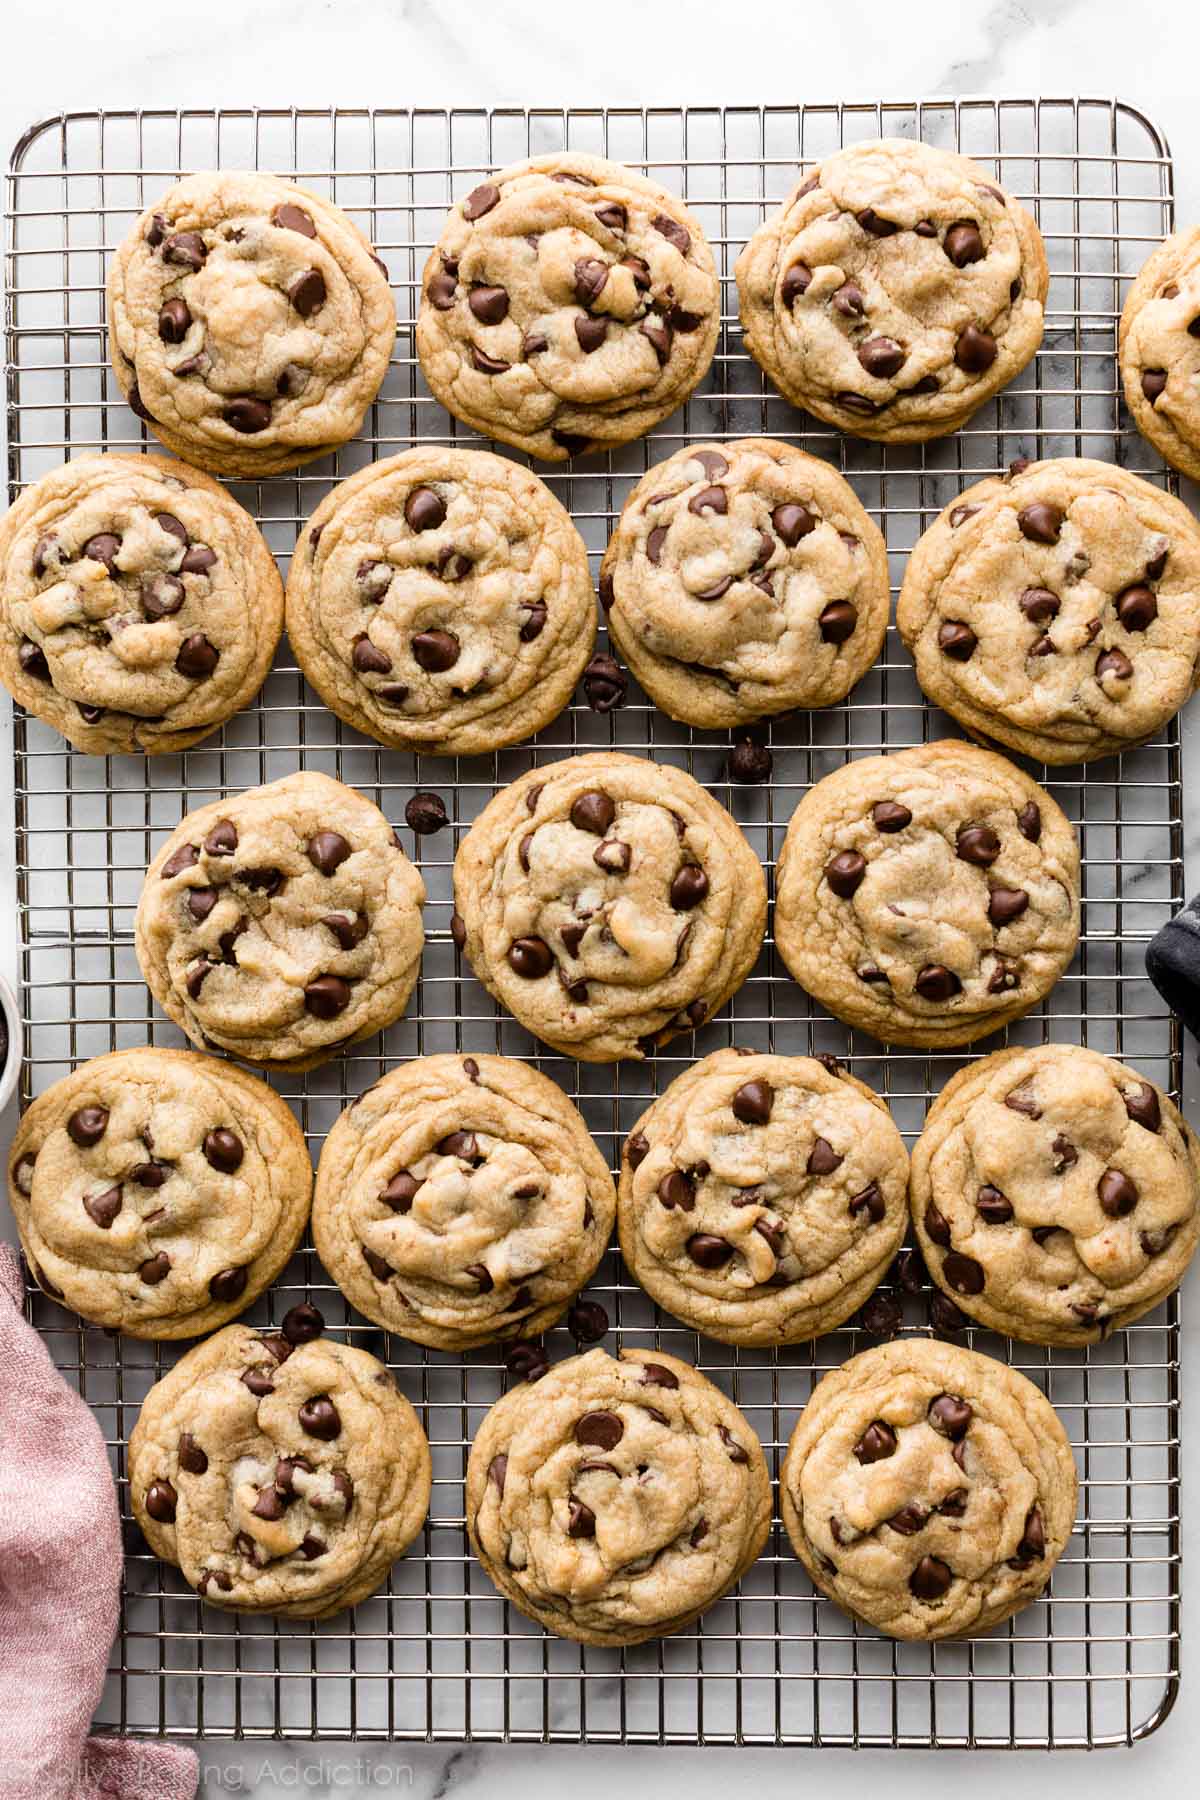
Pictured Below: Chewy Chocolate Chip Cookies
When it comes to baking, it pays off to be a perfectionist. Hopefully these baking tips will help bring you the recipe success and kitchen confidence you crave.
More Baking Tips
- 10 Cake Baking Tips for Perfect Cakes
- Baking Powder Vs. Baking Soda
- 14 Best Baking Tools Every Baker Needs
- Dutch-process Vs. Natural Cocoa Powder
- 10 Tips for Baking the Best Cupcakes
- 10 Best Cookie Baking Tools


Sally I have a question. I bake cookies at least a few times a week…..after my cookies are cool I leave a few out for the kiddos to munch on for an after school snack and for me to enjoy after the kids are asleep but I freeze the rest of them. The reason I don’t leave anymore out is because I have tried your trick of putting a slice of bread in with the cookies. The problem I have is that whatever cookies the slice of bread touches the cookies get super soft some times even soggy. I was wondering how you prevent the cookies that touch the slice of bread from getting soggy? Are you supposed to wrap the bread up a little bit so it doesn’t touch the cookies? Please help me Sally I would love to be able to have cookies out every day without having to always get them out of the freezer first. Thank you so much Sally!!! You are my go to for almost all of my recipes!!! The only recipes I use that aren’t yours are the ones that you don’t have recipes for! I just got done eating your Slow Cooker Light Chicken Corn Chowder and Honey Butter Rolls for lunch!!! So so so yummy!!! Happy 5 Year Blogging Anniversary I seriously don’t know where I would be in my baking and cooking life if it wasn’t for your recipes!!! They always always always turn out amazing for me!!!
Lindsay! Thank you so much for the incredibly kind comment. I’ve never had that issue before BUT you can always layer a piece of parchment paper lightly on top of the cookies and place the bread on top. Then close the container tightly. This way it is not directly touching the cookies but still in the container. Does this make sense?
Your tips are extremely helpful. Keep doing this I love it!
Hi Sally, firstly I adore your website! Your recipes are so good and thankfully easy to follow for amateur bakers like myself. But, as I am in Ireland, some of our terminology is slightly different (ie: regarding sugars, flour, etc.) I have printed out a little conversion chart for most things (metric v imperial, etc) but I have a question about one of the most important ingredients: CHOCOLATE!
What is the difference between semi-sweet, bittersweet, unsweetened, etc? (there are probably others that I should list here that I haven’t heard of yet) I would be so grateful if you could help with this because, really, where’s the fun in baking without chocolate?! 🙂
Thank you in advance.
Thanks so much Tina! Here’s a breakdown of different types of chocolate for you. It’s a really helpful read!
For your tip on chilling cookie dough, would you get the same results by rolling/dropping into balls first and then chilling? I’ve had trouble in the past getting the dough back to a good temperature for rolling without letting it get too soft.
I always find it’s best to chill the dough then roll into balls. I usually let dough sit out for 30 minutes before I begin to roll (after it’s been chilling). Not sure if this helps!
I love reading other people’s top tips, everyone has different ones but are all equally as important! Will be taking these on too!
Hi! first of all, thank you so much for this tips!!! they are really usefull. I’m returning to my baking addiction after a long time and starting a little business on my own, so I´m reading all your blog, since here in Peru there are not many blogs of baking or desserts.
Basically im starting with mini cheesecakes and cookies – two of my favorite things in the world – and last week made my first mini cheesecakes, but im not sure if using a water bath (or how do you say it?) is the only way for baking cheesecakes. I’d love to learn more about tips for this deliciuos dessert. Thank you in advanced 🙂
Love your recipes and your tips! And I really like the fact that you list ingredients by weight. Makes it so much easier to follow.
I absolutely LOVE every single cupcake recipe of yours – they always turn out so delicious!! I have been using your cupcake recipes for about 2 years now (sometimes with my own alterations, just for fun — because they definitely aren’t necessary). I plan to begin trying other desserts of yours because I am positive they will be a big hit! THANK YOU so much for sharing your amazing, delicious, to die for recipes!
Question:
I am wondering if you have ever done a blog/post about doubling recipes or if that will be in the near future? Maybe I am wrong, but it is my understanding that you can’t always just simply double the recipe because some ingredients may not be an exact double measurement (not even sure if this makes sense when I say it/type it but I know their is a science to it all). To avoid a failed batch, I always just do a 2nd (and sometimes 3rd) individual batch because I am so afraid to mess something up by doubling all of the ingredients… am I crazy? Did I completely imagine that you can’t just simply double a recipe? Any input/advice/tips would be greatly appreciated! Thanks so much!!
Breads, rolls, cookies, and bars are usually problem-free when it comes to doubling. Where I run into the most problem are cakes/muffins/quick breads. The baking soda and baking powder are usually the issues. I almost never double cake recipes– if needed, I make two batches. This way there is no issue.
I love your tips and your recipes, especially the Nutella cookies….wow. So I HAD to buy your book ” Sally’s Baking Addiction” and I wasn’t disappointed 😉 I made the vanilla bean cake yesterday and although it is yummy with that strawberry whipped cream on top I found the sponge to be greasy. I melted and cooled the butter before using it as the recipe states, but after reading your baking basics again about butter I wonder was it the melted butter that made it greasy? One last thing, your death by chocolate brownie with that yummy mint frosting is our family favourite xxx
Hi Maria! It may have something to do with it, but all that flour should’ve soaked it up! How about slightly decreasing the butter.
I absolutely love your blog & find that it is my blog to come to when I need a recipe. Being from the UK the gram conversion is most helpful so thank you!
A quick question, when your cake recipes (muffins, cupcakes, cheesecakes) mention yoghurt should it be used at room temperature or straight from the fridge before adding to the recipes?
If the butter is melted or at room temperature, which usually it is, then yes– the yogurt should also be at room temperature.
I HAVE to know where you got those copper measuring cups!! They are absolutely amazing!!
PS. Your blog is amazing. I love all of your recipes. I make your skinny strawberry chocolate chip muffins on the regular. Everyone loves them!!
Sally, I’ve noticed your cupcakes recipes typically use all purpose flour. Other recipes I’ve tried in the past call for cake flour. The cake flour recipes tend to have a softer, larger crumb. Can you tell me why you prefer all purpose flour for cupcakes?? THANKS!! Love your blog.
Michele, I use all-purpose flour for my online recipes because it is most convenient for readers. I tweak my recipes for the use of all-purpose, while still achieving a soft crumb. A few of my cake and cupcake recipes call for cake flour OR have notes about subbing cake flour.
YOU ARE THE BOMB.COM!!!!! I’ve baked every week since discovering your website!!! I like to bake for other people and the feedback has had everyone raving like I’m the best baker haha. Thanks for sharing your recipes and tips 🙂 Look forward to more recipes to come!
I LOVE YOUR SITE! I found you a few months ago after looking for a Bete way of making chocolate chip cookies, and I have to say by far your recipes and site have ben the best. Please the post coming!
Fantastic advice Sally! I’m looking forward to this new baking series of yours! 🙂 Cookie dough chilling is one of the best tips – completely changes the outcome of cookies! I now always chill my cookies!
Just wanted to say how much I love your photos.. I swoon over them in every post! Especially when I see the big jars of sprinkles!! Oh how I wish I had me one of those!
Looking forward to reading the next in your baking series! 🙂
Thank you so much Kathryn! I loved reading this comment.
I have to thank you for the recommendation for Platinum Red Star Yeast. I used it to make your pizza dough then started using it to make bread. I had been trying to make bread using the King Arthur sandwich bread recipe with mixed results. Sometimes it didn’t rise well, sometimes it collapsed if it had risen too high in the pan before baking (the yeast was exhausted-my fault for not watching carefully). Once I started using the Platinum yeast I’ve had good bread every time. Now the dough rises so fast, I can make bread in half the time, it has great oven spring and is very forgiving of excessive rising. I’ve even cut back the amount of yeast I use in the recipe. Anyway, last night I decided to make bread and used 25% whole wheat flour. (I’ve really had problems with texture in WW bread). The first rise was beautiful. I folded the dough and put it in the pan for the second rise and FELL ASLEEP WATCHING TV. Well when I awoke hours later, the dough had risen over the sides of the pan like a lava flow and looked like an alien. I was about to throw it out but I just punched it down right in the pan and let it rise again (and this is at room temp beneath an under cabinet kitchen light, not in a warm oven). It rose an inch over the top of the pan after about 45 minutes and int he oven it went. It had not the greatest oven spring, but this morning for breakfast is delicious with excellent texture. This yeast is unbeatable. It’s all I ever use now.
Thanks for all your excellent baking advice.
Donna
These are some great tips! I’d never heard of the bread tip before but I’ll definitely use that, what a wonderful post! I definitely need to get an oven thermometer for sure!
I stumbled upon your page when I was searching for a cupcake frosting recipe earlier this year. Your classic chocolate cupcake with vanilla frosting popped up and reading through, I felt like you were actually there taking me through the recipe. Love your tips! I made your cupcakes and then your super moist carrot cake. Want to give your salted caramel apple pie a go. Sally, I am addicted now.
Thank you so much Esther, I appreciate your comment so much!
Thank you for your great recipes,.
Wondering if oven has to be set,at the posted temperature, before you put sponge cake in the oven, if nothing is mentioned,
Or does it have to rise as temp. In oven reach the posted temp.
Thank you
Jane
This post is SO helpful! Can’t wait to see what else is coming in this series! Thanks so much, Sally!
Sally that’s the thing I LOVE the most about your recipes- the detail on how to get it just right! Well that and the fact that everything tastes so darn good. I tell everyone that you are the gold standard for cooking making. Bought a food scale, now use only Eggland’s Best eggs and other quality ingredients, and of course bought your book when it first came out. People always rave about my cookies and I always give you credit. Thanks for the tips!! You’re the best and my fav!!
Bring it on, Darlin’. I’m ready to learn. Will be paying attention and taking notes. I love, love, love baking!! Love that last picture of the cookies. This is going to be soooooooo cool!! Totally addicted to your blog! Best one out there.
Thanks for all the tips, I do them all except for the last one, only because there are never any cookies left over. Great job on all your projects.
Sally, I can’t thank you enough for this series, as a new baker I have a lot to learn! Very excited to try your recipes and this series will be a godsend. Thank you for all the time and effort you put into all your postings 🙂
Thank you very much for your 10 tips looking forward for the next 10 …
I just recently started following your blog ,and I think its brilliant!
Just bought your 1st book can’t wait for it to arrive already.
These are so helpful, Sally! I appreciate you taking the time to share tips- I often get so excited to bake that I don’t take the time to do little things, such as wait for butter to warm to room temp, etc. I now understand that it does make a big difference!
Very helpful, Sally! Thanks for the great advice.
I just recently discovered your site via search engine and I gotta say….your recipes are fantastic! Not just your recipes, but the helpful advice you offer leave me thinking, ‘Oh yeahhh I didn’t think of that’. I love baking and you just made my baking experience a whole lot brighter! Thanks Sally! .
Sally, I love this new series! I’ve never heard of the ‘store bread with cookies’ trick before but it’s definitely one I’ll be using in the future 🙂
Now I understand why we need to chill the cookie dough before baking! In all the recipes I read saying to do so , no one has explained why. Thank you for that info. 🙂
When I was reading through the different types of butter temperature (softened, chilled, and melted and cooled), I was silently laughing at myself because I constantly made that mistake when I was new at baking! I always used chilled butter even when the recipe called for softened butter because I didn’t know that it yields different results! LOL. But I’m gladly over that phase now. =))