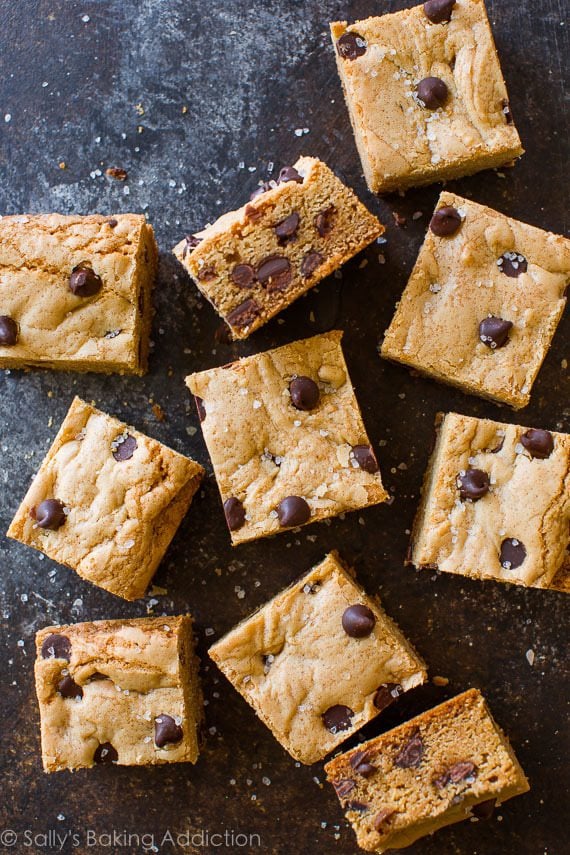
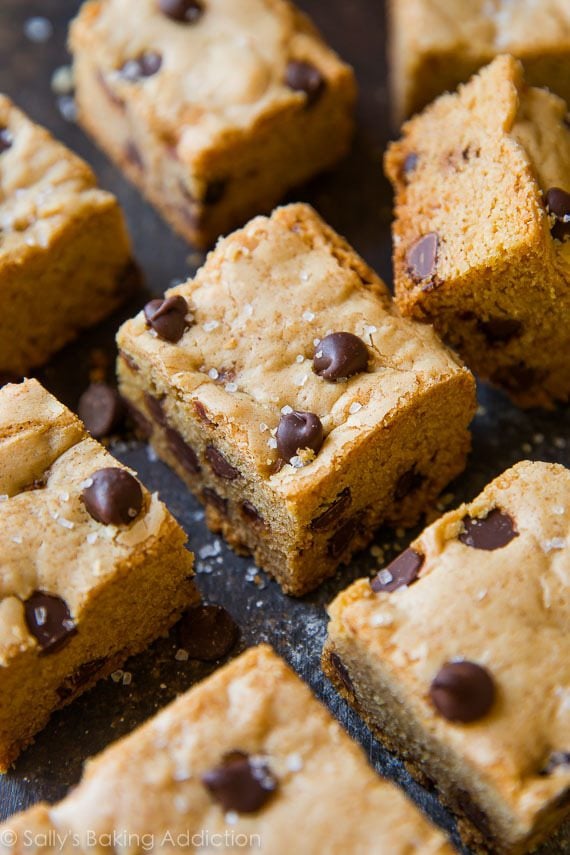
These extra soft and chewy chocolate chip cookie bars are incredibly easy to make. No dough chilling or rolling into balls required! Sprinkle with sea salt for a little something extra.
Taste testers gave these chocolate chip cookie bars a stamp of approval—and I’m so glad because this dough makes my favorite chewy chocolate chip cookies, too. We’re talking the softest, chewiest, thickest chocolate chip cookies to ever come out of my oven.
And if you can believe it, baking chocolate chip cookies as cookie bars transforms them into something even better. Plus, we don’t have to chill the cookie dough and we don’t need to roll the dough into individual cookies. So they’re homemade soft and chewy chocolate chip cookies, only easier to prepare. A lazy gal’s cookie if you will.
Why You’ll Love These Chocolate Chip Cookie Bars
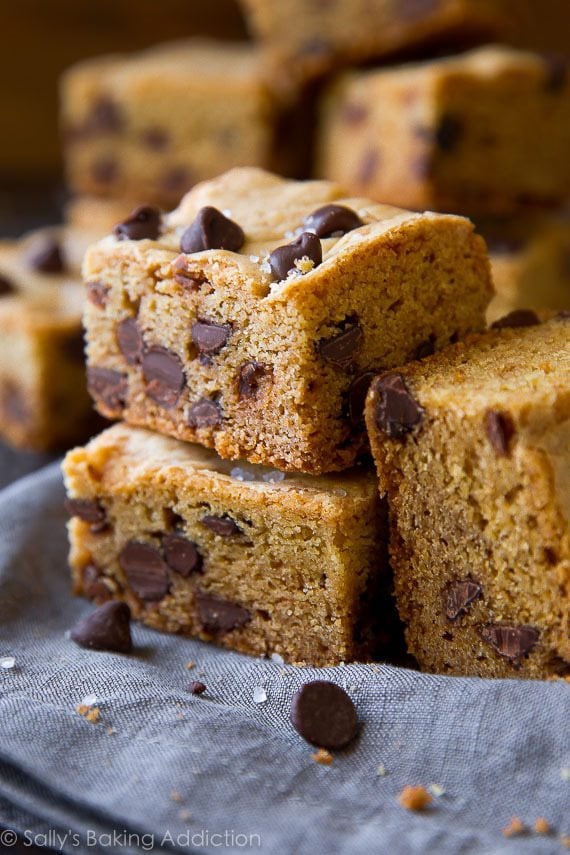
- Dense and buttery
- Extra chewy and extra soft
- Just like chocolate chip cookies, but they don’t spread
- 100x easier than making cookies—no individual cookie dough rolling
- No electric mixer needed
- A quick no chill cookie recipe
- Can be easily doubled for a larger pan
- Topped with sea salt for a little something extra
- Still soft and chewy on days 2 and 3 (if they last that long!)
Ingredients For Perfect Chocolate Chip Cookie Bars
If you’ve tried my beloved chewy chocolate chip cookies, you’re already familiar with the ease of this recipe. We’re using the same cookie recipe, just baking them as bars. Here’s what you need:
- Flour: All-purpose flour is the base of this recipe.
- Baking Soda: Baking soda helps these bars rise as they bake.
- Cornstarch: Cornstarch gives the cookie bars that ultra soft consistency we all know and love. Plus, it helps keep them wonderfully thick.
- Salt: Salt adds flavor.
- Butter: Use melted butter in this recipe for the chewiest cookie bars. Because we use melted butter, there’s no need to get out your mixer.
- Sugar: I like to use a mix of brown sugar and white granulated sugar this recipe. More brown sugar than white granulated sugar promises an extra soft and chewy cookie bar because there’s more moisture in brown sugar.
- Egg & Egg Yolk: 1 egg binds everything together and 1 extra egg yolk adds richness and chewiness.
- Vanilla Extract: Pure vanilla extract adds flavor. If you have any homemade vanilla extract, use that!
- Chocolate Chips: 1 cup of chocolate chips ensures tons of melty chocolate in each bite. Instead of semi-sweet chocolate chips, try using dark, milk, or even white chocolate chips. Or swap half of the chocolate chips for M&Ms like we do in these soft M&M cookie bars.
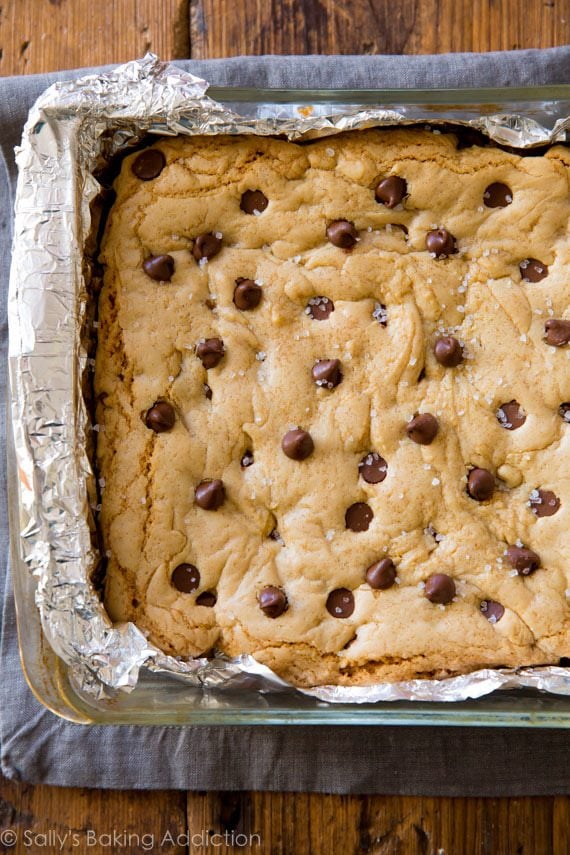
9-Inch Pan of Chocolate Chip Cookie Bars
After you prepare the cookie dough, press it into a baking pan. There’s no risk of cookie spreading with this recipe because the edges of the pan completely contain the cookies from overspreading. I love that.
- By the way, if you’re ever having spreading issues with your regular cookies, here are my top 10 tips for how to prevent cookies from spreading.
One batch of these chocolate chip cookie bars fits perfectly into a 9-inch square pan. I love using this size of pan because it yields a nice, manageable batch—about 16 super thick bars. If you want a larger batch, double the recipe and bake the bars in a 9×13-inch pan. (See recipe note.)
Baker’s Tip: I like to line my baking pans with aluminum foil or parchment paper. This way, you can lift the entire cookie bar mass out then easily cut into squares. Also makes for quick clean up! I do the same when making rice krispie treats, too.
How to Freeze Chocolate Chip Cookie Bars
Homemade chocolate chip cookie bars freeze beautifully so they’re a great make-ahead dessert option. Follow these instructions and no one will know they aren’t freshly baked the day you serve them:
- Bake and cool the cookie bars.
- Slice the bars into squares. If you lined your baking pan with aluminum foil or parchment paper, simply pull the slab of bars out of the pan, place onto a cutting board, and cut into squares.
- Layer the bars between sheets of parchment paper in a freezer-friendly container. The parchment paper ensures that the bars don’t stick to each other and that the tops of the cookie bars stay intact.
- Thaw bars overnight in the refrigerator and bring to room temperature before serving.
More Cookie Bar Flavors
- Frosted Sugar Cookie Bars
- S’mores Cookie Bars
- Gingerbread Cookie Bars
- Magic Cookie Bars
- M&M Cookie Bars
- Chocolate Chip Cookie and Brownie Bars

Classic Chocolate Chip Cookie Bars
- Prep Time: 15 minutes
- Cook Time: 35 minutes
- Total Time: 2 hours
- Yield: 16 bars
- Category: Dessert
- Method: Baking
- Cuisine: American
Description
No mixer required and there’s no waiting for cookie dough to chill with these soft & chewy chocolate chip cookie bars!
Ingredients
- 2 and 1/4 cups (281g) all-purpose flour (spooned & leveled)
- 1 teaspoon baking soda
- 1 and 1/2 teaspoons cornstarch
- 1/2 teaspoon salt
- 3/4 cup (12 Tbsp; 170g) unsalted butter, melted and slightly cooled
- 1 cup (200g) packed light brown sugar
- 1/4 cup (50g) granulated sugar
- 1 large egg plus 1 large egg yolk, at room temperature
- 2 teaspoons pure vanilla extract
- 1 cup (180g) semi-sweet chocolate chips
- optional: sprinkle of sea salt
Instructions
- Preheat the oven to 350°F (177°C). Line the bottom and sides of a 9-inch square baking pan with aluminum foil or parchment, leaving an overhang on all sides to easily lift the bars out of the pan when cool. Set aside.
- Whisk the flour, baking soda, cornstarch, and salt together in a large bowl. Set aside.
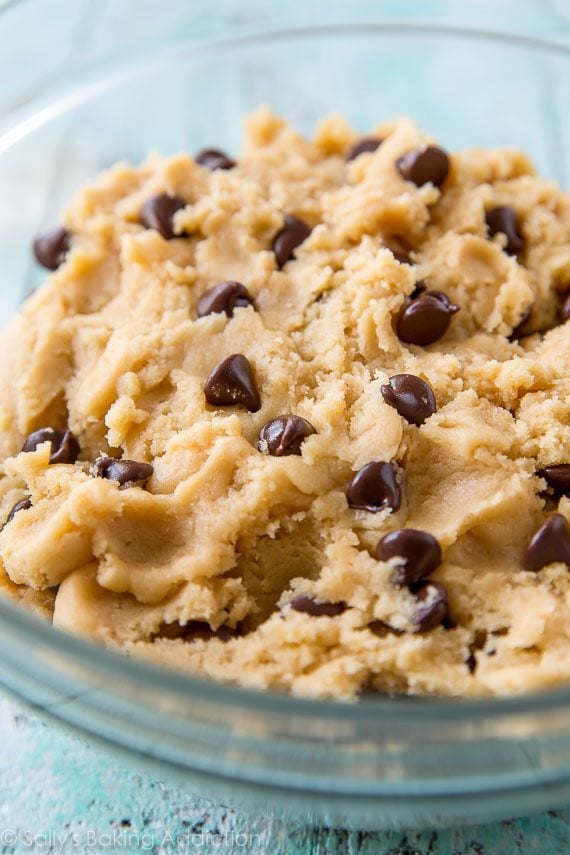
- In a medium bowl, whisk the melted butter, brown sugar, and granulated sugar together until no brown sugar lumps remain. Whisk in the egg, then the egg yolk. Finally, whisk in the vanilla extract. The mixture will be thick. Pour the wet ingredients into the dry ingredients and mix together until combined. The dough will be very soft, yet thick. Fold in the chocolate chips. The chips may not stick to the dough because of the melted butter, but do your best to combine them.
- Transfer dough to the prepared baking pan and press/smooth into an even layer. Sprinkle the top with sea salt if desired. Also, I like to press a few more chocolate chips on top of the dough before baking (I do this just for looks!). Bake for 32-35 minutes or until lightly browned on the sides. Use a toothpick to test for doneness; if it comes out clean from the center of the pan, the bars are done.
- Allow the bars to cool in the pan set on a wire rack for at least an hour. Once relatively cool, lift the foil out of the pan using the overhang on the sides and cut into squares. Store in an airtight container at room temperature for up to a week.
Notes
- Make Ahead & Freezing Instructions: You can make the cookie dough and chill it in the refrigerator for up to 3 days or freeze for up to 3 months. Allow to come to room temperature and continue with step 4. Baked cookie bars freeze well for up to 3 months. Thaw bars overnight in the refrigerator and bring to room temperature before serving.
- Special Tools (affiliate links): 9-inch Square Baking Pan | Glass Mixing Bowl | Whisk | Rubber Spatula | Cooling Rack
- 9×13 Pan: You can double this recipe to fit into a 9×13-inch baking pan. The bars will take longer to cook through, about 40 minutes at 350°F (177°C). Use a toothpick to test for doneness.


I doubled the recipe and baked in a 13 x 9 pan, but after 20 minutes they were getting too dark, so I took them out, and of course they are not done in the middle. I used oven thermometer which read 350 degrees. I tried single batch recipe and baked for time shown, still not done in middle.
So good! After making these bars, I can’t go back to just regular chocolate chip cookies. I used a kitchen scale for the flour and an oven thermometer to make sure my oven was at 350. I used a 9×9 pan and baked them for 25 minutes as another reviewer said and it was right on. Thank you!
Just made these and they are amazing! I doubled it and made it in a 9×13 and it turned out great!
These are amazing! Thanks for the recipe!
I doubled this recipe to make in a 9*13 pan; I split the cookie dough into two equal amounts, and place one half of the dough mixture into the lined baking pan. Use my fingers to press the dough out to the edges of pan. Then spread the Nutella over the top of the cookie dough layer, leaving some gap around the edge to stop the Nutella leaking out when baking. Then took chunks of the rest of cookie dough – spread between palms and placed on top of Nutella.. gently press down to form a uniform top layer!
Turned out fantastic!! Perfect toffee-tasting-chewy-nutella-filled-cookie-bars!!
Perfect for when you need a fast chocolate chip cookie fix and don’t feel like waiting for the dough to chill (or for the butter to soften!)
This is delicous! I tried with my grandson and he said it tastes amazing! Good job Sally! Much love.
I have had really good luck with recipes on this site — some of my faves are from here! Unfortunately, like others mentioned, these came out quite tough and dry. I used a scale for measuring so it couldn’t have been too much flour. I put them in for just 30 min and I can tell when I took them out that it was about 5 min too long. I should’ve paid closer attention to the color, but in most baking recipes, I find my baked things need more time than recipe recommends. Next time I would say 25 min as the lower side of the time and this is more in alignment with the baking time of other cookie bars recipes I made of that size pan.
Disgusting. Way too salty, smells gross and really dry. Would not make again.
Any tips for adjustments that need to be made when baking at altitude? Over 6,000ft. Thank you! Love your recipes!
Hi GT, I wish I could help, but we have no experience baking at high altitude. I know some readers have found this chart helpful: https://www.kingarthurflour.com/learn/high-altitude-baking.html
These are the best chocolate chip cookie bars I have ever made! I delivered a bunch through quarantine and now I have requests for these cookie bars 🙂
These are so delicious! A lot less work than making cookies but totally packed with flavor. I made these in a 11 x 7″ pan and baked them for about 29 minutes; they came out perfect Thank you so much Sally! Your recipes are amazing and have given me a love for baking.
One request – more whole wheat recipes please, if possible?
Hi SA, We are so happy you enjoyed these! Did you know you can use the menu bar at the top of this page to search recipes by ingredient? Here are all of our recipes that use whole wheat flour. Happy baking!
I doubled it, only missing the Walnuts. I love all Sally’s recepies I have tried, 50% of all recepies. Thank you Sally!
Great recipe! Only had 8″ pan or 13×9″…Didn’t want to double the recipe but went with the 13×9″ anyway.. .they came out thinner than if I had used the 9″ square pan or doubled the recipe yet they were great! Only problem… I couldn’t wait the hour before eating them!
Thanks! I’ll be revisiting this sight & your books
Good tasting cookie bars. My only complaint is the baking time of 32-35 minutes. I checked them at 32 minutes, and they were overbaked. I was pretty caught off-guard, since my recipes always need the upper limit of cooking times with my current oven. I’m trying them again because they were good even with tough, dry edges
I made these on Sunday morning and they were a hit. So easy and quick to pull together. The sprinkle of salt was a nice touch on top. My family loved them and I was glad to find a small batch recipe instead of the standard one which makes 48 bars; since we do not need that much. Next time I’ll throw in some nuts just for fun. Thanks for a great recipe!
We tried it & it was AMAZING!!!
Hi! These look great, and I might add come chopped up chocolate covered espresso beans since we love coffee. I did have one question – can this recipe be halved? I am trying to make treats but not have too many sitting around where they can tempt me too much 🙂
Hi ST, Yes you can cut the recipe in half. Chocolate covered espresso beans sound like a delicious addition!
This is my all time favorite cookie recipe! So easy to make and they turn out better every time I make them! Just curious, could I add Reese’s pieces to this instead of chocolate chips and everything come out right?
Delicious!
Tried it today using caramel chocolate chips… soooo yummy!!!! Thanks so much for keeping us happy (and full) despite being quarantined at home… Much love from the Philippines!!!
These were great! My daughter and I loved them!! Will definitely make again. Thanks so much for the easy recipe 🙂
Could we replace the chocolate chips with other ingredients such as m & ms or Oreos ?
Hi Roberta, definitely! Keep total add-ins to about 1-1 and 1/2 cups.
A note about doubling this recipe: doubling will NOT fit into a 9×13” pan! You’ll need at least a 12×16” pan- after all, 9 + 9 equals 18!
I also brown the butter as my husband can’t have nuts and that gives it a nice nutty flavor!
A great, easy recipe that always turns out delicious!
Thank you for this great recipe! Made them twice this past month and each time they were perfect. Melting the butter instead of waiting for it to soften is so convenient. Quick to make and very delicious!!
My family LOVES this cookie recipe! My kids (7 and 5 years old) and I have made it several times in the last few months. They never last more than a couple of days!
Loved this recipe. Light, buttery toffee -like flavor. Turned out just as you discribed. Took to a party and they loved them too!
These bars are insanely delicious! Super easy to make too. I am imagining them warmed up a bit with vanilla icecream on top for a delicious and decadent dessert. It’s all you will ever need!
these are absolutely amazing, i’d say even nicer than a regular chocolate chip cookie!
Loveee this recipe! It was easy even for baking idiot like me! My whole family loves it, the soft and chewy texture are exactly what im looking for! Thanks sally for the recipe! Love from Malaysia.