Description
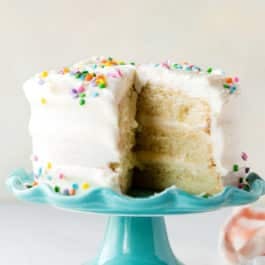
Learn how to make a deliciously soft and buttery 6 inch vanilla cake, plus a dozen other cake flavors for your smaller 6 inch cake pans. 6 inch cakes are perfect for smaller gatherings and much easier to decorate, too!
Ingredients
- 1 and 3/4 cups (207g) cake flour (spooned & leveled)
- 3/4 teaspoon baking powder
- 1/4 teaspoon baking soda
- 1/4 teaspoon salt
- 1/2 cup (8 Tbsp; 113g) unsalted butter, softened to room temperature
- 1 cup (200g) granulated sugar
- 3 large egg whites, at room temperature
- 2 teaspoons pure vanilla extract
- 1/2 cup (120g) full-fat sour cream at room temperature
- 1/2 cup (120ml) whole milk at room temperature
Vanilla Buttercream
- 1 cup (16 Tbsp; 226g) unsalted butter, softened to room temperature
- 4 – 5 cups (480-600g) confectioners’ sugar
- 1/4 cup (60ml) heavy cream or whole milk
- 2 teaspoons pure vanilla extract
- salt, to taste
- sprinkles for decorating
Instructions
- Preheat oven to 350°F (177°C). Grease three 6×2 inch cake pans, line with parchment paper rounds, then grease the parchment paper. Parchment paper helps the cakes seamlessly release from the pans. (If it’s helpful, see this parchment paper rounds for cakes video & post.)
- Make the cake: Whisk the cake flour, baking powder, baking soda, and salt together. Set aside.
- Using a handheld or stand mixer fitted with a paddle attachment, beat the butter on high speed until smooth and creamy, about 1 minute. Add the sugar and beat on high speed for 2 minutes until creamed together. Scrape down the sides and up the bottom of the bowl with a rubber spatula as needed. Add the egg whites and vanilla extract. Beat on medium-high speed until combined, then beat in the sour cream. Scrape down the sides and up the bottom of the bowl as needed. With the mixer on low speed, add the dry ingredients until just incorporated. With the mixer still running on low, slowly pour in the milk until combined. Do not over-mix. You may need to whisk it all by hand to make sure there are no lumps at the bottom of the bowl. The batter will be slightly thick.
- Pour batter evenly into cake pans. Bake for around 18-21 minutes or until the cakes are baked through. To test for doneness, insert a toothpick into the center of the cake. If it comes out clean, it’s done. Allow cakes to cool completely in the pans set on a wire rack. The cakes must be completely cool before frosting and assembling
- Make the frosting: With a handheld or stand mixer fitted with a paddle attachment, beat the butter on medium speed until creamy, about 2 minutes. Add 4 and 1/2 cups confectioners’ sugar, the heavy cream, and vanilla extract. Beat on low speed for 30 seconds, then increase to medium-high speed and beat for 2 full minutes. Add up to 1/2 cup more confectioners’ sugar if frosting is too thin or another Tablespoon of cream if frosting is too thick. Add a pinch of salt if frosting is too sweet. (I add 1/8 teaspoon salt.)
- Assemble and decorate: Using a large serrated knife, slice a thin layer off the tops of the cakes to create a flat surface. Discard (or crumble over ice cream!). Place 1 cake layer on your cake stand, cake turntable, or serving plate. Evenly cover the top with about 3/4 cup of frosting. Top with 2nd cake layer and evenly cover the top with about 3/4 cup of frosting. Top with the third cake layer. Spread the remaining frosting all over the top and sides. A bench scraper and small offset spatula are handy for decorating. Decorate with sprinkles if desired.
- Refrigerate for at least 30-45 minutes before slicing. This helps the cake hold its shape when cutting.
- Cover leftover cake tightly and store in the refrigerator for 5 days.
Notes
- Make Ahead & Freezing Instructions for any flavor: The cake layers can be baked, cooled, and covered tightly at room temperature overnight. Likewise, the frosting can be prepared then covered and refrigerated overnight. Let the frosting sit at room temperature to slightly soften for 10 minutes before assembling and frosting. If the frosting is still too stiff, beat it on medium speed with an electric mixer until it’s soft and spreadable again. Add a splash of milk or cream to thin out if needed. Frosted cake or unfrosted cake layers can be frozen up to 2-3 months. See How to Freeze Cakes. Thaw overnight in the refrigerator and bring to room temperature before decorating/serving.
- Special Tools (affiliate links): 6-inch Round Cake Pan | Glass Mixing Bowl | Whisk | Electric Mixer (Handheld or Stand) | Cooling Rack | Cake Turntable | Bench Scraper | Small Offset Spatula
- Cake Flour: If you can’t get your hands on cake flour, use this cake flour substitute.
- 6 Inch Chocolate Cake: Skip steps 2 & 3 and instead, use the chocolate cake batter from my chocolate cupcakes. Frost with chocolate buttercream.
- More Flavors: See post above for links to more cake flavors using my cupcake batters. Skip steps 2 & 3 above, swapping out the vanilla batter for your chosen flavor.