Description
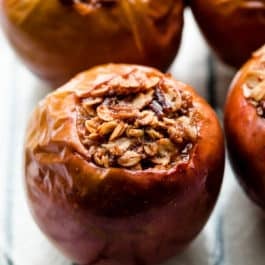
This recipe is for whole baked apples stuffed with buttery brown sugar oat crumble. For extra flavor, feel free to swap the water with warm apple cider.
Ingredients
- 3 Tablespoons (43g) unsalted butter, softened to room temperature (extra soft, so it’s easy to mash)
- 1/4 cup (50g) packed light or dark brown sugar
- 1/2 teaspoon ground cinnamon
- 1/8 teaspoon ground nutmeg
- 1/4 cup (21g) old-fashioned whole rolled oats
- 4 large apples (see note), rinsed and patted dry
- optional: 2 Tablespoons raisins, dried cranberries, or chopped nuts
For Baking
- 3/4 cup (180ml) warm water
Instructions
- Preheat oven to 375°F (191°C).
- Using a handheld or stand mixer with a paddle attachment, or simply using a fork or spoon, beat/mash the butter, sugar, cinnamon, and nutmeg together until combined. Stir in the oats, then the raisins/dried cranberries/nuts, if using. Set aside.
- Core the apples: This can be tricky, but I recommend using a sharp paring knife and a spoon. (Or an apple corer.) I find cookie scoops can easily break or crack the apples. Using a sharp paring knife, cut around the core, about halfway or 3/4 down into the apple. Use a spoon to carefully dig out the core. Takes a bit of patience and arm muscle. Once the core is out, use a spoon to dig out any more seeds.
- Place cored apples in an 8-inch or 9-inch baking pan, cake pan, or pie dish. Spoon filling into each apple, filling all the way to the top. Pour warm water into the pan around the apples. The water helps prevent the apples from drying out and burning.
- Bake for 40-45 minutes or until apples appear slightly soft. Bake longer for softer, mushier baked apples. The time depends on how firm your apples were and how soft you want them to be.
- Remove apples from the oven and, if desired, baste the outside of the apples with juices from the pan. This adds a little moisture to the skin, but it’s completely optional.
- Serve warm with salted caramel, whipped cream, or ice cream. Cover and store leftovers in the refrigerator for up to 2 days.
Notes
- Make Ahead Instructions: I don’t recommend preparing the baked apples ahead of time to serve later. They brown and become mushy, fast. Instead, prepare the filling in advance, cover, and refrigerate for up to 3 days before spooning into the apples and baking. I don’t recommend freezing these baked apples because they’re overly mushy when thawed.
- Special Tools (affiliate links): Electric Mixer (Handheld or Stand) or Glass Mixing Bowl | Apple Corer | 8-inch Square Pan or Round Pan, 9-inch Square Pan or Round Pan, or 9-inch Pie Dish
- Best Apples to Use: Choose perfectly round apples that are on the firmer side. I usually use Granny Smith, Fuji, Pink Lady, or Honeycrisp. Make sure they stand up straight on their bottom, so they don’t tip over in the oven. For more information, here are the best apples to use for baking.
- Sugar: Brown sugar adds moisture, as well as the best flavor. Feel free to use regular granulated sugar or even coconut sugar if needed. I don’t recommend any liquid sweeteners or sugar replacements.
- Oats: Oats add wonderful texture. You can use the same amount of quick oats instead. I don’t recommend leaving out the oats but if you need to, you can try replacing with finely chopped nuts. I don’t recommend replacing with oat flour or any flour.