Description
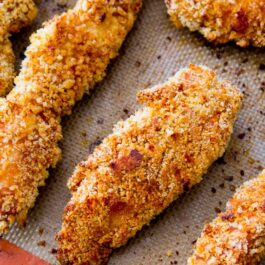
Extra crispy chicken fingers marinated in honey and BBQ sauce. Baked, not fried!
Ingredients
- 1 and 1/2 pounds skinless, boneless chicken breasts or tenders
- 3/4 cup your favorite BBQ sauce
- 1/4 cup honey*
- 1/2 cup whole wheat flour or all-purpose flour (spooned & leveled)
- 1 teaspoon salt
- 1/2 teaspoon ground black pepper
- 1/2 teaspoon smoked paprika*
- 2 large eggs
- 1 and 1/2 cup Panko (or more, as needed)
- nonstick spray like PAM, olive oil spray, or coconut oil spray (found mine at Trader Joes!)
Instructions
- Combine barbecue sauce and honey in a large bowl. If using chicken breasts, pound down and cut into strips. If using boneless, skinless chicken tenders (chicken tenders are the lean strips of meat found attached to the underside of chicken breasts – they can also be purchased separately), cut in half lengthwise. Add the chicken strips to the bowl and stir to coat. Cover tightly and marinate in the refrigerator for 30 minutes and up to 4-6 hours. The longer, the more flavorful your chicken.
- Preheat oven to 400°F (204°C). Line a large baking sheet with a silicone baking mat or coat heavily with nonstick spray.
- Combine flour, salt, pepper, and smoked paprika in a shallow dish. Beat eggs in another shallow dish. Pour Panko breadcrumbs into a third shallow dish. Coat each chicken strip in flour, shaking off any excess. Then, dip in egg and let any excess drip off. Then generously roll in the breadcrumbs, shaking off any excess. Add more Panko to the dish if you are running low. Place the chicken strips on the prepared baking sheet. Spray each with nonstick spray to “seal” the breading, which will prevent the breading from staying raw and allows it to bake onto the chicken fingers.
- Bake for 10 minutes. Turn each piece over and continue baking until the outside is crisp and the centers are cooked through, about 10 minutes more. Baking times may vary, just make sure yours are cooked through. If you like them more brown, bake longer.
- Serve chicken fingers with more BBQ sauce. Store any leftovers in the refrigerator for up to 2 days.
Notes
- Freezing Instructions: Chicken fingers freeze well, up to 2 months. Bake frozen for about 18 minutes, flipping once, at 350°F (177°C).
- Special Tools (affiliate links): Glass Mixing Bowls | Rubber Spatula | Baking Sheet | Silicone Baking Mat or Nonstick Spray | Shallow Dish (like a Pie Dish)
- Honey: You can simply use a honey flavored BBQ sauce. I find that there isn’t enough honey flavor for me, so even when I do use a honey BBQ sauce, I still add honey to the marinade. Test until you find what you like.
- Paprika: I love to use smoked paprika for added flavor – use your favorite seasonings if you do not have any on hand.
- Panko: Panko is a Japanese-style breadcrumb traditionally used as a coating for fried or baked foods. It’s available in major grocery stores near the stuffing. Panko is heavily preferred opposed to regular bread crumbs because they tend to stay crispier longer. You can buy seasoned or unseasoned and then add more/less seasonings to your breading if preferred. I use unseasoned.
- Adapted from Rachael Ray.