Galette! Pie’s very unassuming and carefree little sis. I love her.
Have you ever made a galette before? You must. Galette is the dessert I suggest to nearly any beginner baker, especially those nervous about making pie crust from scratch. Because… great news! It’s literally free-form pie. Just as delicious + awesome as pie, but there’s no weaving, crimping, trimming, or any of that meticulous business. The baking and cooling times are both much shorter than a traditional blueberry pie. You can make mini fruit galettes, too!
I think we all need more low maintenance desserts in our life, just saying.
To make things super interesting, I played around with a new crust: buttermilk cornmeal! It doesn’t necessarily taste like cornbread, but it has similar flavors. This crust crisps up beautifully, has a little crunch from the cornmeal, and when paired with juicy, sweet, and warm berries? It’s absolute heaven.
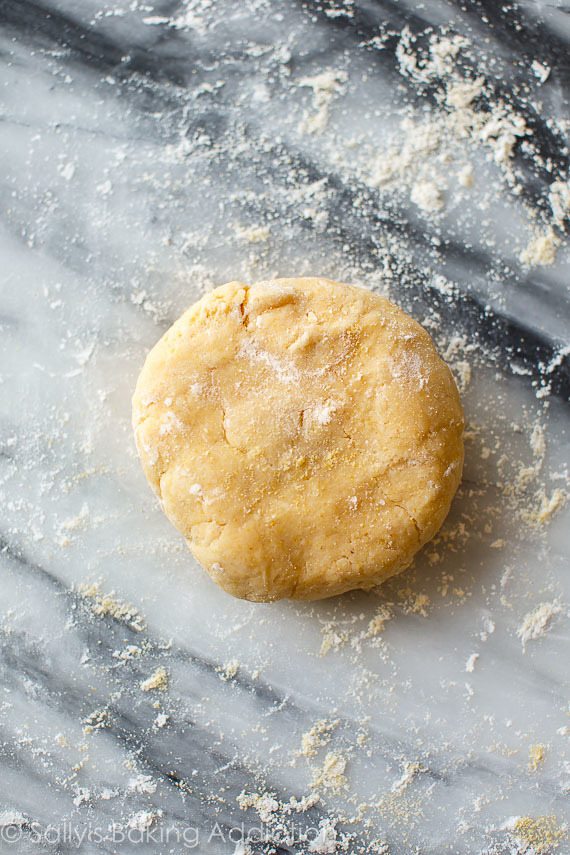
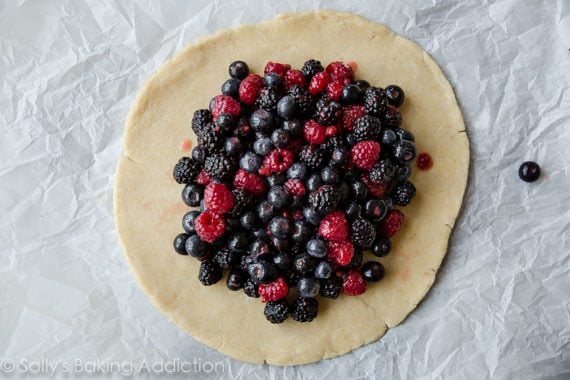
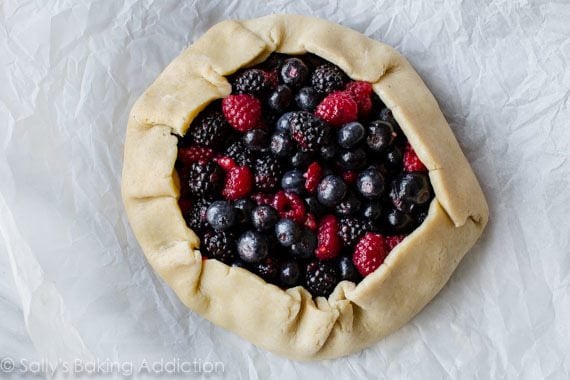
Make sure you chill the buttermilk cornmeal crust before shaping and filling. And by “shaping” I mean that in the most casual sense ever. Because galette is not picky. Whatever shape the dough rolls out to be, leave it. One thing to keep in mind, though—unlike pies where you can pile the fillings sky-high, galette’s don’t really like it when there’s too much stuff. The crust will become mushy, shapeless, and blah. (Technical terms here.) To avoid that nonsense, keep this in mind: flat and compact. Flatten that filling down, compact the fruit as much as you can, and leave a 2-3 inch border so you can fold the edges over.
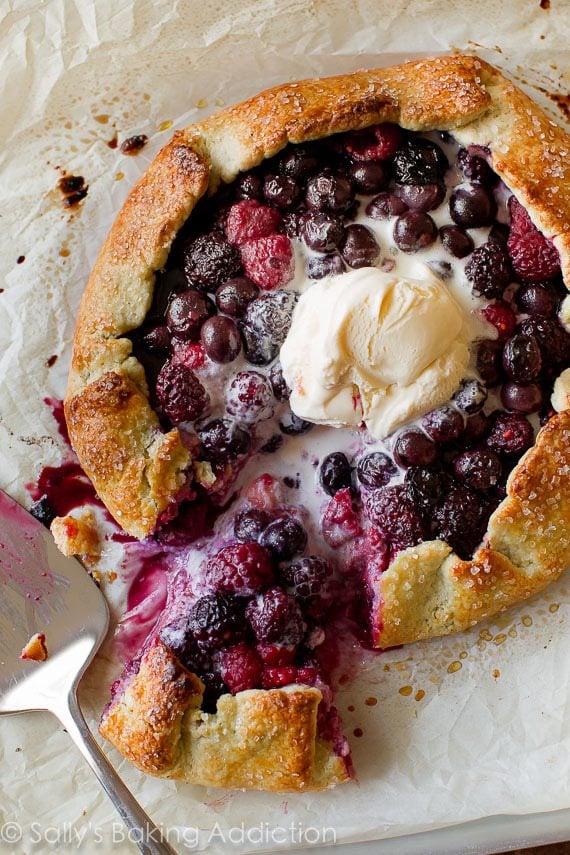
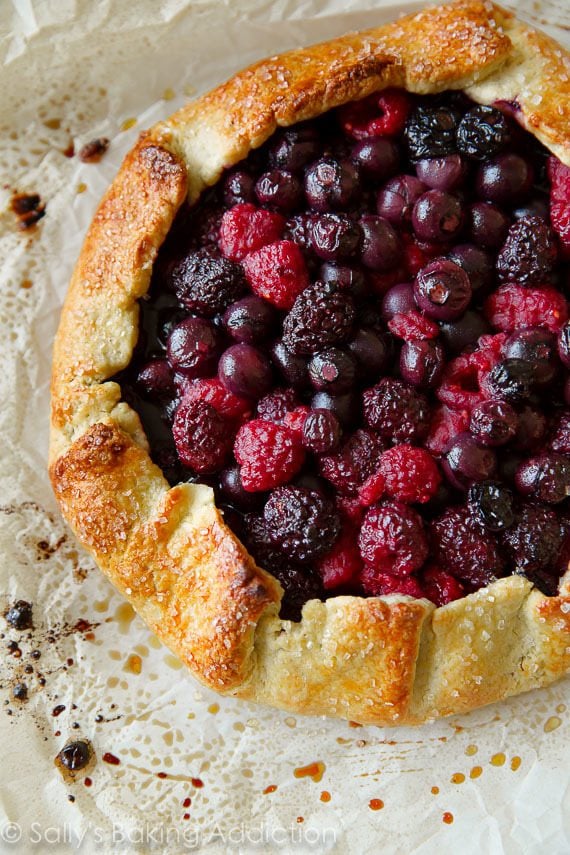
Before baking, brush the buttery cornmeal crust with a little egg wash and sprinkle with coarse sugar. The egg wash makes the edges super glossy and shiny—and helps it brown more evenly. The coarse sugar is for… well… who doesn’t love a little sparkle with their dessert?
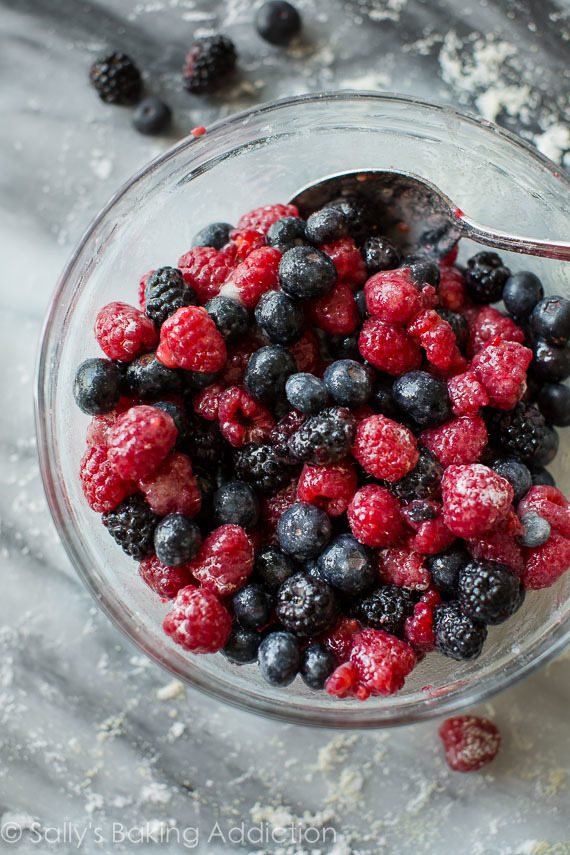
The berries are up to you! I used more blueberries than raspberries and blackberries, but any ratio works. Strawberry fan? Chop them up and throw them in too. Just make sure you have no more or less than 4 cups of berries total. I definitely suggest a mix of berries for different flavors and textures.
In addition to berries, be sure to try my apple galette and ginger pear galette. Both are fall favorites!
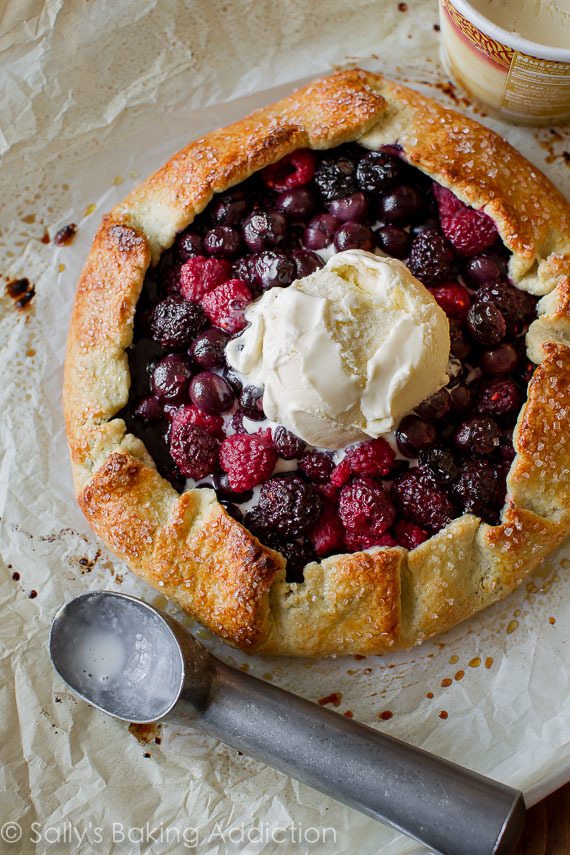
The one thing galettes demand, however, is a big fat scoop of melty vanilla ice cream. Duh.
Print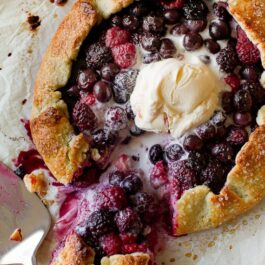
Mixed Berry Galette with Buttermilk Cornmeal Crust
- Prep Time: 1 hour, 20 minutes
- Cook Time: 28 minutes
- Total Time: 2 hours
- Yield: 1 galette; about 6-8 servings
- Category: Dessert
- Method: Baking
- Cuisine: American
Description
As delicious and impressive as pie, but half the work! This mixed berry galette with buttermilk cornmeal crust is the easiest summer dessert.
Ingredients
Cornmeal Crust
- 1 and 1/4 cups (156g) all-purpose flour (spooned & leveled)
- 1/4 cup (30g) cornmeal
- 1/4 cup (50g) granulated sugar
- 1/4 teaspoon salt
- 1/2 cup (115g; 1 stick) cold unsalted butter, cubed*
- 1/4 cup (60ml) cold buttermilk*
Filling
- 4 cups (about 600g) fresh or frozen mixed berries* (do not thaw & see note)
- 3 Tablespoons (37g) granulated sugar
- 1 Tablespoon (7g) cornstarch
- 1 Tablespoon (15ml) fresh lemon juice
- egg wash: 1 large egg beaten with 1 Tablespoon milk
- coarse sugar for sprinkling
Instructions
- Make the crust: Whisk the flour, cornmeal, sugar, and salt together in a medium bowl. Using a pastry cutter or a couple forks, cut in the butter until the mixture resembles coarse, pea-sized crumbs. Add the buttermilk and stir until the flour is moistened. Add 1 more Tablespoon of buttermilk if the dough seems dry. Gently knead the dough a few times on a lightly floured work surface until it all comes together. Shape the dough into a ball and flatten it into a thick disk. Wrap it in plastic wrap and refrigerate it for at least 1 hour and up to 3 days (or freeze up to 3 months).
- As the dough chills, prepare the filling: Mix the berries, sugar, cornstarch, and lemon juice together in a large bowl. Cover tightly and let sit until the dough is ready. I usually cover it and keep in the refrigerator during this time.
- Preheat oven to 425°F (190°C). Line a large baking sheet with parchment paper or a silicone baking mat. Set aside.
- On a lightly floured work surface, roll the dough into a 12-inch circle (or any shape, really!). Trim the rim of the circle to make a clean cut if desired. Transfer dough to the prepared baking sheet.
- Spoon the berries (not the juices) into the center of the dough, leaving a 2-3 inch border all around. Gently fold the edges of the dough over the fruit, overlapping the dough as necessary. Press gently to seal the edges. Brush the edges with egg wash and sprinkle with coarse sugar.
- Bake until the filling is bubbly and the crust is golden brown, about 25-28 minutes. Allow to cool on the baking sheet for 10 minutes before slicing and serving.
Notes
- Make Ahead & Freezing Instructions: Both the dough and filling can be made ahead of time and chilled in the refrigerator for up to 3 days. The dough can be frozen for up to 3 months after prepared in step 1. Allow to thaw overnight in the refrigerator before rolling out and filling.
- Special Tools (affiliate links): Glass Mixing Bowls | Whisk | Pastry Cutter | Baking Sheet | Silicone Baking Mat or Parchment Paper | Rolling Pin | Pastry Brush | Coarse Sugar
- Cold Ingredients in Dough: Make sure the butter and buttermilk are SUPER cold. Cold ingredients, as well as chilling, help the crust keep its shape.
- Buttermilk: Buttermilk adds unbelievable flavor and texture to this dough. I highly recommend it. If you don’t have buttermilk, use a DIY sour milk instead. Add 1/2 teaspoon of fresh lemon juice or white vinegar to a liquid measuring cup. Then add enough cold whole milk until it reaches 1/4 cup. Stir together and let it sit for 5 minutes before using in the recipe.
- Mixed Berries: I use 2 cups blueberries, 1 cup raspberries, 1 cup blackberries.


