
Welcome to Sally’s Cookie Palooza. If you’re new to this website, my annual Christmas cookie palooza hits right after Thanksgiving. It’s a huge cookie fiesta as we countdown until Christmas. 10 new cookie recipes in a row, unapologetically full of all the butter, sugar, sprinkles, and chocolate you could imagine. Time to switch gears on your rolling pins from pie crust to sugar cookies!
We’re kicking off with Snowman Cookies!
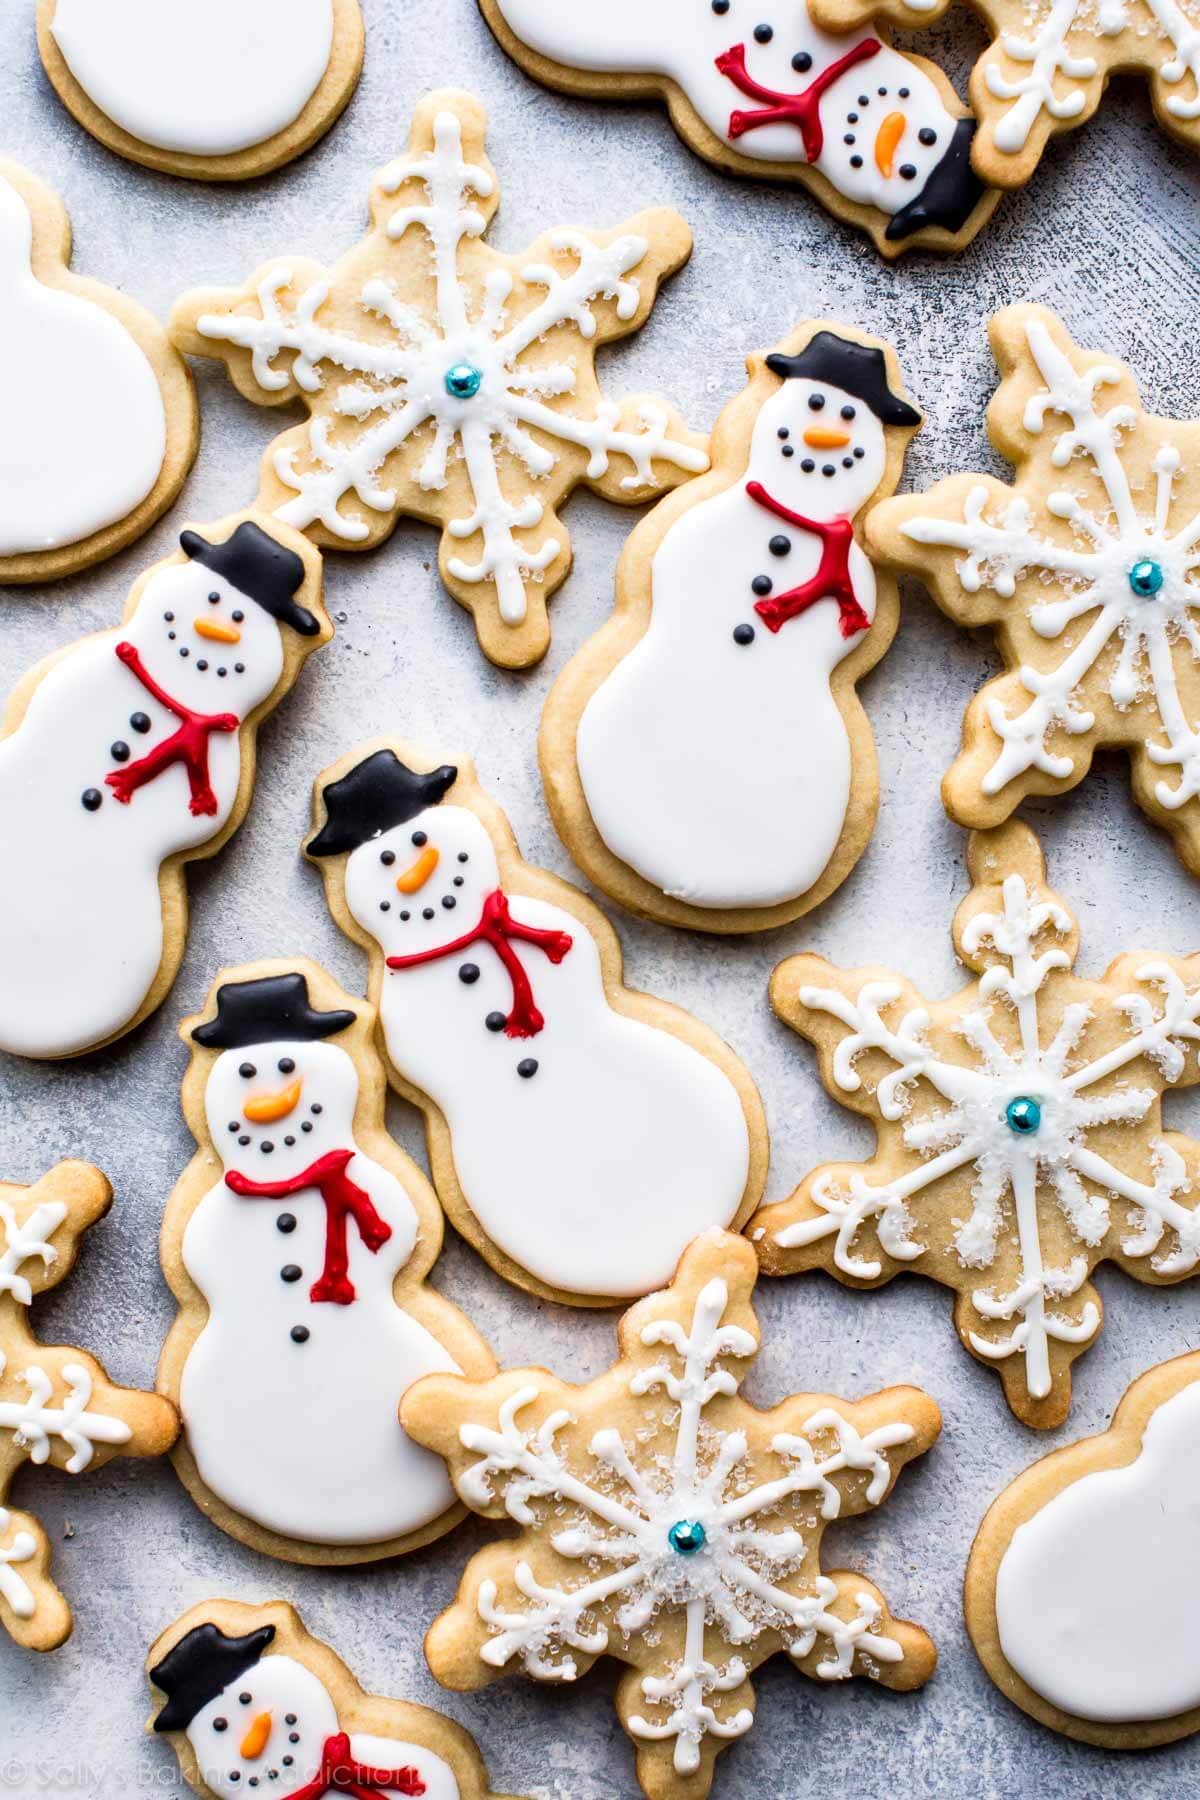
Start with my sugar cookies recipe and cut into holiday shapes. Any shape or size holiday cookie will do—I chose snowmen and snowflakes. But mostly snowmen because they’re so darn cute! Since the cookie shape is completely up to you, I really want you to focus on working with royal icing. I know decorating cookies with royal icing can be intimidating, but here’s what I’ve learned: set your expectations appropriately. Don’t expect to create a fancy intricate design if this is your first time. Start small and go from there. A lot of the decorated sugar cookies I create are extremely simple. And of course, don’t limit them to one time of year! Valentine’s Day cookies, Easter cookies, and Halloween cookies are all equally festive during their holiday seasons.
But again, you have to start somewhere. You CAN do this. Watch me make the cookies, shape the cookies, and decorate them:
Sugar Cookie Steps
- make cookie dough
- divide in two pieces
- roll out cookie dough
- chill rolled out cookie dough
- cut into shapes
- bake & cool
- decorate
Whenever I decorate sugar cookies, I always begin with a quality homemade sugar cookie recipe. A recipe that I can always depend on, so all I have to “worry” about is decorating. My go-to sugar cookie recipe produces soft sugar cookies with slightly crisp edges. It starts with butter and sugar creamed together. Add 1 egg and vanilla (sometimes almond extract, yum!), then flour + baking powder + salt. That’s it. Only 7 basic ingredients.
My Sugar Cookie Trick
Notice in the video that I roll out the dough BEFORE chilling it in the refrigerator? That’s my trick! Why? The dough is so much easier to roll out before it’s chilled. But why are we chilling it? So the cookies keep their shape when baked. Wait, why divide in 2? Because it’s difficult to roll out a huge mass of dough. Dividing into smaller sections makes rolling out more manageable.
Roll out the doughs until to about 1/4 inch thickness. I like to do this directly on a silicone baking mat. Why? Because you have to chill the rolled out dough in the fridge. And you can’t really pick up a mass of dough you rolled out on the counter, right? Nor can you cut into shapes when the dough is this warm. So roll out on a nonstick surface that you can literally pick up, put on a baking sheet, and place in the fridge. So… make dough, divide in 2, roll out, chill. Got it?
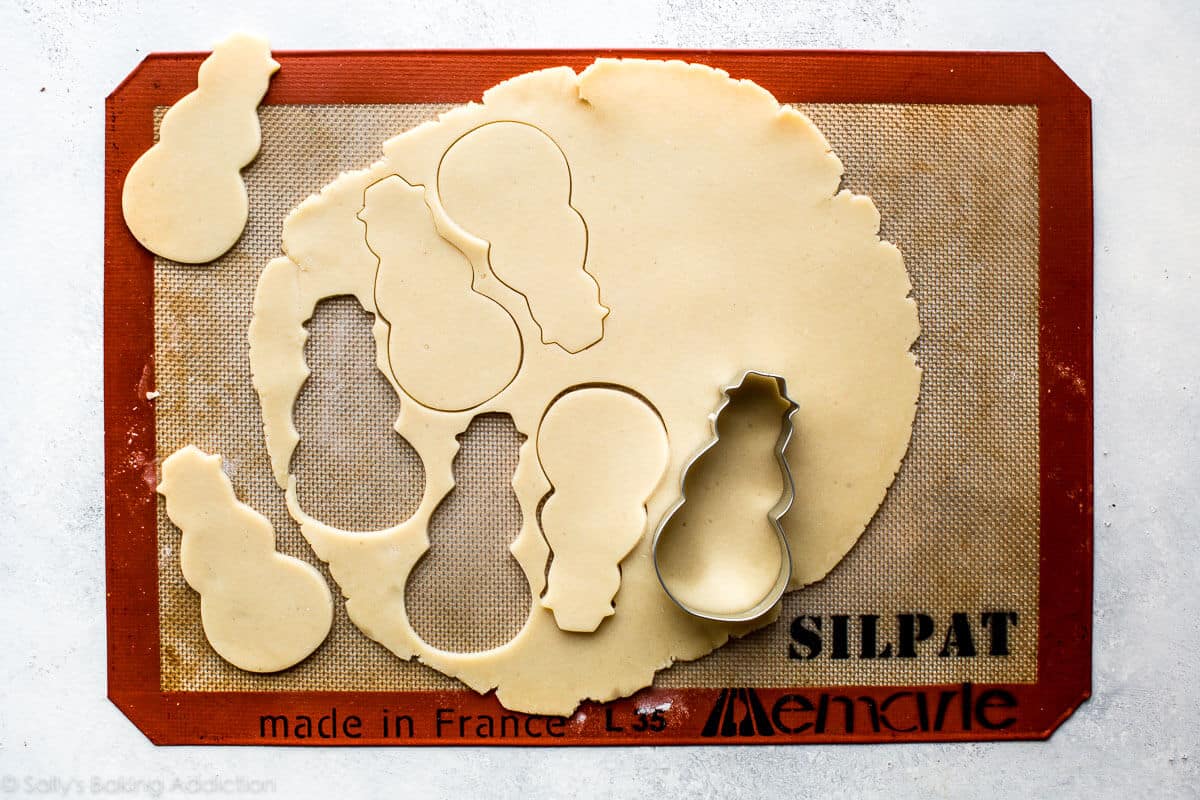
After the dough is chilled (you’ll have two of these rolled out doughs ↑↑), cut into shapes.
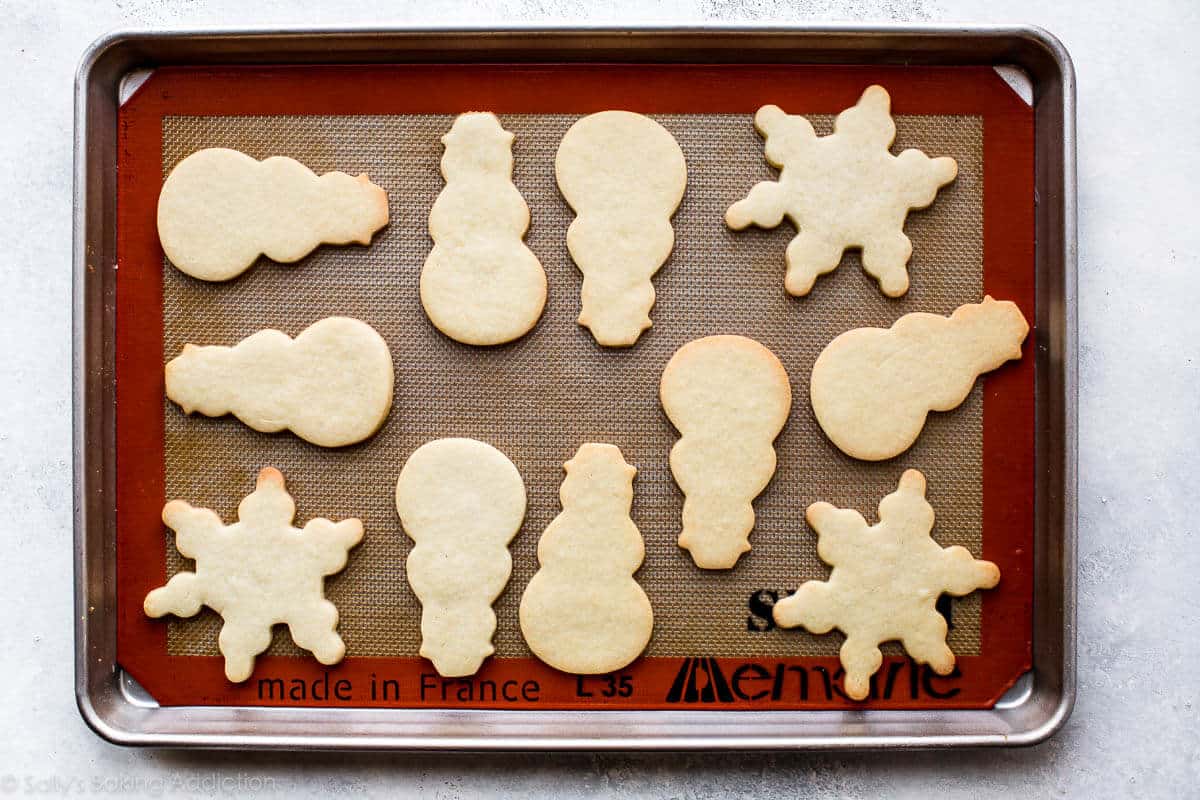
Then bake them.
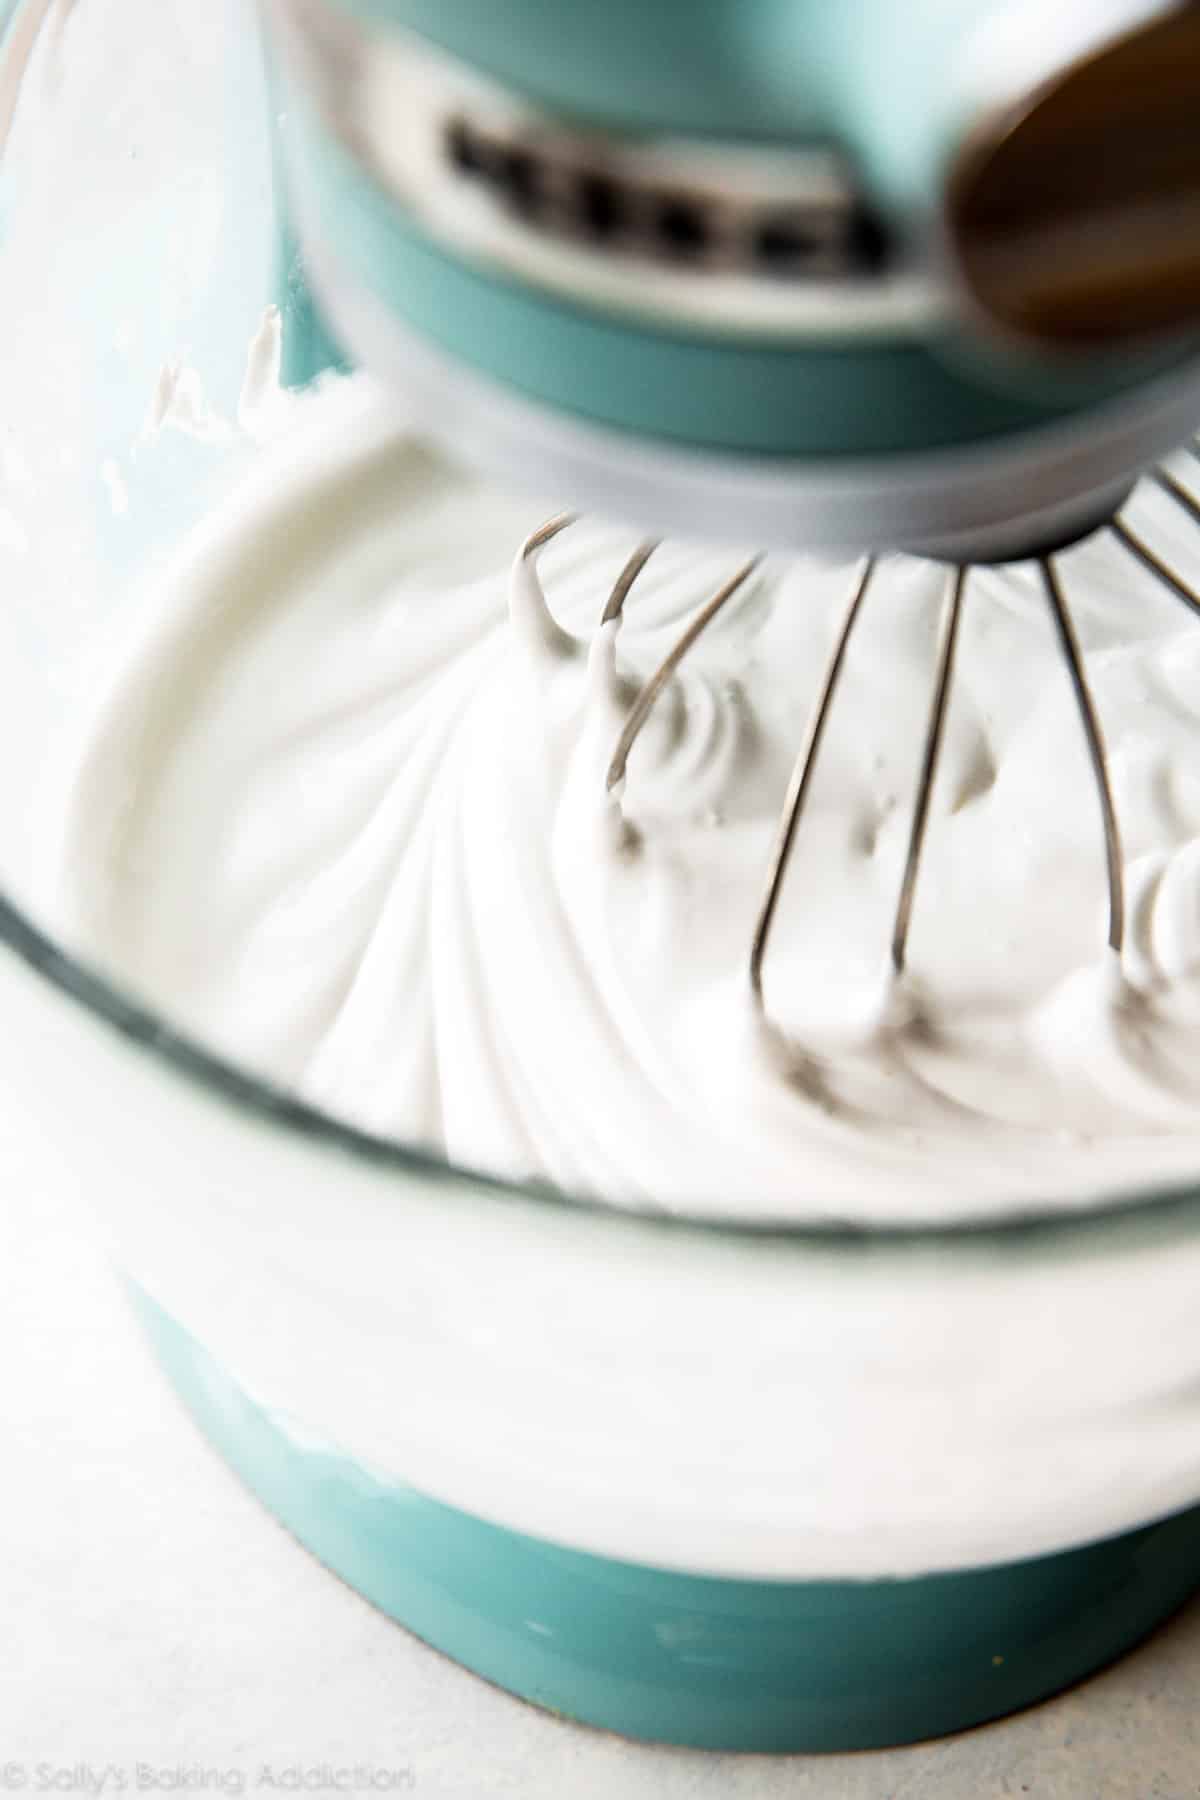
Let’s Talk Royal Icing
Now let’s make royal icing. There are many ways to prepare royal icing and my favorite method is with meringue powder. Meringue powder takes the place of raw egg whites, which is found in traditional royal icing recipes. Both create a very sturdy and stable icing that hardens quickly on top of cookies. It’s awesome. Meringue powder eliminates the need for raw fresh eggs, but still provides the EXACT same consistency. You can find meringue powder in some baking aisles, most craft stores with a baking section, and online. I just buy it on Amazon in the 8 ounce container. Super inexpensive and it lasts me awhile.
This royal icing is just 3 ingredients: confectioners’ sugar, meringue powder, and water. The trickiest part is landing on the perfect consistency. Sometimes I need more water, sometimes I need less water. But the wonderful thing is that you can manipulate the icing to get the proper consistency by adding more water or more confectioners’ sugar. It’s awesome.
You can also use this easy cookie icing for decorating the snowmen cookies, but it’s difficult to pipe fine detail since it’s just a really thick glaze (unlike royal icing, which is quite sturdy). This icing doesn’t set/dry as quickly as royal icing and it’s not as easy to decorate with. That being said, sometimes it’s just the more convenient option! So give it a try if you prefer. (It will dry in about 24 hours, where the royal icing recipe below dries in about 1-2 hours.)
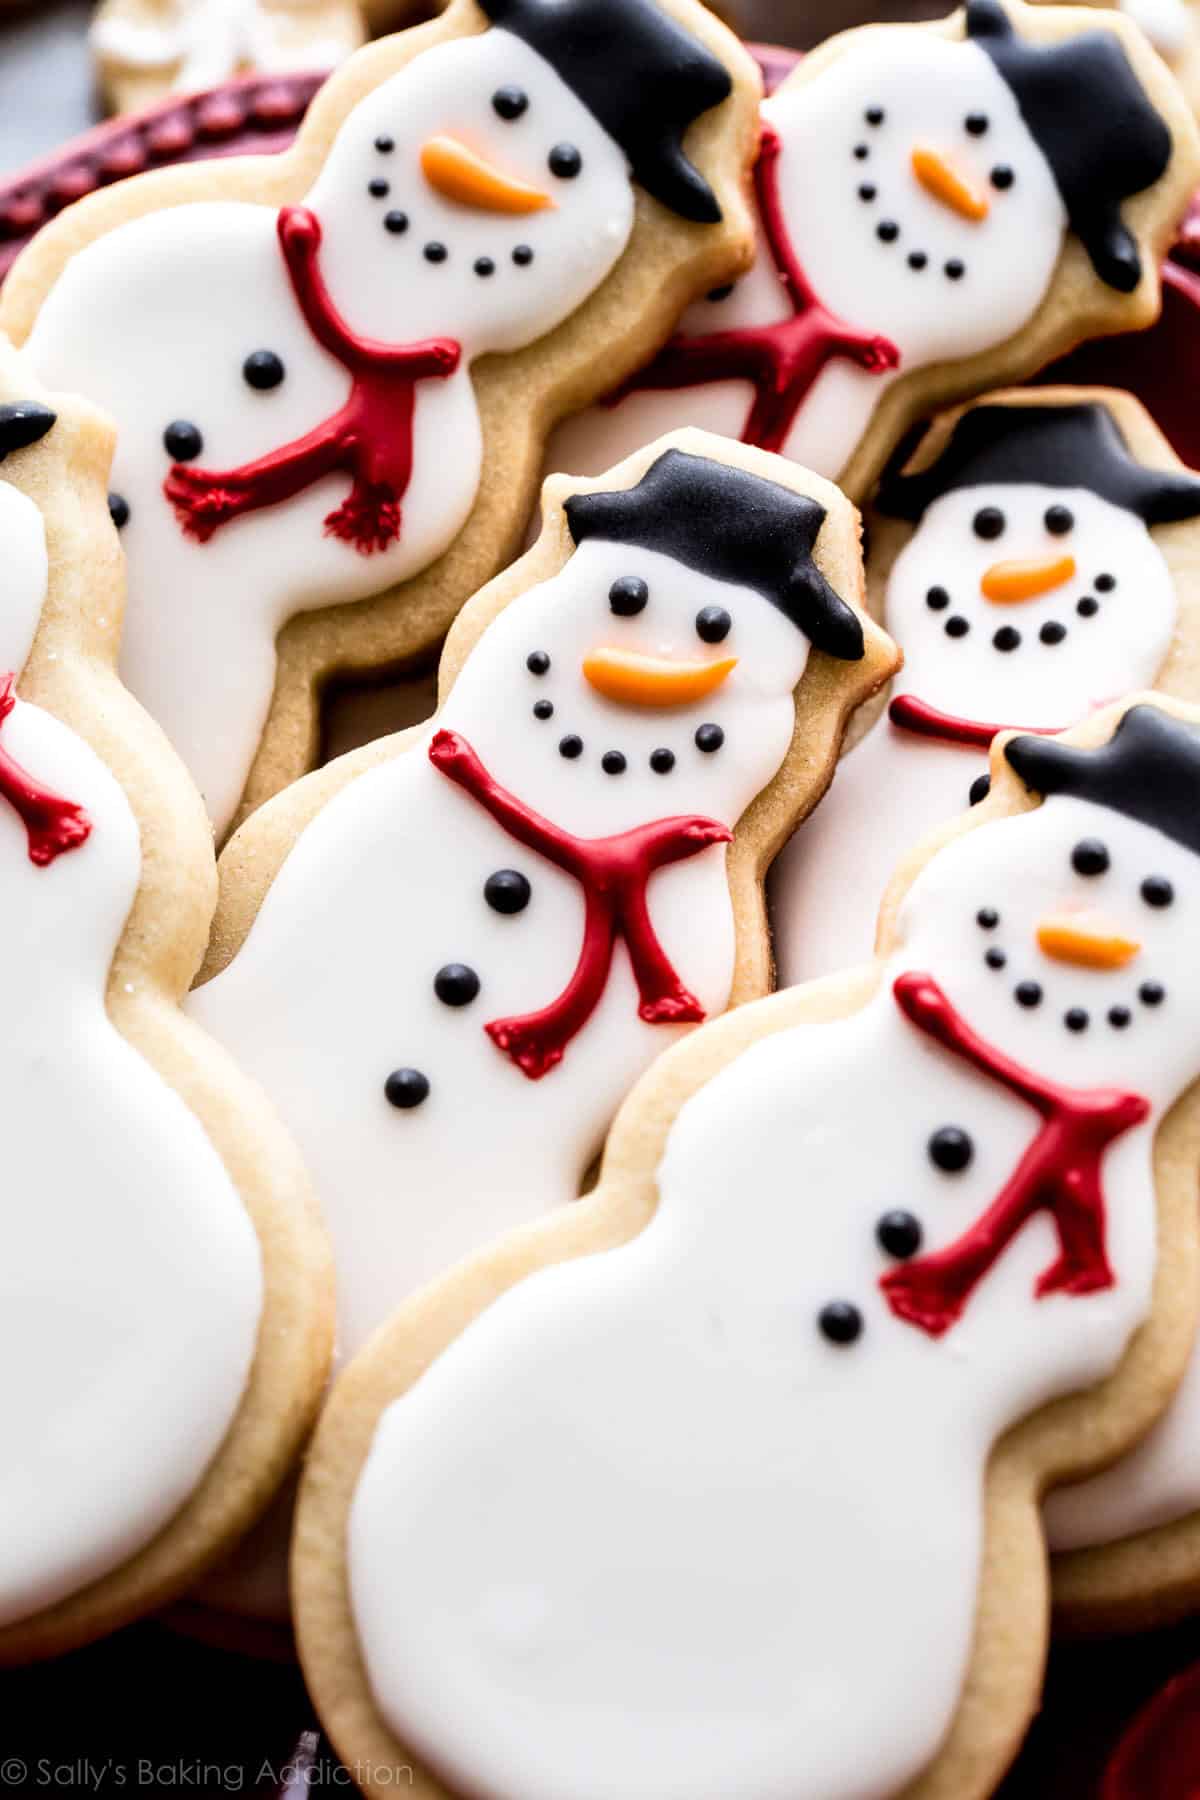
Let’s Decorate Snowman Cookies
Like I mentioned above, I’m not a super fancy cookie decorator. But after much practice over the years, I’m happy to recommend my most-used cookie decorating supplies.
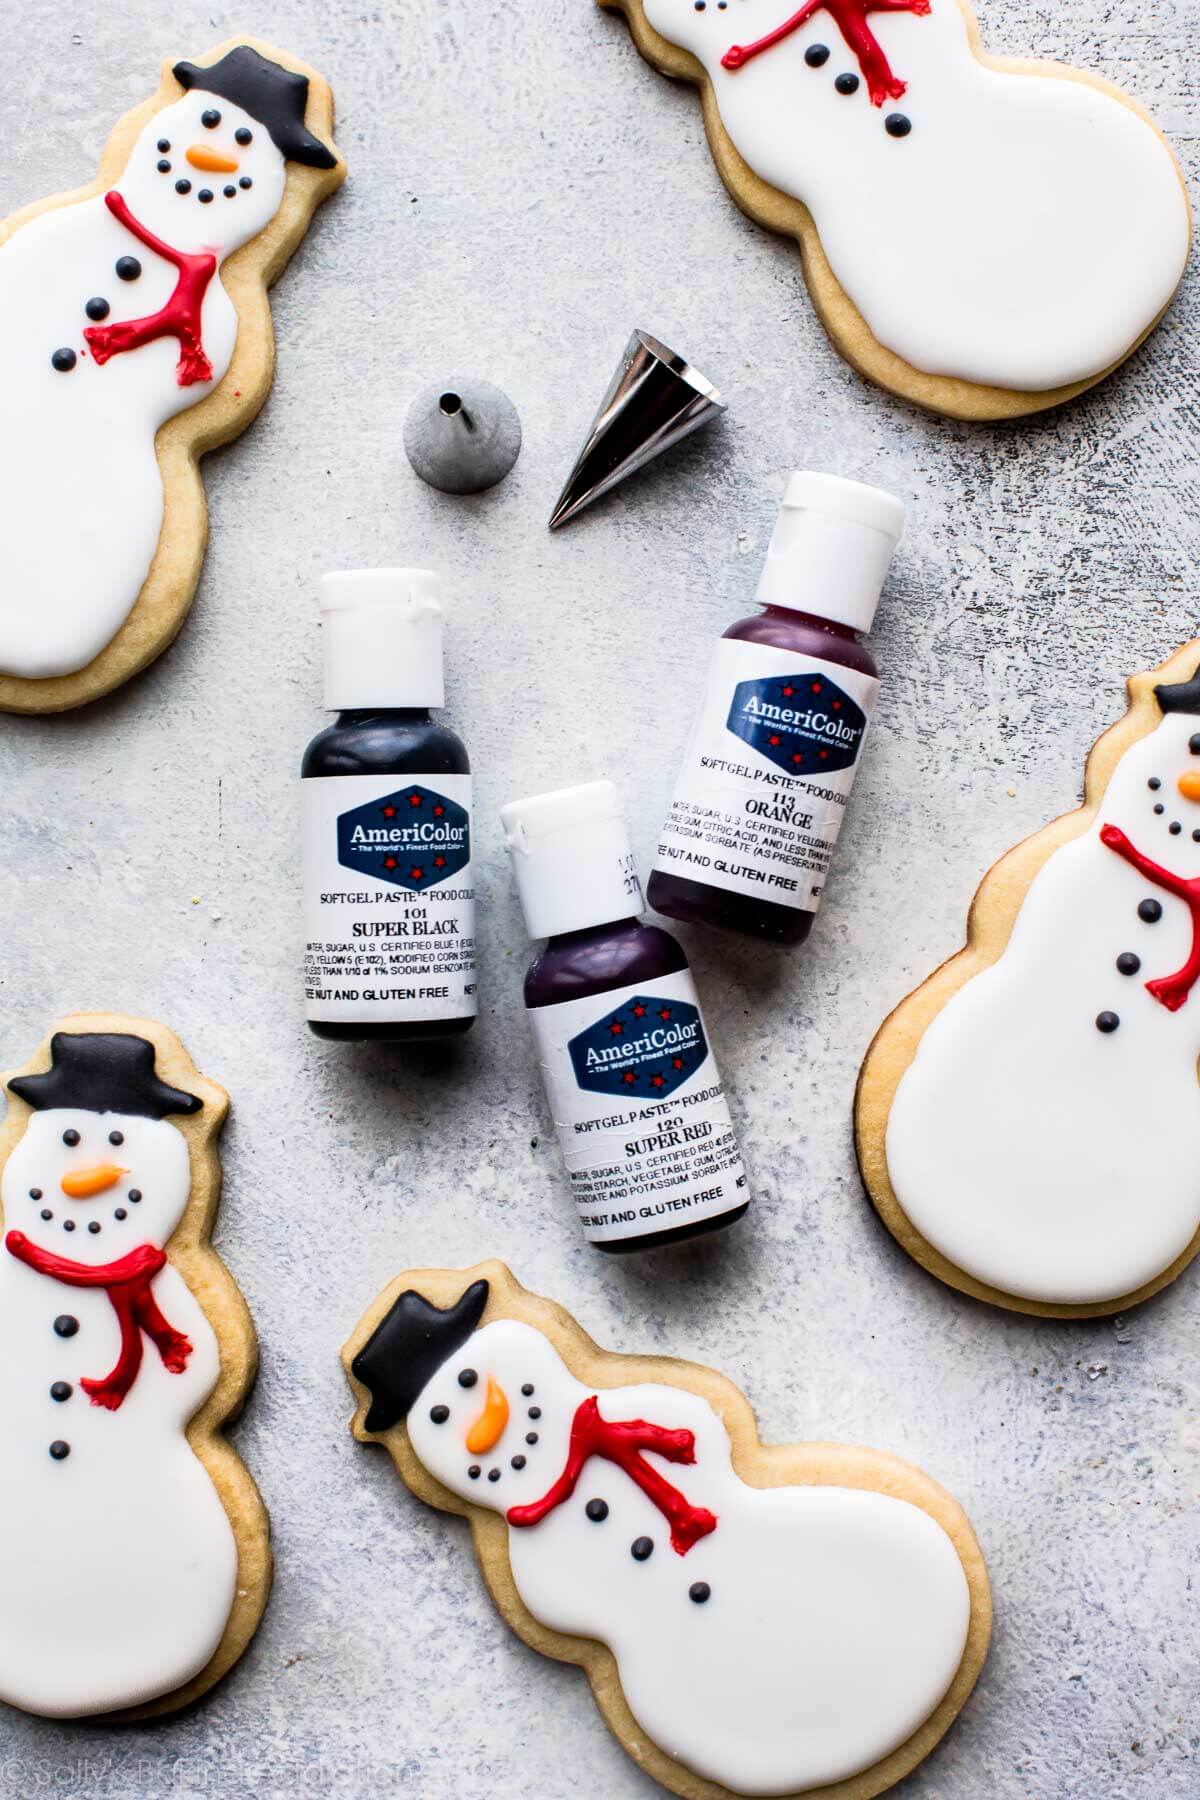
Whenever I decorate sugar cookies, I grab a couple basic piping tips: a thin Wilton #1 tip and a wider Wilton #4 tip or Wilton #5 tip. I use the wider tip for big designs, outlining, and flooding. The white snowman’s body and red scarf are done with this wider tip, as well as the snowflakes. I use the thinner tip for smaller detail like the snowman hat, eyes, buttons, and nose.
For coloring the icing, I strongly recommend gel colors. I prefer Americolor’s color kit. I’ve had this for a year and haven’t even made a dent in most colors. It’s a GREAT set to have in your kitchen!
These cookie decorating tools would be great to add to your holiday wish list. And while you’re at it, be sure to check out my Holiday Baking Gift Guide. Lots of fun ideas in there, either for yourself or other baker friends!
Snowman Cookie Decorating Tips
- Start small—don’t attempt super intricate designs if you’re a beginner.
- Take your time. Don’t expect to rush through it!
- There will be some uglies. There are always some uglies. 🙁
- Have fun. Invite friends or family over, grab your kids, or host a cookie decorating day. Make an afternoon or evening of it. Make some chocolate chip cookies to munch on while you work!
- Don’t stress! It’s just a cookie!
Have fun decorating; I can’t wait to see your cookie creations!
See Your Snowman (and other shapes) Sugar Cookies!
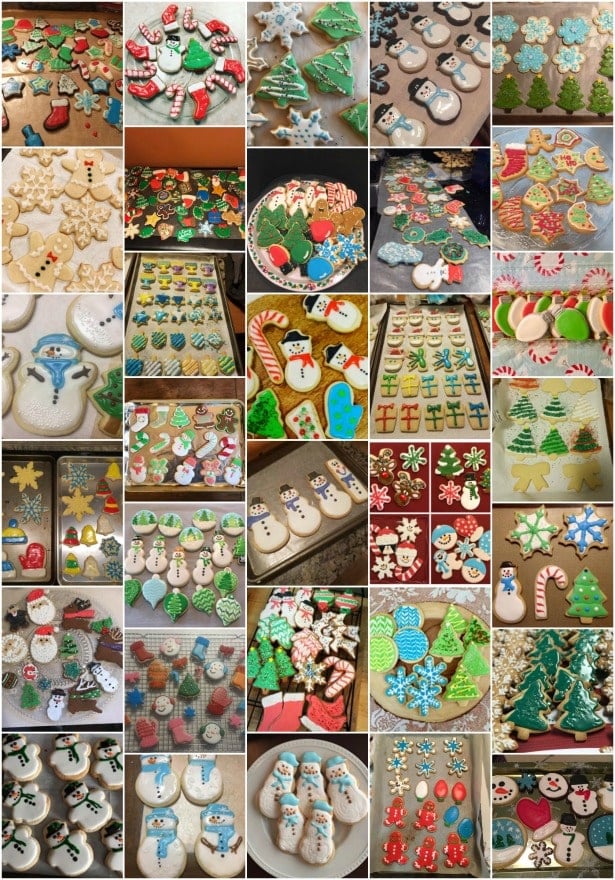
Many readers tried this recipe as part of a baking challenge! Feel free to email or share your recipe photos with us on social media. 🙂
Print
Snowman Sugar Cookies
- Prep Time: 2 hours, 30 minutes
- Cook Time: 12 minutes
- Total Time: 4 hours, 45 minutes (includes cooling)
- Yield: 20 (4-inch) cookies
- Category: Cookies
- Method: Baking
- Cuisine: American
Description
Christmas sugar cookies are so much fun to decorate! Here’s how to make adorable snowman sugar cookies for your holiday cookie trays.
Ingredients
- 2 and 1/4 cups (281g) all-purpose flour (spooned & leveled), plus more as needed for rolling and work surface
- 1/2 teaspoon baking powder
- 1/4 teaspoon salt
- 3/4 cup (12 Tbsp; 170g) unsalted butter, softened to room temperature
- 3/4 cup (150g) granulated sugar
- 1 large egg, at room temperature
- 2 teaspoons pure vanilla extract
- 1/4 or 1/2 teaspoon almond extract (optional, but makes the flavor outstanding)*
For Decorating
- Royal Icing
- red, black, and orange gel food coloring
Instructions
- Whisk the flour, baking powder, and salt together in a medium bowl. Set aside.
- In a large bowl using a handheld or a stand mixer fitted with a paddle attachment, beat the butter and sugar together on high speed until completely smooth and creamy, about 2 minutes. Add the egg, vanilla, and almond extract (if using) and beat on high speed until combined, about 1 minute. Scrape down the sides and up the bottom of the bowl and beat again as needed to combine.
- Add the dry ingredients to the wet ingredients and mix on low until combined. Dough will be a bit soft. If the dough seems too soft and sticky for rolling, add 1 more Tablespoon of flour.
- Divide the dough into 2 equal parts. Place each portion onto a piece of lightly floured parchment paper or a lightly floured silicone baking mat. With a lightly floured rolling pin, roll the dough out to about 1/4-inch thickness. Use more flour if the dough seems too sticky. The rolled-out dough can be any shape, as long as it is evenly 1/4-inch thick.
- Lightly dust one of the rolled-out doughs with flour. Place a piece of parchment on top. (This prevents sticking.) Place the 2nd rolled-out dough on top. Cover with plastic wrap or aluminum foil, then refrigerate for at least 1-2 hours and up to 2 days.
- Once chilled, preheat oven to 350°F (177°C). Line 2 large baking sheets with parchment paper or silicone baking mats. Carefully remove the top dough piece from the refrigerator. If it’s sticking to the bottom, run your hand under it to help remove it. Using a snowman cookie cutter, cut into shapes. Re-roll the remaining dough and continue cutting until all is used. Repeat with 2nd dough piece of dough. (Note: It doesn’t seem like a lot of dough, but you get a lot of cookies from the dough scraps you re-roll.)
- Arrange cookies on baking sheets 3 inches apart. Bake for 11-12 minutes, until lightly browned around the edges. If your oven has hot spots, rotate the baking sheet halfway through bake time. Allow cookies to cool on the baking sheet for 5 minutes then transfer to a wire rack to cool completely before decorating.
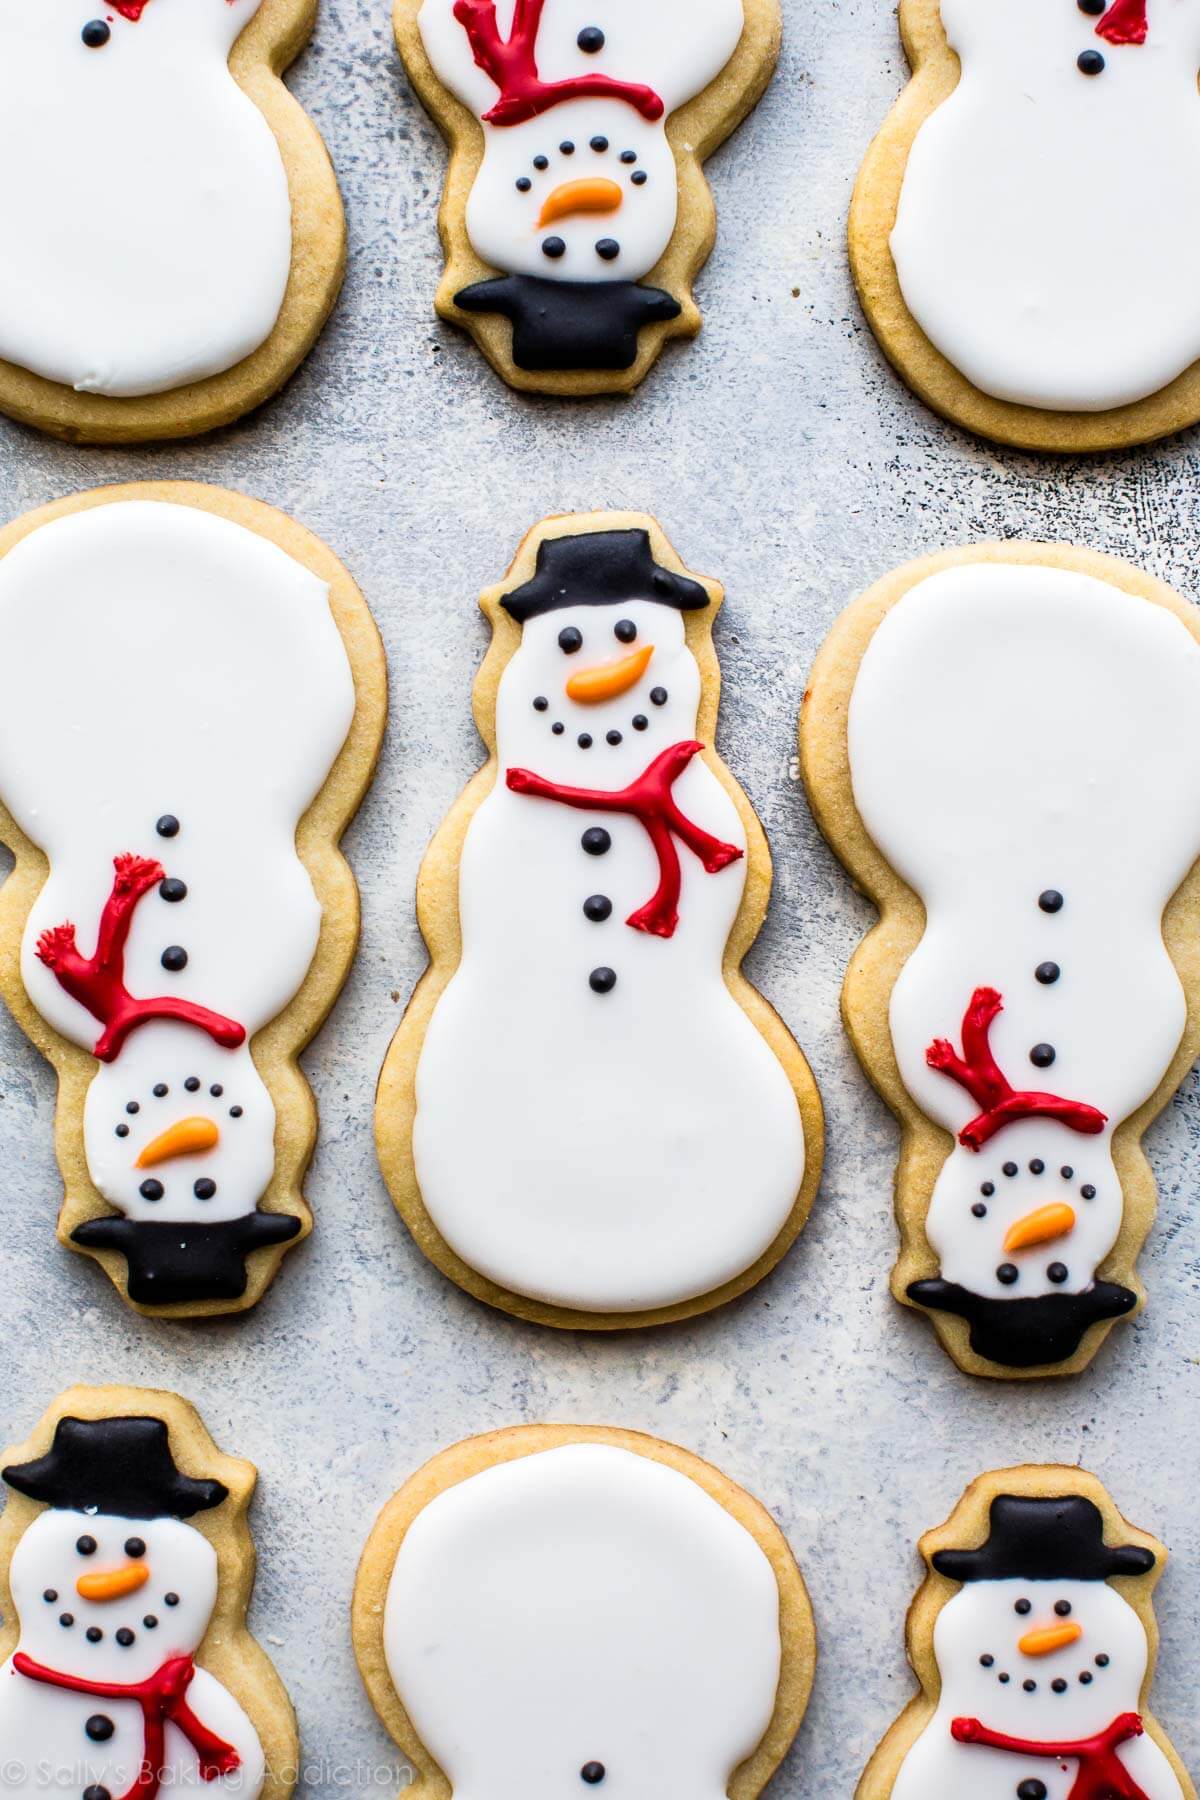
- Decorate: Prepare Royal Icing. You’ll need 3 small bowls: one for red icing, one for black icing, and one for orange icing. Spoon 1/4 cup of icing into each bowl. The rest of the icing will remain white. Stir red food coloring into 1 bowl until you reach your desired shade. Stir black food coloring into another bowl until you reach your desired shade. (I find that black always dries darker so stop adding coloring when you reach a dark gray.) Finally, stir orange food coloring into the last bowl until you reach your desired shade.
- Fit a piping bag (reusable or disposable) with Wilton piping tip #5 or piping tip #4. If you only have 1 of these piping tips, keep the tip on the outside of the bag by using a coupler so you can easily transfer the piping tip to the bag of red icing because you need the same tip for the red scarf. Spoon white icing inside the piping bag. Decorate cookies with white icing by piping a border around the edges and then filling it. (Leave room for the black hat!) Allow to set. I put the baking sheet in the refrigerator to speed it up.
- Meanwhile, fill more piping bags with remaining colors of icing. You need Wilton piping tip #1 for the black hat, eyes, mouth, and button. You also need it for the orange icing, so if you only have 1 tip, use a coupler so you can easily transfer the piping tip to the bag of orange icing. You need Wilton piping tip #5 or piping tip #4 for the red scarf.
- Once the white icing sets, pipe the scarf with red icing. Then pipe the hat, eyes, and buttons with black icing. Pipe the nose with orange icing.
- Icing will completely set in about 2-3 hours at room temperature. Enjoy cookies right away or wait until the icing sets to serve them. Once the icing has set, these cookies are great for gifting or for sending. Plain or decorated cookies stay soft for about 5 days when covered tightly at room temperature. For longer storage, cover and refrigerate for up to 10 days.
Notes
- Freezing Instructions: Plain or decorated sugar cookies freeze well up to 3 months. Wait for the icing to set completely before layering between sheets of parchment paper in a freezer-friendly container. To thaw, thaw in the refrigerator or at room temperature. You can also freeze the cookie dough for up to 3 months before rolling it out. Prepare the dough through step 3, divide in half, flatten both halves into a disk as we do with pie crust, wrap each in plastic wrap, then freeze. To thaw, thaw the disks in the refrigerator, then bring to room temperature for about 1 hour. Roll out the dough as directed in step 4, then chill as directed in step 5—no need to chill for 1-2 hours, 45 minutes should be plenty.
- Special Tools (affiliate links): Electric Mixer (Handheld or Stand Mixer) | Rolling Pin or Adjustable Rolling Pin | Snowman Cookie Cutter | Silicone Baking Mat or Parchment Paper | Baking Sheet | Cooling Rack | Americolor Food Coloring Kit | Piping Bags (Reusable or Disposable) | Couplers | Wilton #1 Piping Tip | Wilton #4 Piping Tip or Wilton #5 Piping Tip
- Flavors: I love flavoring this cookie dough with 1/2 teaspoon almond extract as listed in the ingredients above. For lighter flavor, use 1/4 teaspoon. Instead of the almond extract, try using 1 teaspoon of maple extract, coconut extract, lemon extract, or peppermint extract. Or add 1 teaspoon pumpkin pie spice or ground cinnamon. If using lemon extract, you can also add 1 Tablespoon lemon zest.
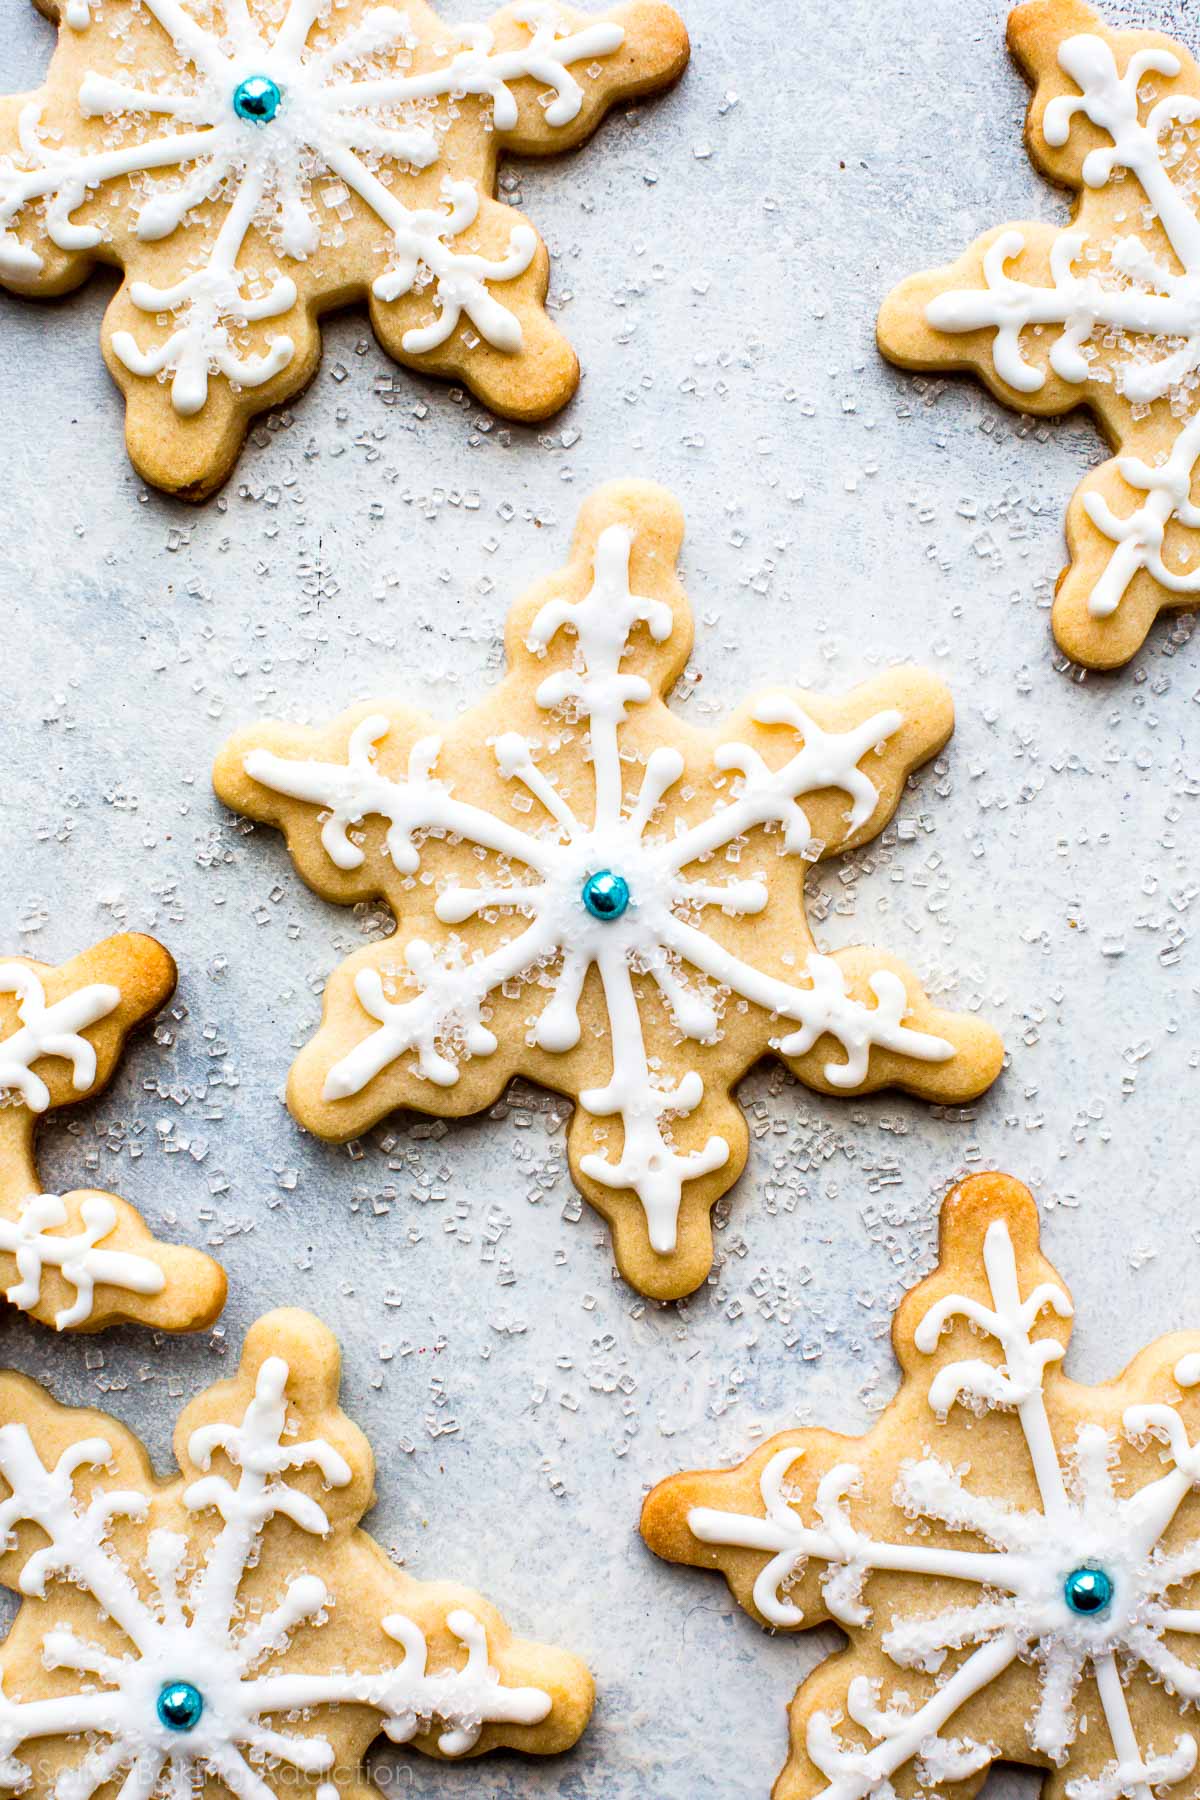
- Snowflake Sugar Cookies: I used this snowflake cookie cutter, the Wilton #4 piping tip, a big blue sprinkle bead in the center, and sprinkled white sparkling sugar on top.
- Room Temperature: Room temperature butter is essential. If the dough is too sticky, your butter may have been too soft. Room temperature butter is actually cool to the touch. Room temperature egg is preferred so it’s quickly and evenly mixed into the cookie dough.
- Be sure to check out my top 5 cookie baking tips AND these are my 10 must-have cookie baking tools.


