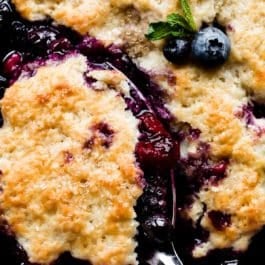
Description
Use your favorite fresh or frozen berries. If using frozen, do not thaw. For extra help, read the recipe notes before beginning.
Ingredients
- 8 cups (approx. 1kg) mixed berries* (see note)
- 1/3 cup (67g) granulated sugar
- 2 Tablespoons (15g) cornstarch
- 1 teaspoon lemon juice
- 1/2 teaspoon pure vanilla extract
Biscuit Topping
- 1 and 1/2 cups (188g) all-purpose flour (spooned & leveled)
- 1/3 cup (65g) granulated sugar
- 1 and 1/2 teaspoons baking powder
- 1/4 teaspoon salt
- 6 Tablespoons (85g) unsalted butter, cold and cubed
- 1/2 cup (120ml) buttermilk, cold*
- for topping before baking: 1 Tablespoon buttermilk and coarse sugar
Instructions
- Preheat the oven to 350°F (177°C) and grease a 9×13 inch pan.
- Make the filling: In a large bowl, gently fold the berries, sugar, cornstarch, lemon juice, and vanilla extract together until thoroughly combined. Spread filling evenly into prepared pan.
- Make the topping: Whisk the flour, sugar, baking powder, and salt together in a large bowl. Using a pastry cutter or two forks, cut the butter into the mixture until it resembles coarse meal (pea-sized crumbs). A pastry cutter makes this step very easy and quick! You could also use a food processor. While slowly stirring, slowly drizzle in 1/2 cup buttermilk. Mix until evenly combined. Take handfuls of dough and gently flatten out. Place dough all over the top of the berry filling. There’s no special trick to this—just flatten the dough in sections and cover most of the berries.
- Brush the top of the biscuit dough with 1 Tablespoon of buttermilk and then sprinkle with coarse sugar. These two are optional, but both help achieve a shiny, crunchy, golden brown crust.
- Bake for 45-55 minutes, or until golden brown and biscuit topping is cooked through. Stick a toothpick into the biscuit topping, if it comes out clean, it is cooked through and the cobbler is done. Set the pan on a wire rack, then cool for 5 minutes before serving. Serve warm with vanilla ice cream or whipped cream.
- Cover and store leftovers in the refrigerator for up to 5 days.
Notes
- Freezing Instructions: I don’t recommend preparing this recipe ahead of time, the biscuit topping won’t rise as much if it is not immediately baked. You can, however, freeze the prepared berry filling for up to 3 months. Allow to thaw in the refrigerator before using. It will be quite juicy, but that’s not a bad thing in cobbler! You can also freeze the baked cobbler for up to 3 months. Thaw overnight in the refrigerator and warm in the oven before serving.
- Special Tools (affiliate links): 9×13-inch Pan | Glass Mixing Bowl | Rubber Spatula | Whisk | Pastry Cutter | Pastry Brush | Cooling Rack
- Berries: Use any berries, fresh or frozen (do not thaw), that you enjoy. I recommend 3 cups blueberries, 2 cups blackberries, 1 and 1/2 cups raspberries, and 1 and 1/2 cups chopped strawberries. Keep in mind that the juicier the berries (raspberries, strawberries), the more liquid-y the berry layer will be. Frozen berries will produce a more liquid-y layer.
- Buttermilk: You can make your own DIY version of buttermilk if needed. Add 1 teaspoon of white vinegar or lemon juice to a liquid measuring cup. Then add enough cold whole milk to the same measuring cup until it reaches 1/2 cup. (In a pinch, cold lower fat or cold nondairy milks work for this soured milk, but the topping won’t taste as moist or rich.) Stir it around and let sit for 5 minutes. The homemade “buttermilk” will be somewhat curdled and ready to use in the recipe.
- More biscuit topping: For this berry cobbler, I reduced and adapted the biscuit topping from my peach cobbler recipe so that the berries were the star of the dessert. If you’d like more biscuit topping, use the biscuit topping measurements from the peach cobbler. (That one includes baking soda.)
- Individual Cobblers: Instead of baking as one big dessert, you can make individual berry cobblers by dividing the layers and baking in several oven-safe ramekins. Bake time depends on the amount of food in each ramekin. Bake on a large baking sheet until the berries are bubbling and biscuit topping is golden brown. It’s easier to bake as a whole and simply serve in individual ramekins or even parfait glasses, though!
