Description
This is regular cheesecake… made easier! Enjoy a creamy, velvety smooth filling with a crispy, crunchy graham cracker crust. Skip the water bath and use a pie dish instead of a springform pan. Feel free to serve with optional toppings listed in recipe Note.
Ingredients
Graham Cracker Crust
- 1 and 1/2 cups (180g) graham cracker crumbs (about 12 full sheet graham crackers)
- 1/4 cup (50g) granulated sugar
- 6 Tablespoons (85g) unsalted butter, melted
Filling
- 16 ounces (452g) full-fat brick cream cheese, softened to room temperature
- 1/2 cup (100g) granulated sugar
- 1/4 cup (60g) full-fat sour cream, at room temperature
- 1 teaspoon pure vanilla extract
- 1 teaspoon fresh lemon juice
- 2 large eggs, at room temperature
- optional for topping: raspberry dessert sauce, fresh raspberries, & whipped cream
Instructions
- Preheat oven to 350°F (177°C).
- Make the crust: If you’re starting out with full graham crackers, use a food processor or blender to grind them into fine crumbs. Stir the graham cracker crumbs and granulated sugar together in a medium bowl, and then stir in the melted butter. The mixture will be thick, coarse, and sandy. Try to smash/break up any large chunks. Pour the mixture into an ungreased 9-inch pie dish. With medium pressure using your hand, pat the crumbs down into the bottom and up the sides to make a compact crust. Do not pack down with heavy force because that makes the crust too hard. Simply pat down until the mixture is no longer crumby/crumbly. Tips: You can use a small flat-bottomed measuring cup to help press down the bottom crust and smooth out the surface, but do not pack down too hard. And run a spoon around the bottom “corner” where the edge and bottom meet to help make a rounded crust—this helps prevent the crust from falling apart. For more shaping technique tips, see the graham cracker crust recipe page.
- Bake the crust for 10 minutes. Make the filling in the next step as the crust bakes.
- Make the filling: Using a handheld or stand mixer fitted with a paddle attachment, beat the cream cheese and granulated sugar together on medium-high speed in a large bowl until the mixture is smooth and creamy, about 3 minutes. Scrape down the sides and up the bottom of the bowl with a rubber spatula as needed. Add the sour cream, vanilla extract, and lemon juice, and then beat until fully combined and very smooth. Scrape down the sides and up the bottom of the bowl with a rubber spatula as needed to combine—you don’t want any lumps. Then on medium speed, add the eggs one at a time, beating after each addition until just blended. After the second egg is incorporated into the batter, stop mixing. If you still see some lumps at this point, switch to a whisk and whisk by hand just until you break up the large lumps. Some small lumps are OK.
- Lower the oven temperature to 325°F (163°C) and spread the cheesecake filling into the warm crust.
- Bake the pie for 35 minutes or until the center is almost set. Check it at the 25-minute mark, and if it’s browning too quickly on top and around the edges, tent it with aluminum foil for the last 10 minutes of baking.
- Set the pie on a wire rack and cool for 1 hour at room temperature. Then place it in the refrigerator and chill for at least 2 hours and up to 2 days before serving. (Cover if chilling it for longer than a few hours.)
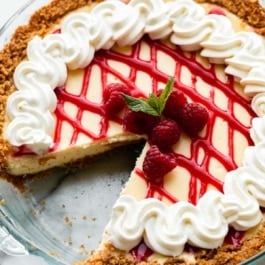
- Feel free to garnish the pie with any of the optional toppings listed in the notes right before or a couple hours before serving. (Keep pie refrigerated if you decorate it and plan to serve later.) I use a squeeze bottle to drizzle raspberry sauce on top and a piping bag fitted with Wilton 1M piping tip to zigzag whipped cream on top. For neat slices, use a clean sharp knife, and wipe the knife clean between each slice. Tip: The first slice is never pretty! Much easier to slice after that first piece is out.
- Cover and store leftover pie in the refrigerator for up to 5 days.
Notes
- Make Ahead Instructions: This cheesecake pie can be made up to 2 days in advance. See step 7. It’s best if the crust is still a bit warm when you pour in the filling, so I don’t recommend pre-baking the crust in advance. You can also freeze the baked and cooled cheesecake for up to 3 months. Thaw overnight in the refrigerator before serving.
- Special Tools (affiliate links): Food Processor | Glass Mixing Bowl | 9-inch Pie Dish | Electric Mixer (Stand Mixer or Handheld) | Cooling Rack
- Oreo Cookie Crust: You can use an Oreo cookie crust instead of a graham cracker crust.
- Toppings: My favorite toppings for this pie are raspberry sauce, fresh raspberries, and whipped cream, which are pictured in the post. You can also top the baked and cooled cheesecake with salted caramel, lemon curd, strawberry topping, chocolate ganache, or red wine chocolate ganache.
- Room Temperature Ingredients: Bring all cold ingredients to room temperature before beginning. Room temperature ingredients combine quickly and evenly, so you won’t risk over-mixing. Also, beating cold ingredients together will result in a chunky cheesecake filling, hardly the way you want to begin!
- Non-US Readers: If graham crackers are not available where you live, we have also tested this pie with a crust made from digestive biscuits, and it turned out great. Use 200g ground digestive biscuit crumbs (about 2 cups; 13–14 biscuits), 1/3 cup (67g) granulated sugar, and 6 Tablespoons (85g) melted butter. Pre-bake the crust for a bit longer, about 12–14 minutes. And from what I understand, spreadable cream cheese sold in a tub in countries outside of the US is a little different from the spreadable cream cheese in the US. It’s thicker, sturdier, and more solid and should be OK to make this pie. I have no experience with it, but this is what I’ve heard from other non-US readers. If you try it, let us know how it turns out!