Description
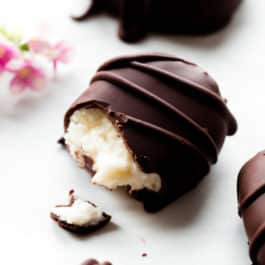
These Easter egg buttercream candies combine a thick and creamy buttercream filling with rich dark chocolate. Choose from a variety of flavors listed in the blog post above or stick with vanilla listed below. See blog post for extra tips on coating the buttercream candies with chocolate.
Ingredients
- 1/2 cup (8 Tbsp; 113g) unsalted butter, softened to room temperature
- 4 cups (480g) confectioners’ sugar
- 3 Tablespoons (45ml) heavy cream or half-and-half
- 1 and 1/2 teaspoons pure vanilla extract
- 1/2 teaspoon almond extract
- pinch salt, to taste
- four 4-ounce semi-sweet chocolate bars (450g), coarsely chopped*
- 1 teaspoon vegetable oil
Instructions
- In a large bowl using a handheld or stand mixer fitted with a paddle attachment, beat the butter on medium speed until creamy, about 2 minutes. Add the confectioners’ sugar and beat on low for 1 minute. Add the cream, vanilla and almond extracts, then beat on high for 3 minutes or until completely smooth and creamy. Taste, then beat in a pinch of salt if needed. (It’s supposed to be very sweet!) The mixture will be very sticky. Cover the bowl tightly with aluminum foil or plastic wrap and chill in the refrigerator for at least 1 hour and up to 1 day. Chilling makes shaping the buttercream filling a little easier.
- Line 1-2 large baking sheets with parchment paper or silicone baking mats. Set aside.
- Once chilled, remove the mixture from the refrigerator. Scoop 1 Tablespoon of the buttercream mixture and roll into a ball. Flatten the ball between your palms and use your fingers to thin out one end into an egg shape. The egg should be roughly 1/2 – 3/4 inch thick. Place on the prepared baking sheet. Repeat with remaining buttercream mixture. The buttercream mixture may be a little crumbly, but the warmth of your hands will bring it together. If you find the buttercream mixture becoming too soft to handle, chill in the refrigerator for 15 minutes. Alternatively, you can powder your hands with confectioners’ sugar, which helps prevent the buttercream from sticking to your hands.
- Chill the shaped buttercream eggs in the refrigerator for at least 1 hour and up to 1 day. During the last few minutes of the chilling time, begin melting the chocolate and oil together. You can melt it in a double boiler or the microwave. If using the microwave: place the chocolate and oil in a medium heat-proof bowl. I recommend using a liquid measuring cup because its depth makes dipping really easy. Melt in 20 second increments in the microwave, stirring after each increment until completely melted and smooth. Let the warm chocolate sit for 6-8 minutes to slightly cool before dipping, otherwise it will melt the buttercream filling.
- Remove buttercreams from the refrigerator. Working with 1 at a time, submerge into the chocolate, then carefully lift out using a fork. Tap the fork gently on the side of the bowl/measuring cup to rid excess chocolate. Use a toothpick or a 2nd fork to help you slide the buttercream off of the fork and onto the baking sheet.
- If you have leftover chocolate, drizzle over candies. I reheated the chocolate and used a squeeze bottle to drizzle.
- Refrigerate buttercream eggs for 30 minutes or until chocolate has completely set before serving.
- Layer buttercream eggs between sheets of parchment or wax paper and store in an airtight container in the refrigerator for up to 2 weeks.
Notes
- Make Ahead & Freezing Instructions: You can start this recipe 1 day ahead of time. The shaped filling can be chilled in the refrigerator for up to 1 day prior to coating. The coated buttercream candies can be frozen. Freeze the coated candies for up to 3 months. Thaw overnight in the refrigerator.
- Special Tools (affiliate links): Electric Mixer (Handheld or Stand) | Baking Sheets | Silicone Baking Mats or Parchment Paper | Double Boiler or Liquid Measuring Cup | Squeeze Bottle
- Chocolate: For the best looking and tasting candies, use 4 ounce “baking chocolate” bars found in the baking aisle. I prefer Bakers or Ghirardelli brands. You need about 4 four ounce bars for this recipe, 16 ounces total. You can use semi-sweet or bittersweet chocolate. A sweeter chocolate, such as milk chocolate or white chocolate will produce VERY sweet candies. Candy melts or almond bark work too, but they don’t taste like real chocolate. Do not use chocolate chips, as they contain stabilizers preventing them from melting into the correct consistency for coating.
- Coating/Melting Chocolate: See all my troubleshooting tips in the post.
- I do not recommend tempering the chocolate for this recipe. Tempered chocolate should not be refrigerated and due to the fresh ingredients in the filling, these candies must be refrigerated.