Description
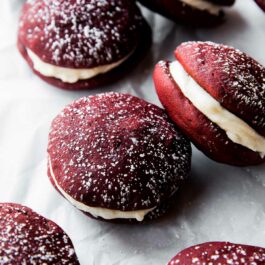
Homemade red velvet whoopie pies with cream cheese filling are decadent, moist, and flavorful!
Ingredients
- 2 cups (250g) all-purpose flour (spooned & leveled)
- 3 Tablespoons (15g) unsweetened natural cocoa powder
- 1 teaspoon baking soda
- 1/2 teaspoon salt
- 1/2 cup (8 Tbsp; 113g) unsalted butter, softened to room temperature
- 1 cup (200g) packed light brown sugar
- 1 large egg, room temperature
- 2/3 cup (160ml) buttermilk, room temperature
- 2 teaspoons pure vanilla extract
- gel red food coloring
Cream Cheese Filling
- 6 ounces (170g) full-fat brick cream cheese, softened to room temperature
- 1/4 cup (4 Tbsp; 56g) unsalted butter, softened to room temperature
- 1 and 1/2 cups (180g) confectioners’ sugar, sifted (plus more for topping)
- 1/2 teaspoon pure vanilla extract
Instructions
- Preheat the oven to 350°F (177°C). Line two large baking sheets with parchment paper or silicone baking mats (highly recommended for best nonstick cookie baking surface!). Set aside.
- Whisk the flour, cocoa powder, baking soda, and salt together.
- In a large bowl using a handheld or stand mixer fitted with a paddle attachment, beat the butter for 1 minute on medium-high speed until completely smooth and creamy. Add the brown sugar and beat on medium high speed until fluffy and combined. Beat in egg on high speed, scraping down the sides and bottom of the bowl as needed. Once egg is full combined, beat in the vanilla and buttermilk. Mixture may look curdled; that’s ok.
- On low speed, slowly mix the dry ingredients into the wet ingredients until combined. Add enough food coloring to achieve a deep red hue (usually about 1 teaspoon gel). Spoon or scoop mounds of batter, about 1 and 1/2 Tablespoons each, onto prepared baking sheets—about 3 inches apart.
- Bake the cookies for 10-12 minutes or until centers appear set. Mine usually take 11 minutes. Allow to cool completely before sandwiching.
- In a large bowl using a handheld or stand mixer fitted with a paddle or whisk attachment, beat the cream cheese for 1 minute on high speed until completely smooth and creamy. Beat in the butter until combined. Add the confectioners’ sugar and vanilla and beat on medium-high speed until combined and creamy.
- Pair the cookies up based on their size. Spread cream cheese filling onto the flat side of one cookie and sandwich with the other. A small offset spatula is helpful. Repeat with remaining. Sprinkle confectioners’ sugar on top of each if desired. Cover leftover whoopie pies and store in the refrigerator for up to 1 week.
Notes
- Make Ahead & Freezing Instructions: You can prepare the batter, cover it tightly, and refrigerate for up to 3 days. Let it come to room temperature and bake as directed. You can freeze the baked whoopie pies for up to 3 months. Wrap them individually. Before enjoying, thaw overnight in the refrigerator.
- Special Tools (affiliate links): Baking Sheets | Silicone Baking Mats or Parchment Paper | Glass Mixing Bowl | Whisk | Electric Mixer (Handheld or Stand) | Medium Cookie Scoop | Small Offset Spatula
- Buttermilk: Buttermilk is required for this recipe. You can make your own DIY buttermilk substitute if needed. Add 1 and 1/2 teaspoons of white vinegar or lemon juice to a liquid measuring cup. Then add enough whole milk to the same measuring cup until it reaches 2/3 cup. (In a pinch, lower fat or nondairy milks work for this soured milk, but the whoopie pies won’t taste as moist or rich.) Stir it around and let sit for 5 minutes. The homemade “buttermilk” will be somewhat curdled and ready to use in the recipe.
- Adapted from Better Homes & Gardens.