Description
For best results, let the vanilla beans infuse the vodka for at least 12 months.
Ingredients
- .75 to 1 ounce (21–28g) vanilla beans (about 8 beans)
- 1 cup (8 fl oz; 240g/ml) 80 proof vodka (or bourbon, brandy, or even rum)
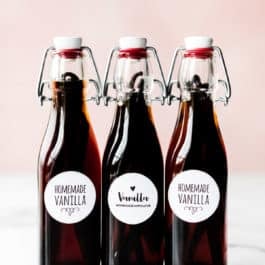
- 8-ounce bottle or jar with a tight seal
Instructions
- Using a sharp knife, slit the vanilla beans so the beans are exposed. No need to completely split the bean in half, just slit down the middle. If the length of the vanilla beans don’t fit into your bottle or jar, cut the vanilla beans into smaller pieces. Place beans into bottle or jar.
- Pour vodka on top. A funnel helps. Use a little extra vodka, if needed, so the beans are fully submerged. Shake a few times.
- Store vanilla at room temperature out of direct sunlight. Shake about once per week or once every couple weeks. You can use it in 6 months, but 12+ months is even better.
- As you begin to use your vanilla, you can refill with a little vodka each time. Give it a shake after you refill and give it a shake before each use, too. If you’re gifting the vanilla or if you don’t have any more alcohol to refill, remove the beans completely after first use. The beans will become a little slimy if they aren’t almost fully submerged.
- Unused aged vanilla extract (with the beans fully submerged) will last several years. If it still smells good, it’s still good to use! Aged extract without the beans will last indefinitely. Once you begin using the vanilla and adding more alcohol after each use, the beans will eventually need to be replaced. It’s hard to give a specific amount of time as some may use (and refill) the vanilla more quickly than others. After about 1 year of frequent use and refilling, you will you find the vanilla flavor less intense. Simply remove old beans, add fresh beans, shake, and continue to use/refill.
Notes
- Special Tools (affiliate link): Madagascar Vanilla Beans, these Tahitian Vanilla Beans, or these Tahitian Vanilla Beans | 8-ounce Glass Bottles | Funnel
- Using More Vanilla Beans: Most store-bought vanilla extracts are what’s known as single-fold. Single-fold vanillas are weaker and to make your own, you need about 6 vanilla beans per 8 ounces of alcohol. I prefer a stronger vanilla. Strong vanilla is known as double-fold and it’s pretty pricey because it requires a lot of vanilla beans. Since double-fold can get expensive, I opt for .75 to 1 ounce of vanilla beans per 8 fluid ounces of alcohol. This is the best balance of taste and price. Feel free to use more beans per 8 fluid ounces if desired.
- Seeds: Since the vanilla beans are exposed (slit open), there will be vanilla bean seeds in the bottle and therefore in your baked good. They add even more wonderful flavor!
- Use the same amount of homemade vanilla extract as you would store-bought in recipes.
- Gifting: I usually remove the beans if I’m gifting the bottle, that way the gift recipient isn’t responsible for refilling with more alcohol and the beans don’t go to waste. (You can reuse the beans for a new bottle.) However, if it’s been less than 6 months, I recommend gifting with the beans in the bottle because there’s still lots of flavor in there! Tell the gift recipient to remove the beans once he/she begins using the vanilla.
- Alcohol: If baking gluten free, use certified gluten free alcohol. Avoid flavored vodkas as they often contain artificial flavors, which negates the purpose of making your own pure vanilla.
- Sterilizing: Sterilizing the bottles is ideal, though we’ve skipped that step with no problem in the outcome of the vanilla. If your bottles or jars don’t have any plastic pieces attached, we recommend sterilizing them before using. The pictured bottles have a removable plastic topper piece. You can soak any plastic pieces in very hot soapy water, and dry completely before using.