Description
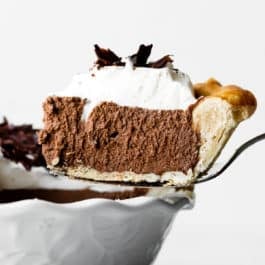
This French silk pie features my perfectly flaky pie crust, a smooth chocolate filling, and whipped cream on top. Read through the recipe and helpful notes before beginning.
Ingredients
Crust
- 1 unbaked Flaky Pie Crust (what I used) or All Butter Pie Crust*
- egg wash for pie crust: 1 large egg beaten with 1 Tablespoon milk or heavy cream
Filling
- 1 cup (240ml) heavy cream or heavy whipping cream
- two 4-ounce quality bittersweet or semi-sweet chocolate bars (113g each), finely chopped*
- 4 large eggs
- 1 cup (200g) granulated sugar
- 3/4 cup (12 Tbsp; 170g) unsalted butter, softened to room temperature
- 1 and 1/2 teaspoons pure vanilla extract
Topping
- 1 cup (240ml) heavy cream or heavy whipping cream
- 2 Tablespoons confectioners’ sugar or granulated sugar*
- 1/2 teaspoon pure vanilla extract
- optional for garnish: chocolate curls*
Instructions
- Pie crust: I like to make sure my pie dough is prepared before I begin making this pie. Make pie dough the night before because it needs to chill in the refrigerator for at least 2 hours before rolling out and blind baking.
- Roll out the chilled pie dough: On a floured work surface, roll out one of the discs of chilled dough (use the 2nd pie crust for another recipe!). Turn the dough about a quarter turn after every few rolls until you have a circle 12 inches in diameter. Carefully place the dough into a 9-inch pie dish. Tuck it in with your fingers, making sure it is completely smooth. To make a lovely thick edge, I do not trim excess dough around the edges. Instead, fold the excess dough back over the edge and use your hands to mold the edge into a nice thick rim around the pie. Crimp the edges with a fork or use your fingers to flute the edges. (Review my how to crimp and flute pie crust tutorial if you need extra help with this step.) Chill the dough in the refrigerator or freezer for at least 30 minutes—this helps prevent the crust from shrinking.
- Preheat oven to 375°F (191°C).
- Blind bake the crust: Line the chilled pie crust with parchment paper. (Crunch up the parchment paper first so that you can easily shape it into the crust.) Fill with pie weights or dried beans. (Note that you will need at least 2 standard sets of pie weights to fit.) I like to push the weights up against the sides of the pie crust to help ensure the sides don’t shrink down. Bake until the edges of the crust are starting to brown, about 15–16 minutes. Remove pie from the oven and carefully lift the parchment paper (with the weights) out of the pie. Prick holes all over the bottom crust with a fork. If desired for a shiny golden crust, brush egg wash on edges. Return pie crust to the oven and bake for 14–15 minutes, or until bottom has browned. Remove from the oven, and cool on a wire rack completely before filling. You can blind bake the crust up to 3 days ahead of time. Cover cooled crust tightly and refrigerate until ready to fill. (Review this how to par-bake pie crust page if you need extra help with this blind-baking step.)
- Start the filling: Using a hand mixer or a stand mixer fitted with a whisk attachment, whip the heavy cream on medium-high speed until stiff peaks form, about 4 minutes. Stiff peaks hold their peak shape and do not droop. Set whipped cream in the refrigerator (covered or uncovered, doesn’t matter) until step 8. Melt the semi-sweet chocolate. You can melt it in a double boiler or the microwave. If using the microwave: place the chopped chocolate in a medium microwave-safe bowl. Microwave in 20-second increments, stopping and stirring after each increment until completely melted and smooth. Set aside until the end of the next step.
- Cook the eggs: Whisk eggs and sugar together in a heatproof bowl or the top piece of a double boiler. Place over a pot of simmering water (or the bottom part of your double boiler) on medium heat. Do not let the surface of the simmering water touch the bottom of the heatproof bowl. Whisking constantly, cook the egg mixture until it reaches 160°F (71°C) on an instant-read thermometer, about 10–11 minutes. If the steam gets too hot over your hand, use an oven mitt. (If you do not have an instant read thermometer, lightly and quickly dip your finger—it’s very hot, be careful—and rub the mixture between your thumb and finger. You shouldn’t feel any sugar granules.) Carefully remove from heat and allow to cool for 10 minutes. After cooling, slowly stir in the melted chocolate. To prevent curdling, cool for another 10 minutes before using in the next step.
- Using a handheld or a stand mixer fitted with a paddle attachment, beat the butter on medium-high speed until creamy, about 1–2 minutes. Add the vanilla and beat on medium-high speed for 30 seconds. Scrape down the sides and up the bottom of the bowl. With the mixer running on low speed, pour in the chocolate/egg mixture and then increase to medium-high speed and beat for 3 minutes. With a silicone spatula, fold in the whipped cream until combined.
- Spread filling into cooled pie crust. (A small offset spatula is helpful for this.) Cover tightly with plastic wrap and refrigerate for at least 4–6 hours or overnight, until chilled and thickened. Pie may be refrigerated for up to 2 days before serving.
- For the whipped cream topping: Using a handheld or a stand mixer fitted with a whisk attachment, whip the heavy cream, sugar, and vanilla extract on medium-high speed until medium peaks form, about 3–4 minutes. Medium peaks are between soft and stiff peaks, and are the perfect consistency for topping and piping on desserts. Pipe or spread the whipped cream on top. Garnish with chocolate curls (see Notes), if desired. Serve immediately, or chill the pie uncovered for up to a few hours.
- Cover leftovers and store in the refrigerator for up to 5 days.
Notes
- Make Ahead & Freezing Instructions: The pie dough can be prepared ahead of time and stored in the refrigerator for up to 5 days or in the freezer for up to 3 months. There are plenty of ways to make this recipe ahead of time. See end of steps 5 and 9. You can also freeze the pie after step 8. Cover with an extra layer of plastic wrap before freezing. Freeze for up to 3 months. Thaw in the refrigerator prior to topping with whipped cream and serving.
- Special Tools (affiliate links): Rolling Pin | 9-inch Pie Dish | Parchment Paper | Pie Weights | Pastry Brush | Cooling Rack | Electric Mixer (Handheld or Stand) | Double Boiler | Whisk | Instant Read Thermometer | Silicone Spatula | Small Offset Spatula
- Update in 2022: This recipe used to call for 1 cup of butter as well as creaming half of the sugar with the butter. After further testing and feedback from readers, the recipe now uses 3/4 cup (170g) butter in the filling and all of the sugar is now cooked with the eggs.
- Pie Crust: Both linked pie crust recipes make 2 crusts. You only need 1 crust for this pie, so freeze the 2nd half for another use. If using store-bought pie dough, you still need to blind-bake it. If needed, you can use a graham cracker crust or Oreo cookie crust instead of traditional pie crust. Pre-bake either cookie crust at 350°F (177°C) for 12 minutes. No need for pie weights if using a cookie crust. Cool completely before filling.
- Chocolate: Filling will only set if the correct chocolate is used. I recommend using pure chocolate baking bars. You can find them right next to the chocolate chips in the baking aisle. They are sold in 4-ounce bars. I like Baker’s or Ghirardelli brands. I use and recommend semi-sweet chocolate, but you can use bittersweet or even unsweetened chocolate for a darker flavor.
- Sugar in whipped cream: Some bakers swear by granulated sugar in whipped cream; others swear by confectioners’ sugar. If you’re only working with a couple Tablespoons of sugar as listed in the recipe above, it doesn’t really make a difference. Use either.
- Garnish: You can leave the whipped cream on top plain or sprinkle with chocolate curls or shavings, mini chocolate chips, or chocolate sprinkles. To make chocolate curls, run a vegetable peeler down the side of a Hershey’s milk chocolate bar (or similar chocolate bar).