

Use this page to learn how to blind bake a pie crust, whether that’s fully blind-baking before adding a no-bake filling, or partially baking (par-baking) the crust before returning to the oven with a filling. Many pie recipes require par-baking pie crust and this tutorial provides step-by-step instructions, as well as a helpful video tutorial and plenty of success tips.
I originally published this tutorial in 2018 and have since added new photos, a video tutorial, and a few more success tips.
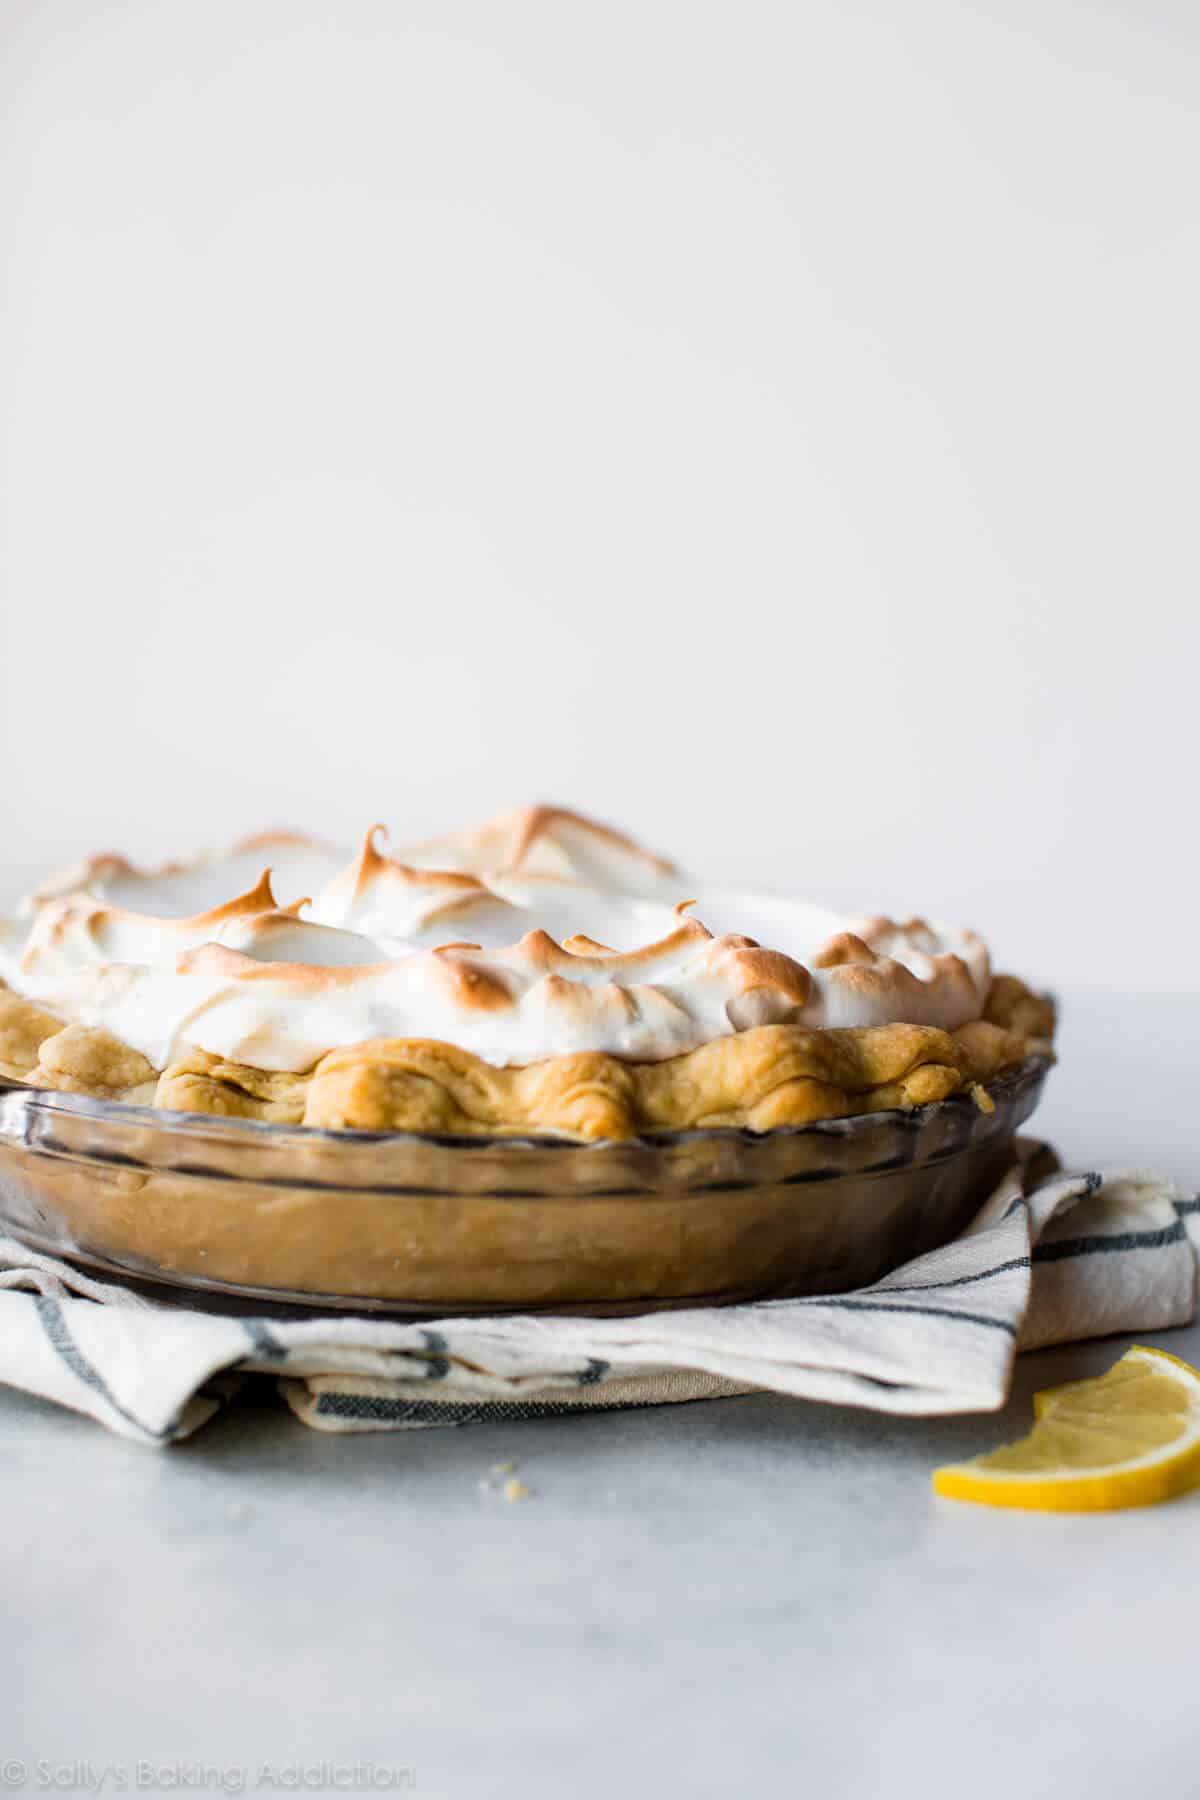
Par-baking (which can also be called blind baking) is an integral step in many pie recipes and a basic baking technique to have in your back pocket. Classic recipes such as coconut cream pie, pumpkin pie, and lemon meringue pie require some sort of blind baking.
Par-baking pie crust sounds pretty intimidating, especially if you’re already nervous about making pie from scratch. I’m here to tell you (and show you!) that blind baking pie crust is simple, and I have a few tips to help guarantee success.
Why Par-Bake?
Why would you bake pie crust without a filling? There are a few instances, actually. You need a par-baked or fully baked crust if you’re making quiche, no-bake pie, custard pie, cream pie, pudding pie, or simply want an extra-crisp pie crust. If you’re making a pie that doesn’t require a baked filling, you still need a baked crust. Or if you’re baking a pie with a liquid-y filling that sets quickly in the oven, like pumpkin pie, your crust may need a baking headstart.
One reader, Marylou, commented: “I made 2 par-baked crusts for pumpkin pies. They turned out perfectly. Well worth the extra step. No mushy bottom crust! ★★★★★“
Fully Blind Baked vs. Partially Baked
If your pie recipe calls for a baked pie shell, such as butterscotch pie, you need to fully bake it. But some recipes require a partially baked pie crust and those recipes will typically include “pre-baking,” “partially baking,” or “par-baking” the crust in the instructions. I’ll show you both methods below.
Whether you’re fully blind baking or partially blind baking pie crust, the process is exactly the same; it’s the bake time that differs. Fully baked pie crusts bake for longer than partially baked pie crusts.
- Fully blind bake a pie crust if you’re making no-bake pie like coconut cream pie.
- Partially bake a pie crust if your crust needs longer in the oven than the pie filling, such as brownie pie or quiche. And if you want an extra-crisp pie crust for your apple pie, you can partially blind bake the crust before adding the filling.
How to Par-Bake Pie Crust
While the idea of baking pie crust is quite simple, there’s more to it than just throwing pie dough in a pie dish and baking.
Here’s our problem: As the pie dough bakes, the fat melts. This causes the pie crust to shrink down the sides of the pie dish. And as the fat melts, it creates steam. Steam is both good and bad. It creates DELICIOUS layers and flakes, but also causes the pie dough to puff up when there’s no heavy filling weighing it down.
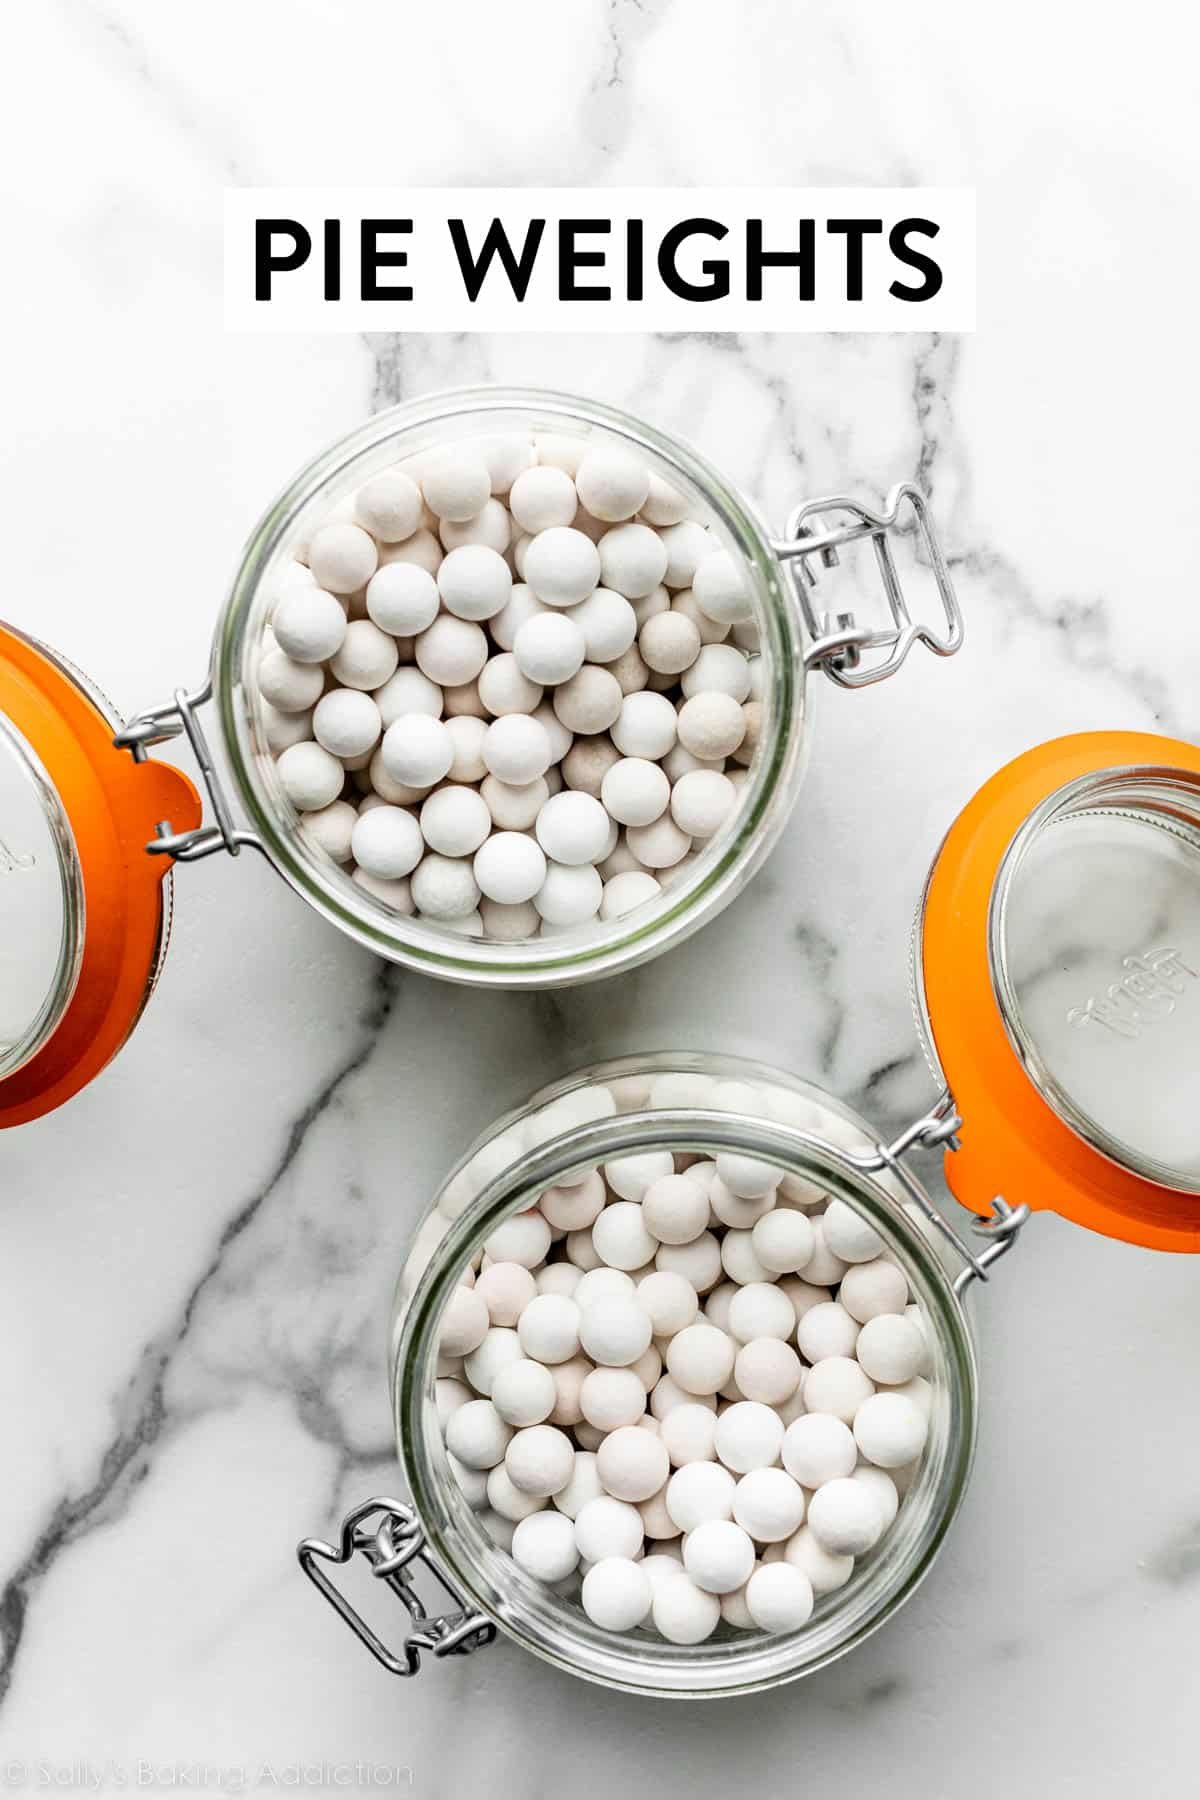
Here’s our answer: Weigh down the pie crust with something so it doesn’t puff up in the center or shrink down the sides. Carefully line the pie dough with parchment paper first, then add some weight. You can purchase special pie weights or you can use dry beans. I’ve also seen the use of granulated sugar and even pennies. I just stick to pie weights. Note: 2 packs of these pie weights is definitely needed!
You’ll bake the pie crust with pie weights until the edges set, or lightly brown, which is about 15 minutes.
One reader, J.D., commented: “Finally had a pie crust that didn’t shrink or melt down the sides. Great instructions, thank you! ★★★★★“
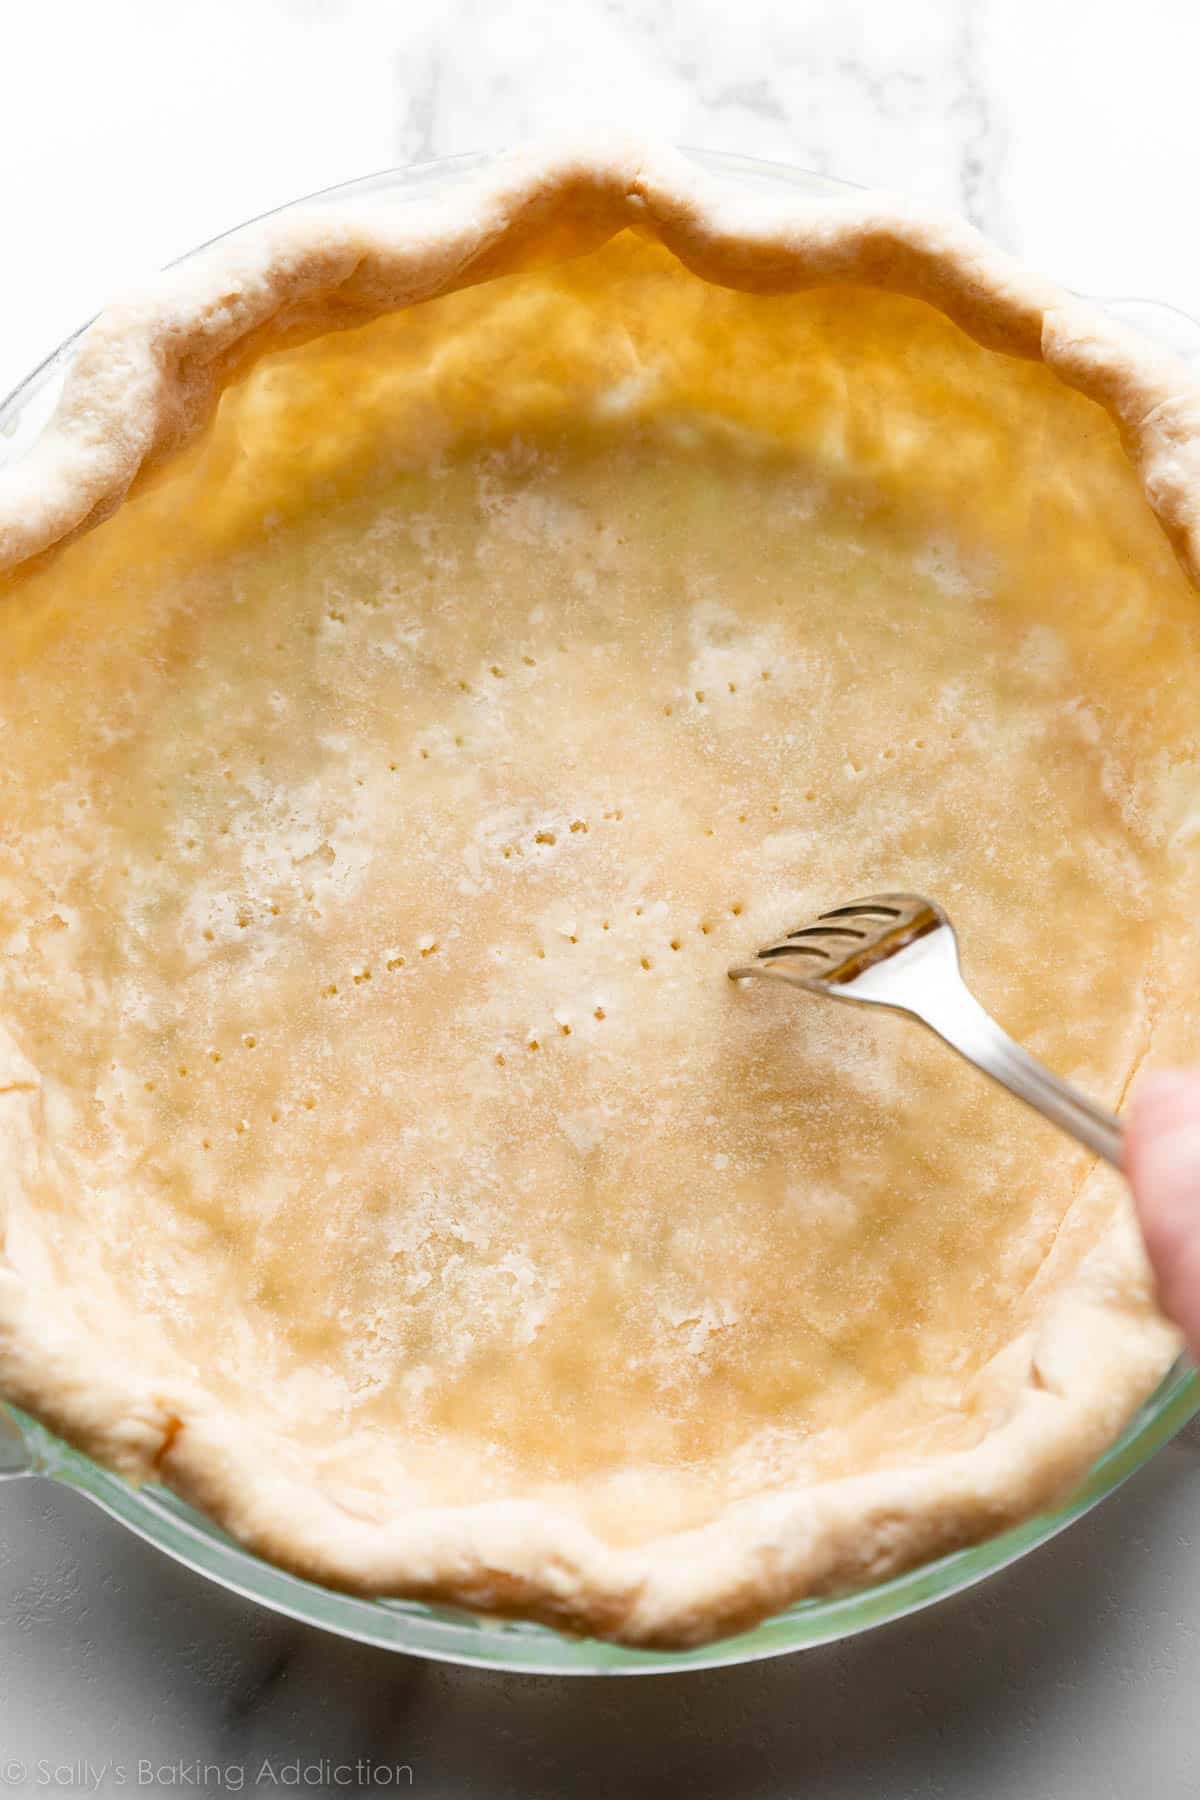
Because it’s covered with weights, the bottom of the pie crust doesn’t cook. You have to return it to the oven after the edges have set. But first, dock it with a fork:
How to Dock Pie Crust
Once the crust is brown around the edges, carefully remove the parchment paper + weights, then let the crust cook a little longer on its own. The amount of time the “weight-free” pie crust bakes depends on if you need a partially baked crust or a fully baked crust.
Before returning to the oven without the weights, you need to prick the bottom crust with a fork to prevent it from puffing up. Pricking holes in pie crust is also called “docking” the pie crust.
Some bakers skip the pie weights and just dock the pie crust from the beginning, but I’ve never had luck this way. The sides of my pie crust still shrink down. So I always use pie weights, remove them after the edges begin to turn brown, dock the crust with a fork, then return it to the oven so the bottom cooks.
How Long Does the Pie Crust Bake After Removing the Weights?
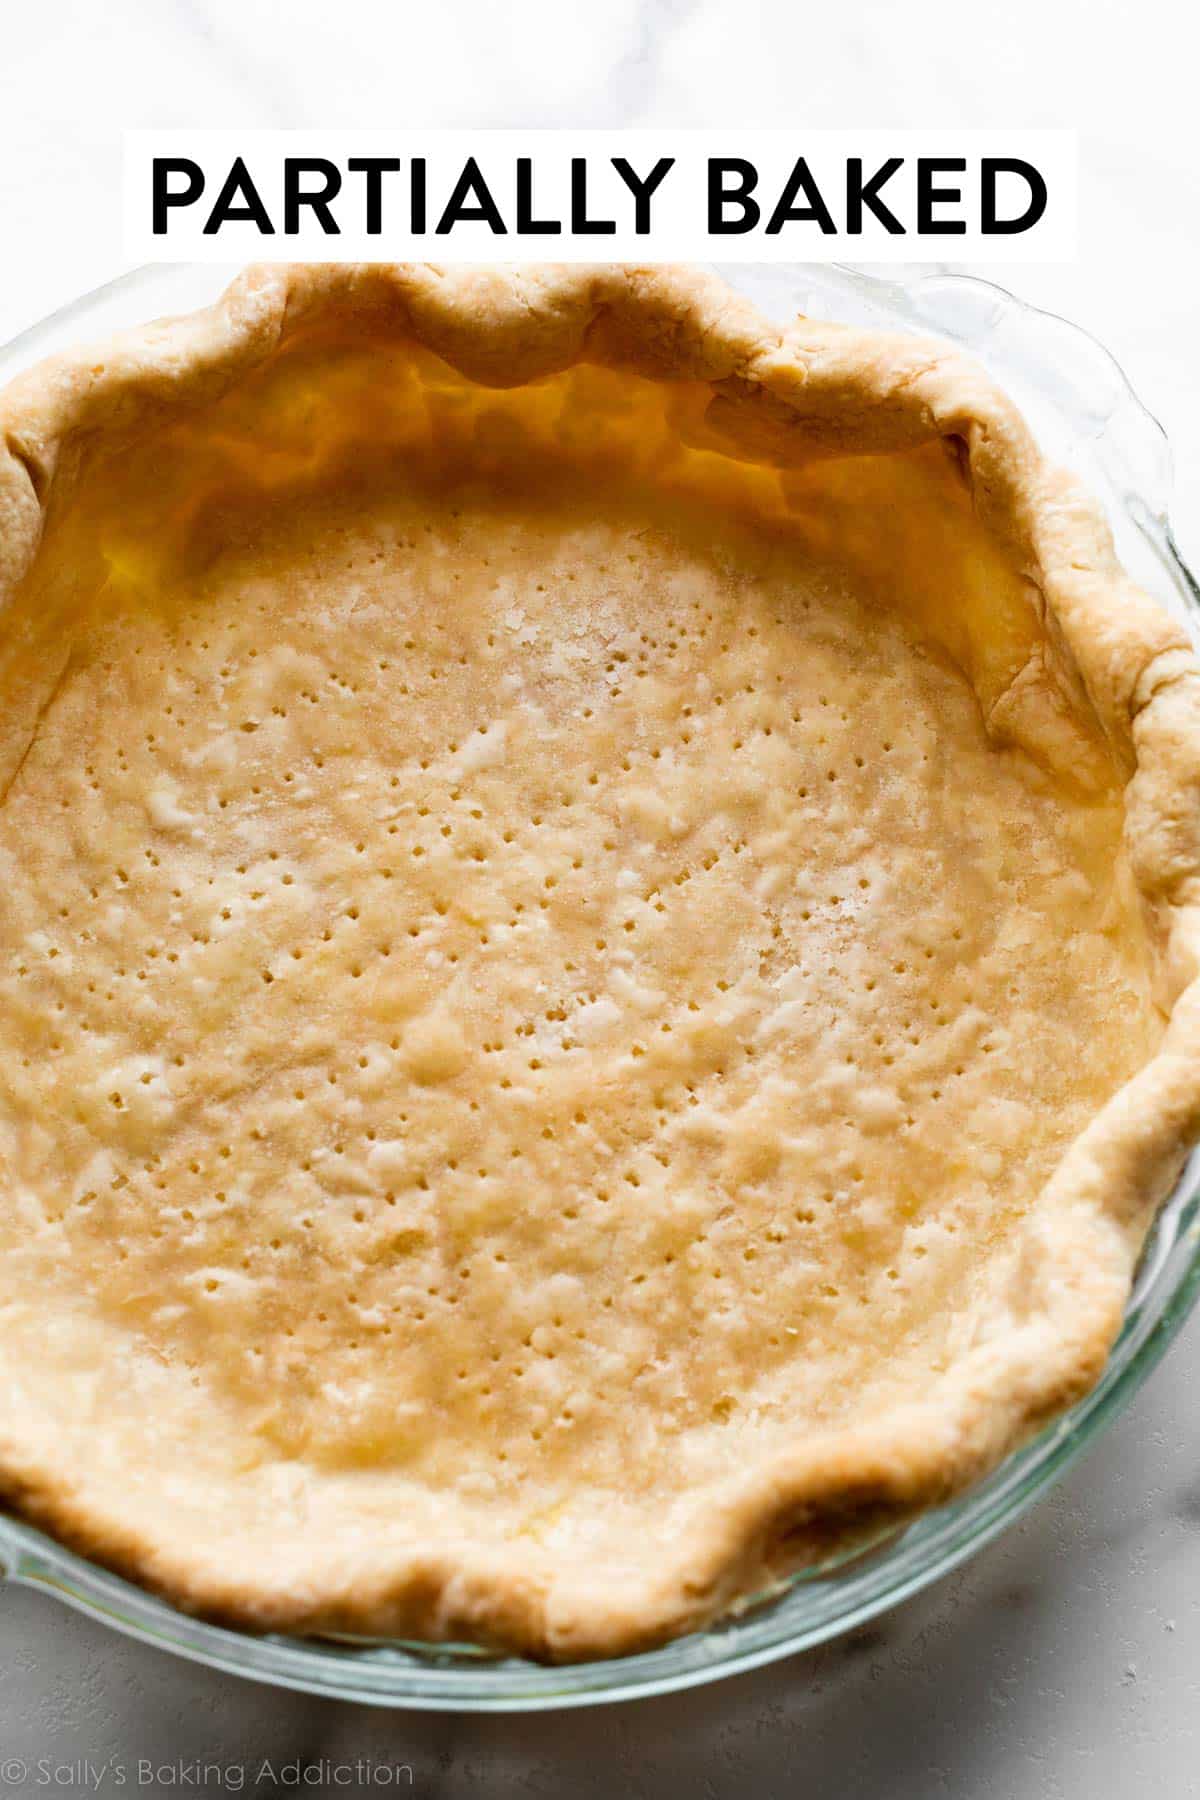
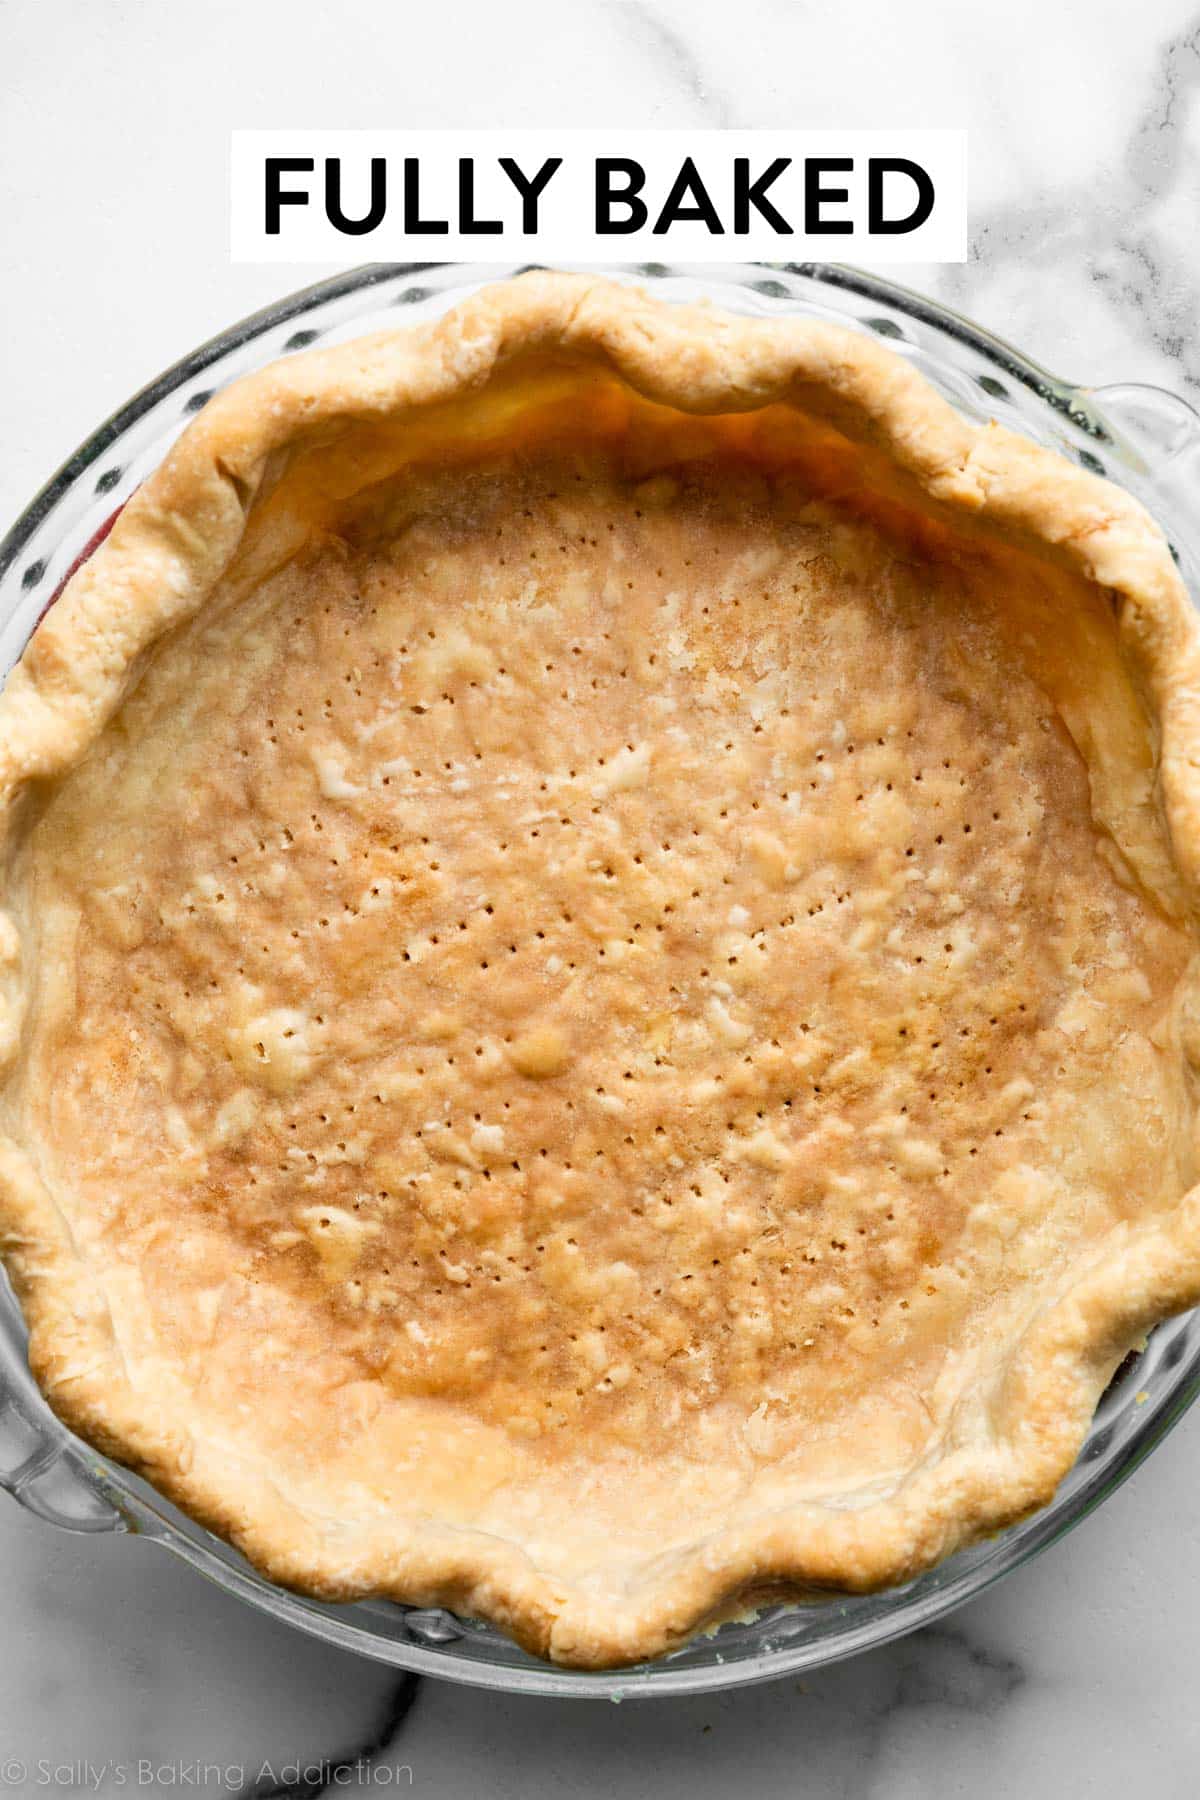
The remaining oven time depends on whether you want a partially blind baked pie crust or a fully blind baked pie crust. For a partially baked pie crust, bake until the bottom just begins to brown, usually about 7–8 more minutes. To fully bake a pie crust, bake until the bottom and edges are browned and cooked through, about 15 more minutes.
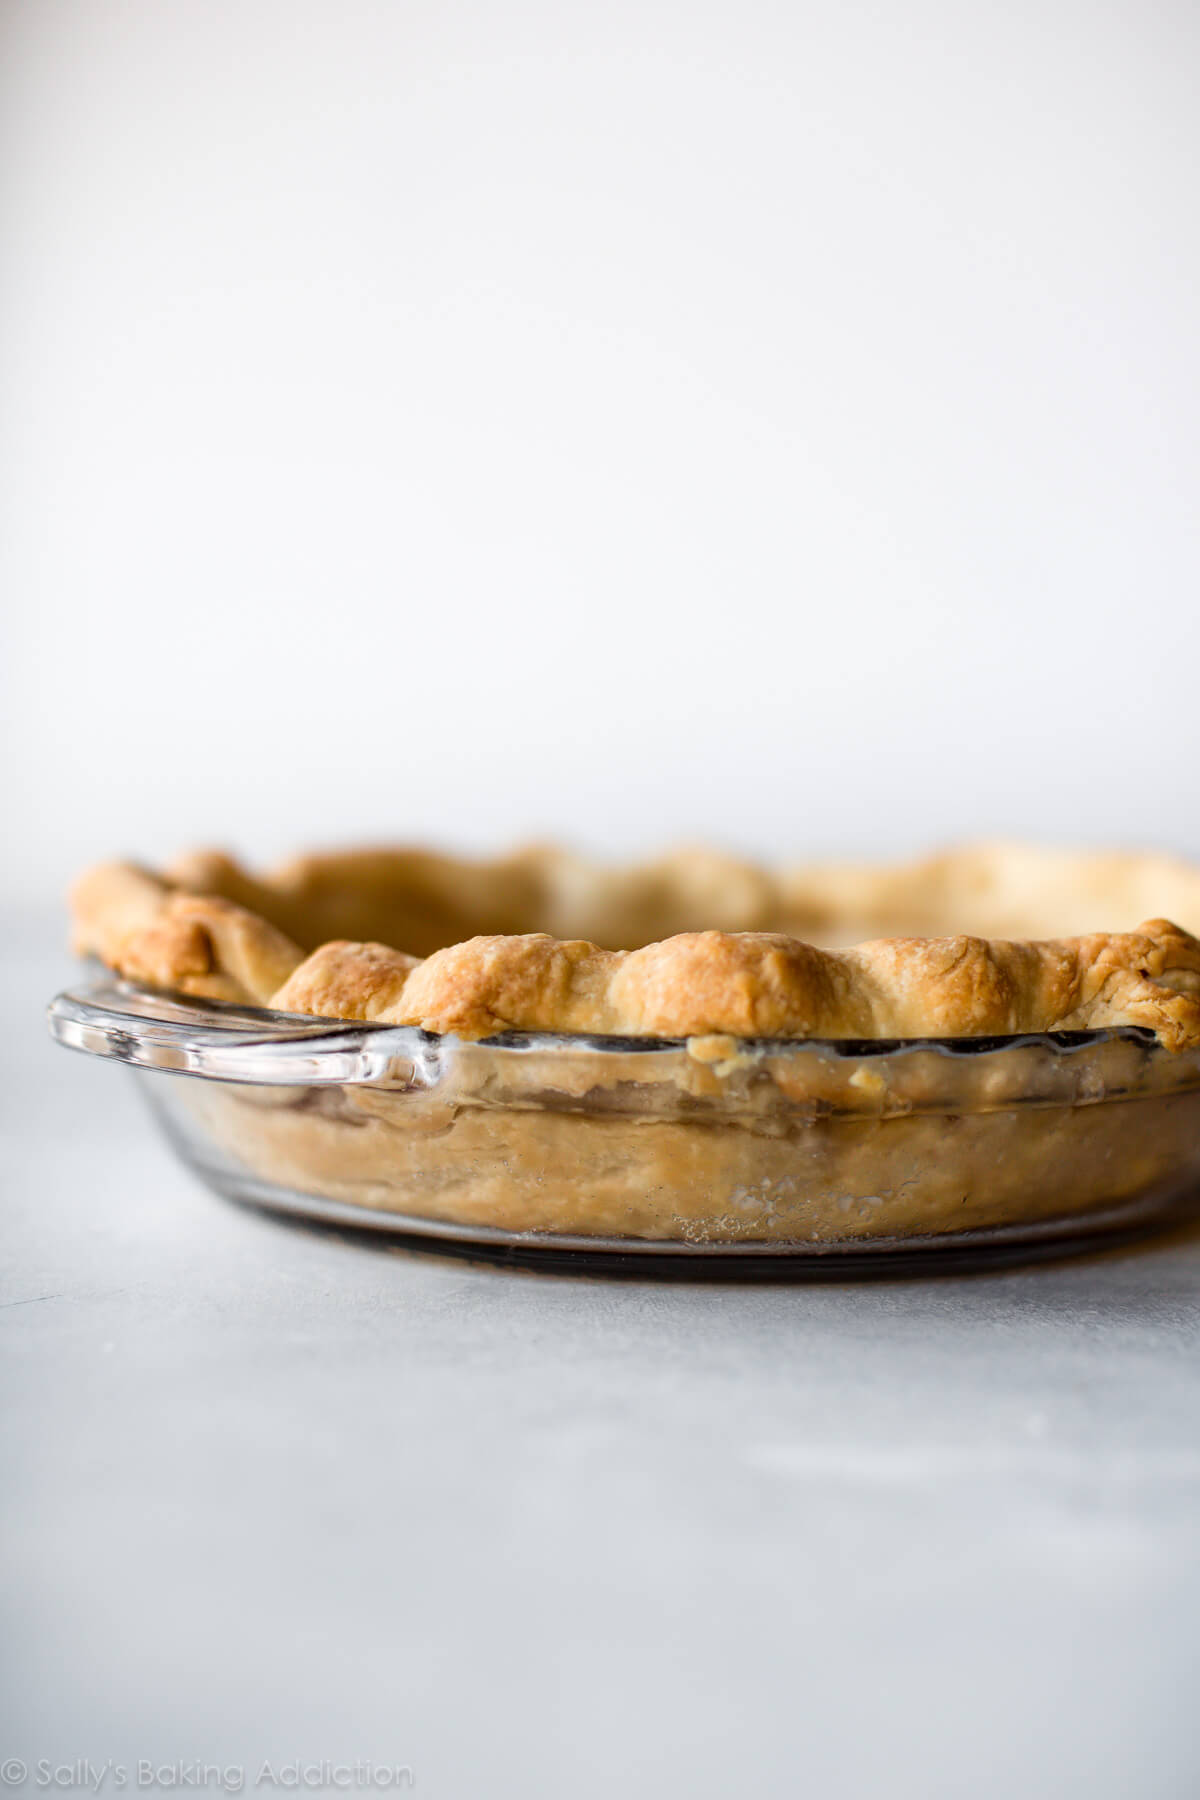
Partially baked means your crust is just barely brown and the pie will return to the oven with a filling:
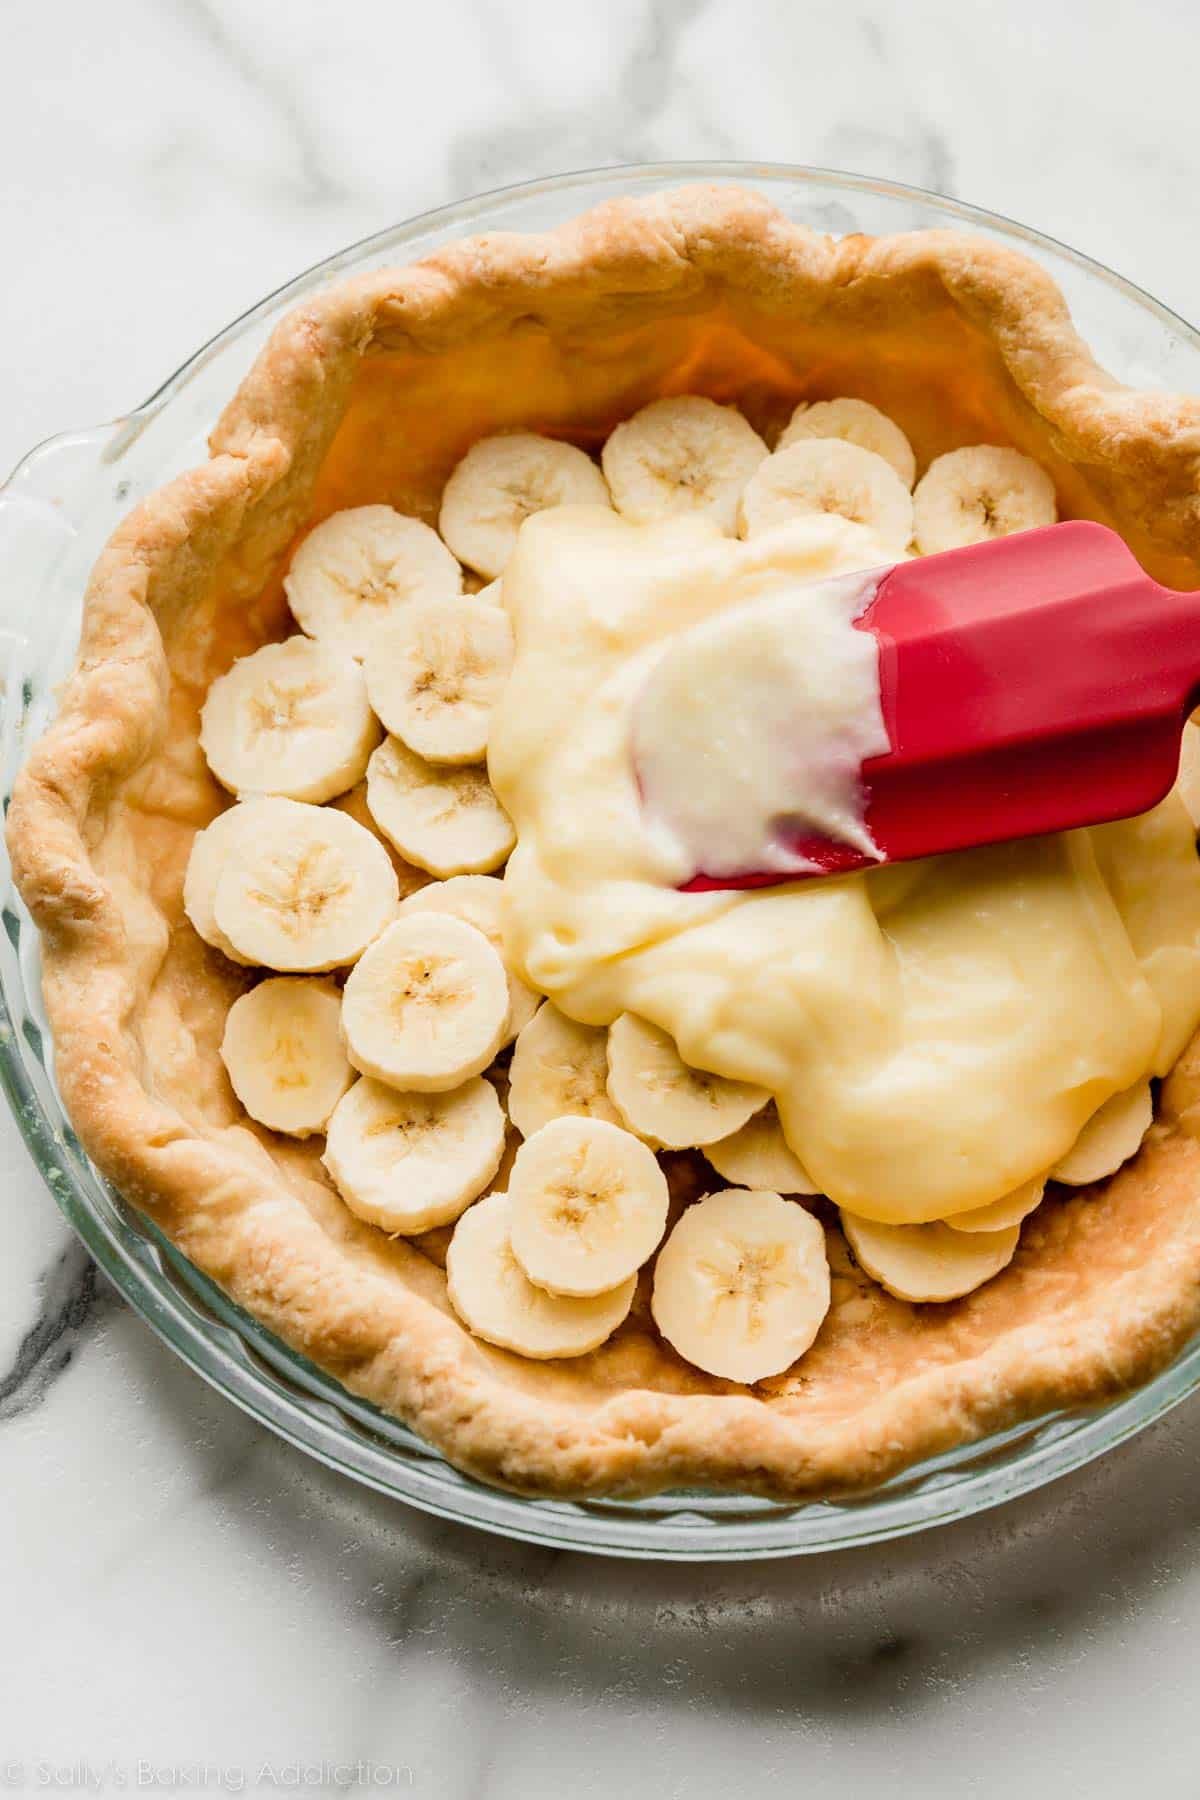
Fully baked means your pie dough is 100% cooked and ready for a no-bake filling:
Like banana cream pie:
FAQ: Do I Need to Par-Bake a Store-Bought Pie Crust?
If your recipe calls for a baked or par-baked pie crust, and you are using store-bought pie dough, you still need to par-bake it. For example, if using store-bought crust in this brownie pie recipe, you still need to follow the par-baking instructions in that recipe (which are the same instructions you find below).
FAQ: Can I Add an Egg Wash?
Many pie recipes call for brushing the crust with an egg wash, and typically the recipes will tell you when to do that. If you aren’t sure when, and you need to par-bake the crust, you can brush the crust’s edges with an egg wash after par-baking with pie weights, and before returning to the oven to bake without the weights. This is what we do for my chai pumpkin meringue pie recipe. An egg wash is 1 egg beaten with 1 Tablespoon of milk or water. Use a pastry brush.
FAQ: How Can I Apply a Top Crust to Par-Baked Bottom Crust?
Blind-baking is usually required for custard-type pies, where there generally isn’t a top crust. Adding a top crust, such as lattice pie crust or other beautiful pie crust designs is possible though. I’ve always found Erin McDowell’s tutorial for this helpful. A lot of it is tucking the top dough edges under the par-baked bottom crust edge, and then crimping the pie crust edges together.
How to Prevent Pie Crust From Shrinking
Pie weights prevent the bottom crust from puffing up and help prevent the sides from shrinking down, but up until recently, I still had trouble with the sides losing shape. It was so frustrating. I played around with some techniques and now my pie crusts never shrink. I have a nice thick crust with a beautifully fluted or crimped shape around the pie dish. And you can too!
2 TRICKS THAT HELP:
- Make sure you chill your pie shell before par-baking.
- Make sure you have a thick crust on the sides using my “dough strip” technique.
Chilling the pie shell before par-baking doesn’t need much explanation, so let me show you how I create thick edges.
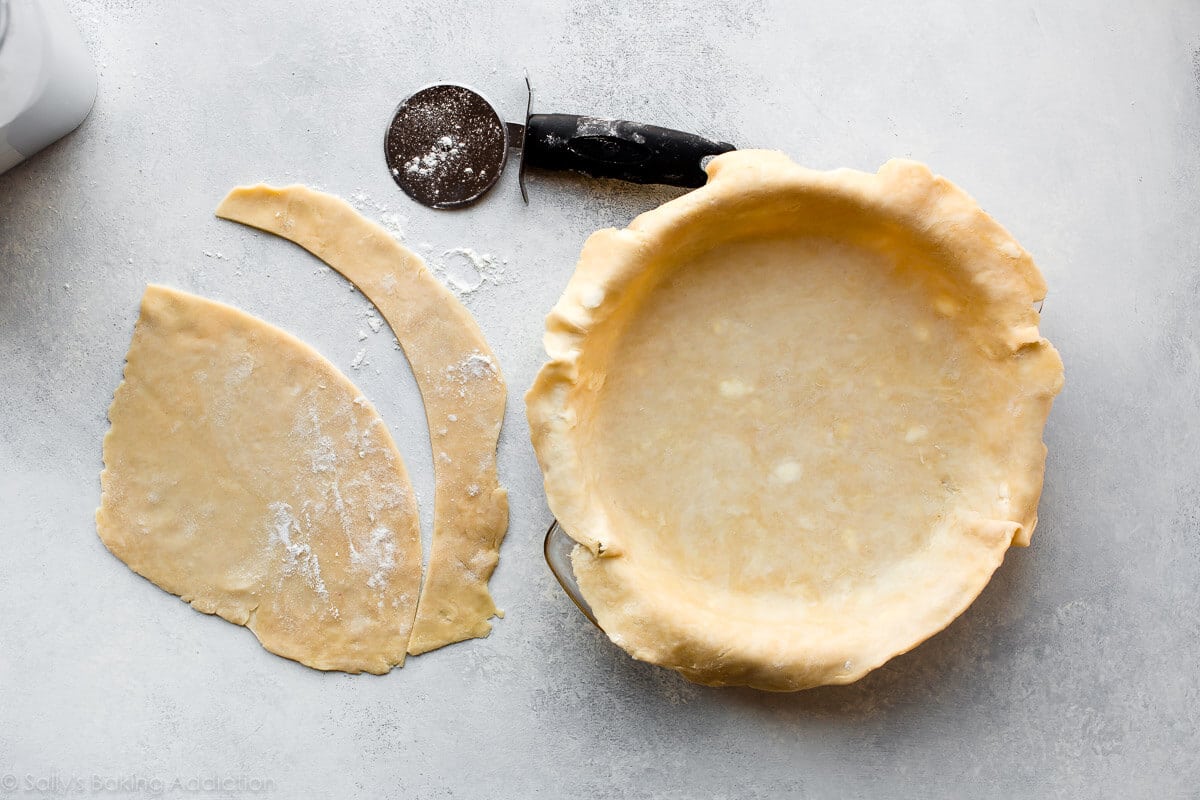
DOUGH STRIP TECHNIQUE
Roll out your pie crust dough and fill your pie dish. Grab some extra pie dough, cut into strips, and meld the strips around the edges.
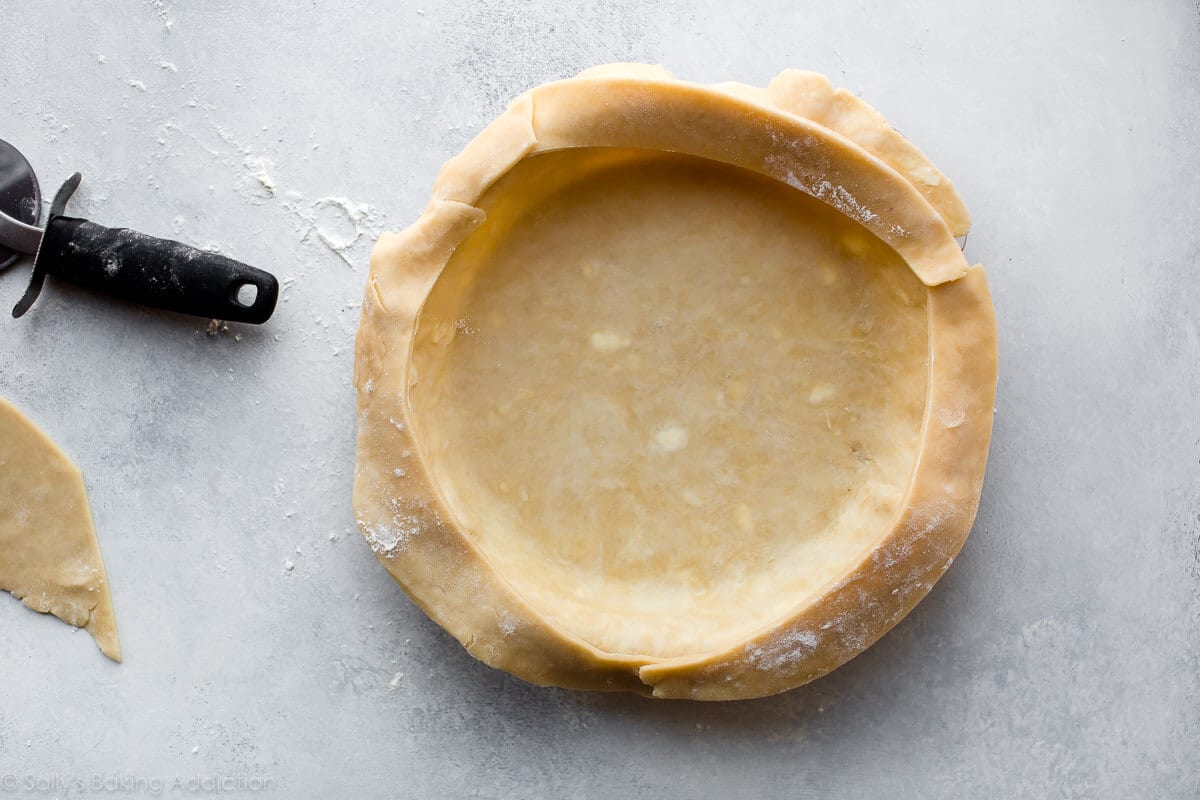
Use your fingers to work the extra strips of dough into the edges.
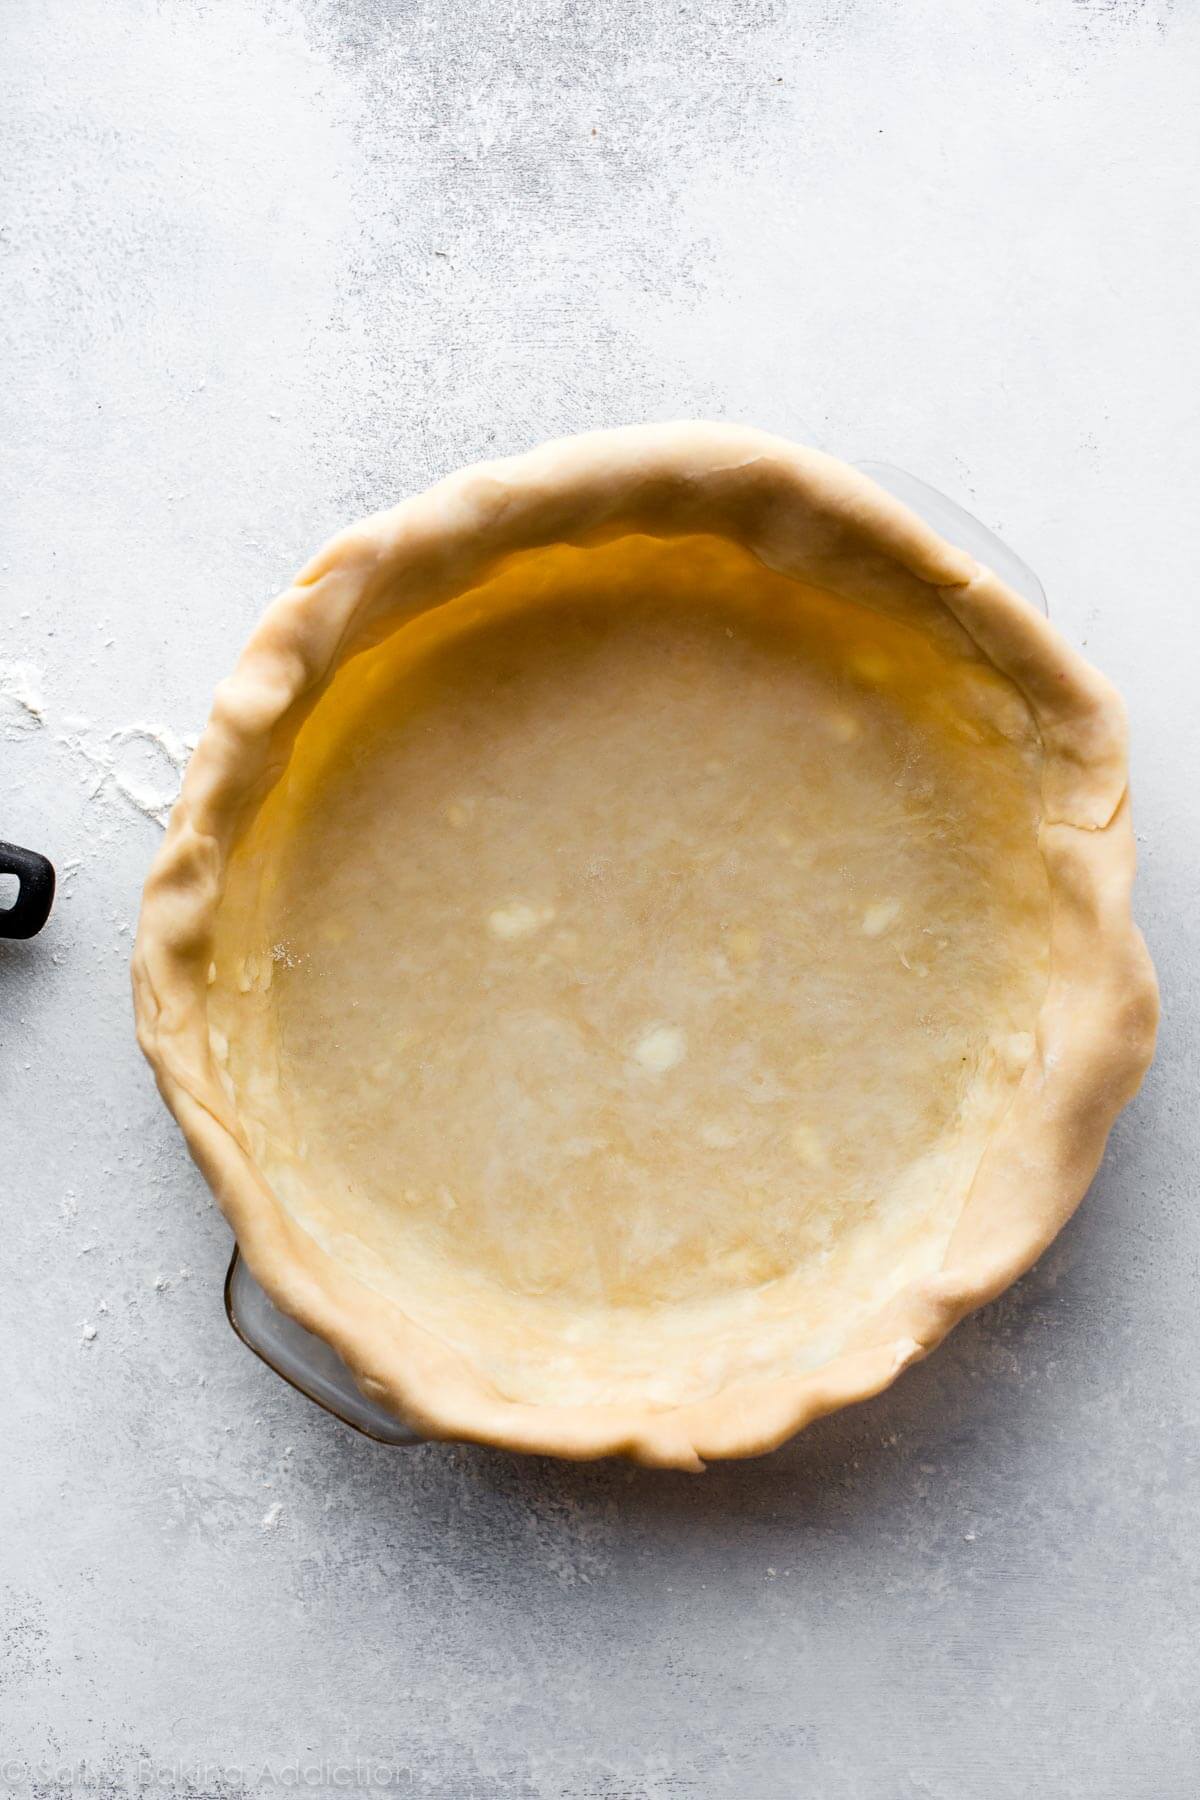
Now it’s all 1 uniform crust with extra thick and sturdy edges. My dough strip technique uses about 1 and 1/2 pie crusts. No big deal since my pie crust recipe makes 2 crusts. You’ll have 1/2 pie crust leftover for the next time you need dough scraps.
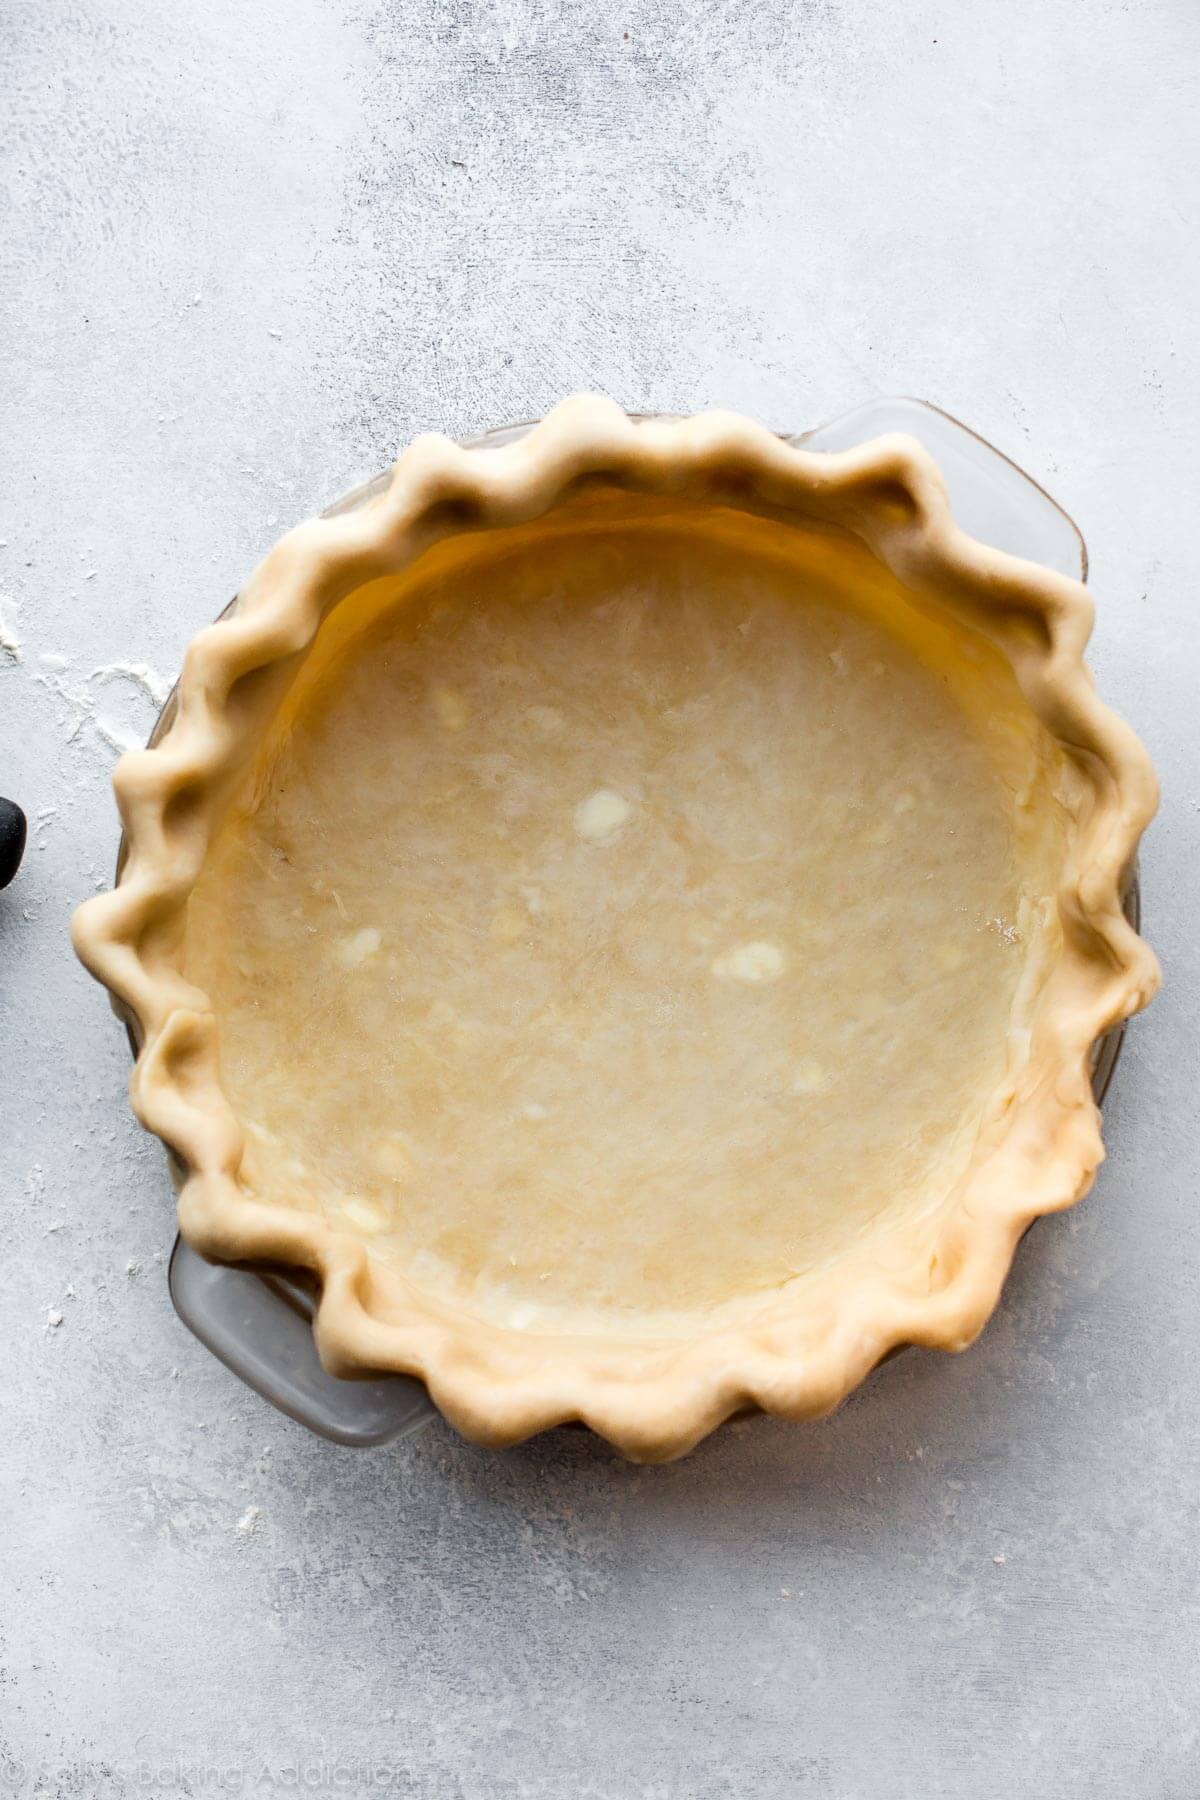
If you need extra help with the shaping, review my how to crimp and flute pie crust tutorial.
One reader, Shannon, commented: “FINALLY—my crust didn’t shrink on the sides or lose its shape! This was always my problem—and it was so frustrating—until I tried the dough strip technique. THANK YOU! ★★★★★“
That was a lot of information thrown at you, but I promise it’s manageable! And if you need it, I also have a list of my top 10 pie baking tools.
Print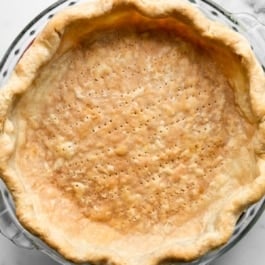
How to Blind Bake Pie Crust
- Prep Time: 2 hours 45 minutes
- Cook Time: 30 minutes
- Total Time: 3 hours 15 minutes
- Yield: 1 pie
- Category: Pie
- Method: Baking
- Cuisine: American
Description
Use this tutorial to learn how to blind bake a pie crust, whether that’s fully blind-baking before adding a no-bake filling, or partially baking (par-baking) the crust before returning to the oven with a filling.
Ingredients
- pie dough such as homemade pie crust (recipe makes 2 crusts)
- pie weights (you need 2 packs)
- all-purpose flour, as needed for rolling out dough
Instructions
- Make the pie dough: Prepare and chill your pie dough for at least 2 hours. If using the linked recipe, prepare pie crust through step 5.
- Roll out the chilled pie dough: On a floured work surface, roll out one of the discs of chilled dough (keep the other one in the refrigerator until you need it). Turn the dough about a quarter turn after every few rolls until you have a circle 12 inches in diameter. Carefully place the dough into a 9-inch pie dish. Tuck it in with your fingers, making sure it is completely smooth.
- Dough strip technique: This step is optional, but will help prevent the sides from shrinking down as well as promise a thick and sturdy crust. Remove the 2nd pie dough disc from the refrigerator. Roll out the same way you rolled out the first one. Using a pizza cutter, slice rounded 1- or 2-inch strips, and arrange around the edges. Use your fingers to meld the dough together. What you’re basically doing here is adding another layer of crust to just the edges. Crimp or flute the pie crust edges. They should be nice and thick now. Wrap up any leftover pie dough to use for next time. Freeze it for up to 3 months.
- Refrigerate: Chill the shaped, unbaked pie crust in the refrigerator for at least 30 minutes and up to 5 days. Or freeze for up to 3 months. Cover the pie crust with plastic wrap if chilling for longer than 30 minutes or if you’re freezing it. If you freeze it, let it thaw for a couple hours in the refrigerator before continuing.
- While the crust is chilling, preheat oven to 375°F (190°C).
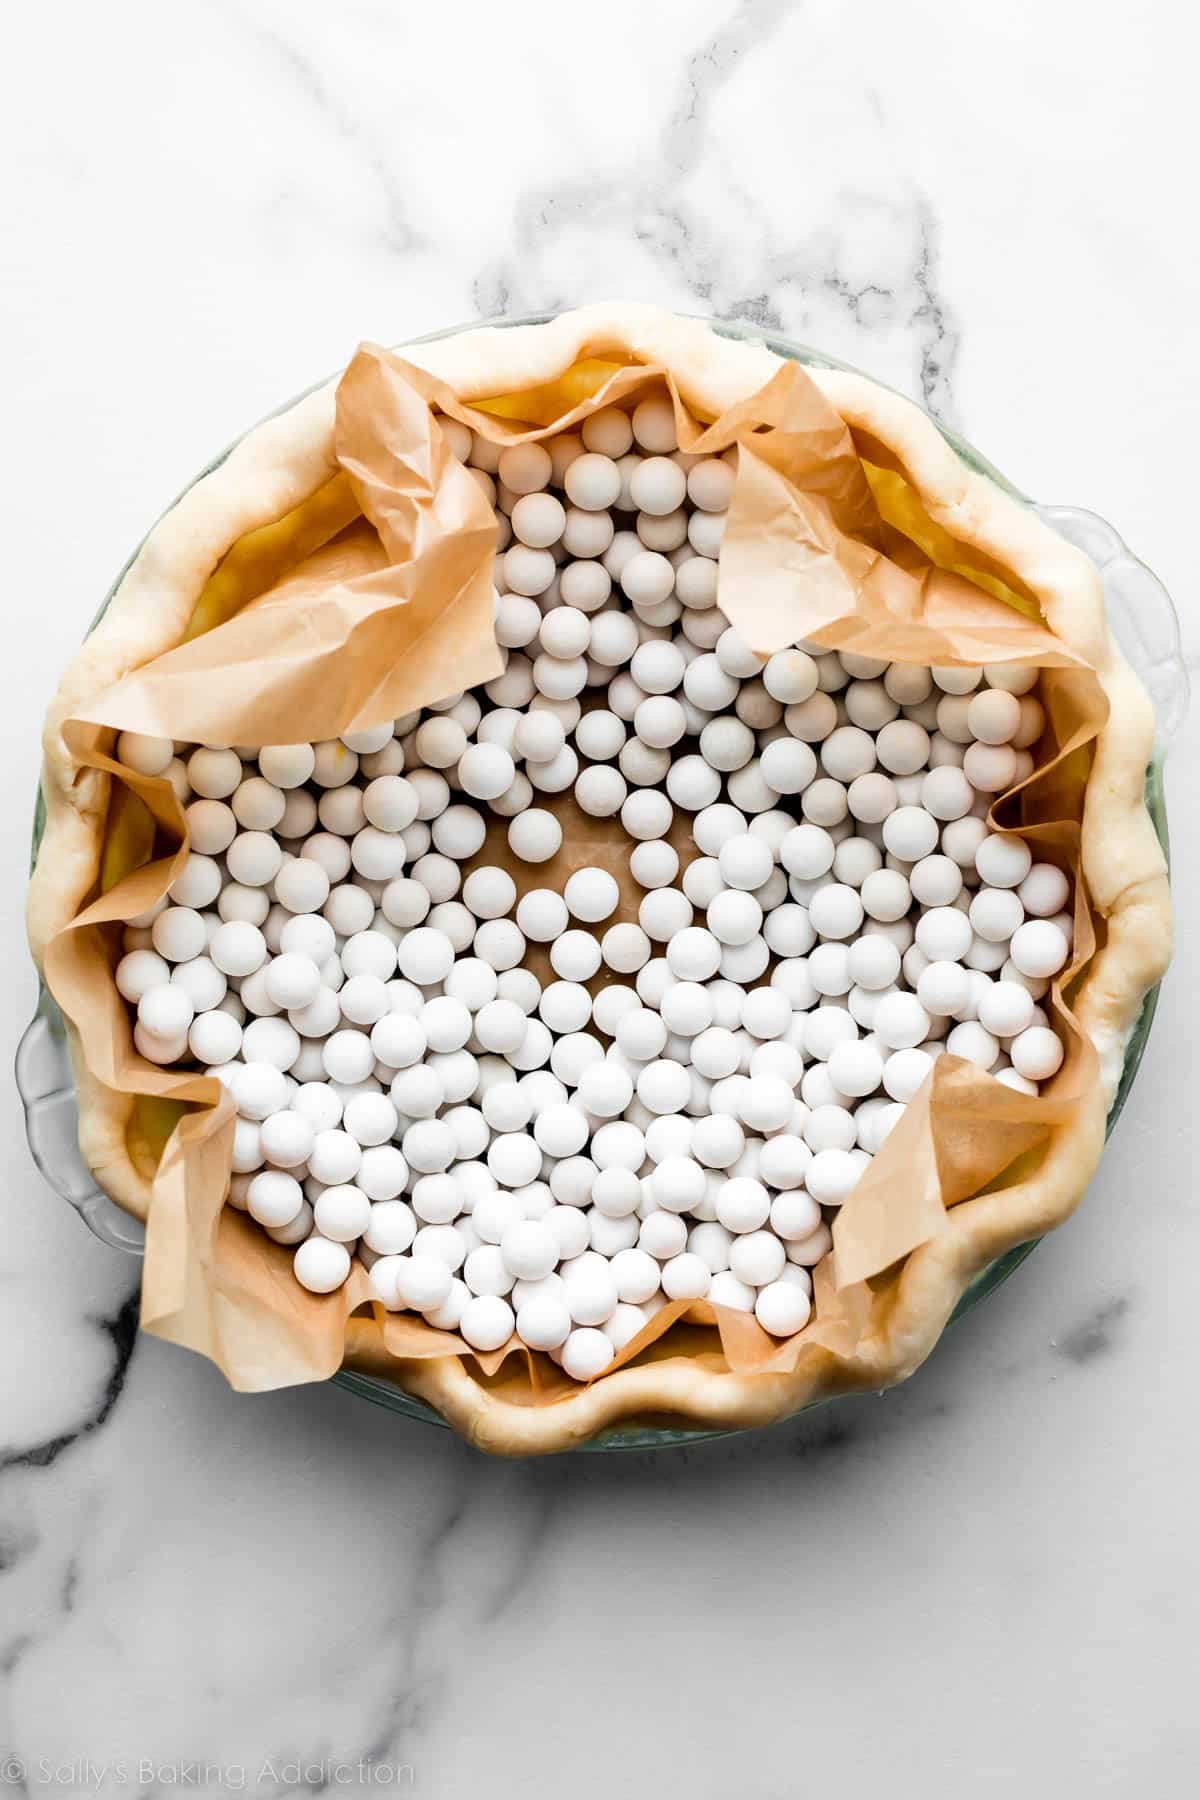
- Fill with weights: Line the chilled pie crust with parchment paper. (Crunch up the parchment paper first so that you can easily shape it into the crust.) Fill with pie weights or dried beans. I like to push the weights up against the sides of the pie crust to help ensure the sides don’t shrink down.
- Bake: Bake until the edges of the crust are starting to brown and appear set, about 15–16 minutes. Remove pie from the oven and carefully lift the parchment paper (with the weights) out of the pie. With a fork, prick holes all over the bottom crust. Return the pie crust to the oven.
- If you need a fully baked pie crust, bake until the bottom crust is golden brown, about 14–15 minutes longer. For a partially baked pie crust (if you’re baking the pie once it is filled, like a quiche), bake until the bottom crust is just beginning to brown, about 7–8 minutes.
- If you’re making a no-bake pie, let the baked crust cool completely before adding the filling unless your pie recipe states otherwise. For pies that will go back in the oven, like quiche or pumpkin pie, the crust can still be warm when you add the filling. (Again, unless your recipe states otherwise.)
Notes
- Make Ahead Instructions: You can make pie dough and freeze it for up to 3 months. See my pie crust recipe for details. If you want to shape the pie dough ahead of time, see step 4 above.
- Special Tools (affiliate links): Rolling Pin | 9-inch Pie Dish | Pizza Cutter | Pie Weights
- Egg Wash: Many pie recipes call for brushing the crust with an egg wash and, typically, your pie recipe will tell you when to do that. If you aren’t sure when, and you need to par-bake the crust, you can brush the crust’s edges with an egg wash after par-baking with pie weights (step 7), and before returning to the oven to bake without the weights (step 8). An egg wash is 1 egg beaten with 1 Tablespoon of milk or water. Use a pastry brush.
- How Can I Apply a Top Crust to Par-Baked Bottom Crust? Blind-baking is usually required for custard-type pies, where there generally isn’t a top crust. Adding a top crust, such as lattice pie crust or other beautiful pie crust designs is possible, though. I’ve always found Erin McDowell’s tutorial for this helpful. A lot of it is tucking the top dough edges under the par-baked bottom crust edge, and then crimping the pie crust edges.


Reader Comments and Reviews
Can I use rice instead of pie weights
Hi Evelyn, that should work.
Is par baking a pie crust and blind baking a pie crust the same thing?
Yes!
So glad to discover your awesome website!
I have a Quiche Lorraine recipe that calls for brushing egg white on the store-bought crust before partially par-baking. I don’t think your quiche recipes call for that (unless I missed it).
Is using egg white necessary for a quiche crust and, if so, do you do it before par-baking a store-bought crust or during the last few minutes of par-baking?
Hi Sally, I have used your par baking method very successfully for my pie crusts using AP flour. Recently I bought some soft white wheat pastry flour. I tried using this par bake method with that and it gets way too dark around the rim. Have you ever tried this kind of flour for a pie and you have any tricks to share?
Hi Kathleen, great question! Pastry flour tends to brown faster than all-purpose flour, which is likely why the rim is getting darker during par-baking. You can help prevent this by shielding the edges earlier with foil or a pie crust shield, and making sure the crust is well chilled before baking. Reducing the oven temperature by about 25°F can help as well.
Sally, Just read your Tips on how to Par Bake a pie shell. I have just baked your Quiche Pie recipe and was frustrated to find this beautiful pie with lovely brown crust looking like I dropped it on the floor. Now ,after reading your “tips” I think I will at least have a head start and I will purchase the stones. Thanks again, I enjoy your recipes and have attempted, literally, over one hundred of your recipes. I have a family that appreciates Grandpas retirement hobby, baking. Thanks ever so much, Jerry
Help! I had a big oily mess in my oven! Where did I go wrong?
Hi Lorie, If the butter/fat chunks are a little too big, the melted butter will create holes in the crust. Try working in the fats just a little bit more next time.
If you crush the parchment paper into a ball and then straighten it out, it is easier to form into the shape of the pie plate I think. I am an experienced baker, and I always turn to Sally’s Baking Addiction when I need more info!
Thanks for the blind baking recipe.
One thing that newer bakes may not realize is that, if they pie dough gets warm when they’re rolling it out, and they put it in the oven with the pats of butter having melted, the butter doesn’t “explode” in the oven while blind baking, and it fails to creates that flakiness.
I found that, after I rolled out the crust, it helped to refrigerate the pie crust for maybe 20 minutes so that the butter would get very cold (and harden!) again, and would THEN it would “pop” inside the crust and create the flaky layers.
I put it in the oven many times immediately after rolling it out, the dough was almost room temperature and so the butter just melted during the blind baking. People don’t realize the butter has to be COLD (and hard) in order to “explode” during the blind baking stage.
Do you have a recommendation for parbaking mini pies in the standard 24ct mini muffin pan? Specifically how long? Thanks!
It will really depend on the exact recipe you’re using and whether par-baking is required. It often isn’t necessary when making mini pies. Otherwise, we’d expect a par-bake time to be quite short—just a few minutes or so. We hope this helps!
You changed the recipe. My original says to do an egg wash. Any reason why this was omitted
Hi B, see section in blog post “FAQ: Can I Add an Egg Wash?” for more details on when/how to add an egg wash.
I am working on my pie crust in a glass pie plate and realizing that the instruction to go from the freezer to the oven could be calamitous–glass could crack! –so I am going to let it sit on the counter for a while to bring it back to room temperature. Just thought I should bring this up so no one else accidentally makes that mistake.
no temperature is ever said or a time
Hi Marty, see step 5 for temperature and steps 7 and 8 for the bake time.
Can I refrigerate a partially blind baked crust for use in a few days?
Hi Cathy, yes! You can partially blind-bake a crust up to 3 days ahead of time. Cover and store in the refrigerator (without weights) until ready to use.
Can u blind bake pie crust and keep 1 day before filling with pumpkin
Hi Tina, yes, you can!
Hello Sally, firstly great pumpkin pie. Just a couple of things. One, I make the pie without milk so I use Heavy Full Fat Coconut Cream, it tastes great and doesn’t taste of coconut. One small problem with the par-baked crust the wax paper sticks to the crust making it extremely hard to work with, any suggestions would be greatly appreciated. Thanks again for a great pumpkin pie.
Hi Avroham, so glad you love this pie! Are you using parchment paper or wax paper? We recommend parchment paper.
Can par baked pie crust be refrigerated
Hi Susan, yes! You can partially blind-bake a crust up to 3 days ahead of time. Cover and store in the refrigerator (without weights) until ready to use.
I think it’s perfect thank you
It looks just a bit lighter than your pictures is there ever a time to bake longer than 30 minutes in total how would you really know if pie dough needs a couple minutes more wish I could send a pic lol
Hi Lisa, the color can depend on each baker and whether or not you will be continuing to bake with a filling. Does the crust seem “set”?
Hi Lisa, Many pie recipes call for brushing the crust with an egg wash, and typically the recipes will tell you when to do that. If you aren’t sure when, and you need to par-bake the crust, you can brush the crust’s edges with an egg wash after par-baking with pie weights, and before returning to the oven to bake without the weights.
Once you par-bake a crust for quiche, can it sit out for 6 hours or must it be covered tightly and refrigerated?
Hi Dawn, you can let it sit out for that long. If overnight, I recommend refrigerating it and then bringing back to room temperature.
After you take it out and take your beans out how long do you put it back in the oven for to finish it?
Hi Wanda! See step 8: If you need a fully baked pie crust, bake until the bottom crust is golden brown, about 14–15 minutes longer.
Very helpful video – thanks for all of the tips on blind baking! Just made my grandson a chocolate cream pie!
No good for beginners
Hi R, We are happy to help troubleshoot if you let us know exactly where you had trouble when par-baking your crust.
Hi! No matter what I do (follow the instructions), the sides shrink. Any suggestions?
Hi Emmie, I understated the frustration! An over-hydrated dough will shrink, any chance you’re adding a bit more water than needed? Was your pie crust cold before going into the oven? A cold crust is key for ensuring the pie dough keeps its shape. The section titled “How to Prevent Pie Crust From Shrinking” will be helpful for troubleshooting as well. We hope this helps and thank you for giving our pie crust a try!
can you dock the pie crust prior to blind baking?
Hi Joan, Some bakers skip the pie weights and just dock the pie crust from the beginning, but we’ve never had luck this way. The sides of our pie crust still shrink down. So we always use pie weights, remove them after the edges begin to turn brown, dock the crust with a fork, then return it to the oven so the bottom cooks.
hi, sally, when would you brush egg whites on the crust to keep a cream filling from causing a soggy bottom – before you blind bake? after?
Hi Steph, see section in blog post “FAQ: Can I Add an Egg Wash?” for more details on when/how to add an egg wash.