

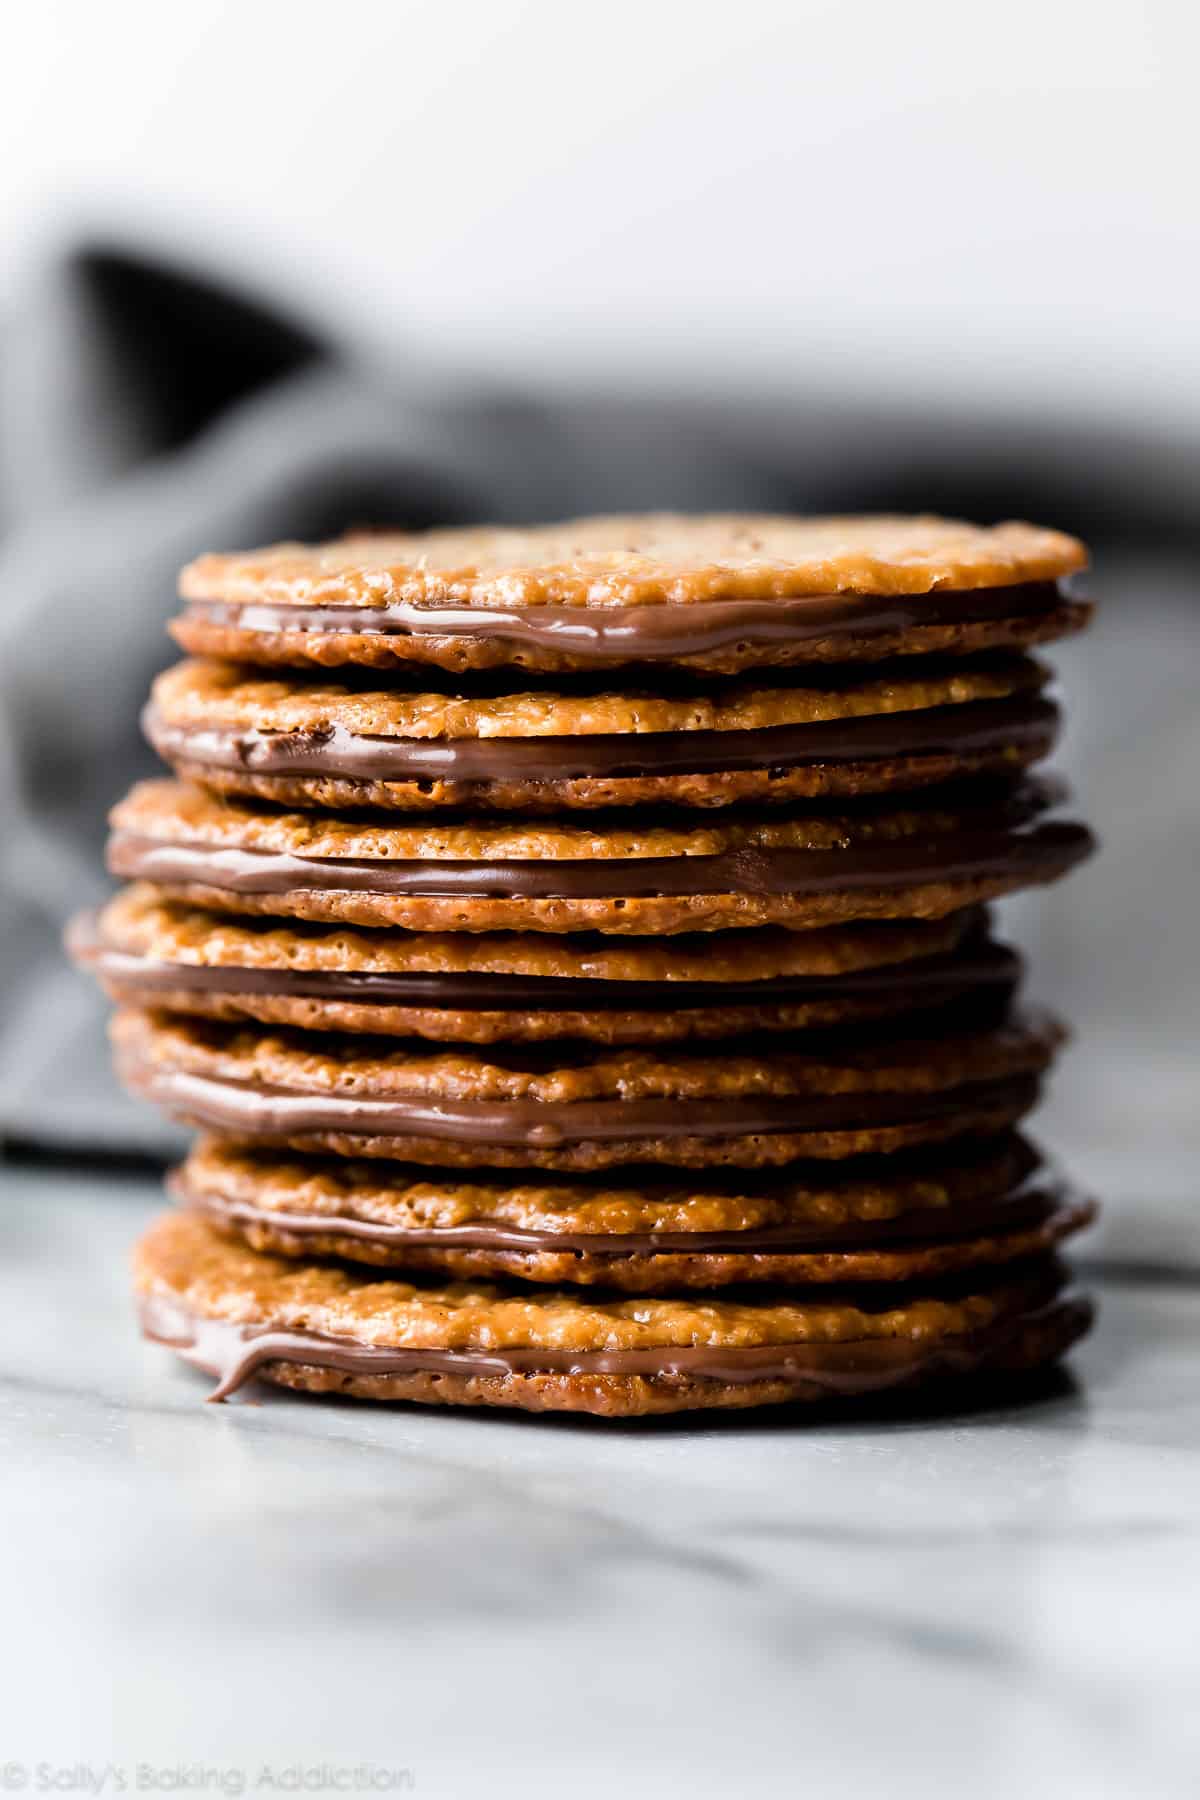
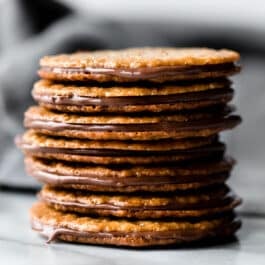
Made from only 6 ingredients, these easy lace cookies are ready in 30 minutes and they taste like sweet brown butter and caramel. Sandwich with a little chocolate for an extra special treat. Everyone loves these and they’re gluten free too!
Welcome to day 7 of Sally’s Cookie Palooza! If you’re just joining us, here are all the recipes published so far:
- Peppermint Bark Cookies
- Spritz Cookies
- Christmas Cookies in a Jar (with free printable!)
- Santa’s Whiskers Cookies
- Iced Oatmeal Cookies
- Gingerbread House (December Baking Challenge!)
Day 7 calls for something easy. So easy you’ll think you’re doing something wrong. Made from only 6 ingredients, these lace cookies are ready in 30 minutes and they taste like sweet brown butter and caramel. As if you took caramel, mixed it with brown butter, and made it into a thin and crispy cookie. THEY’RE HEAVEN.
What are Lace Cookies?
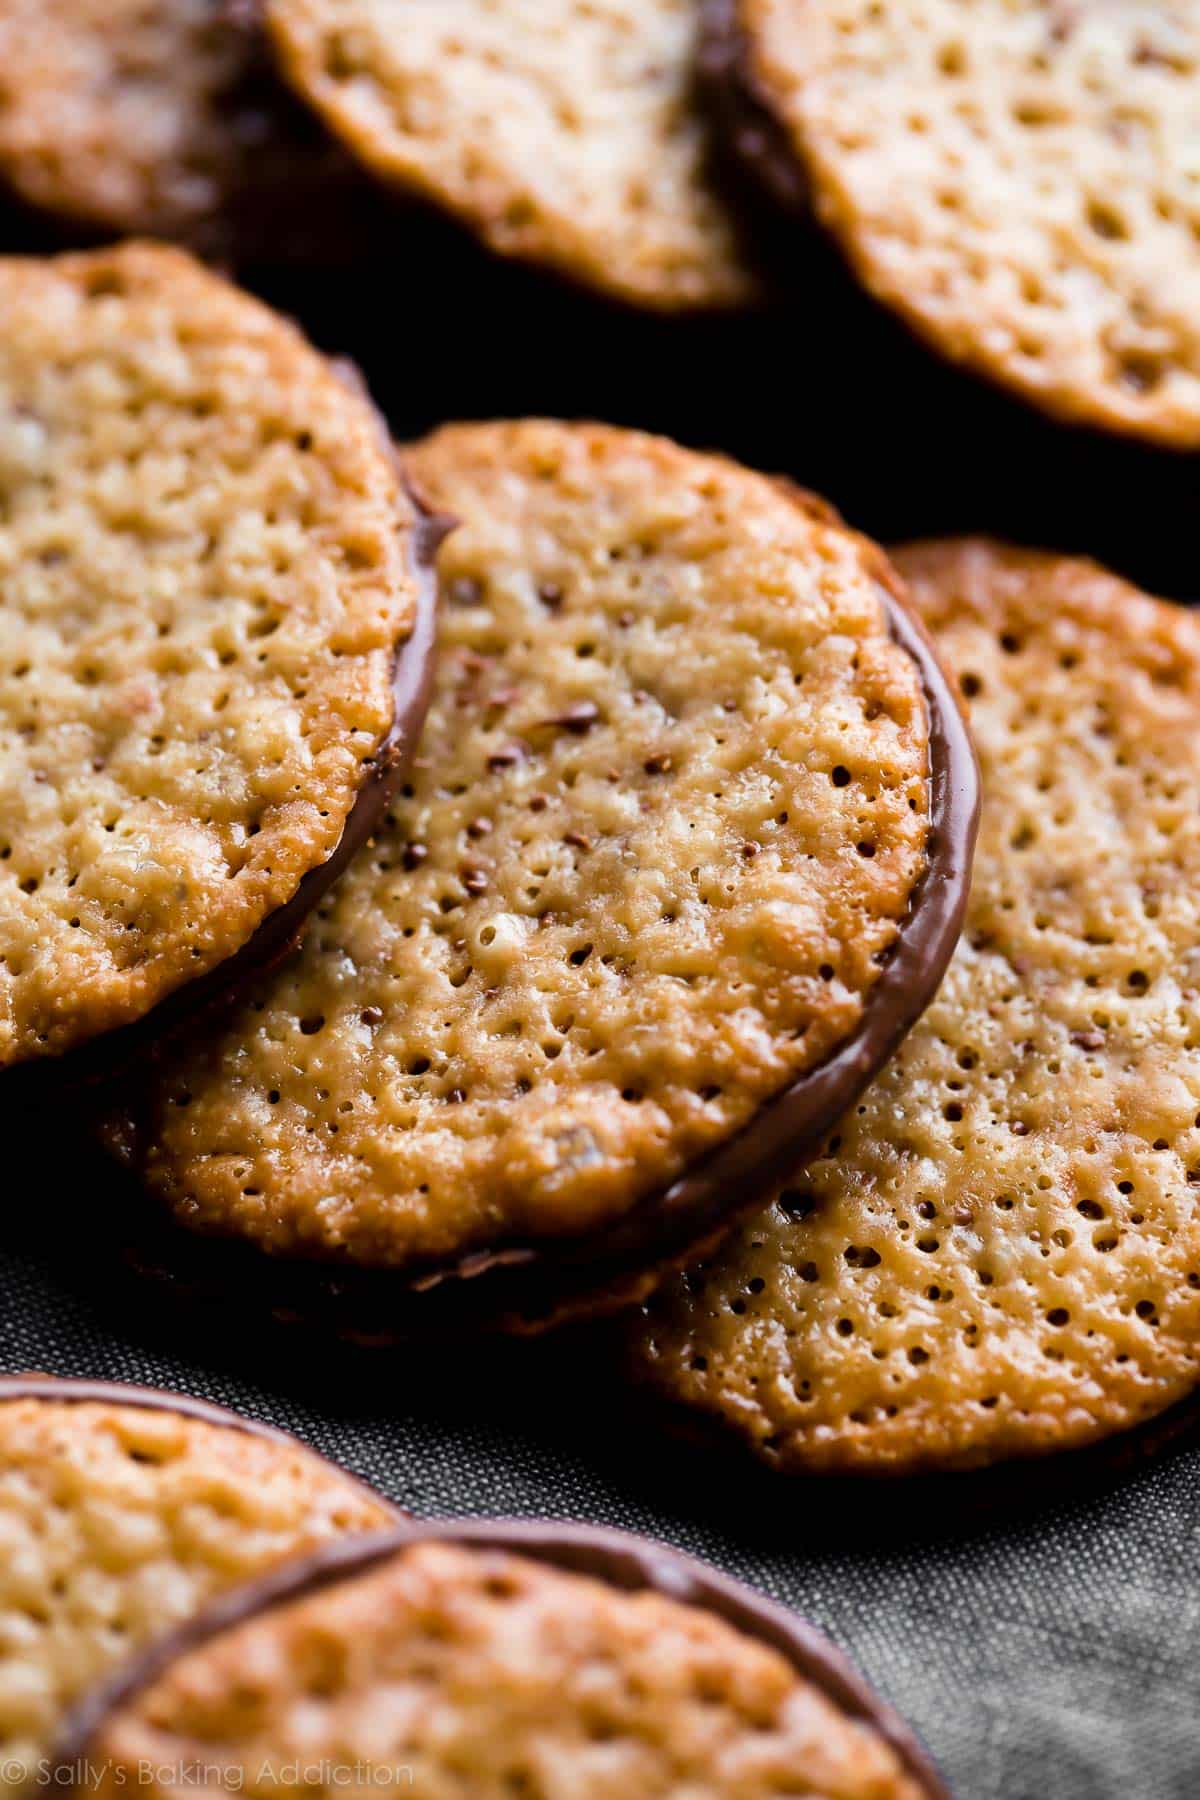
Lace cookies are very thin and crunchy cookies made from butter, sugar, salt, and other ingredients. The other ingredients vary depending on the recipe. Some recipes use oats and flour, other lace cookie recipes use nuts. Lace cookies get their name from their delicate and see-through appearance. My mom always used to make these—they’re a beautiful cookie!
They’re also one of my favorite gluten free dessert recipes. It’s nice to have a gluten free option among your spread of Christmas cookies!
How to Make Lace Cookies
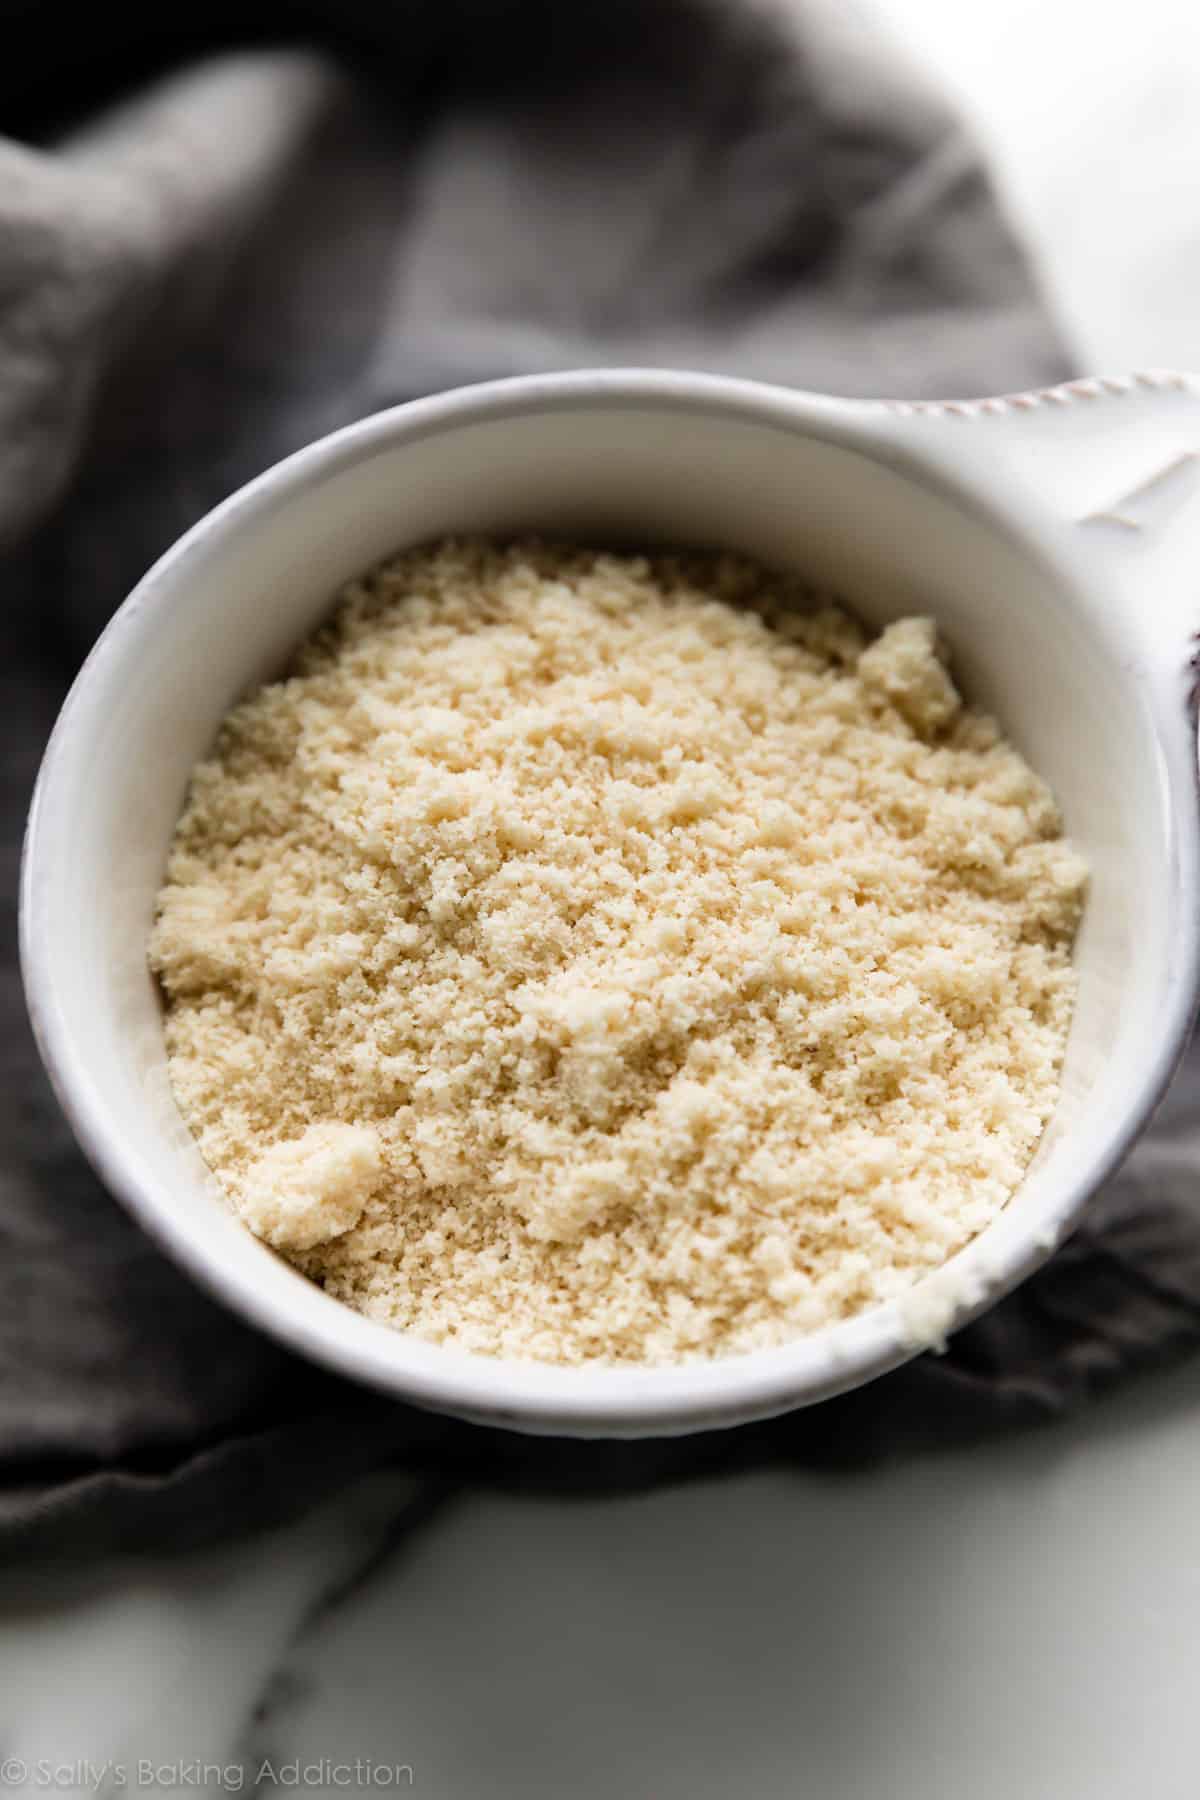
In an effort to keep these gluten free AND to add elevated flavor, my lace cookie recipe uses almond flour. In addition to almond flour, you’ll also need: butter, brown sugar, salt, milk or corn syrup, and vanilla extract. That’s it!
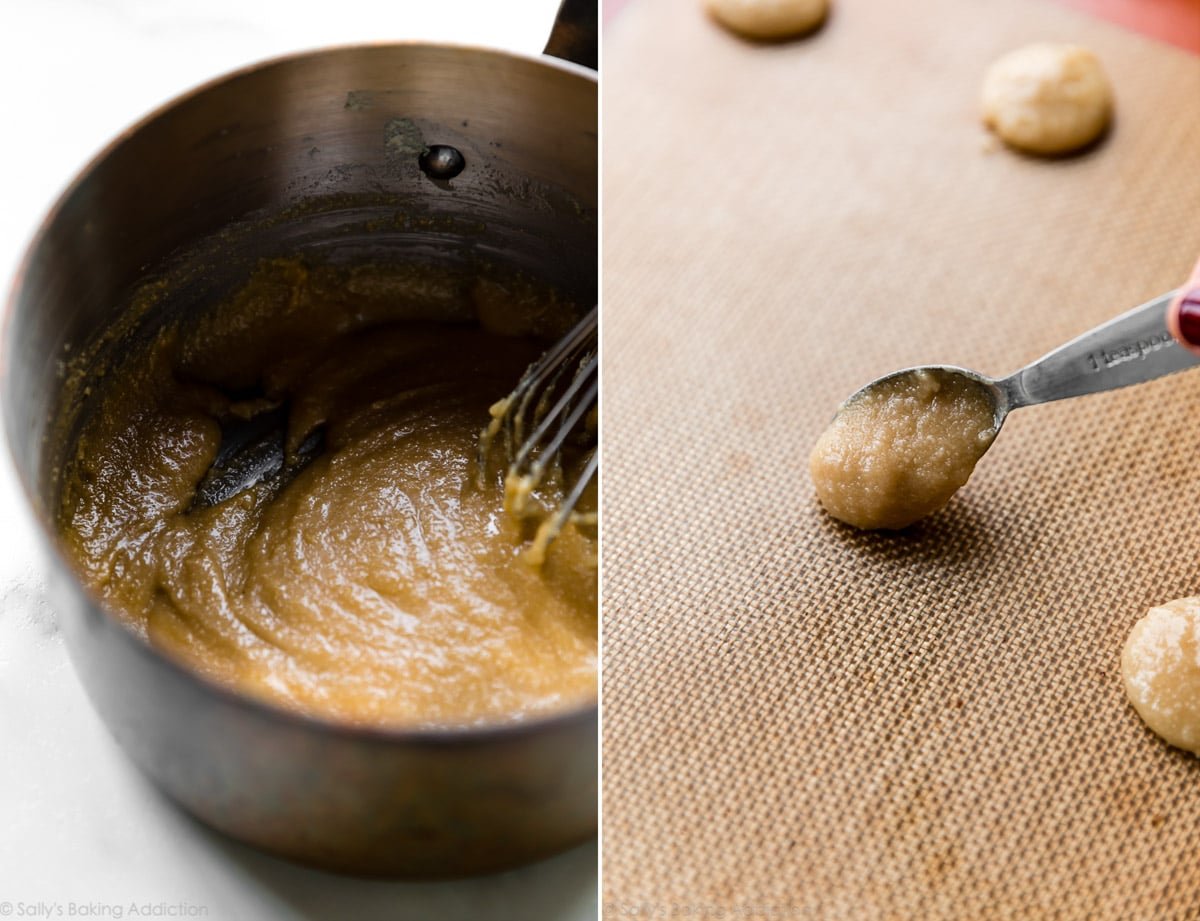
- The cookie dough is prepared on the stove. And I use the term “cookie dough” loosely as this is more like a cake batter. All the ingredients, except for the vanilla extract (stirred in later), are cooked for a few minutes in a saucepan before spooning onto the baking sheet. This cooking stage melts the ingredients together, while baking in the oven will create caramelized sugar and brown butter flavors.
- No chilling the cookie dough. But let it rest for about 5 minutes. The cookie dough will slightly thicken, making spooning onto the baking sheets easier.
- Only 1 scant teaspoon of cookie dough per cookie. Because they’ll spread!
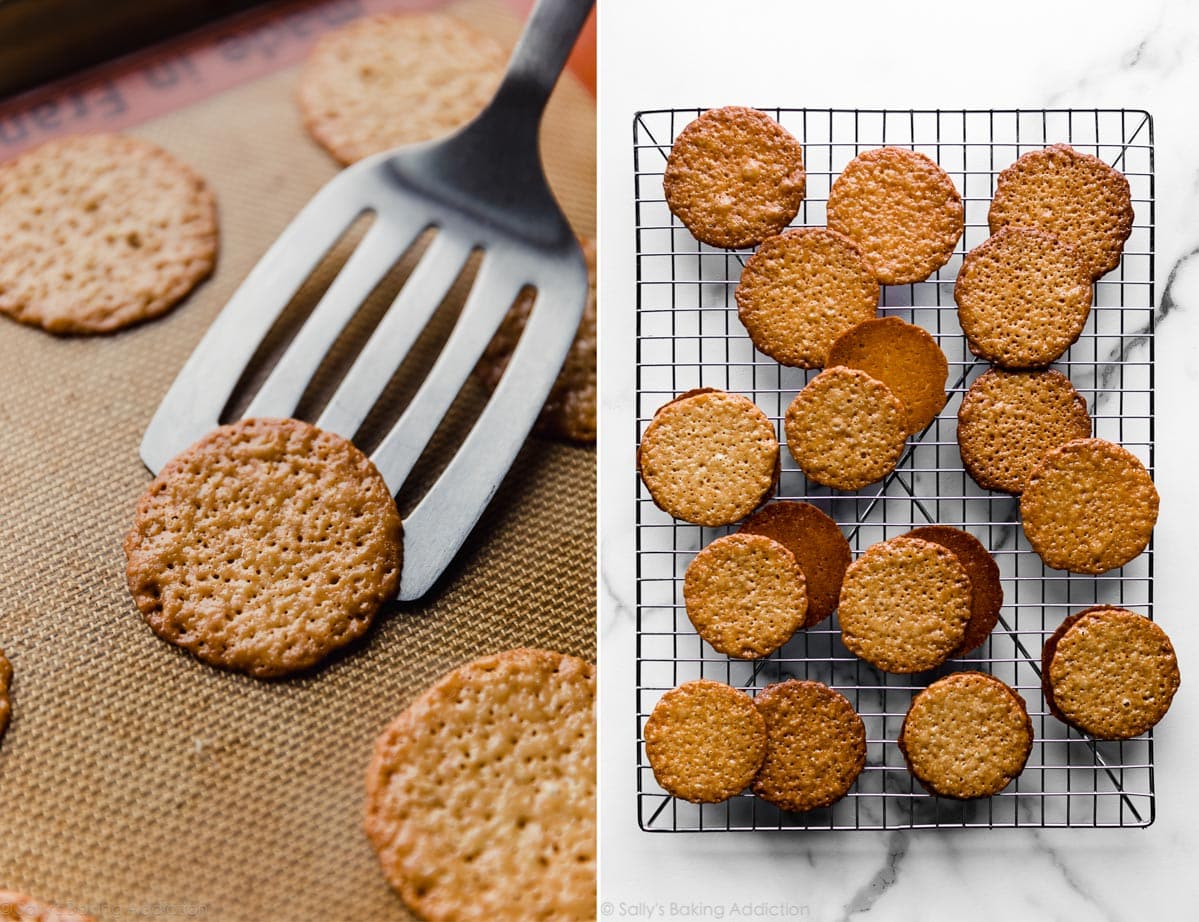
- Short baking time – only 8 minutes. The cookies won’t spread out at first, but around the 4 minute mark, they’ll begin their spreading journey! Listen to the butter sizzling around the edges. I love these unique cookies!
Forget everything I taught you about how to prevent cookies from spreading. You want lace cookies to be extra thin and crisp because that’s where all the caramelization happens. 🙂
Be Extra
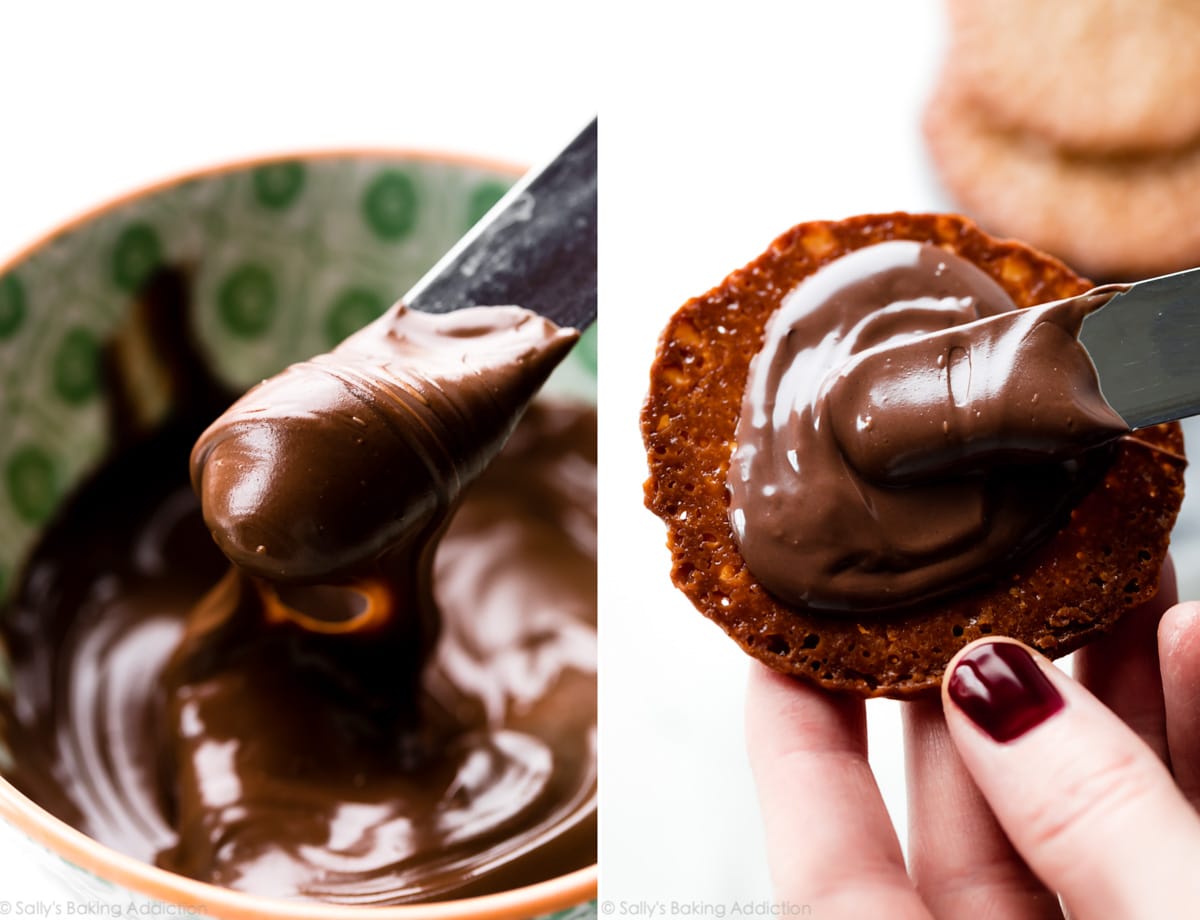
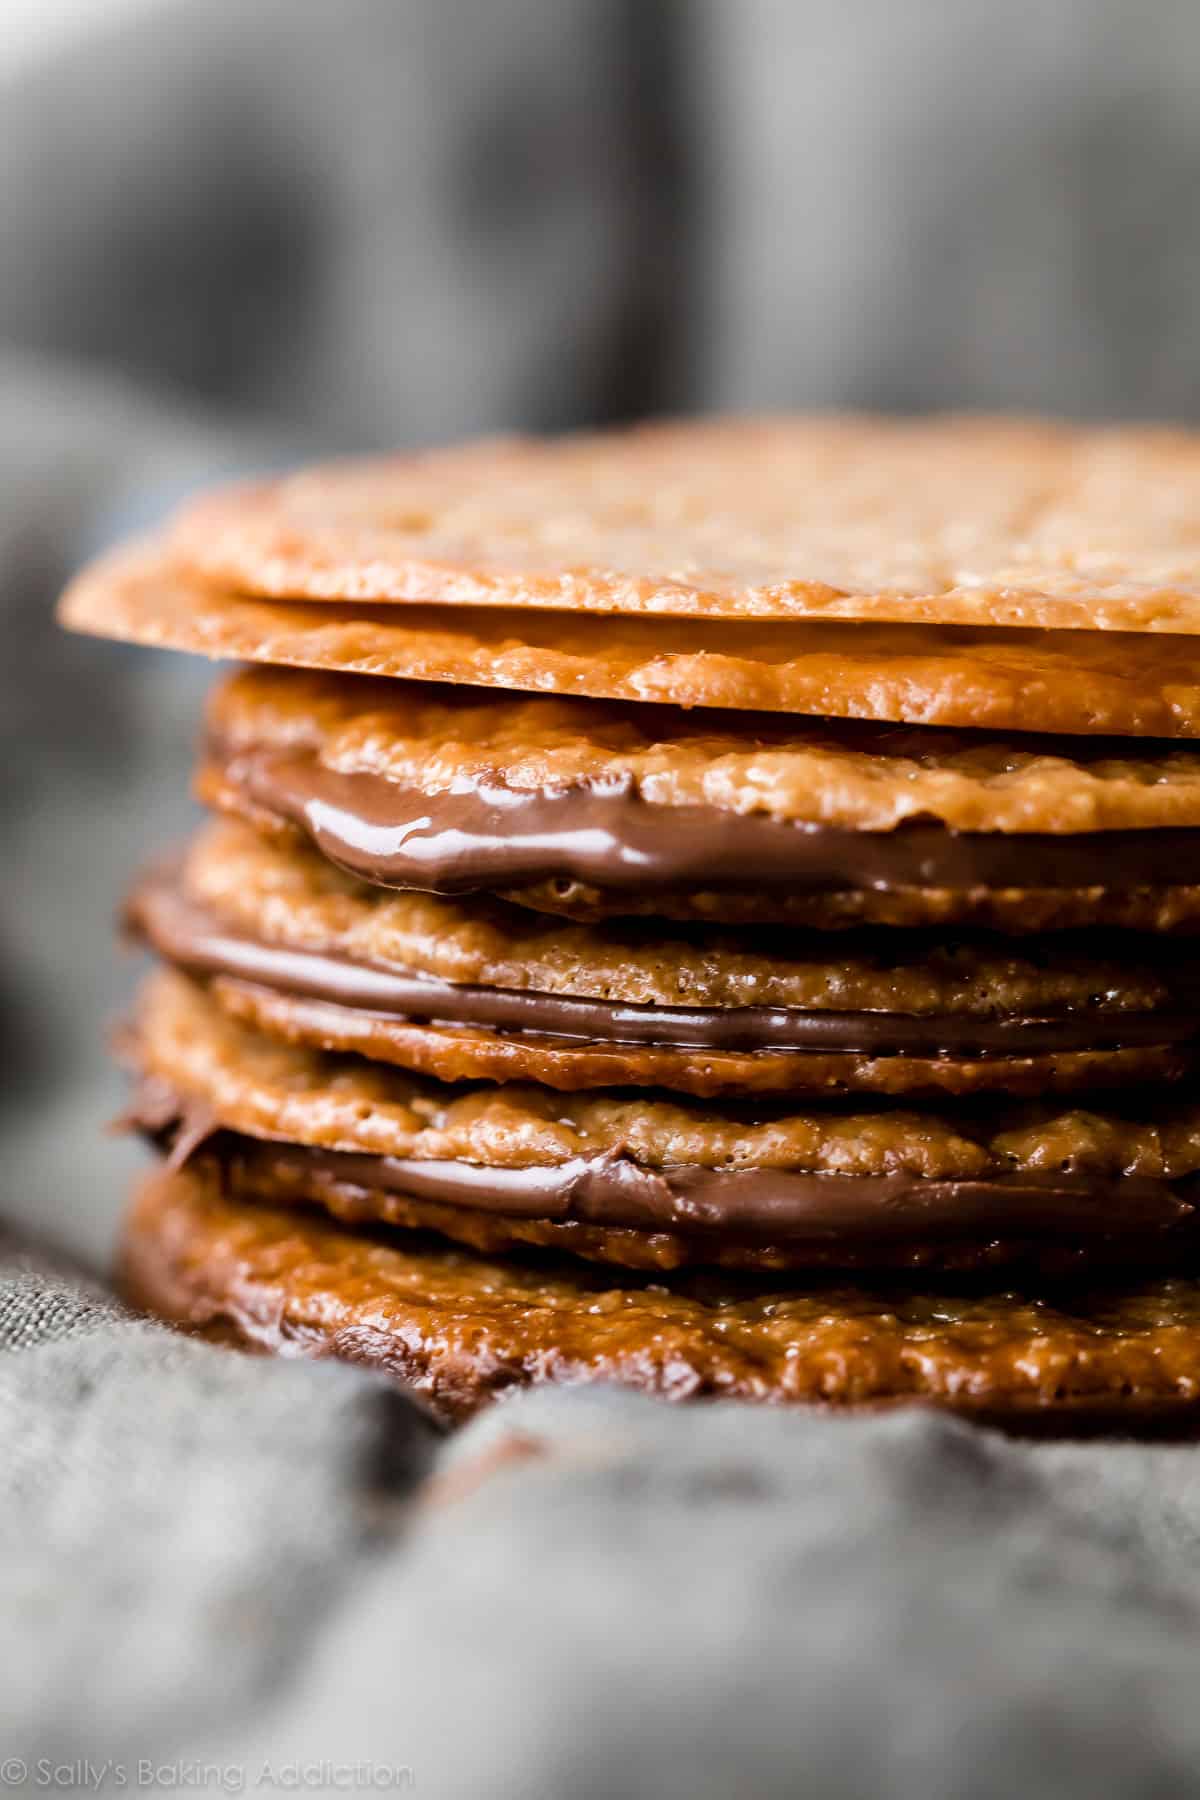
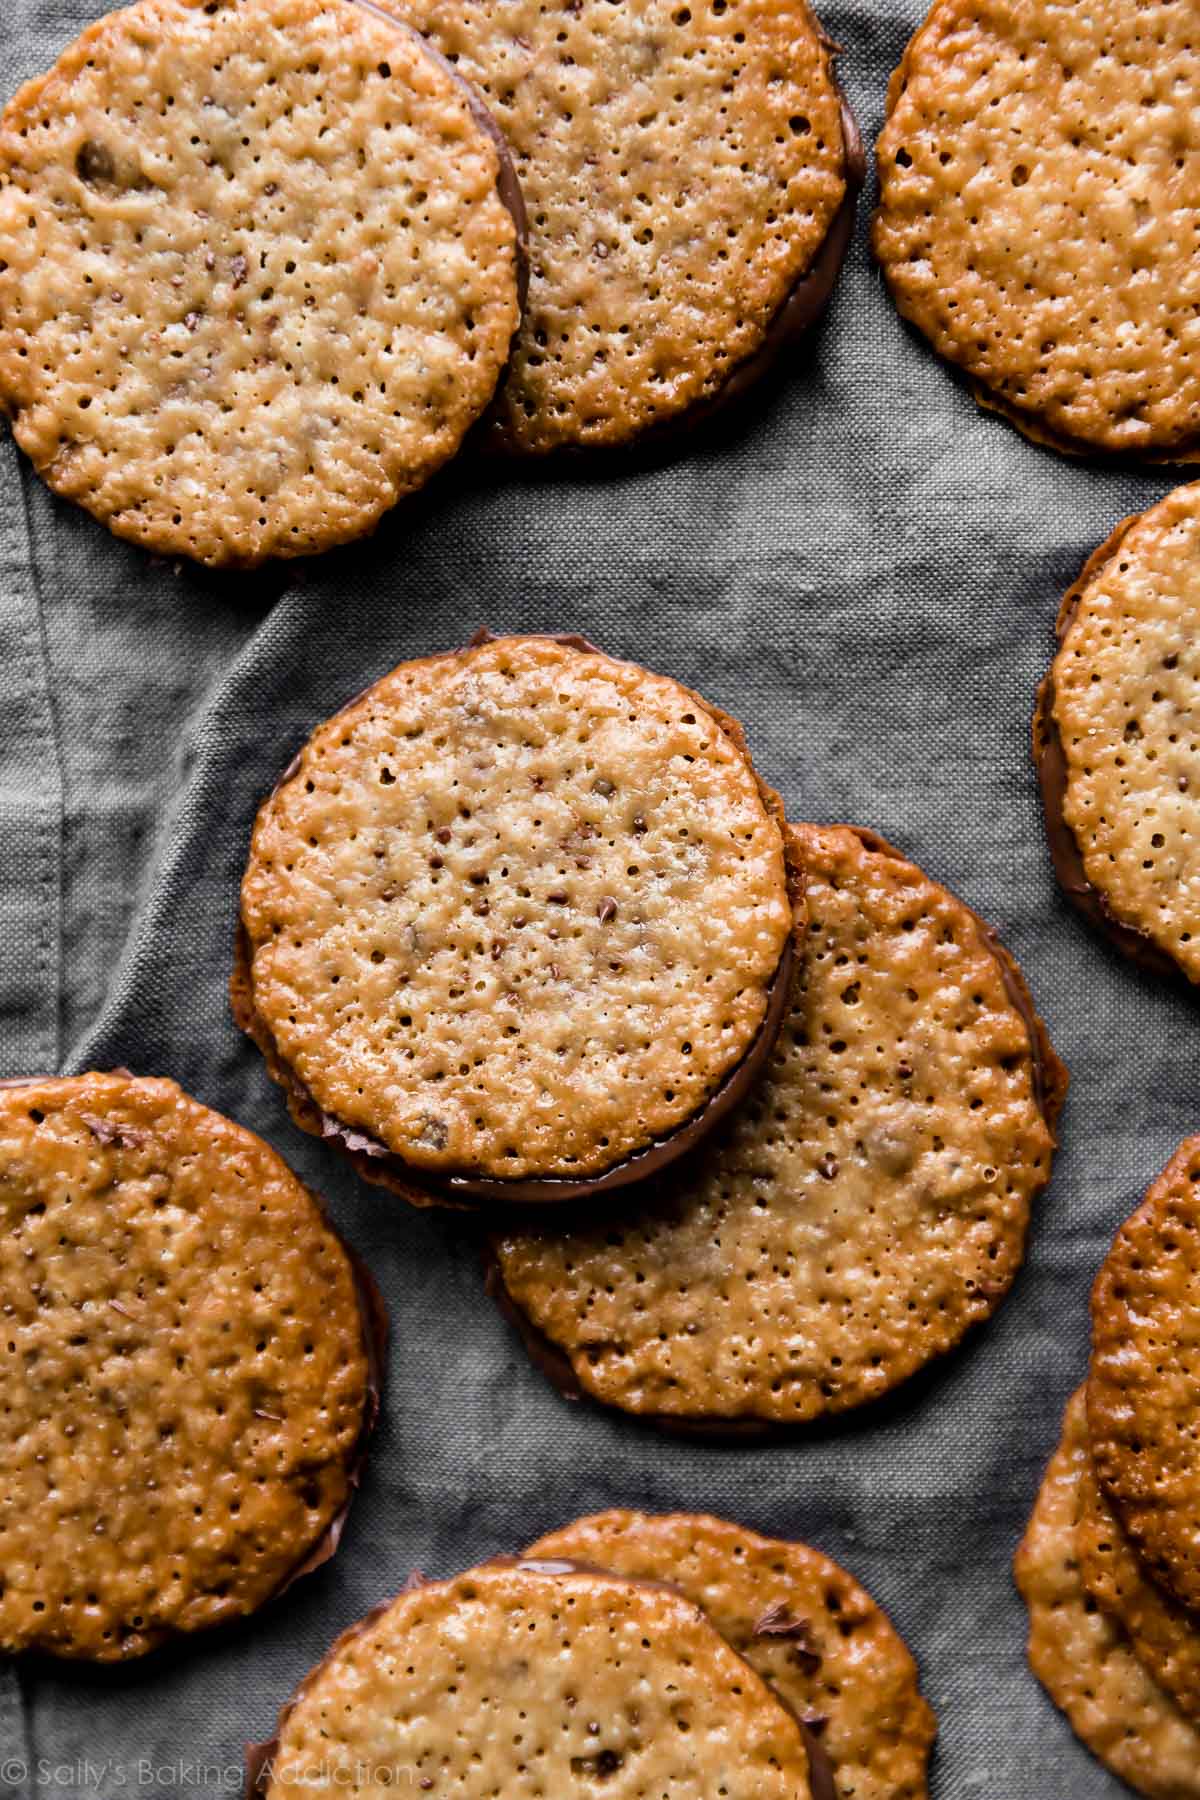
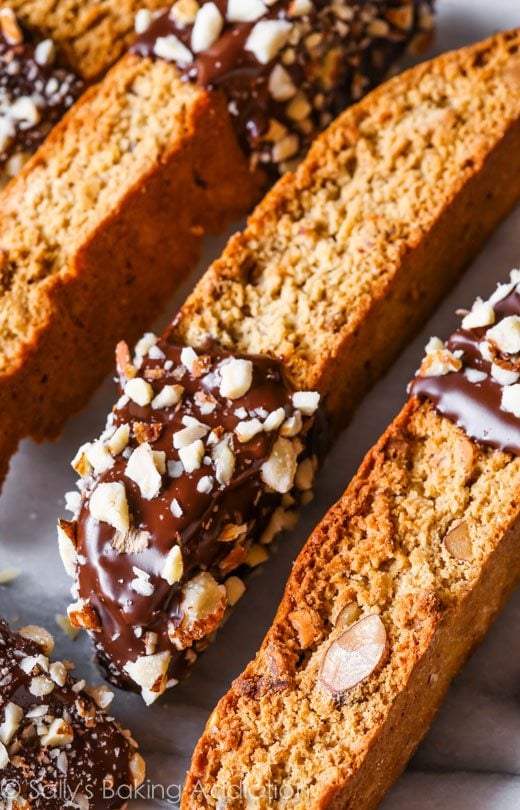
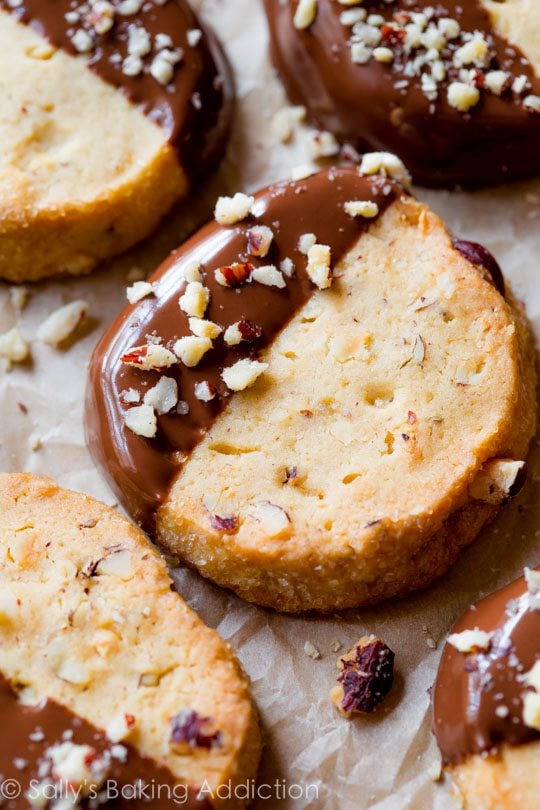
Though lace cookies have the most interesting flavor and texture, it’s Christmastime which means we can add a little flair. Sandwich your lace cookies with a generous spread of Nutella or melted chocolate and prepare for the cookie sandwich of a lifetime. Can you truly think of a better flavor combination than butter, caramelized sugar, vanilla, almond, and chocolate?! Nutella can get a little messy, so if you’re gifting or traveling with the lace cookies—I suggest melted chocolate. Unlike Nutella, melted chocolate will set. I have instructions for chocolate in the recipe notes below.
If you love adding a little chocolate to your cookies, give your chocolate ginger cookies and pinwheel cookies a dip in chocolate, too!
With an ingredient line up like this, how can lace cookies not taste good?
I just love how quick and simple these are—much appreciated during the busy holiday season and PERFECT if you want a unique cookie recipe to serve alongside the classics like Christmas sugar cookies and shortbread. This recipe also joins 30+ others in my collection of Quick Dessert Recipes—ready in 1 hour or less!


Easy Lace Cookies
- Prep Time: 20 minutes
- Cook Time: 8 minutes
- Total Time: 30 minutes
- Yield: 30-32 cookies or 15-16 sandwiches
- Category: Cookies
- Method: Baking
- Cuisine: American
Description
Made from only 6 ingredients, these lace cookies are ready in 30 minutes and they taste like sweet brown butter and caramel. Sandwich with a little chocolate for an extra special treat. Everyone loves these and they’re gluten free too!
Ingredients
- 1/2 cup (8 Tbsp; 113g) unsalted butter
- 2/3 cup (130g) packed light or dark brown sugar
- 3/4 cup (75g) almond flour
- 1/4 teaspoon salt
- 1 Tablespoon (15ml) light or dark corn syrup or milk*
- 1 teaspoon pure vanilla extract
- optional: 1/2 cup Nutella or melted chocolate (see note)
Instructions
- Melt butter in a medium saucepan on low heat. Once melted, add the brown sugar, almond flour, salt, and milk/corn syrup. Cook and whisk until sugar has dissolved and ingredients are completely combined, around 3-4 minutes. (Note: If melted butter is separating from the mixture, remove the pan from heat and vigorously whisk until it is all combined again. It will eventually come back together.)
- Remove from heat and whisk in vanilla extract. Mixture will be grainy and shiny. Allow cookie dough to sit and thicken for about 5-10 minutes as the oven preheats. The mixture will thicken as it cools down.
- Preheat oven to 350°F (177°C). Line 2-3 large baking sheets with parchment paper or silicone baking mats.
- Drop scant teaspoonfuls (1 scant teaspoon of mixture per cookie, not Tablespoon) 3 inches apart onto prepared baking sheets. Bake for 6-8 minutes until golden brown around the edges. The edges and centers will sizzle and bubble as the cookies bake!
- Allow cookies to cool for 5 full minutes on the baking sheets before transferring to a rack to cool completely. Cookies dry and crisp up as they cool.
- Once cool, enjoy cookies or sandwich with Nutella or melted chocolate. To sandwich, spread either Nutella or melted chocolate onto the bottom of one cooled cookie and sandwich with another. See recipe note if using chocolate.
- Cookies without Nutella/chocolate filling will stay fresh covered at room temperature for 1 week. Cookies with Nutella/chocolate will stay fresh covered at room temperature for 3 days or in the refrigerator for 1 week.
Notes
- Make Ahead Instructions: Baked cookies, with or without Nutella/chocolate filling, freeze well up to 3 months. Thaw overnight in the refrigerator and bring to room temperature, if desired, before serving. You can prepare the cookie dough in steps 1 and 2, cover tightly once cooled, and refrigerate for up to 3 days. Bring to room temperature, then continue with the recipe.
- Special Tools (affiliate links): Saucepan | Whisk | Baking Sheets | Silicone Baking Mats or Parchment Paper | Cooling Rack
- Almond Flour: I like using Bob’s Red Mill brand almond flour, found in the baking aisle of major grocery stores. If you can’t find almond flour in the store, you can make your own by simply pulsing almonds until they reach a gritty and rough flour-like consistency. Instead of almond flour, you can use the same amount of oat flour. (Buy oat flour or pulse whole oats into a flour.) All-purpose flour isn’t ideal because the cookies will not spread or caramelize. Some readers have used coconut flour, but note that the taste and texture is off. I strongly recommend almond flour.
- Either 1 Tablespoon of milk or corn syrup works in this lace cookie recipe. You need a liquid and the resulting cookie tastes exactly the same no matter which you choose. I prefer corn syrup because I find it makes the cookies just a *little* crispier.
- Nutella can get a little messy, so if you’re gifting or traveling with the lace cookies—I suggest using melted chocolate for sandwiching the cookies. Unlike Nutella, melted chocolate will set. Instead of sandwiching, try dunking the cookies in melted chocolate or drizzling the chocolate on top. Whichever way you prefer, use about 6-8 ounces of chopped semi-sweet chocolate. (I like Ghirardelli or Bakers brand, both found in the baking aisle.) Melt the chopped chocolate in a double boiler or in the microwave in 15-second increments, stopping and stirring after each until completely smooth. Sandwich, dip, or drizzle onto cooled cookies. Allow chocolate to set completely in the refrigerator for 20 minutes or at room temperature for 30 minutes.


Reader Comments and Reviews
I love this recipe even though my first batch got really hard and the butter separated and I couldn’t get it back in. For my second batch I followed the advice in one of the other reviews of using the low heat and whisking vigorously from the beginning. I removed it from the low heat when it appeared that the sugar had melted. My next two batches came out perfect. They were crisp, lacy, and melt in your mouth.
I made this using 1/2 Swerve brown & 1/2 Stevia, but it turned out gooey; wouldn’t crisp. Maybe I didn’t use quite enough almond flour? The parchment was buttery, so I placed another piece of parchment over top, flipped it, & they adhered to new parchment. I placed that on cookie sheet into oven…still warm. We’ll see how that goes.
Love this recipe! I have a pretty rubbish oven (rental apartment) but everything worked out better than I expected, considering the uneven heat in my oven. I’m excited to try out a Keto version later with Swerve Brown. I’ll let you know how it goes!
How did you get them to be so perfectly round in your photos? Any special trick or just practice and repetition? Some of mine were great others were a little goofy, but paired up with their other goofy cookies just fine haha.
These cookies worked really well for me. I cooked over low heat for 3-4 minutes and added orange zest with the vanilla. I was resting the dough and had to take a work call and the dough ended up sitting for about 30 minutes. I debated heating it again but decided to roll with it and it was super easy to work with and portion into balls for very even cookies. Can’t wait to make again!
I set a timer for each step so that I would not overcook the dough and that the cookies had the right amount of time to bubble and spread. They came out perfectly! I’m so thrilled! They are a gift for my mom as she loves delicate treats like these with just a hint of chocolate. Thank you, Sally!!
I have made this recipe an d the flavour was beautiful, my friends loved it. The only thing is that they didn’t get that round edge that shows in the picture. Next time i will let the dough sit a little longer before baking and see. Thank you for this simple recipe.
Swerve doesn’t caramelize – try allulose. It’s about 70% as sweet as sugar, so you might have to supplement sweetness by adding stevia or monkfruit drops, but in baking allulose melts and caramelizes like real sugar. I use it in every piece of baked goods I make. No cooling sensation either, if that’s a concern.
I am an avid baker. This recipe was an absolute flop. The cookies did not spread at all. They burned before spreading. I adjusted the oven temperature for the third batch, but they still didn’t spread.
Would I be able to use a sugar substitute like Swerve Brown? I would like to make these keto/low carb and since it already has almond flour I would just need to substitute the sugar.
Thank you.
The first time I made these, the butter separated and the sugar mixture was very tough, resulting in the cookies not spreading and being very hard.
After reading comments of people who had a similar experience and the comments made, I made them a second time and this time whisked the mixture constantly on low flame only until it was combined then took it off the stove. I noticed the difference right away as it was not as thick as it was last time. This time they came out perfect!
Thanks for a great recipe and for the prompt replies to comments which help when others make the same mistakes. I will definitely be making these many times again.
Such helpful tips. After a failed attempt on the first batch, I moved my double bottom sauce pan to the simmer burner (lower heat than power burner on low) and the ingredients came together in less than 30 seconds (3 minutes is much too long for my kitchen and humidity). I took it off the heat as soon as it came together and stirred in the vanilla as described. This does make 2-3 pans of cookies when they spread out correctly. I only had parchment paper for two of my pans, so I used my silpat for the third pan. The silpat cookies kept their round shape as they spread out and were much better for making cookie sandwiches with the chocolate. If you have silpat mats, I recommend you use them rather than parchment paper! Thanks for the recipe!
The most amazing cookies!!! I used to buy a similar cookie at an import store. I think I paid $12 for 6 cookies, but I loved them.
Now I can make them myself for much less!
They are super crispy and delicious. I filled them with melted dark chocolate to make sandwiches. Awesome recipe!!
Mix at low heat not medium heat!!! Learned the hard way and my dough separated from the butter. After whisking like crazy off heat my dough over cooked.LOW HEAT, LOW HEAT, LOW HEAT!!
Recipe did not turn out as pictured at all. The dough hardened and the butter separated. No amount of “vigorous whisking” would bring it back together. I even tried twice!
Very disappointed. Tried to make these twice (whisking vigorously), and each time they had the texture of being dry and crumbly. I followed the recipe EXACTLY.
Hi Jane, these cookies are meant to be very thin and crisp. They are delicate and crumble easily. I wonder if you over-baked them?
Jane -I had the same result. I’m by no means a talented baker but figured I couldn’t mess it up any worse so tossed in a beaten egg. It was like a miracle! The batter immediately came together and smoothed out enough to scoop onto baking sheet. They don’t look especially light and lacy, but flavor is really good. Everyone loved them.
Hi Sally, do I need to tweak the recipe at all if I want to add chopped pecans to the batter?? Thank you!!
I love all your cookies. I don’t know what happened, but my theory is I did not cook the batter on the stove long enough because the butter separated and then the cookies didn’t spread. Could my oven just be low, it does run low. I now have delicious small cookies and lots of sweet butter. Should I just cook them on the stove longer ? 4 stars because my final cookie was tasty.
Hi Anna, I’m just seeing your comment/question now so my apologies for the delay responding to you. If melted butter is separating from the mixture on the stove, remove the pan from heat and vigorously whisk until it is all combined again. It will eventually come back together. Regardless of this, I’m glad you enjoyed the cookies.
Hi Sally!
I made these per recipe and they turned out very greasy,What happened?
Hi Terri! I wonder if they weren’t done in the oven? A couple extra minutes could help for next time.
From Novice Guy Baker–it took me 3 tries.
1. stove was too hot(I had it on medium) but our medium too hot–try low. Hot stove caused the cookie mix to crystalize and didn’t spread out when cooked–so I smashed them with a spatula and they were still great.
2. didn’t know what a scant was (size of cookie mix to bake) better if had said to make a cookie the size of a life-saver. When baked, they all joined, but cut apart, not pretty, but tasted great.
3. Yeah success–looks good tastes great, kinda like toffee.
Note: Does Almond flour cause reactions for folks with Nt Allergies?
Can these be made with simple all purpose Cup 4 Cup gluten free flour to accommodate nut allergies as well? Didn’t want to substitute without checking.
Hi Suzanne, I don’t recommend it. See recipe note– some readers have used coconut flour instead. I haven’t tested this though.
Made these this afternoon and they came out prefect! Great recipe!
I haven’t made these yet, but lace cookies are among my favorites. My plan is to make these as Christmas cookie gifts. I have questions. Can I brown the butter? I love the brown butter flavor and want to incorporate it into all my recipes. How can I make these uniformly round? I read somewhere to bake them in a muffin tin, thoughts?
Hi Susan, the butter takes on a slightly browned butter flavor so it’s not necessary to brown beforehand. (It could also burn since you are cooking it again.) A muffin tin could be helpful for the cookies’ shape, but I imagine they would be thick unless you used a very small amount of batter per cookie. I haven’t tested it, but let me know if you do.
You need to watch these like a hawk, they go from “will they ever start to spread?” to “I like burnt caramel, I did that on purpose” within two minutes. I had one overdone and then an underdone batch, third time was the charm. I put in a generous splash of cognac at the end (I believe there are very few things that don’t improve with the addition of a little booze) and it added a subtle flavor. To get identical, round shapes I recommend scoring them with a biscuit cutter while they are still pliable, once they cool down you can use a butter knife or small off-set spatula to trim the edges. The trimmings do not get wasted, if you manage not to devour them as you chip them off, they make a great ice cream topping. This is a great website, thank you for all the sound, clear advice and foolproof recipes.
Hi! These were awesome! Even though I didn’t get the size perfect, they tasted delish. And if anyone is wondering…I used chickpea flour (2/3 cup) because my husband is allergic to almonds and they turned out great… everything else the same.
I made these cookies & all I can say is they didn’t last long Can the raw dough be frozen instead of the cooked cookies?
Hi Beki, Since this batter is very thin (more like cake batter than cookie dough) freezing it in “balls” wouldn’t be ideal. You can however make this up to three days in advance – see the make ahead instructions in the recipe notes. I’m glad you enjoyed these!
I made these yesterday, back home in New York you can find these in any bakery . My sister has Celiac so these are perfect for her . Mine however didn’t come out completely round, some were oval and others looked like blobs!
I tried rolling them into balls to see if they would be round nope.
The first batch I baked for 8 minutes and they burned the rest I baked for 6 minutes and they came out just right .
They sure are tasty, thanks for the recipe!
Well, clearly I did something wrong………… My batter/dough came together seriously fast. Like in a minute. But I was being a rule follower and let it cook for 3 minutes. It was SO thick. Like a ball of glue. I let it sit (cool) and thought that is might spread out once in the oven. My little balls in the oven NEVER spread at all. nothing. So, did I just leave it on the stove cooking for too long? Is it possible that it was actually done at the minute mark?
Hi Lynda, I wonder if your stove heat was too high or your pan was too thin. It usually takes more than 1 minute to melt butter and bring it together with these other ingredients. I recommend reducing the heat for next time.
Hi Sally,
I read through some other comments on the same issue and tried the recipe again. This time lowering the heat to med/low. Seemed to do the trick and they turned out great!
*one thing, in the recipe you say to melt the butter first and ‘then’ add the remaining ingredients. Based on your reply, should I be blending/melting all at the same time? That would probably make a big difference in my cooking time.
Thank you!
I just made these today. They didn’t turn out and can’t figure out why. I used all the right ingredients too. While cooking it just got harder and harder, it was like the butter wouldn’t incorporate with the batter, strange. So disappointed wanted to make these for a friend that is gluten and dairy free. Do you have any ideas what happen. I did check my ingredients and my corn syrup was old, but that was the only thing.I love all your recipes that I have used so far and it has been quite a few. Thank you
Hi Janet, this can happen if the heat is too high or if you aren’t whisking enough. I recommend slightly lowering the stove’s heat as well as whisking constantly to encourage the ingredients to combine and stay combined. Additionally, I’ve found that fancy European butter isn’t ideal for this recipe. While delicious for cooking, it just doesn’t work well for this recipe. Use regular butter if you can– I usually choose Land O Lakes or my grocery store’s brand. I hope all of this is helpful.
Do you measure the almond flour like regular flour? Or scoop it like sugar?
Hi Kate, Whether you’re using bread flour, cake flour, all-purpose flour, or any other flours on the market, use the “spoon & level” method. You can see the post How to Properly Measure Baking Ingredients for more details!
I have made these for years, they are called florentines or lace cookies. Try adding finely chopped candied orange or candied ginger for an added layer of flavor (grind finely in the food processor with the sugar). The recipe I use is from a former pastry chef from the White House. Everyone’s favorite for the holidays.
These are so good. Literally made them twice in a row already. The edges on mine come out crispy, but it doesn’t come out like yours a perfect circle without crisp edges. Do you think it is because I used less sugar? I only used a half cup of sugar. Should I use less butter so it doesn’t come out kind of greasy?
Hi Ashley! So glad that you’re enjoying these lace cookies. Thank you for trying them! I recommend making the recipe as written. Without as much sugar, there’s less to soak up the butter. If you want to reduce the sugar, it will likely be helpful to reduce the butter as well. I haven’t tested the recipe that way though.
Can you use regular flour when making these? Just curious.
Tried this recipe and the dough became hard and the butter separated
Hi Rose, If you decide to try this recipe again and the butter separates, remove the pan from the stove and whisk vigorously, the mixture will come back together. Thanks for trying this recipe!
The dough also became hard. Maybe the sugar got too caramelized? Or heat was too high? So what i did to soften the dough, i added one beaten egg. It wasn’t same consistency as a lace cookie but it was so good!
These were SO YUMMY!! One question–mine never crisped up. They stayed chewy and flexible, which tasted great but made it hard to spread with chocolate. Any thoughts on what I may have done wrong?
Thanks!
Hi Elise, I’m so happy you enjoyed this recipe! The cookies will crisp up as they cool. You’ll notice they are very soft and bendable right out of the oven.
Just made this recipe and they turned really thin and lacy, but they seem to be soft still and a bit greasy do you have any recomendations for this?
Hi Sara! I wonder if they weren’t done in the oven? A couple extra minutes could help for next time.
I followed this recipe exactly and something is off with the measurements. I didnt get a creamy mixture in the pan…it’s crumbly and dry. I plopped tsps of it on my baking sheet and had to press the crumbs together. They never spread. Instead, I have a pan of crumbled because nothing melted or stuck together. Is it really 3/4 CUP of almond flour? Or maybe 3 TBSP? There is either too much dry or not enough wet ingredients.