

Learn how to create a stunning lattice pie crust with this helpful information and easy video tutorial. Latticing pie dough is much easier than it looks!

Pies are my favorite dessert. Not only because they taste SO DARN GOOD, but because they’re very satisfying to make. From-scratch pies take careful precision and the end result tastes even sweeter because you know how much love and effort you put into it.
I receive a lot of questions about how to lattice pie crust, so I decided to condense all my tips and information on 1 single page. Hope you feel more *PIE CONFIDENT* after reading and watching!
Designing a pie crust is a form of art. There are so many different pie crust arrangements, but the classic lattice weaving is my favorite. The simple, yet stunning lattice design will never go out of style. Even though it’s a very common way to style pie dough, latticing pie crust seems pretty intimidating. Today I’m sharing a full tutorial with a helpful video so you can be confident with your next piece of pie artwork.
Trust me, it’s easier than it looks!

What is Lattice Pie Crust?
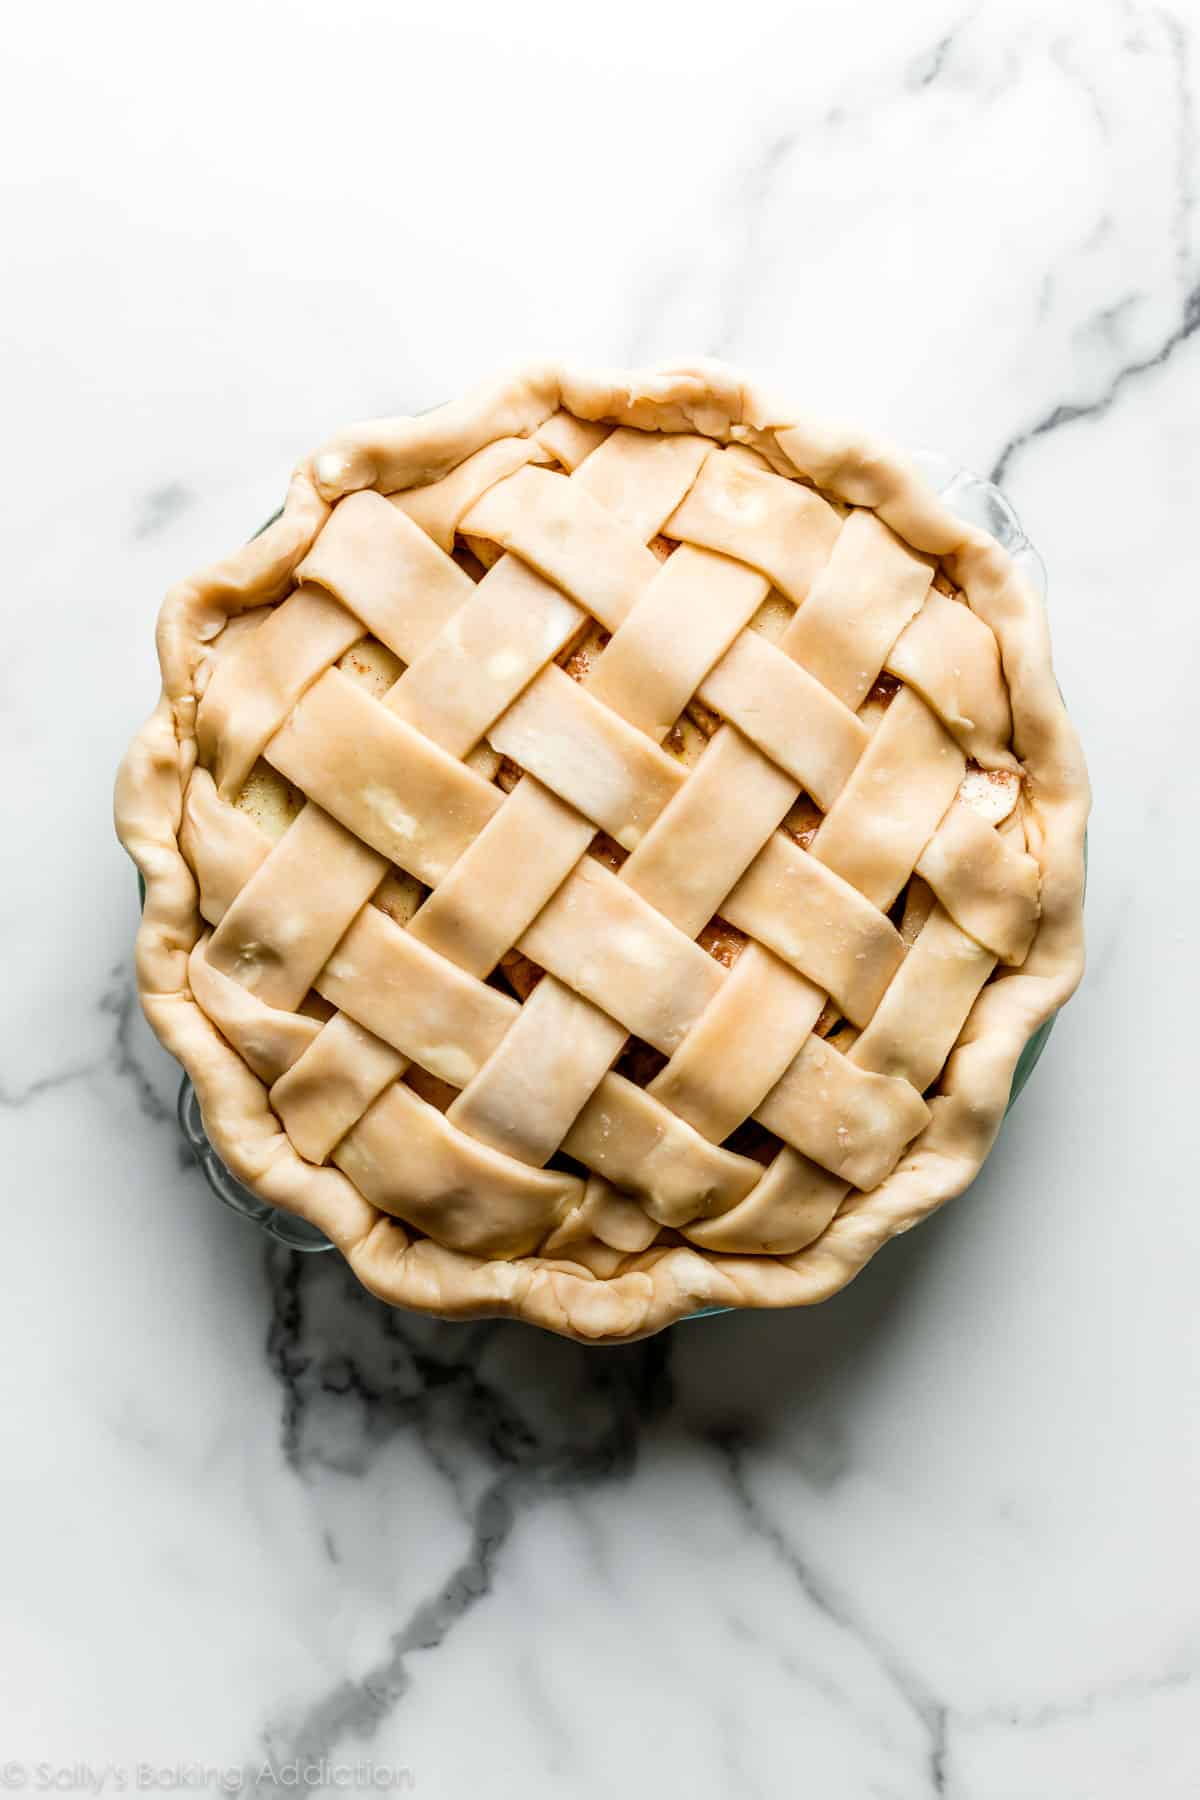
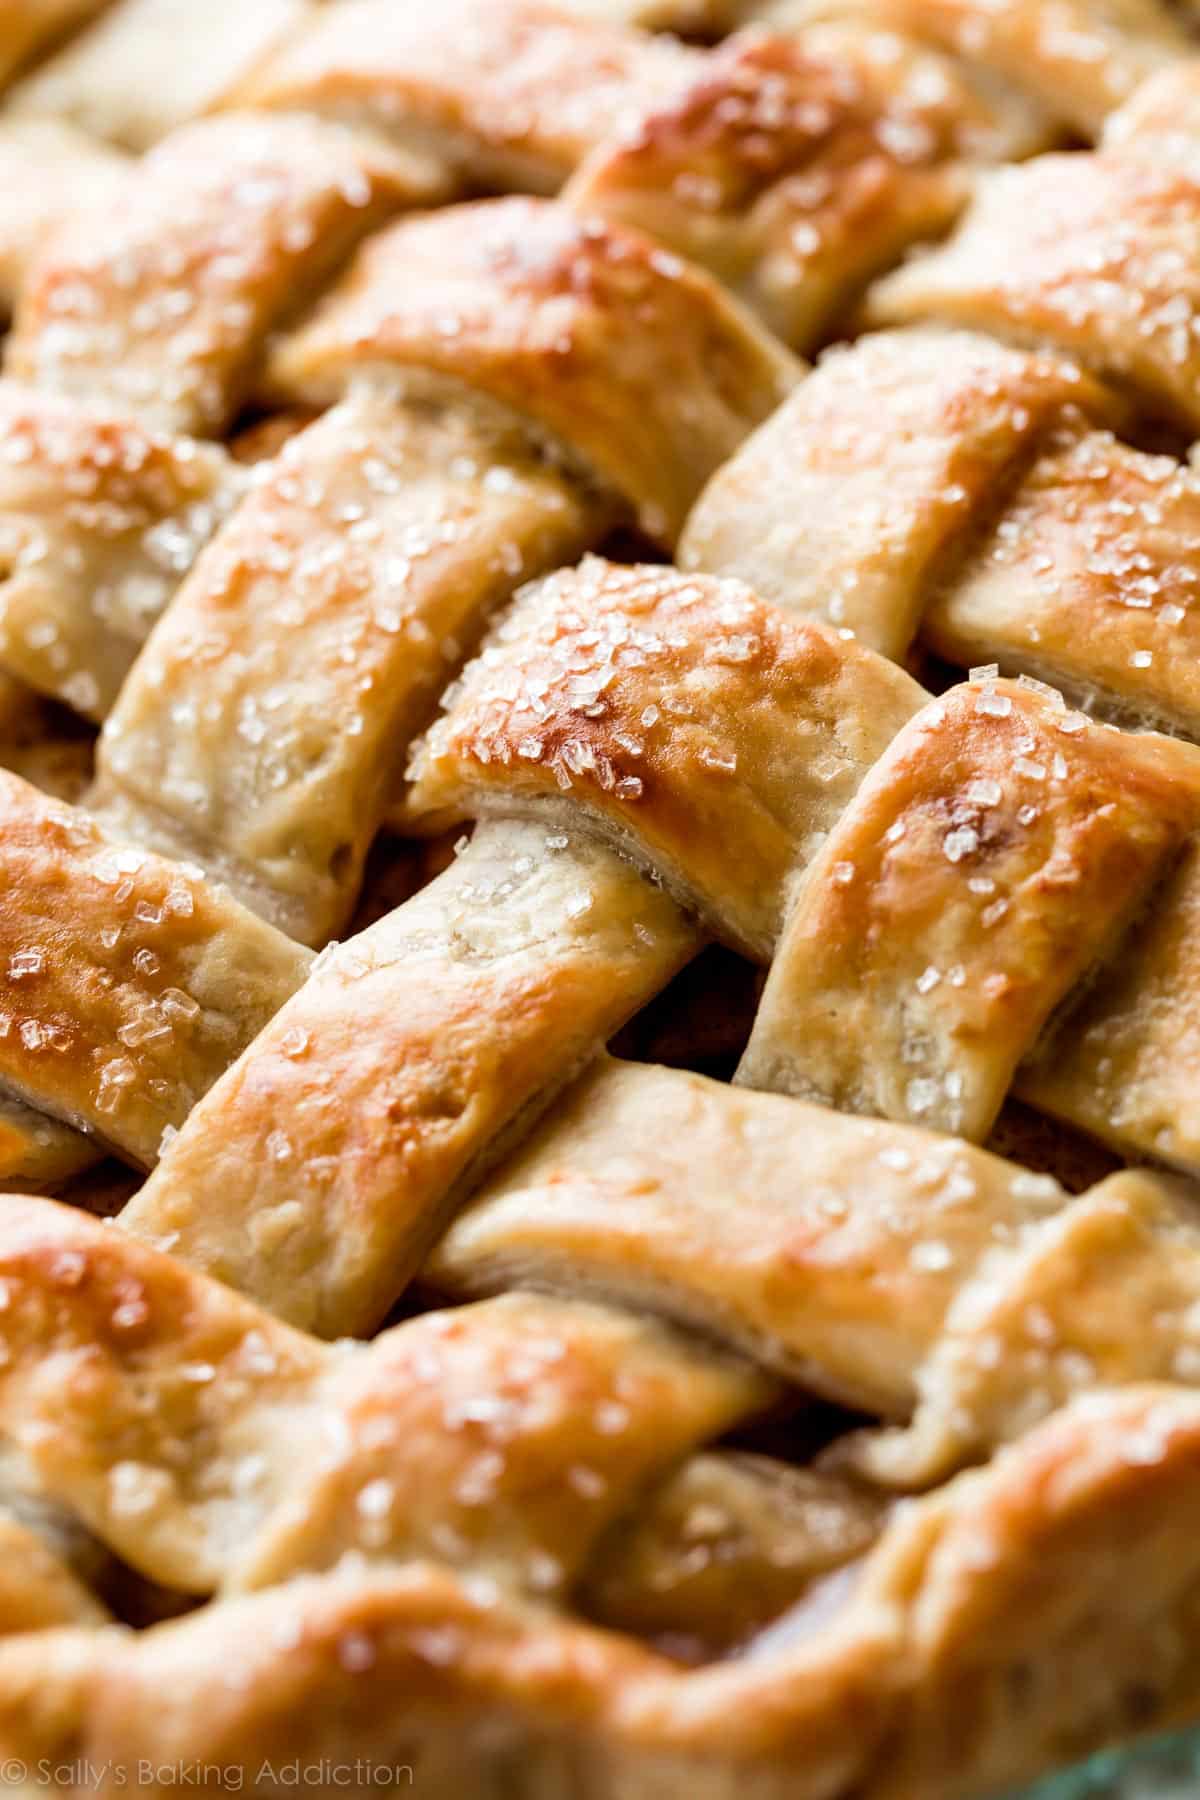
Lattice pie crust is weaved pie dough. Strips of dough lay on top of pie filling, layered over and under one another to create a basket weave appearance. Not only is latticing a beautiful way to decorate a pie, the holes between the strips allow steam to escape. Without these vents, the fruit pie filling could cause a mini explosion in your oven. It’s not pretty!!
Here’s What You Need:
I have a full list of the best pie baking tools, but for this lattice design here’s exactly what you will need:
- Quality pie crust
- Extra flour
- Rolling pin
- Ruler (or just eyeball it!)
- Pizza cutter or sharp knife
- Pastry brush for egg wash
Start with Quality Pie Dough
Lattice will not work unless you begin with quality pie dough. Don’t sabotage your efforts from the start. I recommend my favorite pie crust, which uses both butter and shortening for flavor and stability, or my all butter pie crust. Either are excellent choices for your lattice pie crust because they’re sturdy, yet bake up incredibly light and flaky.
I used my butter and shortening pie crust in these photos.

Troubleshooting Pie Crust
- Pie crust is tough: Tough crusts are the result of not enough fat in the crust, as well as overworking the dough.
- Don’t have enough pie dough: To ensure you have enough pie dough for overhang and a pretty topping, roll your dough out to a 12-inch circle, about 1/8 inch thick.
- Pie dough is dry & cracking around edges when rolling: Use enough ice water when preparing the pie dough. If it’s too late and you notice the edges of your pie crust are cracking as you roll it out, dip your fingers in ice-cold water and meld the edges back together. Wait a minute, and then try rolling out again.
- Pie dough is falling apart & crumbling when rolling: Try adding more water AND more flour. Sprinkle a tiny bit of ice water and flour onto the cracks and crumbled pieces, and gently work it all in with your fingers. Wait a minute, and then try rolling out again.
How to Lattice Pie Crust
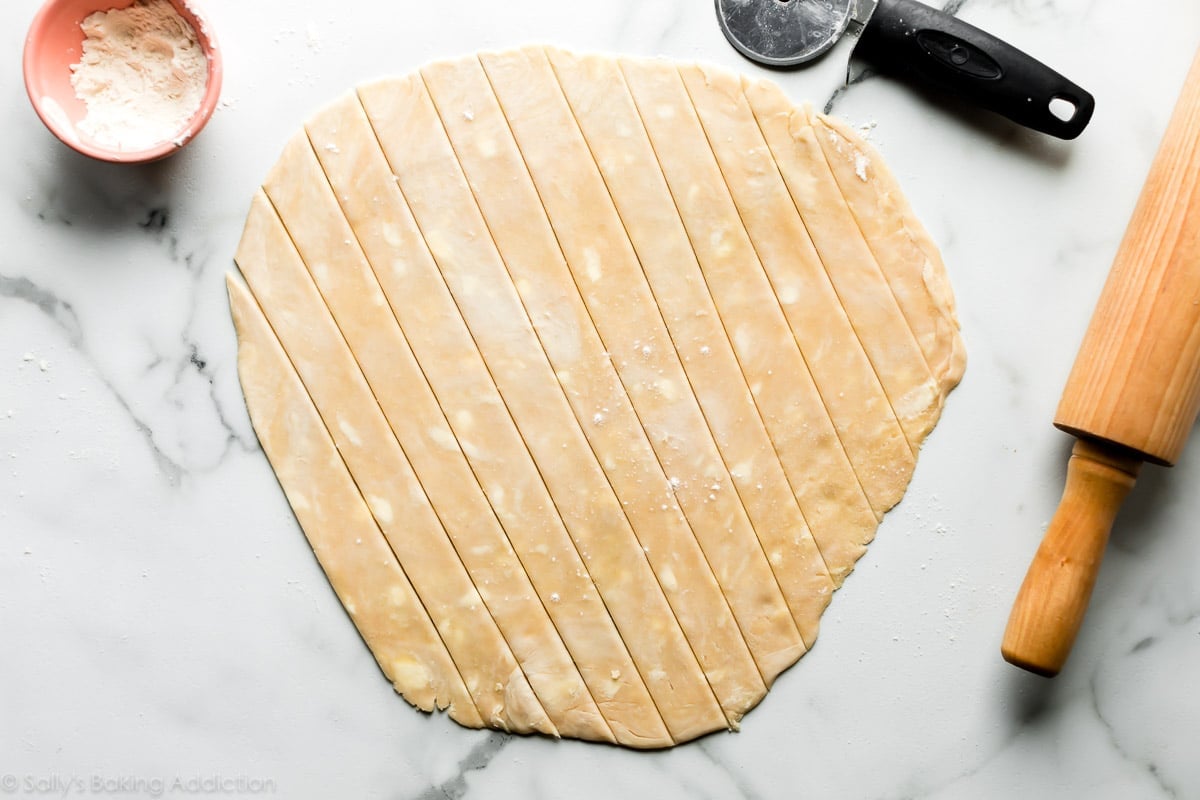
- Roll out pie dough into a 12-inch circle.
- Cut dough into strips. To keep things simple, I recommend 12-1 inch strips.
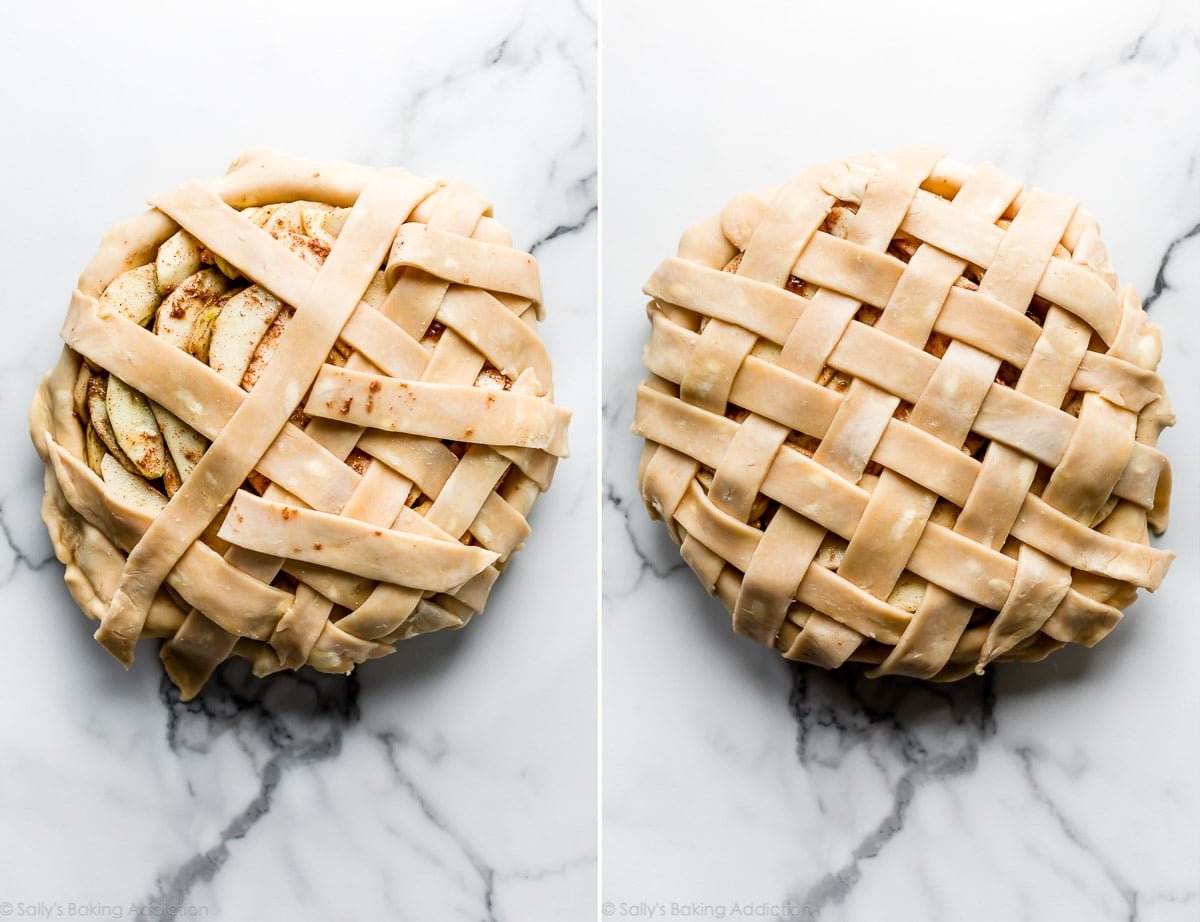
- Lay 6 strips vertically and evenly spaced on top of the filled pie. Use the longer strips in the center of the pie and the shorter strips on the ends.
- Fold every other strip (3 in total) all the way back so they’re almost falling off of the pie. Lay one of the 6 unused strips perpendicular on top. Unfold the 3 vertical strips back so they lay over the perpendicular strip. You have 5 strips left.
- Fold the other 3 vertical strips back. Lay one of the 5 unused strips perpendicular on top. Unfold the 3 vertical strips back so they lay over the perpendicular strip. You’re now beginning to see the beautiful woven pattern!
- Repeat with last 4 strips, weaving the strips over and under one another.
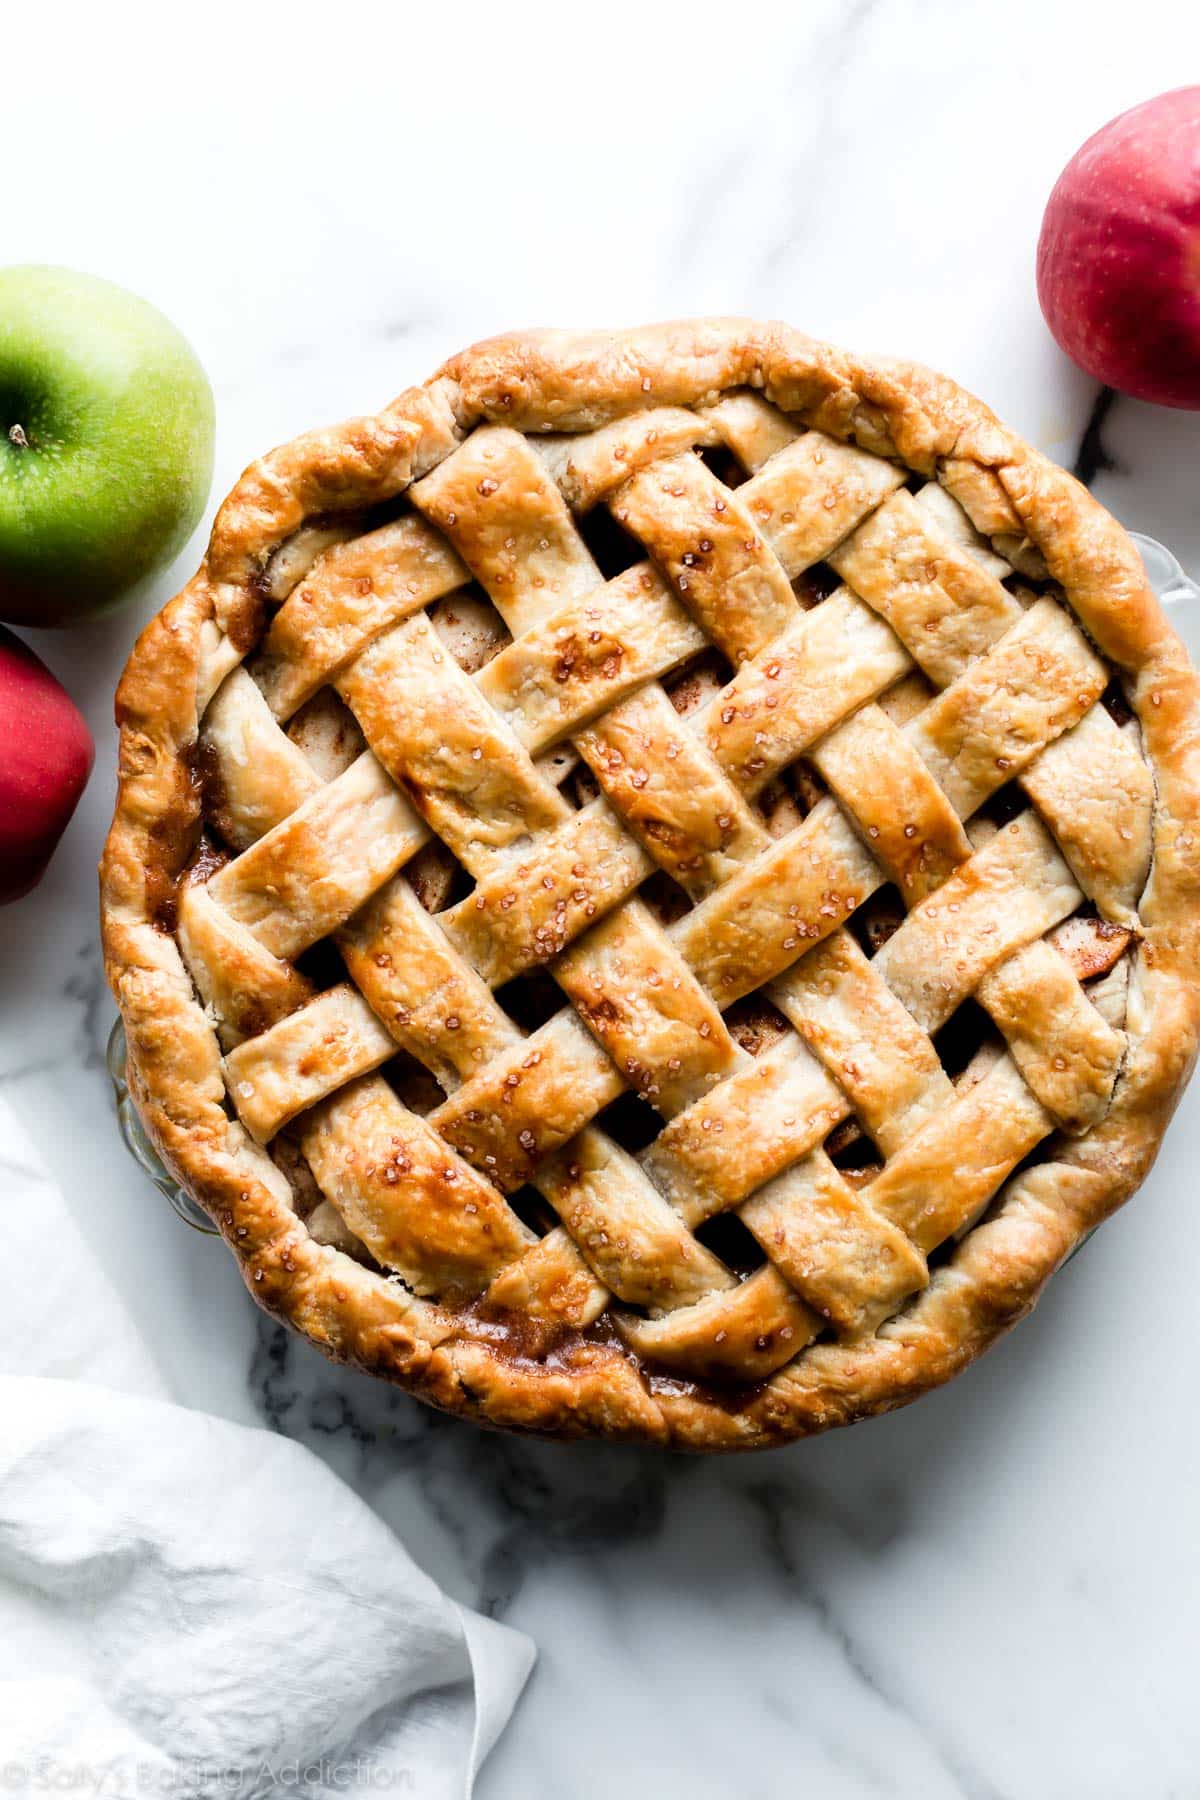
- Fold the excess dough that lays over the edges of the pie back and pinch them with the bottom pie crust. Crimp or flute the pie crust (I fluted the crust in these photos), then brush with egg wash (egg + milk) and sprinkle with a little coarse sugar. This adds a lovely sparkle and crunch!
- Refrigerate unbaked pie for 20 to 30 minutes prior to baking. This is an often overlooked step, but cold dough is guaranteed to hold the lattice shape.
Video Tutorial: Latticing Pie Crust
If you’re a visual learner, use this video tutorial to help understand the process.

My “Thick Edge” Trick
After you create the lattice, you’ll have excess pie dough around the circumference of the pie. Feel free to trim a lot of the excess dough, but if you want enough dough for a pretty edge to flute or crimp, don’t trim it too much or at all. Instead, fold the strips back onto the pie and pinch together with the bottom pie crust. I understand that may not make a ton of sense, but the video tutorial above shows how I do this.
You can also watch how I flute the edges using my thumb and index finger on one hand and my index finger knuckle on the other hand. Fluting pie dough seals the top and bottom crusts together with a lovely scallop design.
For extra details on this step, see my full tutorial on how to crimp and flute pie crust.
2 Final Success Tips
- Keep dough cold when rolling out: Warm pie dough is unworkable. If the dough becomes too warm when you’re rolling it out, stop what you’re doing, pick it up as gently as you can, put it on a plate or small baking sheet, and then over and refrigerate it for 10-20 minutes.
- Don’t Overthink: Your pie will be beautiful and taste amazing even if your lattice is crooked or uneven. Latticing takes practice. The more you do it, the better you become!
Homemade Pie Recipes
Each have a lattice crust on top.
- Classic Apple Pie
- Salted Caramel Apple Pie
- Peach Pie – this one includes braided pie crust using my How to Braid Pie Crust tutorial
- Caramel Pear Pie
- Apple Cheddar Pie
- Cherry Pie
- Blueberry Peach Pie
- Strawberry Rhubarb Pie
- Blueberry Pie
- Apple Cranberry Pie
- Triple Berry Pie

How to Lattice Pie Crust
- Prep Time: 45 minutes
- Cook Time: 0 minutes
- Total Time: 45 minutes
- Yield: 1 pie
- Category: Dessert
- Method: Decorating
- Cuisine: American
Description
Follow this tutorial for a beautiful lattice pie crust topping. Watch the video tutorial and read through all my tips before beginning.
Ingredients
- Homemade Pie Crust (or use my all butter pie crust)
- all-purpose flour for work surface
- egg wash: 1 large egg beaten with 1 Tablespoon (15ml) milk
- coarse sugar for sprinkling on crust
Instructions
- Watch the video tutorial above for a visual of each step. (Latticing is better seen than explained!)
- Make dough in advance: Prepare my pie crust recipe through step 5. Chill in the refrigerator overnight.
- After you roll out the bottom crust and fill your pie, it’s time to lattice. On a lightly floured surface with a floured rolling pin, roll out top pie crust into a 12-inch circle. It’s ok if it’s not a perfect circle, as long as it’s 12 inches in diameter.
- Cut dough into strips. To keep things simple, I recommend 12 1-inch strips.
- Lay 6 strips vertically and evenly spaced on top of the filled pie. Use the longer strips in the center of the pie and the shorter strips on the ends.
- Fold every other strip (3 in total) all the way back so they’re almost falling off of the pie. Lay one of the 6 unused strips perpendicular on top. Unfold the 3 vertical strips back so they lay over the perpendicular strip. You have 5 strips left.
- Fold the other 3 vertical strips back. Lay one of the 5 unused strips perpendicular on top. Unfold the 3 vertical strips back so they lay over the perpendicular strip. You’re now beginning to see the beautiful woven pattern!
- Repeat with last 4 strips, weaving the strips over and under one another.
- Fold the excess dough that lays over the edges of the pie back and pinch them with the bottom pie crust to seal. Crimp or flute the edges of the pie, then brush with egg wash and sprinkle with a little coarse sugar. This adds a lovely sparkle and crunch!
- Refrigerate unbaked pie for 20–30 minutes prior to baking. This is an often overlooked step, but cold dough is guaranteed to hold the lattice shape.
- Bake the pie as directed in your recipe. I recommend my apple pie.
Notes
- Special Tools (affiliate links): Rolling Pin | Ruler (or just eyeball it) | Pizza Cutter or Sharp Knife | Pastry Brush


Reader Comments and Reviews
I’ve made this for two years in a row and have had the same result. The dough rolls out great, and it tastes great, but even though I chill the entire pie in the freezer about 20 mins or more before baking, the crimped edges “melt” in the oven. Parts of it fall off onto the oven floor. So it ends up looking rather sloppy. The latticing is lovely but the edges are rough looking. Help?! I’m in the UK so Im wondering if it’s a butter/shortening ratio or fat content issue. It’s sad though to go through all that work and then have it turn out so scrappy looking, haha. Any tips appreciated!
Hi Christa! European style butter is wonderful in cooking, but we find it’s difficult to use in baking recipes– especially pie crust. Its higher fat percentage, while making the butter tasty, creates too much grease in doughs and is likely the culprit for your crust troubles. It may be best to search for a pie crust recipe that was specifically written for European style butters. Let us know if you find one you love!
Hi! When you make a pie using your pie dough recipe and lattice method (I’m doing apple pie) can I make it Wednesday night and put it in the fridge and bake it the next day?
Hi Kinga! It depends on the pie, but we usually do not recommend that because the bottom can end up soggy. Best to bake after assembling – you could always re-heat before serving!
Ok thank you!! What is the easiest way to re heat it after I bake it? Leave on counter after baking it until the next day and then pop in oven for a bit before serving on the day I want to serve it?
Yes!
This turned out AMAZING!!!!! I’m entering it in a pie contest tonight, and I hope it wins because it is great!
I’ve been having a terrible time with pie gap lately in my all shortening recipe that I’ve used for years. Even cutting larger vents in the top crust isn’t helping or cooking the filling so it’s nice and hot before adding the top crust. Will an all butter crust and doing lattice help with this? Any advice will be greatly appreciated!
Hi Kelley! Gaps can usually happen if (1) there isn’t enough filling and/or (2) the pie was over-baked so the filling softened too much and lost shape. Do you think you over-baked the pie? If not, you can try increasing your filling a bit and packing it tighter into the pie dish. We hope this helps!
Thank you for the quick reply! I made another pie making sure the apple filling was hot and packed down using your all butter crust and watched it very carefully while in the oven to avoid over baking. It was for a friend so I used a disposable pan and then placed the pan in a glass pie plate on a cookie sheet hoping that would help with the bottom browning and catch any over flow of butter from the top crust. It was perfect!
Made your carrot cake yesterday. Hubs said best cake he ever ate!!! Today I did the apple pie w the skinny/fat lattice. No video to be found! I adlibbed…
Hi Anne! Do you see the video tutorial under the recipe instructions?
Went apple picking today so obviously I had to try my hand at Sally’s lattice apple pie, I would love to send a picture of it,it’s perfect! And the recipe is spot on.I did add about 15 caramels cut in small pieces! I’m loving my new Sally’s Baking 101 ♥️