

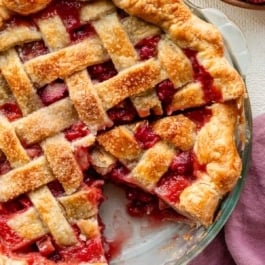
This strawberry rhubarb pie combines juicy strawberries, tart rhubarb, and a homemade flaky all-butter pie crust for a classic spring and summer dessert. The filling bakes up thick and jammy, so every slice holds its shape beautifully. As always, letting the pie cool completely before slicing is non-negotiable for a thick, set filling.
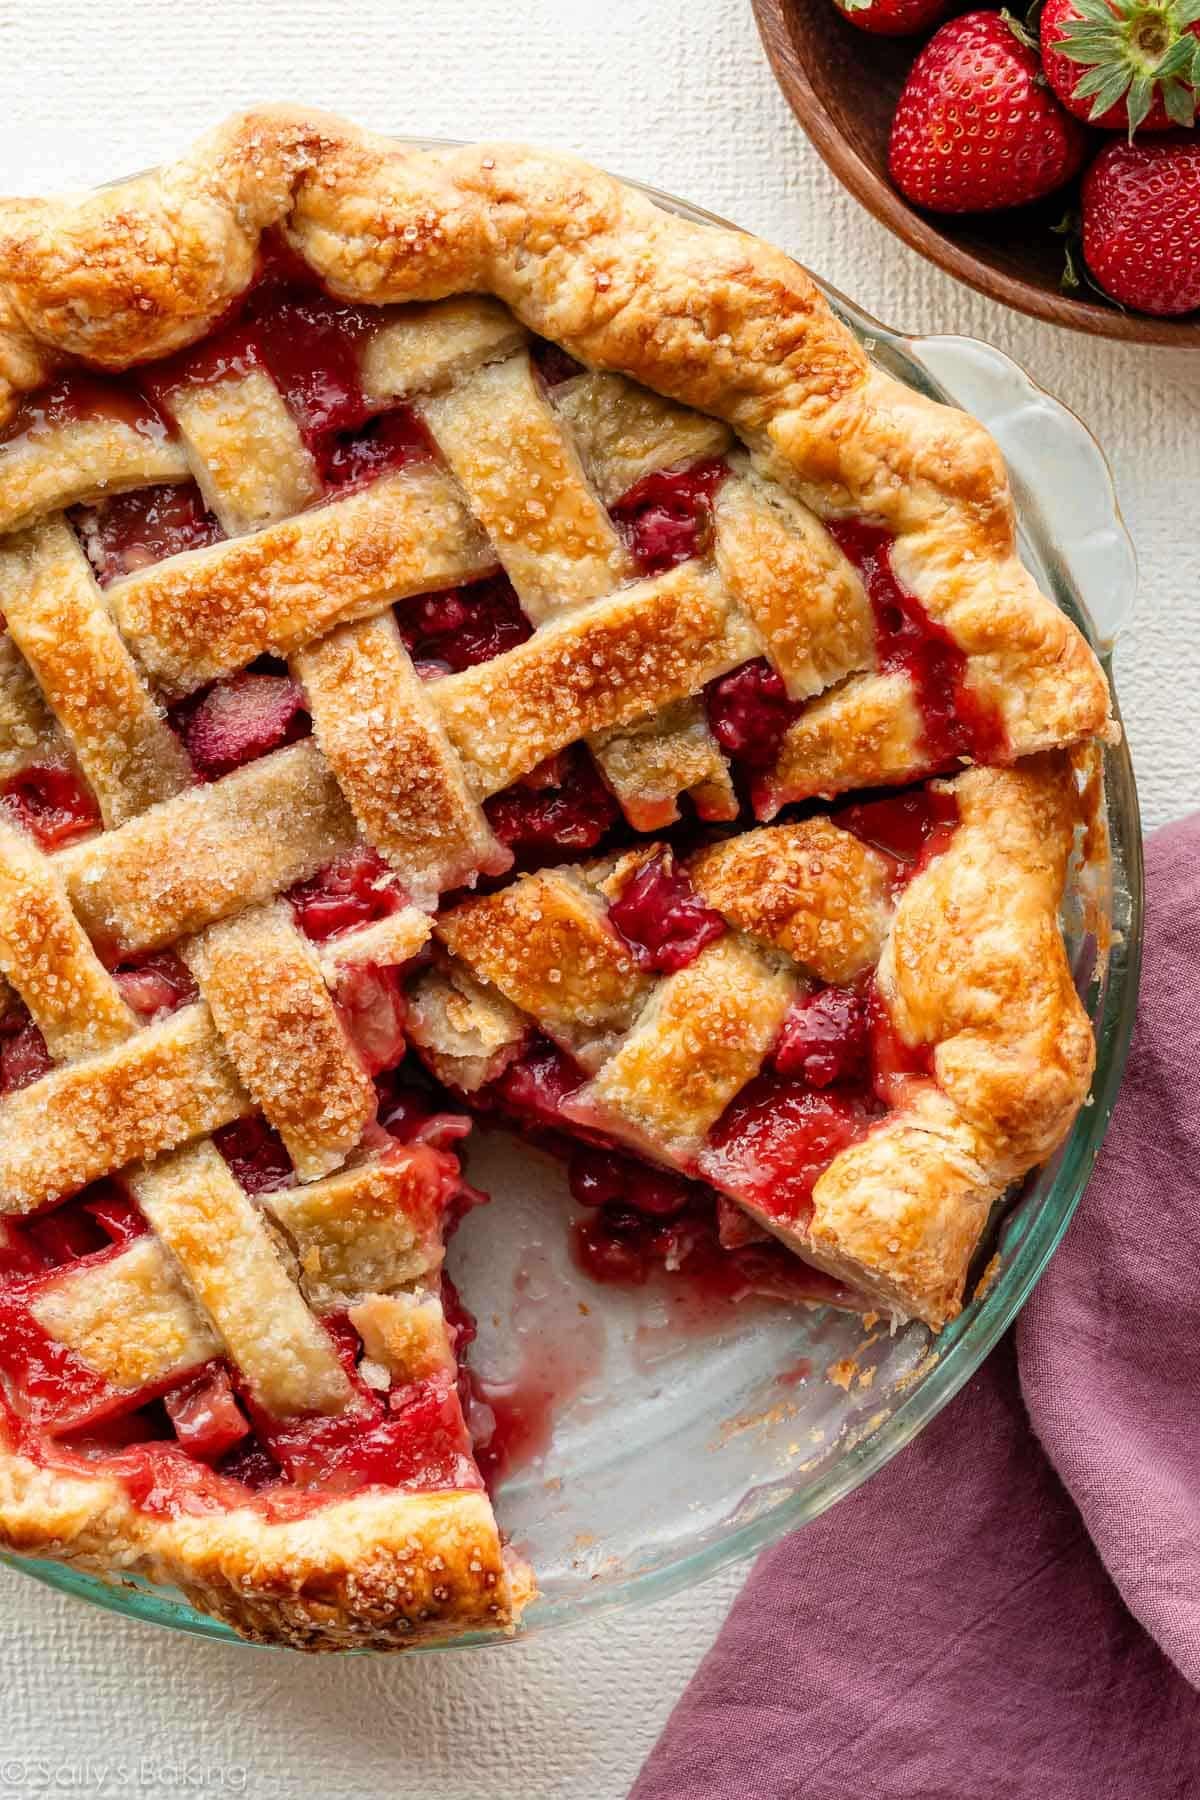
I originally published this recipe in 2016 and have since added new photos, a video tutorial, and more success tips, including an optional stovetop step that helps guarantee a thick pie filling.
Sweet strawberries and tart rhubarb are the ultimate spring pie duo, and this updated strawberry rhubarb pie recipe gets the balance just right. With a flaky all-butter pie crust and a thick, jammy filling that slices beautifully, this is the kind of classic fruit pie that’s worth the wait.
The filling uses strawberries, rhubarb, a touch of orange juice, and just enough cornstarch to keep the pie from turning soupy, which is a common issue with strawberry rhubarb pie. If you’ve ever had a strawberry rhubarb pie turn into a runny mess when you slice it, follow this recipe to prevent that from ever happening again.
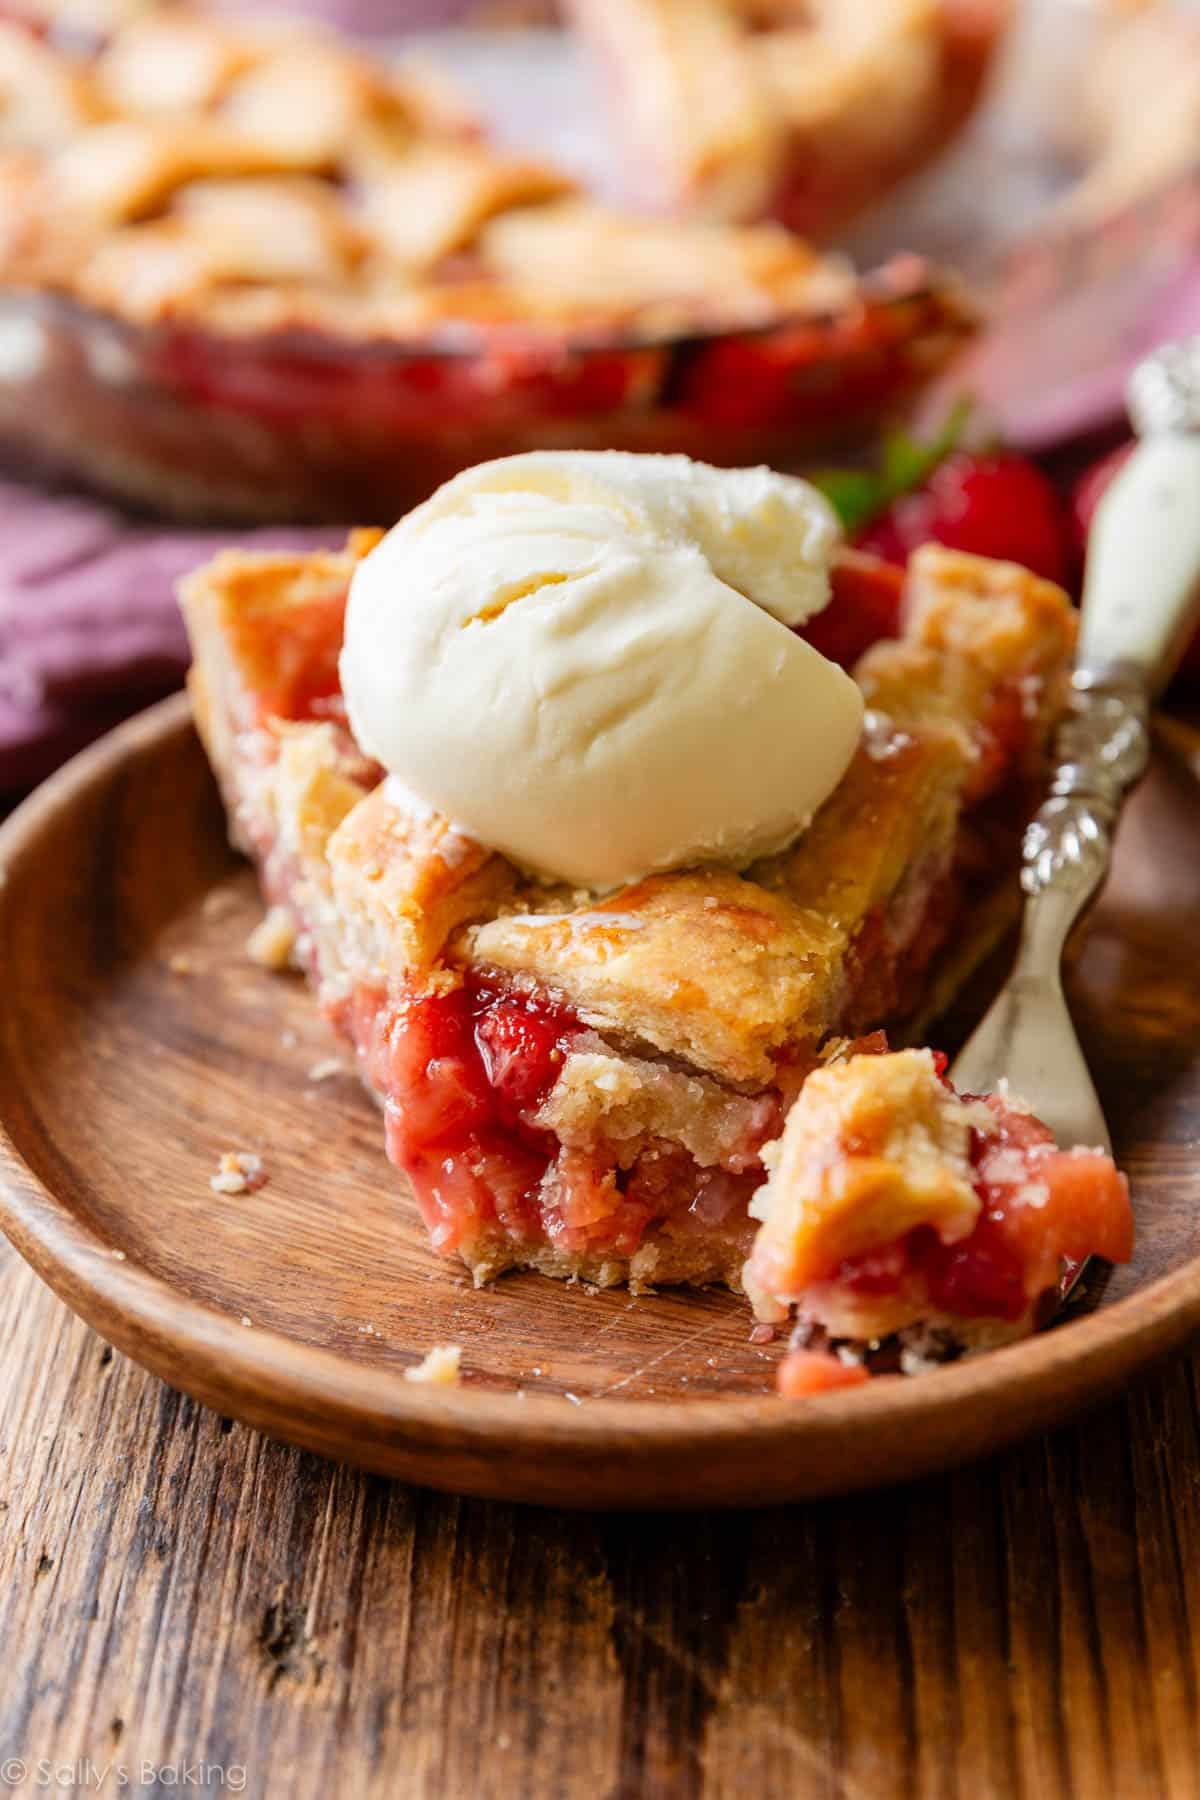
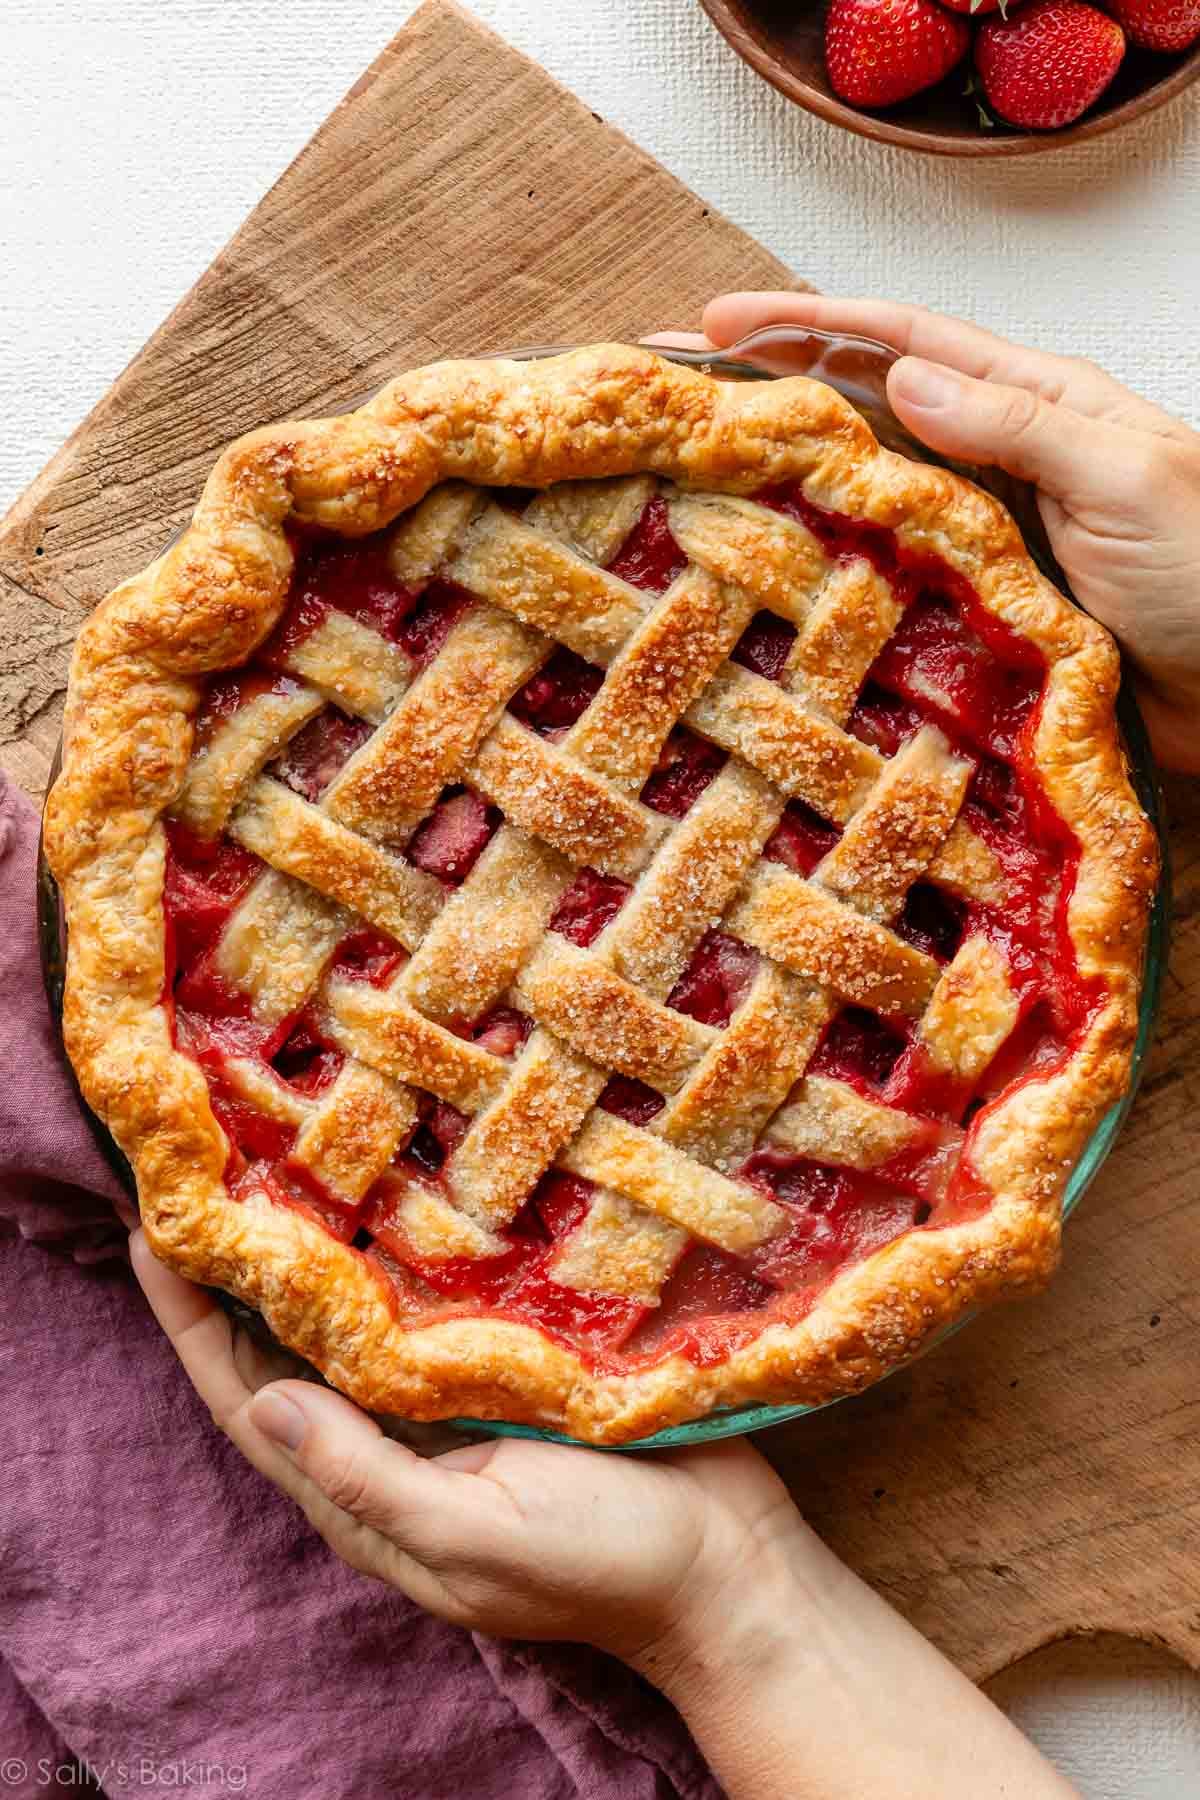
Why You’ll Love This Strawberry Rhubarb Pie
- Perfectly balanced sweet-tart flavor from fresh strawberries and rhubarb
- Thick, jammy filling that slices easily
- Flaky, buttery homemade pie crust
- A wonderful make-ahead spring or summer dessert
Start With the Pie Crust
A sturdy, flaky pie crust is essential for holding the juicy filling. I like to use my all-butter pie crust, which makes enough for both a bottom and a top crust. You could also use this flaky pie crust instead, which uses a mix of butter and shortening.
Start the dough ahead of time because it needs to chill for at least 2 hours before rolling out.
Don’t want to mess with pie crust? If you have a copy of Sally’s Baking 101, see page 164 for a Simple Strawberry Rhubarb Crumble!
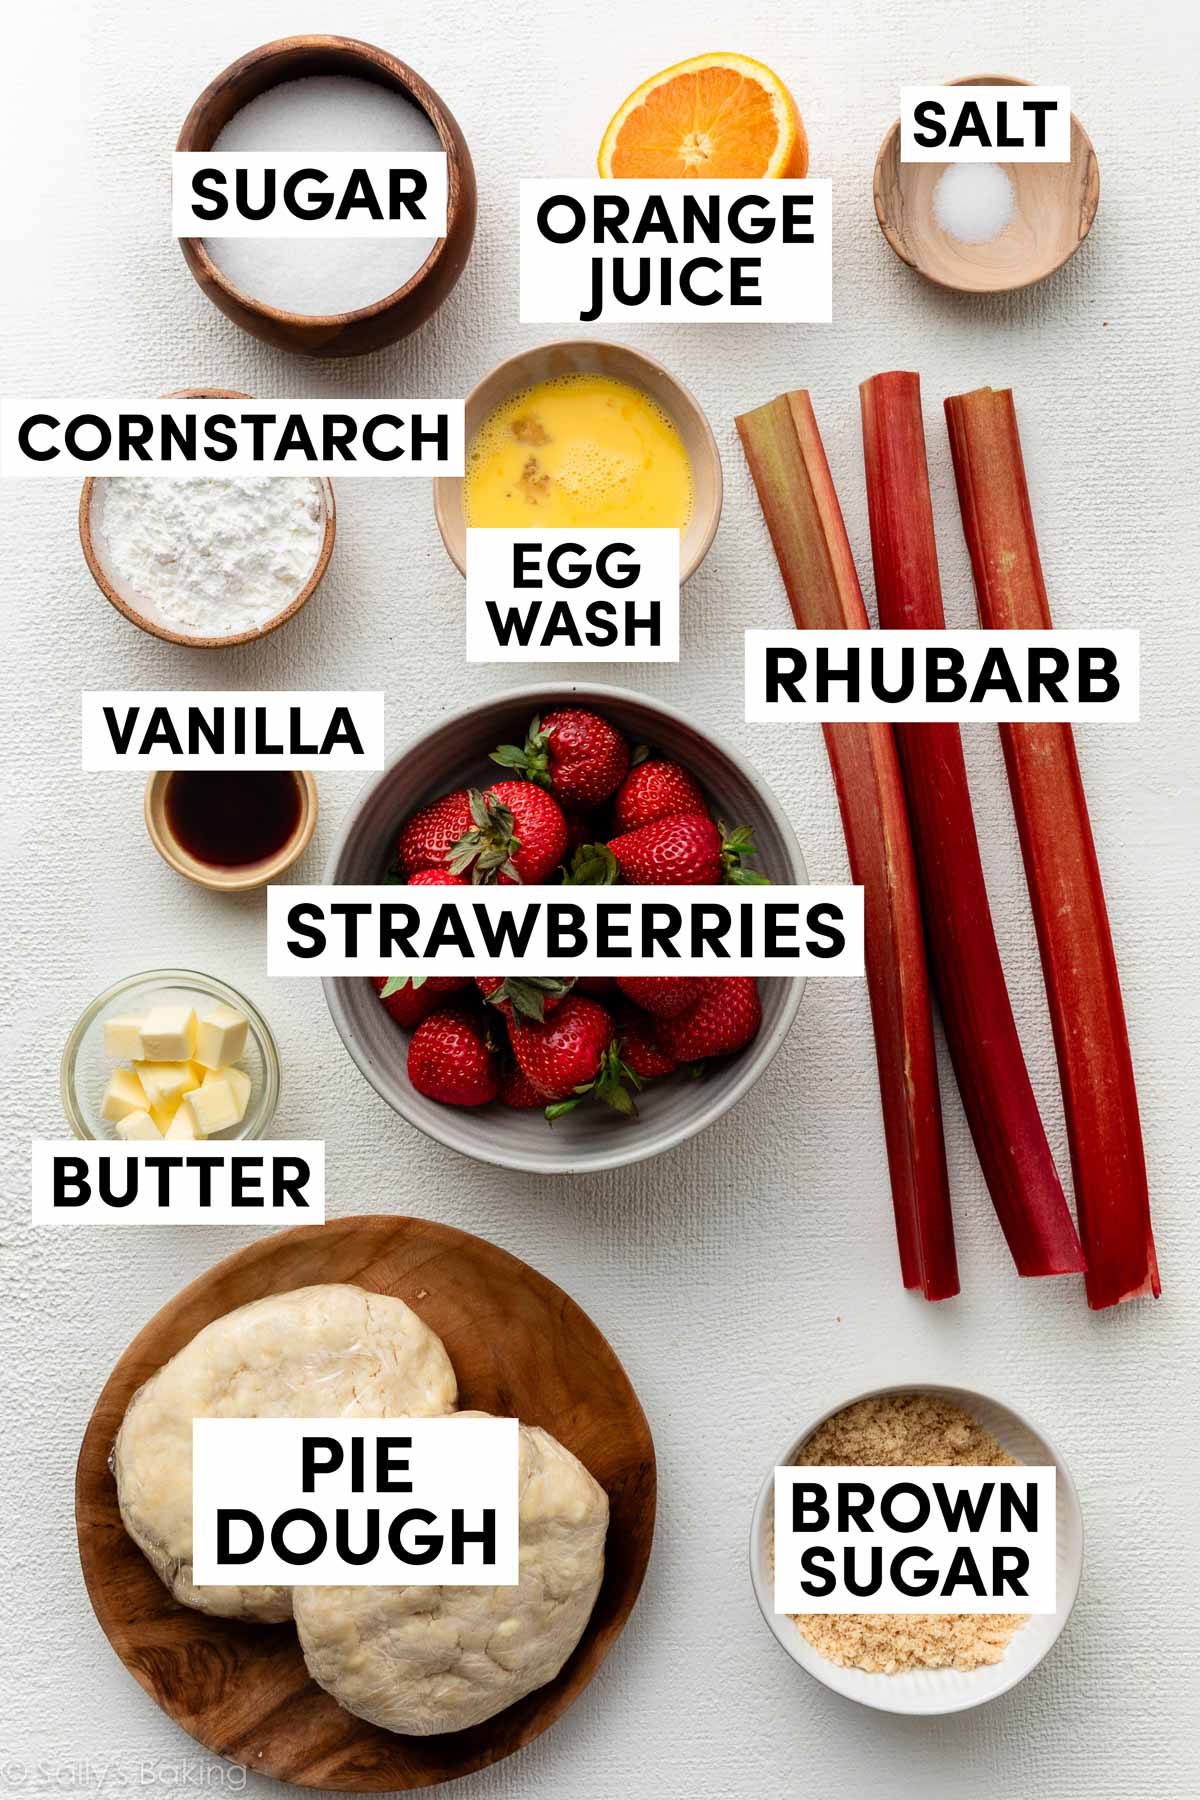
Ingredients That Make This Pie Work
- Fresh Rhubarb: Look for firm, crisp stalks with a deep pink or red color. Slice the rhubarb into uniform 1/2-inch pieces so it softens evenly while baking.
- Fresh Strawberries: Use ripe, flavorful strawberries and chop them into small chunks. Since strawberries release more liquid than rhubarb, I use slightly more rhubarb than strawberries for the best filling consistency.
- Sugar: I use both white and brown sugar here, for some flavor depth as well as sweetening that tart rhubarb.
- Cornstarch: Our thickening agent—absolutely essential.
- Salt: To enhance and balance all the flavors.
- Orange Juice: A splash of orange juice brightens everything up and makes the flavors pop.
- Vanilla: Vanilla adds warmth and depth. It’s a great pairing in this strawberry vanilla crisp, too.
- Butter: Dot the pie filling with small cubes of cold butter before applying the top crust. Why? It adds buttery richness and actually helps prevent the formation of bubbles on the filling’s surface.
How to Prevent a Runny Strawberry Rhubarb Pie Filling
One of the biggest challenges with homemade strawberry rhubarb pie is excess liquid. Strawberries release a lot of juice while baking, which can lead to a runny filling. This recipe uses cornstarch to help thicken the liquid as the pie bakes, creating a filling that’s juicy but sliceable.
After you combine the filling ingredients together, set it aside and roll out the pie dough for your pie dish. During this time, your filling is already working as the sugar pulls juices from the fruit.
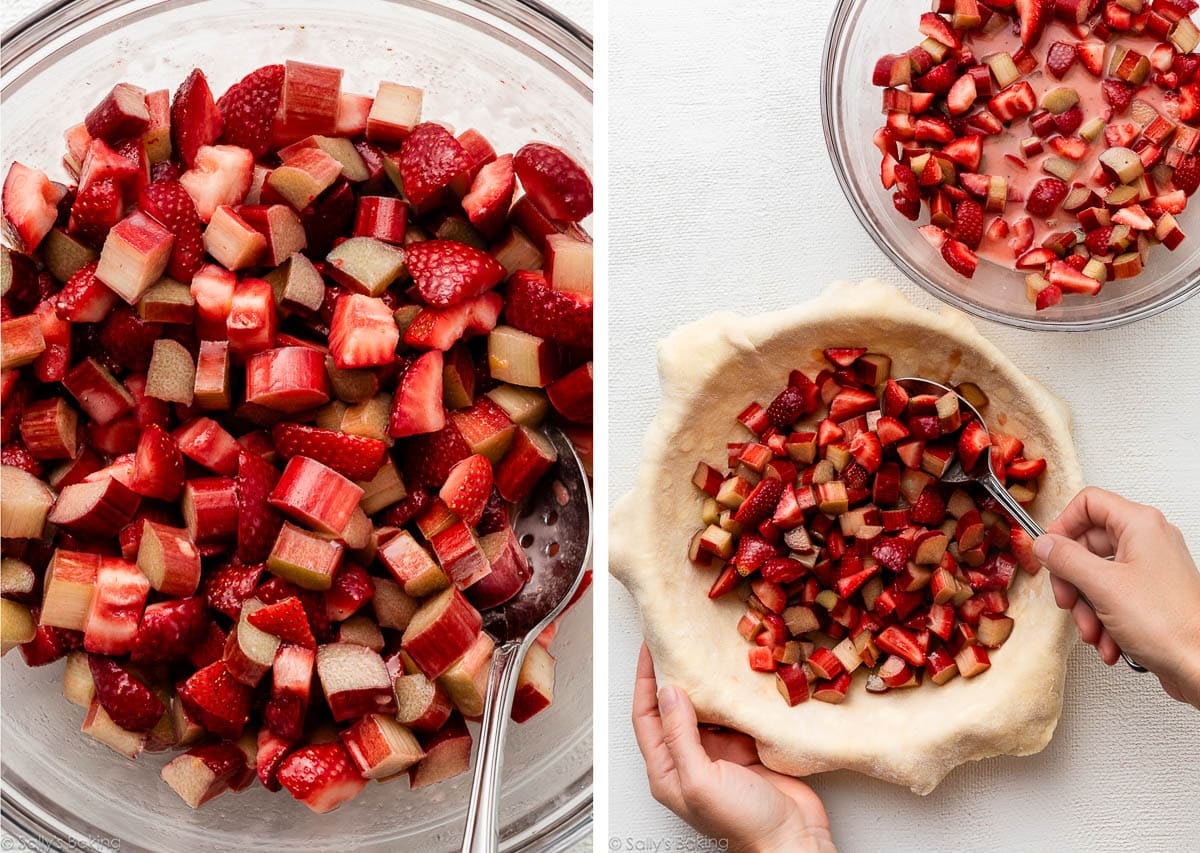
When you’re ready to assemble your pie, if you notice a lot of juice has pooled at the bottom of the bowl with the filling, it could be that your berries were extra ripe or you prepped the filling in advance and it sat for a while. If that happens, use a slotted spoon to transfer the fruit to the pie crust, but don’t discard the juice—it’s where a lot of the cornstarch ends up, and we need it!
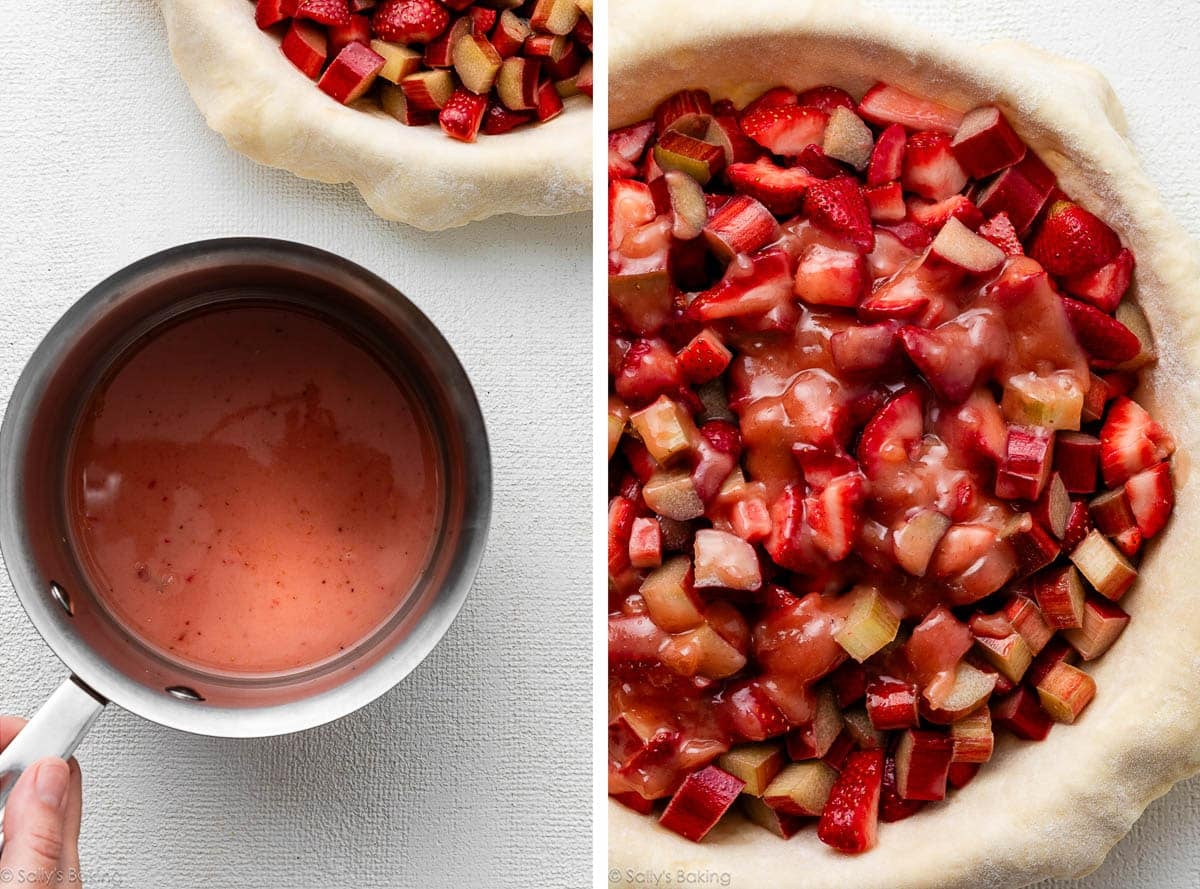
Instead, pour the juice from the bowl into a small saucepan. You may only have a few Tablespoons, but that juice is packed with flavor and cornstarch, so don’t waste it. Reduce the juices in a saucepan over medium-low heat, just for a few minutes until it thickens into a syrupy consistency, then let it slightly cool for about 5 minutes before pouring over the filling in the pie. Gently stir it into the filling as best you can.
This optional pre-cooking step helps activate the cornstarch before the pie goes into the oven, giving you extra insurance that the filling will thicken properly. I use this same method in my cherry pie and blueberry peach pie, and it ensures those juicy fruit fillings set up nicely.
After a few minutes on the stove, the juices will thicken quickly into a jammy, syrup-like consistency. Pour the thickened juices over the pie filling, then gently stir and toss to distribute them throughout the filling:
Lattice Pie Crust
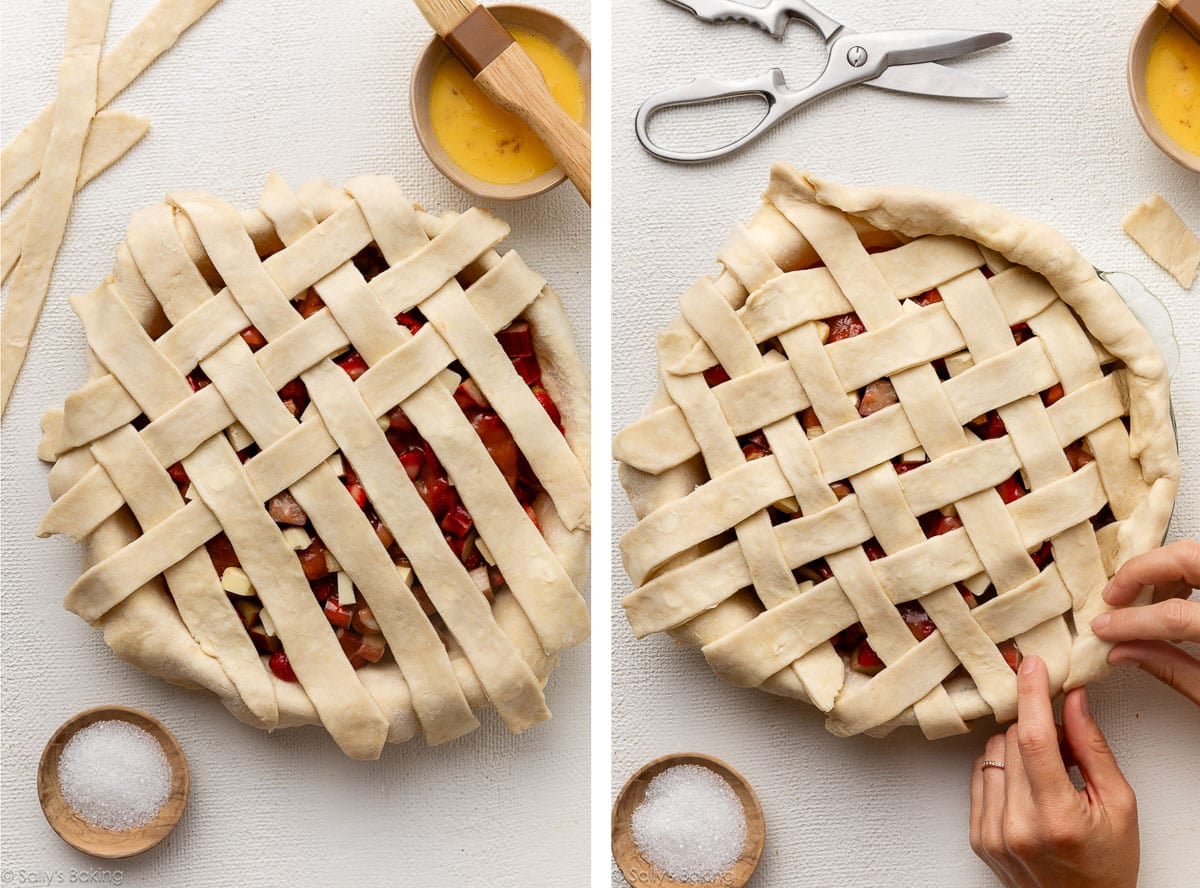
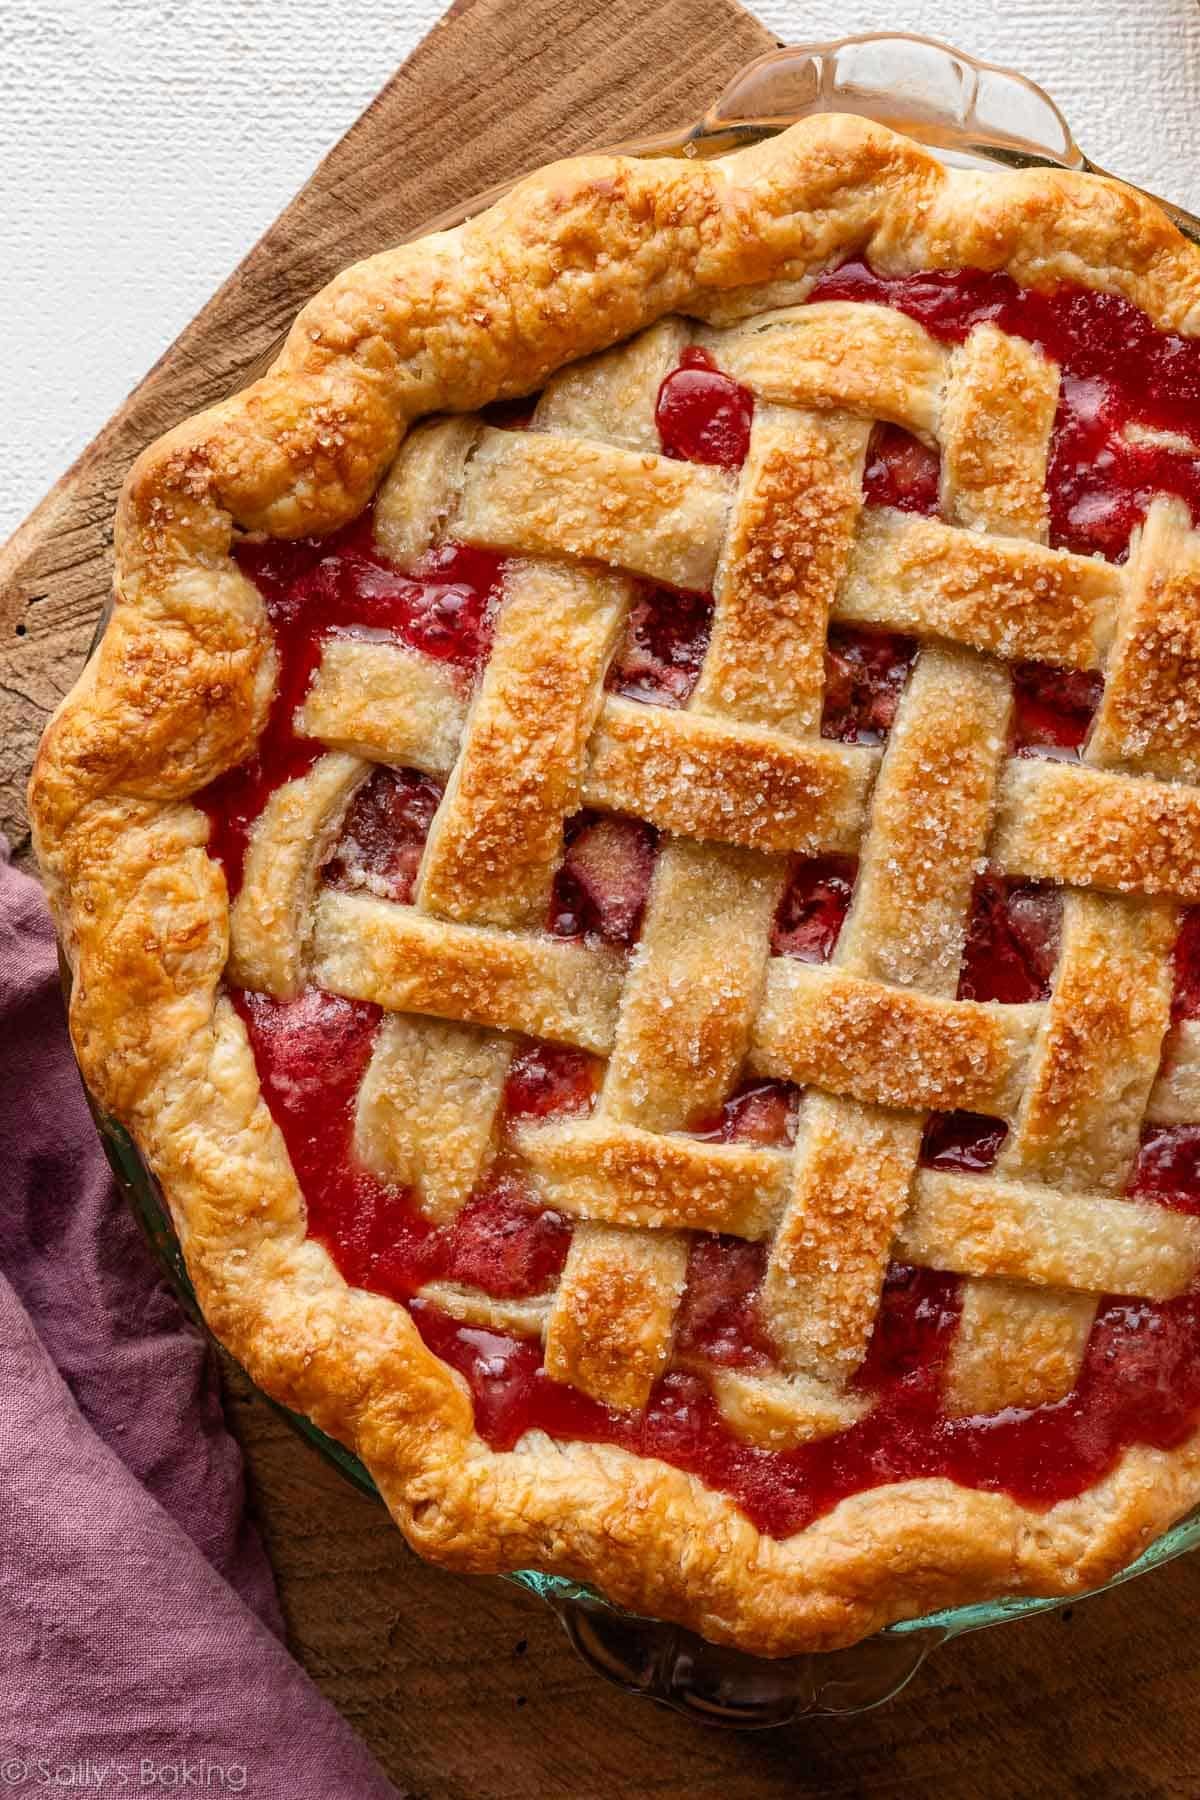
Now it’s time to add the top crust. A lattice topping not only looks beautiful, it also allows steam to escape so the filling can thicken properly. If you’re new to working with pie dough or need a little refresher, check out my tutorial on how to lattice pie crust.
You could even skip the top crust and use the crumble topping from our blueberry crumble pie. Lots of options!
Don’t Forget the Finishing Touches
These are quick and easy steps that make a world of difference, believe me!
- Butter: Dot the filling with small cubes of butter before adding the top crust. This adds richness, helps create a more cohesive jammy filling, and even helps prevent bubbles from forming on the filling’s surface. We do the same thing when we make peach pie.
- Crimp or flute the edges: Once your lattice is assembled, you’ll want to crimp or flute the pie crust to finish it off. I fluted the pie crust in these photos.
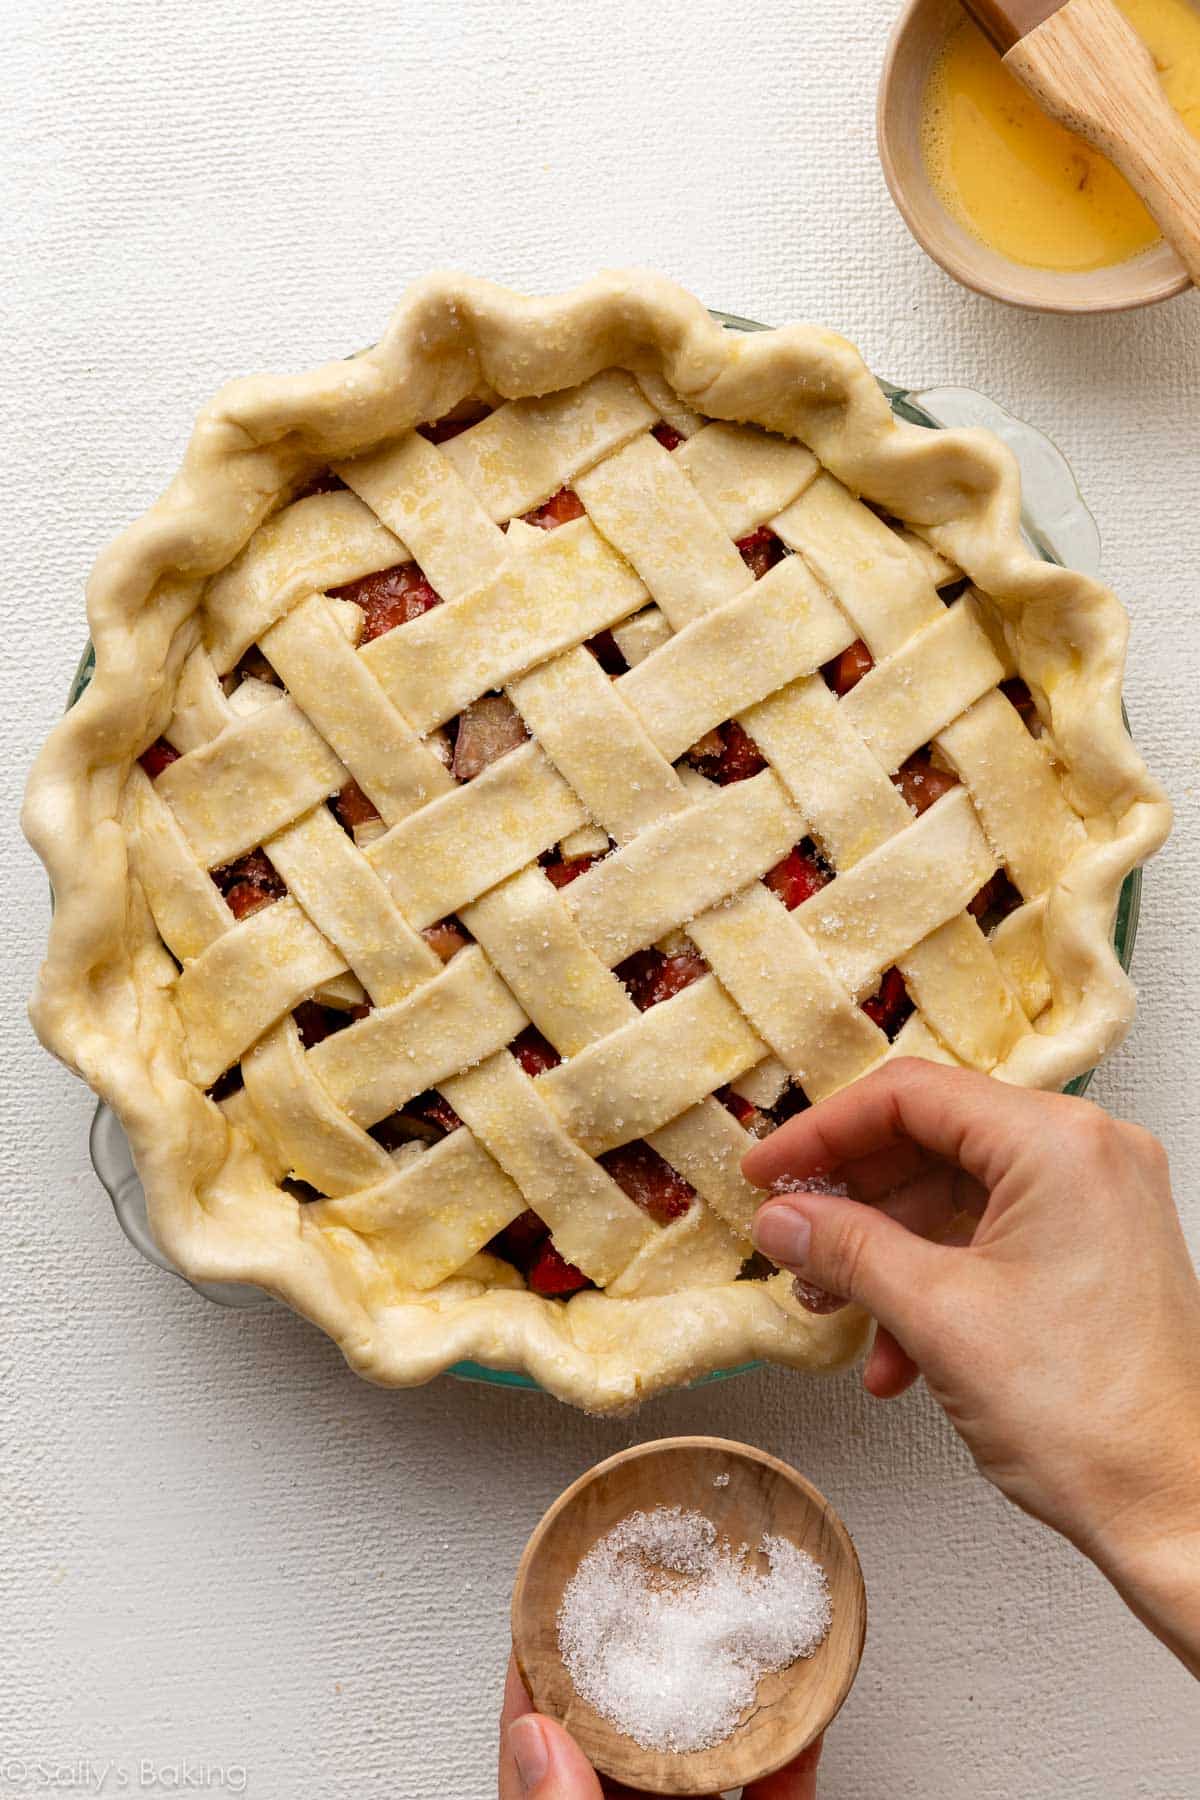
- Egg wash: An egg wash is simply an egg mixed with milk (or water) and you use it pretty much whenever you’re baking pie dough… as well as other shaped dough, such as stromboli, homemade bagels, brioche, choux pastry, croissants, etc. Egg wash helps develop that beautiful golden sheen. Without it, the baked dough looks dull and lackluster.
- Coarse sugar: This is optional, but I love finishing sweet pies with coarse sugar because it adds a little crunch and sparkle. I usually use Sugar in the Raw or these coarse sugar sprinkles, both of which can be found in the baking aisle of major grocery stores or online.
Now your pie is ready to bake! I recommend placing a baking sheet (lined with parchment for easy cleanup) on the rack below the pie, to catch any juices that may bubble over.
Start the Pie at a High Oven Temperature
Why do some pie recipes call for an initially hot oven temperature that you eventually lower? Baking this pie at 400°F (204°C) for 20 minutes helps set the pie crust shape, and activates the cornstarch in the filling (as does heating it on the stove). After that, reduce the oven temperature down to 350°F (177°C) to continue baking the pie. We use this same trick when we make blueberry pie and triple berry pie.
How to Tell When Your Pie Is Done
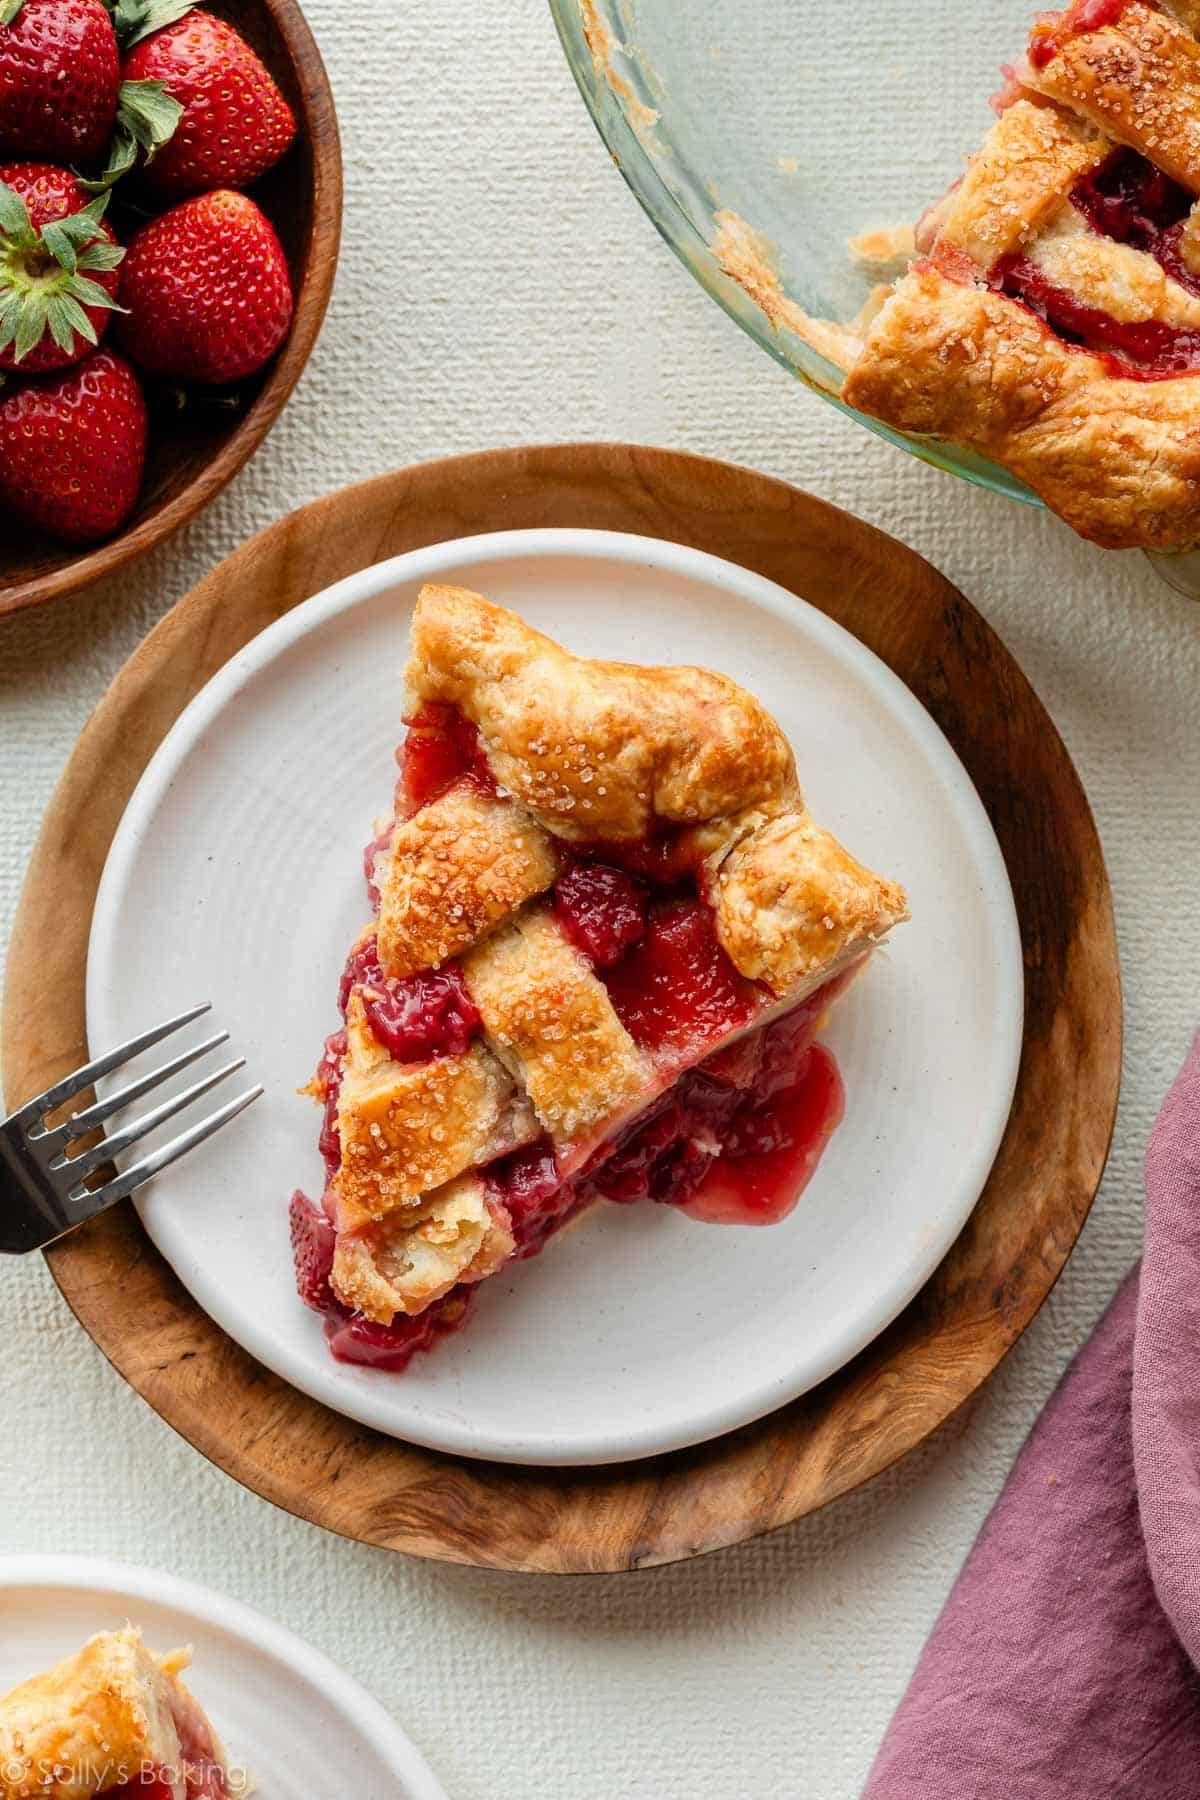
The pie is done when the filling is bubbling up through the lattice and around the edges of the pie. For a more accurate test of doneness, check the pie with an instant-read thermometer; the internal temperature should reach at least 200–212°F (just about 100°C).
This might be the hardest part: you have to let it cool for several hours. During this time, the filling thickens and fully sets. If you cut into it too soon, it will be runny—no matter how well you baked it.
Success Tips for the Best Strawberry Rhubarb Pie
- Pre-cook the filling juices on the stove to activate the cornstarch and reduce the liquid.
- Don’t shorten the long cooling time because the filling needs several hours to fully set.
- Bake the pie over a baking sheet to catch any bubbling-over juices.
- Start baking at a high temperature, then reduce the oven temperature and add a pie crust shield.
If you’re lucky enough to snag a slice of this pie during rhubarb’s short season, you’ll know why it tastes extra special. Rhubarb’s entire life goal is to end up in this dessert. Bake it while you can get it!
Strawberry Rhubarb Pie Tools




Instant-Read Thermometer
Strawberry Rhubarb Pie
- Prep Time: 3 hours
- Cook Time: 70 minutes
- Total Time: 7 hours
- Yield: 1 pie
- Category: Pie
- Method: Baking
- Cuisine: American
Description
This strawberry rhubarb pie combines sweet strawberries, tart rhubarb, and a flaky buttery pie crust with a thick, jammy filling that slices beautifully. Includes plenty of success tips to help prevent a runny pie filling.
Ingredients
- All Butter Pie Crust or Homemade Pie Crust (both recipes make 2 crusts, 1 for bottom and 1 for top)
- 3 cups (about 300g) sliced rhubarb (1/2-inch pieces)
- 2 and 1/2 cups (about 380g) chopped fresh strawberries
- 1/3 cup (67g) packed light brown sugar
- 1/3 cup (67g) granulated sugar
- 1/4 cup (32g) cornstarch
- 1/4 teaspoon salt
- 1 Tablespoon (15g/ml) orange juice
- 1/2 teaspoon pure vanilla extract
- 1 Tablespoon (14g) cold unsalted butter, cut into small cubes
- egg wash: 1 large egg beaten with 1 Tablespoon (15g/ml) milk
- optional: coarse sparkling sugar, for topping
Instructions
- The crust: Prepare either pie crust recipe through step 5. The pie dough needs to chill in the refrigerator for at least 2 hours before using.
- Make the filling: In a large bowl, stir the rhubarb, strawberries, brown sugar, granulated sugar, cornstarch, salt, orange juice, and vanilla together until thoroughly combined. Set aside.
- Roll out the chilled pie dough: On a floured work surface, roll out 1 disc of chilled dough (keep the other one in the refrigerator). Turn the dough about a quarter turn after every few rolls until you have a circle 12 inches in diameter. Carefully place the dough into a 9-inch pie dish. Tuck it in with your fingers, making sure it is smooth. Use a slotted spoon to transfer the filling into the crust. If you have leftover juices in the bottom of the bowl, reserve them for the next step. Place the pie in the refrigerator as you reduce the juice in the next step.
- Optional—reduce the juices: If your pie filling sat for awhile or if your strawberries are particularly juicy, a lot of liquid may pool at the bottom of the bowl. Pour the leftover liquid into a small saucepan. Cook over medium-low heat, stirring constantly, until the juice has slightly reduced and thickened, about 3–4 minutes. Cool for 5 minutes, then pour over the filling in the pie crust. Do your best to gently toss together with the fruit.
- Dot the pieces of cold butter on top of the filling. Place the pie in the refrigerator while you roll out the top crust.
- Arrange the lattice: Remove the other disc of pie dough from the refrigerator. Roll the dough into a circle 12 inches in diameter. Using a pastry wheel, sharp knife, or pizza cutter, cut the dough into strips about 1-inch wide. Carefully thread the strips over and under one another, pulling back strips as necessary to weave. See this post on How to Lattice Pie Crust for help with this step. Press the edges of the strips into the bottom pie crust edges to seal. Use kitchen shears or a small paring knife to trim off excess dough. Flute or crimp the pie crust edges.
- Using a pastry brush, lightly brush the top and edges of the pie crust with egg wash. Sprinkle the top with coarse sugar, if using. Place the pie in the refrigerator for 20–30 minutes while your oven preheats.
- Preheat oven to 400°F (204°C).
- Place the pie on the center oven rack, and place a baking sheet (lined with parchment paper for easy cleanup) on the rack beneath it, to catch any bubbling-over juices. Bake for 20 minutes. Keeping the pie in the oven, reduce the temperature to 350°F (177°C), add a pie crust shield, and bake for an additional 50 minutes or until the top crust is golden brown and the filling juices are bubbling around the edges and/or through the lattice. For a more accurate test of doneness, check the internal temperature with an instant-read thermometer; it should reach at least 200–212°F (around 100°C).
- Remove pie from the oven and place on a cooling rack. Cool for at least 5–6 hours before slicing and serving. The filling will be too juicy if the pie is still warm when you slice it.
- Cover leftovers tightly and store at room temperature for up to 2 days or in the refrigerator for up to 5 days.
Notes
- Make Ahead & Freezing Instructions: There are a couple ways to make this pie ahead of time. Prepare the pie in full 1 day in advance. After the pie cools, cover tightly and keep at room temperature. The pie crust dough can also be prepared ahead of time and stored in the refrigerator for up to 5 days or in the freezer for up to 3 months. Baked pie also freezes well for up to 3 months. Thaw overnight in the refrigerator and allow to come to room temperature before serving.
- Special Tools (affiliate links): Glass Mixing Bowl | Rolling Pin | 9-inch Pie Dish | Small Saucepan | Pastry Wheel or Pizza Cutter | Pastry Brush | Coarse Sparkling Sugar | Baking Sheet | Pie Crust Shield | Instant-Read Thermometer | Cooling Rack
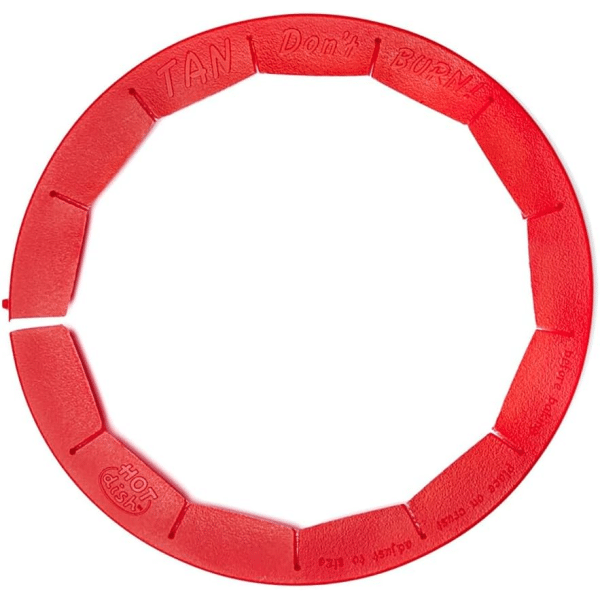
- DIY Pie Crust Shield: You can make your own disposable pie crust shield from a piece of aluminum foil. Fold a 12-inch square of foil in half, and cut a half-circle in the center of the folded edge. When unfolded, you’ll have a foil square with a circle cut out of the center. Place it over the pie and carefully tuck the edges down around the crust.
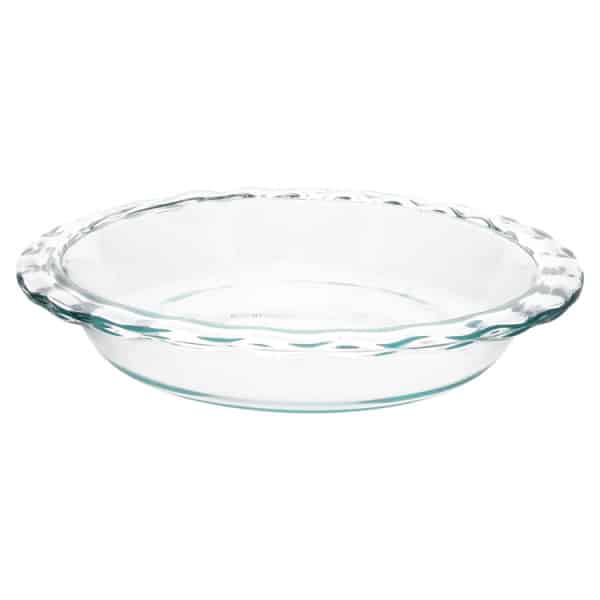
- Pie Dish: I strongly recommend baking this pie in a glass pie dish so you can easily monitor the bottom crust’s browning. Glass pie dishes also bake pie crusts more evenly than ceramic dishes.
- Use Fresh, Not Frozen: I strongly recommend fresh strawberries and fresh rhubarb in this pie. Frozen fruit releases too much excess liquid and can lead to a soupy filling.
- Why Are We Reducing the Liquid on the Stove? If your fruit is especially ripe or juicy, don’t skip the optional stovetop reduction step (step 4). It helps activate the cornstarch and guarantees a thicker filling.












Reader Comments and Reviews
While making this pie I started to add the vanilla but emptied the bottle, reached for another and put spearmint by mistake. I guess about 1/2 vanilla and 1/2 mint. I didn’t realize until it was baked and served. Huge hit!!! The flavors were amazing.
I make 300 pies for charity every year but I just made your Strawberry Rhubarb. That is the best tasting pie I have ever tasted in my life! So Delicious!
My daughter taught me to put about 1/4 cup of honey in the mixture and it is ideal in this pie.
I ALWAYS pick Sally’s Baking Addiction over all else. Even when cooking (not baking). She’s got somethin goin on, for sure.
Takes some love but it is well worth it. Pie came out perfectly.
Thank you! I used your idea for precooking the juices and it’s perfect. The one I made a few days ago fro Martha’s website was rhubarb soup.
The recipe is a little confusing because the italics Optional paragraph has a step that I can’t tell whether it’s optional or not. I think it’s not supposed to be optional:
“Dot the pieces of cold butter on top of the filling. Place the pie in the refrigerator while you roll out the top crust.”
Hi Lucy, so sorry for the confusion here! You are right, that’s not written very clearly. We will change the wording to clarify. Thank you for bringing this to our attention!
I’m out of Orange juice! – is it okay to skip it or do I need to wait until I have OJ?
Hi Lucy! A splash of orange juice brightens everything up and makes the flavors pop. We highly recommend using it, or you can use lemon juice instead. The pie may taste a bit flat without it.
Could you freeze the filling by itself for later?
Hi Jaimie, we don’t recommend it. The filling out release too much moisture. See Notes after the recipe for our recommended make-ahead instructions!
Thank you, Sally!! My honey asked me to make him one and I’ve made two in the past two weeks! This is mid new favorite pie! So grateful for your recipes and the videos really help me get it right. Sending you lots of love, you are the queen of baking!
Hello I love this recipe but can I make it into mini hand pies? Would it need any adjustments?
Hi Melissa! We haven’t tested this as mini hand pies, but it can certainly be done. Bake time will vary. Please do let us know how it goes!
Hey, Trina, I cooked the filling on the stove to a thick pudding consistency. I used puff pastry but tube croissants work, too. Cut into strip a, fill half and top w the other side. For wee pies, cut squares, line muffin tins with the pastry, fill and top with another square. Keep an eye on it while baking. I followed the pastry instructions.
as with every recipe of yours I’ve made, this came out perfectly.
Thank you!
When I served this pie for my husband’s birthday everyone loved it. The tart of the rhubarb and the sweet of the strawberries are perfect!
This was my first ever latticed fruit pie and it was such a banger! A labour of love but so worth it!! Lovely crust and yummy filling — not too sweet. My partner was very enamoured and had no notes. Thanks for a great recipe!
I would like to make this recipe with my community members. But I’ve harvested rhubarb and have been saving up enough strawberries from the gardens as they grow so everything will be frozen. I see you said you strongly recommend fresh but if we must, how would you recommend trying it, more cornstarch? Thawing the berries? Or kept frozen?
Hi Erin, While frozen fruit will not work, we expect frozen, then thawed rhubarb to work nicely here. We recommend thawing it completely and blotting away some excess moisture before using (since frozen rhubarb tends to release more liquid than fresh). The filling may still be a little juicier, but the pie should bake up nicely. We you enjoyed it!
Make this pie several times during rhubarb season
Toss sugars with other ingredients just before placing into bottom crust and after top crust is rolled out
Pie is awesome _ great consistency _ not runny
Thank you for a full proof recipe
One of the joys of summer
Great pie recipe! Made it today but without the vanilla. I also want to replying to the comment about pop up adds blocking the recipe when you go to print it. Their are a indeed ton of pop up adds on your page and they do at times show up on the recipe page when you go to print it out. I just close out the print page and try again and that usually fixes it.
Have a nice day!
Hi Carol, this can definitely be frustrating. There was spammy ad campaign we spotted over the past couple of days that my ad network is working to have it blocked; it’s been covering recipe content. I’m so sorry for the trouble. Thank you for sharing a workaround in the meantime.
Makes the best strawberry rhubarb pie. Thank you.
Love this recipe. I am lucky to have heritage rhubarb in my garden. I gave 4 stars as I used frozen prepared crust. I also forgot the vanilla and oj. Will try the full recipe next time .
Can I make this into a strawberry rhubarb crisp, by not putting a crust on the bottom and putting a “crisp” topping on it? For example, your peach or apple crisp topping? Thanks!
Hi Janet, We haven’t tested this filling as a crisp, but let us know if you do! It may be easier to adapt our Strawberry Crisp recipe by reducing the strawberries, adding rhubarb, and a touch of orange juice.
Thanks for the suggestion – I will let you know how it goes!
The most detailed and informative recipe I have ever seen. I will be making this tomorrow and post more comments. Thank you
I made another successful pie with this recipe! it was delicious!
Put your apron on and plan on a lot of time in the kitchen — and it was worth it!! The butter crust recipe was the hardest part and maybe that was because it was my first homemade crust ever. My lattice work was not a thing of beauty but this strawberry rhubarb pie was a huge hit and party goers were asking me how I made such a great crust. It was gone in minutes. Oh! I did take the extra step of putting the liquid in a saucepan and reduced it for a bit. Thank you for excellent directions so even a novice like me could make something wonderful!!
I discovered this recipe last week and since then have made a 6 of them for ourselves and to gift to friends. BEST STRAWBERRY RHUBARB PIE EVER!!! Perfect balance of tart and sweet, the filling perfectly set. This is the only recipe I will use from now on. Thanks so much, Sally!
I love your recipes! Is there a reason you use cornstarch instead of tapioca starch? I have read that tapioca has a cleaner flavor. Would it be the same quantity and method?
Hi Sarah! If you want to use tapioca instead, we recommend 1/3 cup instant tapioca instead of cornstarch.
I made this pie yesterday and we tried it today. It was quite a bit more tart than I expected. Do I need to add more sugar next time or maybe double the amount of white sugar?
Hi Barbara, a slight tart taste is to be expected, but if it was too tart for your tastes you can try slightly increasing the sugar next time (doubling would likely be too much). Or topping your pie with a scoop of vanilla ice cream also helps to sweeten it up!
Hi Sally, happy 250th USA!
A Boston friend has sent some homegrown garden rhubarb to me in South Florida. My favorite pie is strawberry rhubarb. I’ve already used some of the rhubarb for quick bread. I probably have half a pound of rhubarb and plenty of strawberries. Since I’m a little short on fruit, I thought I could just make the crust and proceed with the scaled-down formula in a tart pan. I would do a streusel topping.
Naturally, I would have to adjust the baking time Do you think this would work as a strawberry rhubarb tart? Could I make a frangipane filling and succeed? So YUM.
Thanks so much for all your beautiful baking recipes, and advice!
LDR, Miami
Hi LDR, yes, I think that would work beautifully! A tart pan is a great way to use a smaller amount of fruit/filling, and a streusel topping would be delicious. You could also add a thin layer of frangipane underneath the fruit. I think the almond flavor would pair wonderfully with strawberry and rhubarb. Just keep an eye on the baking time, since a tart will likely bake a bit faster than a pie.
Really nice pie! And it does indeed need to set for the full time. I used my own premade and frozen pie shell, no lattice top because I didn’t have extra. I am thinking that tapioca might work as well as the corn starch for thickening, and may try this next time (I make a rhubarb sour cream pie with tapioca).
Can I add raspberries? I only have 2 cups of rhubarb so I thought I might replace the final cup with raspberries to keep the tart flavor.
Yes, you can add raspberries. I would replace the missing cup of rhubarb with 1 cup of raspberries and keep the rest of the recipe the same. Since raspberries break down more than rhubarb as they bake, the filling may be a bit softer, but it should still set up nicely.