

This weekend, let’s satisfy our candy cravings and make homemade caramels completely from scratch. Before you run away at the thought of making caramel, let me assure you that making chewy creamy soft caramels on the stovetop is SO easy.
A 15 minute ordeal where all you have to do is… stir.
I’m being serious. If you know how to stir, you know how to make caramels from scratch. They’re truly that simple.
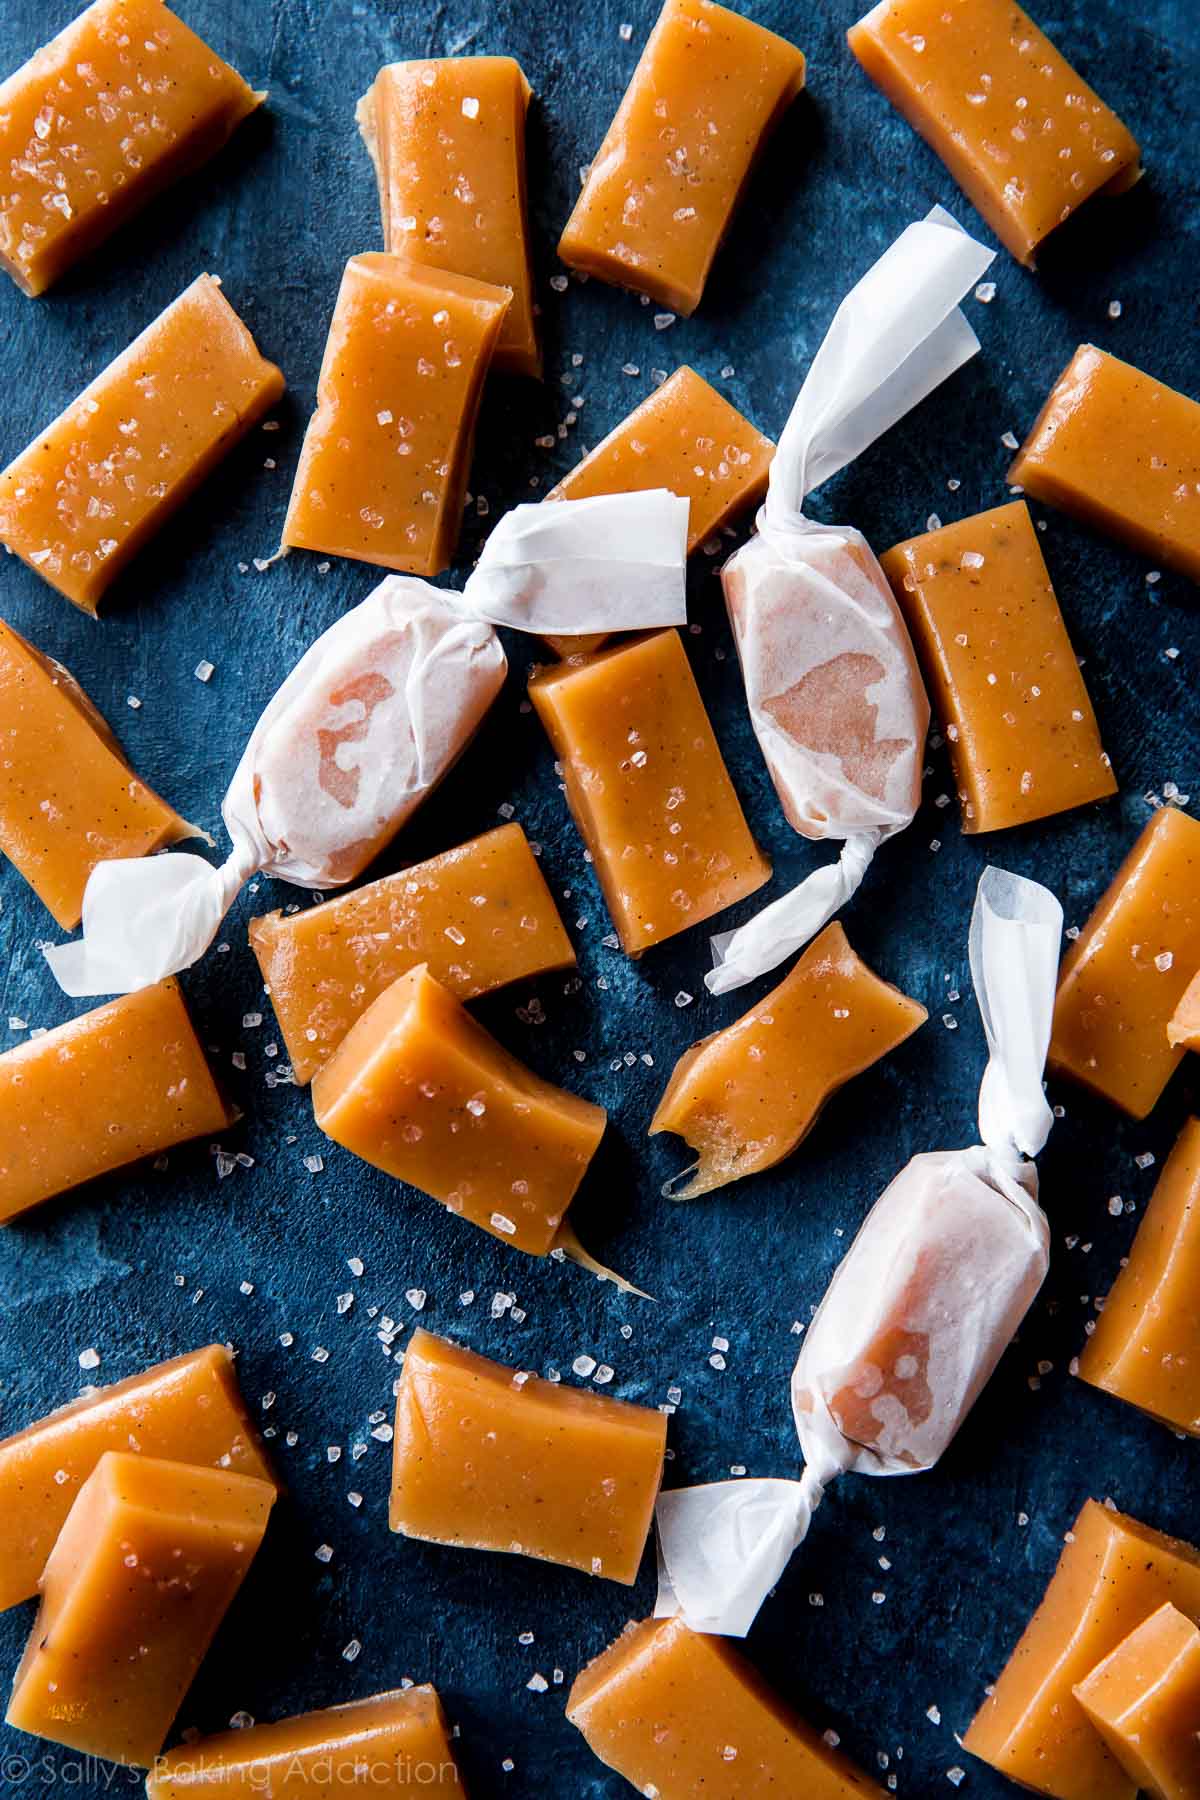
And, let me tell ya, homemade caramel candies taste even better than anything you can buy at the store. Especially when you flavor them with vanilla bean and extra sea salt on top. Friends, just check out all those vanilla bean specks!!
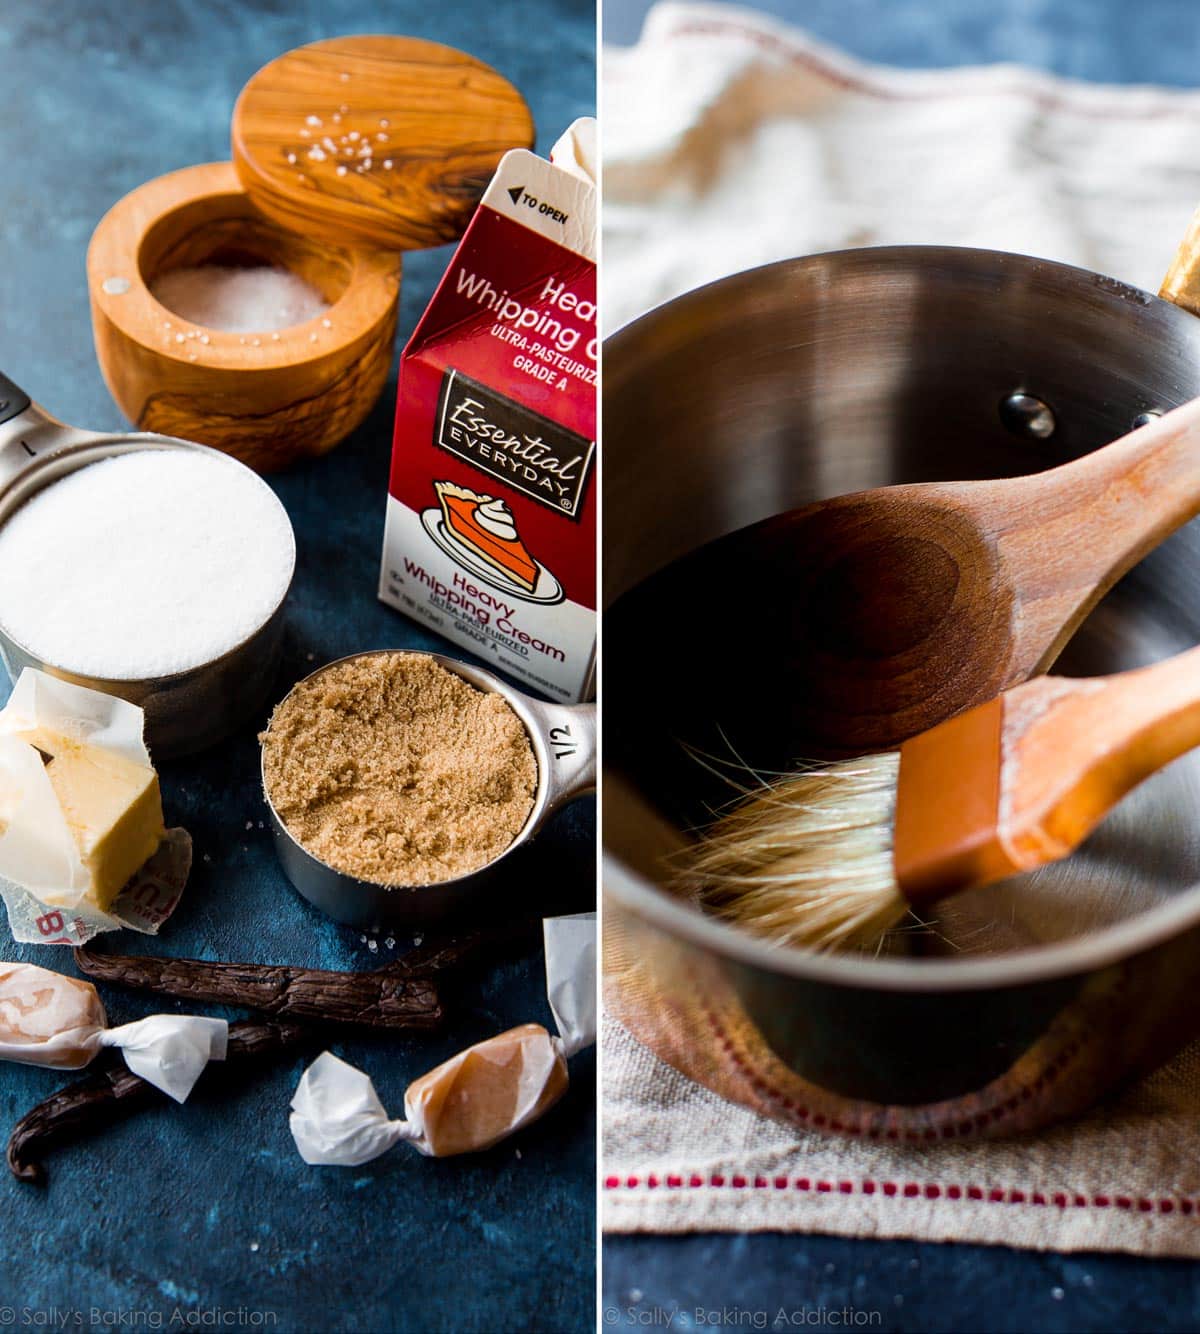
Here’s exactly what you’ll need to make these sea salt vanilla caramels and why. When making candy, it’s important to know what each ingredient does in the recipe. Because it really is chemistry! Delicious chemistry. There are very little ingredients (just 7!) required and each one plays an equally imperative role.
Heavy cream. Or heavy whipping cream. Cream is the base of these caramels and what makes them, well, CREAMY!
Sugar. Duh! Caramel is sugar and sugar is caramel. 🙂
Brown sugar. I looooove adding brown sugar to caramels because it keeps them incredibly soft and chewy. This is because brown sugar has a lot of moisture.
Corn syrup. It’s a controversial ingredient, for sure, but an imperative one for making candy as it prevents crystallization and keeps the caramels smooth as silk. It’s necessary when making homemade marshmallows, too. What I like to keep in mind is that there are far worse processed ingredients in store-bought candies and only 1/3 cup of corn syrup divided over 65 candies is like .00000001 teaspoon per caramel. Or something like that.
These are the 4 main ingredients. After the caramel is made, remove it from heat and immediately stir these ingredients in for flavor:
A smidgen of butter… yum! Makes them even softer and creamier, too.
Vanilla extract and vanilla bean. Vanilla bean can be a little hard to come by, but I usually find it in the baking aisle of most major grocery stores. And there’s always online. Amazon has them for a steal!
Salt because we always need a little salty with our sweet.
Here are 3 tools you’ll need and why each is important.
Sturdy pan. A thick-bottomed and sturdy pan which is KEY to even heat distribution. Thinner, cheaper pans can scorch the cooking candy and cook it unevenly. Here are some great choices: Anolon Nouvelle Copper and Crestware. I own a couple pricier copper pots because of the amount of candy I make. In all honesty, you can’t beat their quality.
Candy thermometer. Don’t get nervous! Candy thermometers make your job even easier, not harder! It literally tells you when your candy is ready, ensuring consistency and success. I prefer using digital candy thermometers. Here is an excellent choice right here. If calibrated, a candy thermometer is 1000x more accurate than using your eyes to detect candy’s doneness. See My Favorite Candy Making Tools for how/why to calibrate.
Pastry brush. A pastry brush is imperative when making candy—its purpose is to help rid the saucepan of any sugar syrup or cooking candy that may have splashed up on the sides. The candy on the sides of the pan can burn and crystallize, ruining your batch of candy. Running a water-moistened pastry brush around the sides of the pan helps prevent this from happening.
More on my favorite candy making tools right here!
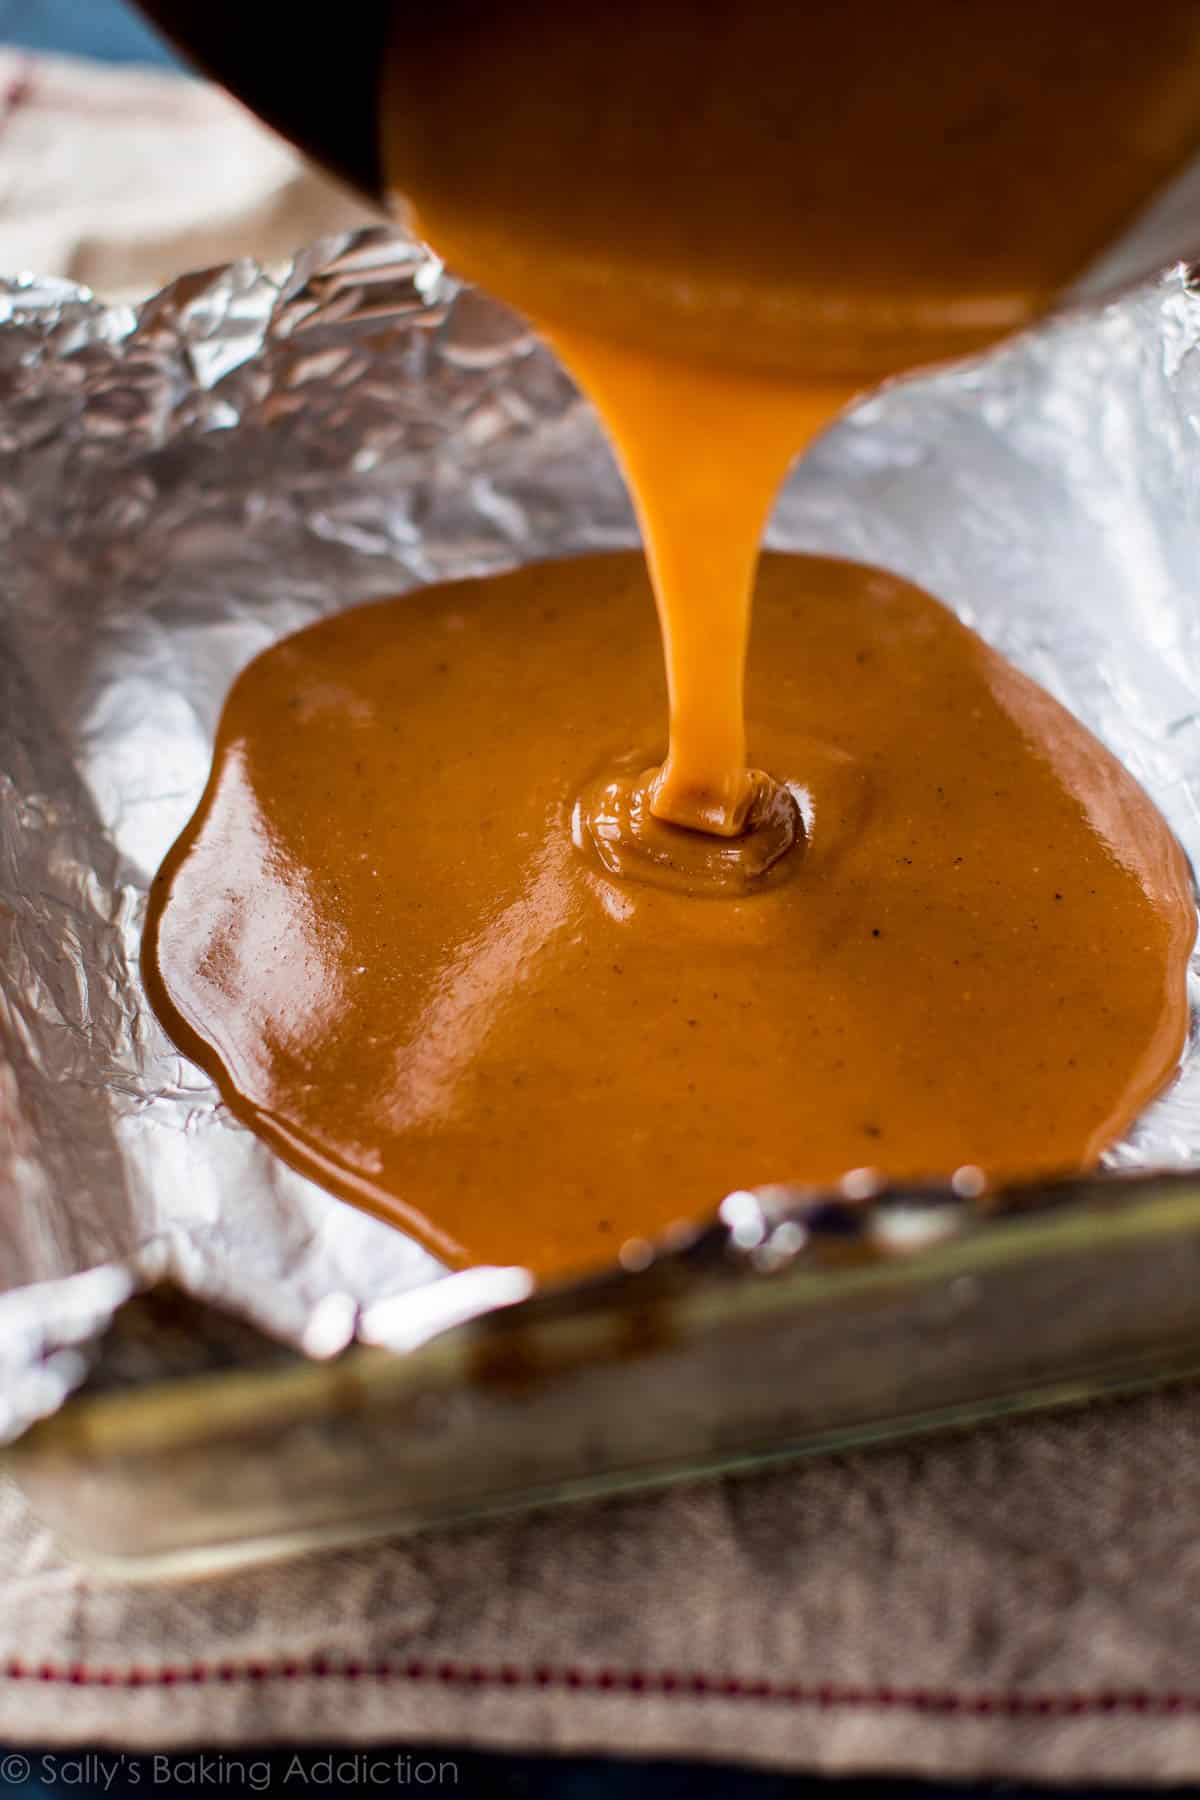
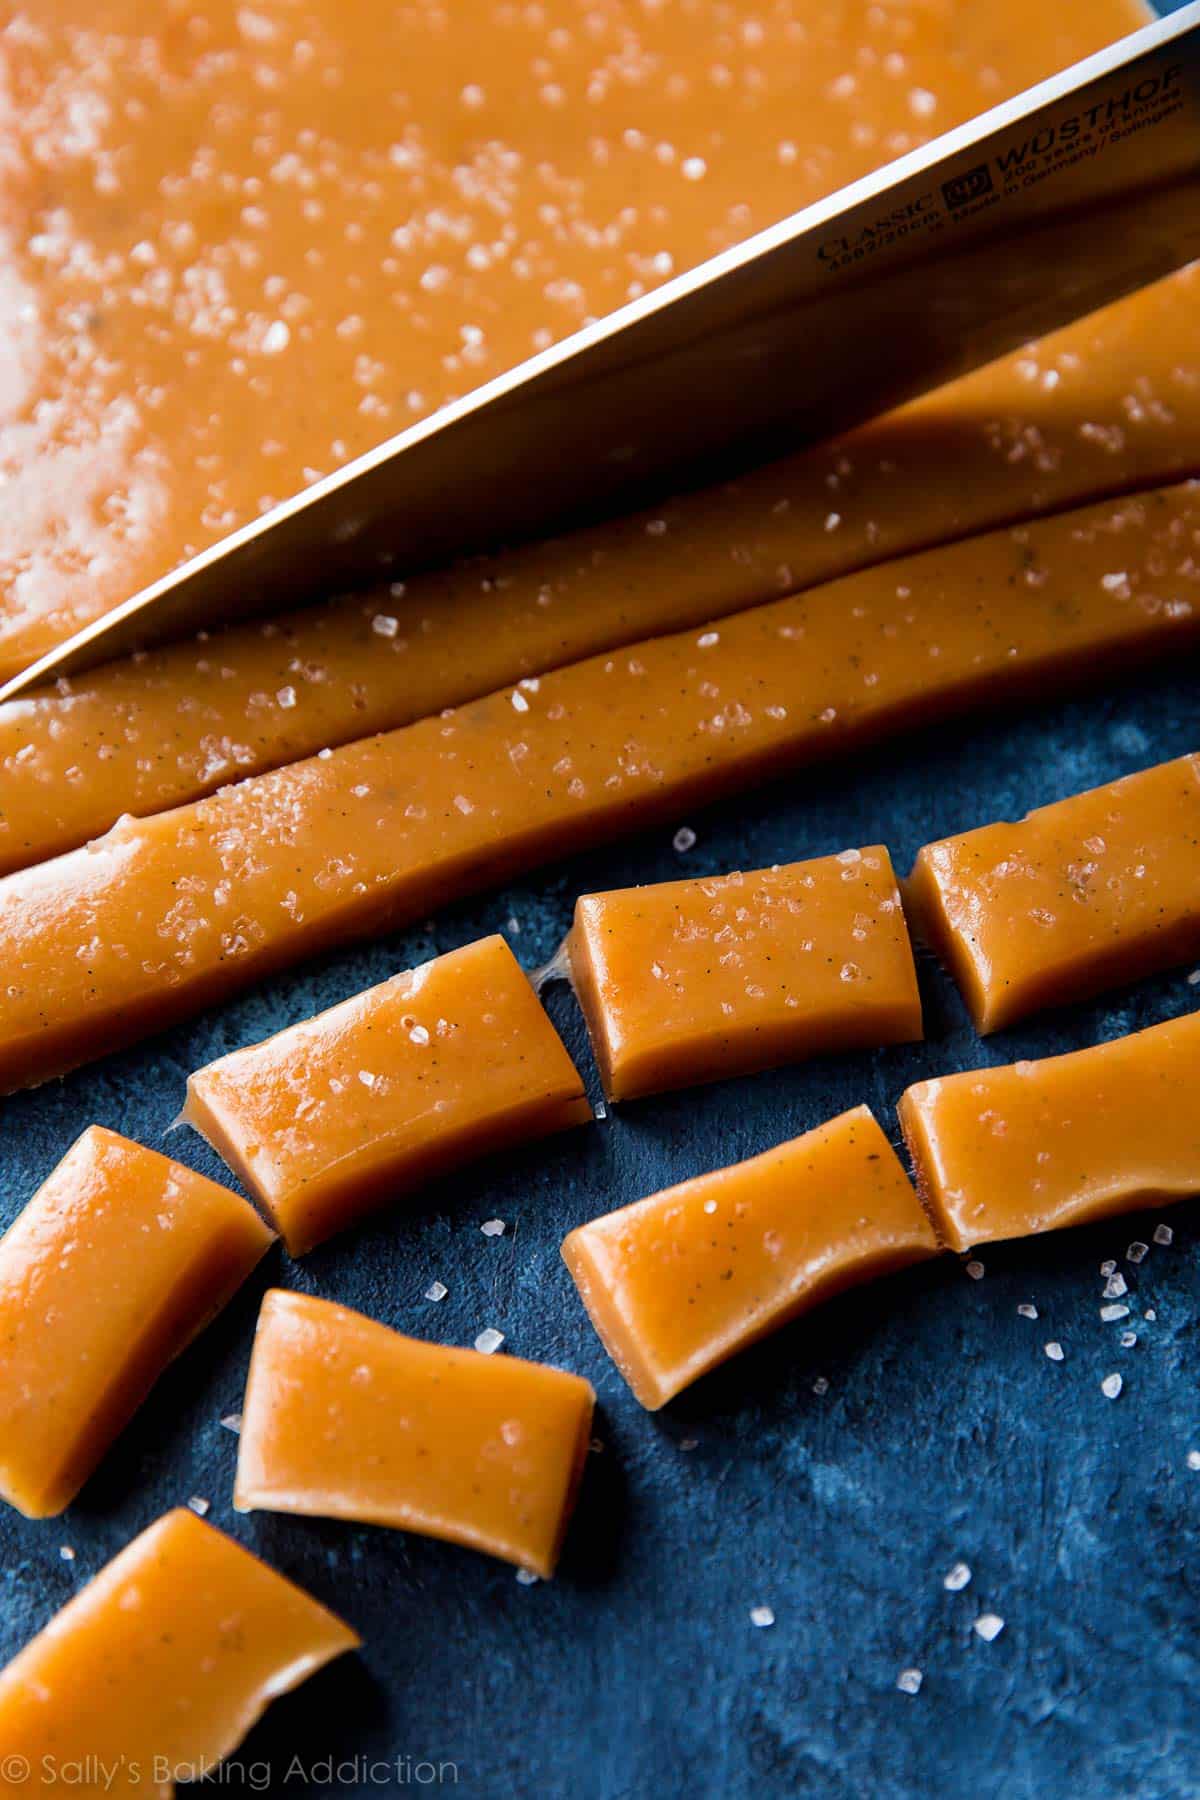
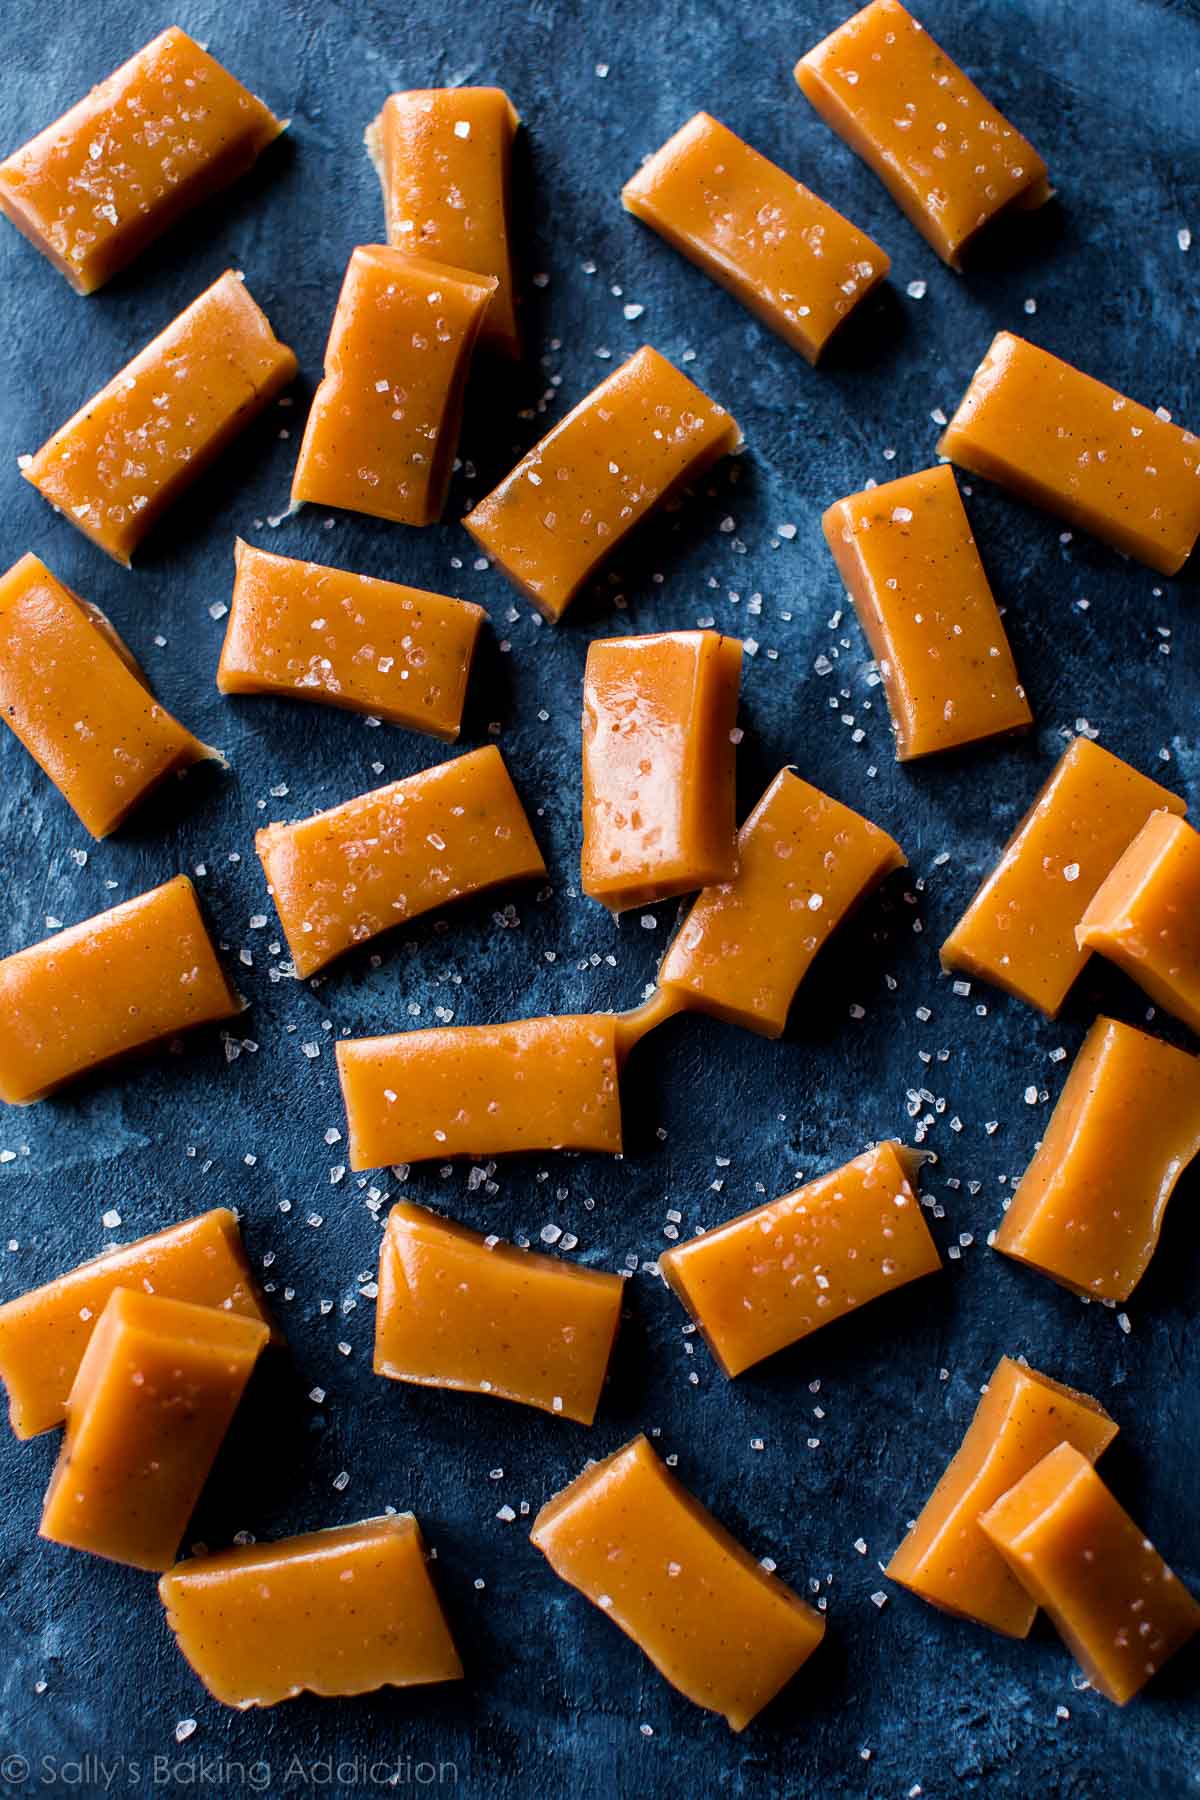
Pour the hot caramel into a lined pan. I always line it with aluminum foil because it’s very easy to get that foil lined nice and snug in the pan. Lightly butter the foil so the caramels peel off easily. Then let the caramels cool for about 4 hours (or overnight) at room temperature. Then cut into rectangles or little squares.
I usually give caramels out or bring them with me to events, so I individually wrap them. And I’m sure you’ll give some away as well—I know I can’t be trusted with 65 caramels in my kitchen TAUNTING me! But maybe you’re stronger than I am. I’ve tested out many different types of wrappers and these twisting candy wrappers are the easiest to use and the perfect size. They’re great for homemade truffles or other candies too! I went through a ton while writing Sally’s Candy Addiction.

This is my go-to base for homemade caramels. Sometimes I even dip them into dark chocolate after I cut them. My piece of advice? Place one in your mouth and let it melt on your tongue. Truly an indulgence!
And if you can’t get enough of salted caramel, try my salted caramel cupcakes with salted caramel frosting next! Or these white chocolate caramel cashew clusters. You can’t go wrong when it comes to salted caramel 😉
For more gluten free sweet treats, see my roundup of 40 gluten free dessert recipes that everyone loves. These soft caramel candies included!
Print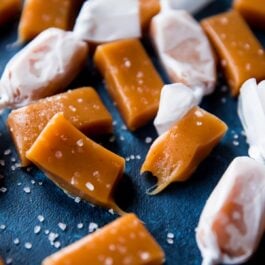
Soft Caramel Candies
- Prep Time: 30 minutes
- Cook Time: 0 minutes
- Total Time: 4 hours, 30 minutes
- Yield: 65 caramels
- Category: Candy
- Method: Baking
- Cuisine: American
Description
These sea salt vanilla caramels are unbelievably soft and chewy; the ultimate sweet and salty candy treat. The recipe makes a big batch to share!
Ingredients
- 1 and 1/2 cups (355ml) heavy cream
- 1 cup (200g) granulated sugar
- 1/2 cup (100g) packed light brown sugar
- 1/3 cup (80ml) light corn syrup
- 1 teaspoon salt
- 1 teaspoon pure vanilla extract
- seeds scraped from 1/2 of a vanilla bean
- 1 Tablespoon (14g) unsalted butter, softened (plus more for lightly buttering the pan)
- coarse sea salt for topping
Instructions
- Line an 8-inch square baking pan with aluminum foil, leaving enough overhang on the sides to easily remove the caramel once it has set. Lightly grease the foil with butter.
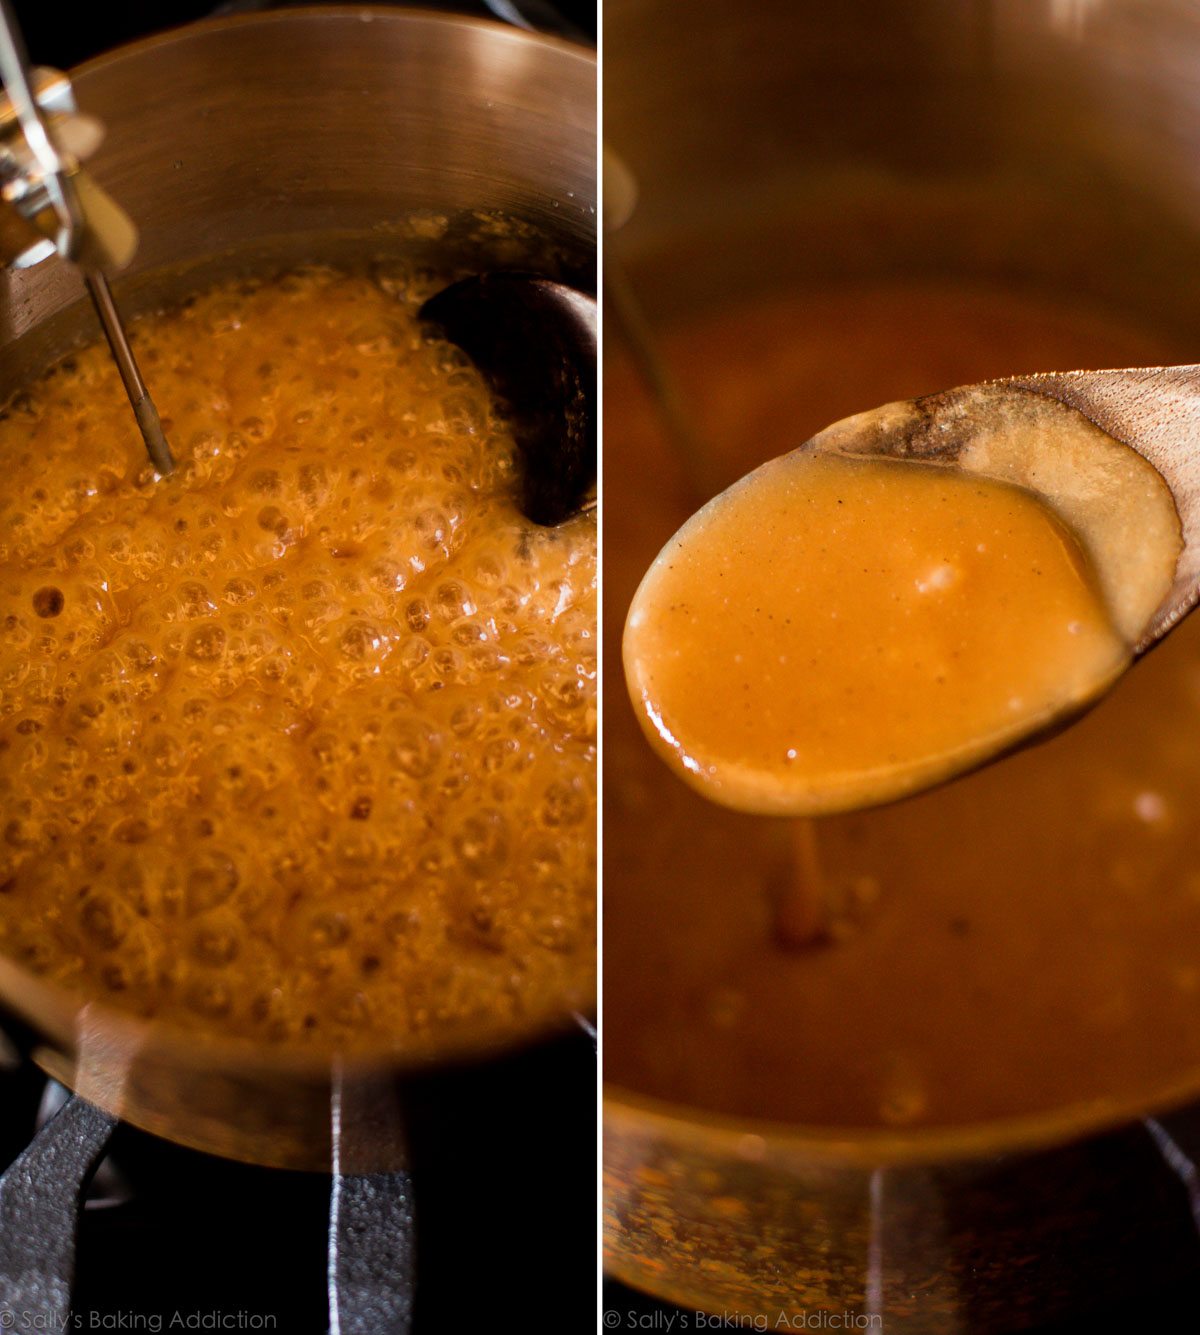
- Combine the cream, granulated sugar, brown sugar, and corn syrup in a 3-quart heavy duty saucepan over medium heat. Using a wooden spoon, stir constantly as the sugars dissolve. The mixture will be thick and cloudy looking.
- Once boiling, brush down the sides of the pan with a water-moistened pastry brush. Attach a candy thermometer to the pan, making sure not to let it touch the bottom.
- Without stirring, cook until the temperature reaches 245°F (118°C). Immediately remove from heat and stir in 1 teaspoon of salt, the vanilla extract, vanilla bean seeds, and butter. The mixture may burst and bubble, so be careful stirring.
- Pour the hot caramel into the prepared baking pan and top with coarse sea salt, if desired. Allow to cool at room temperature, uncovered, for 4 hours or overnight (no need to cover).
- Once set, remove the caramel from the pan by lifting out the aluminum foil. Peel the foil off and, using a very sharp knife, cut into rectangles or squares. Wrap with candy wrappers, if desired.
Notes
- Make Ahead Instructions: Wrapped caramels keep at room temperature for up to 2 weeks.
- Special Tools (affiliate links): 8-inch Square Baking Pan | Heavy Duty Saucepan (like this one or this one) | Wooden Spoon | Pastry Brush | Digital Candy Thermometer | Candy Wrappers


Reader Comments and Reviews
can i use only vanilla extract
Another 1/2 teaspoon of vanilla extract may be substituted. Enjoy!
can i use these as a filling for cookies
Hi Madilyne, Yes! We use them in our salted caramel dark chocolate cookies.
Thea are about 16 teaspoons per 1/3 cup. That is approx 0.25 teaspoon corn syrup per candy. 16/65=0.246
These turned out great!! Very easy. I’m new to making candy and this was a great starter recipe. I used it to make turtles for my mom for her birthday!
I just used a cookie scoop to pour the warm caramel over the pecans (and pretzels!), and let it cool before pouring chocolate on top!!
I have made this recipe 4 times already and I can’t believe how well the caramel turns out. I have tried to make caramels several times in the past and never could get it to turn out like these do. I gifted many to friends and family and everyone loved them. Thank you Sally!
I made these Caramel candies exactly like the recipe said. They turned out perfectly. I then dipped them in chocolate and put sea salt on top. Everyone loved them. Thank You. My first time making candy. The only thing I did different was I used parchment paper instead of foil.