

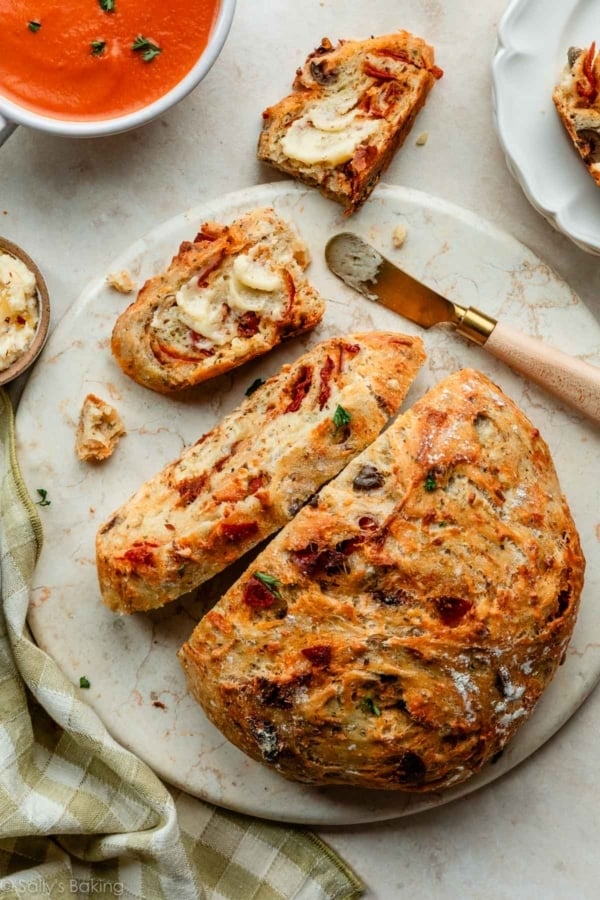
This blueberry peach pie combines two juicy summer fruits in a beautifully golden, flaky all-butter pie crust. The filling is thick and flavorful (not runny) thanks to a careful combination of cornstarch and flour, plus a quick step on the stove to reduce the excess fruit juices. This pretty pie shines during peak peach season, and with the recent recipe updates, it bakes and slices as wonderfully as it tastes!

I originally published this recipe in 2014 and have since added new photos, a few more success tips, and I’ve also made a few small improvements to the filling, which are reflected in the printable recipe below.
While I always focus on pies in November during my annual Pie Week and many, many Thanksgiving pie recipes, I definitely don’t limit pie-making to the holiday baking season! Summer is prime pie time.
This Blueberry Peach Pie Is:
- A celebration of peak-season fruit
- Made completely from scratch
- Sliceable, not overly runny
- Delicately spiced with cinnamon and allspice
- Lightly brightened with fresh lemon
- Baked in a homemade butter pie crust; but you can use your own favorite recipe or store-bought pie crust if you’d like.
One reader, Jamie, commented: “My husband took one bite and said it was the best pie he’s ever had! It’s definitely a labor of love, but the end result is totally worth it! ★★★★★“
One reader, Paula, commented: “I made this wonderful pie last night and hubby and I had it for breakfast this morning… it is so delicious! I followed the recipe exactly, even weighing my fruit, and the consistency is perfect! ★★★★★“
One reader, Abbie, commented: “Love this recipe! One of my all-time favorite pies. ★★★★★“

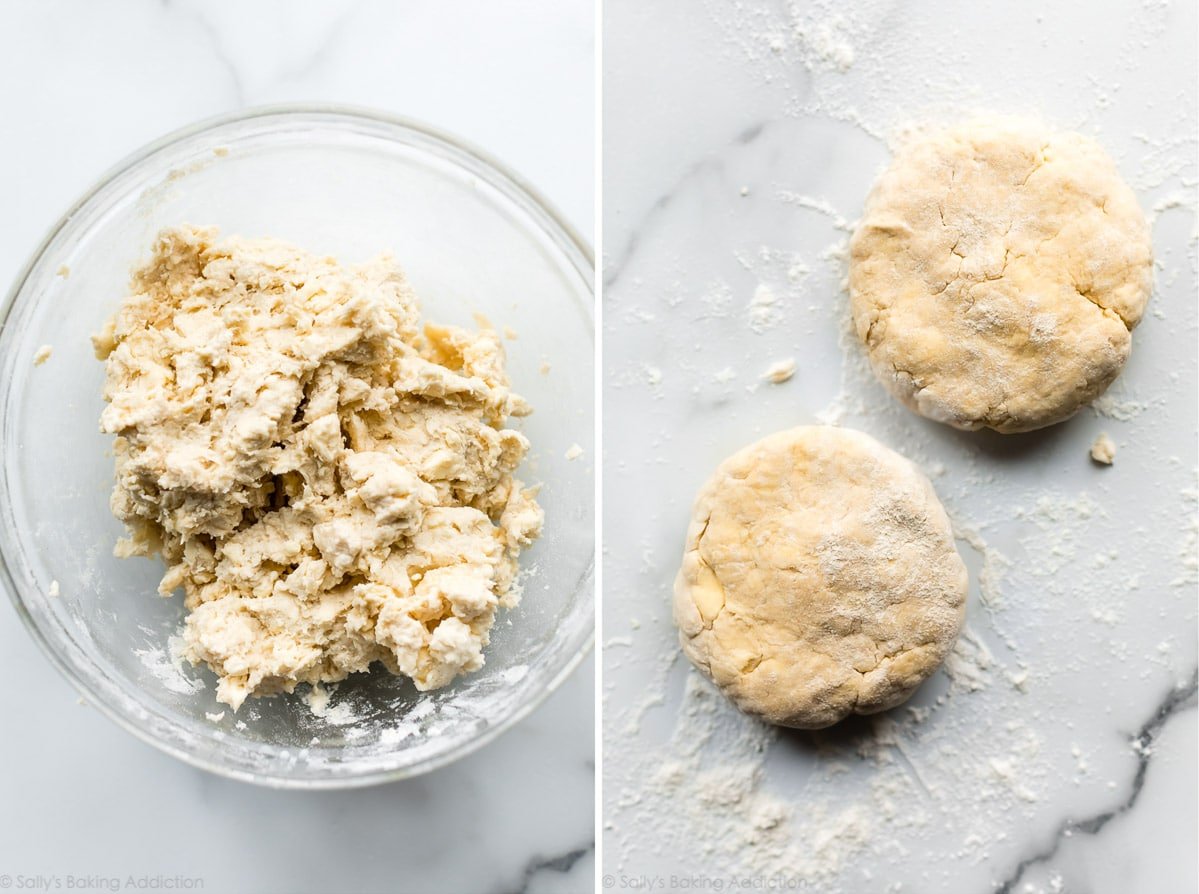
Start With Pie Dough
You can use my all-butter pie crust, this buttery flaky pie crust (which uses a combination of shortening and butter), your own favorite recipe, or store-bought. I used my all-butter pie crust in the pictured pie.
If using either homemade recipe, make the pie dough ahead of time, because it needs to chill in the refrigerator for at least 2 hours before you can roll it out. But it keeps well in the refrigerator for up to 5 days and the freezer for up to 3 months, so make it in advance and it will save you time on the day you actually make this pie.
Like most homemade pies, this blueberry peach pie takes several hours to make; but most of that time is hands-off, as the pie is baking and cooling. It’s an exercise in patience! And I should also note that you don’t need to par-bake the crust because this pie bakes for so long.
Here’s Why This Filling Works
Let’s move on to the filling. When I first developed this recipe back in 2014, I relied solely on flour to thicken the blueberry peach filling. The flavor was spot-on, but the pie never quite set into clean, sliceable pieces. (Delicious, but not very neat.)
After 10+ years and countless pies (my favorite category of baking!), I’ve found that a combination of cornstarch and flour is ideal for this particular fruit pairing.
Here’s why:
Cornstarch is most effective at thickening high-moisture fruit fillings like berries. Flour works nicely for fruits like apples and pears because it helps bind the large pieces of fruit together, creating structure. Together, these two thickeners create a perfectly set pie that still tastes juicy.
But that’s not all:
2 More Tricks to Ensure the Filling Sets:
- Briefly Reduce the Juices: Briefly reducing the juices—released from the fruit after mixing with sugar—makes a big difference. Cook the liquid for a minute or two over low heat on the stove, then spoon it over the filling before adding the top crust. I use this same method in my cherry pie, and it helps the filling set nicely.
- Watch for Bubbling Filling: Be sure to bake the pie until the filling is bubbling all around the edges, which is always a helpful indicator that your pie is done. If you want to be precise, the internal temperature of the filling taken with an instant-read thermometer should be around 200°F (93°C) when done.

Here’s everything you need for the filling:
- Peaches: You need 6 cups of chopped peach chunks, which is around 950g. 8 peaches can yield this amount, depending on size.
- Blueberries: Use 1 and 1/2 cups, which is about 210g.
- Sugar: Helps draw out liquid from the fruit, so the cornstarch and flour can work together to firm up the filling.
- Cornstarch: Helps to thicken the filling.
- Flour: Adds structure and supports the cornstarch with thickening the filling.
- Cinnamon & Allspice: Both add warm spiced flavor. Feel free to skip the allspice or try replacing with ground nutmeg or ground ginger.
- Lemon Juice: Adds a fresh, bright flavor.
- Butter: Like cherry pie and my regular peach pie, dotting small cubes of butter on top of the filling helps create a richer-tasting filling. Feel free to skip if desired.
I don’t recommend it. The two fruits together are so juicy already, that using frozen or thawed fruit won’t be doing the filling any favors. I strongly recommend fresh.
You want slightly firm yellow peaches with zero soft spots. Your best bet is to purchase or pick about 8 firm peaches, then let them sit in a paper bag for 1–2 days to ripen. Some may have soft spots, so that is why I suggest purchasing an extra.
Use Peach Chunks, Not Slices
I have found most success with peach pie when I cut the peaches into 1-inch chunks instead of slices. Because peaches are so juicy, slices bake into mush, while chunks retain more of their deliciously soft texture. I do the same for regular peach pie and peach cobbler, too.
Peeling & Cutting Peaches
- You can place the peaches in a pot of boiling water for a few seconds to loosen the skin. Use a slotted spoon to remove the peaches and place them in a bowl. The peel should easily come off. I learned this trick from Taste of Home, so read more over there!
- When I don’t use the boiling water trick, I use a peeler. I like this OXO peeler because it’s flexible and easy to hold. Make sure to rinse the peeler and your hands often because everything starts to get a little slippery from the juicy peaches.
- To easily cut peaches, use a sharp knife and, again, rinse it and your hands often so nothing slips.
And the blueberries are just the easiest fruit for a pie. No peeling, chopping, or slicing. I always appreciate that when making blueberry pie!
Reduce the Filling Juices on the Stove
After you combine the filling ingredients together, set it aside and roll out the pie dough for your pie dish. During this time, your filling is already working as the sugar pulls juices from the fruit. Normally I discard all this juice, but it’s where a lot of the thickeners end up and that’s what helps thicken the filling in the oven.
Instead, use a slotted spoon to transfer the fruit into your crust, then pour the leftover juice into a small saucepan. You’ll only have a few Tablespoons, but this juice is valuable! Reduce on the stove over low heat for about 1–2 minutes. It will turn into the consistency of applesauce. Cool for 5 minutes, then pour over the filling and toss gently (in your pie dough!) to combine. See below:

Top Pie Crust Options
I went with a traditional lattice pie crust here, but you can certainly try others. Here are a few suggestions:
- How to Lattice Pie Crust: A classic look I use for so many pies, like triple berry pie and my favorite apple pie.
- Braided Pie Crust: Challenge yourself with a braided pie crust.
- Cookie Cutter Shapes: Use pie punches or cookie cutters to punch out shapes of pie dough and arrange on top. You can see an example in this pie crust designs post, which includes a video tutorial.


Let’s Bake the Pie
After filling the pie and topping the pie, be sure to crimp or flute the pie crust. Brush the surface and edges with egg wash, which is 1 egg and a bit of milk. This promises a crispier crust and helps develop that signature golden sheen. Without it, the pie dough looks dull and lackluster. Sprinkle with coarse sugar, if desired.

Here are some final tips that will help when it’s time to bake the pie:
- Start at an Initial High Temperature: 425°F (218°C) for 20 minutes, then the remainder at 375°F (190°C). The reason for the initial hot oven burst is to set the crust and encourage the thickeners, mainly cornstarch, to begin working.
- Place a Baking Sheet on Rack Below Pie: This pie filling can drip. Place a baking sheet on the bottom oven rack to catch any bubbled-over juices. If you really want to save yourself cleanup time, line it with foil first.
- Pie Crust Shield: After the first 20 minutes in the oven, when you lower the temperature, I recommend placing a pie crust shield on the crust’s edges to prevent it from over-browning too quickly. You can purchase a pie crust shield, but I often make one out of aluminum foil (see recipe Notes).
- Bake for a Long Time: You want the filling to be bubbling at the surface nearly everywhere, and this takes close to 70 minutes total. The internal temperature in the test pies (easy to take with an instant-read thermometer because of the lattice top) was around 200°F (93°C) when done.
- Cool Completely: Slicing warm will give you a soupy slice of pie. Cool for at least 5 hours at room temperature because the pie filling continues to set up as it cools.


Blueberry Peach Pie
- Prep Time: 3 hours
- Cook Time: 70 minutes
- Total Time: 8 hours (includes cooling)
- Yield: 8-10 servings
- Category: Dessert
- Method: Baking
- Cuisine: American
Description
A classic lattice-topped homemade blueberry peach pie bursting with juicy flavor. Follow all of my success tips to ensure your pie filling sets up nicely, including chopping the peaches into chunks, briefly reducing the juices on the stove, and cooling completely before slicing. Serve with some vanilla ice cream for an unforgettable summer treat.
Ingredients
- All-Butter Pie Crust (recipe makes 2 crusts, 1 for bottom and 1 for top)
- 6 cups (around 950g) peeled chopped peaches, cut into 1-inch chunks
- 1 and 1/2 cups (210g) fresh blueberries
- 3/4 cup (150g) granulated sugar
- 3 Tablespoons (23g) cornstarch
- 2 Tablespoons (25g) all-purpose flour
- 3/4 teaspoon ground cinnamon
- 1/8 teaspoon ground allspice
- 1 Tablespoon (15ml) fresh lemon juice
- 1 Tablespoon (14g) cold unsalted butter, cut into small cubes
- egg wash: 1 large egg beaten with 1 Tablespoon (15ml) milk
- optional: coarse sugar for sprinkling on crust
Instructions
- The crust: Prepare the pie crust recipe through step 5.
- Prep the peaches: Peel the peaches and then cut into 1-inch chunks. You need about 6 cups of peach chunks, which is around 950g.
- In a large bowl, stir the peach chunks, blueberries, granulated sugar, cornstarch, flour, cinnamon, allspice, and lemon juice together until thoroughly combined. Set filling in the refrigerator while you roll out the dough. No need to cover it.
- Adjust the oven rack to the lower third position and preheat to 425°F (218°C). Place a baking sheet on the bottom oven rack to catch any bubbling-over juices.
- Roll out the chilled pie dough: On a floured work surface, roll out one of the discs of chilled dough (keep the other one in the refrigerator). Turn the dough about a quarter turn after every few rolls until you have a circle 12 inches in diameter. Carefully place the dough into a 9-inch round pie dish. Tuck it in with your fingers, making sure it is smooth.
- Use a slotted spoon to transfer the filling into the crust. Reserve the juice in the bowl for the next step. Refrigerate pie, uncovered, as you reduce the juice in the next step.
- Pour the leftover juice into a small saucepan. Cook over low heat, stirring, until juice has slightly reduced and thickened into an applesauce-like consistency, about 1–2 minutes. Cool for 5 minutes, then pour over the filling. Do your best to gently toss together. The reduction will harden and thicken as a result of mixing with the cold fruit—this is normal. Dot the pieces of cold butter on top of the filling. Place the pie in the refrigerator while you roll out the top crust.
- Arrange the lattice: Remove the other disc of chilled pie dough from the refrigerator. Roll the dough into a circle that is around 12–15 inches diameter. Using a pastry wheel, sharp knife, or pizza cutter, cut strips of dough; in the pictured pie, I cut 10 1.25-inch-wide strips. Carefully thread the strips over and under one another, pulling back strips as necessary to weave. (Here’s a lattice pie crust tutorial if you need visuals.) To seal the edges, use a small paring knife or kitchen shears to trim excess dough that extends more than 1.5–2 inches over the edge. Fold bottom pie dough edges back over and press/meld into the lattice edges to form a smooth, neat rim. Flute or crimp the pie crust edges with a fork.
- Lightly brush the top of the pie crust with the egg wash. Sprinkle the top with coarse sugar, if using.
- Bake the pie at 425°F for 20 minutes; then, keeping the pie in the oven, reduce the oven temperature down to 375° (190°C). Place a pie crust shield (see Note for homemade shield) on the edges to prevent them from over-browning. Continue baking the pie until the filling’s juices are bubbling everywhere, including in the center, 45–50 more minutes. This sounds like a long time, but under-baking the pie means a soupy, paste-like filling. If you want to be precise, the internal temperature of the filling taken with an instant-read thermometer should be around 200°F (93°C) when done. Tip: If needed towards the end of bake time, remove the pie crust shield and tent a large piece of foil over the entire pie if the top looks like it’s getting too brown.
- Remove pie from the oven, place on a cooling rack, and cool for at least 5 hours before slicing and serving. Filling will be too juicy if the pie is warm when you slice it.
- Cover leftovers tightly and store in the refrigerator for up to 5 days.
Notes
- Make Ahead & Freezing Instructions: This a great pie to make 1 day in advance, because the filling will have time to set overnight. The pie crust dough can also be prepared ahead of time and stored in the refrigerator for up to 5 days or in the freezer for up to 3 months. Baked pie freezes well for up to 3 months. Thaw overnight in the refrigerator and allow to come to room temperature before serving.
- Special Tools (affiliate links): Pastry Blender | Pie Dish | Rolling Pin | Pizza Cutter for lattice pie dough strips | Vegetable/Fruit Peeler | Citrus Juicer | Pastry Brush | Sparkling Sugar | Pie Crust Shield
- Pie Dough: You can use my all-butter pie crust, this buttery flaky pie crust (which uses a combination of shortening and butter), your own favorite recipe, or store-bought. I used my all-butter pie crust in the pictured pie, which is linked in the ingredient list.
- Peaches: You want slightly firm yellow peaches with zero soft spots. Your best bet is to purchase or pick about 8 firm peaches, then let them sit in a paper bag for 1–2 days to ripen. Fresh peaches are best for peach pie. I do not recommend frozen or canned.
- Blueberries: Use fresh, not frozen or thawed from frozen.
- Aluminum Foil Pie Crust Shield: You can purchase a pie crust shield or make one from aluminum foil. Cut a 14-inch square of aluminum foil. Fold in half. Cut out a 5-inch semi-circle on the folded edge. Unfold. Carefully fit the aluminum foil over the pie crust edges, lightly securing down on the sides as best you can (careful, the pie is hot!), leaving the center of the pie exposed.
- Update in 2025: I updated this recipe to help ensure the filling sets a little better. The updates, reflected in the recipe, include using a combination of cornstarch and flour in the filling as well as reducing the excess juices on the stove (step 7). If you prefer to make the pie the older way, skip the cornstarch and increase the flour in the filling to 6 Tablespoons (75g). Skip step 7.


Reader Comments and Reviews
Pie looks amazing! Can’t wait to try this recipe!
I love this recipe! I made it with bottled peaches from Trader Joe’s and it turned out great! New family favorite!❤️
I also only used 3/4c of sugar instead of 1cup. It was a little tart, but I liked it!
I made this pie and it is now my favorite! Everyone in the family loves it as well!
I did just use 3/4 c of sugar though. A little tart, but just didn’t want to do full cup of sugar!
I also used canned peaches!
Please tell me how to create an account so I can save the recipes I want too.
I’m in Canada and wish to create an account to save recipes
Hi Val, You can save any recipe from the recipe card, or click on the heart icon on the lower right-hand corner of the page. Then you can create an account, and find your saved favorites by clicking on the saved tag next to the heart, or click the magnifying glass at the upper right hand of the page.
Would the recipe be a lot different if I used less peaches and more blueberries? I was hoping to make this, but we don’t have that many peaches but a lot of blueberries. Thank you! It looks delicious!
Hi Willa! You can certainly try, otherwise, you could use our blueberry pie recipe and add some peaches.
Thank you! You guys are amazing, answering all of our questions and helping us bake better! I love all of your guys recipes! You’re amazing!
Amazing! I used fresh fruit. Can I freeze the baked pie?
Hi Penny, yes! See the recipe Notes for freezing instructions. Enjoy!
Great pie! Made for first time and came out looking like photo, and the taste is perfection
It says in the recipe that it’s best not to use frozen fruit but where I’m from we don’t really get fresh blueberries at reasonable prices. If I was to use frozen blueberries anyway is there anything to be done to ensure better results?
Hi Natalya, we strongly recommend fresh fruit because the frozen fruit will release too much additional liquid and prevent the pie from setting properly. Unfortunately there isn’t much of a way around this when using frozen fruit; if you do decide to try it, keep in mind that the filling may be soupy and not as intended.
I needed a recipe for Peach Huckleberry Pie and used this one but I prefer and used tapioca (a full 1/4 cup) instead of flour and cornstarch. It turned out great! The family loved it!
A couple of things: The filling was too much to put in my 10″ pie pan so I will adjust the fruit. For my tastes it needed more huckleberries to peaches so my changes will be to decrease the peaches to 4 cups and increase the huckleberries to 2 cups. The amount of sugar in the original recipe is good.
I plan on making a number of peach/huckleberry pie fillings and freezing them for future pies. I see where it is not recommended but I have been freezing fruit pie fillings for many years. The trick is — don’t let them completely thaw before putting them in crust. Defrosting completely does NOT work well but it has worked well to partially defrost with all the different fruit fillings I have made pie filling out of and I have frozen apricot, peach, pie cherry, blackberry, apple, and rhubarb pie fillings.
Can the pie filling alone be made ahead and frozen for later baking?
Hi KO, we usually don’t recommend making peach fillings like this ahead of time because the peaches can release too many juices while thawing. Fresh peaches really are best here! Or, you can freeze the completely baked and cooled pie for up to 3 months.
I love your recipes.
Do you make scones?
Hi Suzy, we sure do! Here is our master scone recipe which includes many different flavor variations. We hope you enjoy it!
I made this wonderful pie last night and hubby and I had it for breakfast this morning…it is so delicious!!! I followed the recipe exactly, even weighing my fruit, and the consistency is perfect! As I do with any peach pie, I left the peach skins on…it enhances the peachy flavor and we don’t notice any textural changes. Thank you for another fantastic recipe!!