

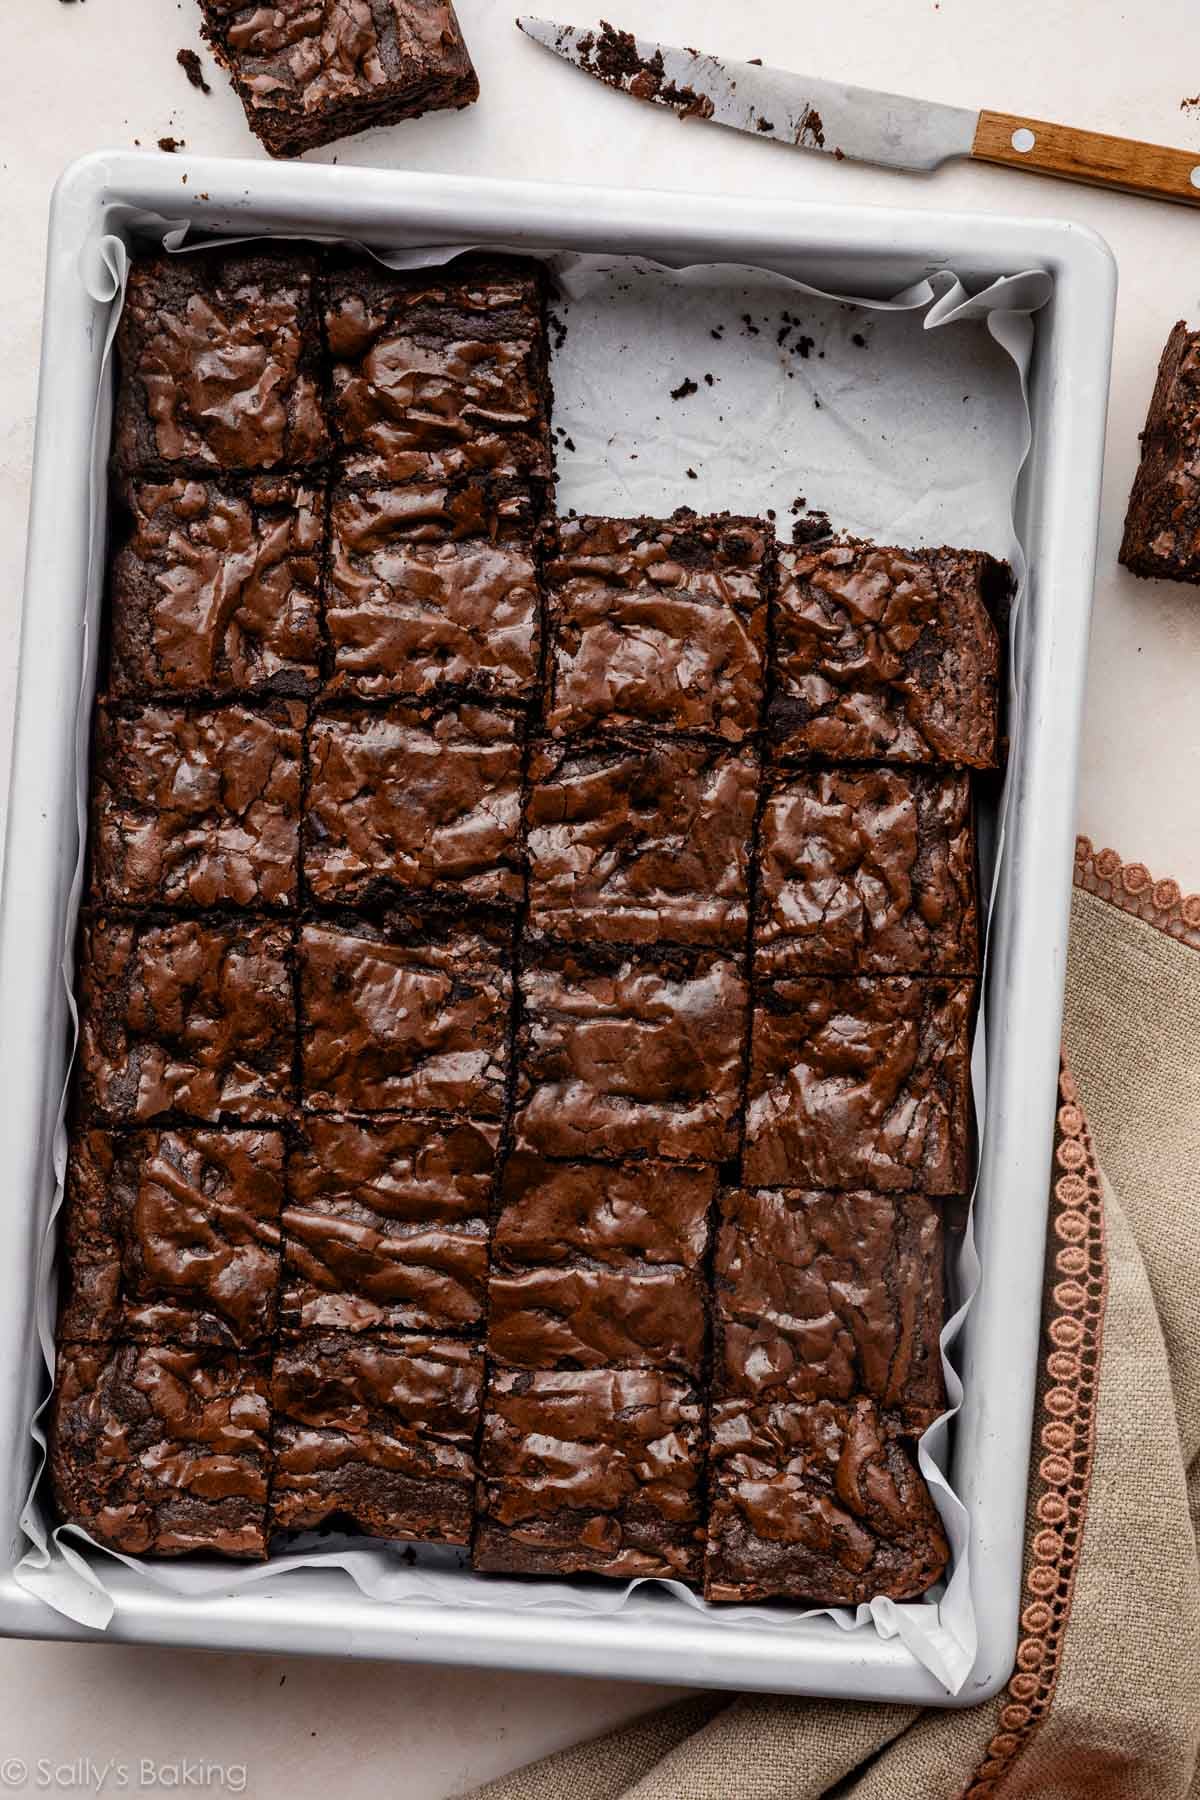
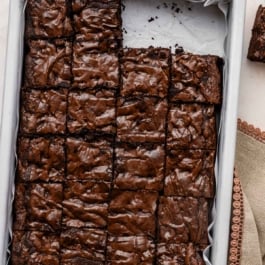
This 9×13-inch pan brownie recipe yields a large batch of rich, dense, and intensely chocolatey brownies with shiny crackly tops and melt-in-your-mouth centers. Based off my most popular brownie recipe and developed specifically for a 9×13-inch pan, this recipe makes even more seriously fudgy brownies that are perfect for sharing.
If you’re looking for a big-batch brownie recipe that bakes up perfectly with shiny crackly tops, ultra-fudgy centers, and rich chocolate flavor in every bite, your search is over!
This 9×13-inch pan brownie recipe is based on my beloved seriously fudgy homemade brownies, but carefully developed for a larger pan so the brownies stay thick, dense, and deeply chocolatey… not thin or cakey.
Perfect for parties, bake sales, potlucks, or simply stocking your freezer with emergency chocolate, this recipe makes a generous pan of brownies with bakery-style texture and the richest chocolate flavor.
Why You’ll Love This 9×13-Inch Brownie Recipe:
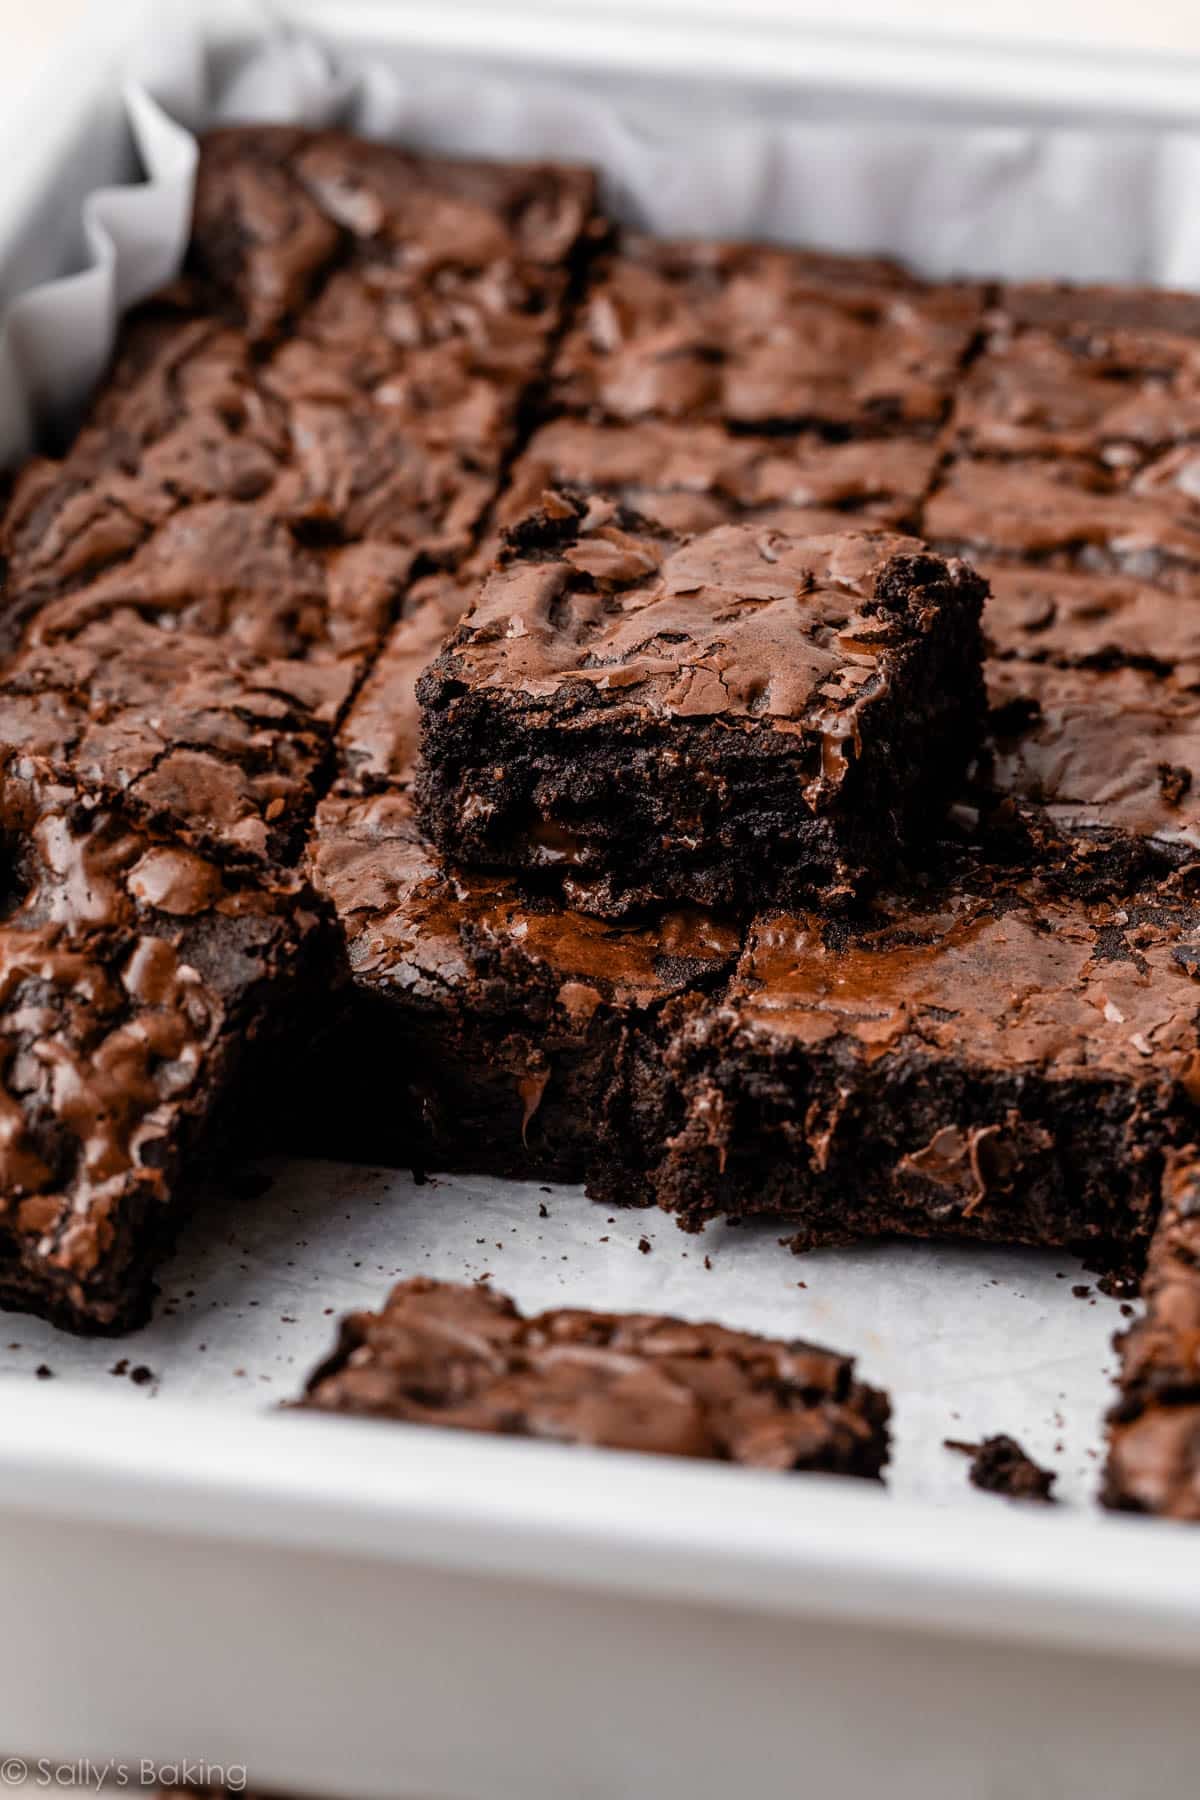
- Thick, dense, extra fudgy brownies
- Shiny, crackly brownie tops
- Chewy edges + gooey centers
- Rich chocolate flavor from 3 sources of chocolate
- Big batch recipe for a 9×13-inch pan
- Make-ahead and freezer-friendly
- Stay soft and chewy for days
And unlike many large-pan brownie recipes that turn out dry or cakey, these brownies retain their dense, moist texture thanks to a careful ratio of ingredients, as well as our extensive recipe testing!
Recipe Testing Brownies for a 9×13-Inch Pan
My team and I made 15(!!!) test batches in our quest to perfect a brownie recipe developed for a 9×13-inch pan. This recipe is based off my reader-favorite recipe for seriously fudgy homemade brownies, but it wasn’t as simple as multiplying all the ingredients by 1.5x. (Or 1.44x, which is the actual amount of additional area a 9×13-inch pan has compared with a 9×9-inch pan.)
When I originally published that brownie recipe in 2017, I made it in a 9×13-inch pan. However, the brownies were a bit thin; and over the years, I switched to a smaller pan for thicker brownies. They’re excellent.
However, I wanted to revisit the recipe and properly scale it up because sometimes we just need a large batch of homemade brownies! The goal here was to effectively scale up that recipe without losing what makes it special: an intensely fudgy texture with rich chocolate flavor. Brownies can quickly turn cakey in a larger pan if there’s too much flour or not enough fat. However, these keep the same rich consistency because we use:
- Melted chocolate and cocoa powder
- Melted butter and oil for flavor + moisture
- Both granulated and brown sugar
- Equal parts flour and cocoa powder
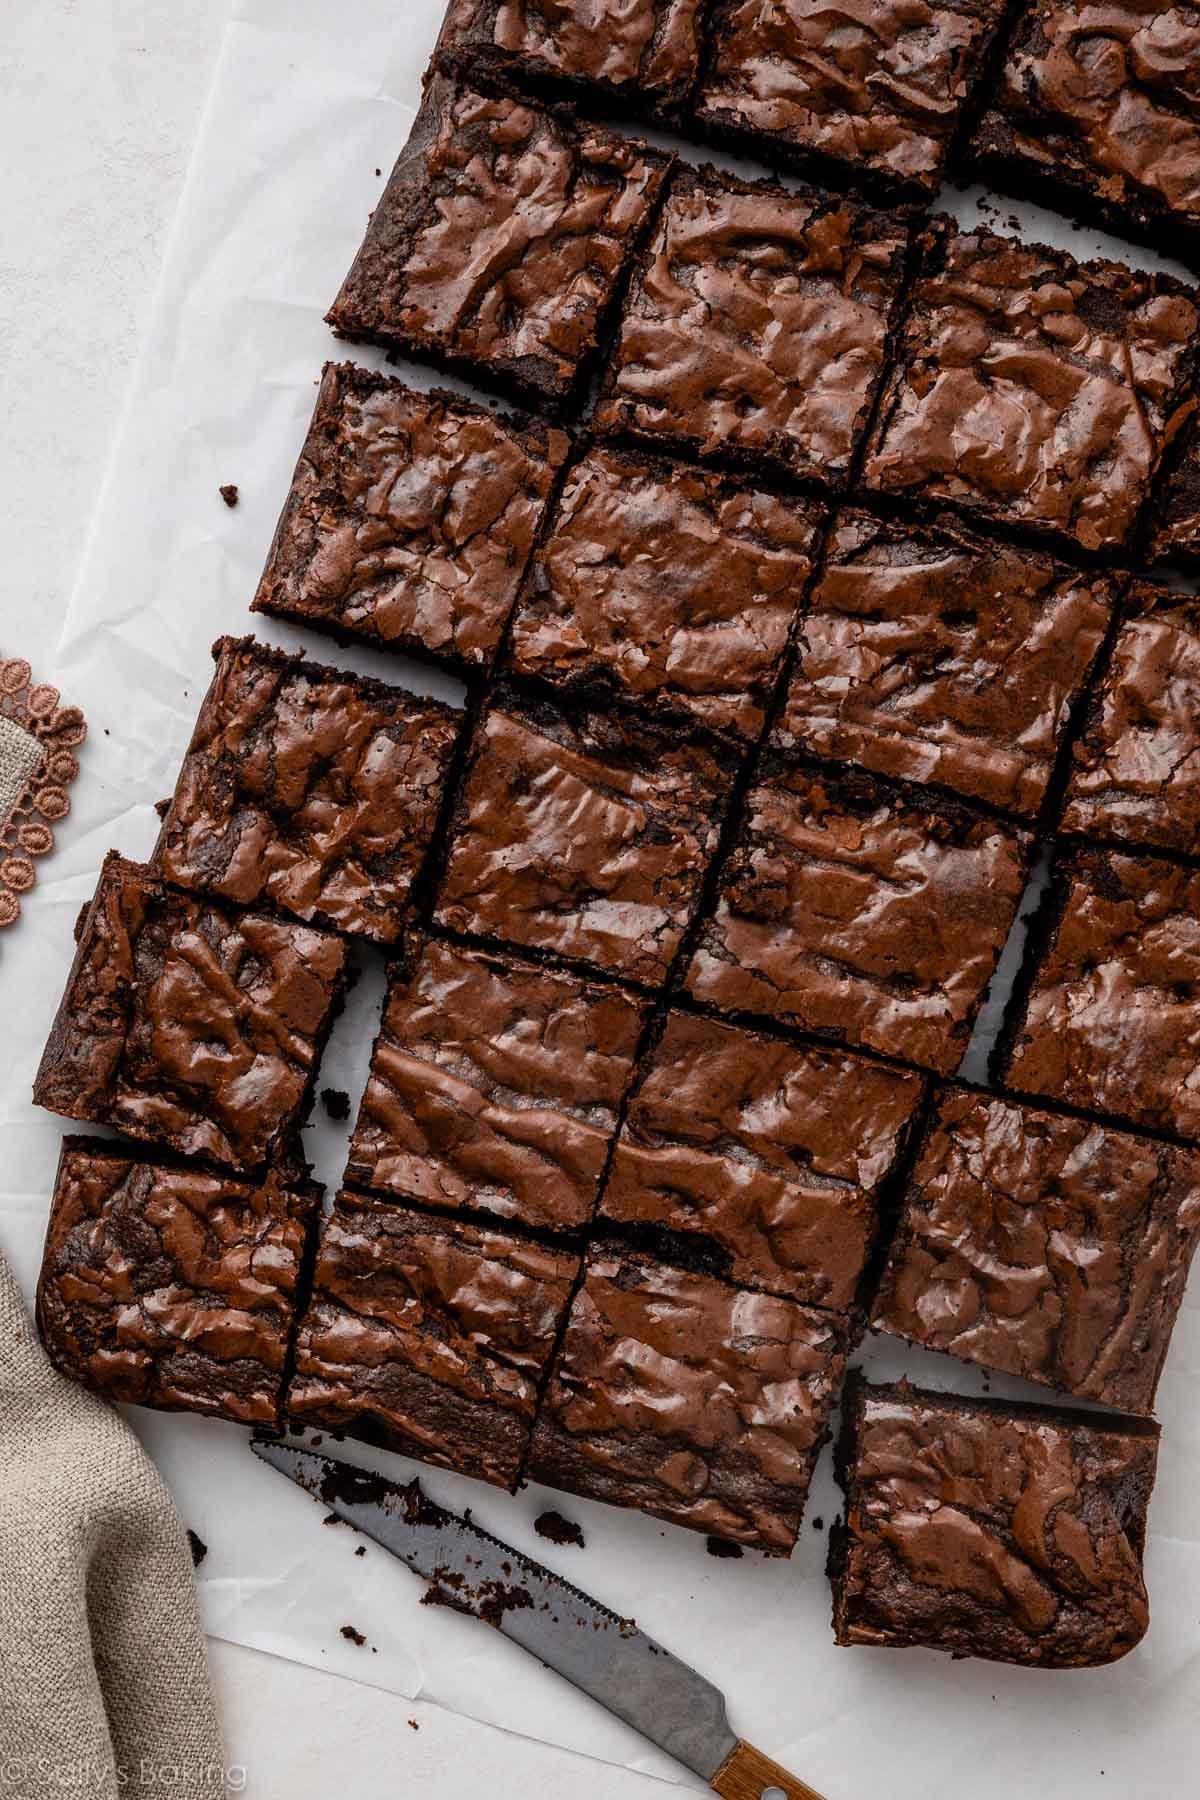
The result? Large-batch brownies with chewy edges, melt-in-your-mouth middles, and that signature tissue-thin shiny crackly top. Perfection.
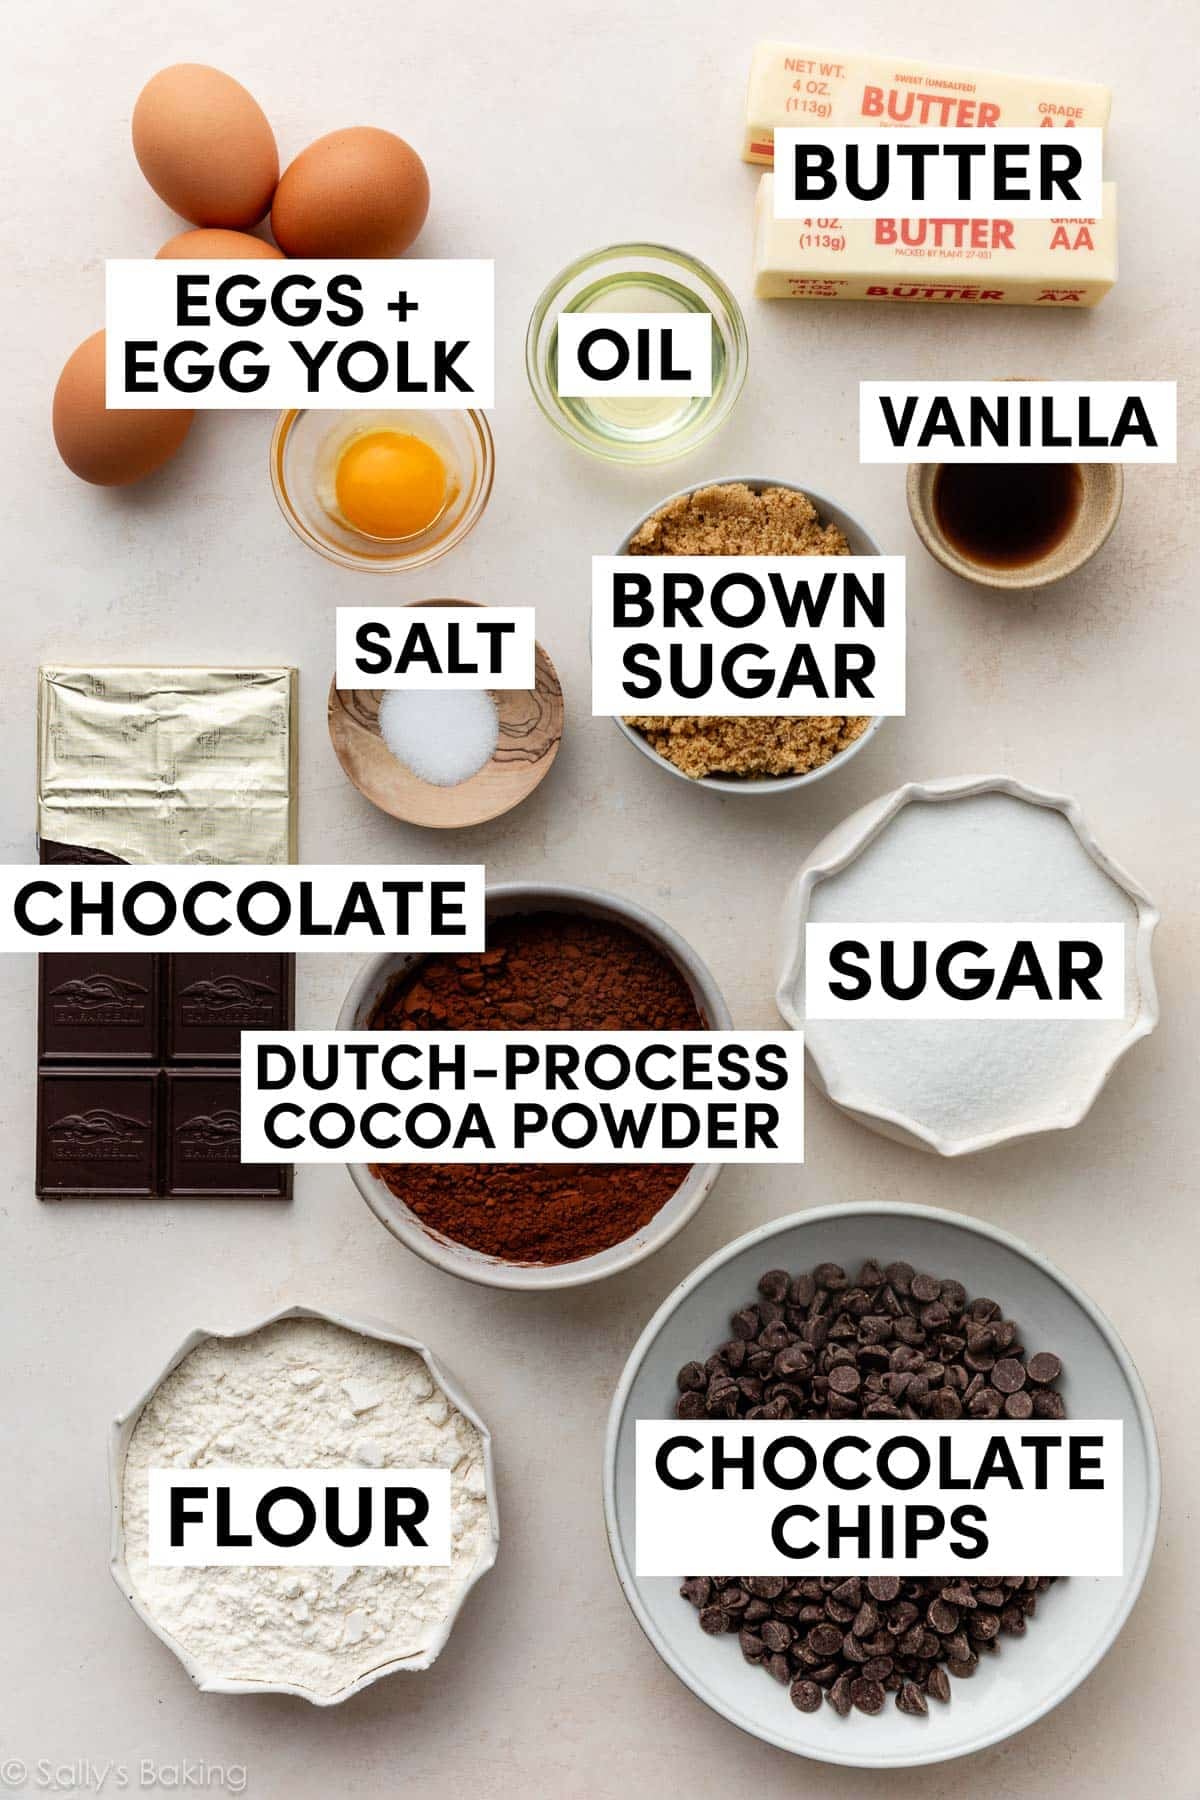
Key Ingredients You Need
- Mostly butter with a touch of oil: There is no question about it… butter provides the best flavor in brownies. However, in our many rounds of testing, the larger pan of brownies kept coming out slightly dry. Finally, we swapped a bit of the butter for oil, which is what makes for extra moist chocolate cake. The moment we tasted that batch, we knew we’d found the solution.
- Chocolate: You need 4 ounces (1 standard bar) of either semi-sweet or bittersweet baking chocolate. Chop it up and melt it with the butter.
- Sugar and brown sugar: Sugar does much more than sweeten brownies. It liquifies as they bake, creating a softer center, and migrates to the top, creating that shiny, crackly surface characteristic of a good brownie. The original homemade brownies recipe uses all white granulated sugar, but our larger batches weren’t quite sweet enough. They also tasted a bit dry. So, we swapped some of the white sugar for brown sugar, which has more depth of flavor. As a bonus, it provides extra moisture as well!
- Eggs, plus 1 egg yolk: Eggs are one of the most important ingredients in brownies. They bind, add richness, and provide structure. To properly scale up the recipe, and to keep such a large batch of brownies chewy and moist, we found 1 extra egg yolk is essential. You need 4 whole eggs, plus 1 additional yolk.
- Dutch-process cocoa powder: Though natural cocoa powder can be used, I strongly suggest a Dutch-process cocoa powder (I really like this brand) for a richer, smoother chocolate flavor.
- Chocolate chips: You may think these brownies have enough chocolate already that you could leave out the chocolate chips, but these aren’t optional! They help bulk up the batter so the brownies are thick, plus they help create an ultra-rich, moist brownie texture.
You also need flour, vanilla extract, and salt.
Helpful Recipe Notes
- Warm melted chocolate and butter are the base of this recipe. Warm ingredients help to dissolve the sugar, which helps prevent grainy brownies.
- This recipe requires an electric mixer, either handheld or stand. You’ll use it to whip the eggs (and additional egg yolk) with the sugars. Whipping these ingredients is the secret to a shiny, crackly, tissue-thin brownie top. As you beat them, the sugar begins dissolving into the eggs while air incorporates into the mixture, creating structure and volume. Then in the oven, the heat continues dissolving the sugar and forms that delicate glossy crust brownies are famous for. Whip until the mixture reaches the ribbon stage: pale yellow, thickened, and almost custard-like in consistency.
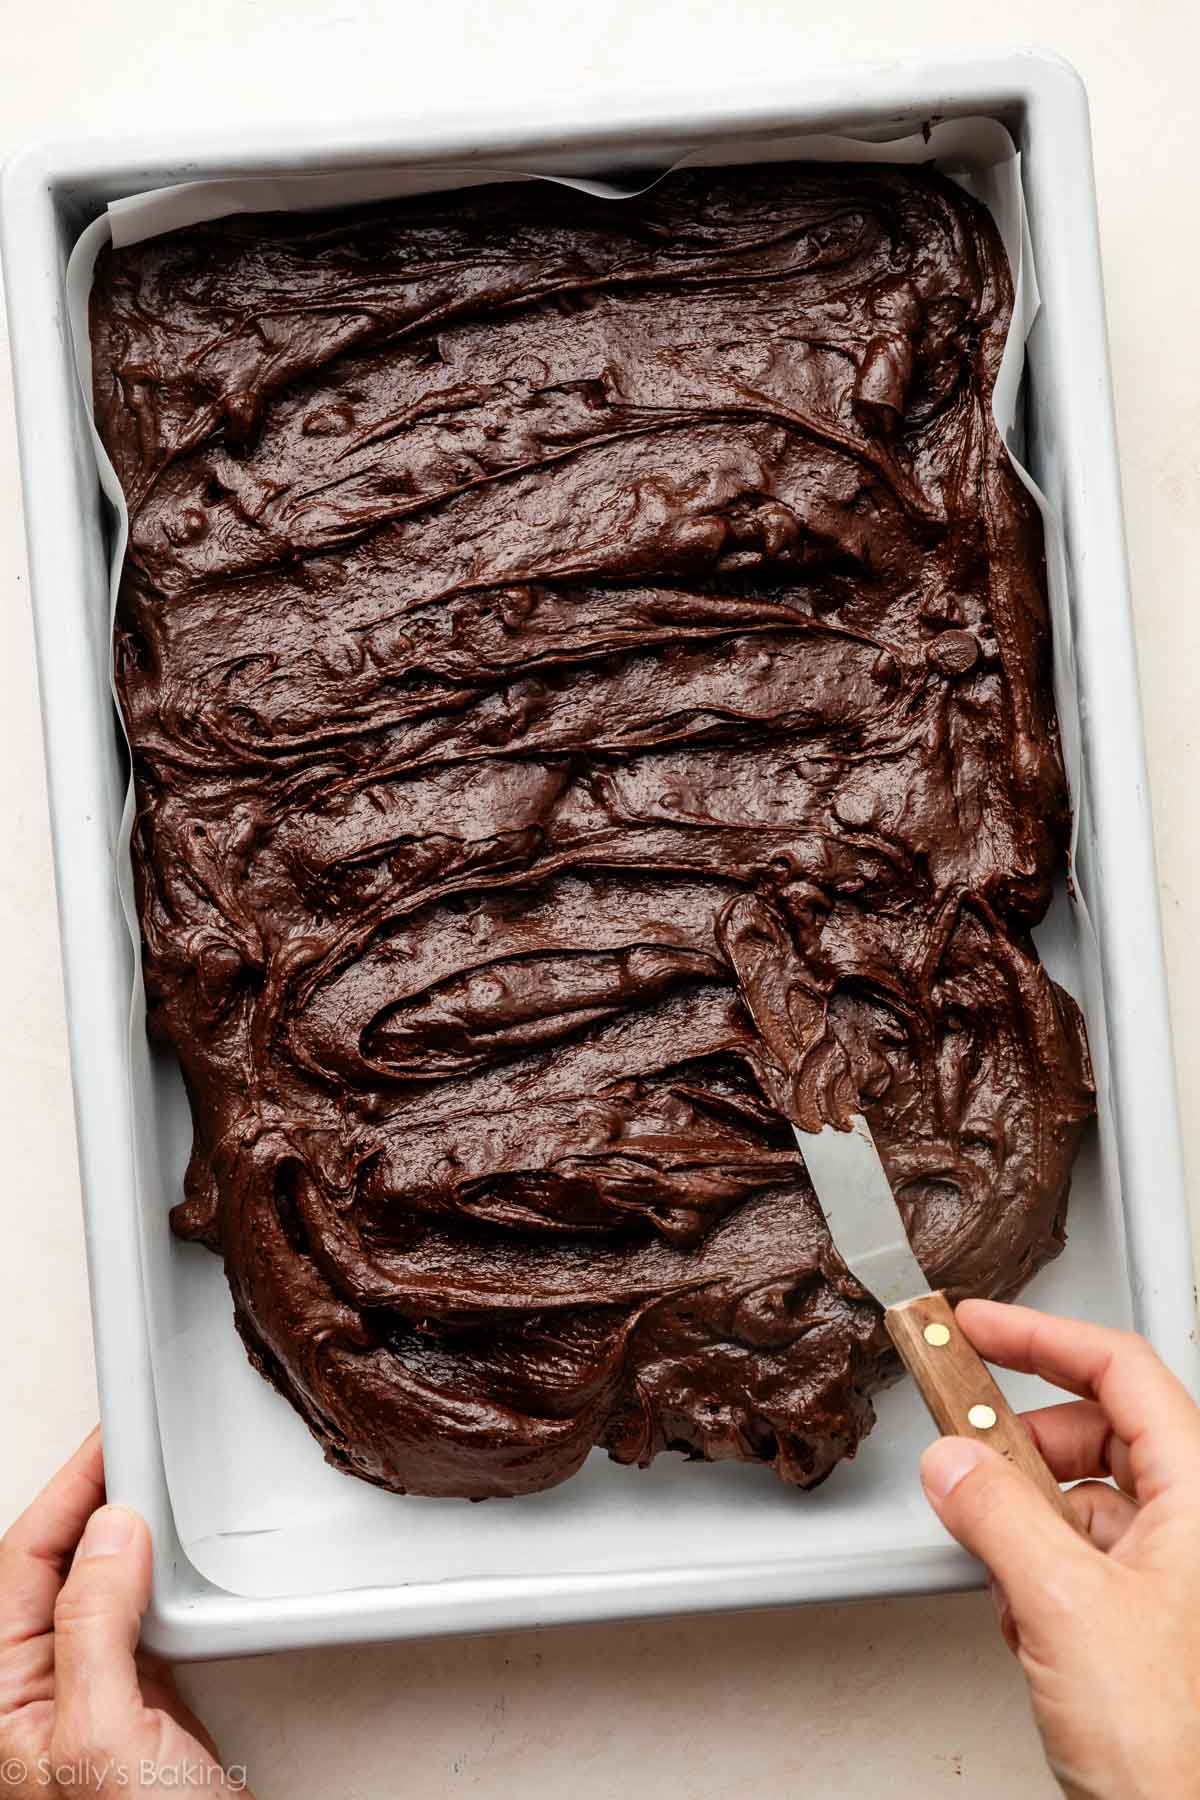
- Don’t skip parchment paper. Line your 9×13-inch pan for easy removal and clean slicing.
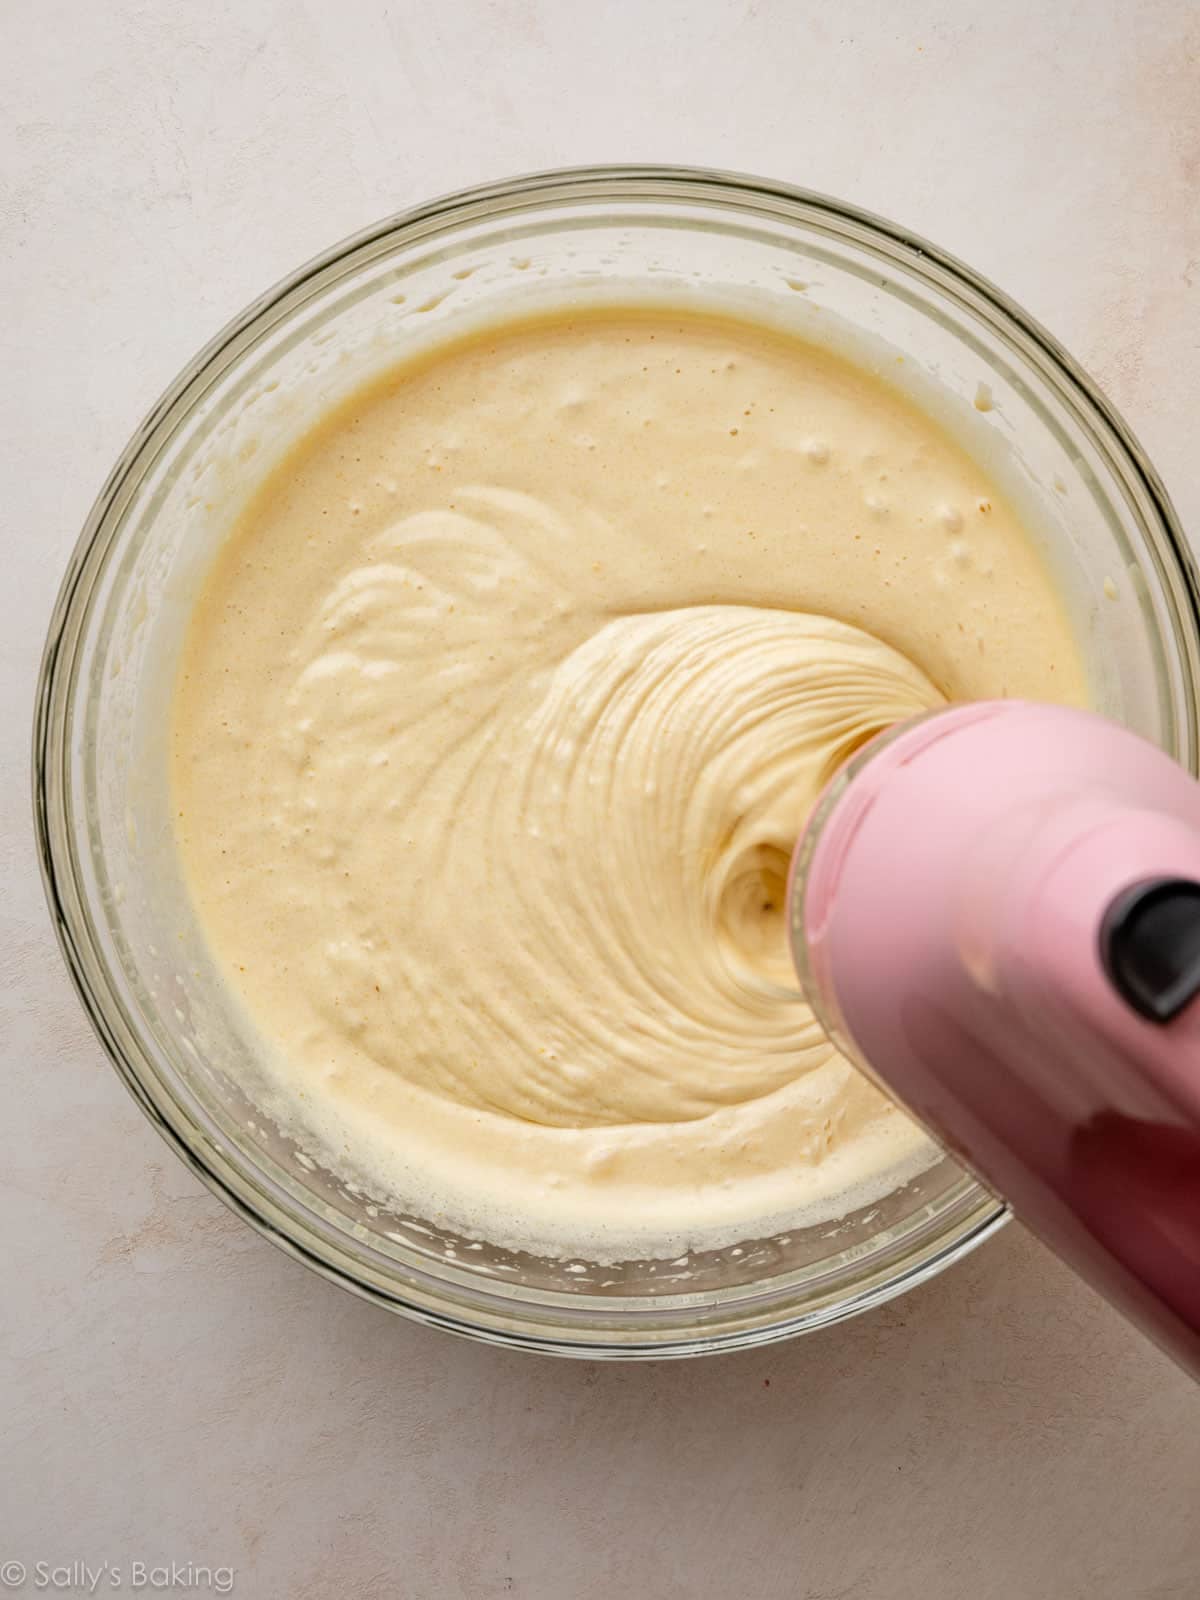
Why Is It Called the Ribbon Stage?
If you stop whipping and lift the beaters or whisk attachment up out of the bowl, the mixture should fall in a continuous stream that creates a trail of folded ribbon lines on the surface that remain visible for 10–30 seconds before they disappear back into the mixture. King Arthur Baking has a helpful article about this, if you’d like some more information and visuals.
Add the melted chocolate/butter to the whipped eggs and sugars, then add the oil and vanilla:

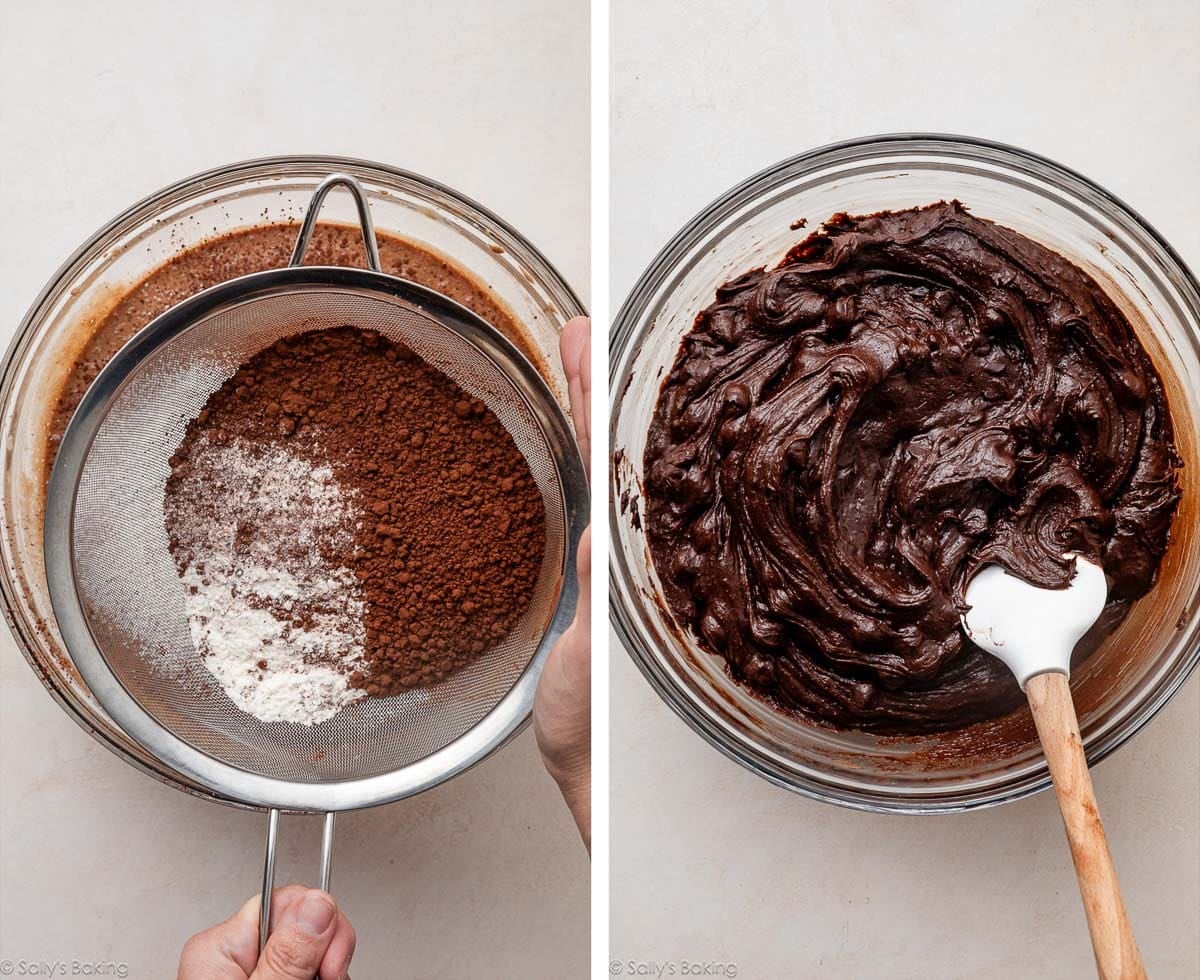
Sift in the dry ingredients, and then fold in the chocolate chips. Expect a thick batter:
The Best 9×13-Inch Pan for Brownies
I strongly recommend using a light-colored metal baking pan for brownies. Metal pans conduct heat quickly and evenly, which gives the most consistent texture and bake time. Avoid dark-colored metal if you can; they can heat the brownies too quickly.
Glass pans heat slower AND retain heat longer, so brownies tend to take longer for the centers to bake through, while the edges over-bake.
Stick with a silver metal pan for brownies—like this one or this one.
How to Tell When Brownies Are Done Baking
This can be tricky, so here’s how to determine when these brownies are done:
- Set the timer to 30 minutes as soon as the brownies go into the oven.
- Stick a toothpick in the center and pull it out. If the toothpick comes out thickly coated in wet batter, the brownies need more time.
- Continue to check the brownies with a new toothpick every 2 minutes. If moist crumbs are clinging to the toothpick, the brownies are done. You don’t want a clean toothpick—that would mean your brownies are overbaked and might be dry. 32 minutes is the most these brownies have ever taken in my oven (if using a light-colored metal baking pan).
Now comes the hard part: waiting for the brownies to cool completely before cutting them. I know, it’s torture! But fully cooled brownies slice much more cleanly and develop an even fudgier texture. If you need a brownie recipe you can dig into right away, try this skillet brownie!
Too much flour usually causes cakey brownies. Be sure to weigh or spoon and level your flour and cocoa powder so you don’t accidentally overmeasure.
Absolutely! Fold in 1 cup chopped walnuts or pecans with the chocolate chips.
Use this very similar recipe for seriously fudgy homemade brownies, which yields 16 brownies in a 9-inch square pan.
You can, but brownies baked in glass pans often take longer and can turn overly chewy and tough around the edges. See the section above on the best pan to use for brownies.
You could use a whisk instead, but it will take some arm muscle and a longer time of vigorous whisking to get the eggs and sugar to reach ribbon stage. I recommend an electric hand mixer or stand mixer with a whisk attachment.


9×13-Inch Pan Brownie Recipe
- Prep Time: 15 minutes
- Cook Time: 30 minutes
- Total Time: 45 minutes
- Yield: 24 brownies
- Category: Dessert
- Method: Baking
- Cuisine: American
Description
Developed specifically for a 9×13-inch pan, this recipe yields a large batch of chewy, fudgy, rich bakery-style brownies that are perfect for sharing.
Ingredients
- 1 cup (16 Tbsp; 226g) unsalted butter, sliced into 16 Tbsp-size pieces
- 4 ounces (113g) semi-sweet chocolate, coarsely chopped
- 1 and 1/2 cups (300g) granulated sugar
- 1/2 cup (100g) light brown sugar
- 4 large eggs + 1 egg yolk, at room temperature
- 2 Tablespoons (28g/30ml) vegetable oil
- 1 Tablespoon pure vanilla extract
- 1 and 1/4 cups (156g) all-purpose flour (spooned & leveled)
- 1 and 1/4 cups (105g) unsweetened Dutch-process cocoa powder
- 1 teaspoon salt
- 1 and 2/3 cups (300g) semi-sweet chocolate chips
Instructions
- Preheat the oven to 350°F (177°C) and line a 9×13-inch metal baking pan with parchment paper, leaving an overhang to lift out the finished brownies (makes cutting easier!). Set aside.
- In a small microwave-safe bowl or liquid measuring cup, combine the butter and chopped chocolate. Melt in 30-second increments, stirring after each, until completely melted and smooth. Set aside to slightly cool while you continue.
- In a large bowl using a handheld or stand mixer fitted with a whisk attachment, combine the granulated sugar, brown sugar, and eggs. Beat on medium-high speed until the sugar begins to dissolve and the mixture is pale and ribbon-y, about 4 minutes.
- Pour the warm melted butter/chocolate into the bowl with the sugar/egg mixture, add the oil and vanilla, and beat or whisk to combine.
- Using a fine mesh sieve, sift the flour, cocoa powder, and salt into the batter, then whisk or beat on low speed until combined. Fold in the chocolate chips. The batter will be very thick. Spread evenly into the prepared pan. (A small offset spatula is helpful here.)
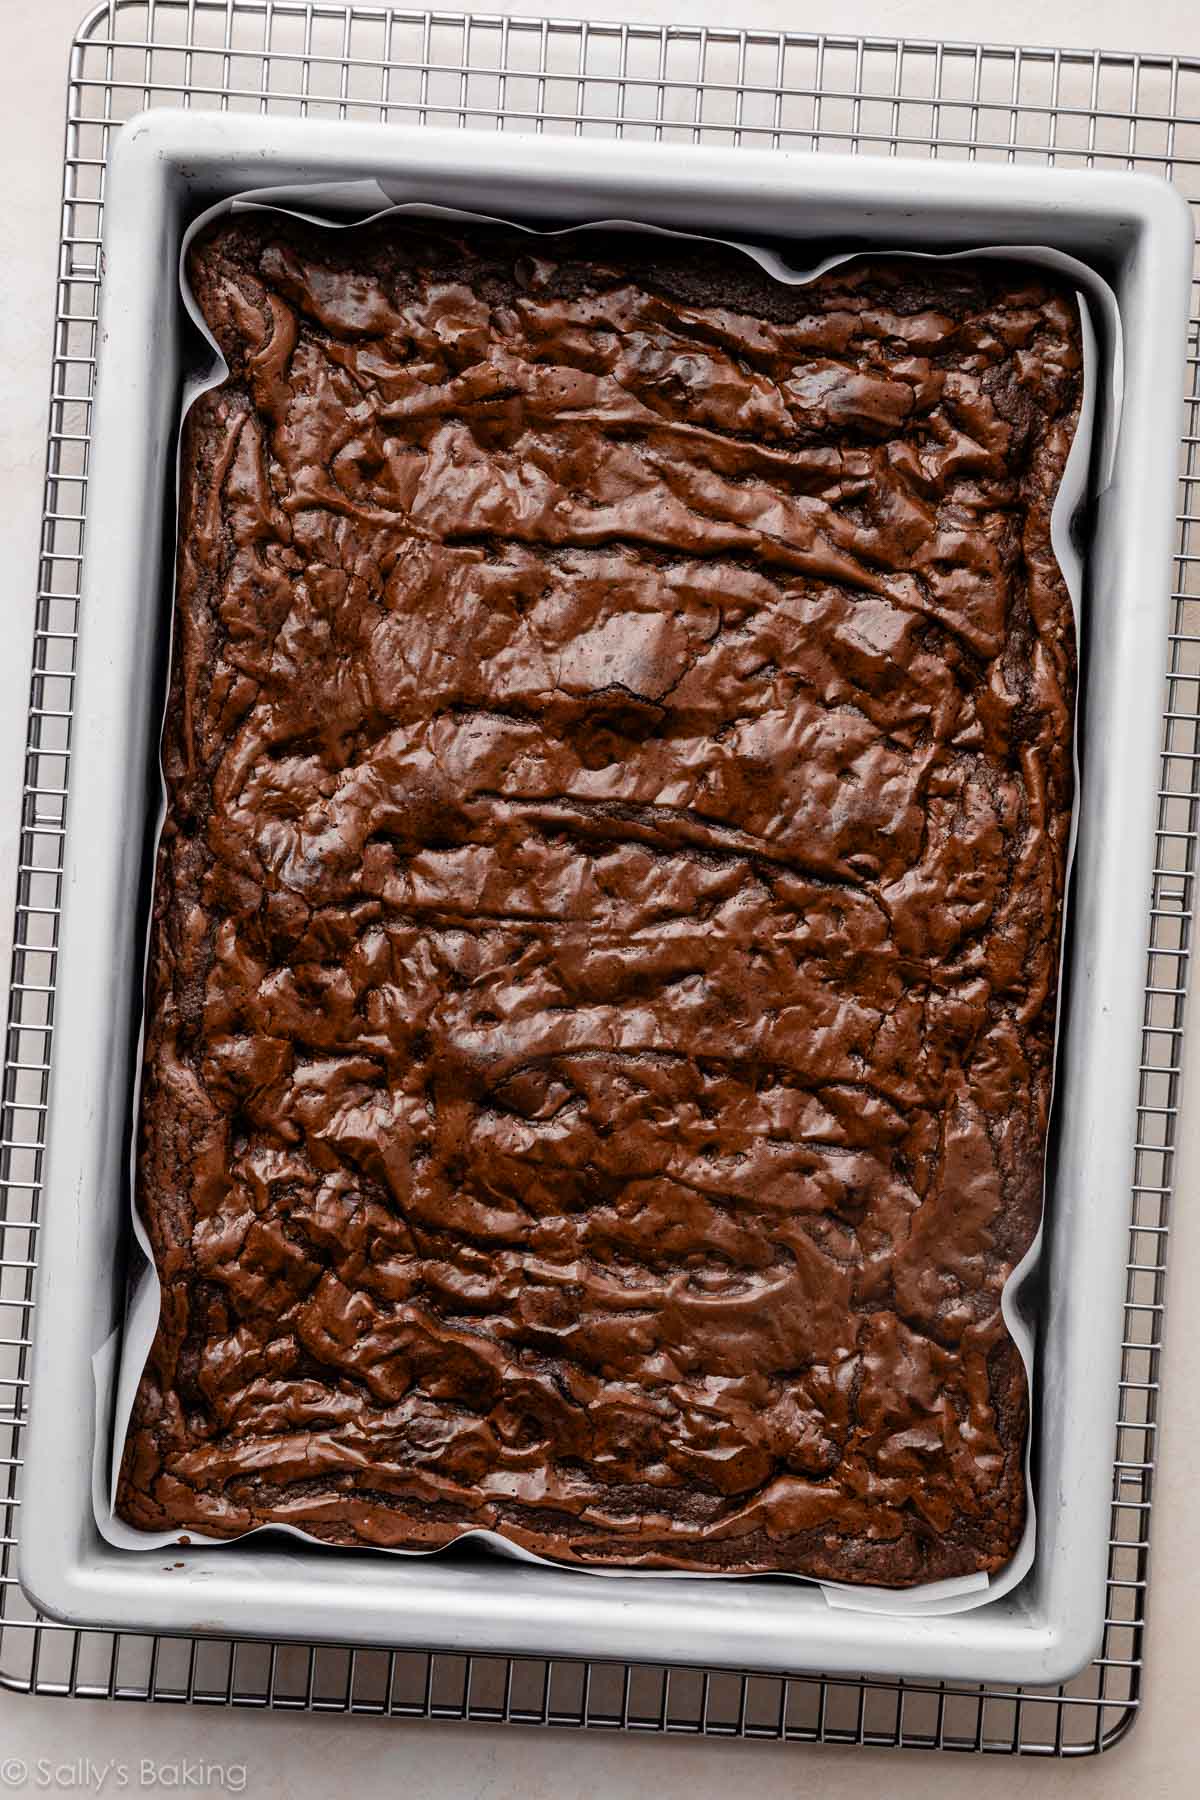
- Bake for 30 minutes, then test the brownies with a toothpick. Insert the toothpick into the center of the pan. If the toothpick is completely coated in wet batter, return the brownies to the oven for 2 more minutes. If the toothpick comes out with moist crumbs clinging to it, the brownies are done. Err on the side of under-baking, as the brownies will continue to set as they cool. (A completely clean toothpick means the brownies are over-baked!)
- Remove from the oven and place on a cooling rack to cool completely in the pan. When cool, lift the brownies out by using the parchment overhangs and transfer to a cutting board. Use a sharp knife to cut into squares.
- Cover and store leftover brownies at room temperature for up to 1 week.
Notes
- Make-Ahead & Freezing Instructions: Brownies freeze well for up to 3 months. Thaw overnight in the refrigerator, then bring to room temperature before serving.
- Special Tools (affiliate links): 9×13-Inch Metal Baking Pan (such as this one or this one) | Parchment Paper | Glass Mixing Bowls | Electric Mixer (Handheld or Stand) | Fine Mesh Sieve | Silicone Spatula | Offset Spatula | Cooling Rack
- Chocolate: Baking chocolate is typically sold in 4-ounce (113g) bars. I suggest Ghirardelli, Baker’s, or Lindt brands; in either semi-sweet (56% cacao) or bittersweet (60% cacao).
- Cocoa Powder: You can use either natural or Dutch-process cocoa powder in this recipe. I strongly recommend Dutch-process (such as this brand) for a smoother chocolate flavor.
- Smaller Batch: Use this very similar recipe for seriously fudgy homemade brownies, which yields 16 brownies in a 9-inch square pan.


Reader Comments and Reviews
These brownies were some of the best homemade brownies I have ever made! I’ve even baking for quite a while, and I’ve never found a by scratch brownie recipe that tastes just as good or equivalent to a box mix with a rich, deep, chocolatey flavor. If you want to find a brownie recipe that tastes just like Ghirardelli dark chocolate brownie mix, this is the one . I’m very picky when it comes to brownies but I loved it.
Turned out great. I will say, they are very rich and more on the dark chocolate flavor side. I personally don’t prefer that, but didn’t feel it warranted any less stars because of my taste preference. I live in the mountains and it did take a while longer to bake (not sure if the mountains is why?). The consistency was great though, even got the nice top on them! Great instructions. I made recipes from 2 sites tonight and did a taste test with my family, most of us prefer the recipe that had more sugar and less cocoa and chocolate chips … mainly because the other recipe was more milk chocolate in flavor. If you like darker chocolate, this is a great recipe for you!
One of my grandson’s needs cocoa from a nut free facility. The dutch one I bought isn’t and some that are are really expensive. Can I substitute Guittard Organic Natural Cocoa Powder? It’s unsweetened but nut free.
Hi Dahris, natural cocoa powder can be used instead. We hope the brownies are a hit!
Thank you so much!
How do you scale up to a full size sheet pan.
Dan
Hi Dan, we haven’t tried scaling this recipe for a pan that size, so we don’t know how they would turn out, and are unsure of the baking time. For best results, make the batter as written for the number of batches needed and bake in separate 9×13-inch pans.
Would it theoretically work to double this recipe for a 18×13″ sheet cake pan since it is exactly double the size of a 9×13″? (I have a sheet cake pan that is deeper than a regular cookie sheet.) I’m trying to find a recipe that makes a larger pan that is also thick.
Hi Alena, while you certainly can try it, we often find that doubling a recipe can sometimes lead to different textures and outcomes. We share more on that thought process in the post, which we discovered while testing and re-testing this recipe. Let us know if you do give it a try!
Hi,
I needed a 9×13 recipe for brownies and figured this would fit the bill. I measured the flour in the grams stated as well as the cocoa. I thought 105 grs of cocoa was a bit too much but I figured the reviews were good so I carried on. The batter was extremely thick. During baking it smelled almost acidic. I let the brownies cool completely for 4 hrs before slicing to box up as a gift.
I cut the very edges to make clean squares and the brownie crumbled. I took a brownie from the middle and it was on the dry side. The taste was acidic so I dropped them in file 13. So sad as all those ingredients went to waste.
I’ve been using the same scale and oven all week.
Can you think of anything that could’ve been the culprit?
I’ve been baking for over 50 yrs and I use the scale all the time.
Hi Patty, I’m so sorry to hear this, and I’d be happy to help troubleshoot. What kind of cocoa powder did you use? And how long were your brownies in the oven?
Hi Beth
I used the Hershey’s brand of 100% Cocoa, not the special dark just the regular.
I noted I kept them in the oven for 30 minutes.
I live this recipe but what changes do I make for 7000 ft. Altitude. I want to make this with my granddaughter when I visit in NM mountains.
Hi Donna, we wish we could help, but we have no experience baking at high altitude. Some readers have found this chart helpful: https://www.kingarthurflour.com/learn/high-altitude-baking.html
I live in NM mtns, about 5000 ft. I made these tonight and they turned out great as written. They did take a while longer to bake … not sure if that was because of the altitude or not. I just used a tooth pick and kept checking.
I recently made these brownies for a family fish fry and they were the absolute hit of the party. Everyone wanted the recipe.
Good morning, What about high altitude baking? What would i need to change? I live at an elevation of over 6000 ft, above sea level. My baking has severely suffered. Please help me. Thank u
Hi Maggie, I wish we could help, but have no experience baking at high altitude. Some readers have found this chart helpful: https://www.kingarthurflour.com/learn/high-altitude-baking.html
The best tool to use when cutting your brownies is to use a plastic serrated knife. This keeps your brownie cuts nice and clean!
I absolutely love this recipe. Made it 3 times already.
One of my friends is not a fan of dark chocolate so I i’m thinking about substituting the semi sweet chocolate bar and the semi sweet chocolate chips for milk, chocolate but leaving the cocoa powder alone your thoughts? I also added walnuts, some toasted sometimes I don’t toast them, but these brownies are absolutely delicious. I only use guittard cocoa and chocolate chips
Hi Barbara! You certainly could if you would like! Or a nice in-between option would be to use semi sweet melted in the batter and then milk chocolate chips as the mix-ins.
These brownies are a sure winner. I made them for a family picnic and they were gone and raved about.
Will definitely put on my repeat list
Taste is delicious. I had a new oven element installed 2 years ago and I should have only baked 25 minutes maximum as the filling was not fudgy. Next time, I will know. When I’ve made the small pan, it was really fudgy and my daughter said best she’s ever had. Sally you are an awesome baker.
I wish you would list the calories and nutritional values of you recipes.
Hi Linda! We don’t usually include nutrition information as it can vary between different brands of the same ingredients. Plus, many recipes have ingredient substitutions or optional ingredients listed. However, there are many handy online calculators where you can plug in and customize your exact ingredients/brands. Readers have found this one especially helpful: https://www.verywellfit.com/recipe-nutrition-analyzer-4157076
I just made your zucchini brownies. They are so moist and rich. I do make them alot and I never tell my husband that there’s zucchini in them. But I definitely will make this brownie recipe next.
These are incredibly thick, soft,
chocolaty, luscious brownies!!!
Thank you, Sally!!!❤️
I made these for Memorial Day get together and they were a huge hit with the kids and adults!! The trick is to not over bake like you advise in the instructions. So good!!
I made the 9 x 13 brownies. They were absolutely fantastic!! Best brownies I have ever eaten.
Hands down the BEST brownie recipe I’ve ever made. I immediately wrote it down and hung it on the fridge. I let it bake for 30 minutes and then completely cooled. Probably could have done another 2 minutes but it was so fudgey! Kids and husband loved it
Hi, I just baked these brownies and they are currently cooling in the pan. I noticed that the top of the brownies is very smooth, almost like a cake, and not much of a crackly top. I measured each of the ingredients, where applicable, with an electric scale so I’m confident I used the correct amounts. I also followed the steps very closely (used a kitchen aid mixer) and baked the brownies in a 9×13 USA pan. Any ideas what could have caused this to happen? Thank you.
Hi Pam, a shiny, crackly top can vary from batch to batch, even when the brownies turn out perfectly. One of the biggest factors is whipping the eggs and sugar until thick and ribbon-like, as directed in the recipe. Was your mixture thick after mixing? Small differences in mixing time or even the ingredient temperature can affect the appearance of the top, too. How did they taste?
Hi Sally,
The brownies ended up being just okay. I was able to get the ribbon texture after whipping the sugar and eggs for the time/speed stated in the recipe. I have an oven thermometer and took the brownies out after the toothpick inserted in the middle showed some moist crumbs, but the edges were kind of dry. The brownies were dense in the middle but overall cakey and didn’t have a fudgy flavor. I’ve made your other 9×13 pan brownies recipe many times and those always turn out amazing. Not sure what happened here.
Have you tried making these into brownie bites in a mini muffin tin? I think I’m going to try it! I will let you know if they turn out good!
These made perfect brownie bites! Thanks Sally. I wish I could attach a picture!
How long did you bake for? Trying this tonight
Hey Carley,
13 min at 350 for my oven
Excellent brownies, we loved them. Crispy edges, moist center, perfect rich chocolate yuminess
Hi I made these brownies and they were good but not as good as the seriously fudgy homemade brownies that you updated recently. I followed this updated recipe exactly and they were good but not as good as the old recipe. Can you bring that back? I always made them in a 9×13 glass pan and they were awesome. Thank you!
Thank you for this wonderful recipe!!! These are the best brownies I have ever made! My family loves them! Looking forward to trying other recipes you have!
I’ve made many brownie recipes over the years and this is the one that tastes most like a Ghirardelli box mix which is the highest praise. This will be my go to brownie recipe from now on.
As I was making this recipe, I noticed the difference in grams for the flour and cocoa (they both say 1 and 1/4 cups). The grams stated for the cocoa equal 3/4 of a cup, which sounded much more accurate. I made them that way and they were perfect. Please either correct the grams or cup measurements, so as not to be confusing in the middle of baking. Thank you!
PS. I love all your recipes!!
I agree with you Denise. I made them as directed on the recipe and the flavor was great but the texture was off.
When I googled it, it says cocoa powder is 105-131 grams is equal to 1 & 1/4 cup, depending on which kind you use and the way it packs. Cocoa is lighter than flour, therefore the weight in grams will seem higher. This comment does have me a little confused now though, cuz I’m not sure which to use. Lol
I hope this measuring mistake is corrected. I haven’t made them yet and I’d like to know what’s accurate. Thank you for catching it.
Hi Judy, the recipe listed is correct. 1 1/4 cup of flour and 1 1/4 cup of cocoa will not weigh the same because they have different densities.
All I have is a glass pan. I know you don’t recommend this, but if that’s all I have and I want to make these do I change the temperature or bake time?
Hi Andrea, Glass pans heat slower AND retain heat longer, so brownies tend to take longer for the centers to bake through, while the edges over-bake, as the glass keeps cooking the brownies after you’ve taken them out of the oven. Metal pans conduct heat quickly and evenly, which gives the most consistent texture and bake time. If you do decide to try them with a glass pan, you can try tinkering with the temperature and keep a very close eye on them.
This is really helpful. I made the 9″ recipe in a Le Creuset baker and they took forever to bake in the middle. Still delicious though! Making the bigger batch for an event to share 🙂
Can I use this recipe with an 11×14 pan? It’s the only aluminum one I have!
Hi Laur, the brownies would be much thinner in that pan and lose their intended texture. A 9×13-inch pan really is best for this particular recipe! We also have this brownie recipe for a 9-inch square pan.
These look so good! I use an instant read thermometer for all of my baked goods to make sure they are done. What internal temp would you suggest to bake the center to? Thanks!
Hi Rebecca! I don’t typically use an internal temperature to test brownies, just a toothpick, but if you’d like to be precise, it’s definitely helpful! You’ll likely find the center is somewhere around 180–190°F when they’re baked to a fudgy texture!
Would gluten free flour have the same result?
Hi Maryanne, we haven’t tested this recipe with gluten-free flour, so are unsure of the result. If you decide to try it, please report back!
I’m so excited to try them
Hi! Used Bob’s Red Mill Gluten free 1-1 baking flour, and they came out perfectly! Just make sure your oven is the right temp, and you don’t overbake. They were delicious and a big hit with everyone! You could not tell they were gluten free!
Hi. The adds are overlapping with the instructions.
Hi Keesha, we noticed this issue last night. I’m so sorry about it, and it’s been expedited to our ad network to fix first thing today. Please email us if you need specific instructions before the issue is resolved. Sorry again. sally(at)sallysbakingaddiction.com
Worked perfectly. Thank you.