

Learn how to make homemade chocolate cake pops completely from scratch, with no box cake mix or canned frosting. Combine rich chocolate cake with the best chocolate buttercream, and coat in melted chocolate for a treat that will make your tastebuds pop! Watch the video tutorial for all my best tips.
See my vanilla cake pops recipe, too.
I originally published this recipe in 2018 and have since added new photos and a video.

Chocolate cake + chocolate frosting + colorful sprinkles = the most adorable treat! Today we’re making chocolate cake pops because, after I shared my vanilla cake pops, I received so many requests for a chocolate version! Your wish is my command.
This recipe was a Sally’s Baking Challenge back in 2018, and readers have loved them over the years:
One reader, Sophia, commented: “Such an awesome recipe—these are basically Starbucks dupes and super yummy! I made the cake pops for a friend’s birthday but my family almost ate all of them before I could give any to her, LOL. ★★★★★”
One reader, Jen, commented: “This recipe was great! Made them for my son’s birthday party and had multiple people ask for the recipe! My son even said they were better than Starbucks! ★★★★★”
By the way, if you’ve ever eaten store-bought cake pops—these taste totally different. They’re from scratch. There’s no cake mix, there’s no canned frosting. You can actually TASTE the homemade.

I have plenty of step-by-step photos, a video tutorial, and lots of success tips today because I want you to understand every instruction before it’s your turn to make them. After all, the process isn’t difficult—you’re literally just baking a chocolate cake and making frosting and then mixing them together. But things just get a little particular when it comes to rolling, lollipop-sticking, and dunking/dipping. If you can make bread bowls, you can handle cake pops. (They’re more fun to eat too… sprinkles!)
How to Make Chocolate Cake Pops
Since we’re ditching box cake mix and canned frosting, we’ll need to take a little extra time to prep both from scratch. Here’s an overview of the process:
- Make a 1-layer chocolate cake and let cool.
- Make chocolate frosting.
- Crumble cake into frosting and mix.
- Roll the mixture into balls.
- Dip in melted chocolate.
- Top with sprinkles and let dry.
- EAT!
Quick tip: Whenever I make cake pops from scratch, I always begin the night before. I make the cake, cover it, and let it sit out at room temperature overnight. I also prepare the frosting, cover, and refrigerate. This way everything’s ready to go the next day.
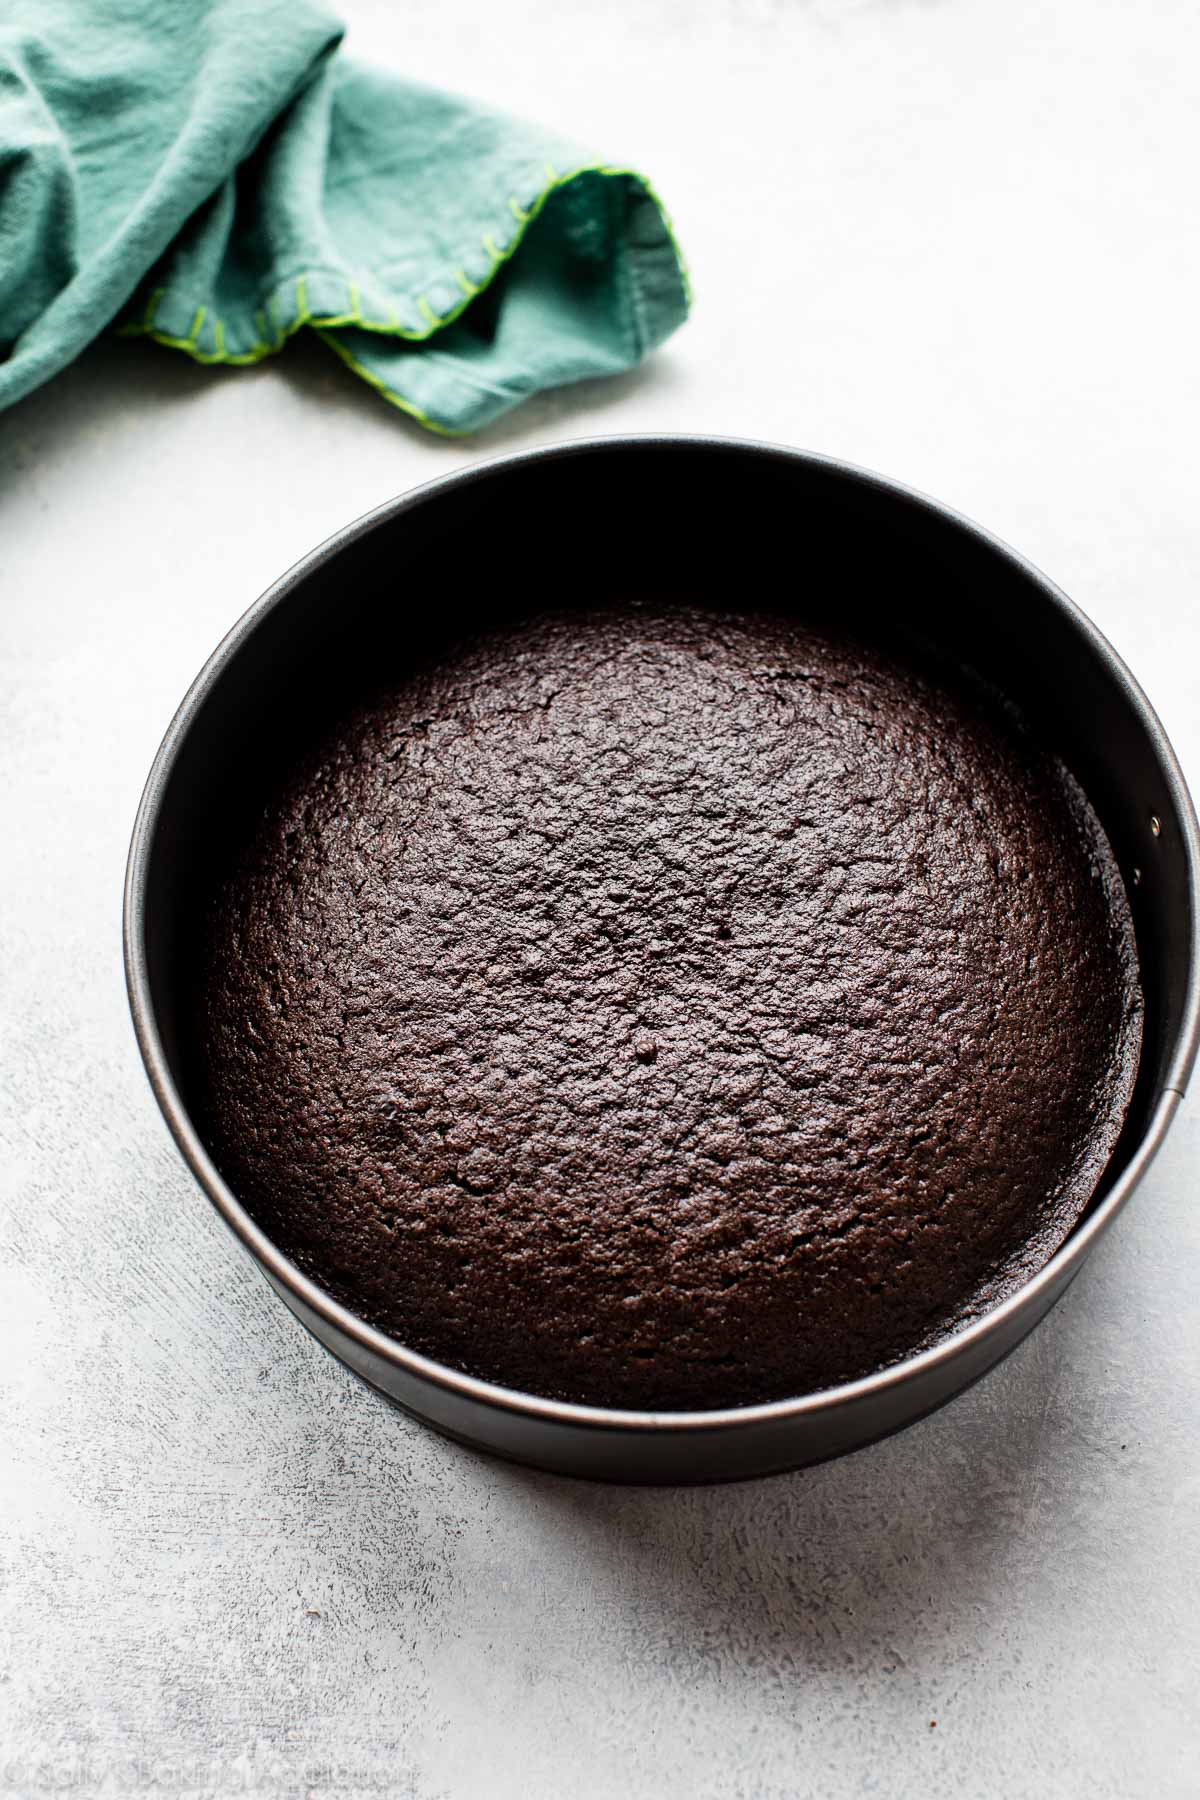
Make a 1-Layer Chocolate Cake
It might seem like the switch from vanilla cake pops to chocolate cake pops is easy. Replace some flour with cocoa powder, right? And vanilla frosting with chocolate frosting? I wish! Chocolate is a complicated soul and requires a little finesse; that’s why my vanilla cake and chocolate cake recipes are so different! I baked a few single-layer chocolate cakes before stopping with this one.
Behind the Scenes: Recipe Testing
The first few began with creamed butter + sugar. My favorite chocolate cakes and cupcakes typically rely on oil for the fat because (1) moisture and (2) the flavor of butter really isn’t necessary because chocolate overpowers it anyway. My initial thought with cake pops, however, was that I needed a slightly drier cake to get the best texture for cake pops (because it will be mixed with frosting). Well this was just a huge mess from the start, because dry cake is gross.
That being said, you’ll need oil for the cake. And a few other basics like cocoa powder, sugar, flour, and eggs. Hot water is also a must. The hot liquid encourages the cocoa powder to bloom and dissolve. When I make chocolate cake, I usually reach for hot coffee (instead of hot water) because coffee accentuates the chocolate favor—but that’s not as crucial here, because we’re just crumbling the cake and mixing with chocolate frosting.
By the way, you can totally enjoy this chocolate cake on its own. If you ever need a single-layer chocolate cake—use this recipe. It’s so good. Deep and dark chocolate flavor. Super moist. Super rich. Top with chocolate buttercream, whipped cream, peanut butter frosting, or red wine chocolate ganache.
What was a little more difficult than testing the perfect single-layer chocolate cake was figuring out how much frosting I needed. Too much frosting and the cake pops are wet and greasy, while too little frosting means there isn’t enough to bind the cake crumbles. After lots of trial and error, I finally found the perfect amount… and it’s not much, because the chocolate cake is already so moist.
Crumble the cake into the bowl of frosting, and yes, you’ll feel very weird doing this. You just made this beautiful chocolate cake and will now break it up into a bowl of frosting. Because that’s what cake pops are—cake crumbs and frosting.

Once the two are mixed together, it’s time to roll the mixture into balls. This part is EASY. I found the chocolate cake pops much easier to roll into balls than my vanilla version. This mixture is just sooo smooth! Your hands will get a little sticky, but just roll with it. 😉

Tips for Homemade Chocolate Cake Pops
Success Tip #1: Make Smaller Cake Pops: If you roll the cake pops too large, they’ll wobble off the lollipop stick because they’re too heavy. You need 1 Tablespoon of the cake pop mixture per ball (about 20g). No more, no less. You’ll end up with 40 of them. Quite a lot—but these freeze beautifully! And you can gift them to anyone and everyone. Who doesn’t love a homemade cake pop?
These cake balls need to chill in the refrigerator before we pop ’em on a lollipop stick. Why? They’re much too delicate right now; they’ll completely fall apart. Which reminds me… you do NOT have to make these as pops. You can make them truffle-style by simply rolling them and coating in chocolate (just like how we make Oreo balls). Either way you enjoy them, chill the cake balls before coating. I just place them on a lined baking sheet and refrigerate them for a couple hours.
- Speaking of chocolate, you can dunk the cake balls into melted chocolate (white or semi-sweet), which is what I prefer for best taste, but that’s pretty expensive. And you need a good amount for all 40 cake pops. Instead, you can use candy melts/candy coating, and I give both options in the recipe below, along with notes for each choice.
Success Tip #2: To ensure the cake ball stays secure on the lollipop stick, dip one end of the stick into the melted chocolate coating first (just about 1/2 inch down), and then insert the coated end into the center of the cake ball. This helps the cake ball adhere to the lollipop stick.

Success Tip #3: A 2-cup glass liquid measuring cup is the perfect depth for dipping the cake pops. If I’m using melted chocolate, like I did in these photos, I melt it in a double boiler then spoon a little at a time into the measuring cup. I don’t like dipping right into the whole pot of melted chocolate. Let the melted chocolate cool down for about 5 minutes before you dip the cold cake balls into it. (Otherwise the coating might crack as it dries.)
Success Tip #4: The best way to allow the coating to dry and set—without ruining the perfectly round cake pops—is to place them right-side-up in a large styrofoam block or even a box. I used a box, as pictured below, for this batch. I just poked little holes into it. Easy and cheap.

If you’re topping with sprinkles (always recommended!), add them now before the chocolate sets. Cake pops dry/set within an hour or so. Enjoy!


Chocolate Cake Pops
- Prep Time: 2 hours
- Cook Time: 26 minutes
- Total Time: 7 hours
- Yield: 40 cake pops
- Category: Cake
- Method: Baking
- Cuisine: American
Description
Chocolate cake pops from scratch—made with homemade chocolate cake and chocolate frosting, dunked in melted chocolate and topped with sprinkles! Follow my thorough instructions, tips, and video tutorial for best results.
Ingredients
- 1 cup (125g) all-purpose flour (spooned & leveled)
- 1 cup (200g) granulated sugar
- 6 Tablespoons (32g) unsweetened natural cocoa powder (1/3 cup + 1 Tbsp)
- 1/2 teaspoon baking soda
- 1/4 teaspoon salt
- 1/2 cup (120ml) canola, vegetable, or melted coconut oil
- 2 large eggs, at room temperature
- 1 teaspoon pure vanilla extract
- 1/2 cup (120ml) hot water
Chocolate Frosting
- 6 Tablespoons (85g) unsalted butter, softened to room temperature
- 3/4 cup (90g) confectioners’ sugar
- 1/2 cup (41g) unsweetened natural or Dutch-process cocoa powder
- 2–3 teaspoons heavy cream or milk
- 1/2 teaspoon pure vanilla extract
Coating
- 24 ounces (680g) candy melts (or semi-sweet chocolate bars)*
- sprinkles
Instructions
- Preheat oven to 350°F (177°C). Grease a 9-inch pan (round or square) or 9-inch springform pan.
- Make the cake: Whisk the flour, granulated sugar, cocoa powder, baking soda, and salt together in a large bowl. Set aside. Whisk the oil, eggs, and vanilla together in a medium bowl. Pour the wet ingredients into the dry ingredients, add the hot water, and whisk everything together until combined. Make sure there are no pockets of dry ingredients hiding.
- Pour the batter evenly into the prepared pan. Bake for 25–27 minutes or until a toothpick inserted in the center comes out clean. Allow the cake to cool completely in the pan set on a wire rack.
- Make the frosting: With a handheld or stand mixer fitted with a paddle attachment, beat the butter on medium speed until creamy, about 2 minutes. This isn’t a lot of butter and it will get stuck on the sides of the bowl, so you may need to scrape down the sides of the bowl with a rubber spatula to really help get it creamed. Add confectioners’ sugar, cocoa powder, 2 teaspoons of heavy cream/milk, and vanilla extract, and beat on low speed until incorporated. Increase to high speed and beat for 3 minutes until it really comes together. Add another teaspoon of milk/cream if it looks a little too thick.
- Crumble the cooled cake into the bowl on top of the frosting. Make sure there are no large lumps. Turn the mixer on low speed and beat the frosting and cake crumbles together until combined.
- Measure 1 scant Tablespoon (20g) of moist cake mixture and roll into a ball. Place cake balls on a lined baking sheet. Refrigerate for 2 hours or freeze for 1 hour.
- Melt the coating in a 2-cup liquid measuring cup (best for dunking!). Microwave in 20-second increments, stirring after every 20 seconds until completely melted and smooth. (Or you can use a double boiler and pour a little at a time into the liquid measuring cup.) Let the coating cool down for a few minutes before you begin dipping. If it’s too hot when you dip, the coating will crack.
- Coat the cake balls: Remove only 2–3 cake balls from the refrigerator at a time. (Keep the rest cold!) Dip one end of a lollipop stick about 1/2 inch into the coating, then insert into the center of the cake ball. Push it about halfway to 3/4 of the way through the cake ball. Dip the cake ball into the coating until it is completely covered. Make sure the coating covers the base of the cake ball where it meets the lollipop stick. Very gently tap the stick against the edge of the measuring cup to allow excess coating to drip off. Decorate the top with sprinkles and place upright into a styrofoam block or box (as explained in the blog post above). Repeat with remaining cake balls, only working with a few out of the refrigerator at a time. The cake balls must be very cold when dipping!
- Coating will set within an hour. Store cake pops in the refrigerator for up to 1 week.
Notes
- Make Ahead Instructions: I always make the cake 1 day ahead of time. Cover and keep at room temperature. You can store the undipped cake balls in the refrigerator for up to 2 days or freeze them for up to 6 weeks. Allow to thaw in the refrigerator then continue with step 7. You can also freeze the finished cake pops for up to 6 weeks once the coating has fully set. Thaw overnight in the refrigerator.
- Special Tools (affiliate links): 9-inch Round Pan, 9-inch Square Pan, or 9-inch Springform Pan | Electric Mixer (Handheld or Stand) | Glass Mixing Bowls | Whisk | Baking Sheet | Silicone Baking Mat or Parchment Paper | Glass Measuring Cup | Double Boiler | Lollipop Sticks
- Chocolate: You can use candy coating/candy melts, almond bark, or semi-sweet chocolate (or white chocolate). If using almond bark or chocolate, chop it up before melting. Melt it with 1/2 teaspoon vegetable oil to thin out so it’s easier to use as a coating. Keep warm over a double boiler. You can also temper pure chocolate for the coating. My full tempering tutorial is in Sally’s Candy Addiction if you have a copy.
- Cake Balls: Want to skip the lollipop stick? Go for it. Just dip the cake balls in melted or tempered chocolate to make delicious chocolate cake truffles. Whenever I dip truffles, I always use this spiral dipping tool. Drop the truffle in the chocolate and lift it out with the dipping tool. Quickly flip it upside down onto a lined baking sheet. You can see exactly how I do this in this post (scroll down for video): dark chocolate coconut rum truffles. Go to the 1-minute mark. That’s how I dip and neatly release truffles. So easy!
See Your Chocolate Cake Pops!
Many readers tried this recipe as part of a baking challenge! Feel free to email or share your recipe photos with us on social media. 🙂


Reader Comments and Reviews
Hi Sally
Your recipes look delicious!
What flavor candy melts do you use for the chocolate cake pops? Could you link your favorite one?
Thank you 🙂
Hi Aga, we prefer to use melted baking chocolate, but you can use chocolate (or white chocolate) candy melts or baking wafers instead. Ghirardelli has chocolate and white chocolate melting wafers that will work well here. See recipe notes for more details. Enjoy!
Hi Sally, I love your recipes! I’m a big fan. I’m wondering if you’ve ever tried to use 1/2 cup hot milk instead of the 1/2 cup water? I’ve made this recipe numerous times, but I’m wondering how it’d taste with hot milk (or even hot buttermilk) instead of hot water would do. Thanks!
Hi SM, hot milk should work just fine here instead. Enjoy!
The chocolate cake is delicious in this recipe! Would doubling the recipe be enough for a 1/2 sheet cake? or Triple?
Hi Shiela, here’s everything you need to know about cake pan sizes and conversions.
Your chocolate recipe for caakepops is awesome! Can the cocoa be omitted to make vanilla ones? I can’t find a decent recipe for one!
Hi Alicia, We’re thrilled these were such a hit! Here is our recipe for Vanilla Cake Pops.
These cakepops are the best cakepops I’ve ever had, and everyone who ate them said the same thing! They are so moist and delicious, this is my first time making cakepops and they are so easy to make. You will not regret making tgese!!
I have just made these but I was wondering if something happens if I chill them for a longer period of time 5-6 h ??
That should be fine, Ioana.
Thank you for this recipe! The cakes are delicious!! But, also curious if anyone else has experienced this…. I’ve baked both the vanilla and chocolate cakes from both cake ball recipes and each time I’ve needed to add about 10 minutes to the baking time. Oven is set to 350 degrees F, and I used a 9 in spring form pan. Anyone else have a similar issue? Is it just my oven?
Hi Sunny, every oven can be a bit different, but perhaps yours runs a bit cooler than it reads? An oven thermometer can help to determine that. If it’s working for you to bake for slightly longer, then not a problem!
I have heard of ppl making cake pops without any frosting at all. they would crumble the hot cake right after baking, and the steam would act like frosting and bind everything together. is that possible here? would the flavour be more bland?
Hi Ellie, we haven’t tested that. You’ll certainly lose some flavor without frosting.
nobody knows but it could be possible.
Can I use Cacao powder instead?
Hi Lindsey, you can use cacao powder if that’s all you have, however natural unsweetened cocoa powder is ideal here. Cacao powder can be drying and bitter and may require some tweaking of the other ingredients. Let us know what you try!
Have you tried making a cookies and cream version? I’m thinking of doing the chocolate cake but mixing it with the frosting recipe from your other cake pop recipe. Wondering if this would work for that!
Hi Renee, we haven’t tested it, but don’t see why it wouldn’t work! Please let us know how they turn out!
I made this once before and it was a big hit! I am about to make it again but I only have regular butter… I will this work?
I was wondering if i can substitute the oil with avocado oil or olive oil? Thank You so excited to try this recipe
Hi Gizel, You could use olive oil or avocado oil here instead of the vegetable oil if you prefer, but the flavor may change.
I rarely ever leave reviews for things, but I had to leave one for this recipe. I have made these cake pops multiple times now and have had SO many people compliment them and rave about them. I’ve even had people offer to pay me to make these for them because they are just THAT good. Thank you for another wonderful recipe, Sally!
I was looking everywhere for a cake pop recipe that DIDN’t use a boxed cake and finally found this one which is perfect. I’d recommend doubling the milk needed for the frosting but otherwise it turned out perfectly for my bf on Valentine’s Day. Great recipe thank you!
can I just use semi sweet chocolate chips instead of normal chocolate?
Hi Alana, We don’t recommend chocolate chips as they contain stabilizers that help them to maintain their shape. Perfect for cookies but it prevents them from melting evenly for coating.
I wish i could have seen a demo for the following omitted points: (1) how you actually sprinkle them (2) how you actually prep them for placement in freezer
Hi, you can view sprinkling the cake pops with sprinkles in the video tutorial. To freeze, I usually lay them in a baking pan, whatever can fit in my freezer at the time, and cover them tightly.
Can not wait to try your recipe. Can I use Heavy Whipping Cream instead of Heavy Cream. No Cream to be found in my area
Yes, that would be fine here. Enjoy!
I’m excited to try this recipe! Do these have to remain refrigerated or can these sit out on a platter for a party?
Thank you!
Hi Marilyn! They can be served at room temperature.
I have left over cake from my grandson’s birthday monster truck cake. This is a good way to use up the bits cut off. What is the icing to cake ratio
I’ve made this a couple of times and they’re fantastic, though I do have a question about the “freeze the cake balls for one hour” method while you’re waiting for them set up for dipping. Do they need to thaw a bit before dipping if they go in the freezer?
Hi Lauren, they should be fine to dip right from one hour in the freezer.
6 Tablespoons (32g) unsweetened natural cocoa powder (1/3 cup + 1 Tbsp)
can you please explain this ?
i have cocoa powder , how much should i use ?
can you please answer today i have to make this tommorow !
Hi Raiba! All amounts listed are the same – just different ways of explaining the measurement.
I successfully made the vanilla ones and the chocolate ones are cooling now. I’m wondering if you have a recipe for red velvet cake pops?
Hi Connie, we don’t have a 1 layer red velvet cake recipe, but you could try crumbling our red velvet cupcakes and using 1 cup of cream cheese frosting. Let us know if you try!
Omg! Thank you for sharing this great recipe…Delicious. I want wait to share them with my team, friends and families.
The cake came out great and the frosting came out great. However when I balled them they didn’t stick and just crumbled. They wouldn’t stay on the stick. What did I do wrong?
Hi Kat, was the frosting at room temperature when you added the crumbled cake? If it’s too cold, the mixture will be a bit crumbly as you mention. And how did you measure your flour for the cake? Be sure to spoon and level (or use a kitchen scale) to ensure the flour isn’t over-measured, which can dry out the cake. Over baking can dry it out, too. Hope this helps for your next batch!
This tasted great but was sooo rich. It was my fault because i think 8 grabbed the cacao and not the coco powder. I added a lot of butter and cream to try to loosen it. It is yummy but very strong. Im going to try to make a peanut butter ganach to dip it into then dip again in white chocolate. The vanilla ones came out perfectly. I mixed some homemade jam into a small amoint and made a few with layers.
This recipe is fantastic! It’s the first time I’ve been able to succesfully complete cake pops, and of courseit was a Sally recipe that made me succesful. These are delicious, I ate some of the cake by itself. My sister said they’re better than Starbucks. I have a question, though! How can I make my chocolate darker? I used Ghiradelli dark chocolate melting wafers (the red bag) and they worked great but I want the coating darker and look more like dark chocolate. I feel like it would make them look better overall. Thank you Sally and team!
I have now made both your vanilla and chocolate cakes pops. They both ended up coming out great! I personally like the chocolate better, it tastes like a brownie! Thank you for all the tips and tricks to help the process go smoothly!
What’s the ratio of almond bark to oil for coating?
Hi Susan, you’ll use the same about. 16 ounces but with 1/2 teaspoon vegetable oil.
My grandson made the cake pops for the 1st time! I’m very proud of him and the initiative he takes with baking. I was not home when it was time to coat the cake balls, but he told me that the cake balls kept falling apart despite the mixture being in the fridge all night. He did salvage about 12 of them and they tasted wonderful!! Do you have any tips for the next time he tries this recipe? He used EVOO instead of canola with the cake mix and regular milk instead of the heavy cream with the frosting. Otherwise he stuck with the recipe. Thank you in advance for any ideas for the future.
The cake pops come out sooo good!! However I had a problem with. The oil seeping through the chocolate. Could I substitute it for something such as milk?
Hi Jasmin, if seem a bit greasy there is probably too much frosting mixed in with the cake. We don’t recommend swapping with milk, but instead you could try using just a tad bit less frosting, and that should help with any oiliness. We’re glad you still enjoyed them!
I love this recipe so much
Oh my goodness these are good! I made them today with my two granddaughters. They are not picture perfect, which might be because we didn’t have sprinkles!