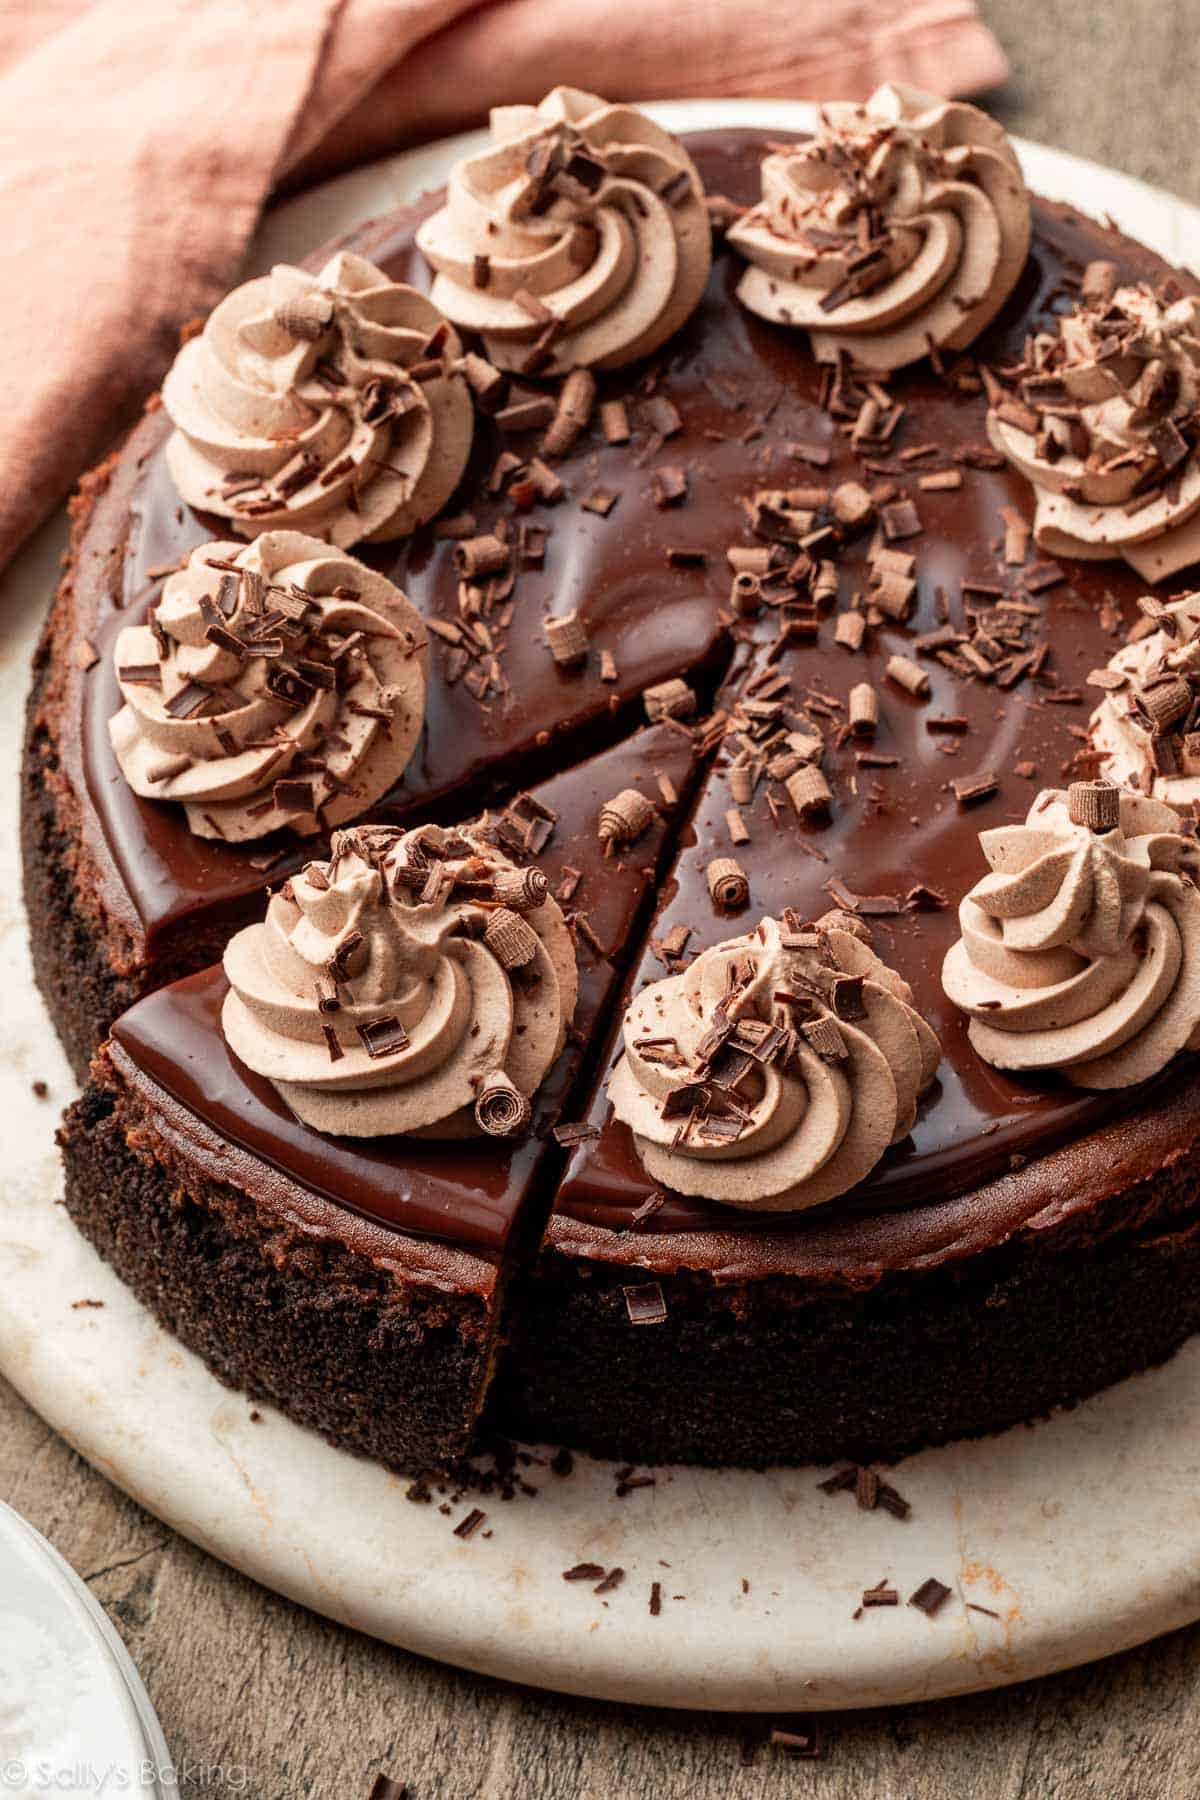
If you’re looking for a truly rich and creamy chocolate dessert, this triple chocolate cheesecake delivers. Chocolate features in every layer, from the velvety-smooth filling to the chocolate ganache topping to the chocolate graham cracker crumb crust. A little sour cream adds that signature tang you love in cheesecake and keeps the filling exceptionally creamy. This impressive dessert strikes the perfect balance: it’s decadent without being overly sweet, and rich without being overly heavy. It’s also a wonderful make-ahead dessert.
Over the years, I’ve developed and published all kinds of cheesecake recipes, ranging from simple to varieties with all the bells and whistles; plus mini cheesecakes, no-bake cheesecake, cheesecake pie, and everything in between. But somehow, one pretty obvious flavor was missing: chocolate cheesecake!
My team has been encouraging me to make one for ages, so my recipe co-writer Beth and I made it our priority this year. It’s the chocolate version of my classic cheesecake, and we think you’ll love it just as much!
This chocolate cheesecake features an ultra-creamy chocolate cheesecake filling, a buttery chocolate graham crumb crust, and a rich chocolate ganache topping, so you get triple the chocolate flavor in every bite.
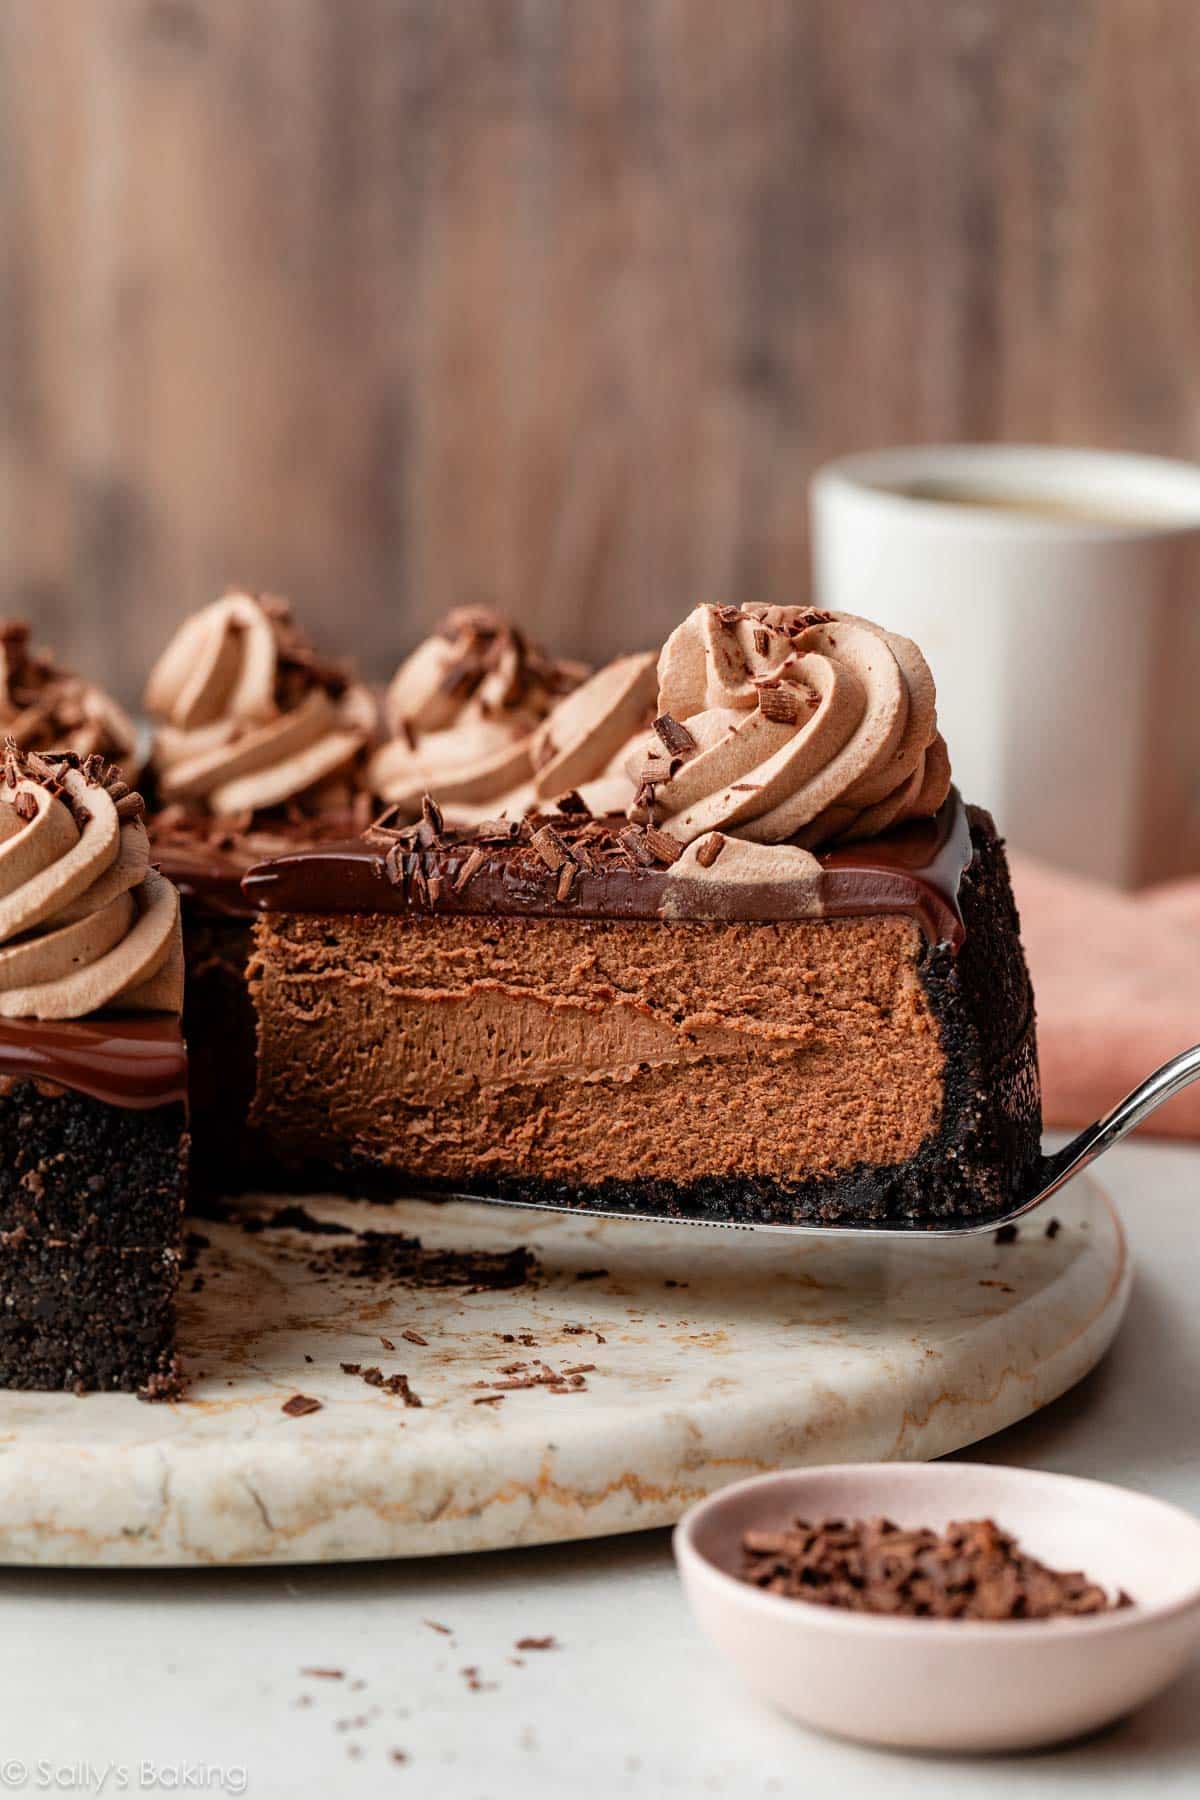
Why You’ll Love This Chocolate Cheesecake
- Rich chocolate flavor. Made with melted bittersweet chocolate, the filling is smooth and perfectly balanced. Best of all, it’s not overly sweet.
- Creamy, velvety filling. Full-fat cream cheese, heavy cream, and sour cream work together to create a velvety-smooth texture with just enough tanginess to balance the chocolate.
- A simple crumb crust. The chocolate graham cracker crust complements the chocolate cheesecake filling.
- Perfect for making ahead. Cheesecake needs several hours to chill and set, making this an excellent dessert to prepare a day in advance.
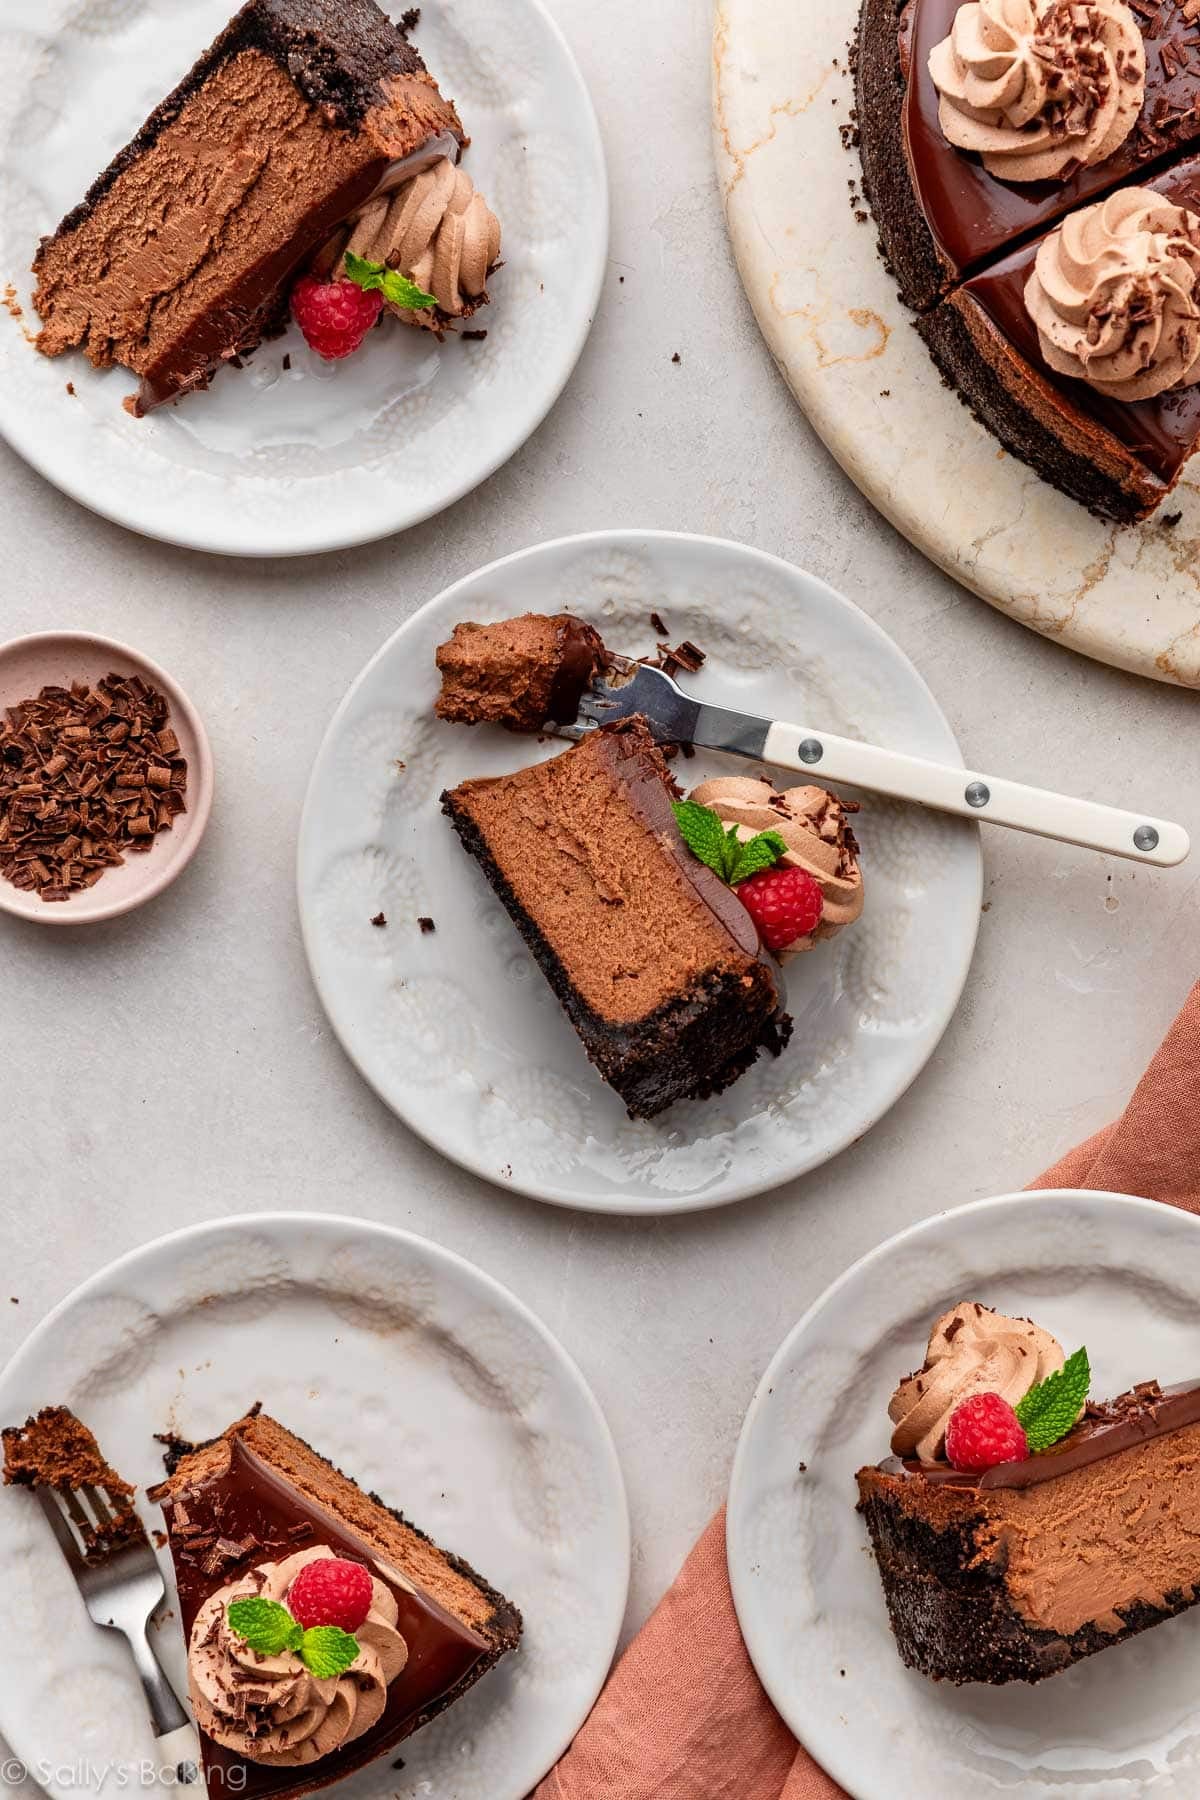
- No complicated decorating required. The chocolate cheesecake is delicious all on its own, or you can dress it up with whipped cream, chocolate shavings, or fresh berries.
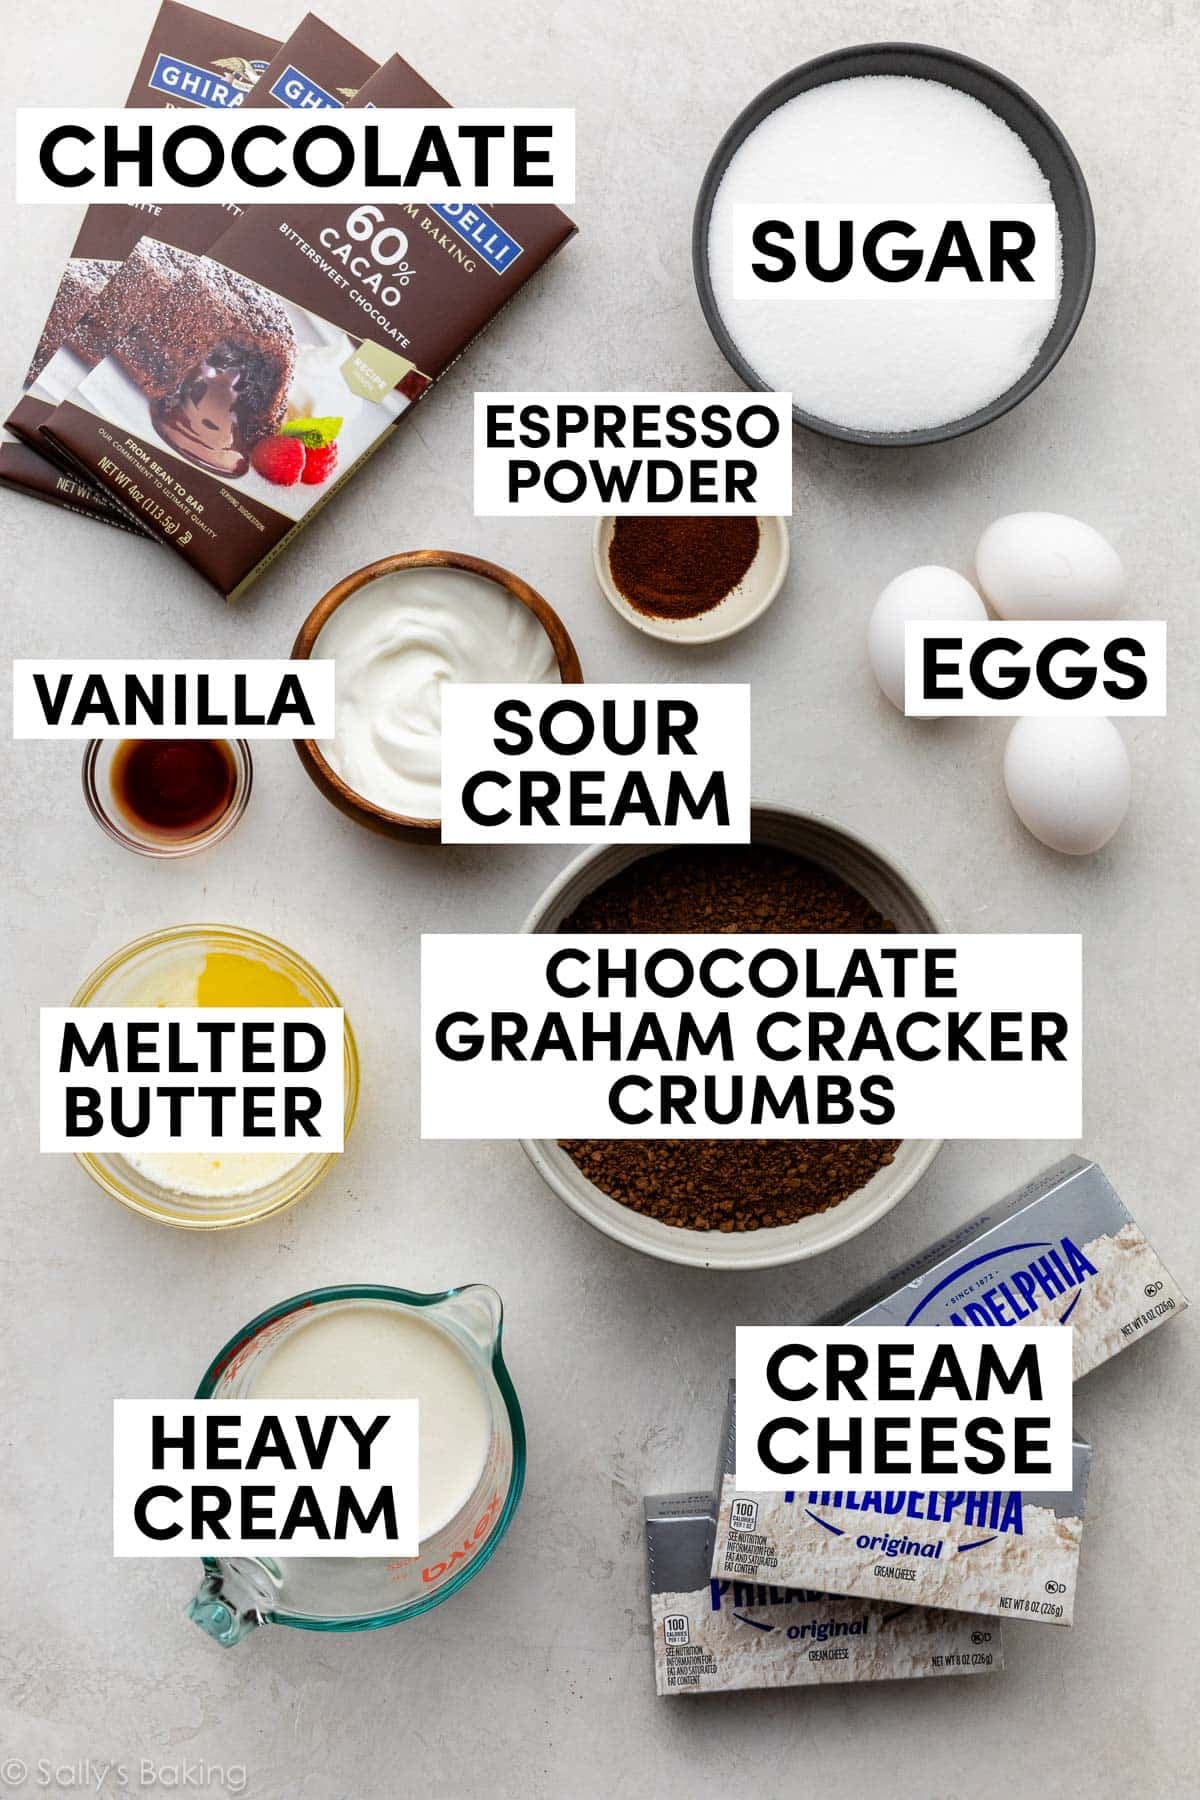
Ingredients You Need & Why I Don’t Recommend Substitutions
Every ingredient has an important job to do, which is why I don’t recommend making any substitutions. There’s nothing worse than wasting your time and money to make a dessert that doesn’t turn out well, so set yourself up for success: use quality ingredients, avoid substituting (reduced-fat dairy products have no place today!), and pay attention to ingredient temperature.
- Chocolate graham cracker crumbs: Look for chocolate-flavored graham crackers, not chocolate-covered graham crackers. If you can’t find chocolate graham crackers, grind chocolate teddy grahams or chocolate animal crackers into crumbs instead. They work just as well for this chocolate cheesecake’s crust. This is the one exception to my “no-substitutions” rule!
- Melted butter: To bind the crumbs together to form the crust.
- Chocolate: Use good-quality bittersweet (about 60% cacao) or semi-sweet chocolate. It gives the cheesecake its rich, chocolate-forward flavor and contributes to its firm, creamy texture once chilled. Let the melted chocolate cool slightly before adding it to the batter. I use Ghirardelli brand baking chocolate bars, which are sold near the chocolate chips in the grocery store’s baking aisle. You need 3 bars (4 oz/113g each) in total; 2 for the filling and 1 for the topping.
- Heavy cream: Smooths out the melted chocolate in both the filling and topping.
- Espresso powder: This is a key ingredient for enhancing the chocolate flavor—I promise the cheesecake doesn’t taste like coffee. You can find it in the baking aisle, or order it online. And you can use it in any of these recipes that call for espresso powder.
- Cream cheese: Use full-fat, brick-style cream cheese for the thickest, creamiest filling. Avoid whipped or spreadable cream cheese, which can affect the texture. Be sure to let it soften to room temperature before mixing so the batter is smooth and lump-free.
- Sugar: Just a cup of granulated sugar sweetens the filling and balances the tanginess of the cream cheese. You also need a bit more for the crust.
- Sour cream: Full-fat sour cream adds a subtle tang and keeps the filling light and creamy, so you’re not just eating chocolate-flavored cream cheese!
- Vanilla extract: Even the most chocolatey desserts need vanilla!
- Eggs: Eggs help the cheesecake filling rise and set as it bakes. Use room-temperature eggs, and add them one at a time, mixing just until incorporated. Over-mixing the batter after adding the eggs can lead to cheesecake sinking, cracking, or collapsing.
How to Make Chocolate Cheesecake
I have plenty of tricks that will help guarantee chocolate cheesecake perfection, including determining when the cheesecake is done and everything you need to know about a cheesecake water bath.
Make sure you plan ahead because this cheesecake has a few stages:
- The cheesecake takes a while to bake through.
- Also, it must sit in the oven after baking as the oven cools down—this is another trick to avoid cheesecake cracks.
- Once the cheesecake is room temperature, you must chill it.
Because of all these steps, this is a great recipe to begin the day before.
Let’s start with the crust. Wrap a springform pan tightly with two layers of heavy-duty foil for extra protection when baking in a water bath (more on this below).
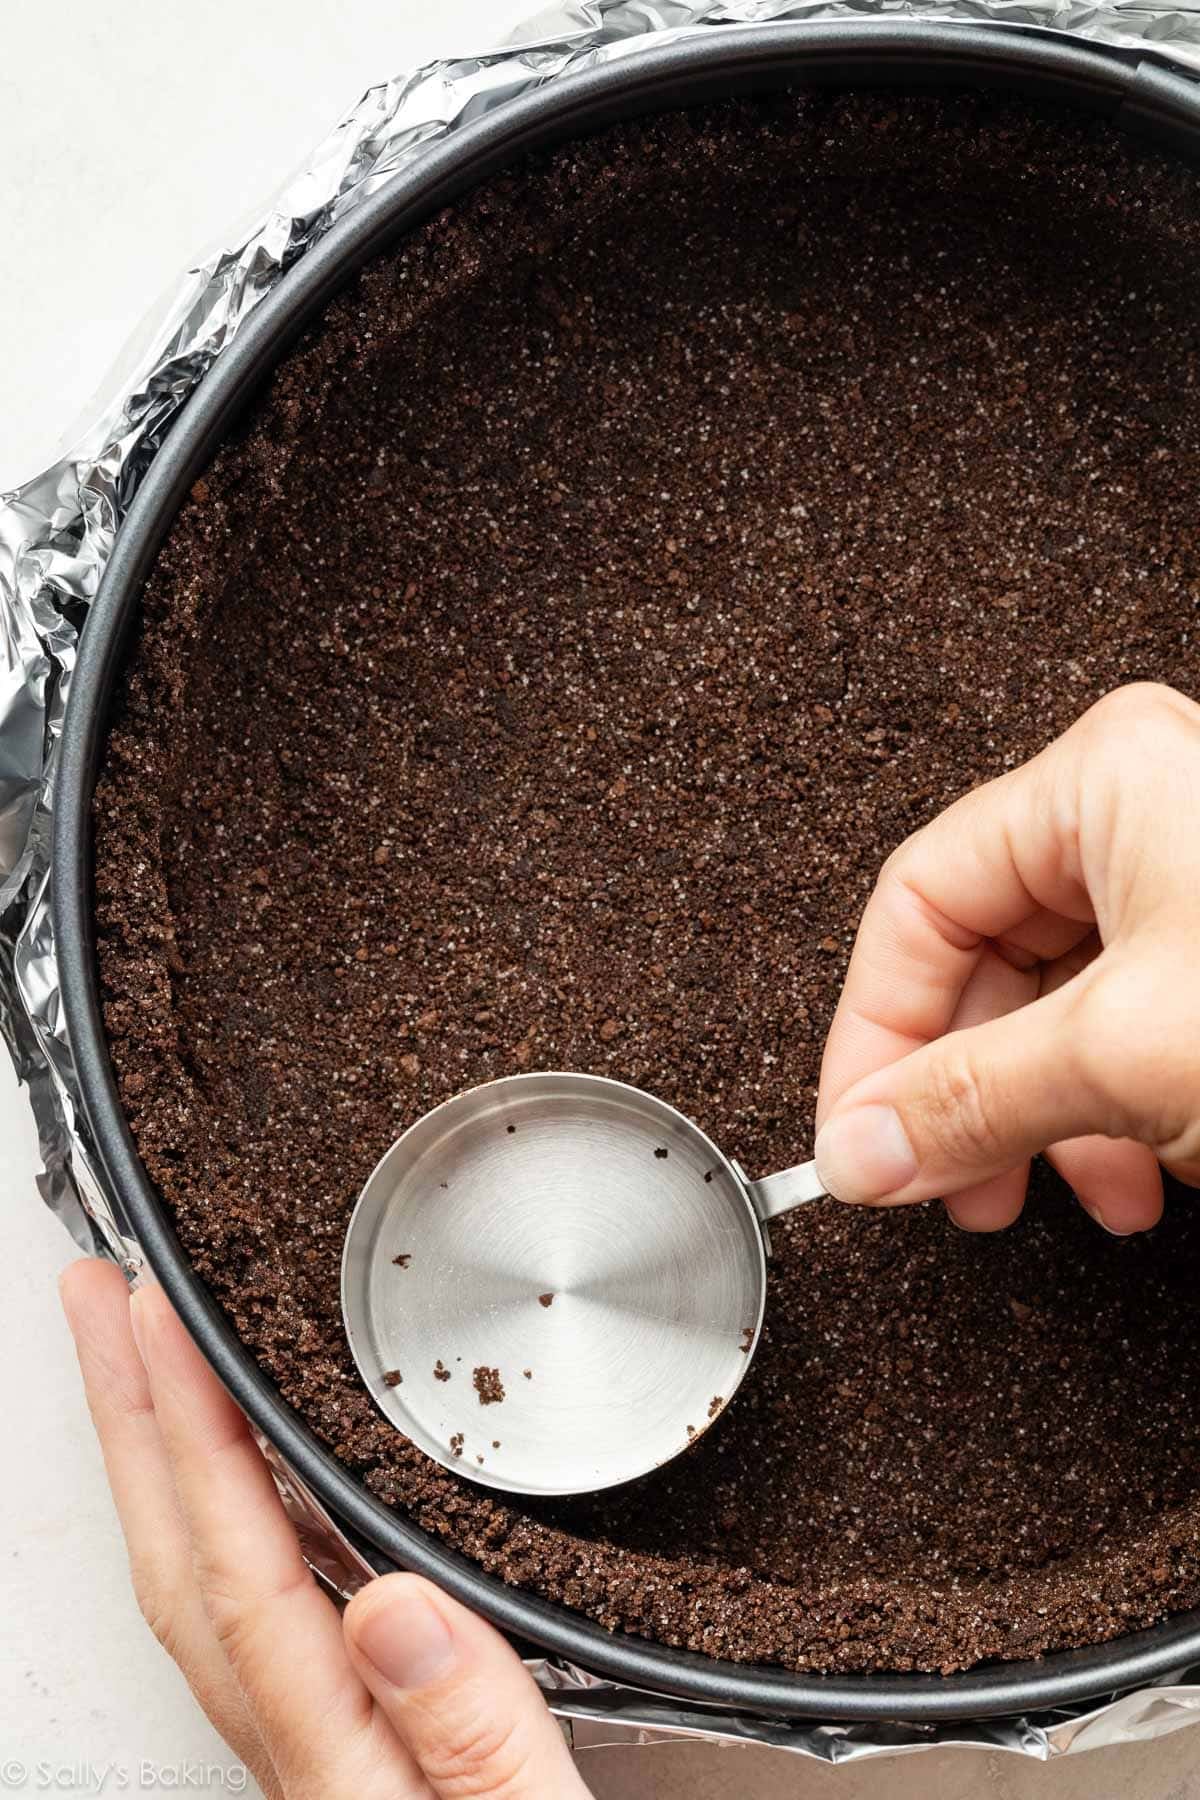
Combine the chocolate graham cracker crumbs, sugar, and melted butter. Press firmly into the bottom and partly up the sides of the pan, using the bottom of a small measuring cup to smooth the surface.
Pre-bake for 10 minutes:
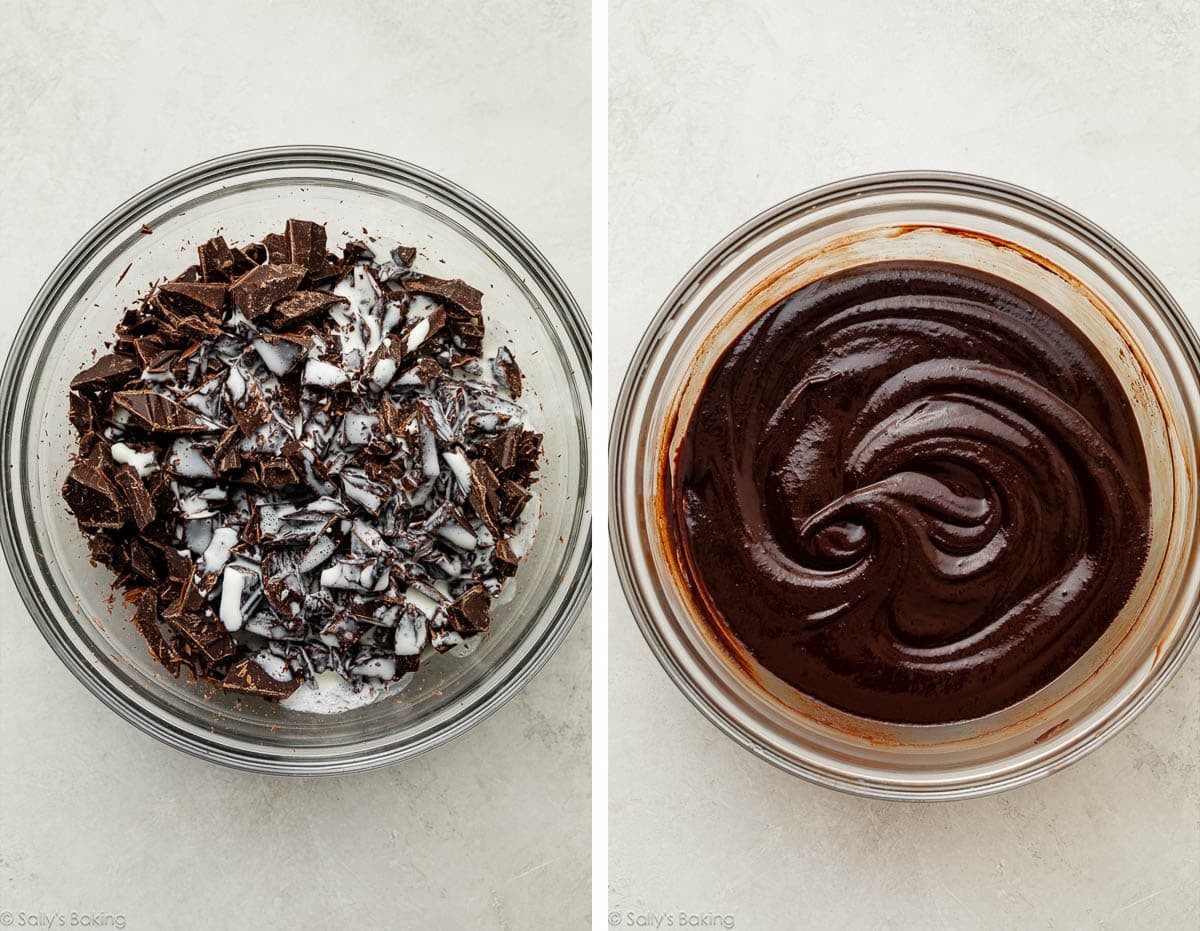
Meanwhile, start the filling: Melt the chopped chocolate with the heavy cream, stirring often until smooth. Whisk in the espresso powder while warm, then set aside to cool slightly. The chocolate should be fluid but not hot when added to the batter.
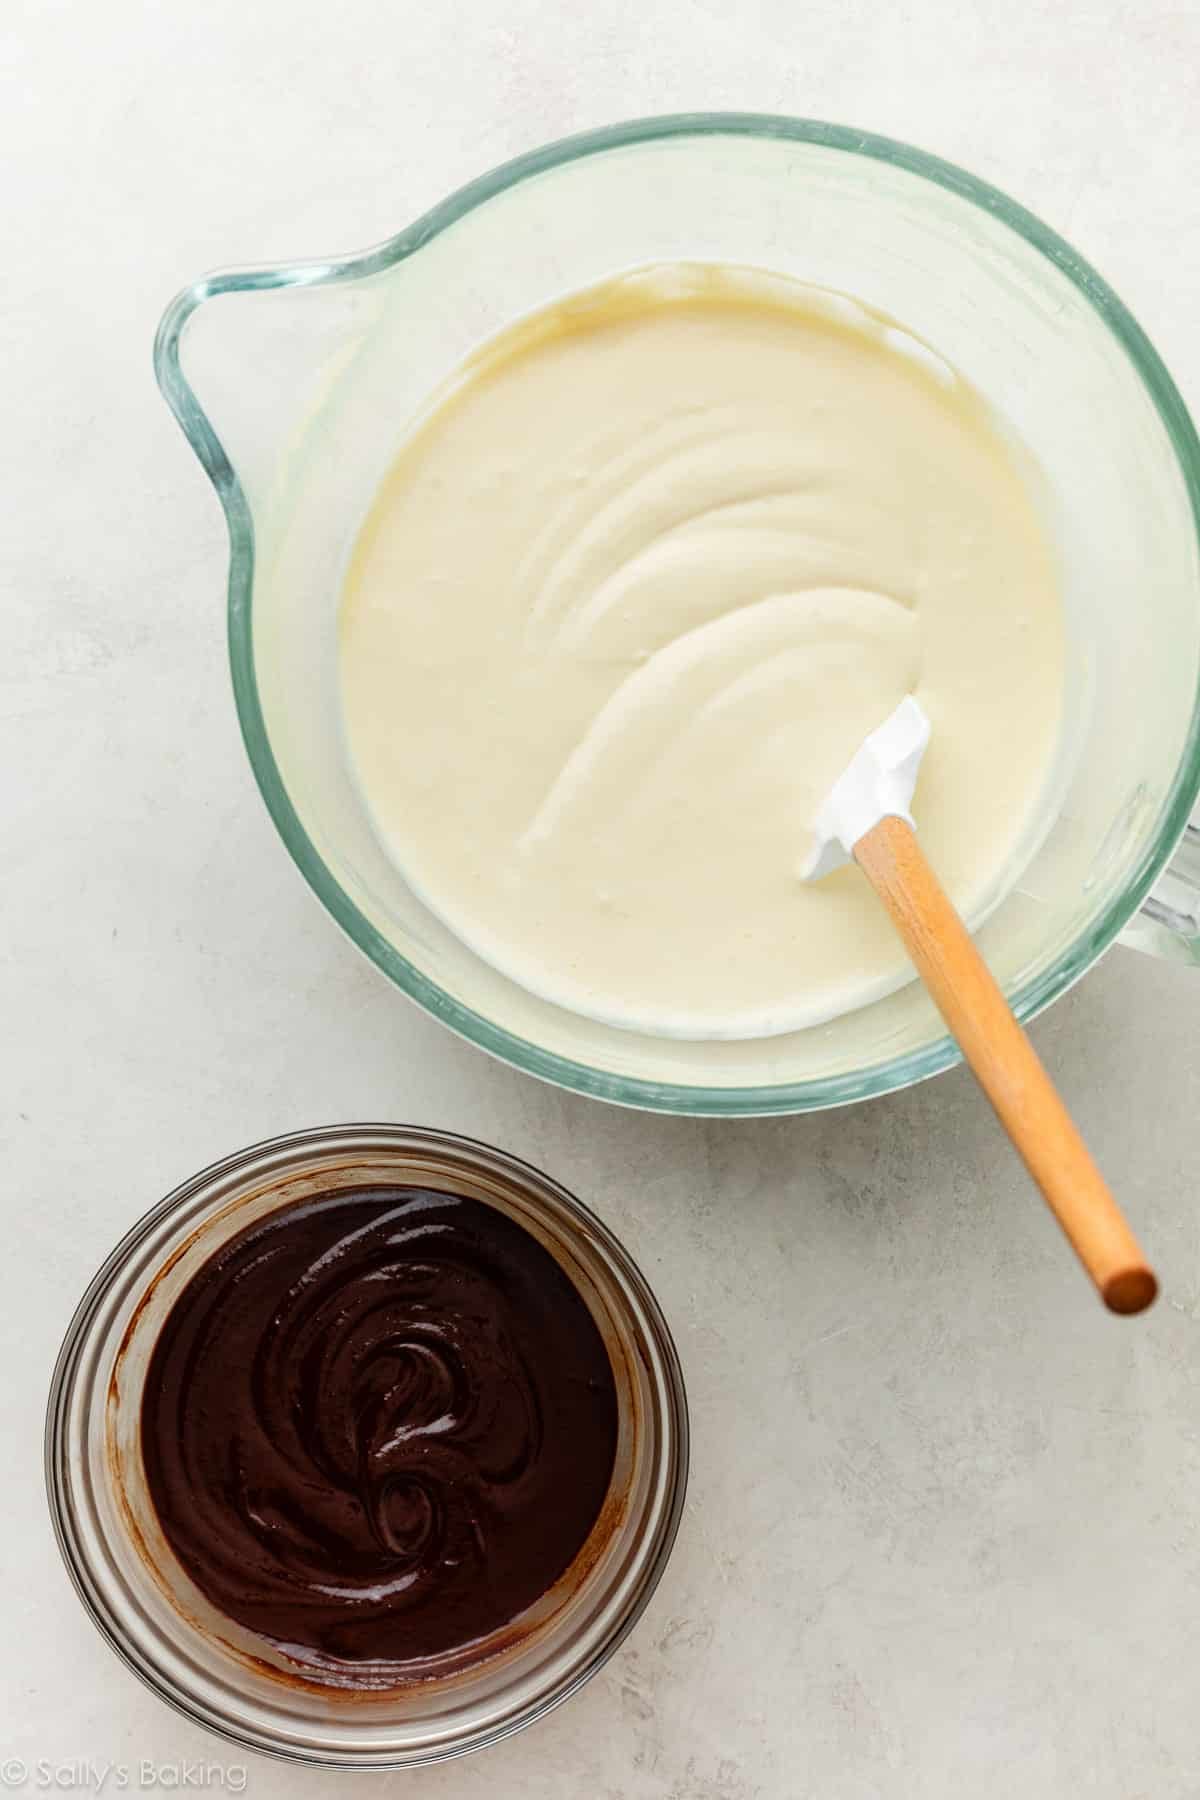
Using a mixer, beat the softened cream cheese and sugar until smooth and creamy. Add the sour cream and vanilla, and mix until combined.
- Success Tip: The cream cheese, sour cream, and eggs should be at room temperature. Cold ingredients can leave lumps that are difficult to beat out without over-mixing.
Add the eggs one at a time, mixing on low speed just until each disappears into the batter. Over-mixing incorporates too much air, which can cause the cheesecake to puff up, fall, and crack. Stop the mixer as soon as the last egg is incorporated.
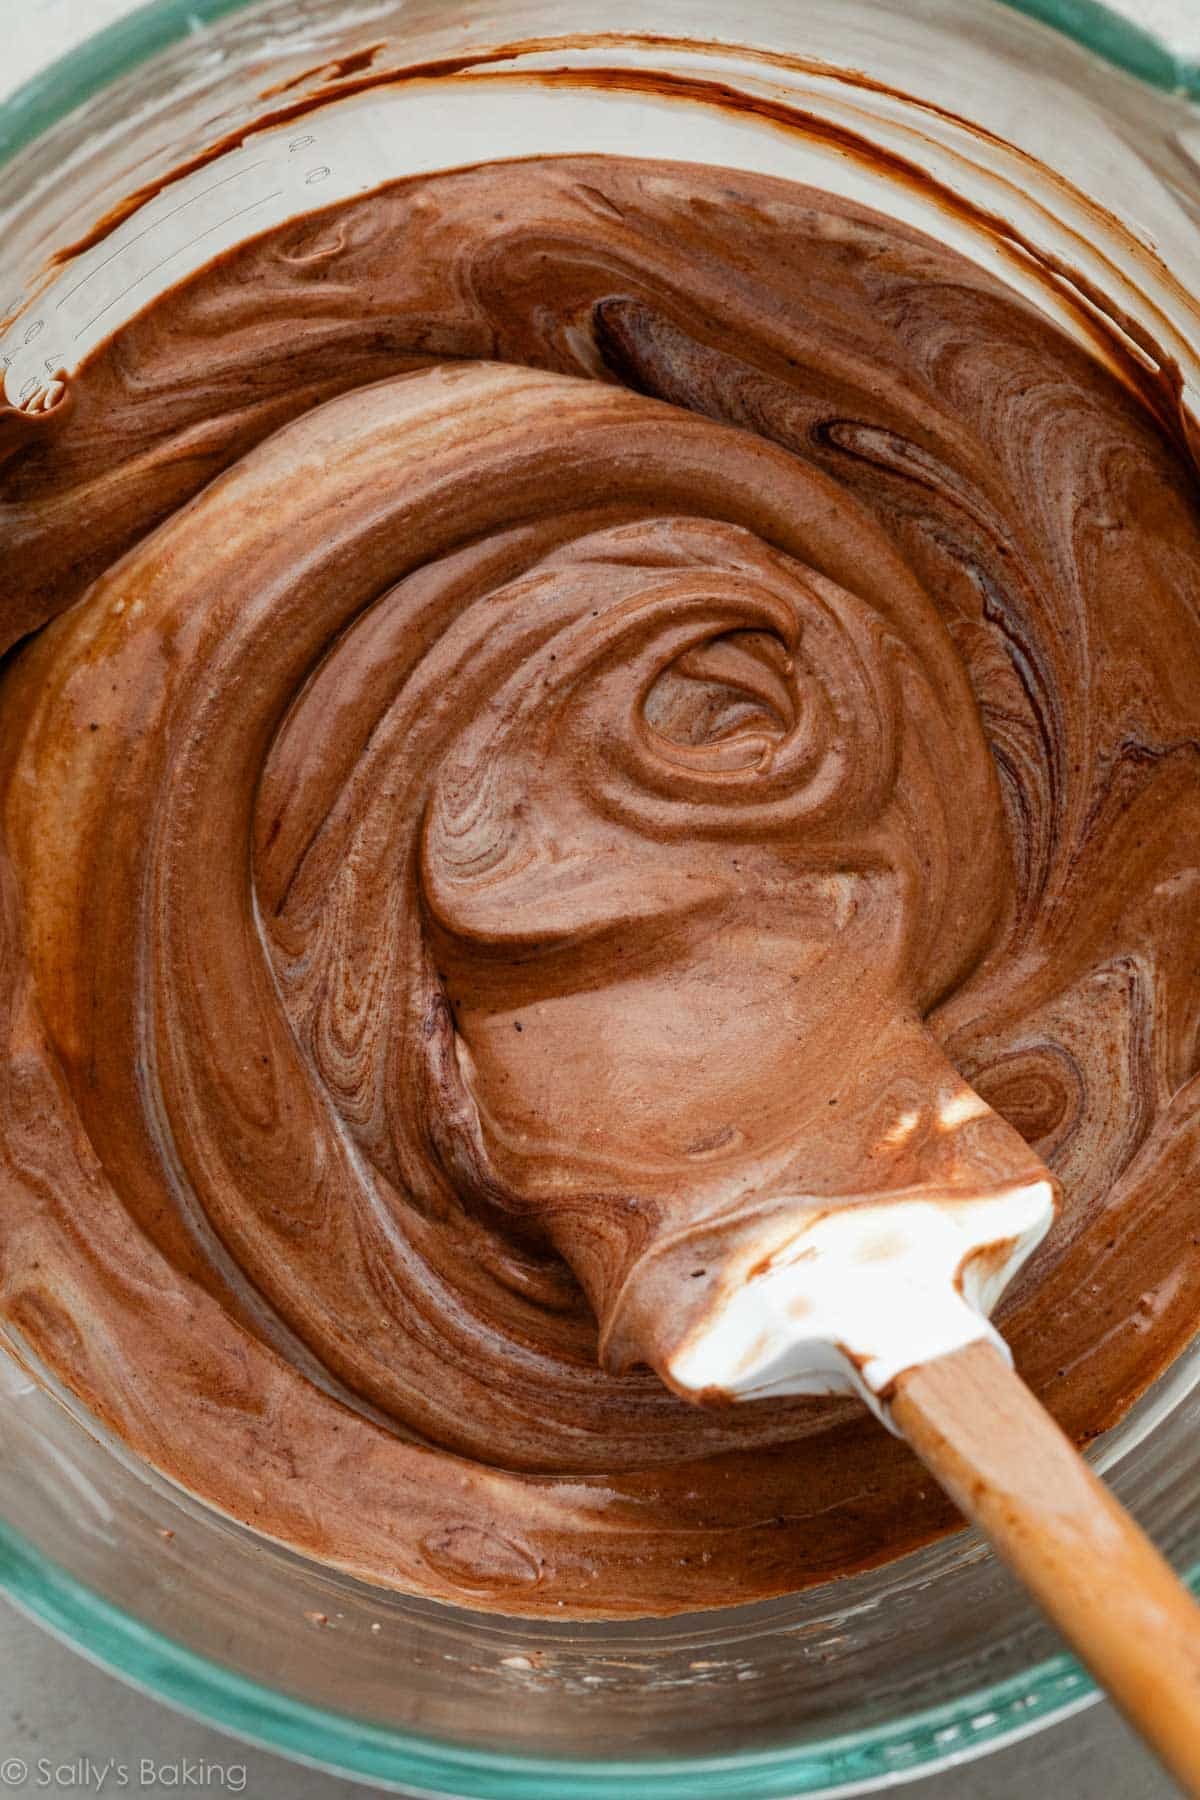
Now gently fold the melted chocolate mixture into the cheesecake batter:
Pour the chocolate cheesecake filling into the prepared crust and your cheesecake is ready to bake.
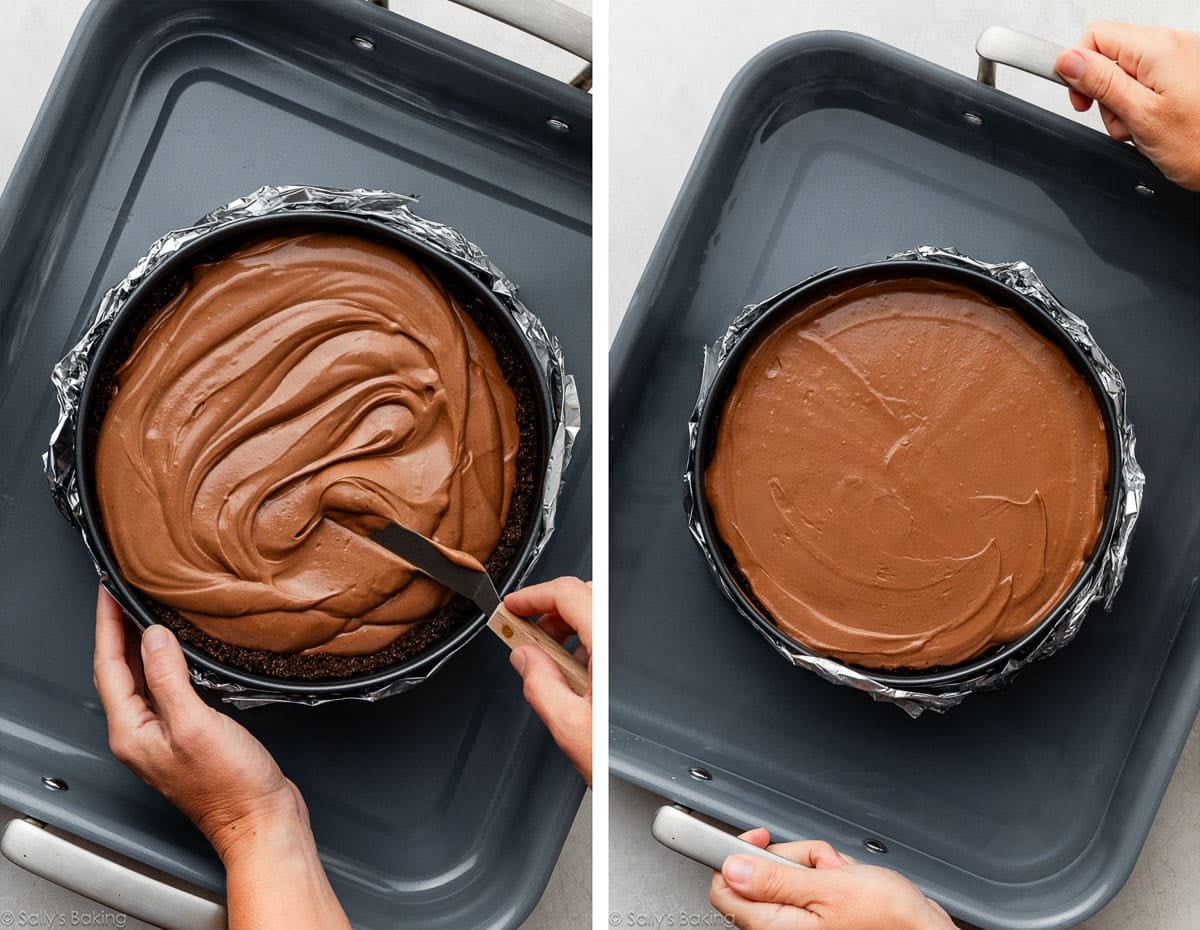
Cheesecake Water Bath
I actually have an entire post and video tutorial for How to Make a Cheesecake Water Bath. I promise that it’s nothing too complicated. All you’re doing is placing the springform pan in a roasting pan, filling it with hot water, and baking.
But what’s the point, you ask? The hot water in the roasting pan creates a steamy, humid environment. This helps the cheesecake bake slowly and evenly, reducing cracks and preventing sinking.
Place the wrapped pan in a large roasting pan, pour in boiling water until it reaches about halfway up the sides, and quickly close the oven door to trap the steam inside.
How Do I Know When Chocolate Cheesecake is Done?
The cheesecake is ready when the outer edges look set but the center still has a slight wobble. It will continue to set as it cools and chills, so avoid baking until the center is completely firm.
When baking is complete, turn off the oven, crack the door open, and let the cheesecake cool inside for 1 hour. Then cool completely at room temperature and refrigerate for at least 6 hours or overnight.
2-Ingredient Chocolate Ganache Topping
Easily one of the most versatile toppings/fillings in the dessert world, chocolate ganache is quick and simple to make. Spread it over the chilled cheesecake:
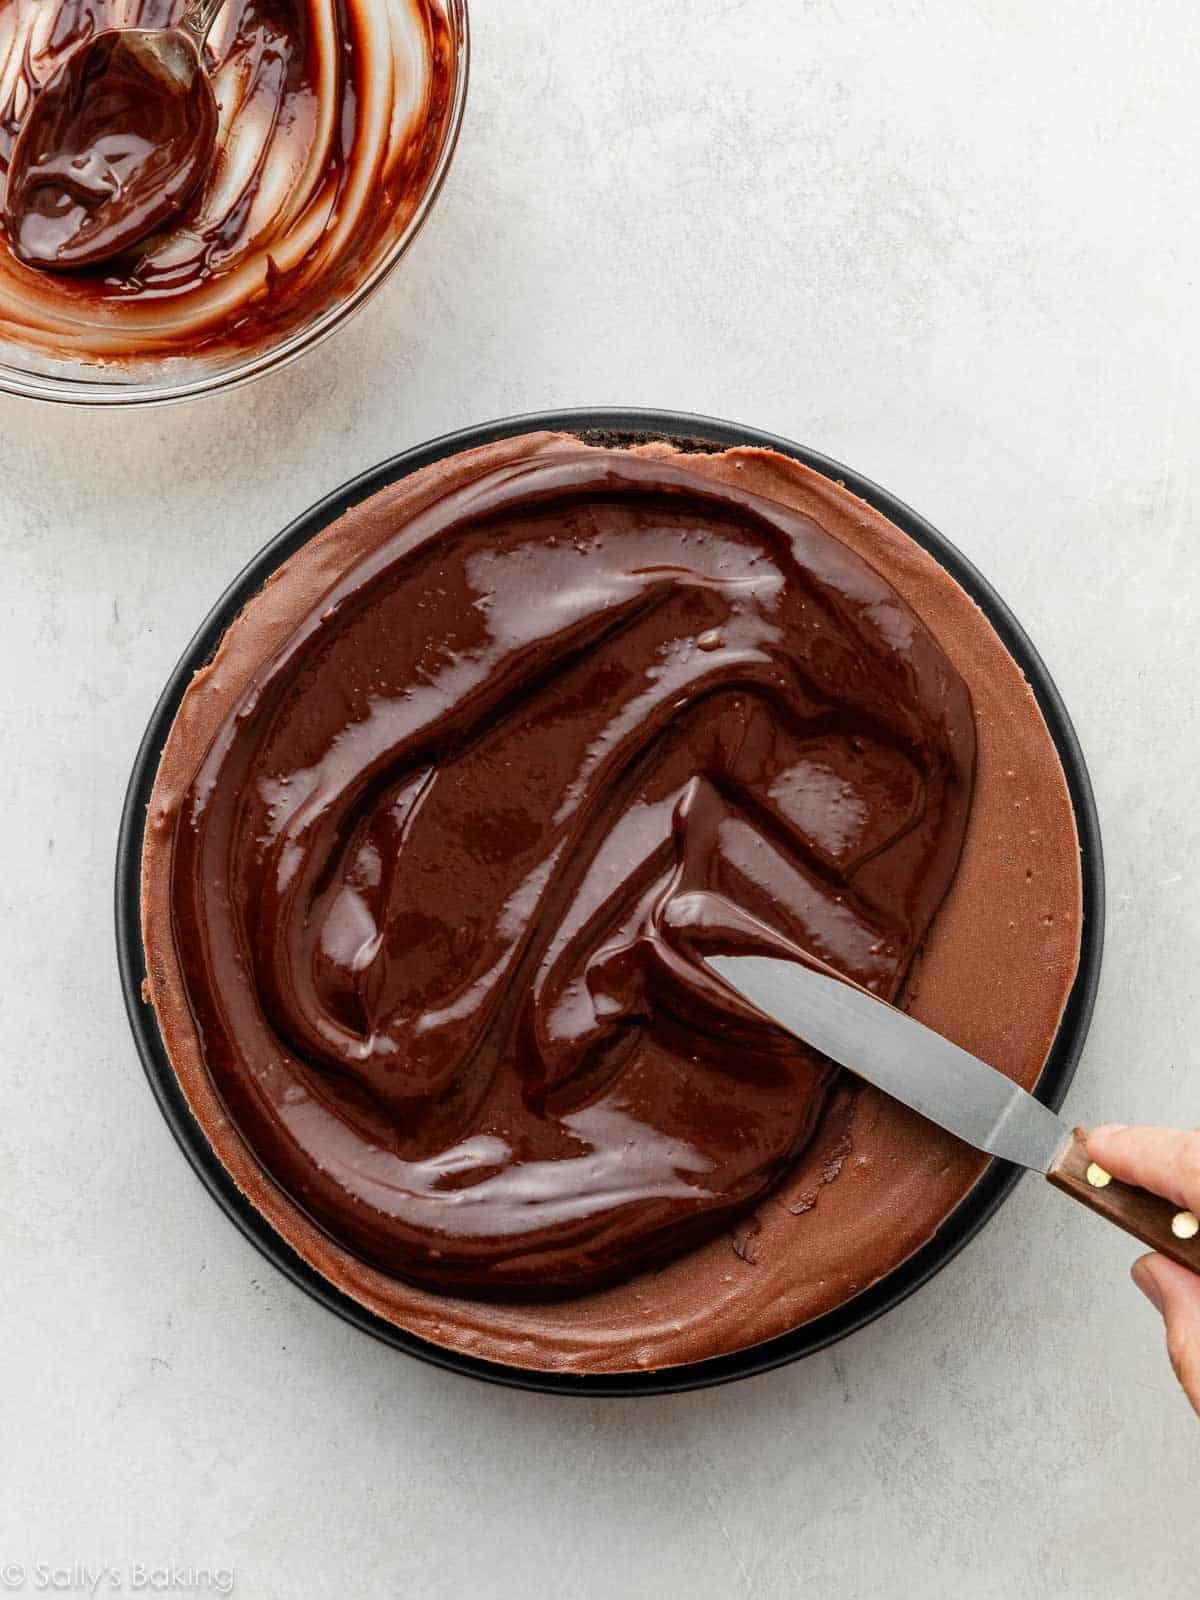
Place the cheesecake back in the refrigerator briefly to set the ganache before slicing.
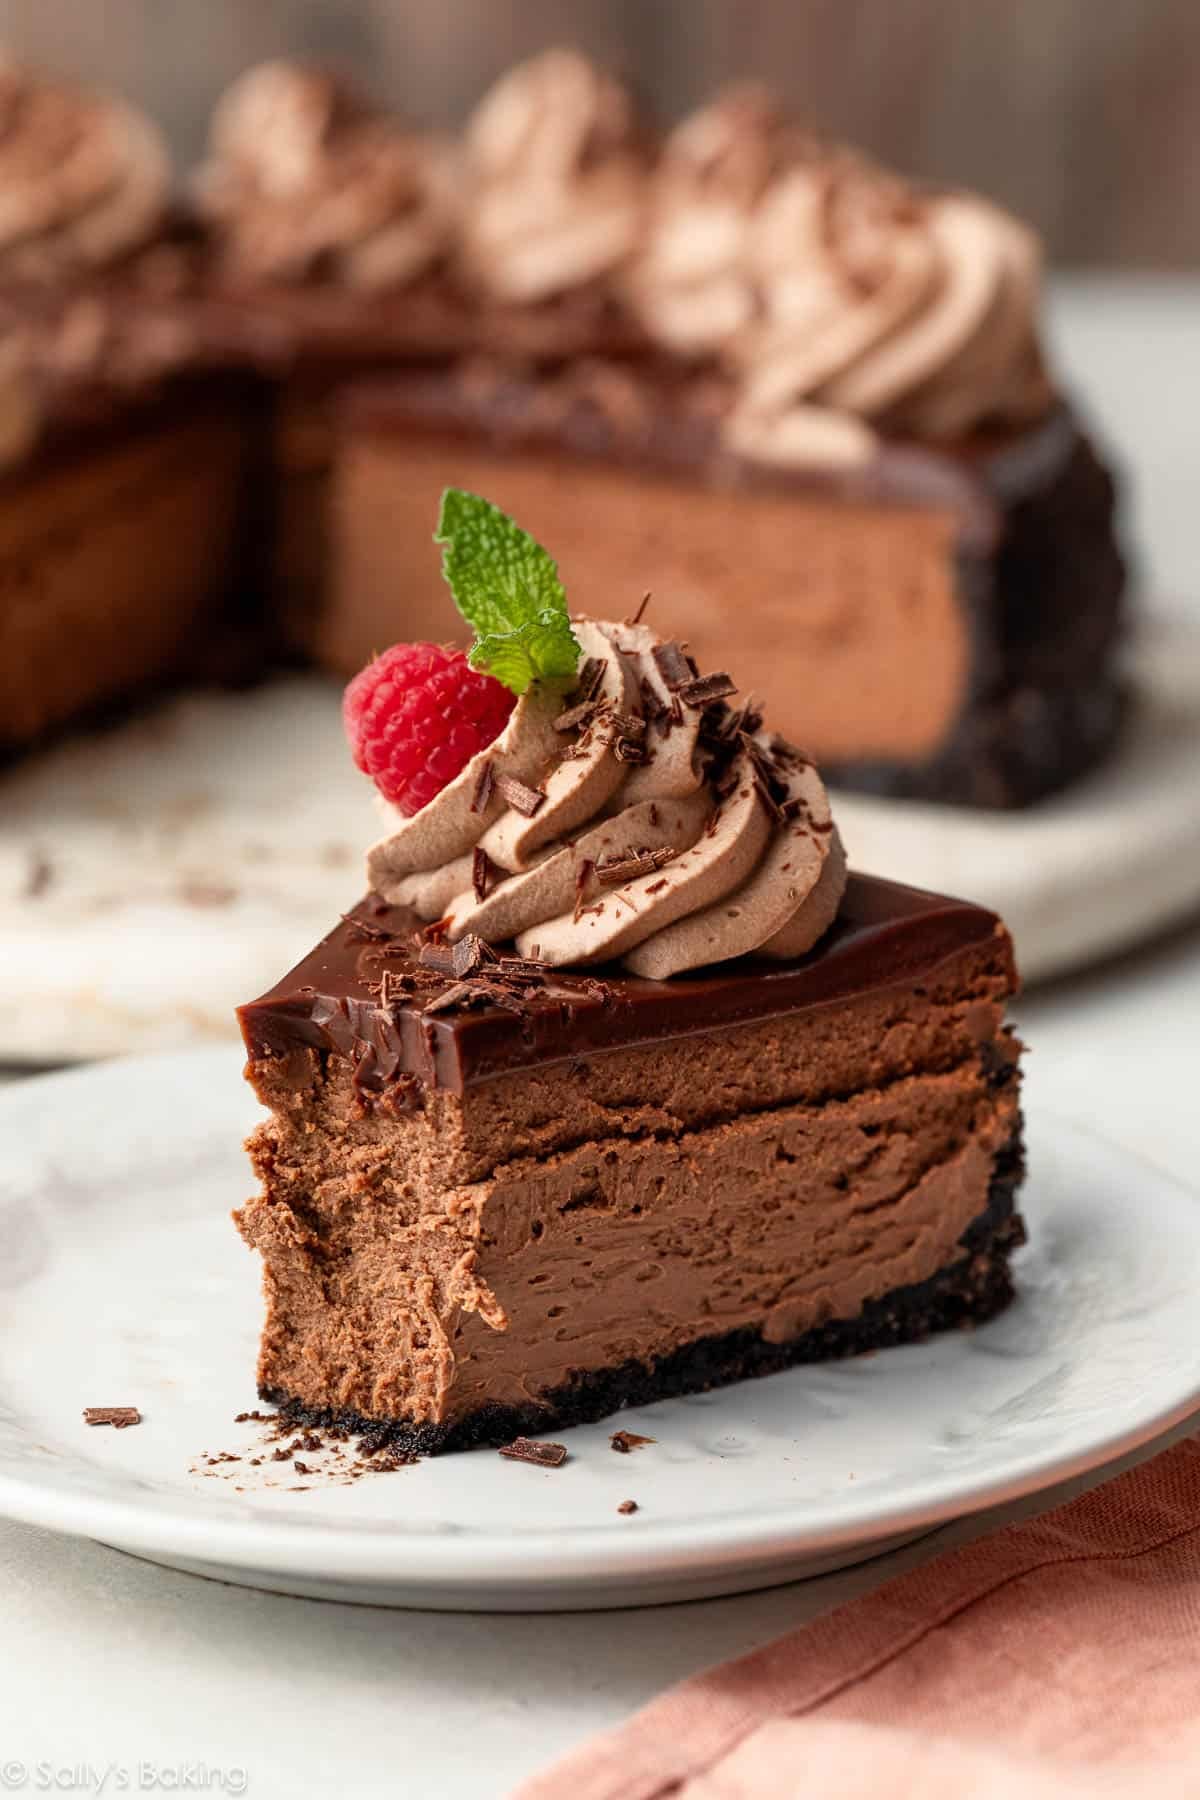
Serve it as is, or garnish with whipped cream, chocolate shavings, or berries. For the pictured cheesecake, I topped it with the mocha whipped cream from this recipe for flourless chocolate cake.
Success Tips for Chocolate Cheesecake
To summarize, here are the most important things to remember:
- Make sure cheesecake batter ingredients are room temperature.
- Do not over-mix the cheesecake batter after you add the eggs.
- Bake in a water bath.
- Let cheesecake cool in the (turned-off) oven for 1 hour.
- Cool completely at room temperature, then chill.
Cheesecake can crack if the batter is over-mixed, the filling is over-baked, or the temperature changes too quickly during cooling. Using room-temperature ingredients, mixing the eggs in gently, baking in a water bath, and cooling the cheesecake gradually all help reduce the risk of cracks.
The cheesecake is ready when the outer edges look set but the center still has a slight wobble. It will continue to set as it cools, so avoid baking until the center is completely firm. All ovens are different, so this can take anywhere from 55 to 65 minutes.
Yes. Chocolate cheesecake freezes well for up to 3 months. Once completely chilled, freeze the whole cheesecake or individual slices until firm. Wrap tightly in plastic wrap, then in aluminum foil, or place in a freezer-safe container. Thaw frozen cheesecake overnight in the refrigerator. If freezing individual slices, you can thaw only what you need, and it will take less time to thaw.
Chocolate is the star of this recipe, so choose a quality bittersweet or semi-sweet baking chocolate, such as Ghirardelli, Baker’s, Lindt, or Guittard brands. Avoid using chocolate chips.
If you can’t find chocolate graham crackers, feel free to use regular graham crackers or homemade graham crackers, or grind chocolate teddy grahams or chocolate animal crackers into crumbs instead. They work just as well here. You could also use this Oreo cookie crust instead, but I recommend reducing the melted butter to 4 Tablespoons (56g), and lightly greasing the bottom of the springform pan to prevent the Oreo crust from sticking.
Wrap the springform pan securely in a double layer of heavy-duty foil to prevent water from seeping into the crust, or use a leakproof water-bath alternative (detailed in this post and video tutorial on How to Make a Cheesecake Water Bath).
Triple Chocolate Cheesecake
Description
With a chocolate graham cracker crust, creamy chocolate filling, and silky ganache topping, this triple chocolate cheesecake is rich without being overly sweet. For best results, use room-temperature cream cheese, sour cream, and eggs, and bake in a water bath. Plan ahead because the cheesecake needs at least 6 hours to chill before topping. And for best success, review the FAQ above and recipe Notes below.
Ingredients
Crust
- 1 and 1/2 cups (180g) chocolate graham cracker crumbs (about 12 full-sheet chocolate graham crackers)*
- 1/4 cup (50g) granulated sugar
- 5 Tablespoons (71g) unsalted butter, melted
Filling
- 8 ounces (226g) semi-sweet or bittersweet chocolate, finely chopped
- 1/4 cup (60g/ml) heavy cream
- 2 teaspoons espresso powder
- 24 ounces (678g) full-fat brick cream cheese, softened to room temperature
- 1 cup (200g) granulated sugar
- 3/4 cup (180g) full-fat sour cream, at room temperature
- 1 teaspoon pure vanilla extract
- 3 large eggs, at room temperature
Chocolate Ganache
- 4 ounces (113g) semi-sweet or bittersweet chocolate, finely chopped
- 1/2 cup (120g/ml) heavy cream
Optional Toppings
- fresh berries and/or mint
- chocolate curls or chocolate shavings
- whipped cream or the mocha whipped cream from this flourless cake
Instructions
- Adjust the oven rack to the lower-middle position and preheat oven to 350°F (177°C). Tightly wrap 2 sheets of heavy-duty aluminum foil around the bottom and sides of a 9-inch or 10-inch springform pan and set aside.
- Make the crust: If you’re starting out with full chocolate graham crackers, use a food processor or blender to grind them into fine crumbs. Pour into a medium bowl and stir in the sugar until combined, and then stir in the melted butter. The mixture will be sandy. Try to smash/break up any large chunks. Pour the mixture into the prepared pan. With medium pressure using your hand, pat the crumbs down into the bottom and partly up the sides to make a compact crust. You can use a small flat-bottomed measuring cup to help press down the bottom crust and smooth out the surface, but do not pack down with heavy force because that makes the crust too hard. Simply pat down until the mixture is no longer crumbly. Bake the crust for 10 minutes. Allow to slightly cool as you prepare the filling.
- Make the filling: Combine chopped chocolate and heavy cream in a medium heat-proof bowl or glass liquid measuring cup. Microwave in 20-second increments, stirring after each, until completely melted and smooth. Whisk in the espresso powder, and set aside to let cool for 5–10 minutes before using in the batter.
- In a large bowl using a handheld or stand mixer fitted with a paddle attachment, beat the cream cheese and granulated sugar together on medium speed until the mixture is smooth and creamy, about 3 minutes. Scrape down the sides and bottom of the bowl as needed. Add the sour cream and vanilla extract, and beat until fully combined. Scrape down the sides and bottom of the bowl as needed. With the mixer running on low speed, add the eggs one at a time, beating after each addition until just incorporated. Stop the mixer as soon as the final egg is incorporated; over-mixing can cause the cheesecake to deflate. Fold the melted chocolate mixture into the cheesecake batter, gently stirring with a spatula until combined. Pour the cheesecake batter into the crust and smooth the top.
- Prepare the water bath: (If needed for extra visuals, see How to Make a Cheesecake Water Bath; the visual guide and video will assist you in this step.) Boil a kettle/pot of water. You need 1 inch of water in your roasting pan for the water bath, so make sure you boil enough. I use an entire kettle of hot water. Place the wrapped springform pan inside of a large roasting pan. Carefully pour the hot water into the roasting pan and place it in the oven. (Or you can place the roasting pan in the oven first, then pour the hot water in—whichever is easier for you.) Quickly shut the oven door to trap the steam inside.
- Bake, cool, and chill: Bake the cheesecake for 55–65 minutes, or until the center is almost set. When it’s done, the center should still slightly wobble when you gently tap or shake the pan. Turn the oven off and open the oven door slightly. With the door ajar, let the cheesecake sit in the oven in the water bath as it cools down for 1 hour. After 1 hour, remove the cheesecake from the oven and water bath, discard the foil, and place the springform pan on a wire rack to cool completely at room temperature. After it has cooled, cover and refrigerate the cheesecake for at least 6 hours or up to 2 days.
- Make the chocolate ganache: Place chopped chocolate in a medium heat-proof bowl with a pour spout (I use a 2-cup glass liquid measuring cup). Heat the cream in a small saucepan over medium heat until it begins to gently simmer. (Do not let it come to a rapid boil—that’s too hot!) Pour over chocolate, then let it sit for 2–3 minutes to gently soften the chocolate. With a metal spoon or small rubber spatula, very slowly stir until chocolate has melted and mixture is smooth. The finer you chopped the chocolate, the quicker it will melt with the cream. If it’s not melting, do not microwave it. If needed, see Troubleshooting Chocolate Ganache. Once ganache mixture is smooth, let it sit for 5–10 minutes to slightly cool.
- Run a knife around the edges of the springform pan to help loosen the cheesecake, then remove the outer rim. Pour the chocolate ganache over the top and smooth it into an even layer with an offset spatula. Refrigerate for 30–60 minutes to set the ganache before slicing and serving.
- Using a sharp knife, cut into slices for serving. For neat slices, wipe the knife clean and dip it into warm water between each slice. Garnish with whipped cream or mocha whipped cream, chocolate shavings, berries, and/or mint sprigs, if desired.
- Cover and store leftover cheesecake in the refrigerator for up to 4 days. I like using a cake carrier for storing and transporting.
Notes
- Freezing Instructions: After the chocolate cheesecake has cooled completely at room temperature (no need to refrigerate first), you can freeze it with or without the springform pan base. To freeze with the base, remove the outer rim and wrap the cheesecake (still on the bottom of the pan) tightly in several layers of plastic wrap, followed by a layer of aluminum foil. To freeze without the pan, run a sharp knife under the crust to release it, carefully slide it onto a parchment-lined piece of cardboard or a plate, and wrap tightly in several layers of plastic wrap and a final layer of aluminum foil. Freeze for up to 3 months. Thaw overnight in the refrigerator before topping with ganache and serving. You can also wrap and freeze individual slices, which thaw faster. Freeze without the topping, and add it before serving.
- Special Tools (affiliate links): 9-inch Springform Pan or 10-inch Springform Pan | Silicone Spatula | Glass Mixing Bowls | Food Processor | Glass Liquid Measuring Cup | Electric Mixer (Handheld or Stand) | Large Roasting Pan | Cooling Rack | Small Saucepan | Offset Spatula | Round Cake Carrier (for storage)
- Chocolate Graham Crackers: Look for chocolate-flavored graham crackers, not chocolate-covered graham crackers. If you can’t find chocolate graham crackers, feel free to use regular graham crackers or homemade graham crackers, or grind chocolate teddy grahams or chocolate animal crackers into crumbs instead. They work just as well here. You could also use this Oreo cookie crust instead, but I recommend reducing the melted butter in that recipe to 4 Tablespoons (56g), and lightly greasing the bottom of the springform pan to prevent the Oreo crust from sticking.
- Chocolate: I recommend using high-quality chocolate baking bars, in either bittersweet or semi-sweet. You can find them right next to the chocolate chips in the baking aisle. They are usually sold in 4-ounce (113g) bars, and you need 3 bars for this recipe—2 for the filling and 1 for the ganache topping. I like Ghirardelli or Baker’s brands.
- Espresso Powder: This is a key ingredient for enhancing the chocolate flavor—I promise the cheesecake doesn’t taste like coffee. You can find it in the baking aisle, or order it online. And you can use it in any of these recipes that call for espresso powder.
- Alternate Water Bath Method: This method works as well, and you don’t have to bake the cheesecake IN water. Boil a kettle or pot of water. You need 1 inch of hot water in your roasting pan for the water bath, so make sure you boil enough. Place the cheesecake on the center oven rack of the preheated oven. Place a large metal baking or roasting pan (do not use glass—I usually use a 9×13-inch baking pan or an extra-large cast iron skillet) on the bottom rack. Pour boiling water into the empty pan, about 1 inch deep. Immediately close oven to trap the steam inside. This unique water bath adds steam to the oven without having the cheesecake sit inside the water itself. No need to wrap the springform pan in foil. See How to Make a Cheesecake Water Bath for more information.
- Avoid Over-baking the Cheesecake. When the cheesecake is done, there will still be a 2- or 3-inch wobbly spot in the center; the cheesecake will continue to set as it cools and chills.