

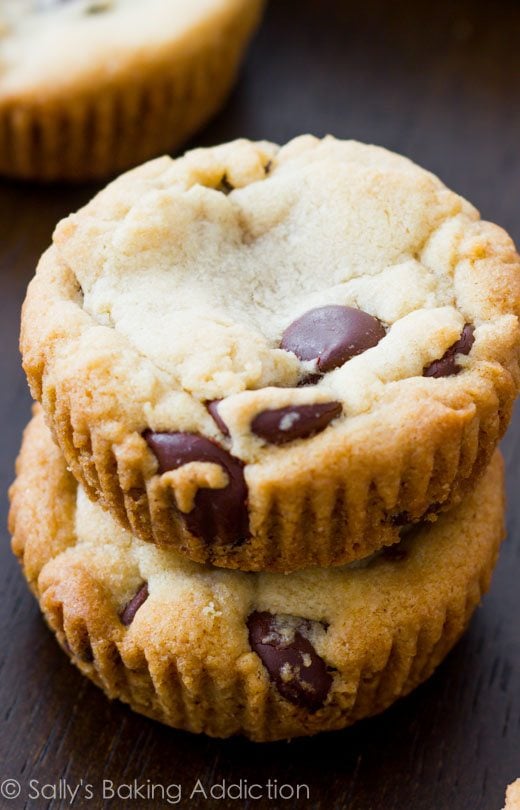
Soft-baked Chocolate Chip Cookie Cups piled high with cookie dough frosting!
I’m sorry for doing this to you. Really, I am. I took chocolate chip cookie dough and combined it with a chocolate chip cookie dough FROSTING. The frosting is egg free and completely safe and necessary to eat. You just found your new favorite way to eat a chocolate chip cookie, I promise.
You can literally see how soft they are! I love these soft chocolate chip cookies but as cupcakes. And I can’t think of a better frosting for them than the actual cookie dough, can you? I didn’t think so.
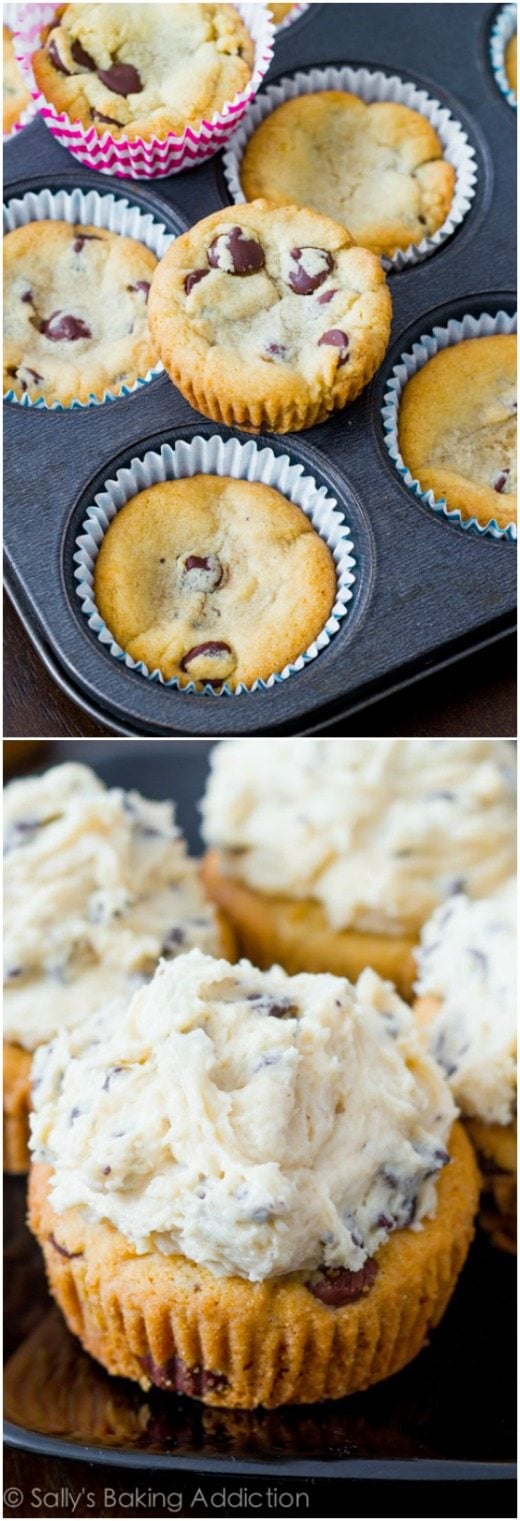
Baking cookie dough in muffin/cupcake pans is actually easier than making actual chocolate chip cookies. There’s no spreading issues to fear and you’re guaranteed a thick result. Spreading is impossible when the cookie dough has no where to spread inside the cupcake tin. Make the cookie dough like usual and then press 1.5 Tablespoons of it into each tin. Be sure to use cupcake liners to make things extra easy. I love the ridged effect the liners give the cookie cupcakes, too. Oh and bonus: no dough chilling for this recipe!
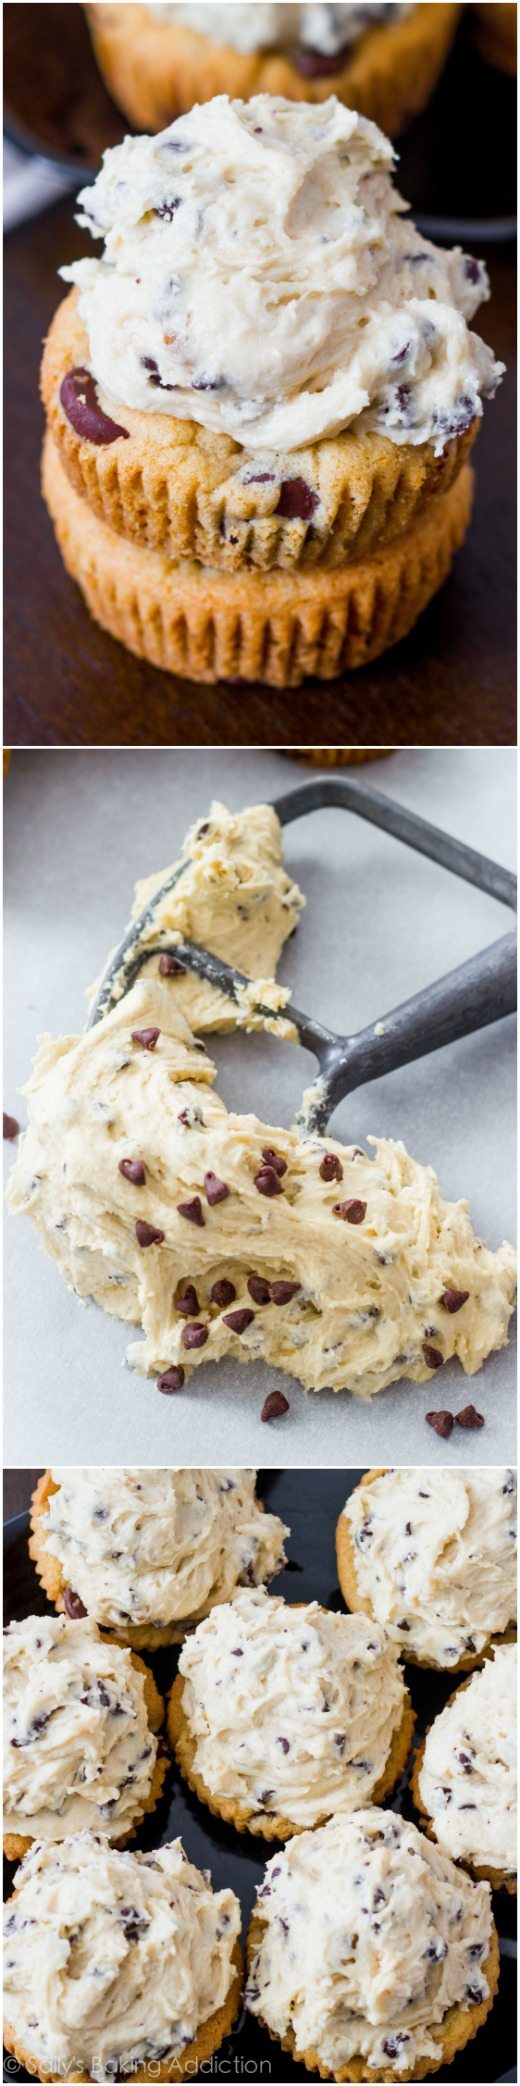
As the cookie cupcakes cool, make your frosting. It’s safe-to-eat cookie dough in frosting form. The frosting uses the same ingredients in your typical cookie dough: softened butter, brown sugar, vanilla extract, flour, salt, and some milk. There are no eggs or leavening agents present—both ingredients used for the structure of a baked cookie. Well, you’re not baking the frosting—you’re just eating it. And it is GOOD. Dessert perfection, if I do say so myself. I use mini chocolate chips for the frosting because you get more chips with each bite and it makes the frosting easier to spread onto the cookie cupcake.
This cookie dough frosting is egg-free and can be made with heat-treated flour. Raw flour can be a carrier of E. coli unless it goes through a heating process to kill the bacteria. (Think about it—flour is usually baked in a recipe.)
How to Heat Treat Flour
Option 1 – Microwave
- You can heat treat your entire bag of flour or just treat the amount you need in a single recipe. If you’re heating just enough for the recipe, add an extra 1/2 – 1 cup to be sure you have enough.
- Place the flour in a microwave-safe bowl and heat on high for 30 seconds at a time, stopping and stirring after each. Stir well to make sure none of the flour burns. Use an instant-read thermometer to test the flour in several places to make sure it has reached 165°F (74°C). If you get a lower reading in one area, stir and heat for an additional 30 seconds until it’s all ready.
- Measure the amount of flour you need and use in the recipe, then let it cool completely.
Option 2 – Oven
- Preheat oven to 300°F (149°C). Spread more flour than the recipe calls for on an un-greased rimmed baking pan, such as a 9×13 inch baking pan or 9×9 inch baking pan. Then follow a process similar to the microwave method by stirring and checking the temperature at 2 minute intervals. Be sure to check multiple spots of the flour to make sure it has all reached 165°F (74°C).
- If some flour sticks to the bottom or sides of the pan, don’t worry, just leave it there. You used more flour than needed in the recipe anyway. Don’t scrape it off because it will add small clumps to your batter/dough.
- If your flour is really clumpy, your oven might be too hot. Break it up with your fingers or pour all the flour into a bowl and whisk it. Discard any chunks if necessary.
- Measure the amount of flour you need and use in the recipe, then let it cool completely.
Be sure to try my cheesecake cookie cups, too!
Print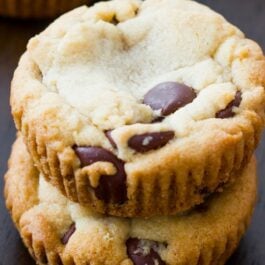
Chocolate Chip Cookie Dough Cupcakes
- Prep Time: 15 minutes
- Cook Time: 13 minutes
- Total Time: 2 hours
- Yield: 24 cookie cups
- Category: Cookies
- Method: Baking
- Cuisine: American
Description
Soft-baked chocolate chip cookie cups piled high with egg-free cookie dough frosting!
Ingredients
Cookie Cups
- 3/4 cup (12 Tbsp; 170g) unsalted butter, softened to room temperature
- 3/4 cup (150g) packed light or dark brown sugar
- 1/4 cup (50g) granulated sugar
- 1 large egg, at room temperature
- 2 teaspoon pure vanilla extract
- 2 cups (250g) all-purpose flour (spooned & leveled)
- 2 teaspoons cornstarch (cornflour)
- 1 teaspoon baking soda
- 1/2 teaspoon salt
- 1 and 1/4 cup (225g) semi-sweet chocolate chips
Cookie Dough Frosting
- 3/4 cup (12 Tbsp; 170g) unsalted butter, softened to room temperature
- 1 cup + 1 Tablespoon (215g) packed light or dark brown sugar
- 2 teaspoons pure vanilla extract
- 1 and 1/4 cups (160g) heat-treated all-purpose flour* (spooned & leveled)
- 3/4 teaspoon salt
- 6 Tablespoons (95ml) milk
- 1 and 1/2 cups (270g) mini chocolate chips
Instructions
- Preheat oven to 350°F (177°C). Line two 12-count muffin pans with liners. Set aside.
- Make the cookie cups: In a large bowl using a handheld mixer or stand mixer with paddle attachment, cream the butter and sugars together on medium speed until fluffy and light in color. Mix in egg and vanilla. Scrape down the sides as needed. In a separate bowl, combine flour, cornstarch, baking soda and salt. On low speed, slowly mix into the wet ingredients. Stir in chocolate chips. Dough will be thick.
- Press 1.5 Tablespoons of dough into each muffin liner. Bake for 12-13 minutes, removing from the oven when the edges begin to slightly brown and the centers still appear soft. Do not bake longer than 13 minutes. Allow cookie cups to cool completely before frosting.
- Make the frosting: With an electric or stand mixer using a paddle attachment, cream together the butter and brown sugar at medium speed. Add the vanilla and beat well. Stir in the flour and salt until doughy. Beat in the milk until fluffy. Gently fold in chocolate chips. Frost cooled cookie cups.
- Unfrosted cookie cups stay fresh covered at room temperature for 5 days. Frosted cookie cups must be stored in the refrigerator.
Notes
- Heat Treated Flour: Though raw all-purpose flour is fine to use in the cookie cups since you’re baking them, it’s safest to use heat-treated flour in the frosting. See note/instructions above recipe or purchase it online.
- Special Tools (affiliate links): 12-count Muffin Pan | Cupcake Liners | Electric Mixer (Handheld or Stand) | Mixing Bowl | Whisk


Reader Comments and Reviews
Very tasty and cute! I made mini cupcakes and loved the little ridges. A fun variation for chocolate chip cookies!
These tasted nice!
They are quick and easy to make too!
Sadly, I wanted to make 24 cupcakes so I would have a snack for all of this week, but mine only made 14 cupcakes, even though I only put about a 1 and 3/4 tablespoons every cupcake.
Hello! I was wondering if it would be ok to make these in an air fryer? Had this craving for the whole day but my oven’s broken …
Hi Al, we haven’t tested these in an air fryer, so we’re unsure of the baking time/temperature. Let us know if you try anything.
I tried it and got 12 mid sized cupcakes! (Baked on 160-170 degrees celsius for about 15 minutes). They turned out very good! One thing i recommend is letting them cool down entirely because I found them a lot better cold than warm ^_^
First of all I love your recipes and detailed instructions Sally!!! Is there a way I can make the frosting without heated flour? I don’t have it on hand and I wanted to make them today for my sons party tomorrow
Hi Nikki, the heat-treated flour is necessary here, but see the pink box above the recipe card for how to make your own heat-treated flour using the microwave or oven. Hope they’re a hit!
The cookies were fantastic! I used liners and took them out of the muffin tin after baking. Because the cookies had not fully set yet getting them out warm while still keeping the “cupcake shape” was tricky. Any tips? Do you let the cookies cool in the muffin tin first before removing, if so how long?
Also (presentation wise) do you usually serve the cookies with frosting with the cupcake liners (just wondering because the cookies don’t rise to the level of a standard cupcake and for me taste wise that would be too high frosting per cookie ratio.) thanks!
Hi Elizabeth! You can leave them to cool in the pan, until set. We usually serve them without the cupcake wrappers, as pictured above.
This is 1 of my best cooks
Is it possible to make this recipe in the form of a 9 inch round cake? My brother wants this for his birthday but requested it as a cake.
Hi Kate, here is our chocolate chip cookie cake recipe instead. We would use that recipe, then the frosting from this recipe. Hope it’s a hit!
These cookies are delicious! I use same recipe but make mini ones for school lunches. These are a big hit for us!! Love love love
I have made this recipe several times and love it! Very easy and delicious. Thank you, Sally.
These are amazing!! Made them for my son’s birthday…the kids loved them and several parents asked for the recipe. You won’t be disappointed!
Woohoo!!! Great recipe. These treats are so delicious. Thanks for answering my question about making a chocolate version of the frosting. It turned out fabulously. These are an irresistible, indulgent treat.
How can I make this frosting into a chocolate version?
Hi Erin! We haven’t tested it, but don’t see why you couldn’t use our favorite chocolate buttercream as the base of the cookie dough buttercream!
Hi!! I’m about ready to bake this yummy treat but I only have the silicone-loaf tin. Will that work just the same as the aluminum tins?
Hi Sally! I love all your recipes. They’re definitely my go-to whenever I’m in the mood to bake something sweet. I’ve tried baking these cookie cups today and noticed more sinking in the middle. Not all, but Some. Where could the misstep have been?
Hi Jenny, this is completely normal with cookie cups– or really anything heavy/denser that you’re baking in muffin cups (like cheesecake or brownies). You didn’t do anything wrong. (More room for frosting or topping!)
I love fun and exciting twists on chocolate chip cookies! I can’t wait to give this recipe a try along with a few of your other chocolate chip cookie twists! I’ve baked several of your cakes for birthdays and holidays and everyone has just loved them all! I always end up on your site somehow. I guess you always have what I’m looking for!
These are really fun muffins to make and they taste really nice and sweet they are a easy recipe to follow these are a 10/10
Hello,
Just found this site and this is a great resource, thank you! Made the cookies and everyone loved them.
I have a kid cousin who’s allergic to eggs – is there a good substitute for the cookie batter I can use? The frosting doesn’t have any so we are good to go there.
Thank you!
Hi Steve, We’re so happy you have been enjoying our recipes! We haven’t tested any egg-free variations of these cupcakes. Let us know if you do! If you’re interested, here is our egg free baking section. Happy baking!
Flax egg works well in this recipe ! One tablespoon of ground flax in 2.5 tablespoons of water. Let sit for a moment.
These turned out perfect! I know it’s an old recipe but I just wanted to say they are sooo good and the recipe actually yielded 35 cookies for me! Thanks!
Made this yesterday, my husband and I love them❤️. Thank you!
I’ve made these a few times for events which led young nieces and nephews to repeatedly request them for their birthday parties. You can’t really get a bigger, better compliment than that.
Made these the other day, and hands down best chocolate chip cookie recipe I’ve made! And I’ve been through many many recipes looking for my “go to” recipe. The cookies came out nice and chewy and thick. My husband loved them! I will be making these for my work’s bake sale next week!
These look great! Im making them for my son’s cookies and milk birthday party and want to make them mini cupcakes instead. What do you recommend as a baking time? Thanks!!
I’d say 10 minutes.
Hi Sally, I have made these cupcakes so many times and they always turn out perfect!! but what do I do if I want to make this delicious recipe into a cake instead of cupcakes?
Kristina, you can bake this in a 9-inch cake or pie dish. And frost with the cookie dough frosting. The bake time will be about 25 minutes.
Hi Sally! I’m just about to make these delicious cupcakes and I was wondering if they would still be good in a mini muffin pan? Just wanted to make them bite sized or should I make them in a regular muffin size? Thank you! Can’t wait to devour them!
You can make them mini size! Unsure of the exact bake time. It will be less. Same oven temperature.
My boyfriend is a chocolate chip cookie addict, and for his birthday I wanted to make something a little more special! This was absolutely perfect, thank you! (:
I just wanted to let you know how much my we appreciated the recipe for the perfect chocolate chip cookies. My sons and grandchildren adored it. The cookie had the perfect blend of soft and chewie which I had been looking for in a recipe for a long time.
So thank you so very much,
Pat
Just curious, is the paddle attachment completely necessary for these? We have a hand mixer, but not the paddle attachment. I was wondering if I’d still get the same result just using the whisk attachment?
No, you wouldn’t. You need the paddle attachment for this very thick and doughy dough. You could use a hand mixer.
I made these last night for my son’s birthday sleepover, and I heard them being devoured at 3am! Thank you for such a fantastic recipe! I know it will be requested that I make them again.
I made these for Easter dessert to take to family dinner today. Followed the recipe exactly and they came out PERFECT! So easy to make. They were a HUGE hit! Can’t say enough good things about them. Amazing. Thanks for a great recipe!