

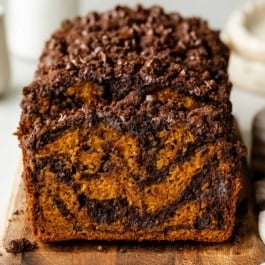
This chocolate marble pumpkin bread brings together two favorite flavors in 1 loaf: classic pumpkin bread, swirled with rich chocolate and finished with a crumbly chocolate streusel topping. Every slice is soft, moist, warmly spiced, and filled with pockets of chocolate flavor. It looks impressive, but the marbled effect is surprisingly easy to create; and best of all, both parts start from the same batter.
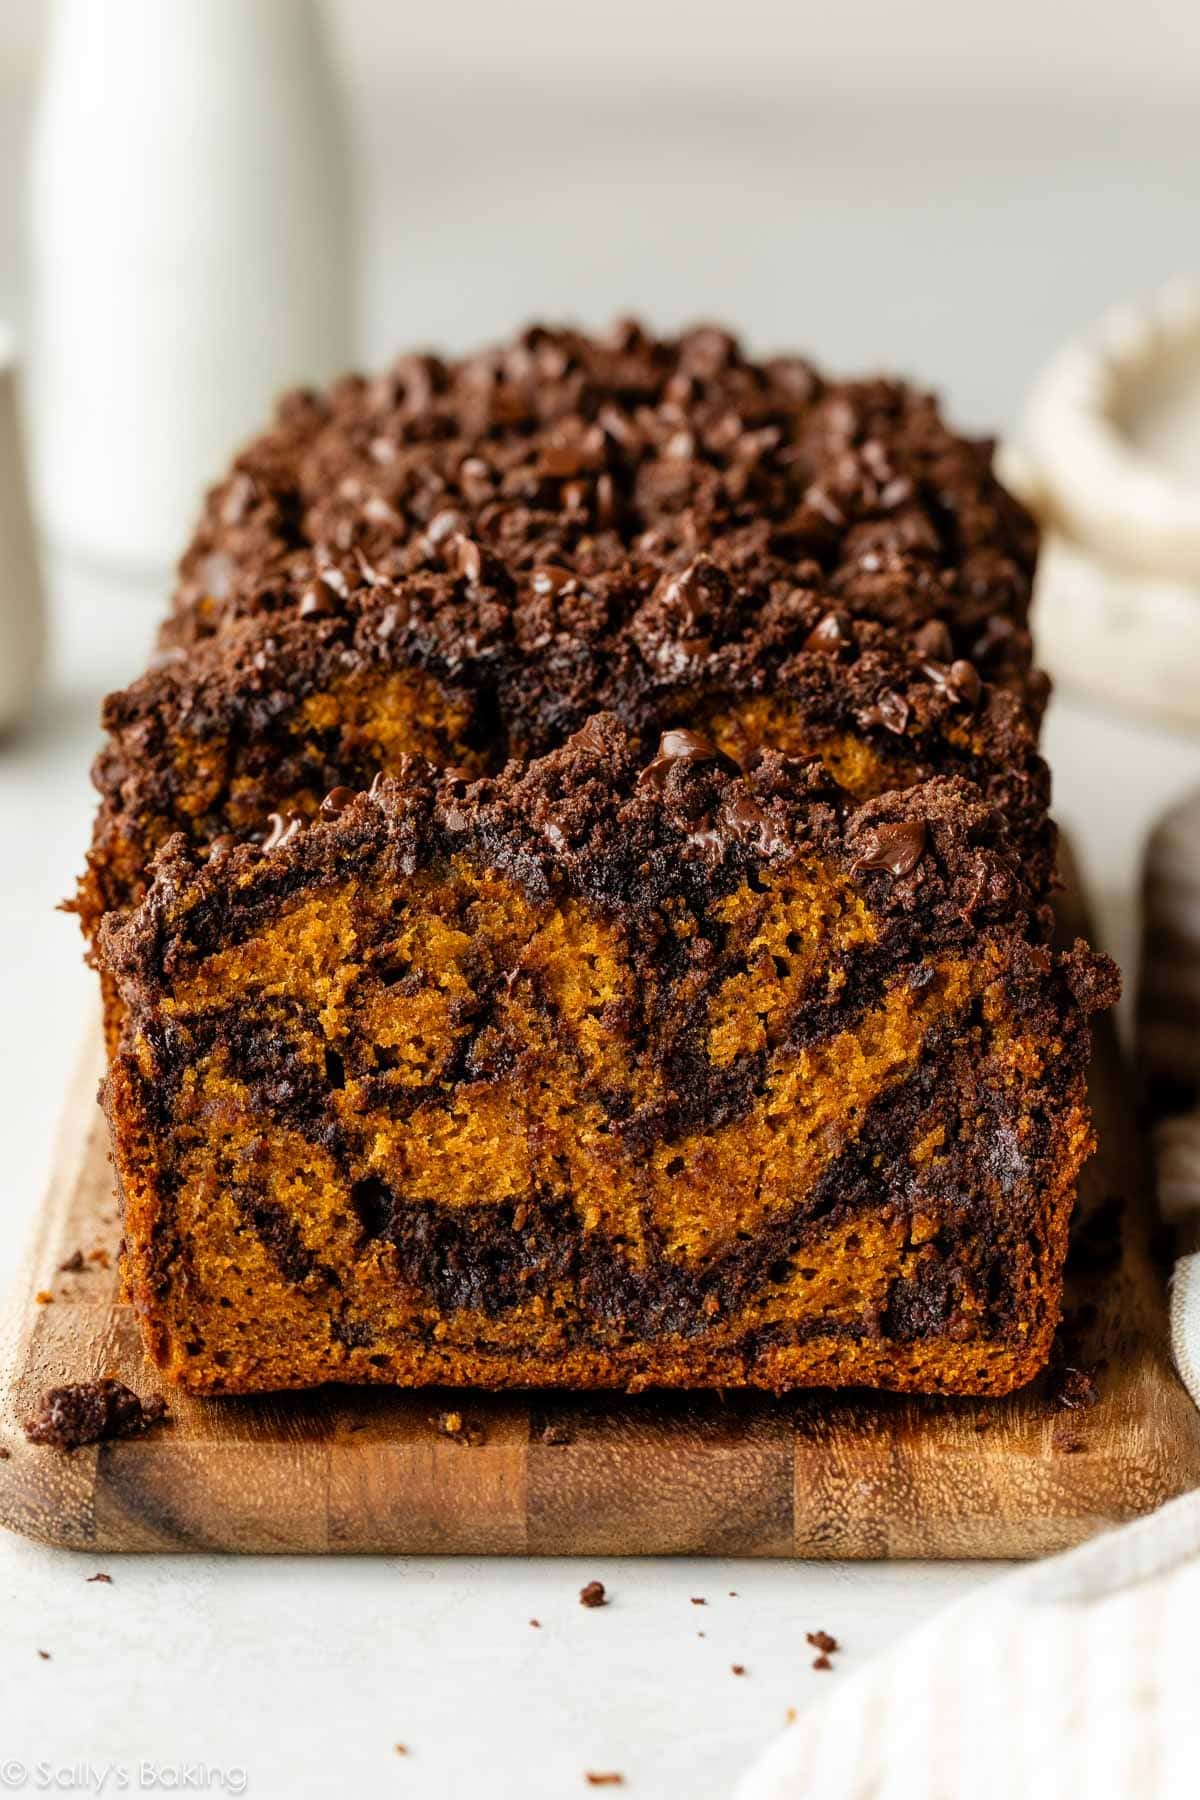
This recipe is based on my favorite pumpkin bread recipe, and it’s assembled the same way as this marble loaf cake. The rich chocolate crumb topping pushes this chocolate pumpkin bread from the quick bread category more into loaf cake territory, and you will definitely not be sorry about crossing that border.
Taste testers RAVED about this one.
Why You’ll Love It
- 2 flavors in 1 loaf: Cozy pumpkin spice meets rich chocolate.
- Soft and moist: Pumpkin puree and oil keep the bread incredibly tender.
- Easy to make: Make the pumpkin batter, then separate out some to make into the chocolate pumpkin batter. No electric mixer needed.
- Beautiful marbling: The decoration is already built in!
- Chocolate streusel topping: Chocolate streusel adds a crisp, crumbly topping that contrasts beautifully with the soft pumpkin bread underneath. Because one layer of chocolate is never enough. 😉
- Perfect for fall: It’s wonderful for a special breakfast, as an afternoon treat, or dessert.
If you love my classic pumpkin bread, this is a fun chocolate twist to add to your fall baking list. The hardest part is waiting for the loaf to cool before slicing!

Ingredients for Chocolate Marble Pumpkin Bread
Let me explain some of the most important ingredients you need and why:
- Pumpkin Puree: Make sure you grab the can labeled “pure pumpkin,” not “pumpkin pie filling.”
- Favorite Fall Spices: Pumpkin pie spice and cinnamon bring their signature warmth to the batter. You can use either store-bought or homemade pumpkin pie spice.
- Oil: Adds incredible moisture and lightens up the crumb. This chocolate marble pumpkin bread stays soft and moist for days! A neutral-flavored oil like canola or vegetable oil is great, but you can substitute avocado oil or melted coconut oil instead.
- Cocoa Powder: You need cocoa powder to make your chocolate batter. Remember this post on Dutch-process vs. natural cocoa powder? In testing this chocolate marble pumpkin bread, we found that using Dutch-processed cocoa made for the best, smoothest-tasting chocolate flavor. I usually use this brand (not working with them, just a big fan!).
- Espresso Powder: Just like in chocolate cake, we use espresso powder to enhance and deepen the chocolate flavor—it doesn’t taste like coffee at all. You can find espresso powder in the coffee aisle at your grocery store or online.
- Mini Chocolate Chips: Using mini chips here means you get more melty pools of chocolate in every bite.
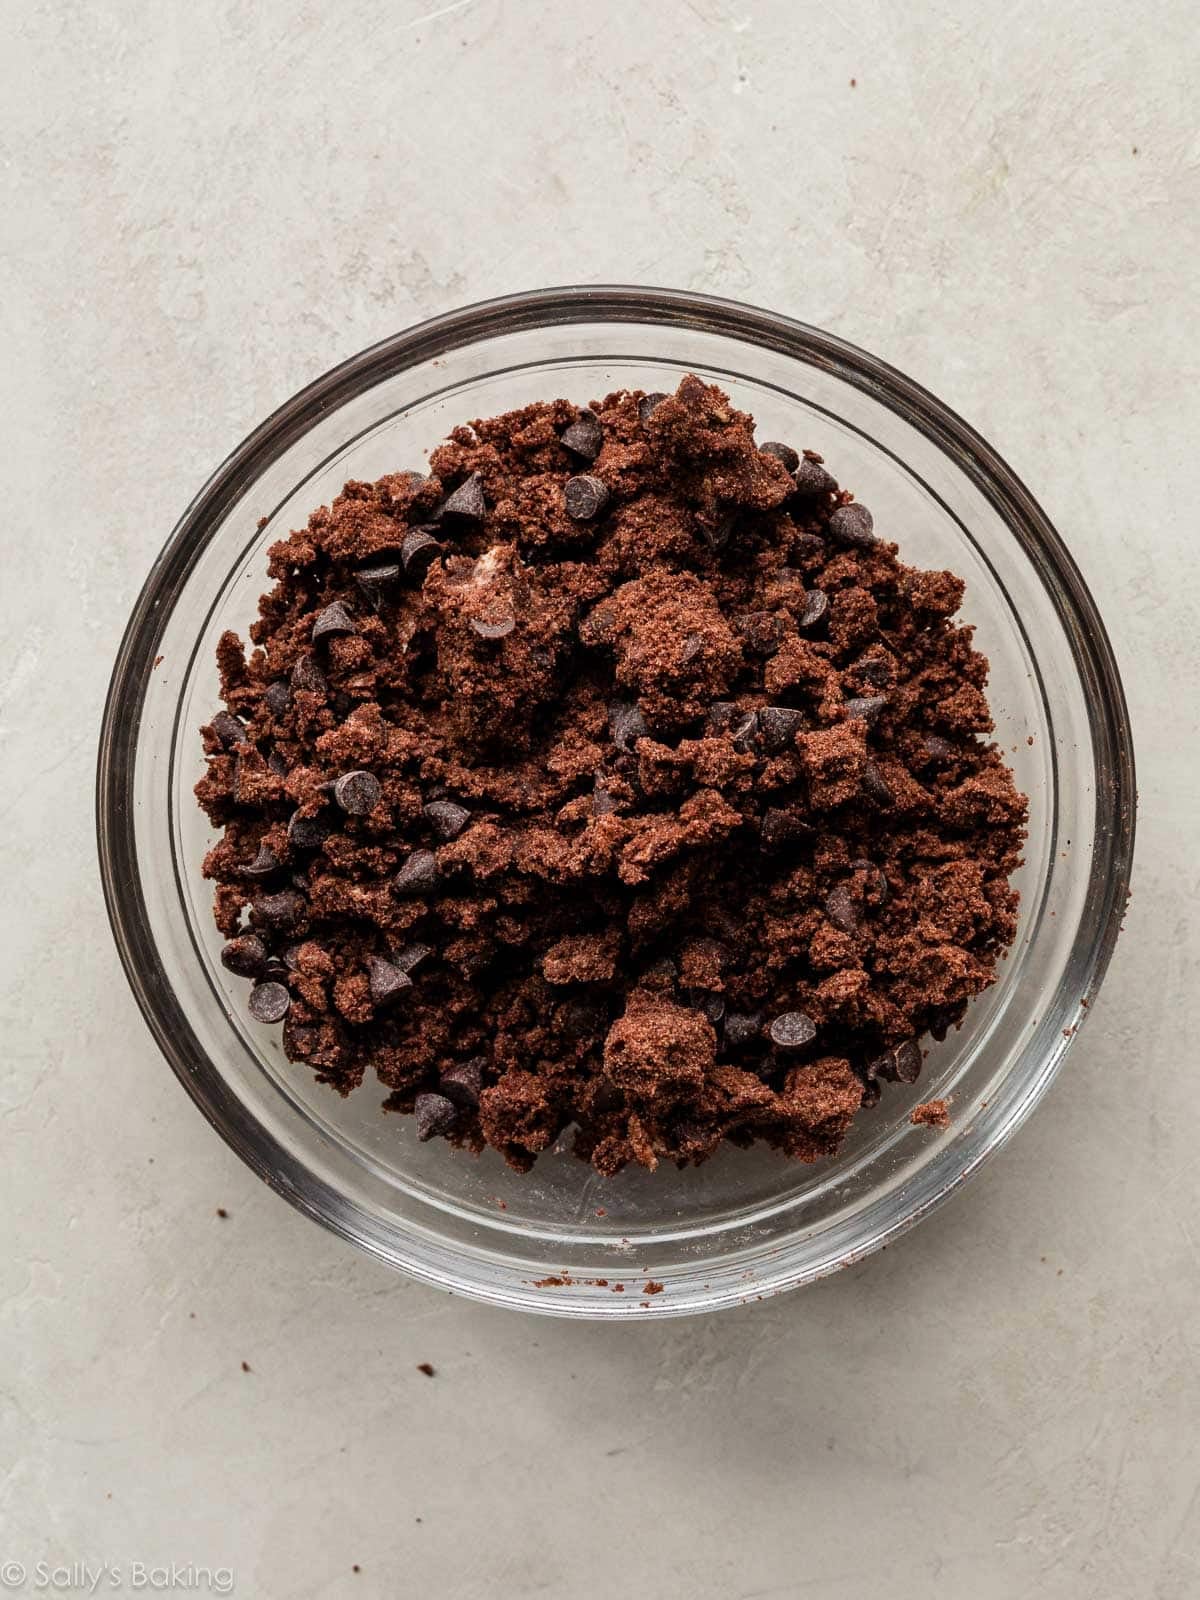
Make the Chocolate Crumb Topping First
Start with the chocolate streusel so it’s ready to go when the batter is finished. Place it in the refrigerator or freezer while you make the batter. You want to keep those crumbles as cold as possible before they hit the hot oven, just like we do when making apple pie bars.
2 Flavors From 1 Batter
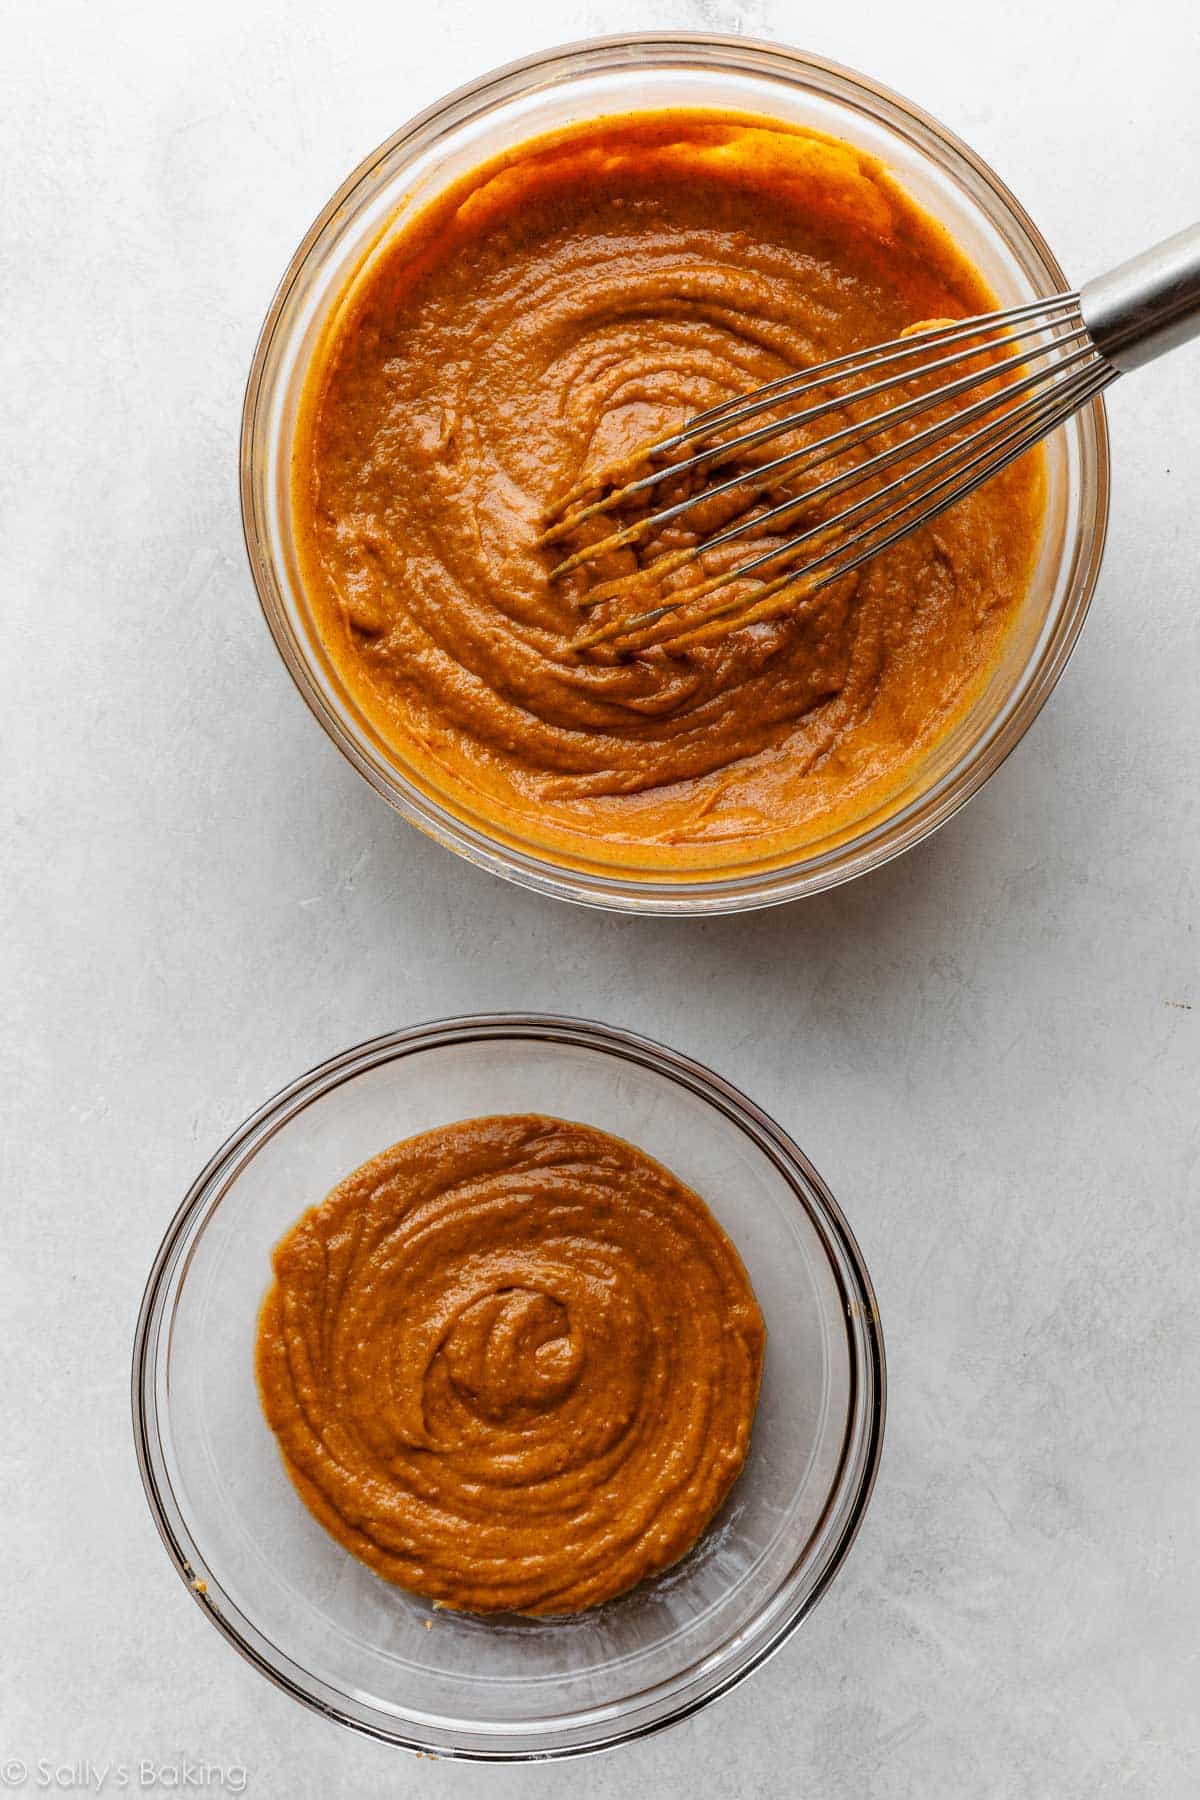
The pumpkin batter follows a simple, familiar process. Whisk together the dry ingredients, then whisk together the wet ingredients, then whisk to combine both. Easy.
Great news: The chocolate batter is made from the pumpkin batter, so you don’t have to prepare two completely separate batters. Yes!!!
Transfer a heaping cup (you can just eyeball it; if you want to be precise, use a kitchen scale and aim for around 280g) into a second mixing bowl.
Add cocoa powder and espresso powder to the smaller amount of batter. Since we’re adding these dry and bitter ingredients to the chocolate batter, we need to add some more moisture too. A little warm milk solves that problem. (Warm liquid helps the cocoa and espresso powders bloom/dissolve.)
Then stir in some mini chocolate chips:
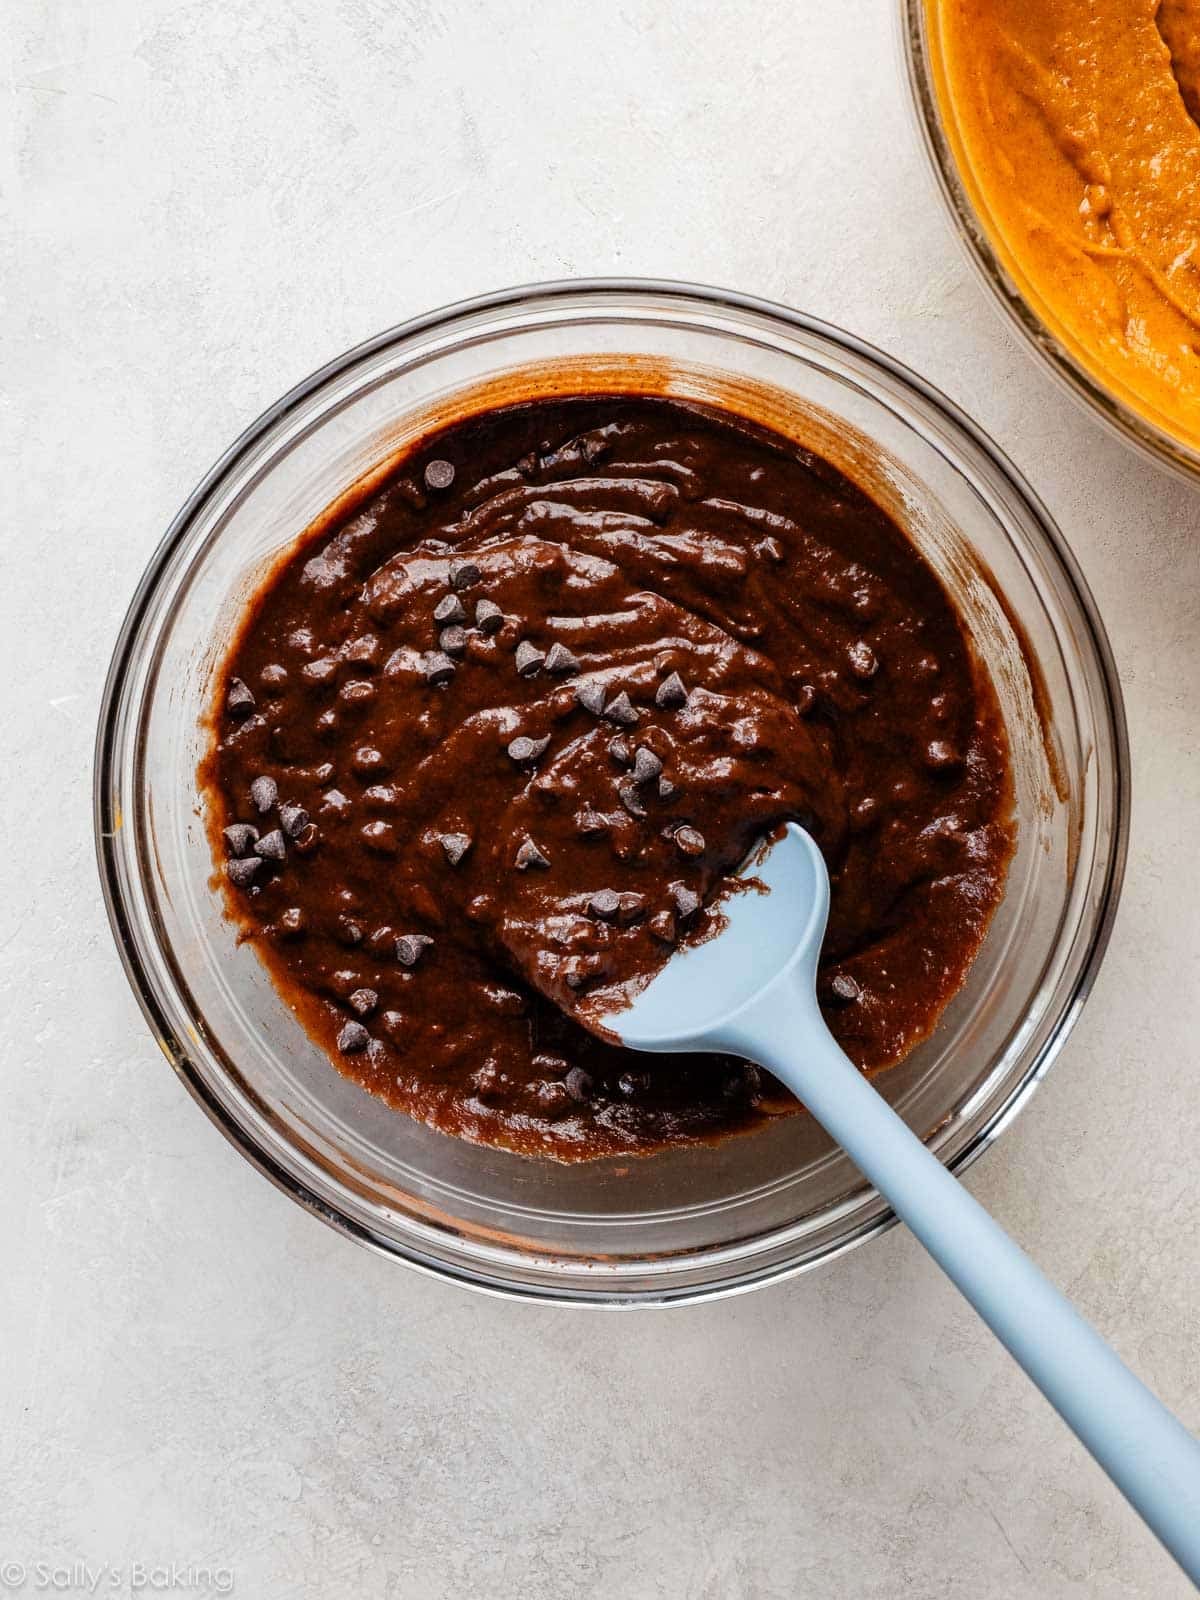
You now have two batters: one classic pumpkin and one chocolate pumpkin.
How to Line a Loaf Pan
For easy removal and perfectly intact slices, I recommend lining your loaf pan with what’s called a “parchment sling.” It essentially gives you handles to lift the entire loaf straight out of the pan once it has cooled—similar to how we line a baking pan for brownies to make for easy removal and cutting.
In the case of this chocolate marble pumpkin bread, my team and I found this to be especially helpful, since flipping the bread out of the pan can be a bit messy because of the crumb topping. Here’s how to make a parchment sling:
First, lightly grease the loaf pan (I always use nonstick spray). Cut a piece of parchment paper that’s long enough to fit across the bottom of the pan and extend up and over the two long sides. Press the parchment into the pan, leaving the ends hanging over the sides. The grease helps hold the parchment in place while you add the batter.
There’s no need to line all four sides of the pan. The parchment sling takes care of the bottom and two sides, while the exposed sides can be lightly greased.
Once your chocolate pumpkin bread has cooled, lift the loaf up and out of the pan.
How to Get the Best Marble Effect
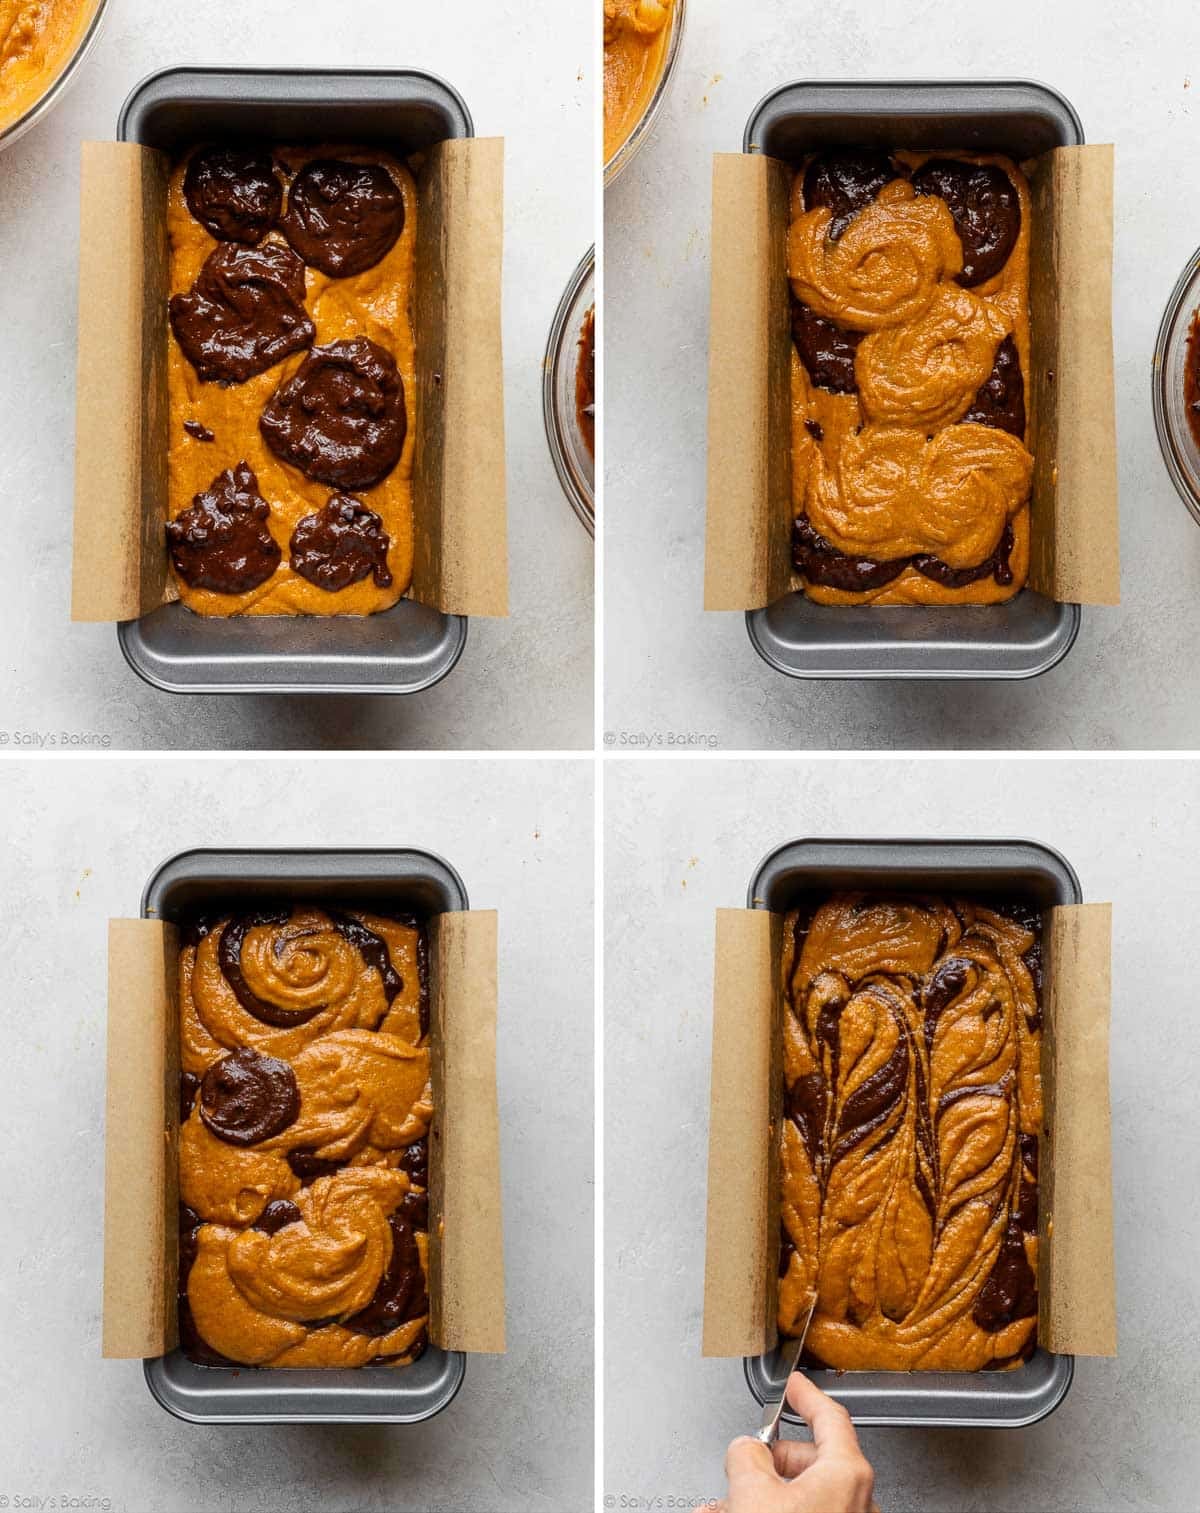
- Spread a thin layer of the pumpkin batter on the bottom of the pan.
- Cover with a few spoonfuls of the chocolate batter, then a few spoonfuls of the pumpkin batter, then more chocolate batter, then more pumpkin batter, and so on until all of the batter is used.
- Gently shimmy the pan to level out the batters.
- Using a knife, make rounded horizontal zig-zags from one side of the pan to the other, and then make rounded vertical zig-zags from the top to the bottom.
The marbling is easy, but there are a few tricks that make a big difference:
Don’t overmix the two batters. A few swirls are all you need. Think gentle figure-eights rather than vigorous stirring.
Alternate the batter. Spoon the pumpkin and chocolate batters into the pan in alternating dollops or layers. This distributes the two flavors throughout the loaf.
Use a thin knife. A butter knife or small offset spatula works well for swirling.
Don’t stress about perfection. Every loaf and slice will look a little different, which is part of the fun!
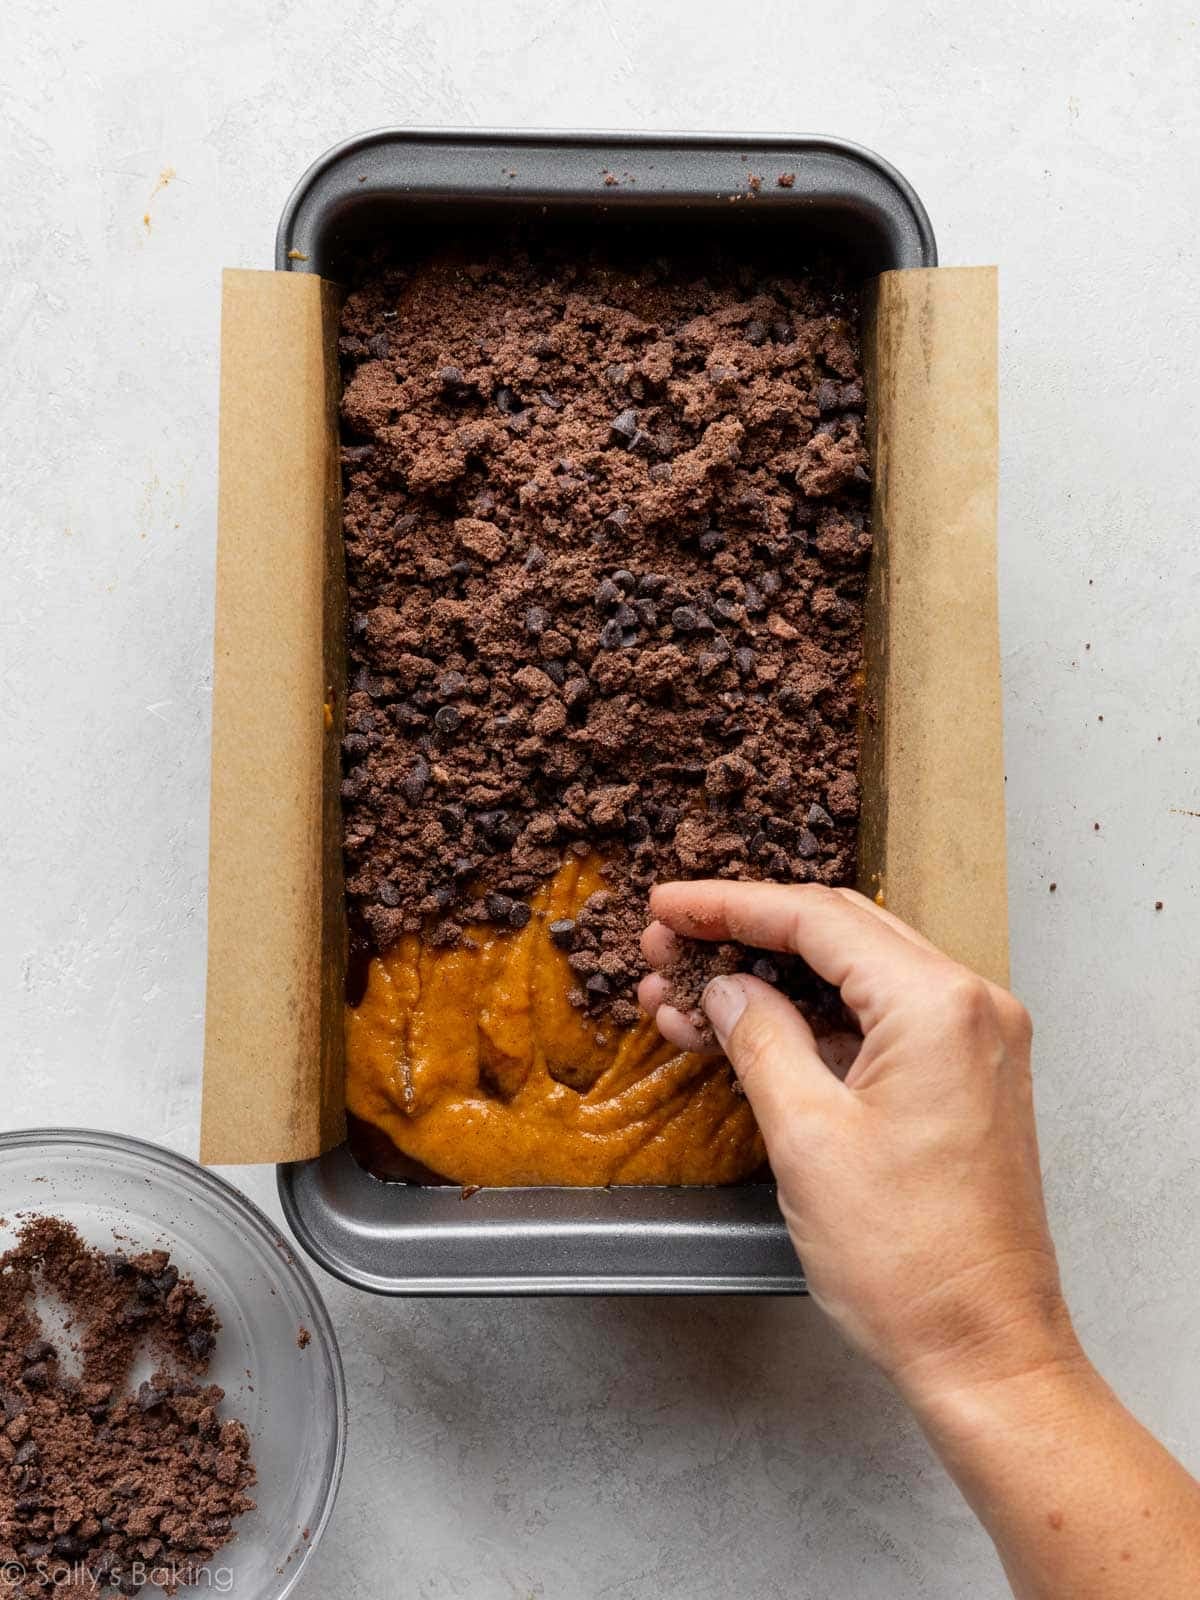
Now sprinkle the cold chocolate crumb topping all over the top and you’re ready to bake!
Toward the end of bake time, loosely tent aluminum foil over the pan to prevent the crumb topping from getting too dark.
Let the bread cool completely in the pan before removing and slicing. For the cleanest slices, use a serrated knife.

There’s something about a loaf of pumpkin bread baking in the oven that makes fall feel official. Add chocolate, a pretty swirl, and a crunchy streusel topping, and you might just want to make this a year-round recipe!
Print


Chocolate Marble Pumpkin Bread
- Prep Time: 25 minutes
- Cook Time: 65 minutes
- Total Time: 3 hours (includes cooling)
- Yield: 1 loaf
- Category: Bread
- Method: Baking
- Cuisine: American
Description
This chocolate marble pumpkin bread brings together two favorite flavors in one loaf: classic pumpkin bread, swirled with rich chocolate and finished with a crumbly chocolate streusel topping.
Ingredients
Chocolate Crumb Topping
- 3 Tablespoons (24g) all-purpose flour
- 2 Tablespoons (27g) packed light or dark brown sugar
- 1 Tablespoon (5g) Dutch-process cocoa powder
- 1/4 teaspoon ground cinnamon
- pinch of salt
- 3 Tablespoons (43g) unsalted butter, cold and cubed
- 3 Tablespoons (34g) mini chocolate chips
Pumpkin Batter
- 1 and 3/4 cups (219g) all-purpose flour (spooned & leveled)
- 1 teaspoon baking soda
- 2 teaspoons store-bought or homemade pumpkin pie spice*
- 1 teaspoon ground cinnamon
- 3/4 teaspoon salt
- 2 large eggs, at room temperature
- 1/2 cup (100g) granulated sugar
- 2/3 cup (133g) packed light or dark brown sugar
- 1 and 1/2 cups (340g) canned pure pumpkin puree
- 1/2 cup (113g/120ml) vegetable oil, avocado oil, or melted coconut oil
- 2 Tablespoons (30g/ml) whole milk
- 1 teaspoon pure vanilla extract
Chocolate Batter
- 1/2 teaspoon espresso powder
- 1 and 1/2 Tablespoons (23g) whole milk, warm
- 2 Tablespoons (10g) Dutch-process cocoa powder
- 1/3 cup (60g) mini chocolate chips
Instructions
- Make the crumb topping: In a medium bowl, whisk the flour, brown sugar, cocoa powder, cinnamon, and salt together until combined. Add the butter and use a pastry cutter, two forks, or your fingers to blend until the mixture forms pea-sized crumbs. Stir in the mini chocolate chips. Cover and place in the refrigerator or freezer until needed in step 5.
- Make the pumpkin batter: Adjust the oven rack to the lower third position and preheat the oven to 350°F (177°C). Grease a metal 9×5-inch loaf pan with nonstick spray and line with parchment paper, leaving a couple inches of overhang on two opposite sides.* Set aside.
- In a large bowl, whisk the flour, baking soda, pumpkin pie spice, cinnamon, and salt together until combined. Set aside. In a medium bowl, whisk the eggs, granulated sugar, and brown sugar together until combined. Whisk in the pumpkin, oil, milk, and vanilla. Pour the wet ingredients into the dry ingredients and whisk together until combined. The batter is thick and a few lumps are OK. Do not overmix. Transfer a heaping cup (about 280g) of the batter to a medium bowl; this will be the chocolate batter. Set aside the remaining pumpkin batter (the larger amount).
- Make the chocolate batter: In a small bowl, combine the espresso powder and warm milk, whisking with a fork to dissolve the espresso powder. Pour this into the medium bowl with the smaller amount of batter, along with the cocoa powder, and whisk to combine. Fold in the mini chocolate chips.
- Assemble the loaf: Spread a thin layer of the pumpkin batter in the bottom of the prepared loaf pan. Layer a few spoonfuls of the chocolate batter on top, followed by a few spoonfuls of the pumpkin batter. Continue alternating spoonfuls of each batter until all of the batter is used. Gently shimmy the pan to level the batters. Using a knife, make rounded horizontal zigzags from one side of the pan to the other, followed by rounded vertical zigzags from top to bottom. Sprinkle the cold crumb topping evenly on top.
- Bake for 60–70 minutes; loosely tent with aluminum foil around the halfway mark. The bread is done when a toothpick inserted in the center comes out clean with only a few small moist crumbs. This may be before or after 60–70 minutes depending on your oven, so begin checking every 5 minutes around the 55-minute mark.
- Cool the bread completely in the pan set on a cooling rack. Lift the bread out of the pan by gripping the parchment paper overhang. Transfer it to a cutting board, then slice and serve.
- Cover and store leftover chocolate marble pumpkin bread at room temperature for up to 3 days, or in the refrigerator for up to 1 week.
Notes
- Freezing Instructions: Wrap the cooled pumpkin bread in a layer of plastic wrap, followed by a layer of aluminum foil; freeze for up to 3 months. Thaw overnight in the refrigerator, then bring to room temperature or serve cold.
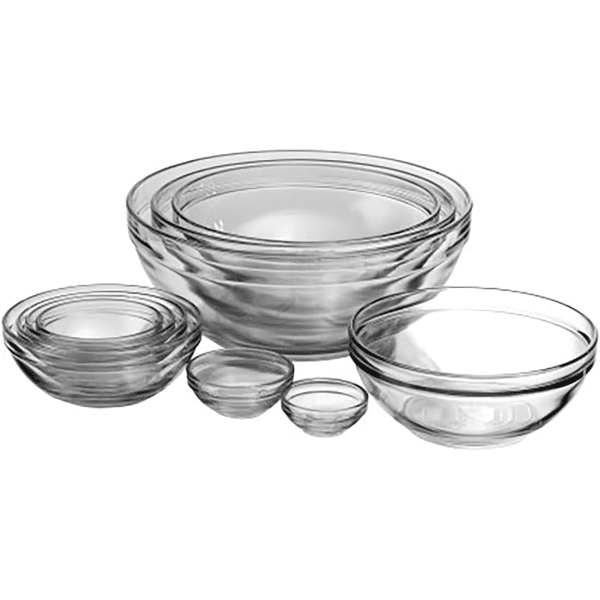
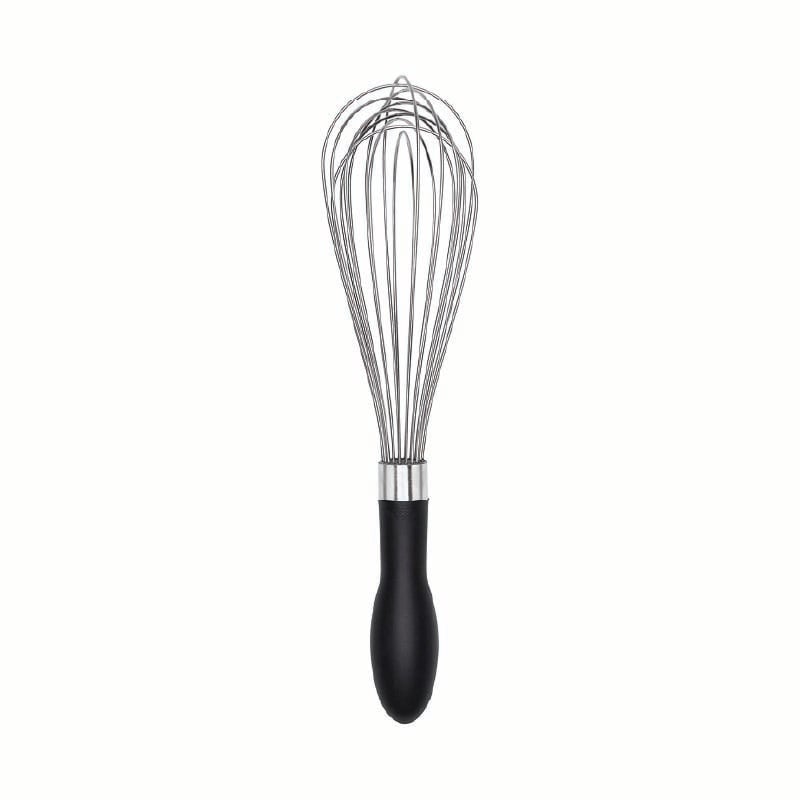
- Special Tools (affiliate links): Dutch-Process Cocoa | Espresso Powder | Pastry Cutter | 9×5-inch Loaf Pan | Glass Mixing Bowls | Whisk | Cooling Rack
- Cocoa Powder: You can use unsweetened natural cocoa powder if you do not have dutch-process cocoa powder.
- Oil: You can use vegetable oil, canola oil, avocado oil, or melted coconut oil. I typically use vegetable oil or avocado oil.
- Espresso Powder: If you prefer to skip the espresso powder, I recommend still warming the milk. Add it along with the cocoa powder in step 4.
- How to Line a Loaf Pan: Lightly grease the loaf pan with nonstick spray. Cut a piece of parchment long enough to cover the bottom and extend up and over the two long sides of the pan. Press it into the pan, leaving the ends hanging over the sides to use as handles for lifting out the cooled bread. There’s no need to line all four sides. The parchment sling takes care of the bottom and two sides, while the exposed sides can be lightly greased.
- Room-Temperature Ingredients: All refrigerated items should be at room temperature so the batter mixes together easily and evenly. Read more about room-temperature ingredients in baking.










Reader Comments and Reviews
This bread was delicious!!! Only thing my family said was that it needed more chocolate chips😂
The crumb topping was super good
Thanks for the recipe!!😂
Perfect every time!
I know this may seem silly but is there a calorie count on a slice or calorie break down? Thank you!
Hi Bree, We don’t usually include nutrition information as it can vary between different brands of the same ingredients. Plus, many recipes have ingredient substitutions or optional ingredients listed. However, there are many handy online calculators where you can plug in and customize your exact ingredients/brands. Readers have found this one especially helpful: https://www.verywellfit.com/recipe-nutrition-analyzer-4157076
The rich chocolate streusel topping? Dear Lord this component took this loaf over the EDGE! My teens gave it 10/10 warm with some vanilla ice cream. I’ll be making this on repeat this fall!
I love pumpkin bread and I love chocolate. This recipe is perfection. BEST Sally’s recipe EVER.
Amazing! So moist and delicious with that bit of crunchy topping. Just wonderful! Served this at a church event and it disappeared instantly. Tons of compliments. Now I have to make one for just me!
Excellent recipe. Not an overly pumpkin flavor mixed with chocolate and very moist! I’ll be making this again.
I rarely ever leave reviews, but this pumpkin bread was FANTASTIC! Seriously, the best I’ve ever tasted. My mom and I devoured it in almost 2 days. I only have a 4.5×8 inch loaf pan, so I baked it for about 18 minutes longer and it came out perfectly. I also used regular chocolate chips since I didn’t have mini ones on hand.
This is probably the best Sally’s recipe I’ve tried. It’s so good as written.
Just started this recipe and quite confused and frustrated by the topping. I added the cubed butter and started whisking. I don’t understand what this accomplishes with cold cubes of butter or what “pea-sized” balls result from this. Then as the recipe states, you can use your hands too. So then I used my hands and the butter began to get very soft from the heat of my hands. And now I just have a giant chocolate butter dough.
Hi Dee, it sounds like your butter got too warm. If this happens again, pop the whole mixture in the fridge to let it chill before continuing.
Perfect as always- spices dosed well, moist, and it won’t last long. Next time I will try to remember to swirl!
Made this bread it was good. The mess I made in my kitchen was big! My did not turn out at all like the picture where you could see the pumpkin, the chocolate overwhelmed it.
Hi Yolanda! Could the two batters have been over-swirled together? You want to swirl them just enough to make it pretty, but not so much that the pumpkin gets lost in the chocolate.
I have a substitute question. What do you recommend I use in place of the espresso powder, which I don’t keep in my pantry nor use?
In place of the dutch-process powder, I have an excellent Unsweetened cocoa powder, would this work?
Hi Sloane, if you prefer to skip the espresso powder, you certainly can, but we recommend still warming the milk and adding it along with the cocoa powder in step 4. You can use unsweetened natural cocoa powder if you do not have dutch-process cocoa powder. Hope you love this bread!
As a baker, I’m aware that the espresso will help lift the chocolate flavor, thus my asking for a substitute. How will standard coffee alter the recipe, if at all? How about freeze dried?
Hi Sloane, freeze dried (instant coffee) is a great substitute for espresso powder.
Love… shared at work and have multiple requests for a repeat bake.
Could I make the crumble topping the night before and leave it in the fridge until baking the next day? (Thank you, I love all your recipes!)
Absolutely!
It’s a little time consuming to make but the finished product tastes great! It’s a looker too 🙂
Can you omit the espresso powder?
Hi Julia, yes, you can omit the espresso powder. If you prefer to skip the espresso powder, we recommend still warming the milk. Add it along with the cocoa powder in step 4.
I made this bread yesterday and it came out SO delicious!
As soon as I saw this recipe posted, I knew I had to make it. I followed the recipe to a “t,” and it turned out perfectly! A little chocolately; perfectly warm from the spices; and tender, oh so tender & moist! 10/10 recommend! This will definitely be on repeat for the fall months!
Just made this bread and it’s amazing!! Moist, not overly sweet and love the texture. It’s easy to make too! All of your recipes have been wins!
Can zuchinni substitute in this recipe?
Would it mess up the recipe to use dark chocolate chips or cocoa powder or for both
It won’t mess anything up; feel free to use chopped dark chocolate or dark chocolate chips, and/or a dark or black cocoa powder.
I made this into 18 beautiful muffins for the grandkids. Baked about 20 minutes. Kids loved it, PopPop did too!!
Any potential issues with skipping the topping?
Hi Becky, You can skip it with no other changes. Enjoy!
I just made this and didn’t have espresso powder but did have a packet of Starbucks Via Italian Roast which is also a dark roast instant coffee. Fantastic!!!
Does the chocolate powder have to be Dutch processed?
Hi Irene, no, you can use natural cocoa instead if that is what you have.
This is in my oven…I can’t wait!! I love chocolate and pumpkin together and your recipe sounded delicious!! It went together easily. I will post later when it’s finished cooking, cooled and tasted!!
This bread is amazing! So moist, and the combination of chocolate and pumpkin is perfect. Thank you, Sally, for another great recipe!
Quick question: If I don’t use the espresso powder do I still need the 1 1/2 Tablespoons of milk?
This looks gorgeous. Looking forward to giving it a try.
Hi Staci! Good question. Yes, you’ll still need the milk. I would still warm it up, so it helps bloom the cocoa powder and easily mixes into the batter. I will add that recipe Note.
Can I substitute gluten free flour for regular flour?
Hi Debbie, we haven’t tested it with gluten free flour, but let us know if you do.
I really like many of your recipes but-as a diabetic-how I wish U would include the carb, fat & protein values of your recipes. As a Sr. Senior citizen I have neither the skill nor the energy to figure it all out for myself.
Wistfully, I say Thank U
Hi Maggie, thank you so much for this feedback. We are looking into adding the nutritional information to more recipes. We are actually switching over our backend recipe system to another system in the new year (a big project behind the scenes!) and will look into those nutrition info/calculation features for each individual recipe.
Hi Maggie! You can input the recipe into an AI platform like ChatGPT or Claude and it should be able to calculate the nutrition information for you.