

Starting from a simple buttery homemade dough, this everything bagel pull apart bread is filled with cheesy garlic & herb cream cheese and topped with everything seasoning. Baked until golden brown and served pull-apart style, this snack is truly irresistible. It’s flaky, salty, savory, garlicky, and cheesy—plus it’s fun to eat & share.
This recipe is brought to you in partnership with Red Star Yeast.
A few readers requested savory football food recipes and snack-style pull apart bread came to mind first. After weeks of brainstorming, asking your suggestions, and a little recipe testing… I baked the BEST PULL APART BREAD you will ever eat. If you have ever tried these pizza pull apart rolls, you know that’s a bold statement. This loaf-style pull apart bread is prepared with easy homemade bread dough, garlic herb & mozzarella cream cheese filling, and everything bagel seasoning on top.
- My assistant said “This is the best thing I’ve ever eaten.”
- Our friend said “This stuff is dangerous.”
- Another friend said “Alert me when you publish the recipe so I can make it.”
- And then “Get this away from me because I can’t stop eating it.”
- And, finally, I said: “This is another example of why I love carbs.”
Pull Apart Bread Dough
The everything bagel pull apart bread begins with homemade dough. A lot of homemade yeasted bread recipes yield 2 or more loaves, but I only wanted 1. It required a little testing, but I found the perfect ratio of ingredients. Pull apart bread dough combines 7 simple ingredients: sugar, milk, butter, salt, egg, flour, and yeast. Here’s the purpose and importance of each:
- Sugar feeds the yeast. Only 1 Tablespoon in the recipe.
- Milk hydrates the yeast and gives the bread a softer texture (as opposed to water).
- Butter and salt give the bread flavor.
- Egg contributes to the bread rising as well as providing texture/structure.
- Flour is the structure of the bread.
- Yeast makes bread… bread!
Baking with Yeast Guide
Reference this Baking with Yeast Guide whenever you work with baker’s yeast. I include practical answers to all of your common yeast questions.
Let’s Talk About the Yeast
We’re using a superior yeast: Platinum Yeast from Red Star. Red Star Platinum Superior Baking Yeast is an instant yeast that strengthens our dough and provides extra volume to the final product. It’s my preferred yeast for any and all bread baking—I use it exclusively in my kitchen because it’s always a guarantee!! If you don’t have Platinum, Red Star Active Dry or Quick Rise Yeast works too! If using active-dry, your dough may take a little longer to rise. We only need 2 teaspoons of dry yeast which is a little less than 1 standard packet.
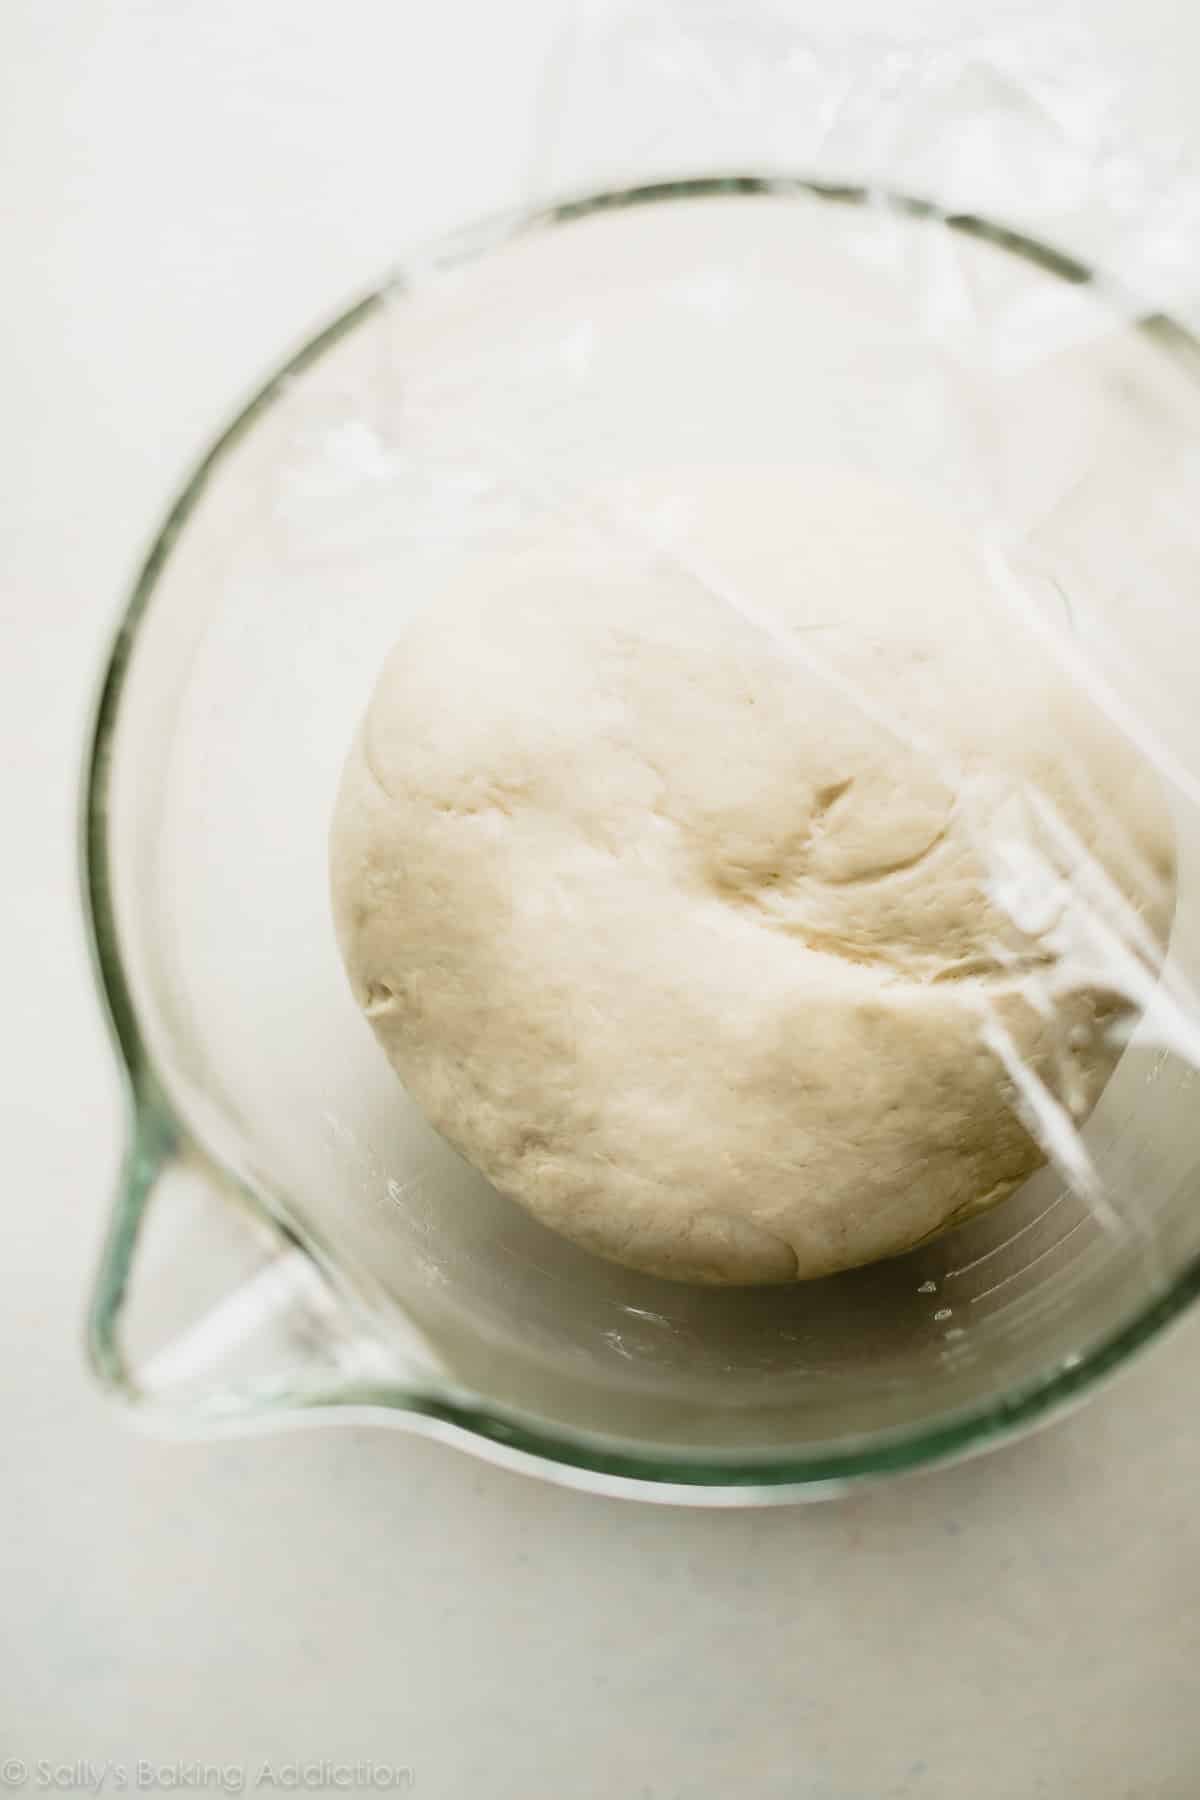
The dough rises twice.
- The first rise is after the dough is prepared and kneaded. (By the way, I have a detailed tutorial on How to Knead Dough, if you need some extra help with that step.) It will rise for about 1 hour until doubled in size. After the first rise, you can continue with the recipe, refrigerate the dough to use later in the week, or freeze it.
- The second rise is after the pull apart bread is assembled. It will rise for about 45 minutes.
During the first rise, get your everything bagel goodies prepared.
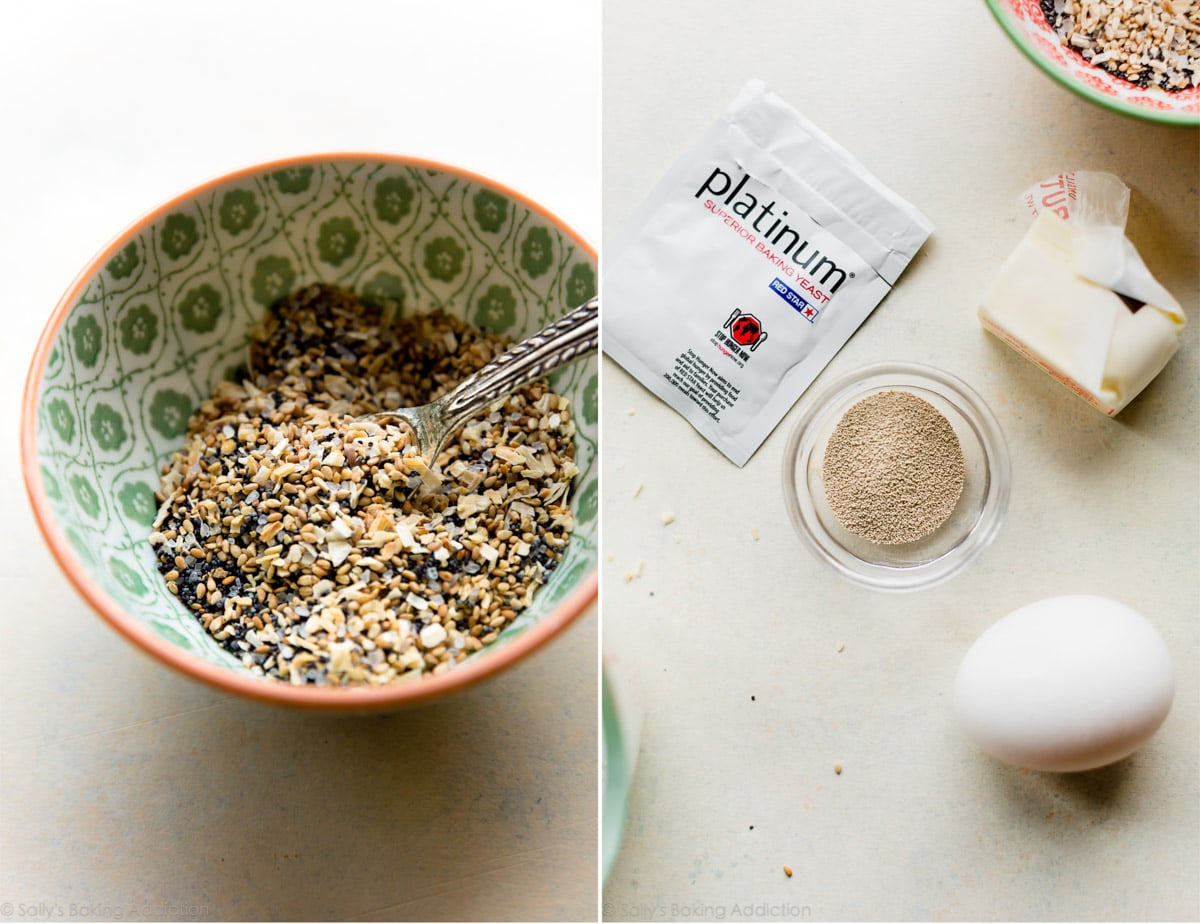
Homemade Everything Bagel Seasoning
Everything bagel seasoning is so easy. You can buy it from the store or mix it up at home with poppy seeds, sesame seeds, dried minced onion, dried garlic flakes, and coarse sea salt or flaky sea salt—the same seasoning I use for homemade everything bagels and these everything biscuits.
Other uses for everything bagel seasoning: sprinkled on hummus, homemade cheese bread, scrambled eggs, toast, fish, chicken, homemade soft pretzels, soft pretzel rolls, cornbread, salads, guacamole, pizza, and more!
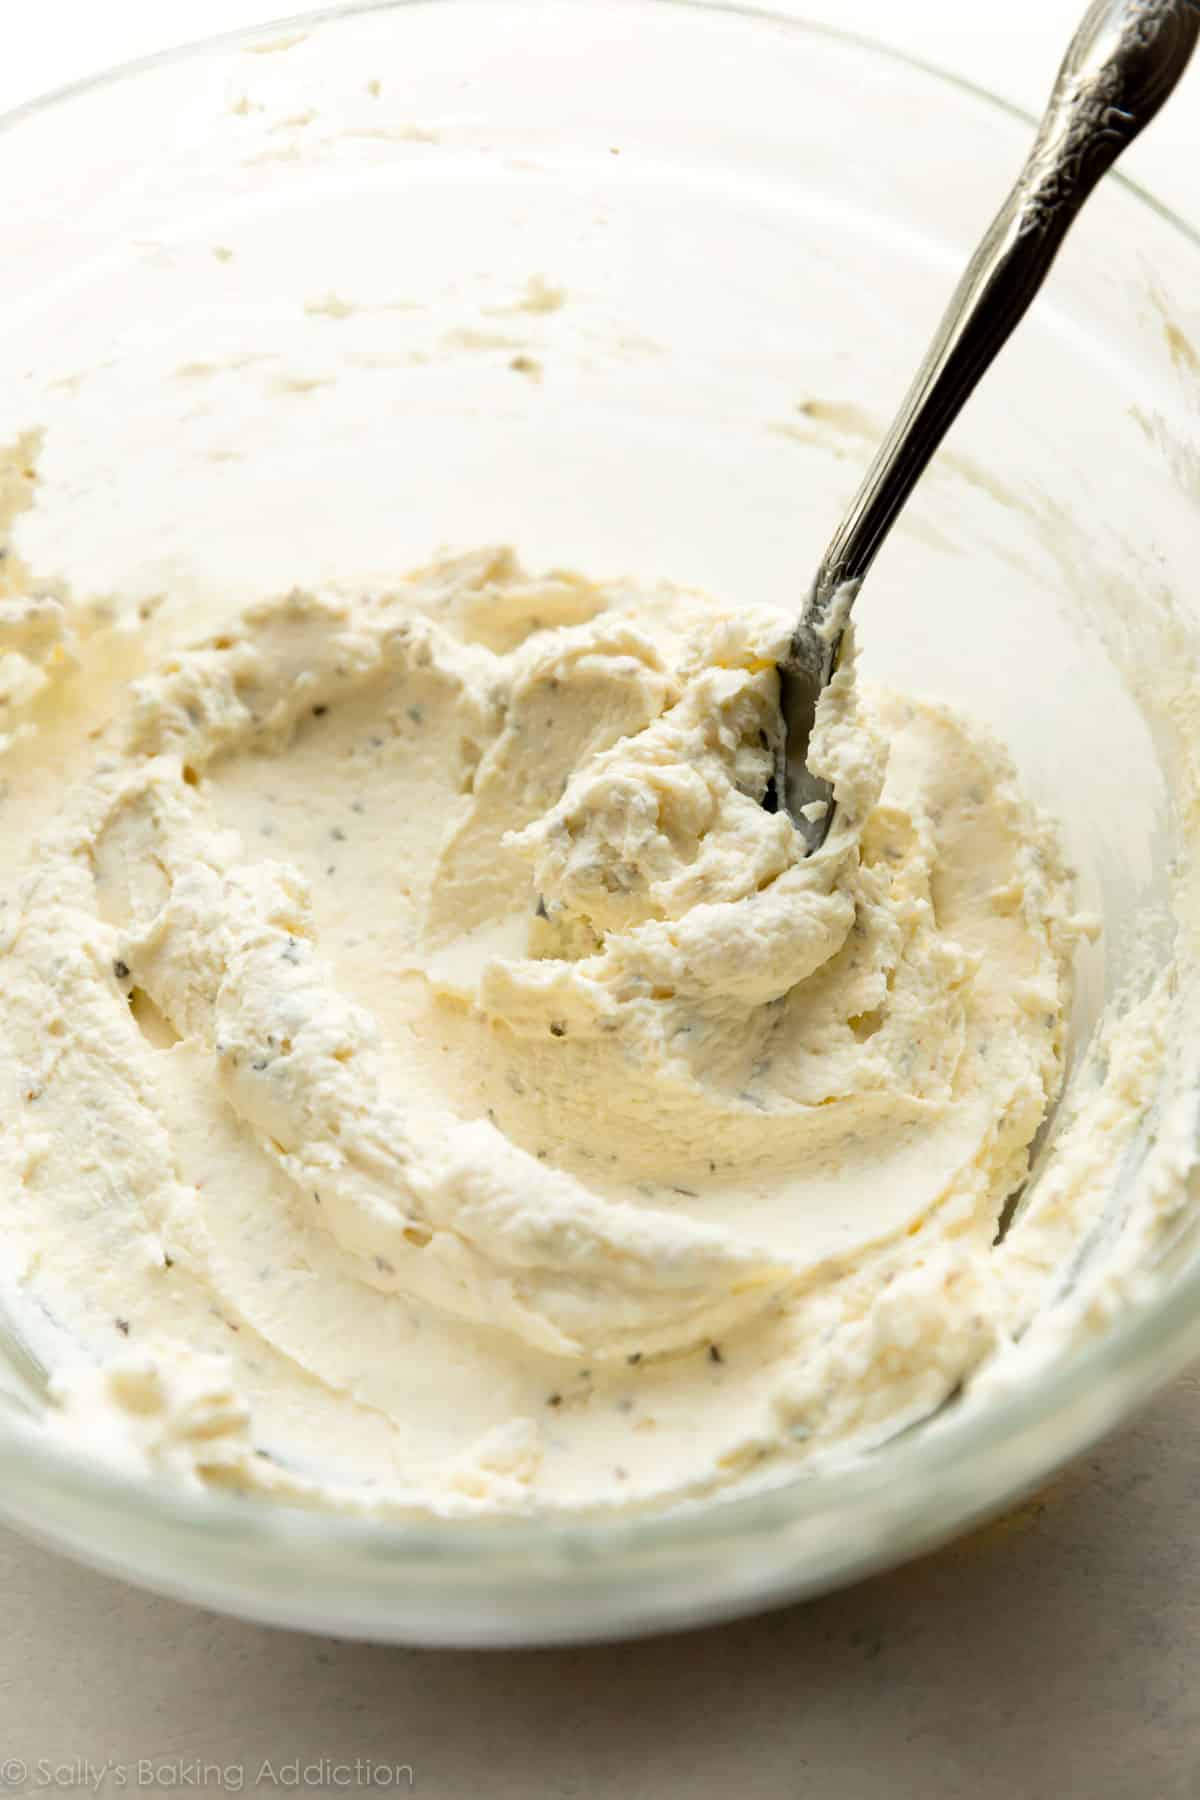
Garlic, Herb, & Mozzarella Cream Cheese
We’re combining, butter, cream cheese, shredded mozzarella cheese, garlic powder, and your choice of fresh or dried herbs. This mixture will be spread on top of the dough before it’s shaped in the pull apart style. The first time I made this everything bagel pull apart bread, I skipped the mozzarella cheese. It was good. When I added the cheese, it was GREAT. Much more of a stretchy cheesy pull apart style.
After the dough has risen, punch it down and roll it out. Spread on the cream cheese mixture.
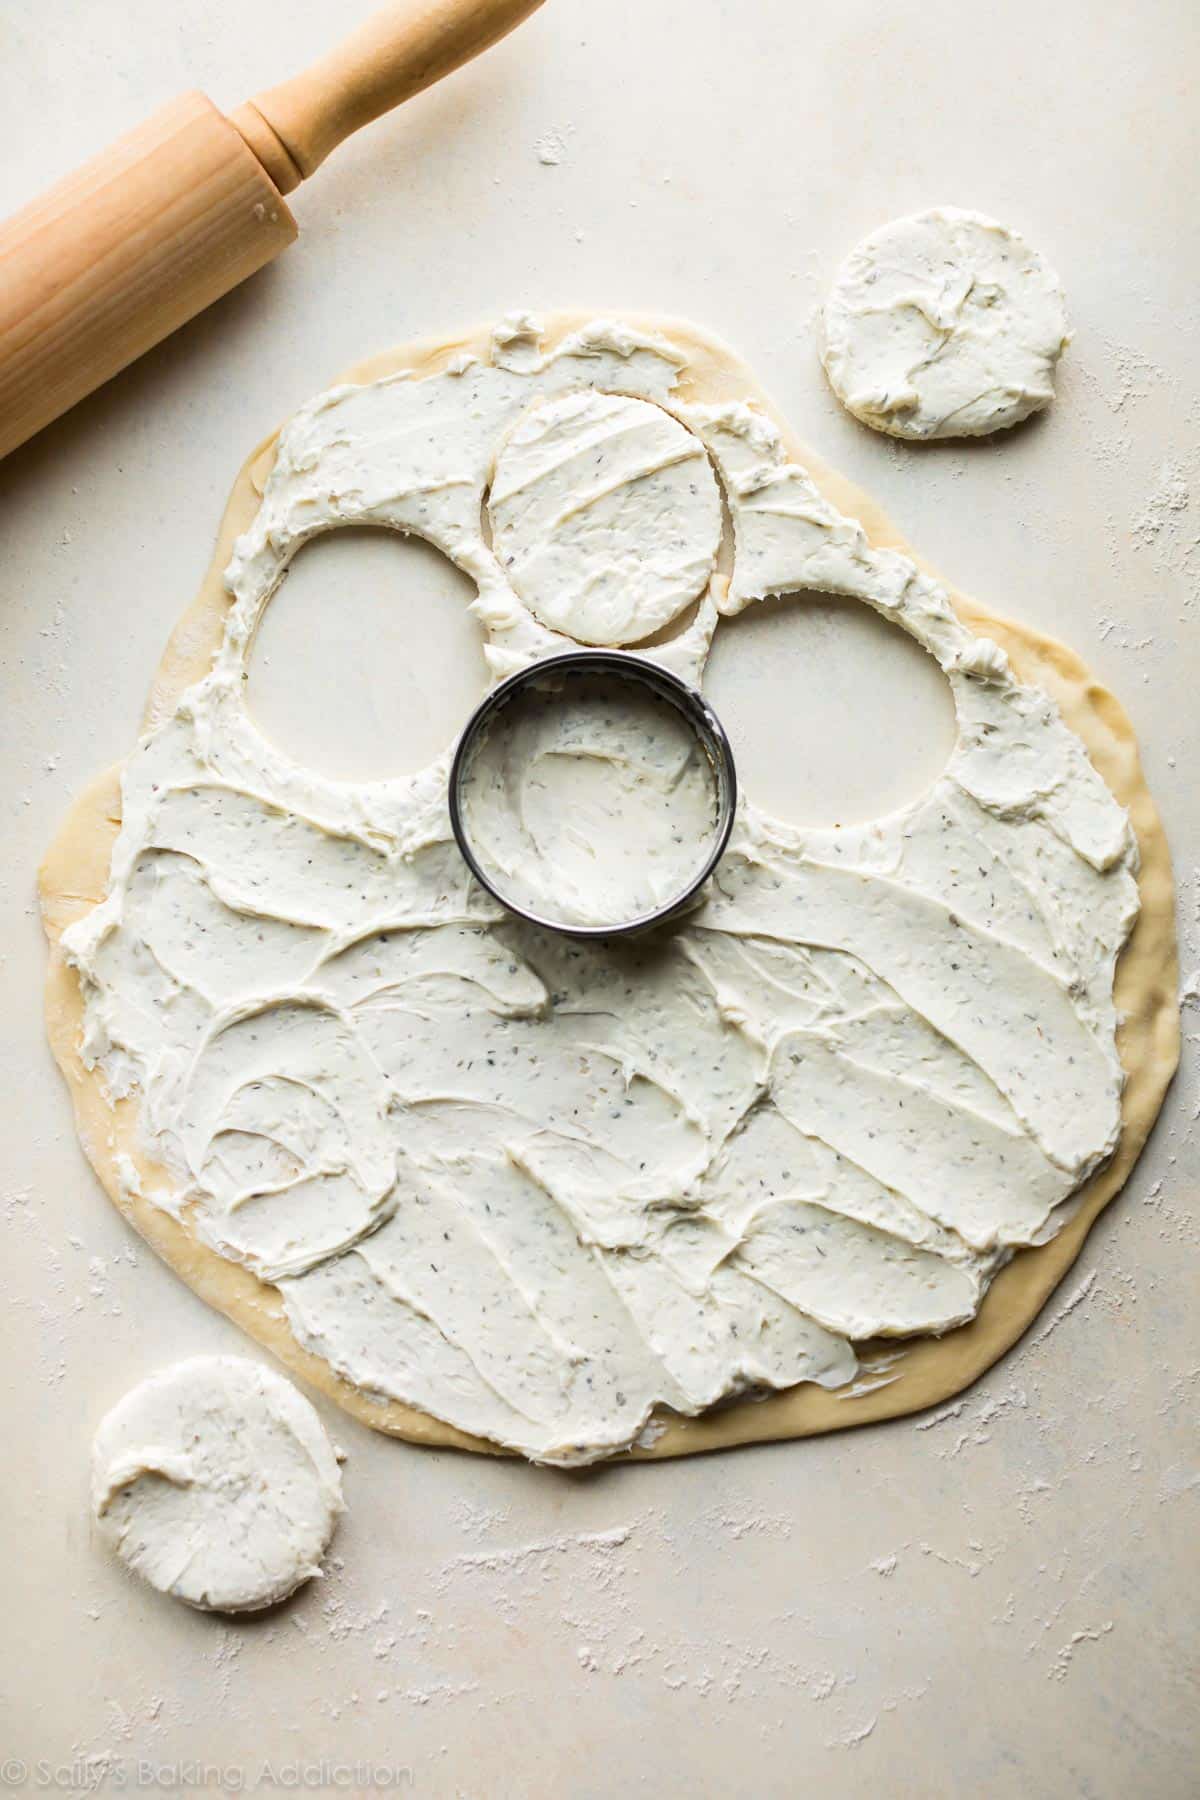
How to Assemble Pull Apart Bread
There are a billion ways to shape/assemble pull apart bread. King Arthur Flour has a blog post about different ways to shape pull apart bread that I found interesting. This particular way doesn’t require a ruler, strict measurements, or any precise measuring:
- Break out a round cutter. You can use a round biscuit cutter, anywhere around 3.5-4 inches. I have this set of round cookie cutters and the various sizes always come in handy.
- Cut dough into circles.
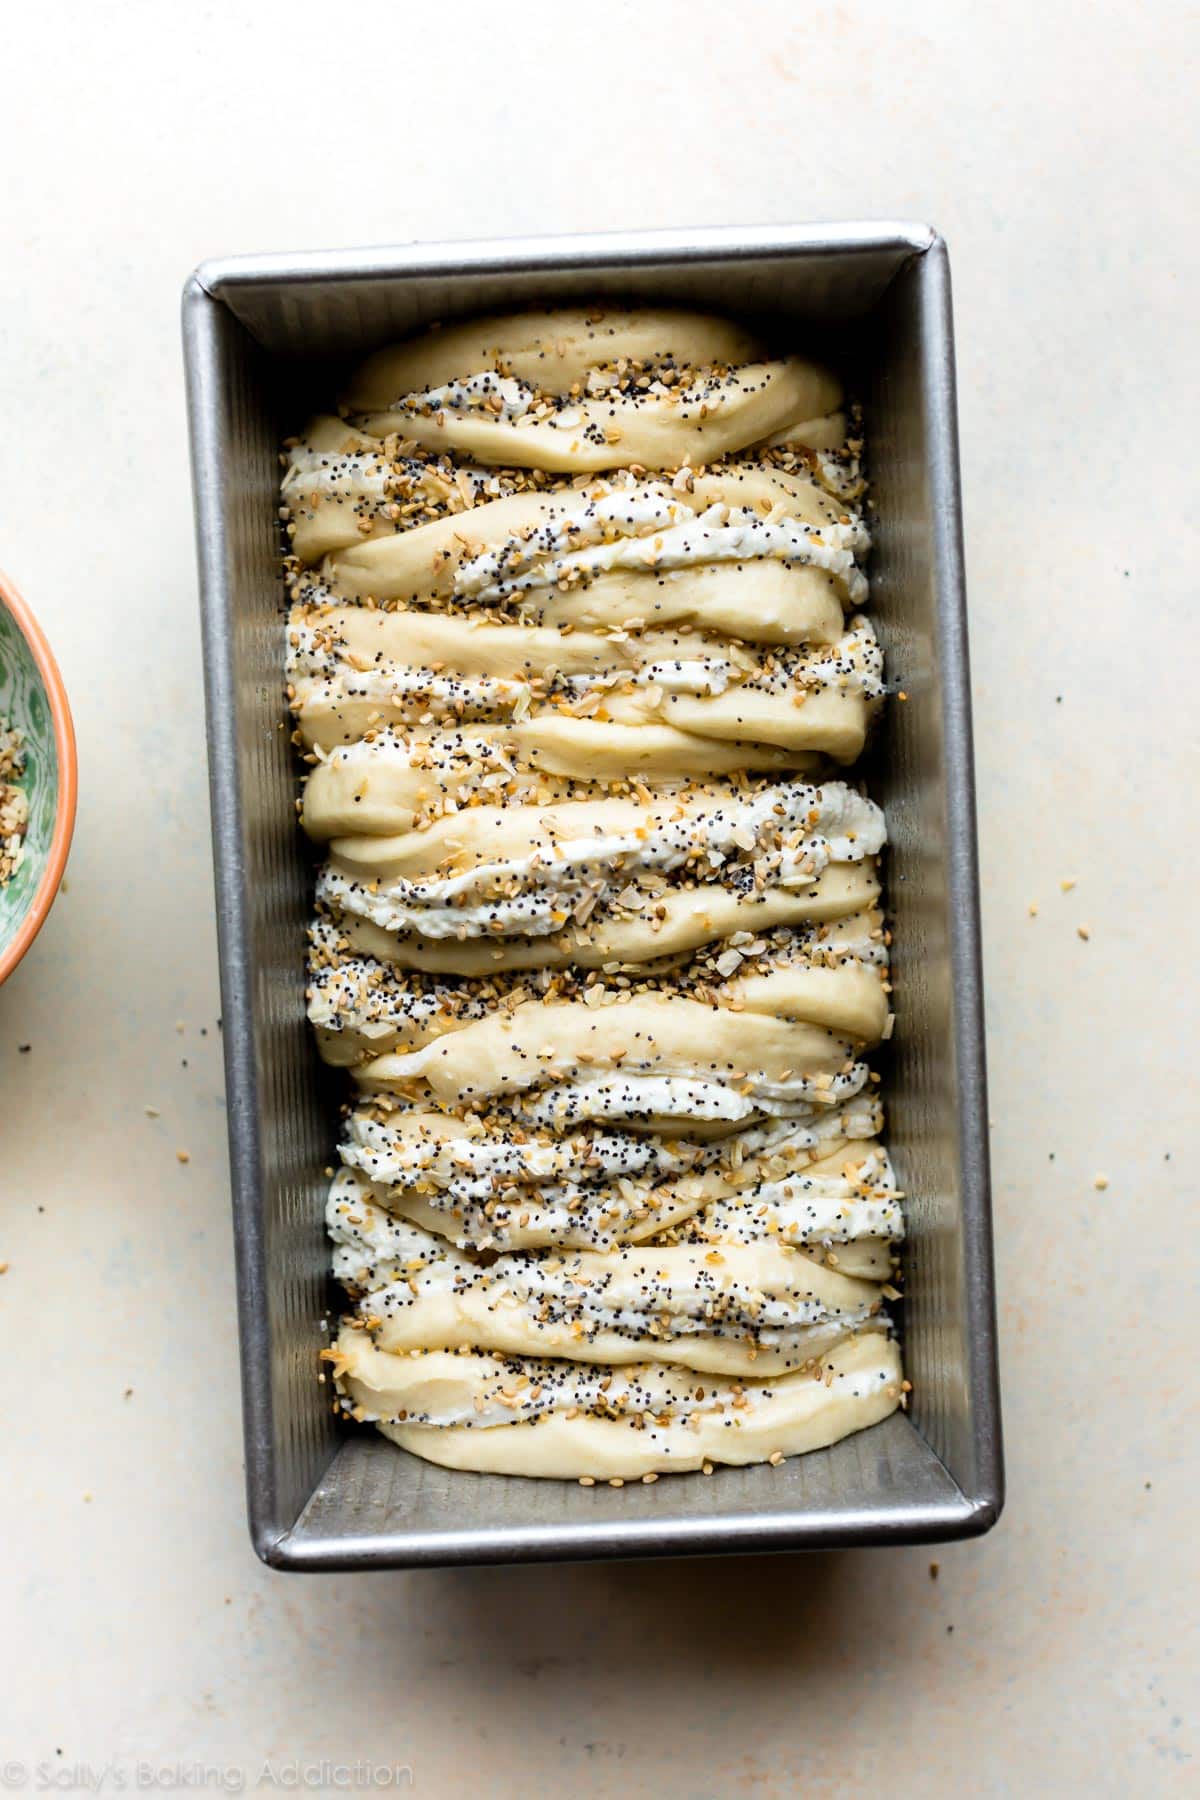
- Fold the circles in half and arrange in the loaf pan.
What to do with the leftover dough scraps? Scroll down to below the recipe. I have something AWESOME you can make. The results are unbelievable!!
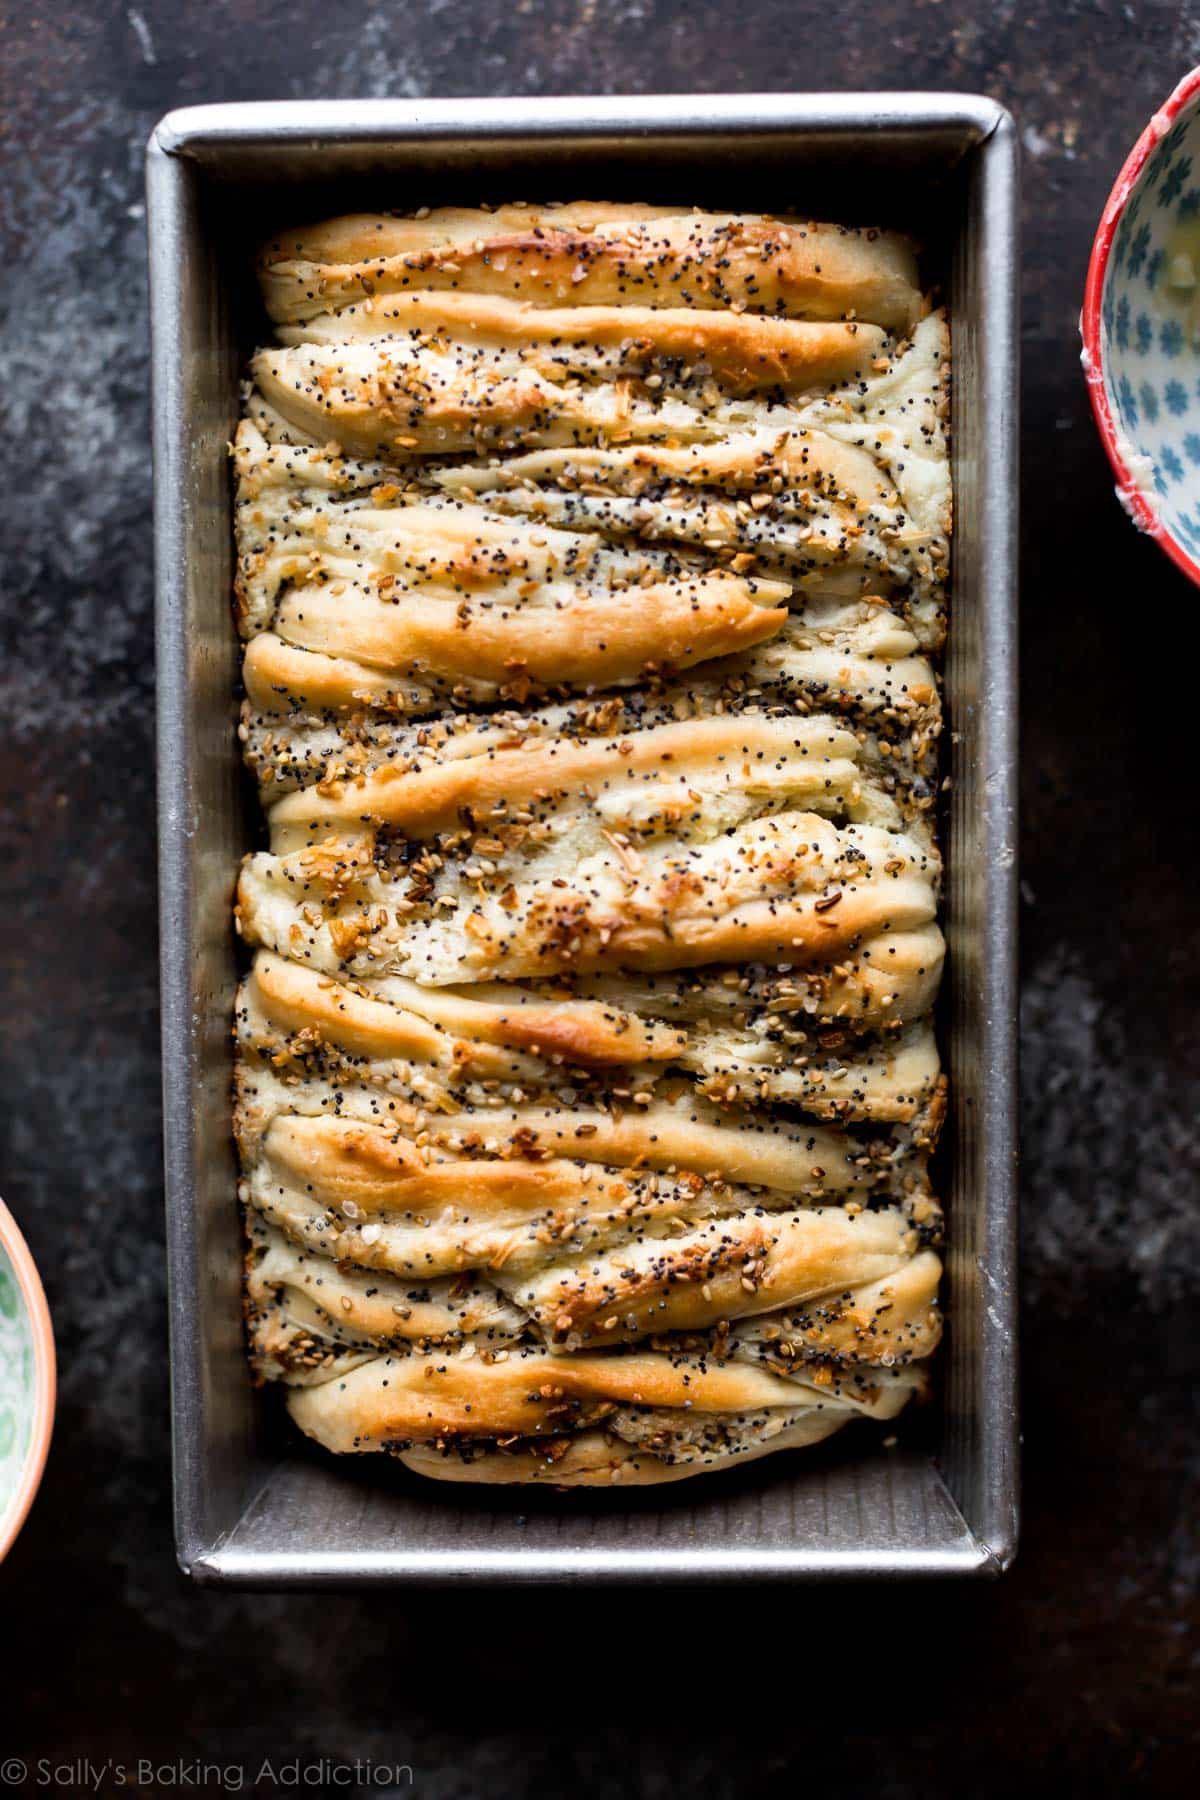
Here are all the filled circles folded in half and lined up in the loaf pan:
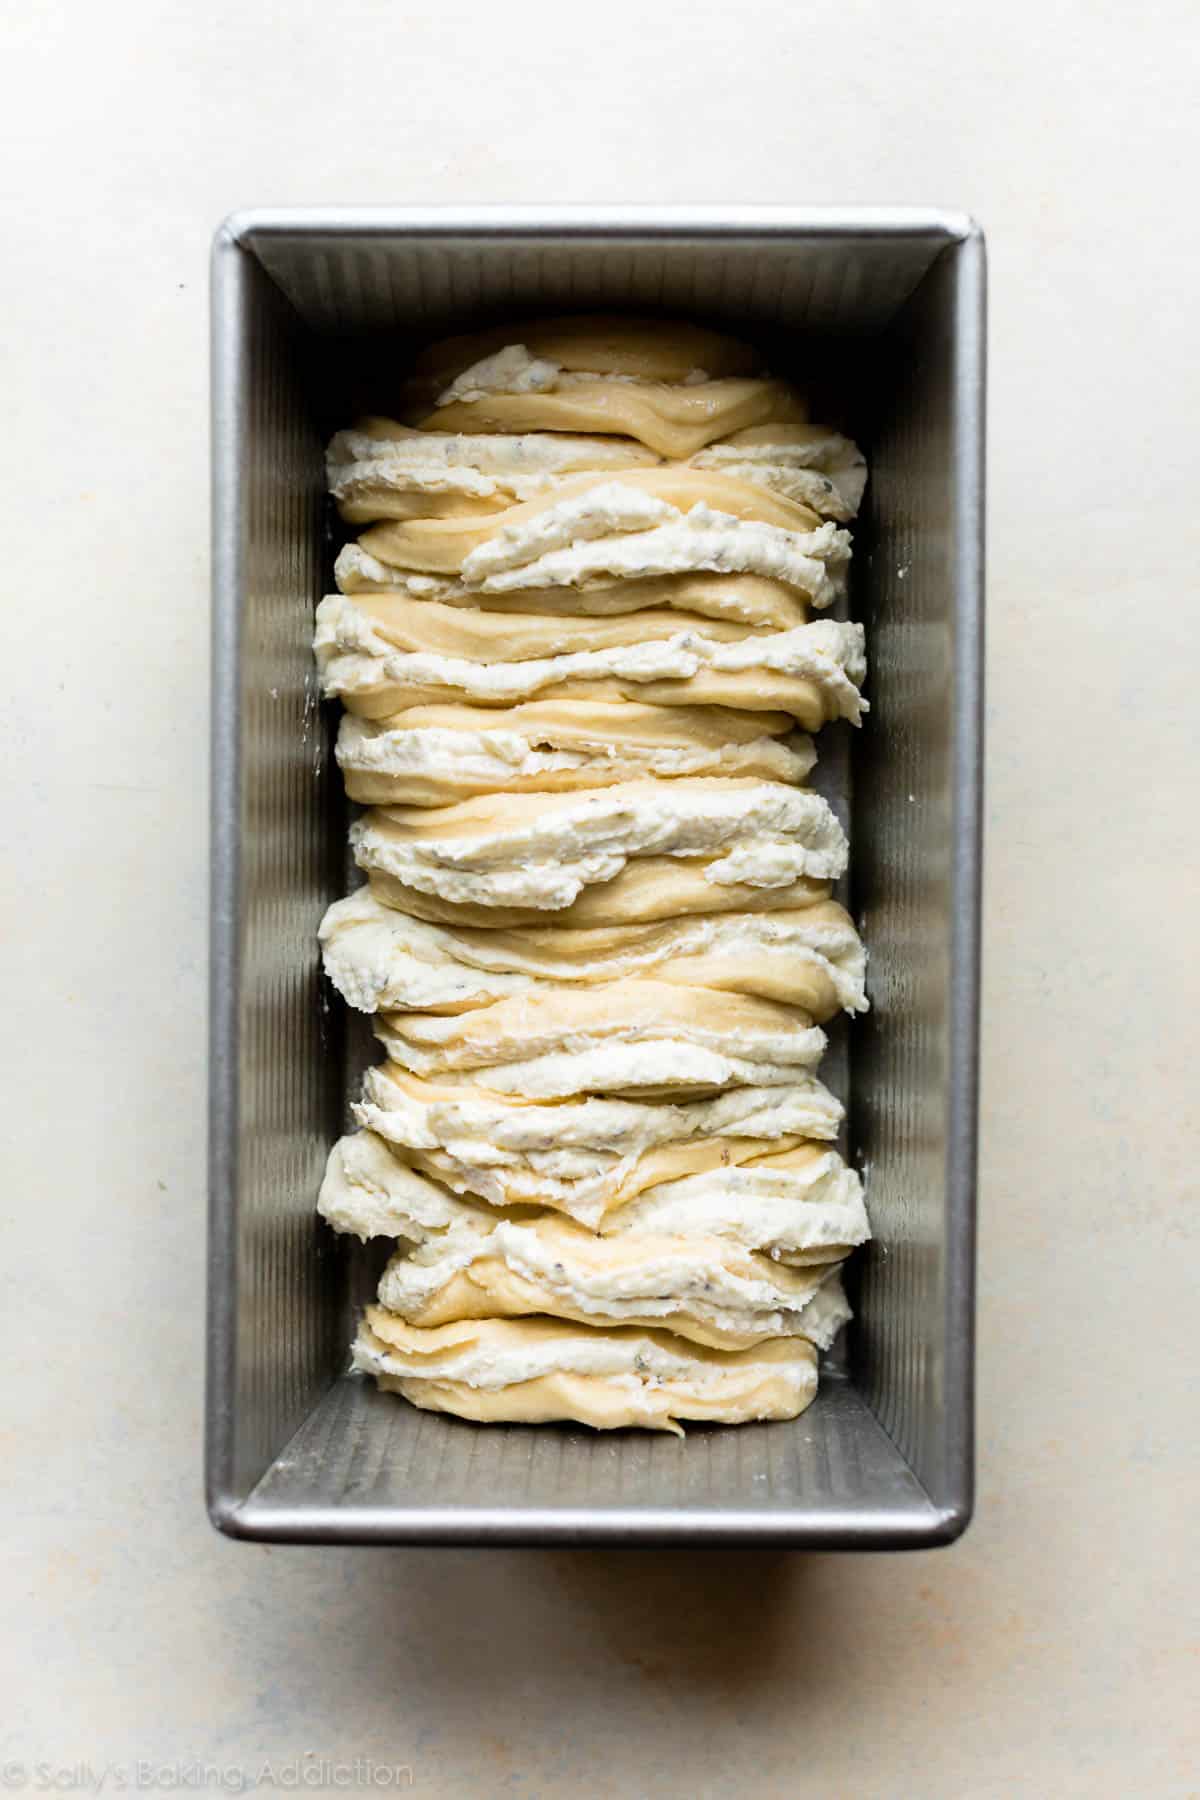
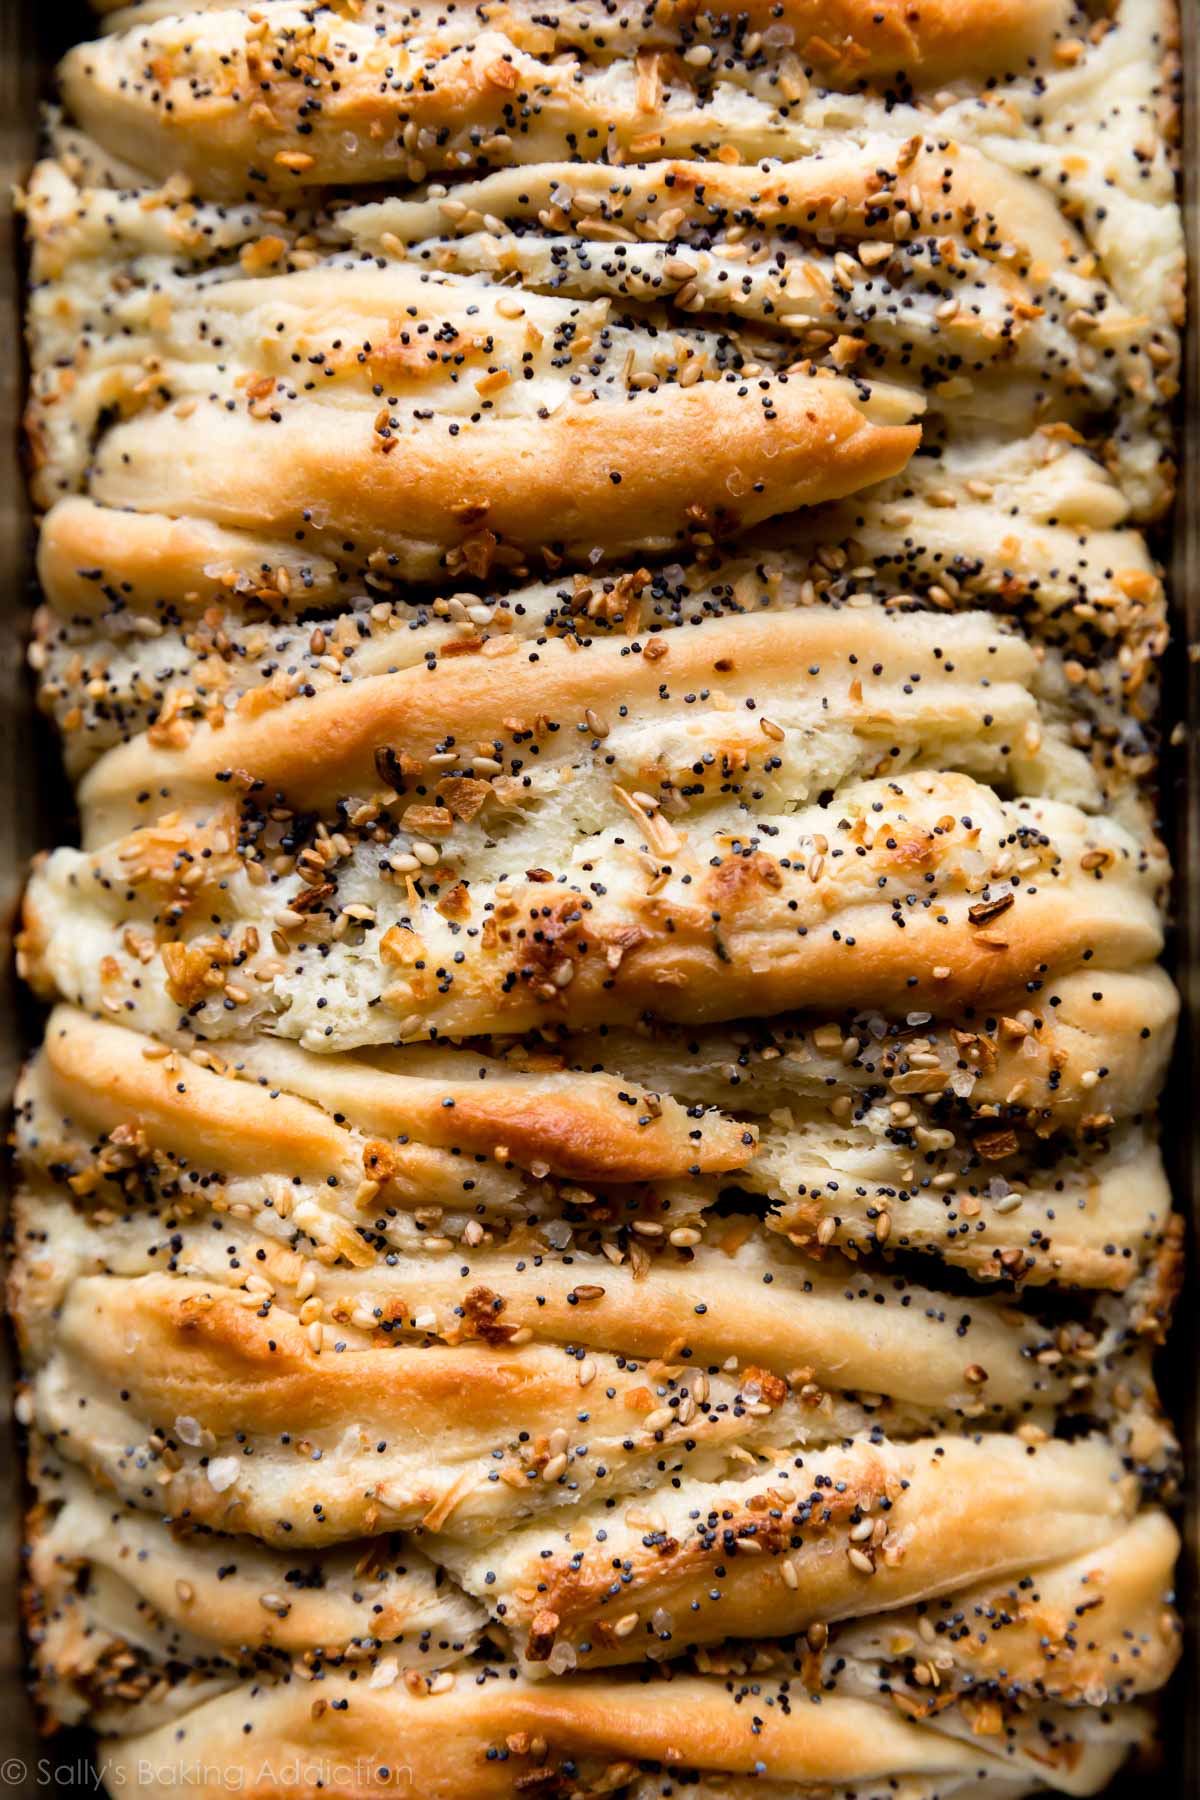
Let the assembled pull apart bread rise for about 45 minutes, then sprinkle with our everything bagel seasoning. Look at how puffy it got:
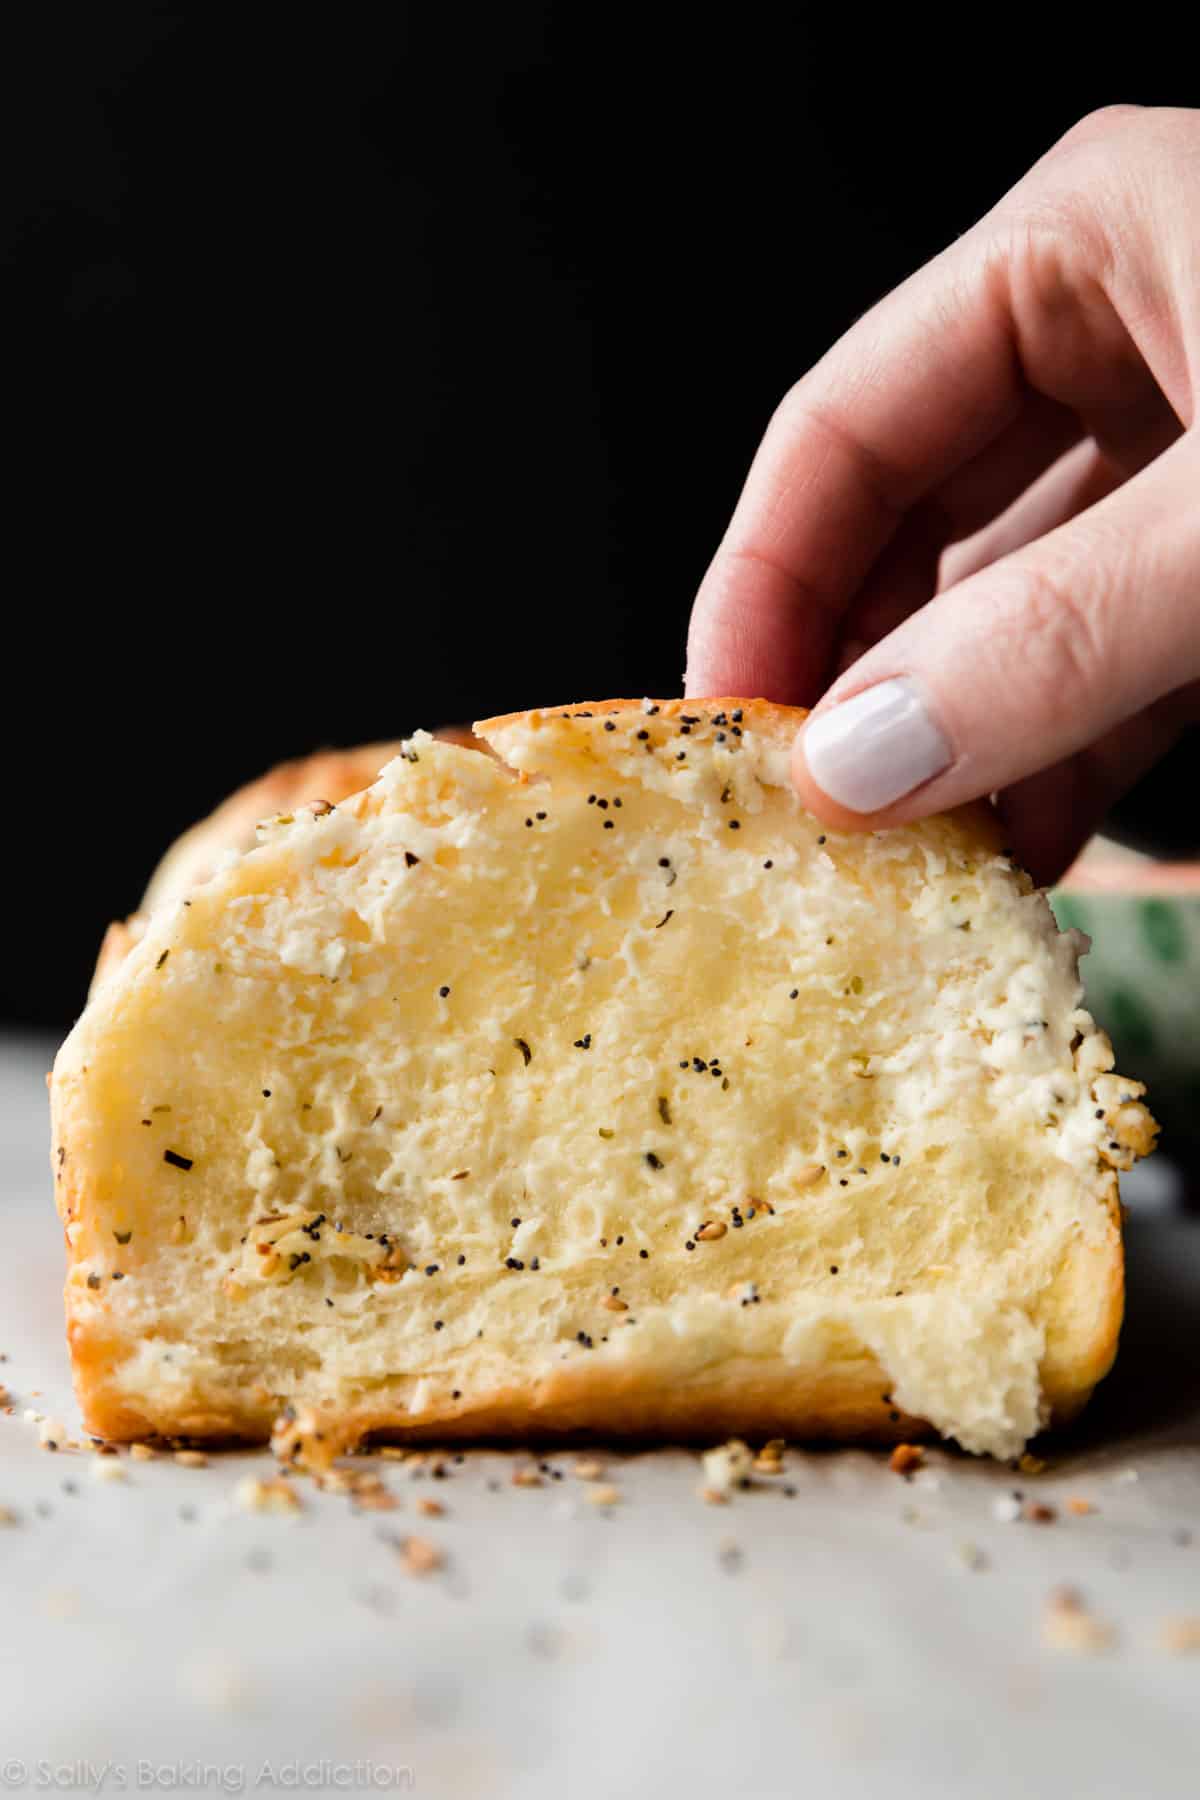
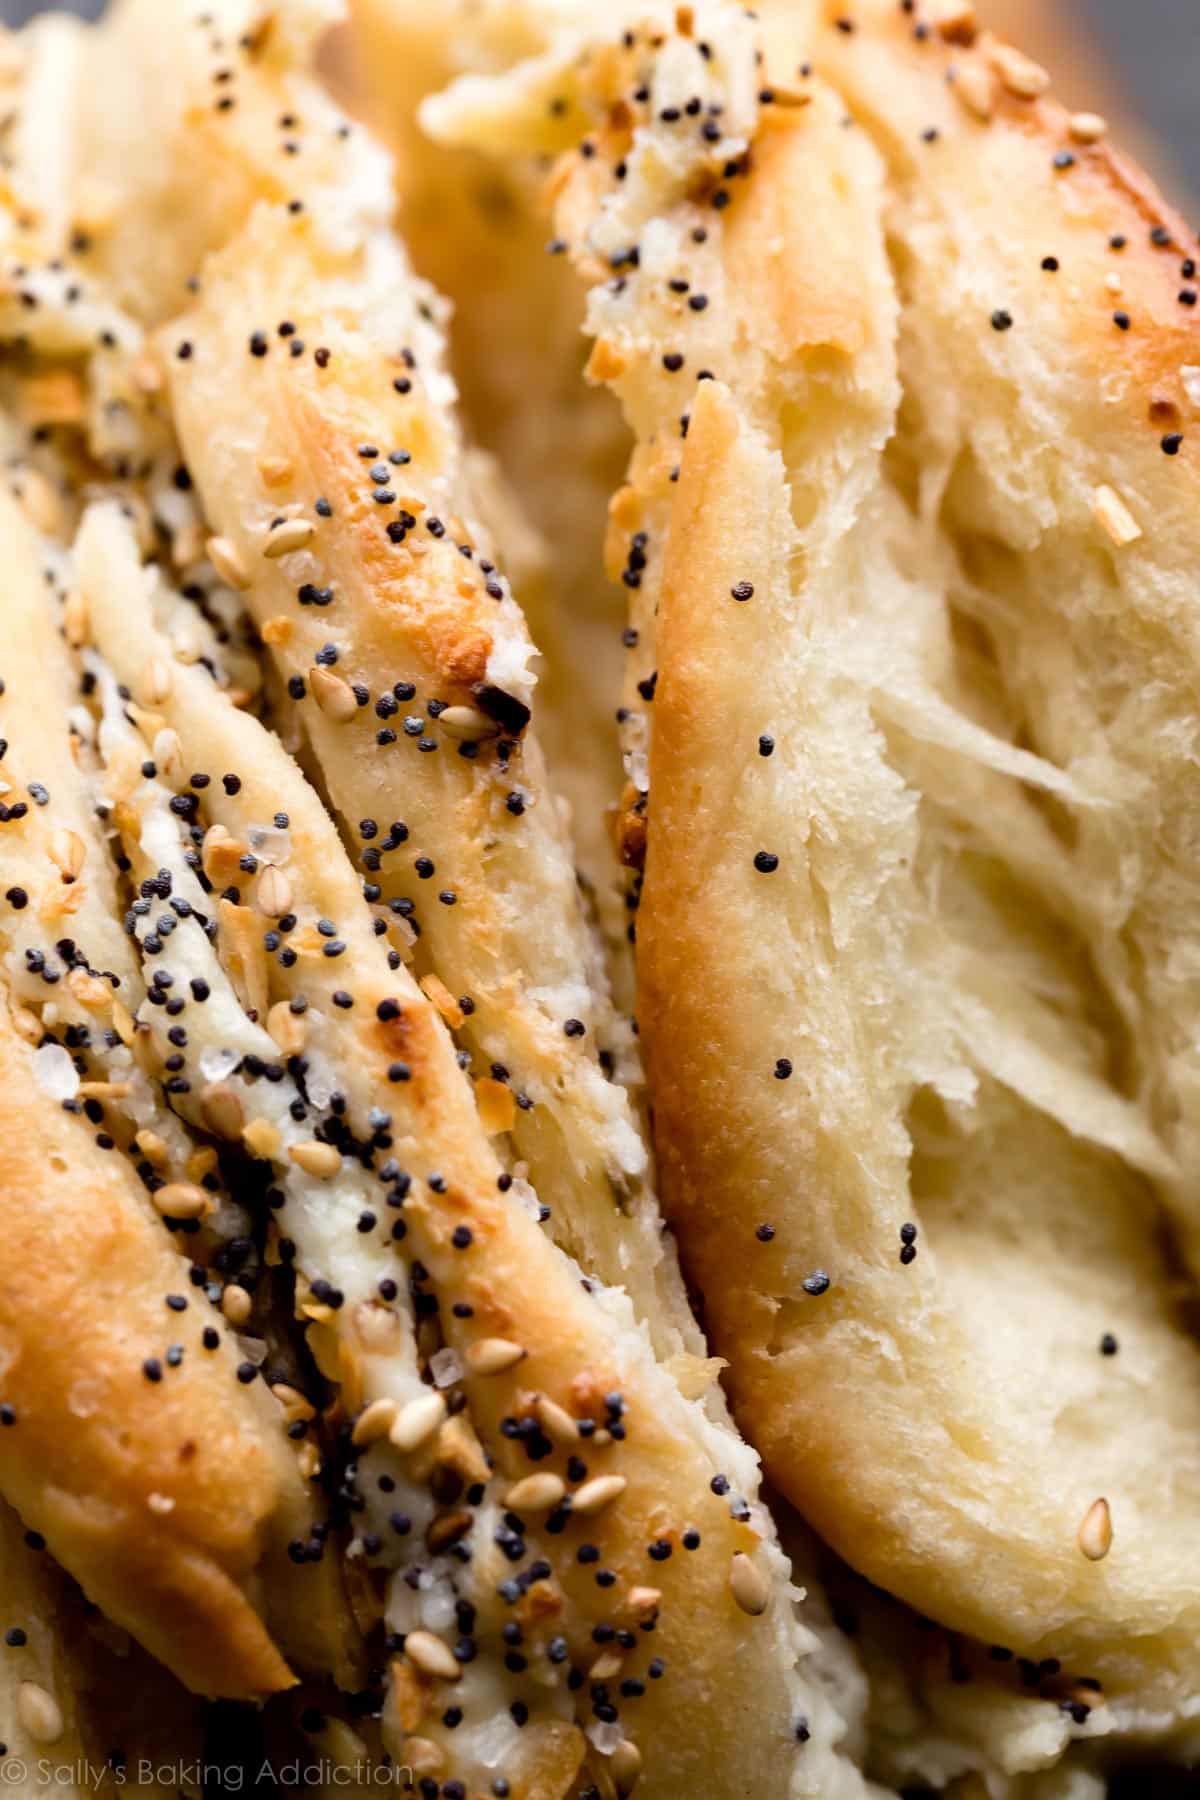
Bake until golden brown, then pull it apart and dig in!
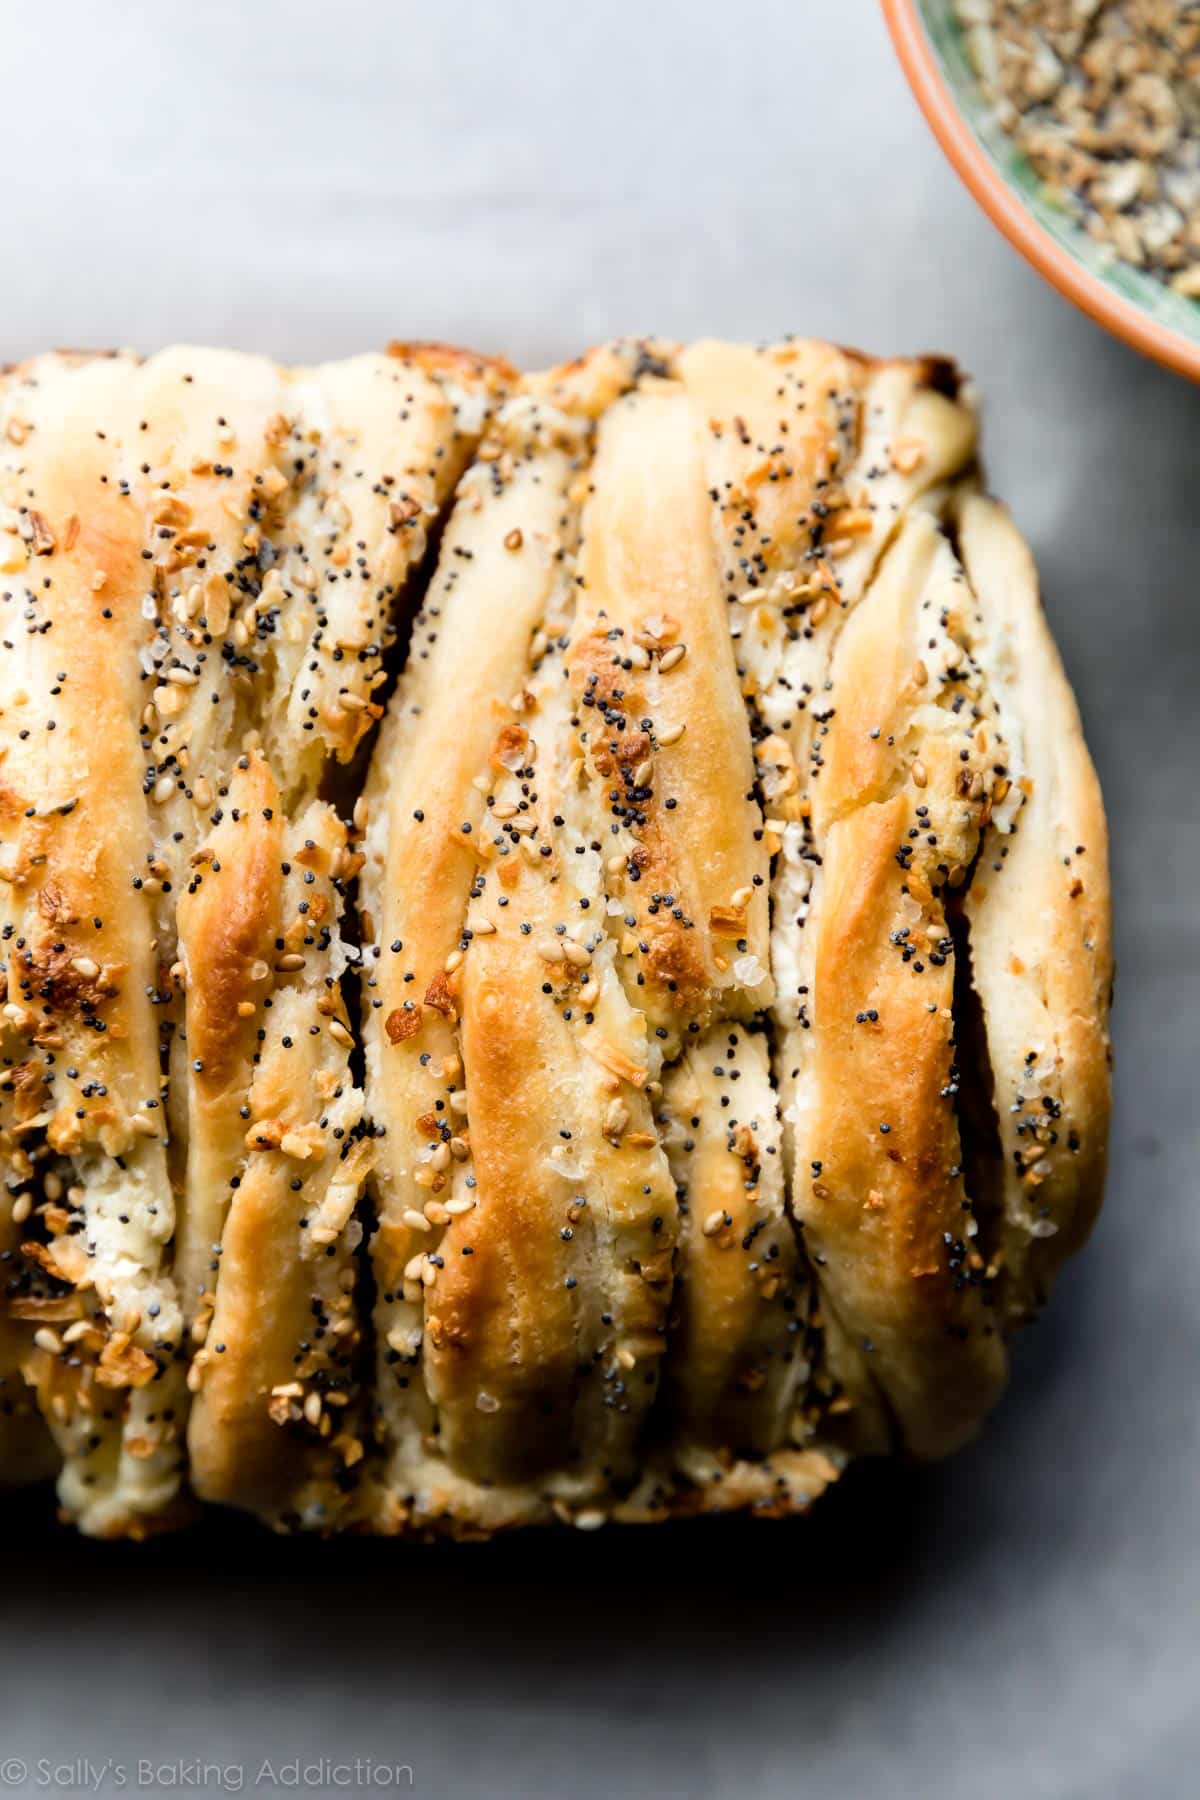
This pull apart bread hits the spot. It’s:
- Buttery
- Salty
- Bagel-y
- Flaky
- Cheesy
- Garlicky
- Soft in the center
- Crisp on the edges
- Fun to eat
- Fun to share
- So addicting it’s scary!!
With make-ahead and freezing instructions, there are so many ways you can prepare this pull apart bread ahead of time. Or if you have a few hours one day, make it all in one go. Truly one of the best savory snacks we’ve had and I guarantee you’ll say the same after 1 bite. See more below the recipe!
Print
Everything Bagel Pull Apart Bread
- Prep Time: 3 hours
- Cook Time: 45 minutes
- Total Time: 3 hours, 55 minutes
- Yield: 1 loaf
- Category: Bread
- Method: Baking
- Cuisine: American
Description
Starting from a simple buttery homemade dough, this everything bagel pull apart bread is filled with cheesy garlic & herb cream cheese and topped with everything seasoning. Baked until golden brown and served pull-apart style, this snack is truly irresistible. It’s flaky, salty, savory, garlicky, and cheesy– plus it’s fun to eat & share.
Ingredients
- 2 teaspoons Platinum Yeast from Red Star instant yeast*
- 1 Tablespoon granulated sugar
- 3/4 cup (180ml) whole milk
- 3 Tablespoons (43g) unsalted butter, softened to room temperature
- 1 large egg
- 2 and 1/3 cups (291g) all-purpose flour (spooned & leveled), plus more as needed
- 1 teaspoon salt
Cream Cheese Filling
- 8 ounces (226g) full-fat brick cream cheese, softened to room temperature
- 3 Tablespoons (43g) unsalted butter, softened to room temperature
- 1–2 teaspoons Italian seasoning*
- 1/2 teaspoon garlic powder
- 3/4 cup (70g) shredded mozzarella cheese
- 1/4 teaspoon salt
Everything Bagel Topping
- 1 Tablespoon poppy seeds*
- 1 Tablespoon sesame seeds*
- 1 and 1/2 teaspoons dried minced onion*
- 1 and 1/2 teaspoons dried garlic flakes*
- 1 teaspoons coarse sea salt or flaky sea salt
- 2 Tablespoons (28g) unsalted butter, melted
Instructions
- Make the dough: Place the yeast and sugar in the bowl of a stand mixer fitted with a dough hook or paddle attachment. Or, if you do not own a stand mixer, a regular large mixing bowl. Heat the milk on the stove or in the microwave until warm to touch, about 110°F (43°C). Pour warm milk on top of yeast/sugar. Whisk gently to combine, then loosely cover with a clean kitchen towel and allow to sit for 5-10 minutes. The mixture will be frothy after 5-10 minutes.
- If you do not have a mixer, you can mix by hand in this step. Add the butter, egg, flour, and salt. Beat on low speed for 3 minutes. Dough will be soft.
- Knead the dough: Keep the dough in the mixer and beat for an additional 5 full minutes, or knead by hand on a lightly floured surface for 5 full minutes. (If you’re new to bread-baking, my How to Knead Dough video tutorial can help here.) If the dough becomes too sticky during the kneading process, sprinkle 1 teaspoon of flour at a time on the dough or on the work surface/in the bowl to make a soft, slightly tacky dough. Do not add more flour than you need because you do not want a dry dough. After kneading, the dough should still feel a little soft. Poke it with your finger—if it slowly bounces back, your dough is ready to rise. You can also do a “windowpane test” to see if your dough has been kneaded long enough: tear off a small (roughly golfball-size) piece of dough and gently stretch it out until it’s thin enough for light to pass through it. Hold it up to a window or light. Does light pass through the stretched dough without the dough tearing first? If so, your dough has been kneaded long enough and is ready to rise. If not, keep kneading until it passes the windowpane test.
- 1st rise: Place the dough in a greased bowl (I use nonstick spray to grease) and cover with plastic wrap or aluminum foil. Place in a slightly warm environment to rise until doubled in size, around 60-90 minutes. (If desired, use my warm oven trick for rising. See my answer to Where Should Dough Rise? in my Baking with Yeast Guide.)
- As the dough rises, prepare the filling and topping in the next steps and grease a 9×5-inch loaf pan.
- Make the cream cheese filling: In a large bowl using a hand mixer or a stand mixer fitted with a paddle attachment, beat all of the filling ingredients together until combined. Cover tightly and set aside until ready to use. (Don’t refrigerate unless making well in advance. It’s easiest to spread on the dough when at room temperature. If refrigerated, let it come to room temperature before spreading on dough in step 7.)
- Make the topping: Combine the poppy seeds, sesame seeds, dried minced onion, dried garlic flakes, and coarse salt together in a small bowl. Set aside.
- Assemble the bread: Punch down the dough to release the air. Place dough on a lightly floured work surface and with a floured rolling pin, roll out until the dough is about 1/4 inch thick. The dough can be any shape, just as long as it’s around 1/4 inch thick. Spread cream cheese filling on top. Using a 3.5 – 4 inch circle cookie cutter, cut into circles. I get about 12 circles. Fold circles in half and line in prepared baking pan, round side up. See photos above for a visual.
- 2nd rise: Cover with plastic wrap or aluminum foil and allow to rise once again in a slightly warm environment until puffy, about 45 minutes.
- Adjust the oven rack to the lower third position then preheat oven to 350°F (177°C).
- Brush dough with the 2 Tablespoons of melted butter and sprinkle everything bagel seasoning on top. (Use as much of the seasoning as you want; extras can be used for any of the suggestions listed in the post above.)
- Bake until golden brown, about 40-45 minutes. If you find the top of the loaf is browning too quickly, tent with aluminum foil. Remove from the oven and place on a wire rack. Cool for 10 minutes in the pan, then remove from the pan and serve warm.
- Cover and store leftovers in the refrigerator for up to 1 week.
Notes
- Make Ahead Instructions: Freeze baked and cooled bread for up to 3 months. Thaw at room temperature or overnight in the refrigerator and warm in the oven to your liking. The dough can be prepared through step 3, then after it has risen, punch it down to release the air, cover it tightly, then place in the refrigerator for up to 2 days. Continue with step 5. To freeze the dough, prepare it through step 3. After it has risen, punch it down to release any air. Wrap in plastic wrap and place in a freezer-friendly container for up to 3 months. When ready to use, thaw the dough overnight in the refrigerator. Then let the dough sit at room temperature for about 30 minutes before continuing with step 5. (You may need to punch it down again if it has some air bubbles.)
- Special Tools (affiliate links): Stand Mixer or Glass Mixing Bowl and Silicone Spatula | 9×5-inch Loaf Pan | Electric Mixer (Handheld or Stand) | Rolling Pin | Circle Cookie Cutters | Pastry Brush | Cooling Rack | Coarse Sea Salt or Flaky Sea Salt
- Yeast: I always use Platinum Yeast from Red Star, an instant yeast. If using active dry yeast, the rise times could be slightly longer. Reference my Baking with Yeast Guide for answers to common yeast FAQs.
- Italian Seasoning: I used Italian seasoning blend in the cream cheese mixture. You can use any dried or fresh herbs you like. Dried works a little better in the baked bread. Dried basil, parsley, oregano, etc.
- Everything Bagel Seasoning: If you don’t care for one of the everything bagel seasonings, feel free to swap it out with another that you love.
- Leftover Dough: To avoid having leftover dough scraps with the garlic herb mozzarella cream cheese mixture on them, you can spread the mixture individually onto each circle. Make sure you load it onto each! Then just save the leftover scraps to make pizza, rolls, whatever. But I found it easier to spread the whole thing with the garlic herb mozzarella cream cheese mixture. See below for what I do with my extra dough scraps!
Leftover Dough
Since we’re using a cookie cutter for shaping this pull apart bread, we’re going to have some dough scraps leftover. The dough scraps are topped with the herbed cream cheese mixture so WHY NOT shape into a ball, then roll it out to make pizza? Pizza on top of a tender and flaky homemade garlic herb cream cheese dough. This pizza might even be better than the everything bagel pull apart bread itself!!
Since the dough is covered with the wet cream cheese mixture, you’ll need extra all-purpose flour on hand. Using well floured hands, peel the scraps off the counter and shape into a ball. This will be messy. Add more flour to the dough as needed (I probably added about 1/2 cup of flour) and place on a parchment paper-lined baking sheet. It’s still going to be a little wet; thats ok. Flatten it out with floured hands or a floured rolling pin as best you can. Top with pizza toppings and bake in a 475°F (246°C) oven for 15-20 minutes or until browned to your liking.
I used homemade pesto, mozzarella cheese, caramelized onion, halved baby tomatoes, and when it came out of the oven, I topped it with our everything bagel seasoning. 🙂

In partnership with Red Star Yeast.


Reader Comments and Reviews
This sounds delicious. I would like to make it in mini loaf pans to share with neighbors. What time adjustment would you suggest?
Hi Ele, Mini loafs would be perfect to share! There is a huge range of sizes for mini loaf pans so I’m unsure of the exact bake time yours will need. Keep your eye on them and bake until the tops are a nice golden brown.
I didn’t realize mini loaf sizes could be different. My mini ‘s are 5 3/4 inches by 3 1/8 at the top of the pan. I baked them for 25 minutes, next time I’ll tent the loaves at 20 minutes and bake for 26-27 minutes. We’re at 3,600 feet, altitude does make a difference. The loaves were absolutely delicious and my neighbors were super happy with the results. Based on other comments, I tried 1 loaf with a cutting and folding and 2 pans with the circles as in the directions (I used a 2 3/4 canning lid to cut the circles). The loaves with circles presented better than the straight cut. I didn’t have many scraps but put them all in one of the mini pans and gave us a half loaf extra. Total yield was 3 1/2 loaves. Thanks so much for responding and sharing delicious recipes!
Hi Sally!
I’ve got to make this! I love anything with Bagel Seasoning!
So I’ve got it right…I’d use 3 Tablespoons of ready made bagel seasoning?
I’m also looking forward to pizza from the leftover dough!
Pesto, .mozzarella, tomato is my new favorite topping!
Thank you!
3 Tablespoons should be plenty! Let me know how you like it. This is one of my favorites!
I made this last week and my son-in-law said it was the best thing he’s ever eaten! So easy and delicious. I was able to make a 12″ pizza with the scraps that my son also raved about. Thank you for another amazing recipe!!
Hi There! I’m planning to use active dry yeast instead of instant dry yeast. Would it be possible to let the dough rise overnight so i’ll be able to put it together early in the morning without having to wait for it to rise before i put it in the fridge? Thanks!
Hi Jessica, The best way to make this the day before is to dough can be prepared through step 3, then after it has risen, punch it down to release the air, cover it tightly, then place in the refrigerator overnight or up to 2 days. You can use active dry yeast, the rise times could be slightly longer.
Thank you, Sally! Absolutely delicious! So much flavour and pulls apart perfectly. I used the everything but the bagel seasoning from Trader Joe’s for the topping. One question – is the cream cheese meant to absorb into the dough as it bakes or should there still be bits of cream cheese in between when it’s done?
Hi Mary, so glad you tried and loved this. Yes, the cream cheese sort of absorbs into the dough.
Hi Sally-
Do you think I could make this the same way as your other soft cheese loaf (in the twist)??
I can’t see why not!
Hi Sally,
I don’t have cookie cutters, do you think I could use the rim of a glass to cut the circles?
That shoud work, Mariam!
Haven’t tried this yet, but I don’t have a stand mixer. Will a hand mixer (w/ dough attachment) be the same?
Hi Jessie, If you do not have a mixer, you can mix by hand. See step two 🙂
Hi Sally,
I haven’t made this yet, but already know it will be delicious I have a question: can I use my bread machine to prep the dough through the rising stage and then continue forming the loaf by hand? If so, how would I do it? I have really bad arthritis and look for ways to put less stress on my hands. Thanks so much for any help you may have.
Hi Peggy! The bread machine should work on its dough setting for this recipe, but I don’t have one so I cannot test it. Happy baking!
Thank you kindly. I really appreciate it.
Peggy
I haven’t tried this yet, but it looks delicious! I’m thinking of adding crumbled fried bacon to the cream cheese filling! Thoughts???
Sounds so good and would work wonderfully with these flavors! Let me know if you try it.
Forgot to say in my last post that for those with access to Trader Joe’s, they have an Everything But the Bagel seasoning that worked perfectly on this bread!
So, so yummy!! I can’t wait to make this again! It got a little overdone around the edges as I was delivering the mini galettes to my neighbors (I certainly can’t eat all these baked goods myself!), but it was still so very tasty! The leftover scraps are waiting in the fridge to become a pizza 🙂
I was thinking instead of cutting them in circles, cutting the rolled dough into strips and then smallish squares. Do you think if I did it this way it would be enough for two full loaves?
I don’t think there would be quite enough for 2 full loaves, but you can certainly try it!
Amazing recipe! Have been wanting to try it for awhile, but no time. With the Covid-19 lockdown, plenty of time… tried it with canned biscuits though. AMAZING!
Could you do this without the cream cheese filling? Sounds amazing, but I can’t eat cheese. I imagine making this and dipping it in hummus or guac or slathering it with butter or oil or something. Thanks! Or maybe doing garlic and herb butter instead of cream cheese?
Feel free to skip the cream cheese filling with no other changes to the recipe. Enjoy!
I absolutely loved the bread! It’s so soft, I love soft bread!
I wanted to ask if there a different filling I could do? Can I leave out the cream cheese and use something else, my husband wasn’t a fan of the cream cheese and Italian herbs flavor.
Please suggest a flavor that won’t be too strong. I wanted to use sundried tomatoes and jalapeños with Shredded cheddar or Shredded mozzarella.
Can you explain how I would do that? Do I keep the butter I. The filling?
Hi Shanza! You can definitely switch up the fillings and spread softened butter, pesto, tomato sauce, or other sauce on the dough instead of the cream cheese mixture. You can also layer in sliced deli meat, sun-dried tomatoes, jalapeños, pepperoni, and sliced cheeses between the circles too.
Can I make this without the cream cheese filling .
Yes
I really enjoyed this recipe!! (I also made a blueberry version instead of the everything bagel.) I was in a hurry, and honestly feeling kind of lazy, so I ended up using premade biscuit dough instead of making my own. I was worried it wouldn’t turn out, but it’s still delicious, and it was so fast! Thanks for providing wonderful recipes, even for those of us known to change them because experimenting is fun. 🙂
Hi Sally, I’ve been looking for a good pull apart pizza bread for the super bowl tomorrow and I’m wondering if you think this recipe would adapt to that idea. Do you think I could layer some pepperoni on top of the cheese mixture or would it be too greasy? Thanks so much for your expertise – I trust your recommendations the most!
Hi Danielle! That would be delicious. You can even add a little sauce between the dough pieces, too. It will be a little greasy (pepperoni is just naturally greasy), but it shouldn’t be a problem.
I’ve made and gifted this bread many times since Sally posted this recipe. Can be made intothree mini loafs (using smaller circle cutters) or into three mini loafs or one 9×5 loaf. The mini loafs were perfect Christmas gifts for couple and widowed friends.
Hi Sally! I have a ton of bread flour I want to use up in my kitchen — can I substitute the AP flour for bread flour in this recipe?
Sure can! Use the same amount.
Divine. But clear half a day, the 4 hr time is no joke. 2.25 hrs of it is rising or baking but the rising has to be done precisely in 45 min increments so you can’t go too far during the rising breaks.
Hi Sally,
I just discovered your website and I can’t stop reading! This pull apart bread recipe looks fantastic and I can’t wait to try it, and it will be soon. Could I make the dough in my bread maker on the dough cycle and then go from there? Also could I use 2% milk since that’s what I have on hand? Thanks so much and I’m going back to reading your recipes!!!
Peg
Hi Peg! 2% milk is a fine substitute for the whole milk. The bread machine should work on its dough setting for this recipe, but I don’t have one so I cannot test it.
I just finished making this bread. I am happy to say it looks just like the picture and it taste delicious. This recipe is so simple to put together and the possible variety of flavors are endless. I am thinking of making a jalapeno cheddar version that might have to have some bacon on top next week.
I made it and it was incredible! My only question was how I can incorporate more garlic into the recipe. Preferably real garlic, either with the spice mixture or into the dough?