

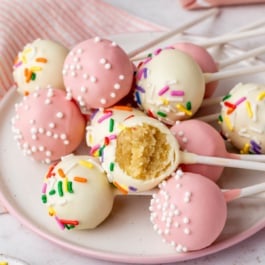
Learn how to make homemade cake pops completely from scratch, with no box cake mix or canned frosting. Combine homemade vanilla cake and vanilla buttercream and dip in white chocolate for a sweet treat kids (and adults, too!) always go crazy for. Watch the video tutorial for all my best shaping tips.
See my chocolate cake pops recipe, too.

I originally published this recipe in 2015 and have since added new photos and a video.
Have you ever seen a child peering into the food display case at Starbucks? I’m not an expert, but I’m willing to bet that 9 times out of 10, the child will ask for a cake pop. This is definitely the case with my own kids, anyway! There’s just something so irresistible about those Starbucks cake pops—a perfectly portioned treat on a stick in eye-catching colors and shapes, topped with sprinkles. It’s hard to say no to something this tempting!
I first began making homemade cake pops when I wrote Sally’s Candy Addiction. In fact, this recipe is published in that book. I wanted to share it on my website as well because I’ve received lots of questions about making from-scratch cake pops.
One reader, Debby, commented: “Made 160 vanilla and chocolate cake pops for my daughter’s graduation party! They turned out great! Many asked where we had purchased them. They looked amazing and tasted awesome, too! Thanks, Sally, for your rolling advice, tips, and techniques. It was nice that you could prepare them ahead of time and freeze them. ★★★★★”
One reader, Luisa, commented: “My first time making cake pops and they were perfect! My kids and their friends loved them. This recipe is going to be a staple in our house for special occasions. ★★★★★”

Why This Recipe Works
The secret to successful homemade cake pops is the perfect cake-to-frosting ratio, which creates a smooth, sturdy texture that’s easy to shape and holds together beautifully.
Another key difference? These are 100% homemade; there’s no box cake mix or canned frosting. That means a richer, more flavorful cake pop where you can truly taste the difference.
Today I’ll walk you through all my tips, tricks, and secrets for crafting the perfect pop, plus how to make the vanilla cake and buttercream used inside. There’s a lot to cover, so let’s pop right to it. (Couldn’t help myself!)
How to Make Homemade Cake Pops
Since we’re leaving the box cake mix and canned frosting on the store shelves, we’ll need to take extra time to prep both from scratch. Here’s an overview of the process:
- Make a 1-layer vanilla cake and let cool.
- Make vanilla buttercream frosting.
- Crumble cake into frosting and mix.
- Roll the mixture into balls.
- Dip in melted chocolate.
- Top with sprinkles and let dry.
- EAT!
Make-Ahead Tip: You can make the cake in advance, because it needs to cool completely before you crumble it into the frosting. I always make the cake the night before, then finish the cake pops the next day.

My recipe for vanilla cake is very straightforward. It’s basically a scaled-down version of my favorite vanilla layer cake. I encourage you to use the correct size pan for the cake. This cake is too large for a typical 9-inch cake pan. You’ll need to use a 9-inch springform pan because it rises quite high. Or you can use an 11×7-inch pan instead. A 10-inch springform pan would work as well.
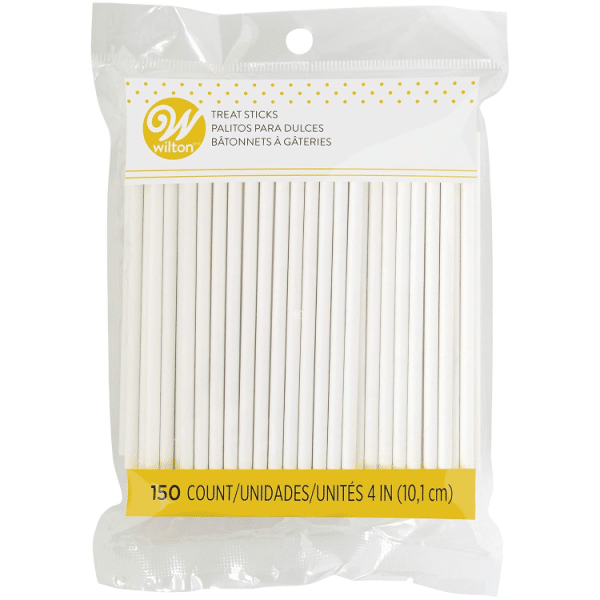
Besides lollipop sticks, a mixer, and the correct size pan, you don’t really need much else to get started!
Then make the vanilla frosting. The difference between this and frosting out of a container is the TASTE; you can tell these cake pops are special and it’s because you started with from-scratch components. This frosting recipe yields *just enough* to barely moisten the cake crumbs. Any more than that and the cake pops would be greasy.
Now it’s time to crumble the cake and mix with your frosting.
(Crumbling the cake into the frosting sounds super weird when you think about it and that’s exactly what cake pops are—super weird when you think about it. It’s cake and frosting mixed together to form a truffle-like ball. Pop a stick in it and dunk into coating. Yep, it’s weirdly delicious and awesome and you need to embrace it.)

Once the two are mixed together, it’s time to roll the mixture into balls.

3 Success Tips for Shaping & Dipping Cake Pops
Success Tip #1: It’s easier to roll the cake + frosting mixture into perfectly round balls if it’s cold. So what I do is roll the balls right after the two are mixed together. They’re pretty misshapen because the cake + frosting mixture is super moist—and at room temperature. Chill the balls in the refrigerator for at least 2 hours. After that, give them another quick roll to smooth out the sides. When they’re cold, they’re easier to smooth out and form perfectly round shapes.
Now let’s dunk! You can dip the cake balls in melted white chocolate, which is what I prefer for the best taste, but that stuff is pretty expensive. And you need a good amount for all 40 cake pops! If desired, you can use candy melts/candy coating instead.
- A 2-cup glass liquid measuring cup is the perfect depth for dipping the cake pops.
- You can used colored candy melts or tint the white chocolate with gel food coloring.
Success Tip #2: To ensure the cake ball stays secure on the lollipop stick, dip one end of the stick into the coating first (just about 1/2 inch down). Then insert the coated end into the center of the cake ball. This helps the cake ball adhere to the lollipop stick.


Success Tip #3: The best way to allow the coating to dry and set—without ruining the perfectly round cake pop—is to place them right-side-up in a large styrofoam block or even a box. I used a box, as pictured below, for this batch. I just poked little holes into it.
Easy and cheap:


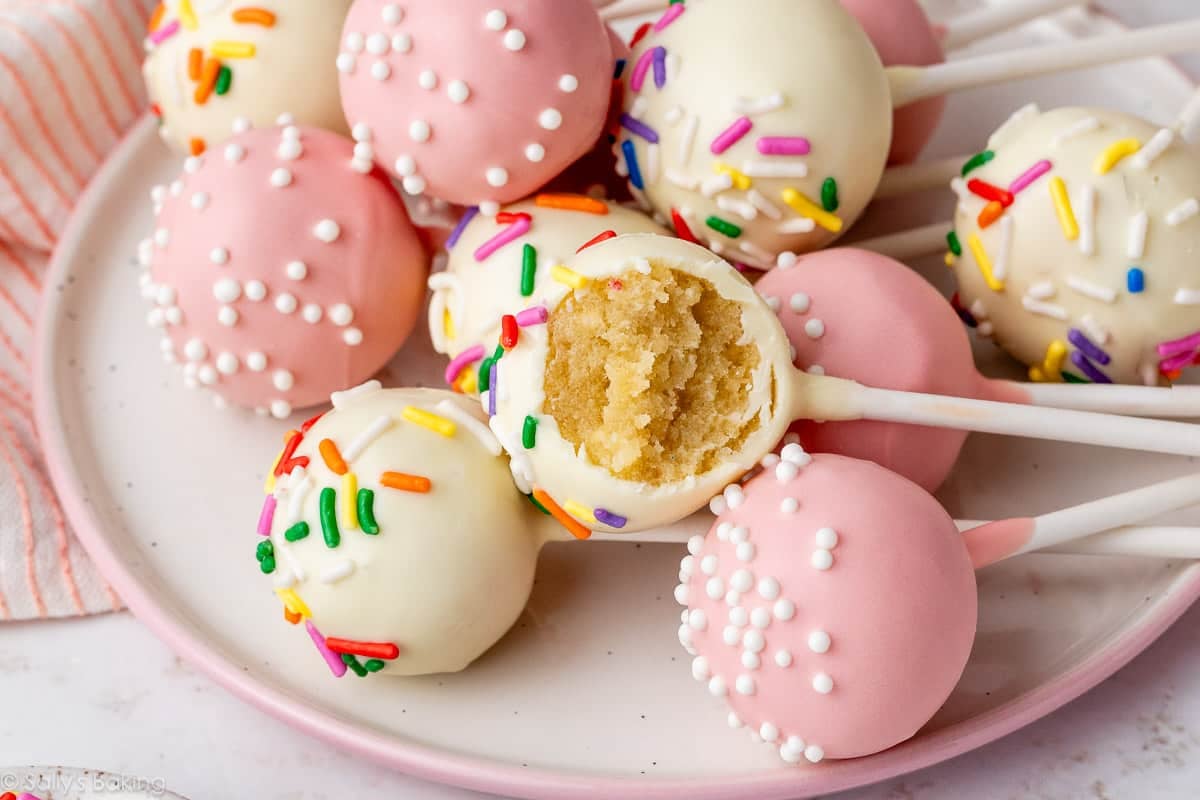
If you’re topping with sprinkles (always recommended!), add them now before the chocolate sets. I used rainbow sprinkles on the white chocolate and white nonpareils on the light pink-tinted white chocolate (like Starbucks!).
Cake pops dry/set within an hour or so.
Cake Pop FAQs
Cake pops are an ideal celebration-worthy treat to make ahead of time because they freeze beautifully. I simply freeze them in a large zip-top freezer bag or freezer-safe container after they’ve fully dried. They can stay in the freezer for up to 6 weeks, then thaw them overnight in the fridge.
Tinting the coating brings a fun POP of color! I usually stick to just white + one other color. Again, you can use colored candy melts for the coating or you can tint the white chocolate with gel food coloring. Then of course you can mix up what sprinkles you use!
Check out my recipe for chocolate cake pops here. You can also switch up dunking in white or dark chocolate.
If your cake pops have some cracks on them, the melted chocolate could have been too hot. Let the melted chocolate or candy coating sit for 5 minutes to slightly cool down before dunking the cold cake balls into it. That usually helps!
Homemade Cake Pops Tools


Gel Paste Food Coloring
Homemade Cake Pops
- Prep Time: 2 hours
- Cook Time: 36 minutes
- Total Time: 7 hours
- Yield: 40 pops
- Category: Cake Pops
- Method: Baking
- Cuisine: American
Description
Homemade vanilla cake pops with vanilla buttercream from scratch—no cake mix or canned frosting! Follow my thorough instructions, tips, and video tutorial for best results.
Ingredients
- 1 and 2/3 cups (209g) all-purpose flour (spooned & leveled)
- 1/2 teaspoon baking powder
- 1/4 teaspoon baking soda
- 1/2 teaspoon salt
- 1/2 cup (8 Tbsp; 113g) unsalted butter, softened to room temperature
- 1 cup (200g) granulated sugar
- 1 large egg, at room temperature
- 2 teaspoons pure vanilla extract
- 1 cup (240ml) whole milk (or buttermilk)
Frosting
- 7 Tablespoons (99g) unsalted butter, softened to room temperature
- 1 and 3/4 cups (210g) confectioners’ sugar
- 2–3 teaspoons heavy cream or whole milk
- 1 teaspoon pure vanilla extract
Coating
- 24 ounces (678g) candy melts (or white chocolate bars)*
- sprinkles
Instructions
- Preheat oven to 350°F (177°C). Grease a 9-inch springform pan.
- Make the cake: Whisk the flour, baking powder, baking soda, and salt together in a medium bowl. Set aside. Using a handheld or stand mixer fitted with a paddle or whisk attachment, beat the butter and sugar together in a large bowl until creamed, about 3 minutes. (Here’s a helpful tutorial if you need guidance on how to cream butter and sugar.) Add the egg and vanilla extract and beat on high speed until combined. Scrape down the bottom and sides of the bowl as needed.
- Add the dry ingredients and milk to the bowl with the wet ingredients and mix on low speed until combined. Give the thick batter a quick stir with a spatula to ensure there are no large lumps at the bottom of the bowl. Pour and spread the batter evenly into the prepared pan. Bake for 30–36 minutes or until a toothpick inserted in the center comes out clean. If the top begins browning too quickly in the oven, loosely tent with a piece of aluminum foil.
- Allow the cake to cool completely in the pan set on a wire rack.
- Make the frosting: With a handheld or stand mixer fitted with a paddle attachment, beat the butter on medium speed until creamy, about 2 minutes. Add confectioners’ sugar, heavy cream, and vanilla extract and mix on low speed to combine. Increase to high speed and beat for 3 full minutes.
- Crumble the cooled cake into the bowl on top of the frosting. Make sure there are no large lumps. Turn the mixer on low speed and beat the frosting and cake crumbles together until combined.
- Scoop 1 Tablespoon (about 20g) of cake/frosting mixture and roll into a ball. Place balls on a lined baking sheet. Refrigerate for 2 hours, or freeze for 1 hour to set the shape. Re-roll the chilled cake pop balls to smooth out, if needed. Place the tray back into the fridge, as you’ll only work with a couple at a time.
- Melt the chocolate or candy melts in a 2-cup liquid measuring cup (best for dunking!) in the microwave in 20-second increments, stirring after each increment, until melted and smooth. You can also use a double boiler on the stove, if you prefer.
- Coat the cake balls: Remove just 2 or 3 cake balls from the refrigerator at a time. Dip the end of a lollipop stick about 1/2 inch into the coating, then insert the coated end into the center of the cake ball. Only push it about halfway through the cake ball. Dip the cake ball into the coating until it is completely covered. Make sure the coating covers the base of the cake ball where it meets the lollipop stick. Very gently tap the stick against the edge of the measuring cup to allow excess coating to drip off. Decorate the top with sprinkles and place upright into a styrofoam block or box (as explained in the blog post). Repeat with remaining cake balls, working with just a few out of the refrigerator at a time. The cake balls must be very cold when dipping!
- Coating will set within an hour. Store cake pops in the refrigerator for up to 1 week.
Notes
- Make Ahead Instructions: I always make the cake 1 day ahead of time. Cover and keep at room temperature. You can store the undipped cake balls in the refrigerator for up to 2 days or freeze them for up to 6 weeks. Allow to thaw in the refrigerator, then continue with step 9. You can also freeze the finished cake pops for up to 6 weeks once the coating has fully set. Thaw overnight in the refrigerator.
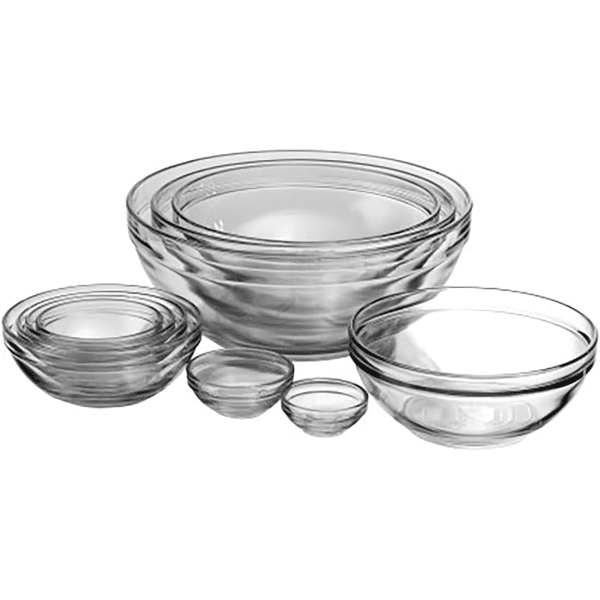
- Special Tools (affiliate links): 9-inch Springform Pan (a 10-inch springform pan or 11×7-inch pan will work, too) | Glass Mixing Bowl | Whisk | Electric Mixer (Handheld or Stand) | Cooling Rack | Baking Sheet | Silicone Baking Mat or Parchment Paper | Glass Measuring Cup | Lollipop Sticks | Americolor Food Coloring
- Coating: You can use candy coating/candy melts, or chopped white chocolate. I typically use Ghirardelli brand white chocolate melting wafers. Semi-sweet, bittersweet, or milk chocolate baking bars work, too. Coarsely chop the chocolate and place it in a microwave-safe bowl or glass liquid measuring cup, along with 1/2 teaspoon vegetable oil to help thin it out. Microwave in 20-second increments, stirring after each 20 seconds, until melted and smooth. Keep warm over a double boiler.


Reader Comments and Reviews
Hi I was wondering for the cake mix can I use 2% milk instead of whole milk?
You bet!
Probably made 10 dozen or more cake pops and still haven’t perfected it. Began with ‘In the Kitchen with Matt’ and experimented from there. Your butter cream from scratch I’ll try next along with longer refrigerator times and reshaping cake pops after chilling.
Great ideas, Thank you.
Hello
My sons birthday and gender reveal are within two weeks of each other and I would love to make these however it’s only my husband and I. I’m not sure we could even eat half the recipe ! How do you suggest making a smaller batch?
And how can we make them less sweet? We love cake pops because they require less cleanup but cake and icing are so sweet, it’s sickly sweet! Thank you!
Hi Nissa, you can try halving (or more) this recipe for a smaller batch. Or, see recipe notes for freezing options if you want to make a full batch and save some for a later date. You can reduce the confectioners’ sugar in the frosting but that will create a much thinner frosting. It shouldn’t make a huge difference in the texture of the cake pops, though. (Or you can very slightly reduce the sugar in the cake.) Let us know if you give them a try!
Thank you for all of your delicious recipes!!
I want to make these but add in some Oreo pieces. Do you think I’m better off baking them into the cake or mixing them in when I mix the frosting with the crumbled cake?
Thank you!
Hi Hillary! We haven’t tested it, but I would think baking them into the cake would be best for texture. Let us know what you try!
Hey Sally! I just baked my cake, however it didn’t rise at all and is a bit overcooked. I checked all my ingredients and tested my baking powder and baking soda and they are all fine. I tasted it and it’s not the worst, but it could be better. Should I rebake the cake or should it be ok?
Hi Jenni! The cake pops may be OK still since you’re mixing the cake with frosting, but for best results we would make the cake again. Careful not to over-mix the batter and use all room temperature ingredients to avoid a dense cake. Happy baking!
I have a question instead of making your own frosting can you buy store bought frosting.
Hi Lilly, you sure can.
Hi Sally I’m making these for my sisters baby shower . Can I double the recipe and bake in a 9×13?
Hi Nita, we don’t recommend this cake as a 9×13 cake. Instead, you’ll enjoy our white cake recipe. See the recipe notes for a 9×13 inch pan. Hope they’re a hit at the baby shower!
Thanks for the response! These were delicious and definitely a hit at the baby shower!!! I ended up doubling this recipe and putting half in a springform pan and splitting the rest into two 9 inch cake pans. They turned out perfect I made 80 of these and 80 of the chocolate ones. They were adorable and delicious
I made the pops tonight, and my goodness they’re delicious!! Tomorrow I’ll be dipping them, I’m curious to know if the 1/2 tsp oil is to be mixed with the whole 40 oz of white chocolate? Thank you!!
Yes! Hope you love them, Ashlea 🙂
I melted white choc. wafers in my microwave. It was to thick to dip my cake pops. What can I do to thin it down without ruining the choc. ?
Hi Pam, Were you using pure white chocolate? And did you melt it down with 1/2 teaspoon of oil to thin out (see recipe note #3 if using pure chocolate)? The oil will help thin it out a bit to make it a workable consistency for dipping the cake pops. Hope this helps!
Can you half the recipe? I love how the normal recipe taste all time fav
Absolutely! An 8 inch pan– regular cake pan, not a springform pan– should be about the right size to bake half of this cake batter.
Okay so how much does this make? Also what is preparation time?
You can find all this information in the gray recipe box just above this comment section!
My cake did not rise as high as the recipe indicates that it should. I double checked my ingredients and tested my baking powder and soda and everything looks good. Do you think it’s usable since it is getting mixed with the frosting anyway or do I need to redo?
Hi Lauren, since the cake is going to be crumbled anyways, it’s likely okay. Give it a quick taste to make sure it’s not overly dense and if it tastes okay to you, go ahead and continue the recipe for cake pops. Hope this helps!
Well I can’t recall if I’ve made these before and my results but I just made today. I’m very concerned I will have to redo as I found the dough mixture very moist and almost too wet. I followed directions exactly and added the crumbs to frosting and mixed. I did roll them and now in refrigerator but thinking for me the mixture was too much on the wet side. I probably should have done like I’ve always done and mix the frosting a little at a time into the crumb mixture. Will give them time in fridge to chill and see what happens. Mixture taste great though!
Sally !!! I made these for my daughters 5th birthday party and they all turned out ! Thank you so much for sharing this recipe! I had been searching for a cake pop recipe that actually works ! All your tips and tricks -THANK YOU!
Help! I accidentally used baking chocolate instead of semisweet chocolate in blondies and they’re bitter, I was hoping to turn them into cake pops maybe or something else if you have any suggestions. I hate to waste.
Hi Anita, we haven’t tried using blondies for cake pops, but we fear the texture may be too heavy. You can certainly try, keeping in mind that the frosting to blondie ratio might be much different. Or, how about topping the blondies with a frosting to offset the bitter chocolate taste?
Cake balls tasted great! We managed with only half the recommended amount of belgian white chocolate on all 40 balls. After coating in white chocolate we simply put them on parchment paper instead of putting on sticks and they turned out like cute little truffles.
Hello, can I substitute gluten-free flour for this recipe?
Thank you.
We haven’t tested gluten free flour in these cake pops but let us know if you do!
We are gluten-free and dairy free, so I used a different cake and frosting recipe, but followed the instructions from this website, and it worked great! (I use the vanilla cake recipe from the gluten free palate blog: https://www.glutenfreepalate.com/easy-gluten-free-vanilla-cake/)
Hello,
Once the cake pops have been dipped, how many days can they sit out without refrigeration? Can they be dipped ahead of time without refrigeration?
Hi Gina, we wouldn’t leave them out for more than a day. Best to store in the fridge for longer than that (or the freezer to make ahead of time!).
Hi! I already baked the cake and mixed it with the frosting. I’m wondering if I can add blue food coloring at this point by remixing for a gender reveal?
Hi Erin, we haven’t tested that, but I fear that the make pop mixture may end up over-mixed and gluey if mixed again. Let us know if you give it a try!
I LOVE ITTTT the cake pops are a hit and there super YUM
I have tried this recipe many times and every time it was a super duper hit with the entire family!! my husband loves this one and he says these are the best he’s ever had (and believe me when I say he’s tried cake pops pretty much everywhere)..but this time I’m going to have to make an eggless version for my guests -Can you please suggest me how to alter the cake recipe to make it eggless? I would highly appreciate any help with this Thanks Sally ❤️
Applesauce is a substitute for eggs….
Thanks Linda for the reply! 🙂 Have you tried this recipe with Apple sauce instead of eggs? If so, what quantity of sauce works?
Hi! I was wondering how much frosting to use if you don’t make your own. I know you said just enough to slightly dampen the cake crumbs but if you use a 13 x 9 inch pan for your cake is there a recommended amount?
Hi Vivienne, this recipe yields about 1 cup of homemade frosting to go with the 9 inch springform pan of cake. The amount you’ll need should be similar, but will depend on the consistency of your frosting and cake.
Yum! thank you sally
Can I substitute regular butter instead of unsalted butter. What affect will it have
Hi Joan, you can use salted butter – simply reduce the added butter to 1/4 tsp. You can read more about salted vs. unsalted butter in baking in this post!
Hi Sally. Thanks for the recipe. I’m planning to make some but I’m worried that the coating will melt. We will travel for almost 2 hrs with those pops. What can you recommend on how we can avoid them? Where should I store them?
Hi Gab, if the coating has fully set, they should be fine for your car ride. For extra assurance, you could store them in a bag or box within a cooler if that’s available to you. Hope you enjoy the recipe!
Hello Sally!
These sound great. I’m planning a desert table for my niece’s birthday and I plan on finishing all treats the day before. Do you think the cake pops would sweat if I leave them in the fridge and later thaw them out on the desert table? Any tips you can give to prevent this would be greatly appreciated. Thank you.
Hi Angelica, the cake pops should be fine stored in the fridge overnight, just make sure they are well covered to prevent any moisture from seeping in. Hope they’re a hit!
Hello!
I want to make cake pops for my daughters’ birthdays. If I make them ahead of time and freeze them fully decorated, what do I store them in? And do I deforest 24 hours before I want to hand them out? I will be wrapping them individually in cellophane so wasn’t sure of the best way to do this with the freezing defrosting etc!
Or shall I make them, wrap them and then keep in fridge?! Thank you!
Hi Verashe, see recipe notes for freezing instructions. You can store them in a tupperware or bag, but it might be easiest to wrap them individually and freeze, then put them in the refrigerator the night before you need them to defrost.
Hi Sally!
Love all your recipes and can’t wait to try this one! 2 questions:
1) what is the best cake to frosting ratio if I want to use other recipes?
2) is it ok to use your: cream cheese frosting, Nutella frosting, vanilla buttercream frosting, salted caramel frosting etc. With corresponding cake flavours to make cake pops as well? Looking for a flavour variety
Hi Anita, you can use any of those frostings to make cake pops. The ratio really depends on the exact frosting and cake you’ll be using — you’ll want *just enough* to barely moisten those cake crumbs. Have fun experimenting!
Always a winner on this site, thank you Sally!
My daughter and granddaughter are cake pop nuts. I made your recipe for them and they said it was the most flavorful and best they ever had !!! Bravo on you recipes. But I am having a small problem.
My chocolate cracked after it hardened. How do I stop this ?
Hi Amelia, We are so happy they enjoyed them! You can definitely help prevent that next time. If you keep the shaped cake pops a little warmer– aka don’t put in the freezer or refrigerator for so long before dipping– the coating won’t crack. OR make sure that the coating isn’t too hot. The coating is cracking because of the temperature difference between the two. Hope this helps!
“You can also freeze the finished cake pops for up to 6 weeks once the coating has fully set.”
Will this cause cracking? I want to make these for my wedding a few weeks ahead of time!
Hi Asha, These freeze beautifully! We’ve never experienced them expanding or cracking in the freezer.