

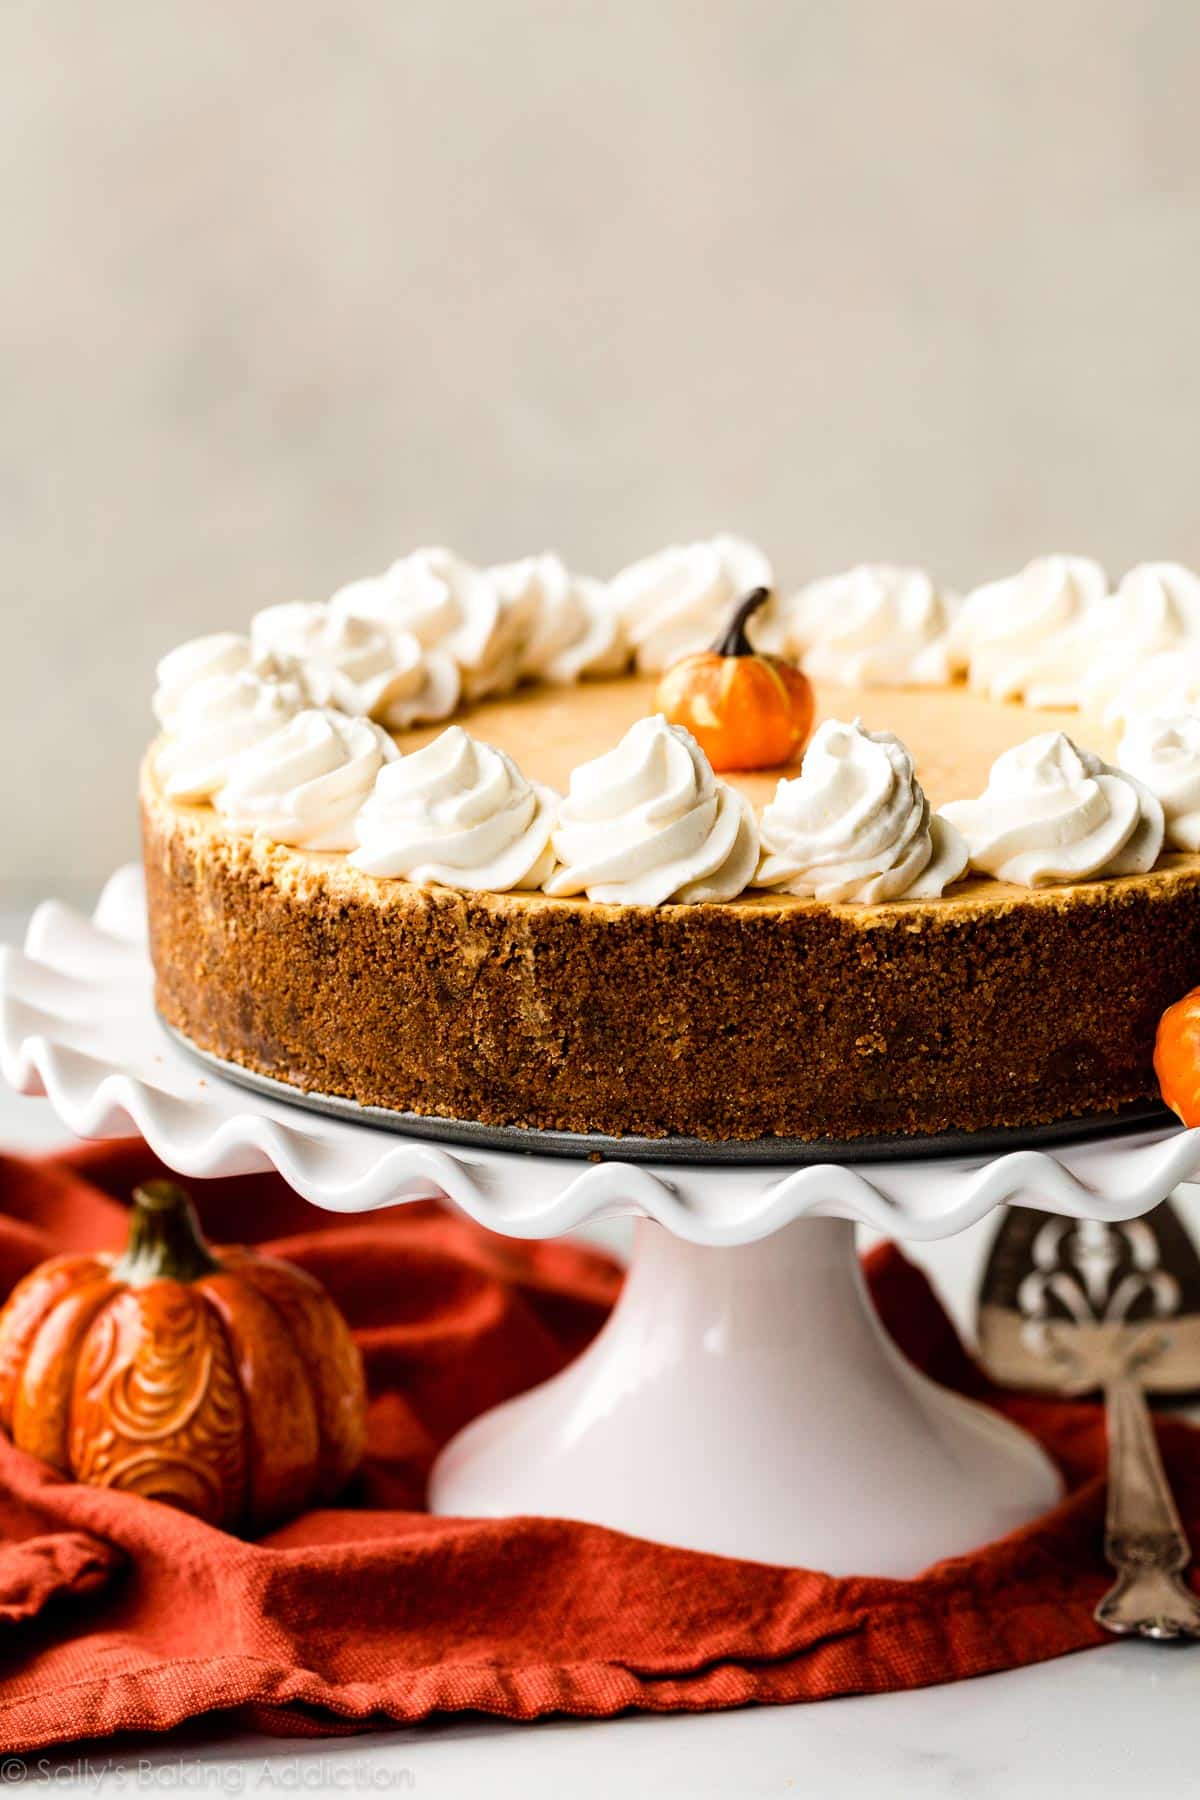
Ever since I published plain no-bake cheesecake, I’ve had requests for this flavor! This no-bake pumpkin cheesecake is smooth and creamy with extra spiced flavor. It sits in a crunchy gingersnap cookie crust that provides the best textural contrast to the fluffy mousse-like filling. There’s absolutely no oven required—the dessert sets up in the refrigerator, making it a convenient make-ahead option this fall season.
There aren’t many seasonal desserts that top pumpkin pie. A dessert tradition this time of year, pumpkin pie features a smooth spiced filling sitting in a wonderfully flaky pie crust. It’s hard to compete with this kind of perfection.
But I found something that comes shockingly close. Let me introduce you to no-bake pumpkin cheesecake. A dessert recipe that skips the oven, says goodbye to pie crust, and waves toodaloo to any sort of cheesecake water bath. It tastes like cheesecake mousse with the deeply spiced flavor of pumpkin pie. This is a great place to use homemade pumpkin pie spice!
Sitting in a flavorful gingersnap cookie crust, this ultra creamy dessert is unforgettable. If you don’t fall in love, I’ll happily take your leftovers.
Why You’ll Love No-Bake Pumpkin Cheesecake:
- Texture: crunchy crust, light & creamy filling
- Flavor: cinnamon gingersnap crust and pumpkin spiced filling
- Ease: no water bath, no baking, no cheesecake cracks on top, no worries
- Convenience: save precious oven space for other dishes
- Make-ahead: filling sets and flavor tastes better
One reader, Whitney, commented: “Simple to whip up and oh-so delicious! I loved this as an ‘update’ to a traditional pumpkin pie at Thanksgiving. The filling was light and airy, and the gingersnap crust packed a spicy punch! I will definitely add this to my Thanksgiving Day dessert menu for years to come! ★★★★★”

No-Bake Pumpkin Cheesecake Video Tutorial
Gingersnap Cookie Crust
With more flavor and crunch than a graham cracker crust, a gingersnap cookie crust isn’t just there in the background. Instead, it’s a whole other layer to savor. You need gingersnap cookie crumbs, sugar, and melted butter. To make this crust a cut above the rest, I suggest adding cinnamon and ginger too. This is exactly how I prepare the crust for my (baked) pumpkin swirl cheesecake, though you need a little more of each ingredient for this recipe.
3 Success Tips:
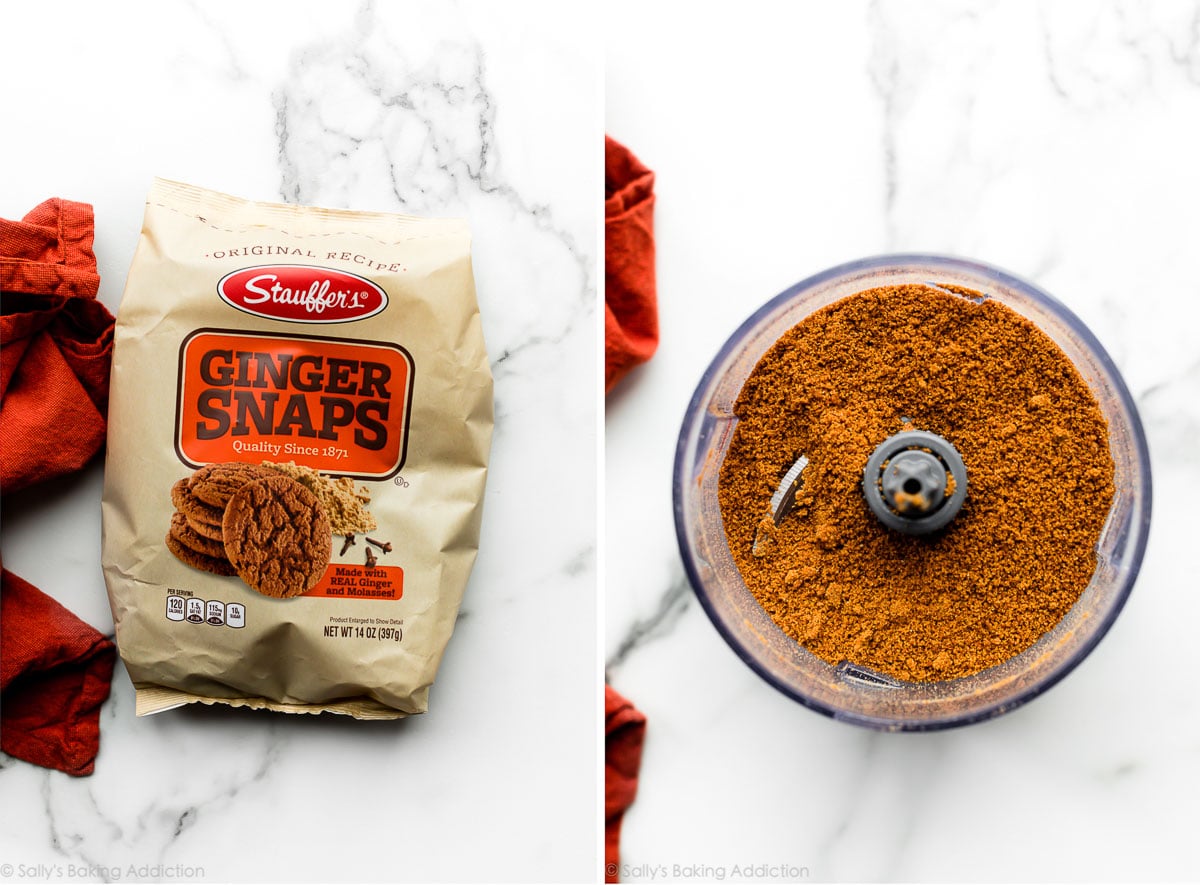
- Type of cookie: The type of gingersnap cookie you use will make or break the recipe. (Literally.) I’ve never had luck using homemade gingersnaps. Pick up a box/bag of store-bought gingersnaps, such as Stauffer’s brand. You can find them in the cookie aisle of most grocery stores. You want extra crunchy, hard, and somewhat dry cookies. If they’re too moist, your crust won’t set up.
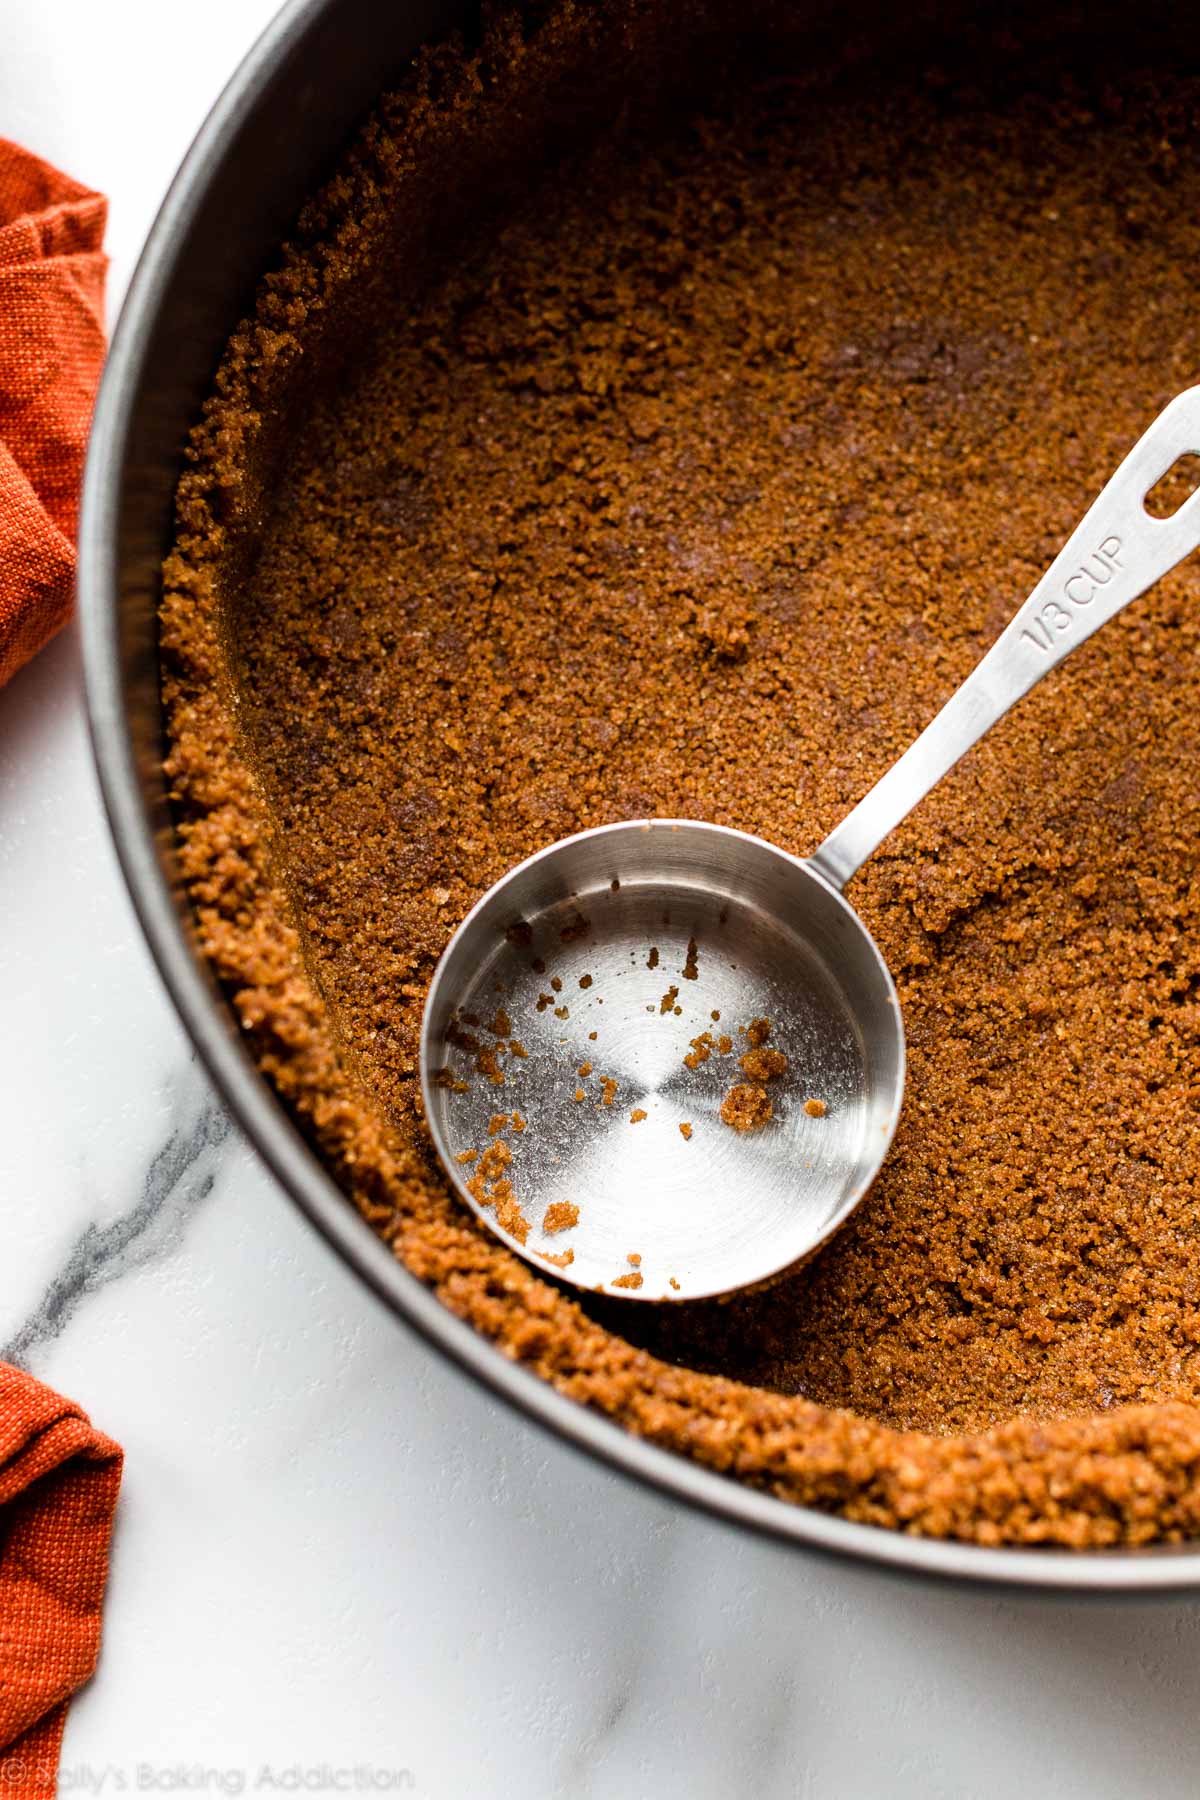
- Pack it in: The tighter you pack in this crust, the less likely it will fall apart when cutting the cheesecake. I recommend using the bottom of a measuring cup to pack it into the bottom and up the sides of your springform pan.
- Briefly freeze to set the crust: After you pack in the crust, place it in the freezer while you prepare the cheesecake filling. Remember, we aren’t baking this crust—the freezer gives the crust a chance to set before you add the filling on top.
Don’t want to use gingersnap cookies? Use the graham cracker crust from my plain no-bake cheesecake.
Overview: How to Make No-Bake Pumpkin Cheesecake Filling
- Whip heavy cream: In the 1st bowl, beat heavy cream/heavy whipping cream into stiff peaks. This is the most important step in this entire recipe and *the secret* to a thick no-bake cheesecake filling. It has proved successful in strawberry cream cheese pie and blueberry cream cheese pie also.
- Mix the other filling ingredients together: In a 2nd bowl, you need cream cheese, canned pumpkin, confectioners’ sugar, brown sugar, vanilla, spices, and salt. In my recipe testing, I used my plain no-bake cheesecake as the starting point. Pumpkin thins the mixture out, so I had to play with the amount of cream cheese and confectioners’ sugar. Thrilled with the developed recipe below—spiced, thickened, and perfectly pumpkin-y.
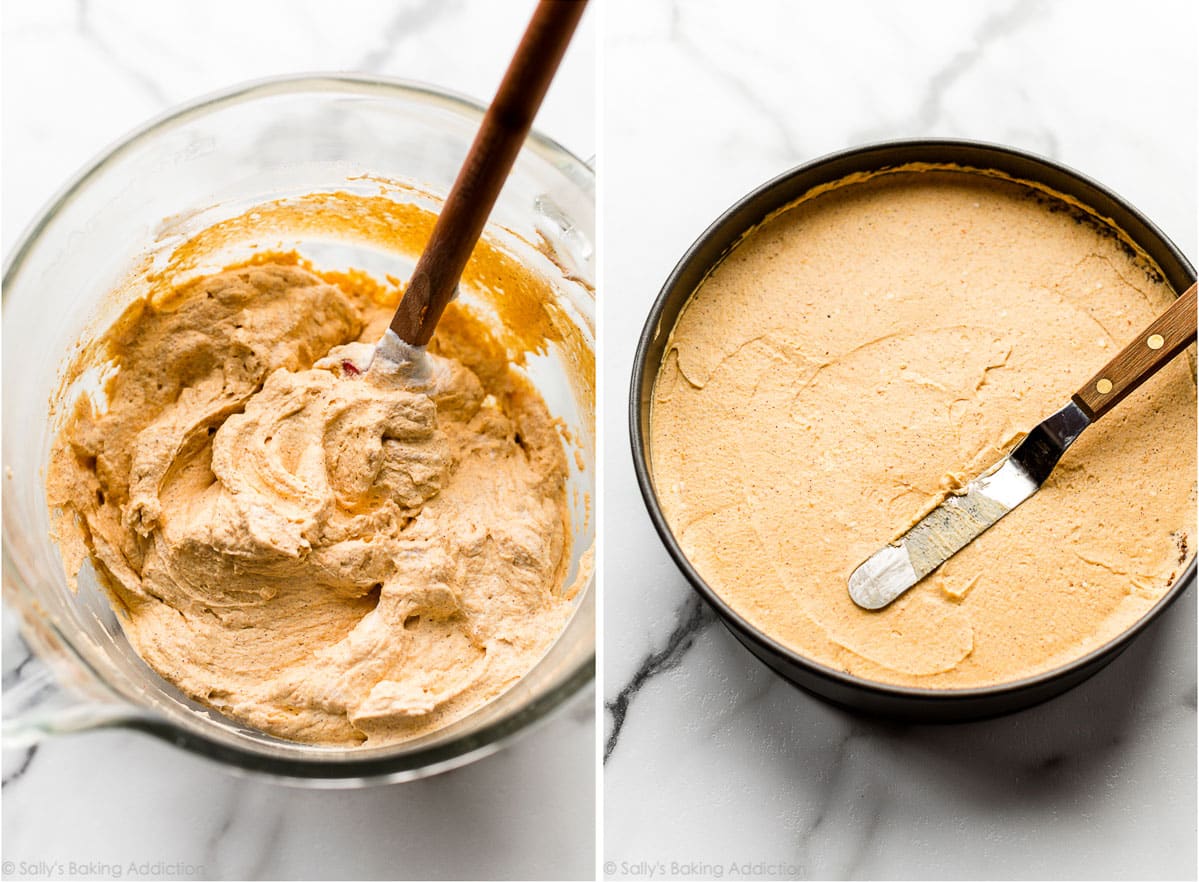
- Fold in the whipped cream: Remember our whipped cream? Gently fold it into the pumpkin cream cheese mixture. Avoid over-mixing because we don’t want to deflate anything.
- Spread into crust: Smooth the filling into the crust. I like using a large or small offset spatula to make the job easier.
- Refrigerate: Instead of the oven, use the refrigerator to set this cheesecake. Cover and refrigerate the prepared cheesecake for at least 8 hours or up to 2 days.
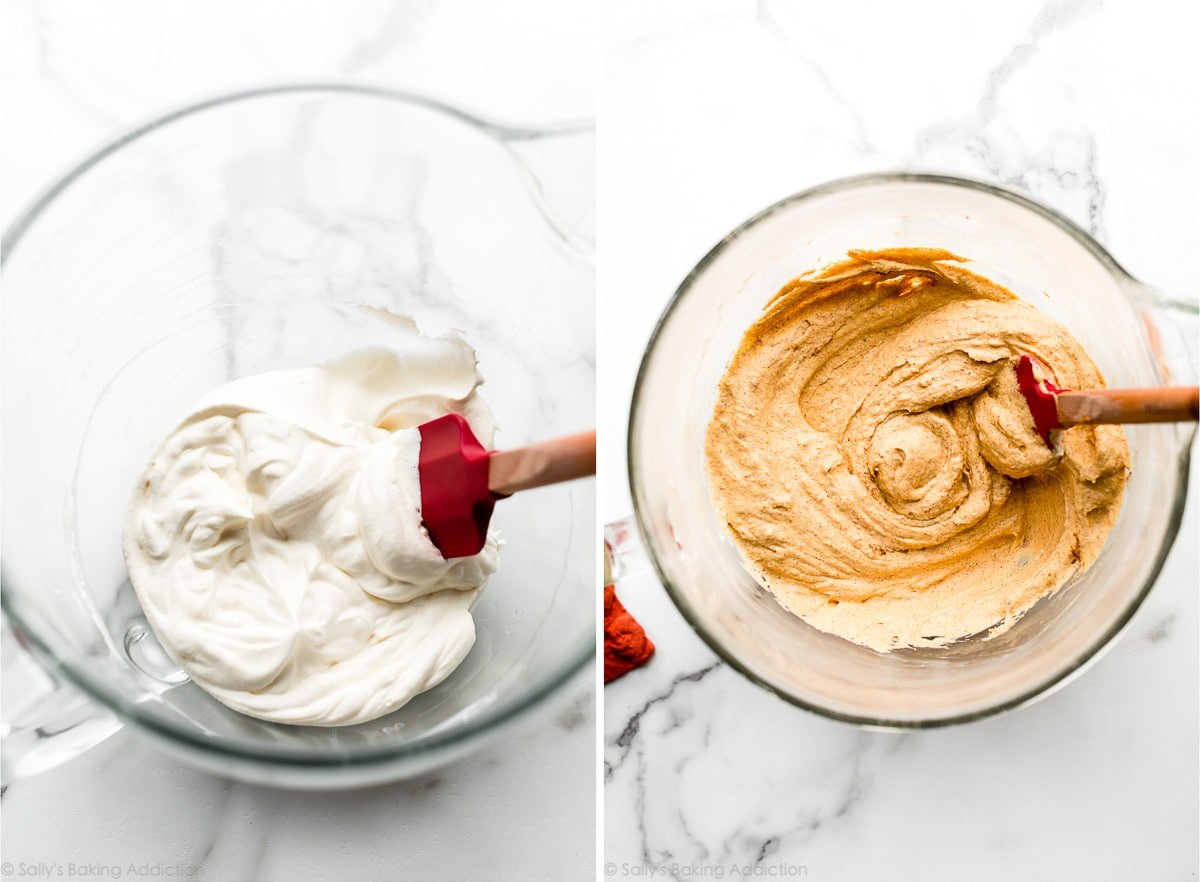
Pictured on the left below: the whipped cream. On the right below: the pumpkin cream cheese mixture.
Pictured on the left below: the whipped cream and pumpkin cream cheese mixture combined. On the right below: spread into our gingersnap cookie crust.
With No Baking, How Does This Cheesecake Hold Its Shape?
- Make sure you pack the crust in tightly.
- As I mention above, the most important ingredient is the whipped heavy cream. Fold the whipped cream into the pumpkin cheesecake filling gently so you don’t deflate all the air. The air creates a deliciously fluffy mousse-like consistency and, more importantly, helps the filling set in the refrigerator.
- For a clean and sturdy slices, refrigerate it for at least 8 hours, but 12+ hours is ideal. Not only does the time in the refrigerator solidify the filling, it also gives the flavors a chance to mix and mingle. Flavor is incredible the next day.
Skip these 3 steps and you’ll be eating pumpkin soup for dessert. Avoid that mess!

Smaller Serving Alternatives
- For 24 cupcake size no-bake pumpkin cheesecakes, use the crust and filling ingredients below and the instructions for my mini no-bake cheesecakes. Feel free to halve the recipe if you don’t need quite as many.
- You can use this recipe to make 6 8-ounce or 10 6-ounce cheesecake jars. Halve the crust recipe below because we don’t need as much crust for the jar dessert. Use the full recipe for the filling. Follow the instructions for my no-bake cheesecake jars. Top with salted caramel, chocolate ganache, heath bar toffee bits, more gingersnap cookie crumbs, or homemade whipped cream.
And if you love both pumpkin pie and cheesecake, you’ll want to try my pumpkin cheesecake pie next.
See Your No-Bake Pumpkin Cheesecakes
So many of you have tried this recipe. Feel free to email or share your recipe photos on social media.
Print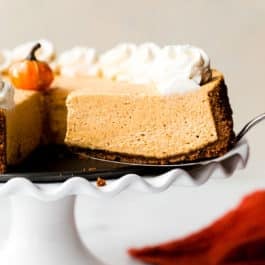
No Bake Pumpkin Cheesecake
- Prep Time: 20 minutes
- Cook Time: 0 minutes
- Total Time: 8 hours, 20 minutes
- Yield: serves 10-12
- Category: Dessert
- Method: Whipping
- Cuisine: American
Description
This fluffy no-bake pumpkin cheesecake sits in a crunchy gingersnap crust. The most important steps are whipping the heavy cream into stiff peaks before folding into the filling and refrigerating the cheesecake long enough so it can set.
Ingredients
Gingersnap Cookie Crust
- 2 cups (200g) gingersnap cookie crumbs*
- 1/4 teaspoon each: ground ginger and ground cinnamon
- 6 Tablespoons (85g) unsalted butter, melted
- 1/4 cup (50g) granulated sugar or brown sugar (packed)
Cheesecake
- 1 cup (240ml) cold heavy cream or heavy whipping cream
- 16 ounces (452g) full-fat brick cream cheese, softened to room temperature
- 1 cup (226g) pumpkin puree*
- 3/4 cup (90g) confectioners’ sugar
- 1/4 cup (50g) packed light or dark brown sugar
- 1 teaspoon pure vanilla extract
- 2 teaspoons store-bought or homemade pumpkin pie spice*
- 1/2 teaspoon ground cinnamon
- 1/8 teaspoon salt
Optional Toppings
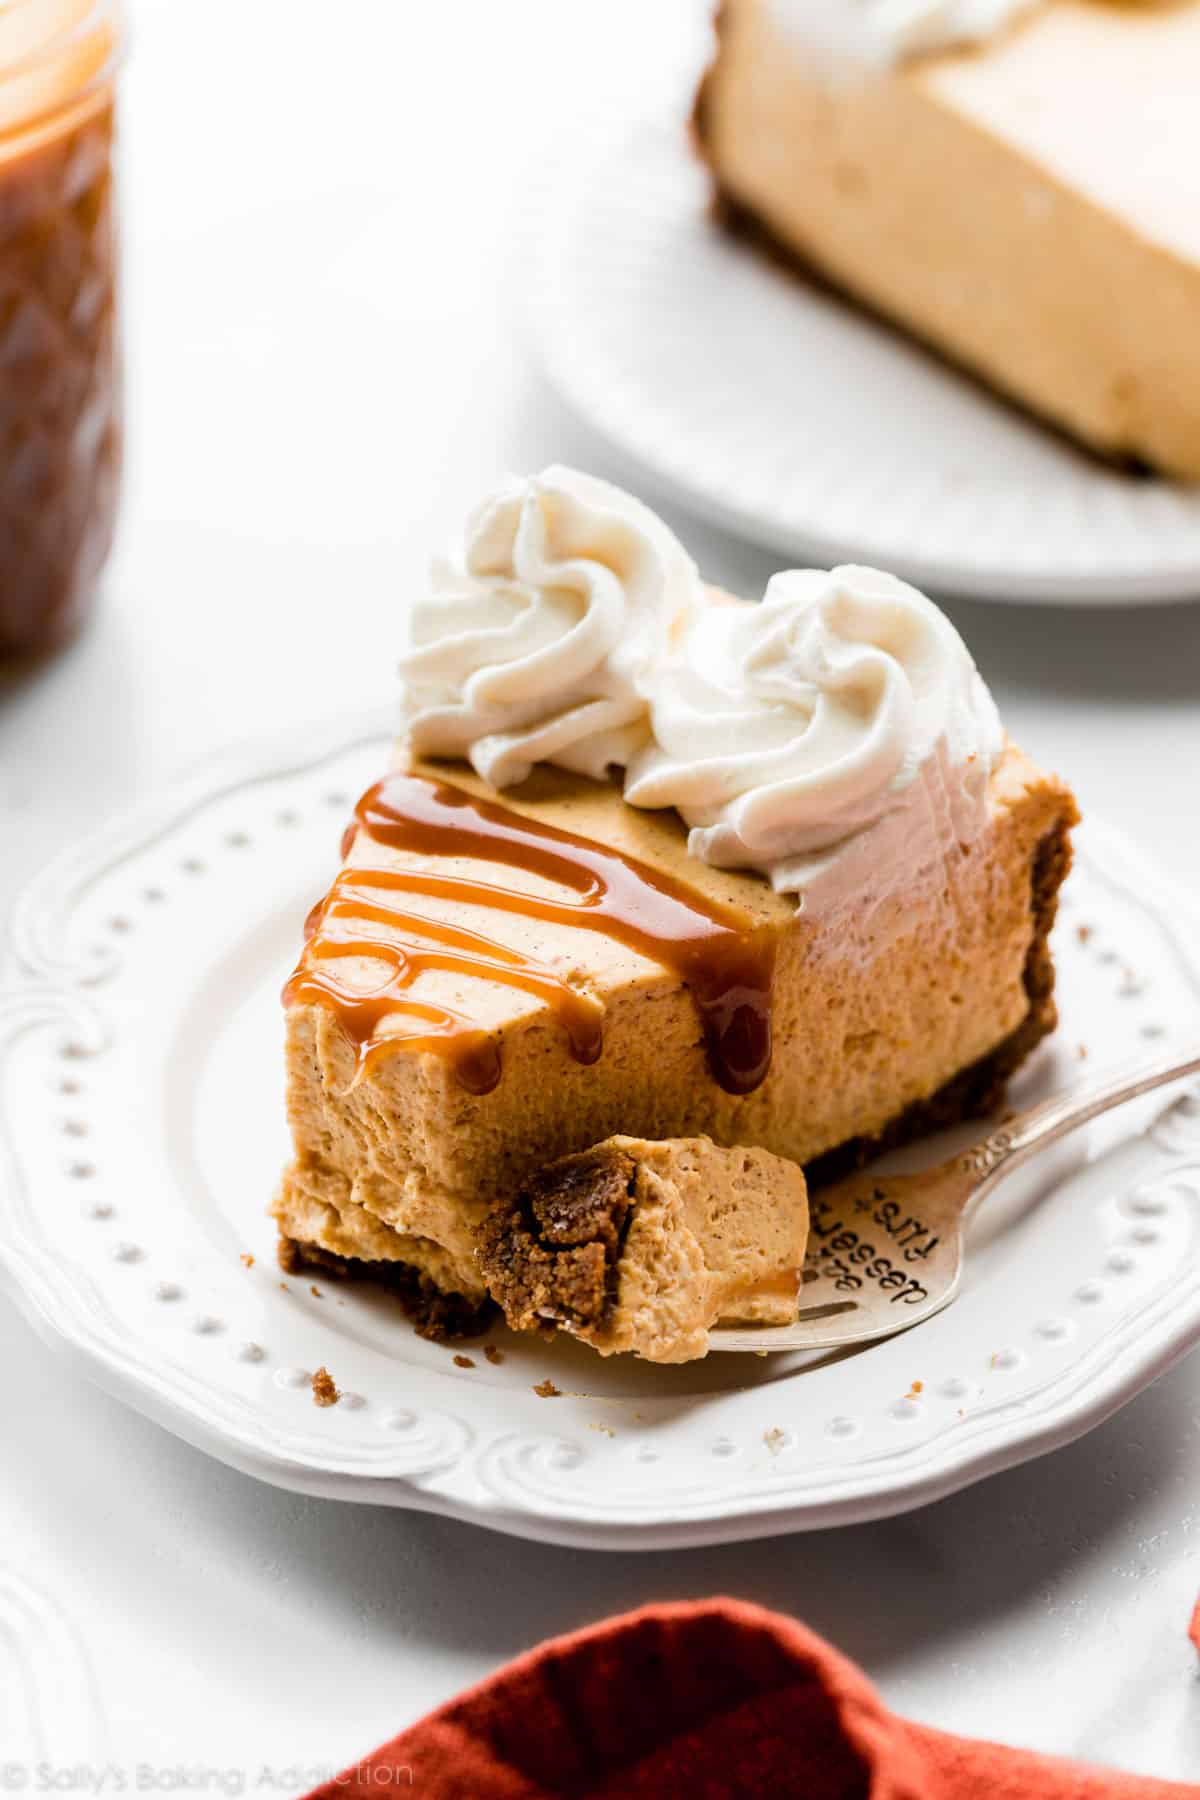
- Whipped Cream and/or Salted Caramel
Instructions
- Make the crust: Stir the gingersnap crust ingredients together. Pour into a 9-inch or 10-inch springform pan and pack in very tightly. The tighter it’s packed, the less likely it will fall apart when cutting the cheesecake. I recommend using the bottom of a measuring cup to pack it into the bottom and up the sides. You can watch me do this in the video above. Freeze for 10-20 minutes as you prepare the filling.
- Make the filling: Using a hand mixer or a stand mixer fitted with a whisk attachment, whip the cold heavy cream into stiff peaks on medium-high speed, about 4 minutes. Set aside.
- Using a hand mixer or a stand mixer fitted with a whisk or paddle attachment, beat the cream cheese on medium speed until perfectly smooth and creamy. Scrape down the sides and up the bottom of the bowl with a silicone spatula as needed. Add the pumpkin, confectioners’ sugar, and brown sugar and beat on medium-high speed until combined. Scrape down the sides and up the bottom of the bowl as needed to help combine. Add the vanilla extract, pumpkin pie spice, cinnamon, and salt and beat until combined, creamy, and smooth. Make sure there are no large lumps of cream cheese. If there are lumps, keep beating until smooth.
- Using your mixer on low speed or a silicone spatula, fold the whipped cream into the cheesecake filling until combined. This takes several turns of your silicone spatula. Combine slowly as you don’t want to deflate all the air in the whipped cream.
- Remove crust from the freezer and spread filling into crust. Use an offset spatula to smooth down the top.
- Cover tightly with plastic wrap or aluminum foil and refrigerate for at least 8 hours and up to 2 days. For best results, at least 12 hours is best. I chill mine overnight. The longer refrigerated, the nicer the no-bake cheesecake will set up. I don’t recommend using the freezer to set this cheesecake filling.
- Use a knife to loosen the chilled cheesecake from the rim of the springform pan, then remove the rim. Using a clean sharp knife, cut into slices for serving. For neat slices, wipe the knife clean between each slice.
- Serve cheesecake with optional toppings. I used Ateco 849 piping tip for the whipped cream in the pictured cheesecake. Cover and store leftover cheesecake in the refrigerator for up to 5 days.
Notes
- Make Ahead Instructions: This cheesecake can be made 1-2 days in advance. It can be refrigerated in step 5 for up to 2 days before serving. You can also make the crust 1-2 days ahead of time. Freeze for up to 1 hour in step 1, then cover tightly and refrigerate for 1-2 days before adding the filling. Another way to make this cheesecake ahead of time is to freeze it. After it sets in the refrigerator (step 6), wrap the whole pan (you can remove the sides if desired) in 1 layer of plastic wrap, then 1 layer of aluminum foil. No-bake cheesecake freezes wonderfully for up to 3 months. Thaw in the refrigerator, then slice and serve.
- Special Tools (affiliate links): Glass Mixing Bowls | 9-inch Springform Pan or 10-inch Springform Pan | Electric Mixer (Handheld or Stand) | Silicone Spatula | Small Offset Spatula | Piping Bag (Reusable or Disposable) | Ateco 849 Piping Tip
- Pan: To make slicing easy and neat, use a 9-inch or 10-inch springform pan. If you don’t have one, a 9 inch deep dish pie dish (at least 2 inches deep) works. Chill the cheesecake for at least 12 hours to help guarantee the cheesecake slices neatly.
- Gingersnap Cookies: Store-bought gingersnap cookies are ideal as they are the most dry. The ONLY brand that I’ve had issues with is the Nabisco gingersnap cookies. They’re delicious on their own, but they’re too moist for a gingersnap cookie crust. I love Stauffer’s brand. You need about 30. Alternatively, you can use the graham cracker crust from my regular no-bake cheesecake instead. Feel free to add or reduce the amount of cinnamon and ginger based on your taste preference.
- Pumpkin: I strongly recommend canned pumpkin, not fresh (homemade) pumpkin puree in this recipe. I like to use Libby’s brand. Fresh pumpkin puree will prevent the cheesecake from properly setting. Do not use pumpkin pie filling. If you can’t find canned pumpkin, use 1 cup of sweet potato puree. Boil 2 medium sweet potatoes until soft, then peel, slice, and puree/mash them with a blender or mixer until smooth. Measure and use 1 cup. Make sure the puree is room temperature or cold before using.
- Pumpkin Pie Spice: You can find pumpkin pie spice in the baking aisle of most grocery stores or make your own homemade pumpkin pie spice. If you don’t have either and want to use individual spices, use 1/2 teaspoon ground ginger, 1/2 teaspoon ground nutmeg, 1/2 teaspoon ground allspice, and 1/4 teaspoon ground cloves. Increase cinnamon to 3/4 teaspoon.
- Can I Make Mini No-Bake Cheesecakes? Yes, use this crust and filling recipe and follow the instructions in my mini no-bake cheesecakes, which are made in a standard muffin pan.


Reader Comments and Reviews
Silky smooth, delicious flavor, and not too sweet. I used graham crackers with the added spices for the crust because it’s what I had on hand. I only chilled 7 hours because I couldn’t wait any longer and it was set just fine and came right off the pan in a beautiful slice. I would definitely make this again.
Great recipe! I made these for a Friendsgiving, and they were a big hit! Everyone loved them. I ended up halving the recipe and making the cupcake sized ones and it worked out perfectly!
I made this for my Wednesday morning Ladies’ Bible Study. (I’ve told them they’re my “taste-testers” after Hubby!!) It was met with rave reviews and requests to take some home for later. Followed the recipe adding a tad more spices. Another Sally’s keeper! Your recipes have always been a success. THANK YOU for sharing!
I’m going to try making this for Thanksgiving! I was wondering, do you know how I might be able to make some chocolate batter to swirl into the pumpkin? Or perhaps do you know an idea for a chocolate topping that would work well with this recipe? Thank you!!!
Hi Ashley! We haven’t tested this recipe with a portion of chocolate batter, but chocolate ganache would be delicious on top!
This was delicious! Not too sweet, and the crust adds a great spice. The texture of mine never quite set up- next time, I will beat my whipped cream even longer and be more carefully when adding it in. Also, I recommend the food processor for the crust so that there’s no large cookie bits left behind!
I’ve never made a cheesecake before and this was fun and delicious!
It’s quite yummy. I made mini cheesecakes, because I was afraid it might not set because I had to use homemade pumpkin puree, but it worked. I strained and blot out the moisture as much as I could from the puree, so they did set, although it was on the softer & creamier side than the usual no bake cheesecake.
Anyway, my family loved it. My mom said it tasted like ice cream. My fav part was the spicy base, which I’ll definitely use it on a regular no bake cheesecake.
Thanks for the recipe!
Thank you Sally, for another 5-star recipe!!! So good!
I loved getting to make this! I even went over the top making Sally’s homemade whipped cream and salted caramel sauce which were the perfect garnishes to this mousse like textured dessert. My only concern was not being able to get a clean cut slice because the crust stuck to the bottom of the pan. I think I would use a circle of parchment paper next time to be able to lift the pie cleanly off the pan before slicing into it. Overall, I highly recommend this pie for Thanksgiving or any holiday occasion!
So delicious! I used gluten free gingersnaps for the crust, and they worked beautifully!
This was a hit. Made at school in our home ec. kitchen with a student. When we sliced it up to share, the staff raved. Other than wishing we had a food processor to break down the ginger snaps (which added a really nice layer of flavor over graham crackers), the recipe was easy to follow. Put this one in your “must try” list. I’m planning to make it again soon. Yum!
Another absolutely delicious recipe!! I would recommend sticking to the longer cooling time (12 hours at least) just to make sure it’s perfectly set. So light, airy, and deliciously pumpkiny!
Hi Sally! This was absolutely amazing and the whole family enjoyed it!
Quick question: How many calories does this have? Thank you!
Hi Sarah, We are unsure of the nutritional info of this recipe, but there are many great online calculators like this one: https://recipes.sparkpeople.com/recipe-calculator.asp
This was SO YUMMY! Just as good or even better then pumpkin pie! 10/10 recommend. So fluffy and creamy and then that ginger snap crust. =D This will be something we make regularly every year for the holidays. Thanks for the great recipe!
Super yummy!!! I love the mousse texture and the ginger snap crust was the perfect spicy accompaniment to the creamy sweet filling. I made it mid-morning and had it after dinner the next day; I think it was completely set, but maybe a little softer in the middle? When I cut it, the tip of the slice kind of wobbled and was difficult to keep it attached. It could just be that I didn’t cut deep enough or use a proper lifter! Regardless, I still loved it!
I must have really whipped my heavy cream well and folded it just right because my filling went almost to the top of the 3″ deep pan and way above the crust level! This was my first time making a cookie crumb crust, but practice makes perfect.. I know for next time.
I’ve never tried ‘pumpkin spice’ before, but my friends said the recipe nailed the flavour exactly, and it was a great mood lifter- thanks!
I wouldn’t call this recipe a cheesecake, more like a mousse in a crust. That being said, it was very simple and tasty. I had a lot of left over filing and will be serving it parfait style with left over crushed up gingersnap cookies.
Hi Mae! This recipe definitely has more of a fluffy, mousse-like consistency than traditional cheesecake (check out my Pumpkin Swirl Cheesecake if you’re interested). I’m glad you still enjoyed it! Thanks so much for participating.
This was my first ever no-bake cheesecake. I was a bit nervous and wasn’t sure which side of the bottom of the pan was up. (I put the lip side up and had a hard time cutting the crust so maybe next time I should have the lip down?!) It was super yummy! My daughter who is in school full-time studying to become a veterinarian popped her head out long enough to have a piece and loved it! I will definitely make this again – maybe with a little less nervousness next time!
Hi Linda! I’m so happy to hear your first no-bake cheesecake was a success. The cheesecake will slice much easier with the lip side down – an easy fix for next time 🙂 Thank you for participating in this month’s challenge!
Easy to make, very tasty and I’m sure we’ll be making it again. The kids especially loved the cookie crust
This was delicious! I don’t typically like pumpkin pie or flavored cheesecake, but I made this because my husband does. I liked it so much I ate two slices! Yum!
It was so light and delicious. It was like a pumpkin spice shake in cheesecake corn. Yum!
Very creamy consistency. Also good as a mousse with cookie crumbles on top and additional whipped cream layered in pretty single serve glass cups – preferably with a pedestal base!
The texture of this cheesecake is awesome. I often find cheesecake to be a bit dense and this was perfectly light. My crust was definitely too crumbly (I used graham crackers). Perhaps I need to press it more? Next time I make this I’ll probably blind bake the crust so it sets up a bit more. Taking that from Sally’s No-Bake Mini Key Lime pies. Overall, another lovely recipe from Sally.
I haven’t made this yet but it roscrumptious. Can you use a 4 in. springform pan?
Hi Rena, We haven’t tested that size but you can try cutting the recipe in half and if you still have too much you can make a few cupcake size servings (see post above for mini directions) to enjoy or freeze for later.
Absolutely delicious cheesecake. I’ve tried many pumpkin recipes this fall and this is definitely one of the best, if not the best! Will make it over and over again. I used homemade pumpkin puree due to living in Sweden and I have no way of getting canned pumpkin but my cheesecake set perfectly so thank you for a delicious recipe once again!
This was a great no-bake recipe. I think the gingersnap crust was my favorite as this is not something I have used before. I also made the salted caramel to go on top and it was awesome as well.
This was the perfect fall treat! I shared it with my grandparents and they loved it! I can’t wait to make it again.
The recipe was very simple to make. You must love pumpkin because obviously there is a strong taste to it. I LOVE no bake cheesecake. However, I think for pumpkin I like Sally’s baked pumpkin cheesecake recipe instead which I tried last year. I decided to use an Oreo crust instead of gingersnap which turned out great. Overall, it was a good tasting cheesecake. 🙂
Super easy to make! The filling was definitely light and airy, like a cloud. It went perfectly with the gingersnap crust. I made the mini version, the perfect serving size. I’m freezing the rest to enjoy over the cold months.