

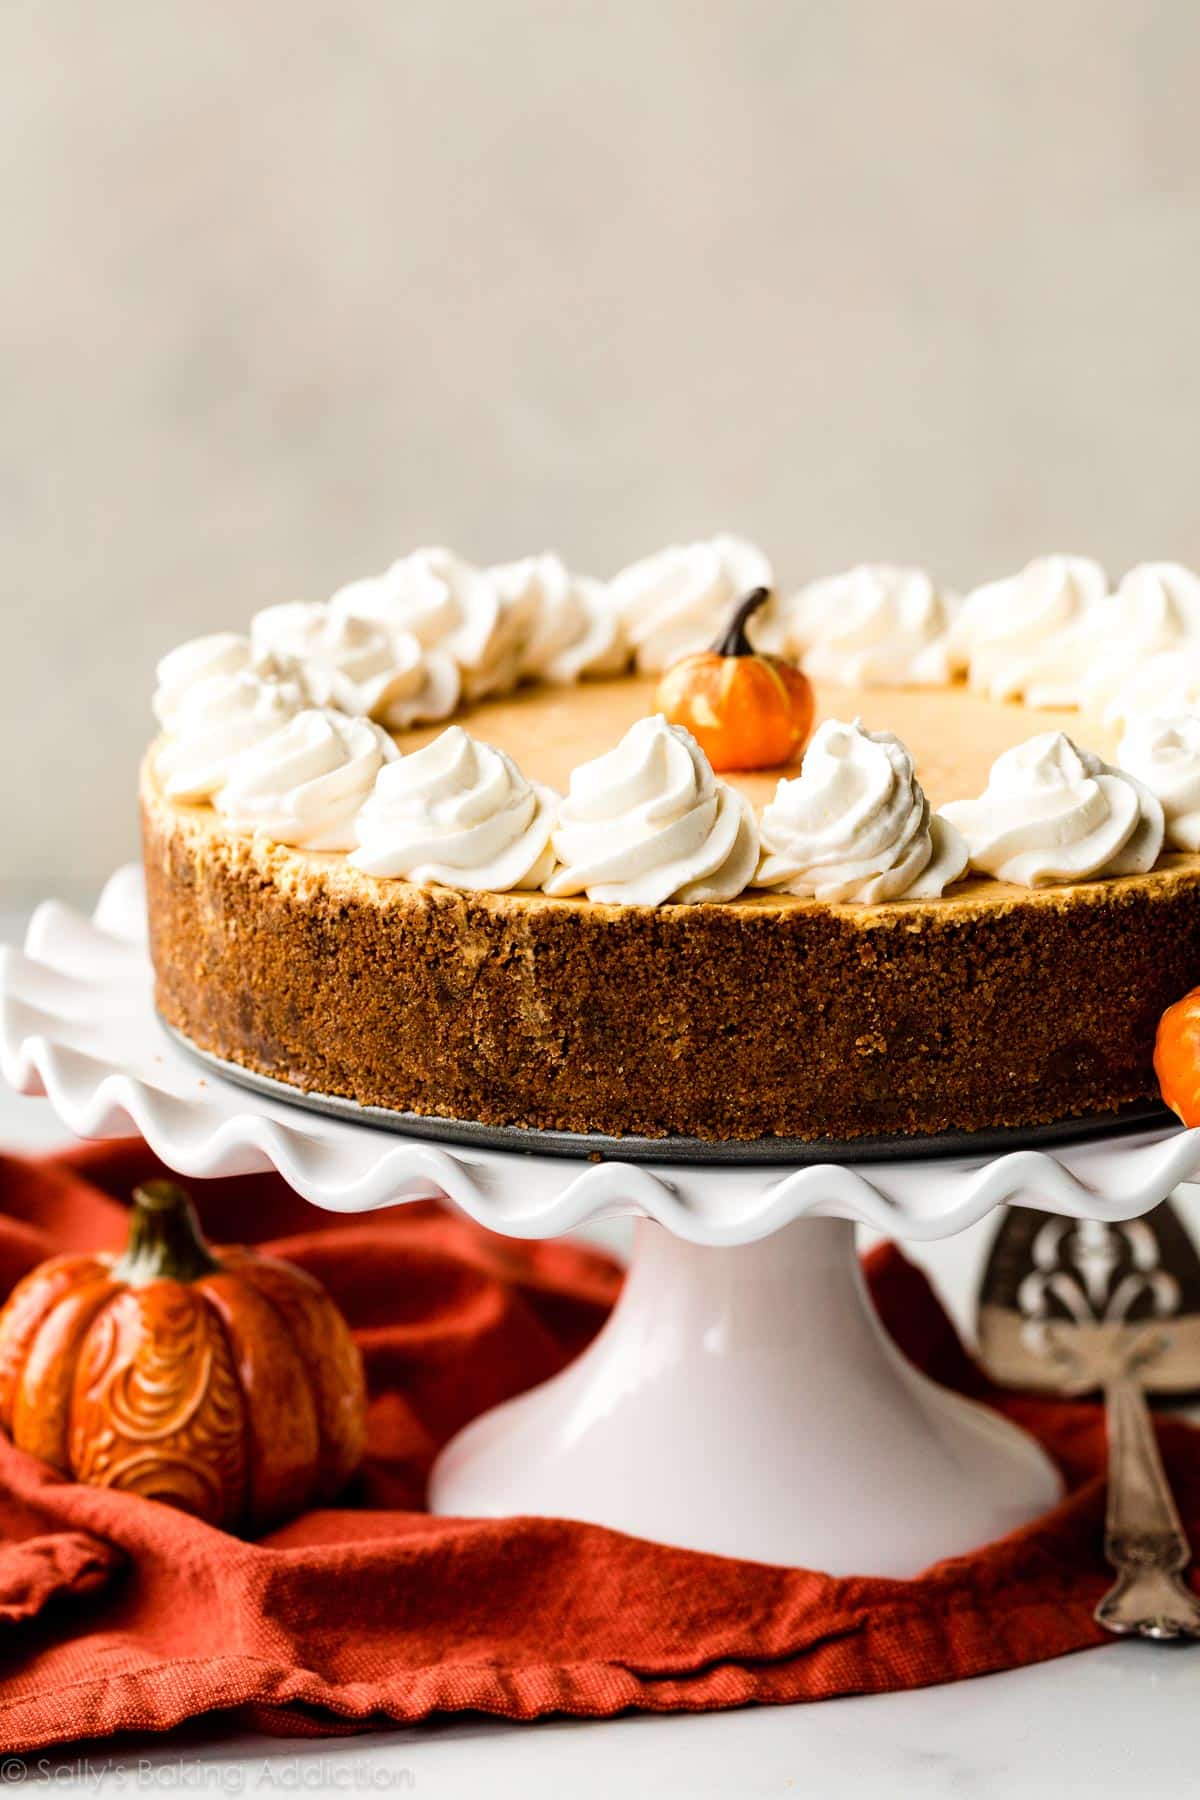
Ever since I published plain no-bake cheesecake, I’ve had requests for this flavor! This no-bake pumpkin cheesecake is smooth and creamy with extra spiced flavor. It sits in a crunchy gingersnap cookie crust that provides the best textural contrast to the fluffy mousse-like filling. There’s absolutely no oven required—the dessert sets up in the refrigerator, making it a convenient make-ahead option this fall season.
There aren’t many seasonal desserts that top pumpkin pie. A dessert tradition this time of year, pumpkin pie features a smooth spiced filling sitting in a wonderfully flaky pie crust. It’s hard to compete with this kind of perfection.
But I found something that comes shockingly close. Let me introduce you to no-bake pumpkin cheesecake. A dessert recipe that skips the oven, says goodbye to pie crust, and waves toodaloo to any sort of cheesecake water bath. It tastes like cheesecake mousse with the deeply spiced flavor of pumpkin pie. This is a great place to use homemade pumpkin pie spice!
Sitting in a flavorful gingersnap cookie crust, this ultra creamy dessert is unforgettable. If you don’t fall in love, I’ll happily take your leftovers.
Why You’ll Love No-Bake Pumpkin Cheesecake:
- Texture: crunchy crust, light & creamy filling
- Flavor: cinnamon gingersnap crust and pumpkin spiced filling
- Ease: no water bath, no baking, no cheesecake cracks on top, no worries
- Convenience: save precious oven space for other dishes
- Make-ahead: filling sets and flavor tastes better
One reader, Whitney, commented: “Simple to whip up and oh-so delicious! I loved this as an ‘update’ to a traditional pumpkin pie at Thanksgiving. The filling was light and airy, and the gingersnap crust packed a spicy punch! I will definitely add this to my Thanksgiving Day dessert menu for years to come! ★★★★★”

No-Bake Pumpkin Cheesecake Video Tutorial
Gingersnap Cookie Crust
With more flavor and crunch than a graham cracker crust, a gingersnap cookie crust isn’t just there in the background. Instead, it’s a whole other layer to savor. You need gingersnap cookie crumbs, sugar, and melted butter. To make this crust a cut above the rest, I suggest adding cinnamon and ginger too. This is exactly how I prepare the crust for my (baked) pumpkin swirl cheesecake, though you need a little more of each ingredient for this recipe.
3 Success Tips:
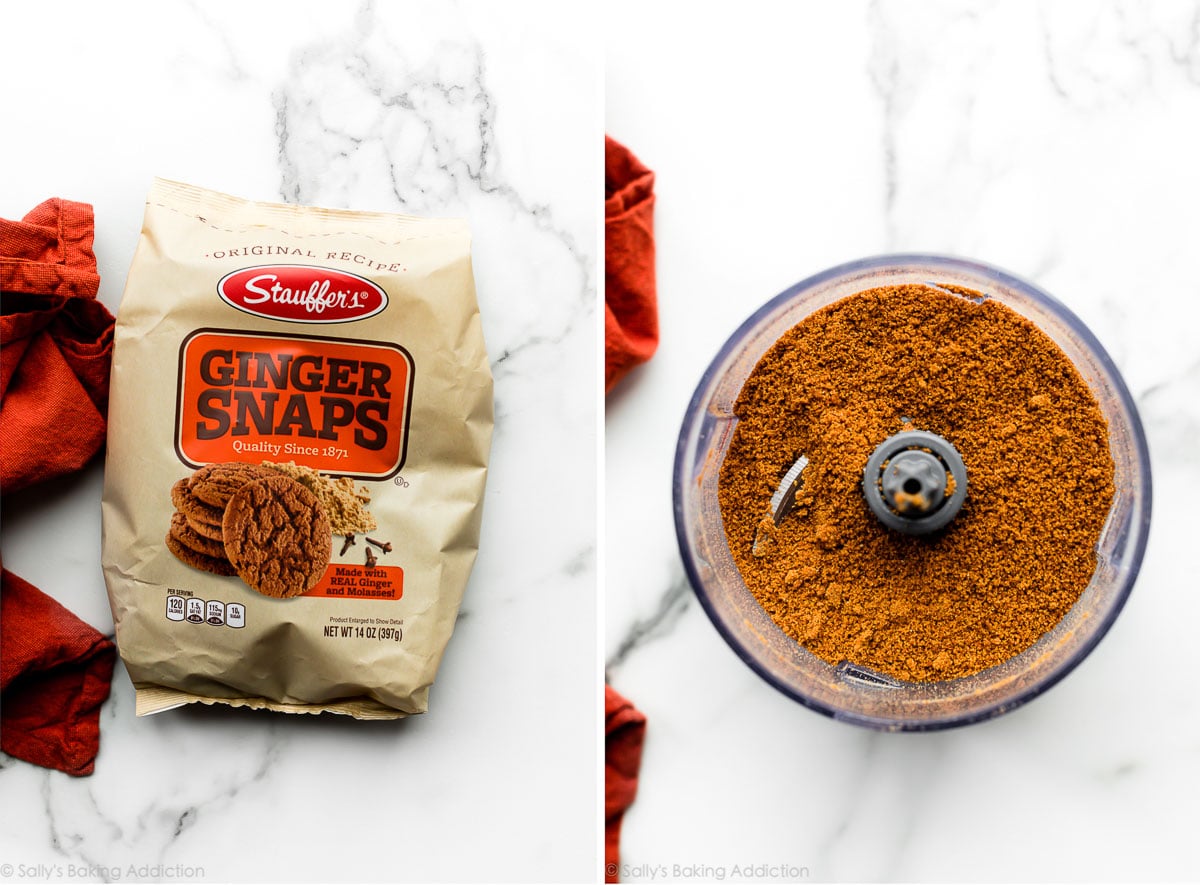
- Type of cookie: The type of gingersnap cookie you use will make or break the recipe. (Literally.) I’ve never had luck using homemade gingersnaps. Pick up a box/bag of store-bought gingersnaps, such as Stauffer’s brand. You can find them in the cookie aisle of most grocery stores. You want extra crunchy, hard, and somewhat dry cookies. If they’re too moist, your crust won’t set up.
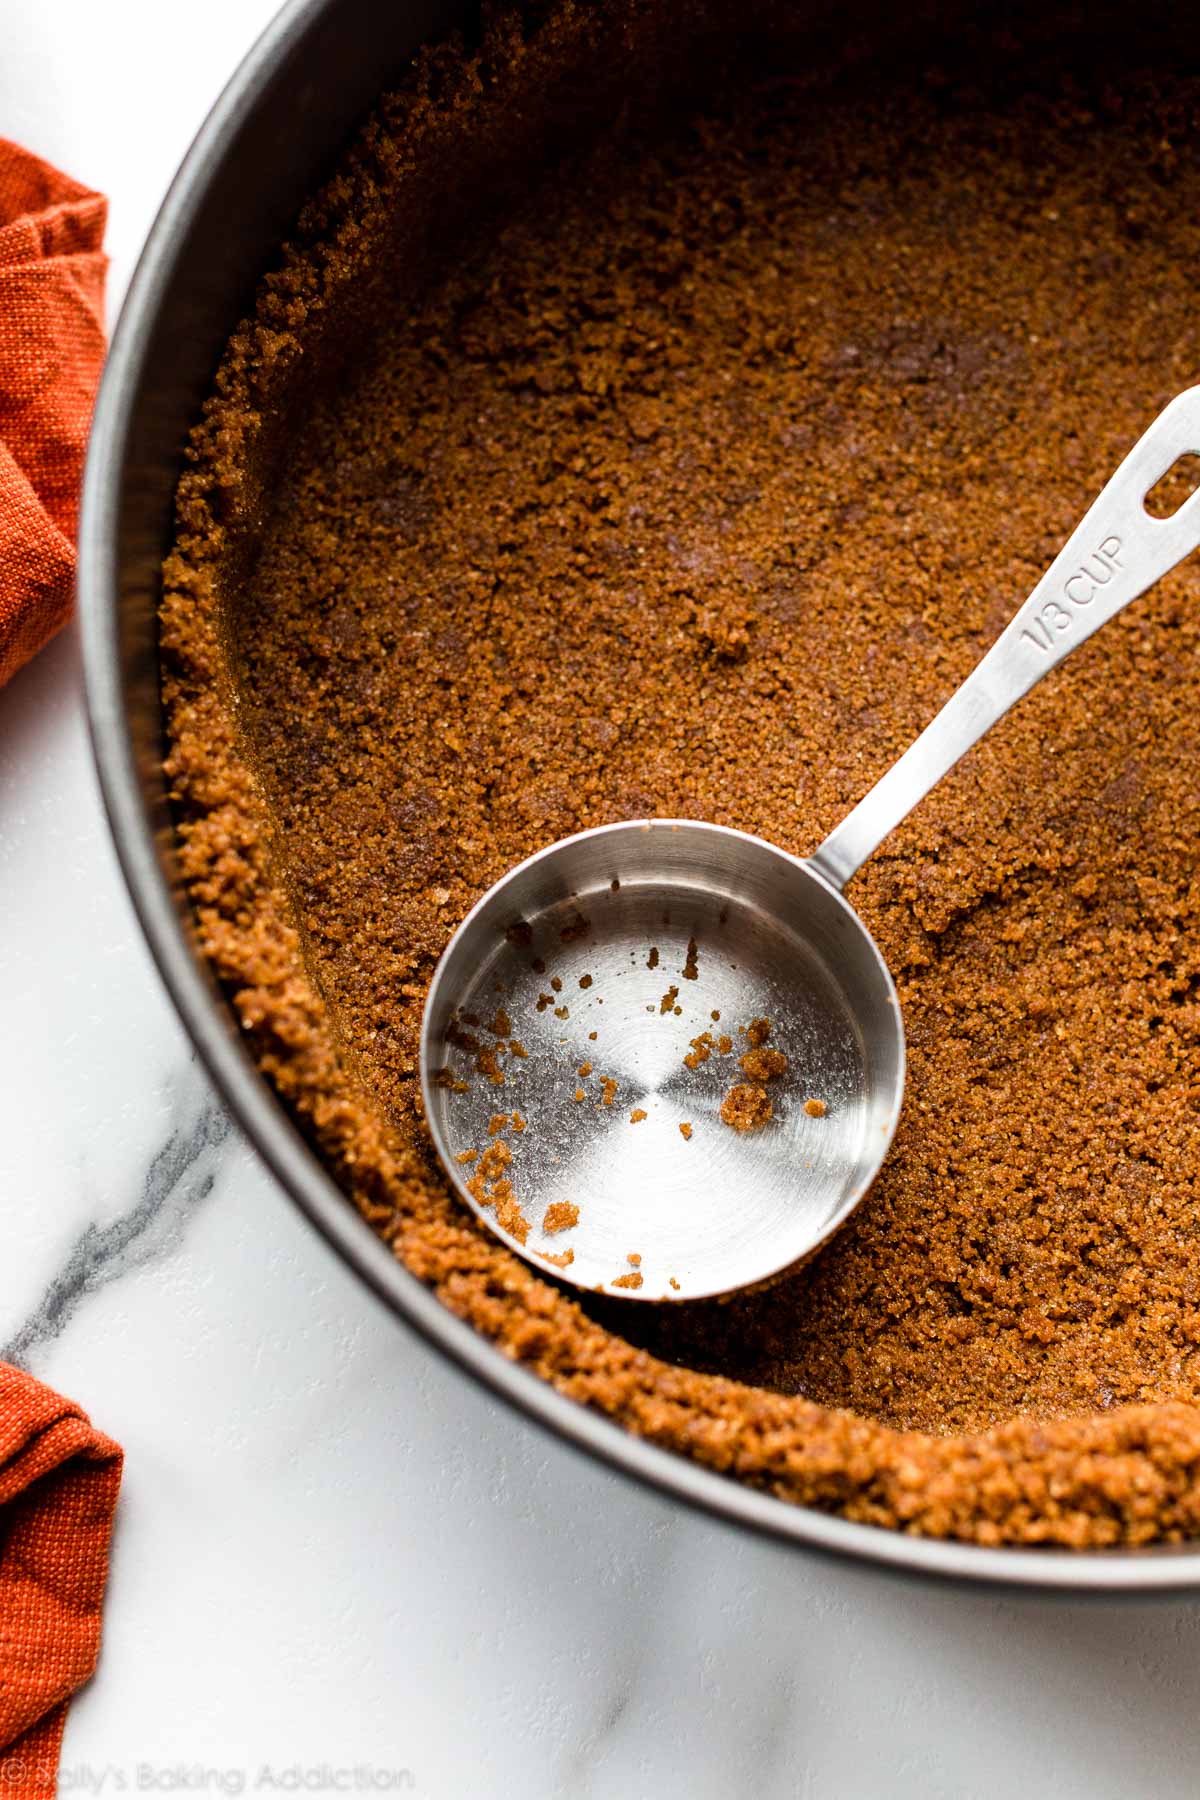
- Pack it in: The tighter you pack in this crust, the less likely it will fall apart when cutting the cheesecake. I recommend using the bottom of a measuring cup to pack it into the bottom and up the sides of your springform pan.
- Briefly freeze to set the crust: After you pack in the crust, place it in the freezer while you prepare the cheesecake filling. Remember, we aren’t baking this crust—the freezer gives the crust a chance to set before you add the filling on top.
Don’t want to use gingersnap cookies? Use the graham cracker crust from my plain no-bake cheesecake.
Overview: How to Make No-Bake Pumpkin Cheesecake Filling
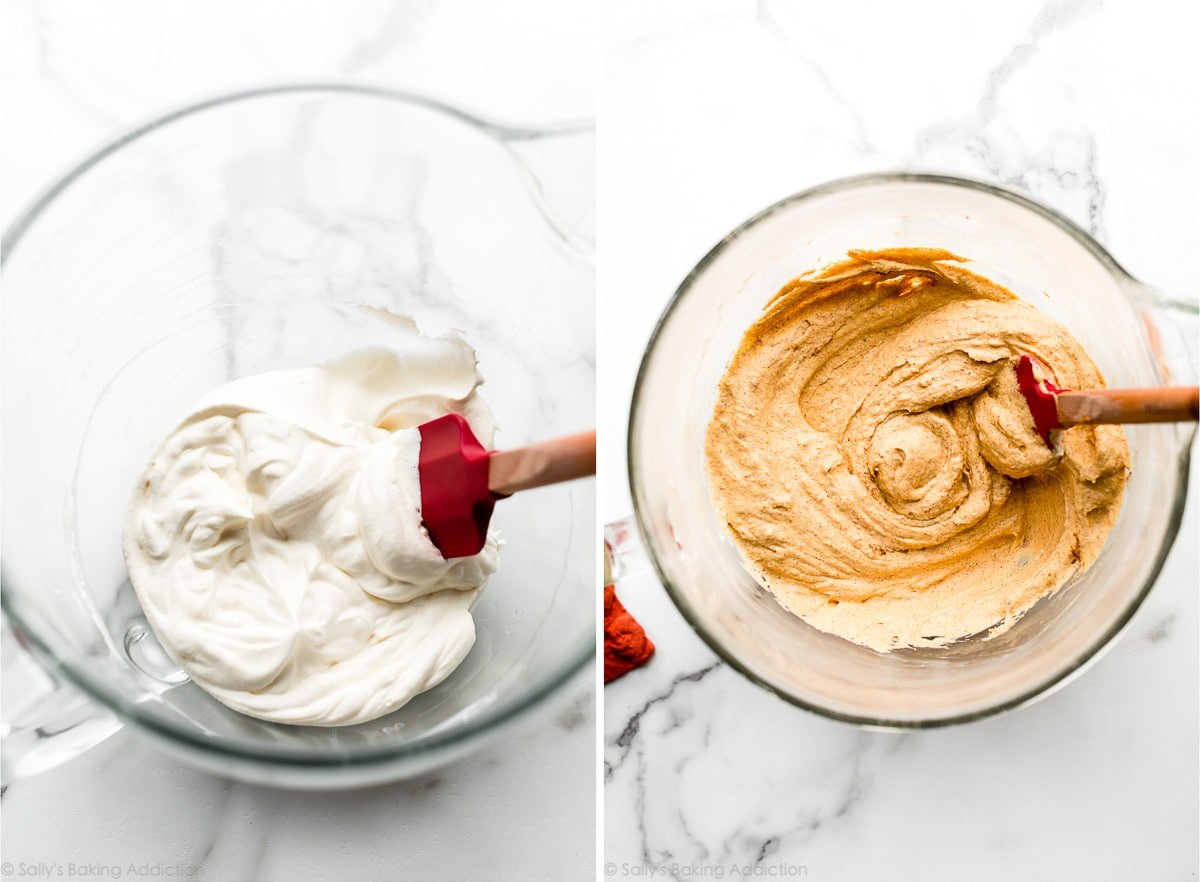
- Whip heavy cream: In the 1st bowl, beat heavy cream/heavy whipping cream into stiff peaks. This is the most important step in this entire recipe and *the secret* to a thick no-bake cheesecake filling. It has proved successful in strawberry cream cheese pie and blueberry cream cheese pie also.
- Mix the other filling ingredients together: In a 2nd bowl, you need cream cheese, canned pumpkin, confectioners’ sugar, brown sugar, vanilla, spices, and salt. In my recipe testing, I used my plain no-bake cheesecake as the starting point. Pumpkin thins the mixture out, so I had to play with the amount of cream cheese and confectioners’ sugar. Thrilled with the developed recipe below—spiced, thickened, and perfectly pumpkin-y.
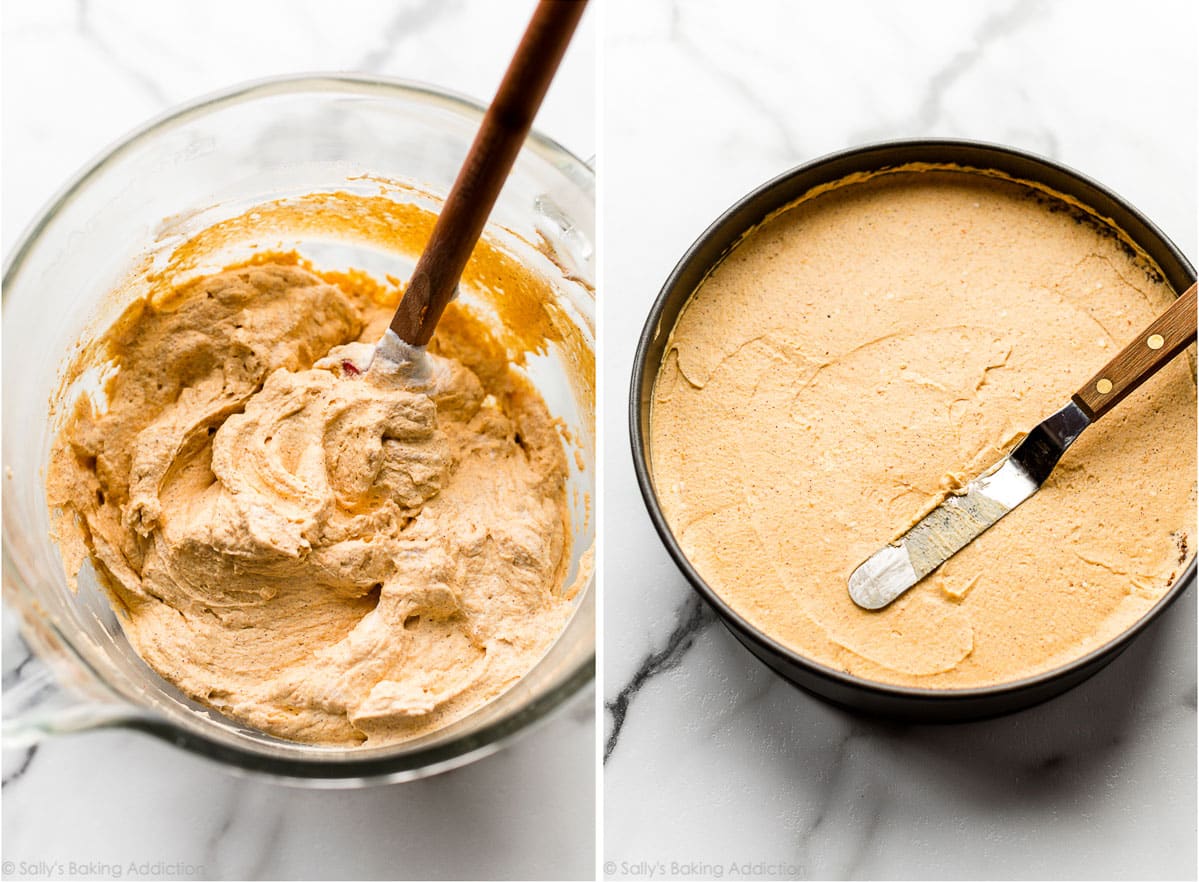
- Fold in the whipped cream: Remember our whipped cream? Gently fold it into the pumpkin cream cheese mixture. Avoid over-mixing because we don’t want to deflate anything.
- Spread into crust: Smooth the filling into the crust. I like using a large or small offset spatula to make the job easier.
- Refrigerate: Instead of the oven, use the refrigerator to set this cheesecake. Cover and refrigerate the prepared cheesecake for at least 8 hours or up to 2 days.
Pictured on the left below: the whipped cream. On the right below: the pumpkin cream cheese mixture.
Pictured on the left below: the whipped cream and pumpkin cream cheese mixture combined. On the right below: spread into our gingersnap cookie crust.
With No Baking, How Does This Cheesecake Hold Its Shape?
- Make sure you pack the crust in tightly.
- As I mention above, the most important ingredient is the whipped heavy cream. Fold the whipped cream into the pumpkin cheesecake filling gently so you don’t deflate all the air. The air creates a deliciously fluffy mousse-like consistency and, more importantly, helps the filling set in the refrigerator.
- For a clean and sturdy slices, refrigerate it for at least 8 hours, but 12+ hours is ideal. Not only does the time in the refrigerator solidify the filling, it also gives the flavors a chance to mix and mingle. Flavor is incredible the next day.
Skip these 3 steps and you’ll be eating pumpkin soup for dessert. Avoid that mess!

Smaller Serving Alternatives
- For 24 cupcake size no-bake pumpkin cheesecakes, use the crust and filling ingredients below and the instructions for my mini no-bake cheesecakes. Feel free to halve the recipe if you don’t need quite as many.
- You can use this recipe to make 6 8-ounce or 10 6-ounce cheesecake jars. Halve the crust recipe below because we don’t need as much crust for the jar dessert. Use the full recipe for the filling. Follow the instructions for my no-bake cheesecake jars. Top with salted caramel, chocolate ganache, heath bar toffee bits, more gingersnap cookie crumbs, or homemade whipped cream.
And if you love both pumpkin pie and cheesecake, you’ll want to try my pumpkin cheesecake pie next.
See Your No-Bake Pumpkin Cheesecakes
So many of you have tried this recipe. Feel free to email or share your recipe photos on social media.
Print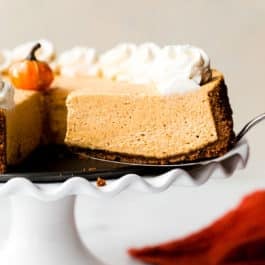
No Bake Pumpkin Cheesecake
- Prep Time: 20 minutes
- Cook Time: 0 minutes
- Total Time: 8 hours, 20 minutes
- Yield: serves 10-12
- Category: Dessert
- Method: Whipping
- Cuisine: American
Description
This fluffy no-bake pumpkin cheesecake sits in a crunchy gingersnap crust. The most important steps are whipping the heavy cream into stiff peaks before folding into the filling and refrigerating the cheesecake long enough so it can set.
Ingredients
Gingersnap Cookie Crust
- 2 cups (200g) gingersnap cookie crumbs*
- 1/4 teaspoon each: ground ginger and ground cinnamon
- 6 Tablespoons (85g) unsalted butter, melted
- 1/4 cup (50g) granulated sugar or brown sugar (packed)
Cheesecake
- 1 cup (240ml) cold heavy cream or heavy whipping cream
- 16 ounces (452g) full-fat brick cream cheese, softened to room temperature
- 1 cup (226g) pumpkin puree*
- 3/4 cup (90g) confectioners’ sugar
- 1/4 cup (50g) packed light or dark brown sugar
- 1 teaspoon pure vanilla extract
- 2 teaspoons store-bought or homemade pumpkin pie spice*
- 1/2 teaspoon ground cinnamon
- 1/8 teaspoon salt
Optional Toppings
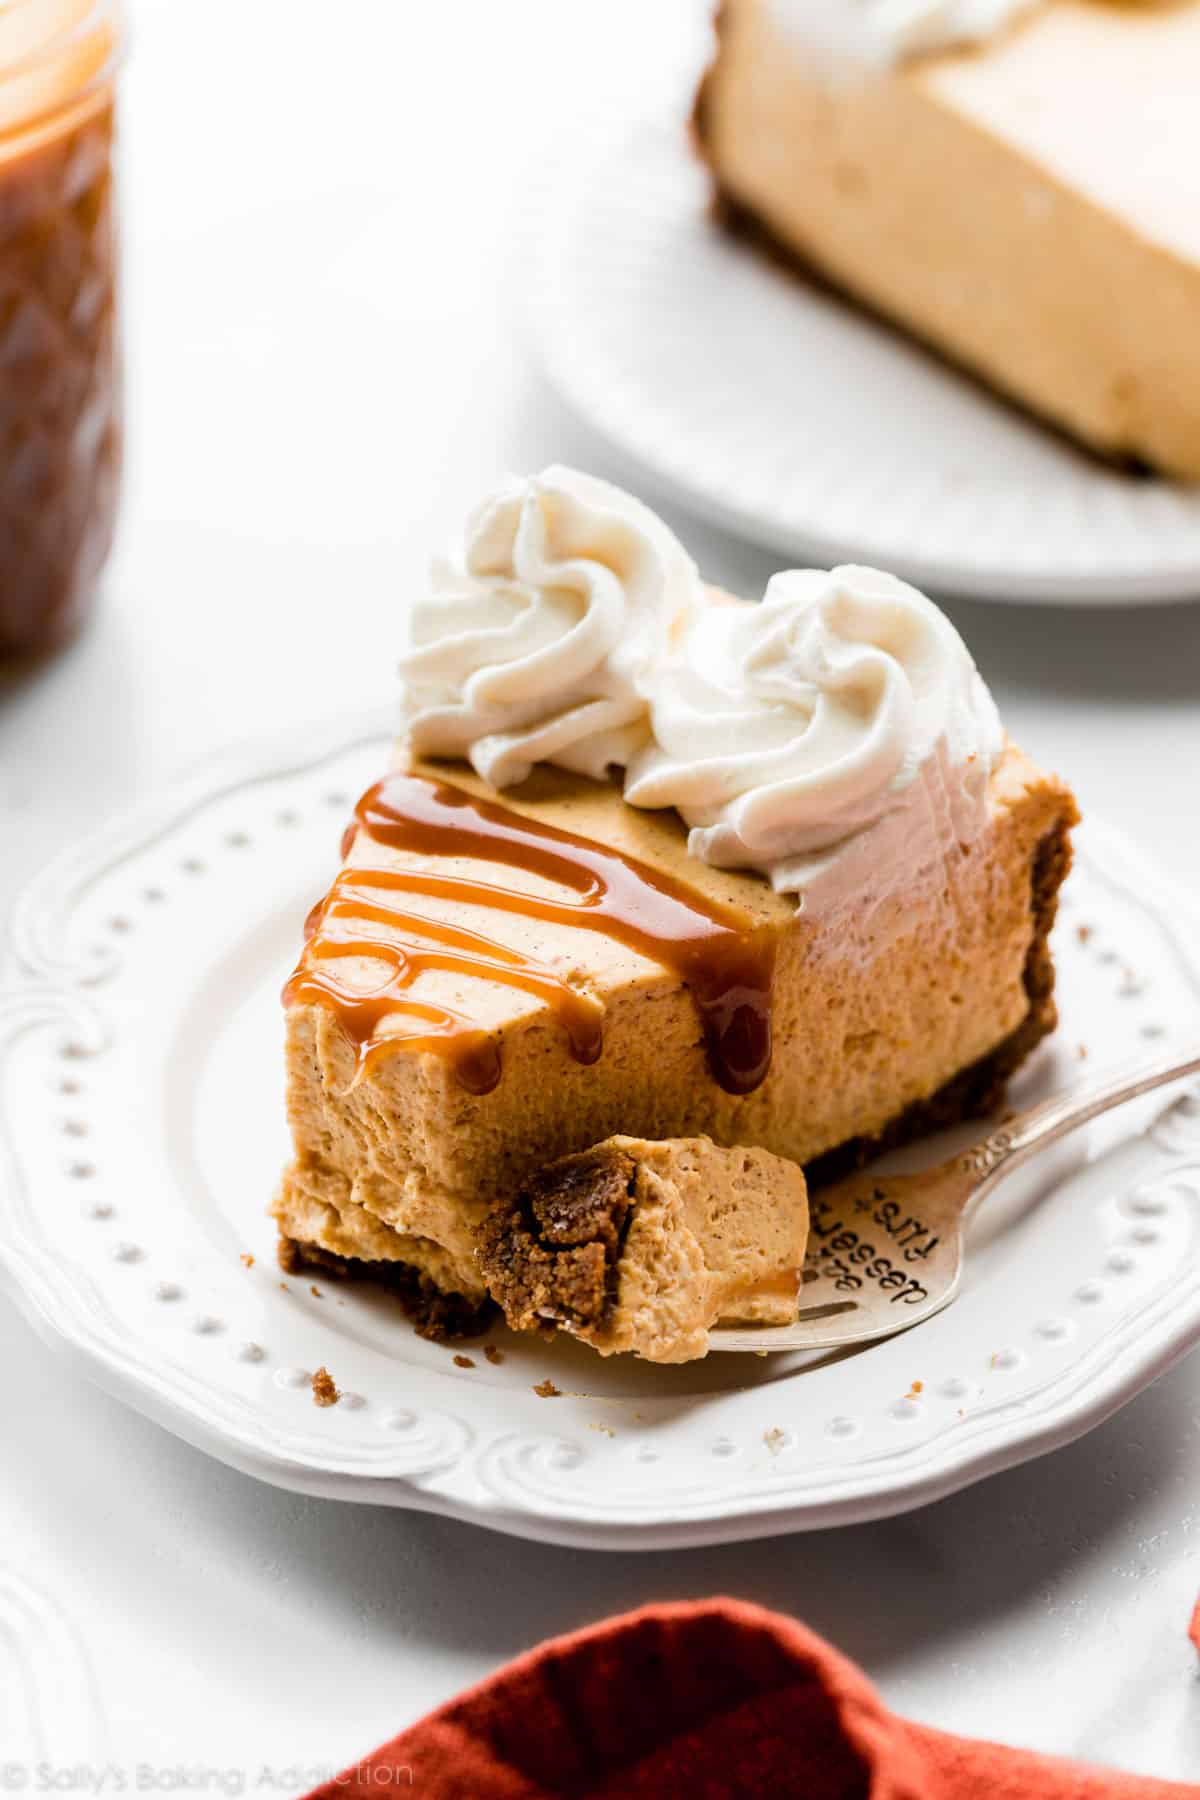
- Whipped Cream and/or Salted Caramel
Instructions
- Make the crust: Stir the gingersnap crust ingredients together. Pour into a 9-inch or 10-inch springform pan and pack in very tightly. The tighter it’s packed, the less likely it will fall apart when cutting the cheesecake. I recommend using the bottom of a measuring cup to pack it into the bottom and up the sides. You can watch me do this in the video above. Freeze for 10-20 minutes as you prepare the filling.
- Make the filling: Using a hand mixer or a stand mixer fitted with a whisk attachment, whip the cold heavy cream into stiff peaks on medium-high speed, about 4 minutes. Set aside.
- Using a hand mixer or a stand mixer fitted with a whisk or paddle attachment, beat the cream cheese on medium speed until perfectly smooth and creamy. Scrape down the sides and up the bottom of the bowl with a silicone spatula as needed. Add the pumpkin, confectioners’ sugar, and brown sugar and beat on medium-high speed until combined. Scrape down the sides and up the bottom of the bowl as needed to help combine. Add the vanilla extract, pumpkin pie spice, cinnamon, and salt and beat until combined, creamy, and smooth. Make sure there are no large lumps of cream cheese. If there are lumps, keep beating until smooth.
- Using your mixer on low speed or a silicone spatula, fold the whipped cream into the cheesecake filling until combined. This takes several turns of your silicone spatula. Combine slowly as you don’t want to deflate all the air in the whipped cream.
- Remove crust from the freezer and spread filling into crust. Use an offset spatula to smooth down the top.
- Cover tightly with plastic wrap or aluminum foil and refrigerate for at least 8 hours and up to 2 days. For best results, at least 12 hours is best. I chill mine overnight. The longer refrigerated, the nicer the no-bake cheesecake will set up. I don’t recommend using the freezer to set this cheesecake filling.
- Use a knife to loosen the chilled cheesecake from the rim of the springform pan, then remove the rim. Using a clean sharp knife, cut into slices for serving. For neat slices, wipe the knife clean between each slice.
- Serve cheesecake with optional toppings. I used Ateco 849 piping tip for the whipped cream in the pictured cheesecake. Cover and store leftover cheesecake in the refrigerator for up to 5 days.
Notes
- Make Ahead Instructions: This cheesecake can be made 1-2 days in advance. It can be refrigerated in step 5 for up to 2 days before serving. You can also make the crust 1-2 days ahead of time. Freeze for up to 1 hour in step 1, then cover tightly and refrigerate for 1-2 days before adding the filling. Another way to make this cheesecake ahead of time is to freeze it. After it sets in the refrigerator (step 6), wrap the whole pan (you can remove the sides if desired) in 1 layer of plastic wrap, then 1 layer of aluminum foil. No-bake cheesecake freezes wonderfully for up to 3 months. Thaw in the refrigerator, then slice and serve.
- Special Tools (affiliate links): Glass Mixing Bowls | 9-inch Springform Pan or 10-inch Springform Pan | Electric Mixer (Handheld or Stand) | Silicone Spatula | Small Offset Spatula | Piping Bag (Reusable or Disposable) | Ateco 849 Piping Tip
- Pan: To make slicing easy and neat, use a 9-inch or 10-inch springform pan. If you don’t have one, a 9 inch deep dish pie dish (at least 2 inches deep) works. Chill the cheesecake for at least 12 hours to help guarantee the cheesecake slices neatly.
- Gingersnap Cookies: Store-bought gingersnap cookies are ideal as they are the most dry. The ONLY brand that I’ve had issues with is the Nabisco gingersnap cookies. They’re delicious on their own, but they’re too moist for a gingersnap cookie crust. I love Stauffer’s brand. You need about 30. Alternatively, you can use the graham cracker crust from my regular no-bake cheesecake instead. Feel free to add or reduce the amount of cinnamon and ginger based on your taste preference.
- Pumpkin: I strongly recommend canned pumpkin, not fresh (homemade) pumpkin puree in this recipe. I like to use Libby’s brand. Fresh pumpkin puree will prevent the cheesecake from properly setting. Do not use pumpkin pie filling. If you can’t find canned pumpkin, use 1 cup of sweet potato puree. Boil 2 medium sweet potatoes until soft, then peel, slice, and puree/mash them with a blender or mixer until smooth. Measure and use 1 cup. Make sure the puree is room temperature or cold before using.
- Pumpkin Pie Spice: You can find pumpkin pie spice in the baking aisle of most grocery stores or make your own homemade pumpkin pie spice. If you don’t have either and want to use individual spices, use 1/2 teaspoon ground ginger, 1/2 teaspoon ground nutmeg, 1/2 teaspoon ground allspice, and 1/4 teaspoon ground cloves. Increase cinnamon to 3/4 teaspoon.
- Can I Make Mini No-Bake Cheesecakes? Yes, use this crust and filling recipe and follow the instructions in my mini no-bake cheesecakes, which are made in a standard muffin pan.


Reader Comments and Reviews
This was an easy recipe to follow and my cheesecake was incredible! The cheesecake had the perfect consistency and the ginger crumb shell was delectable!
I made this tonight for our anniversary dinner. It was a hit! I made the salted caramel sauce with it and my son kept asking for more sauce on the side so he could eat it with a spoon! The cheesecake turned out great and I was really impressed with how well the crust held together.
I like the recipe that has cheesecake in it.
The crust was fantastic! The flavors were delicious. I do prefer the texture of regular cheesecake.
Delicious cheesecake!
Gingersnaps aren’t available in my area so I substituted cinnamon cookies. Also, I used homemade canned pumpkin puree, so the cheesecake didn’t set up as well, but it still tasted amazing!
This is a wonderfully spiced pumpkin cheesecake that takes so little time to make. I tried it with homemade gluten-free gingersnap crumbs and it had enough flavor and spice to stand on it’s own without any caramel or whipped topping. It was quickly devoured by my family who quickly requested another. Thanks for a great recipe!
Such a great recipe! So easy to do, and the ingredients are easy to find as well. I used gingersnap cookies from marks and spencer, they worked well. The pumpkin was a welcome addition, sneaking in healthy stuff into this dessert is the perfect excuse to enjoy it with my child. My husband, who isnt a fan of cinnamon (oops!) also surprisingly enjoyed this too! I topped mine with your fresh whipped cream and some salted caramel sauce. It is divine! Thanks again!
Hi, wondering if I could make this in pie tins? and how many pies for this recipe? Thanks.
Hi Bel, to make slicing easy and neat, use a springform pan. If you don’t have one, a 9 inch deep dish pie dish (at least 2 inches deep) works. Chill the cheesecake for at least 12 hours to help guarantee the cheesecake slices neatly. Yields 1 pie.
This recipe was so easy to make. The pumpkin flavor does not overpower the cheesecake, it’s the perfect blend.
This was a big hit at our house! My daughter loved the gingersnap cookie crust. I loved that it was easy! The hardest part was waiting for it to set up in the fridge.
This one was so much better than I could’ve even imagined! My husband even told me he preferred it to the traditional cheesecake. Made mine with the Biscoff cookies for the crust and can’t imagine it any other way. It was so good, and I would know as I literally ate over half of the thing by myself. Dangerous but oh so good!
Super simple to make; didn’t find it to hold together very well, and tastes a little too cream-cheesy to me. Love the gingerbread base!
Loved the gingersnap cookie crust! Couldn’t find the cookies at the grocery store, but we found them at World Market. The filling was nice and creamy and perfectly pumpkin. The flavors were really coming together and amazing by day 2! There was no day 3…
Forgot to rate this recipe:
This is soo good, I felt as if I were eating autumn itself. Sadly, I did not have time to garnish it with pumpkin spice whipped cream and caramel before it was devoured. My brother said, “This is the best cheesecake I have ever tasted!”
While I am only just-turned eleven, this cake was not challenging. Though I could not find crunchy, hard gingersnaps, using normal biscuits with extra spice proved to be flavorsome nonetheless.
This cheesecake is delectable, smooth and creamy even with no garnishes. I served it with cream puffs filled with cinnamon whipped cream.
Thank you Sally for this finger-licking treat.
I really liked this cheesecake. I made individual desserts in 4 ounce jam jars and served with a swirl of whip cream and a caramel drizzle. A half recipe easily filled 7 jars. This makes it a very transportable dessert. I remove the lids at the party and then pipe the whip cream and add the caramel. To me they look more attractive and appetizing than a whole cheesecake does once the slicing begins.
First time making cheesecake and this was delicious! I followed the measurements exactly. The only problem I had (my fault) is that I didn’t soften the cream cheese/blend it enough which ended up with white spots of it in the end. But still very good, the whole family loved it.
This was an easy recipe that kids could definitely help make. It’s light in texture, not overly spiced, and not too filling making it a good dessert to follow a heavy meal.
This cheesecake was very yummy. I made this with my teacher, Mrs. Fritz (Stacy Fritz) and it was fun making it with her and taking a great picture using my photography skills! I hope our cheesecake makes your mouth water!
I made these into mini cheesecakes which tuned out to be the perfect serving size. It really does taste like a pumpkin pie mousse and the ginger snap crust paired awesome with the cheesecake. I topped each with a bit of whipped cream so they looked pretty darn cute. My kids favorite part of it was the crust:)
I would make this again for a family get together.
Thank you Sally for this new baking challenge, your recipes always bring me some new baking joy each month!
I made this for the November Challenge and it was delicious and simple to make. The crust was perfect, a bit spicy from the cookies. I may just put the filling in a glass and sprinkle the cookie crumbs on top for Thanksgiving.
My 14 year old daughter and I made this cheesecake together. We decided to use the graham cracker crust option this time around. Next time we’ll probably try the ginger snap version. We chilled the cheesecake for about 9 hours, and would definitely chill for longer next time as it was still somewhat soft when we cut into it. We thought the cheesecake had an excellent flavor and the perfect amount of spice!
Hi Sally,
While the crust was delicious I really struggled with it sticking to the pan as I tried to serve the cheesecake so for most of the pieces I ended up having to just scrape off the crust and crumble it over the top.
Any idea how I could prevent this from happening?
Hi Katie, thank you so much for trying this recipe. Using a very sharp knife to slice and a thin pie server helps. Firmly slice into the crust and dig the server under the bottom crust as best you can. You could also try spraying the springform pan with nonstick spray– that should help as well.
I made this the night before and it was really nice and firm by evening the next day. My family absolutely loved it and said I needed to make it again soon. “For Christmas?” I asked. “No. Now.” My sister replied. I’ll definitely be making this again!
This was so good!!! Delicious creamy filling, and the spicy crust! I made salted caramel to go on top, and it was divine!
Delicious! Love the gingersnap crust and pumpkin filling! 2 year olds especially like the “quality check” while mixing this delicious no bake pumpkin cheesecake.
Absolutely love this recipe!! The flavor in the pumpkin cheesecake is so good! Tastes like you baked it all day. Such a good quick recipe. I made mine befor going to bed so it would set over night. Came out delicious! A good go to recipe to impress anyone with.
This No Bake Pumpkin Cheesecake is absolutely amazing! It’s not too sweet and rich with flavor. The salted caramel sauce is a wonderful addition. The texture is creamy and smooth with a little bit of crunch from the ginger cookie crust. Every recipe I make from Sally turns out perfectly every time. Sally, you have really rekindled my love of baking!
This was sooooo gooooood! One of the best Sally’s recipes I’ve tried! Absolutely loved the texture. It makes it a lot more light than regular cheesecake, which makes it great for after dinner consumption. Definitely making again!
This cheesecake was so delicious and fun to make!! My family really enjoyed it. It was especially good with the salted caramel on top. I just have to say that if you follow Sally’s detailed instructions you can’t go wrong. I’ve been making her recipes for a couple years now and I’ve come to realize that if you follow everything she says it will come out perfectly every time! Thank you, Sally, for creating exceptional recipes and for taking the time to add all the details!