These red velvet cake-inspired chocolate chip cookies marry the velvet-soft texture and light cocoa undertones from the popular cake flavor with the gooey goodness and crisp edges of classic chocolate chip cookies. Combining brown sugar, cocoa powder, vanilla, and buttermilk, these aren’t just cookies tinted red—they truly capture the flavor and appearance of both iconic desserts.
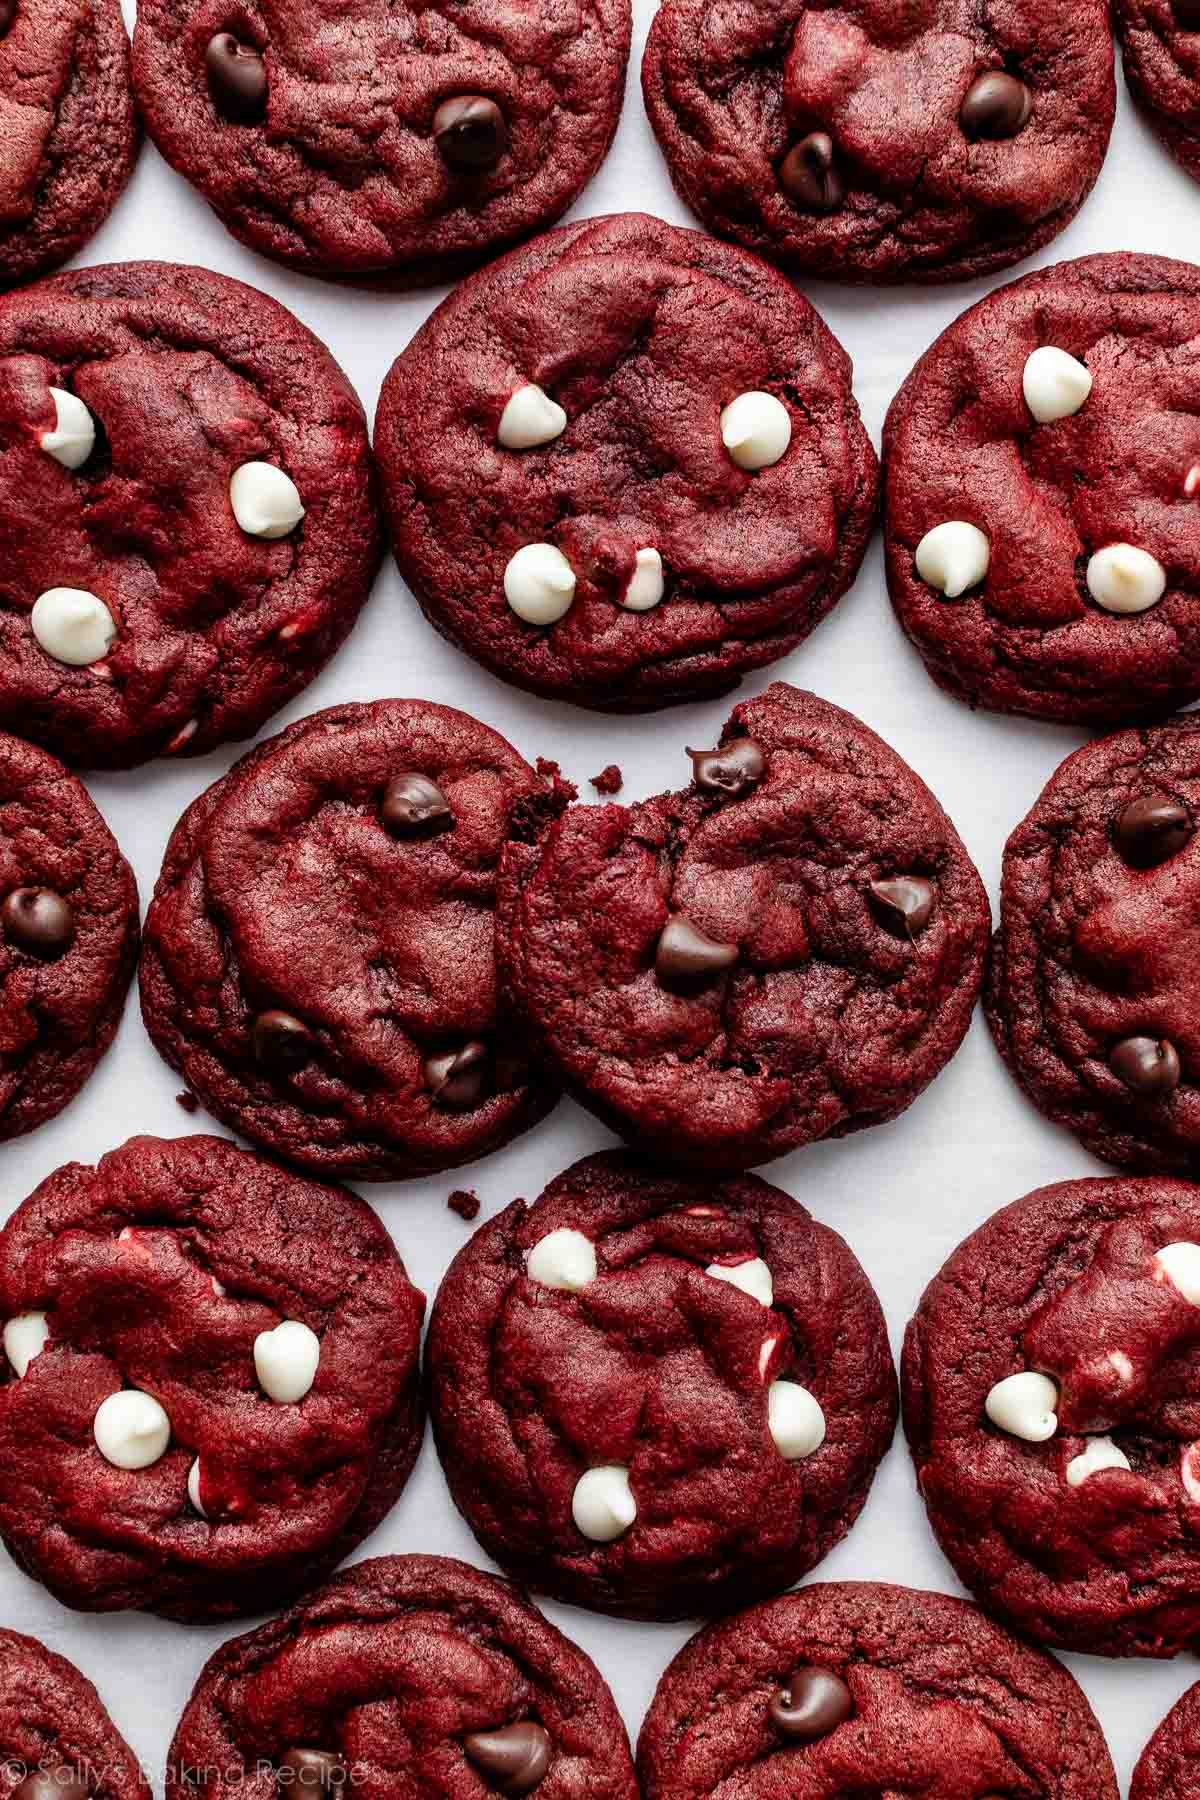
I originally published this recipe in 2013 and have since added new photos and success tips.
Is red velvet a mystery flavor to you? It used to be for me, and I really didn’t understand the hype. I don’t make red velvet treats often, but when I do, I always try to get these 4 flavors into every bite:
- Mild cocoa
- Tangy buttermilk
- Sweet vanilla
- Rich butter
When done right, these 4 flavors are outstanding together! And today’s red velvet chocolate chip cookies nail it.
One reader, Margaret, commented: “I made these with white chocolate chips. They are a new contender for favorite in our house! They were so so good!! Color and consistency turned out just right. Will definitely be making these again. ★★★★★“
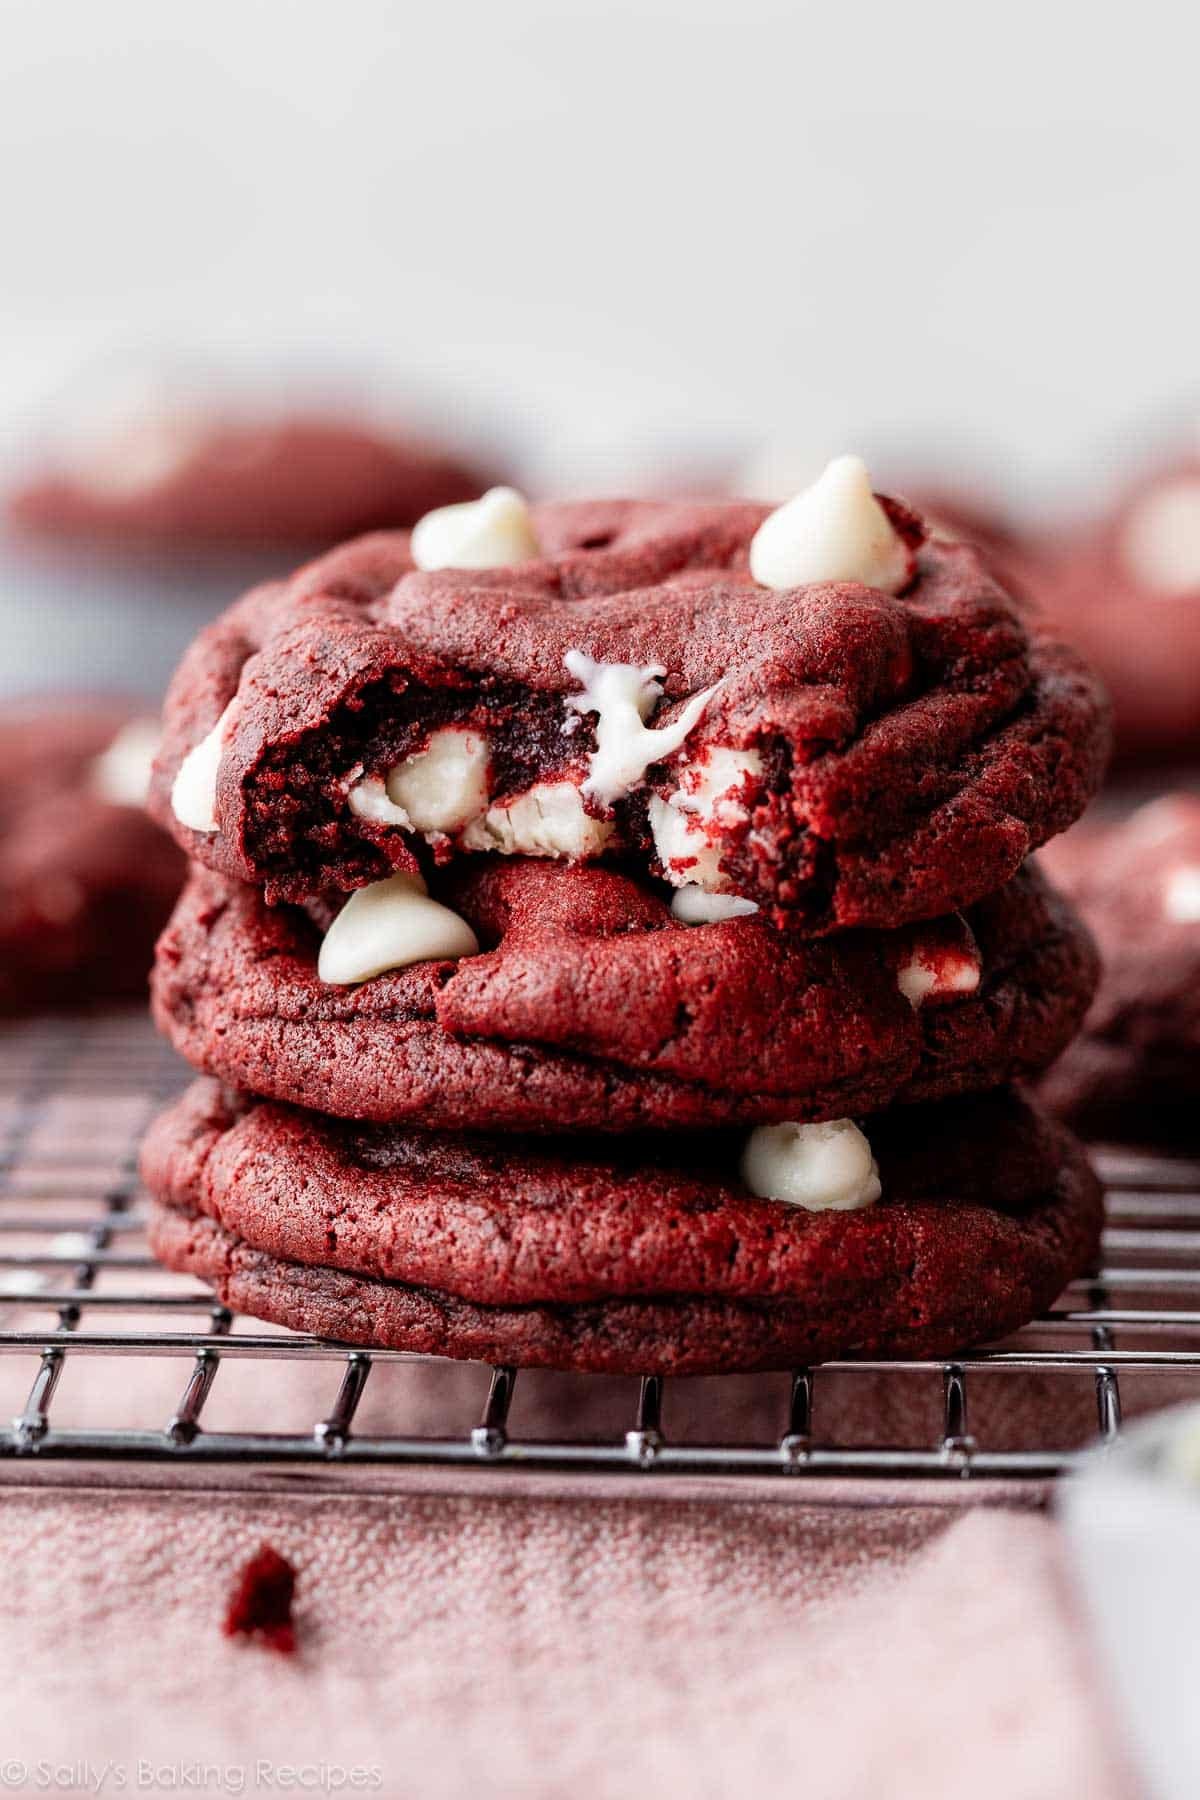
Here’s Why You’ll Love These Red Velvet Cookies
- Soft and chewy in the centers with buttery-crisp edges
- Crimson hue is festive for holidays like Valentine’s Day, Christmas, 4th of July, or if your team’s colors include red
- Simple to make
- You can use white or semi-sweet chocolate morsels, or both
- The vibrancy of red is up to you; use as much or as little coloring as you want OR skip it entirely for a light brown cookie
If you’ve ever tried my cream cheese-stuffed red velvet cookies or white chocolate-dipped red velvet cookies, you’re familiar with this cookie dough. Today’s red velvet chocolate chip cookies were the original red velvet cookie I developed and published, and I based the dough off of my double chocolate chip cookies dough.
Grab These Cookie Ingredients:
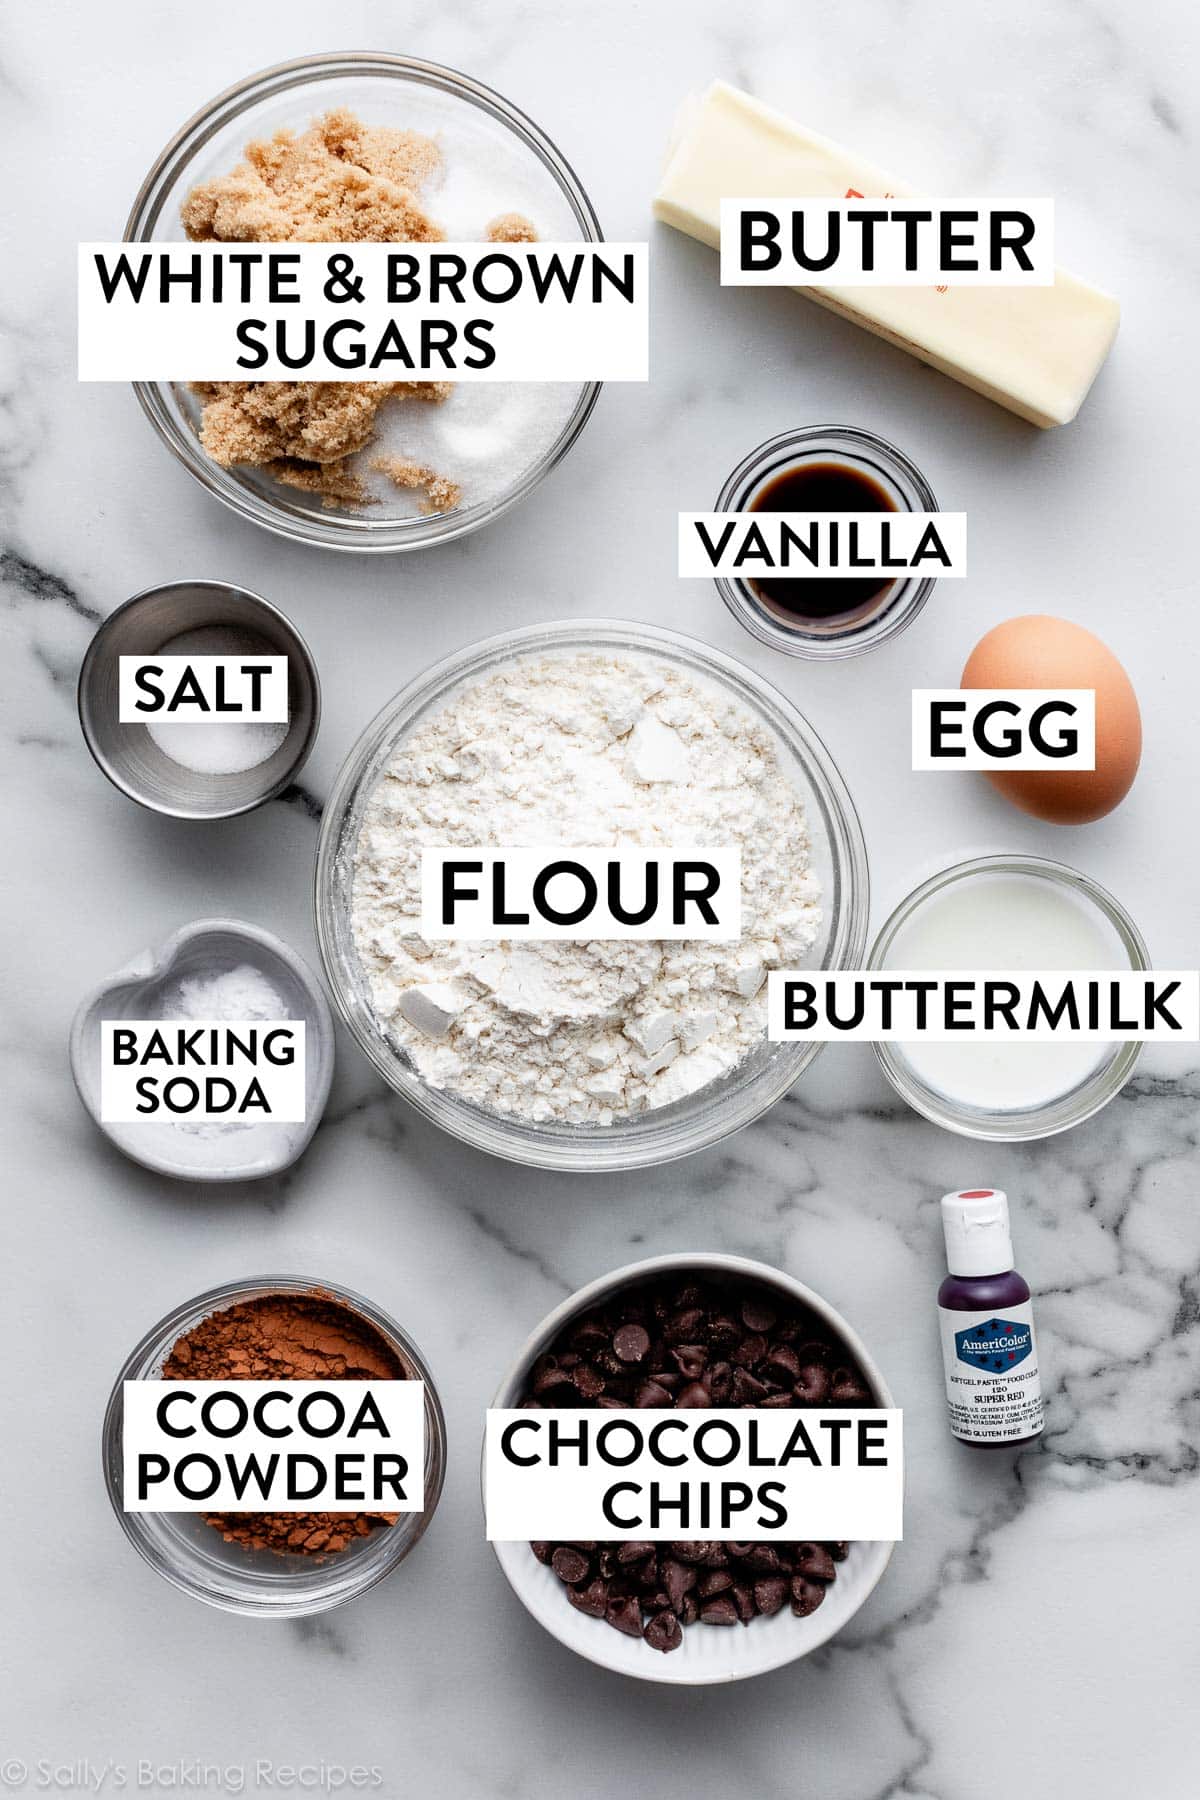
As you can see, you need some chocolate chip cookie basics including flour, egg, vanilla, brown sugar, and regular granulated sugar. A kiss of cocoa powder and a little buttermilk help move us in the flavor direction of red velvet cake. Between chocolate chips and white chocolate morsels, I think I sway more towards the white chocolate in these cookies, which is usually not the case!
Both are obviously delicious, though.
Tinting the Dough
Tinting the cookie dough red is optional. If you skip the food coloring, the cookies will be light brown.
For the pictured cookies, I use 3/4 teaspoon gel food coloring. You can control how vibrant the red color is, so use more or less depending on the color you’d like. You can find gel food coloring in craft stores, some grocery stores, or online. (I like Americolor Red Red or Super Red.) Liquid coloring is fine in a pinch, but you need more of it for the color to actually show up. If you’re looking for a natural alternative, use 2 teaspoons of beet powder. The color stands out a lot more in cookie dough than in cake batter, and you won’t taste it.
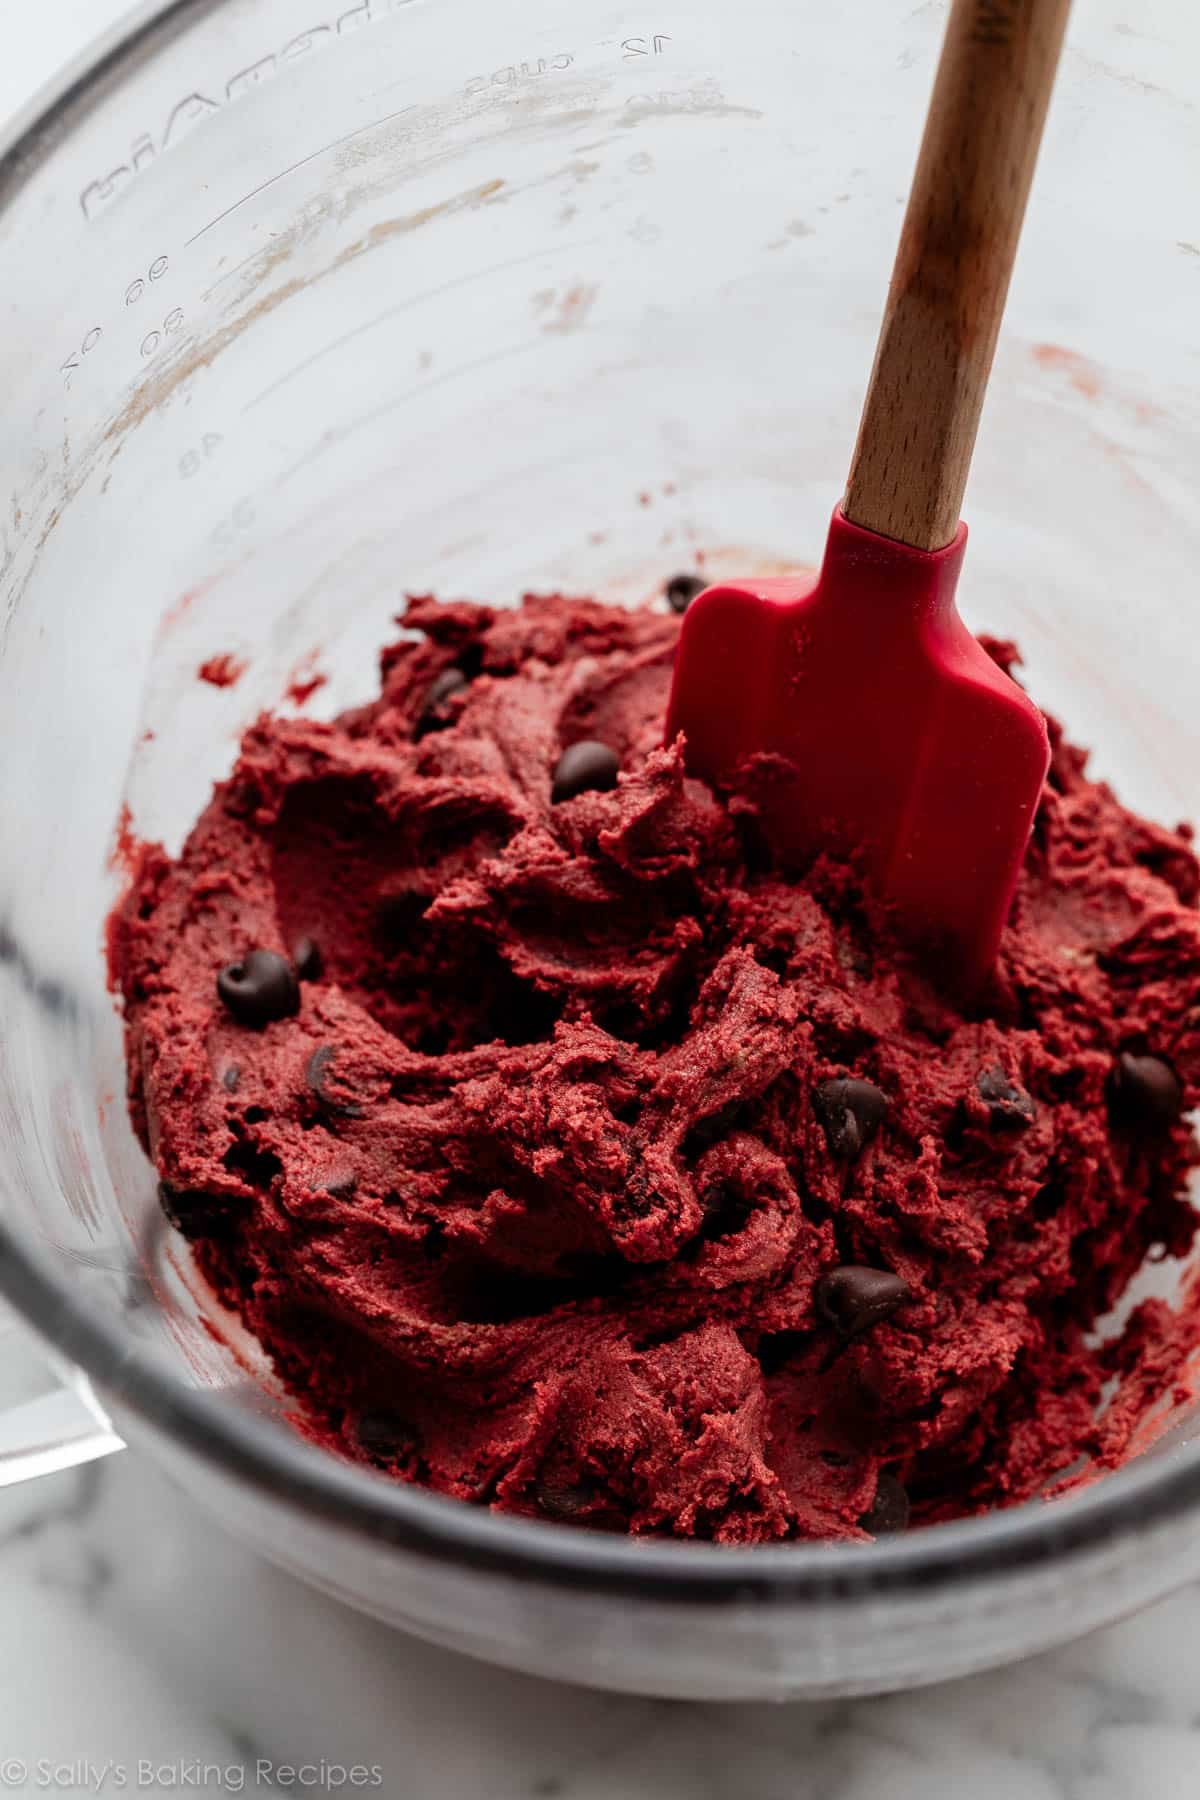
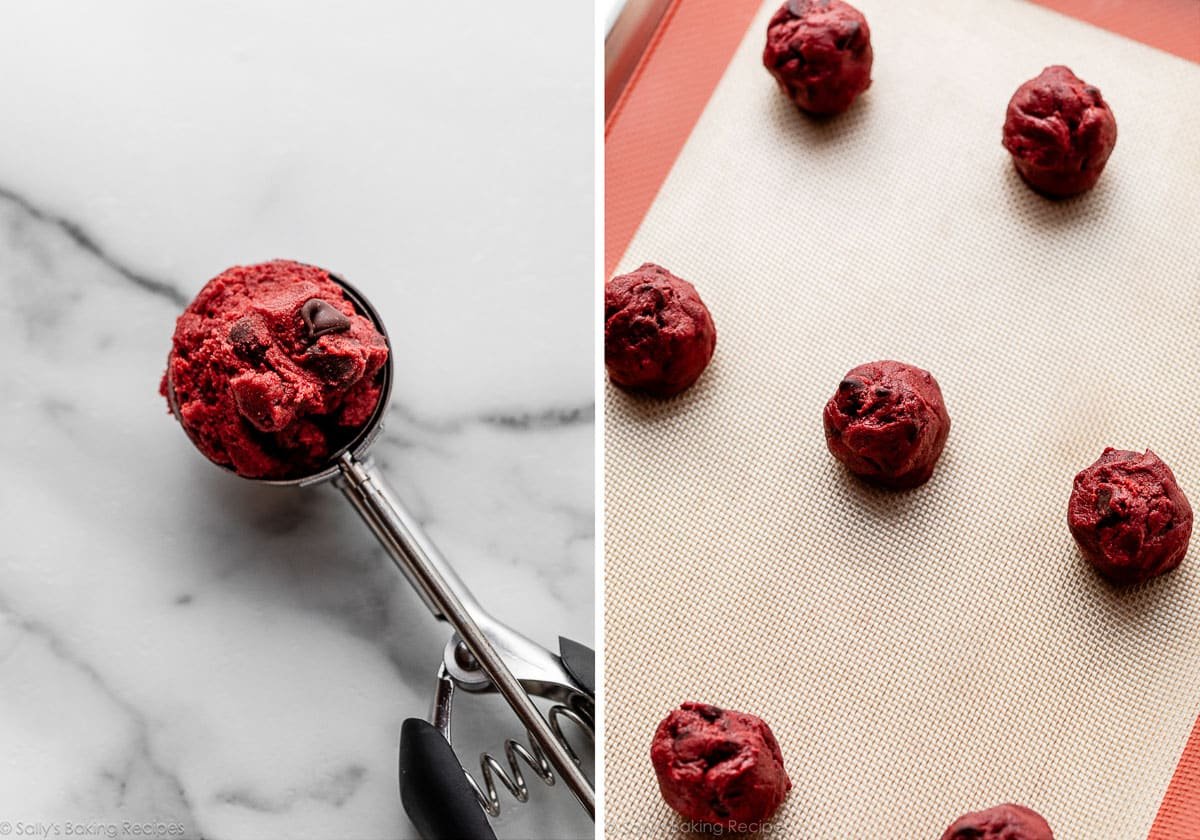
Expect a sticky cookie dough:
Chill the Cookie Dough, Briefly
Like with many cookie recipes on my website, I recommend chilling the cookie dough in the refrigerator before baking it. This is a sticky dough, and letting it firm up in the refrigerator will help your cookies hold shape and maintain wonderfully soft and chewy centers.
I usually only refrigerate the cookie dough for about 1 hour. I find the longer I chill this particular dough, the thicker the cookies will be. If your cookies aren’t spreading at all, you may have chilled the dough for too long; in that case, lightly press down on them with the back of a spoon towards the end of bake time. Easy fix.
You can use a medium cookie scoop to measure 1.5 Tablespoons of dough per cookie, or weigh the dough balls to be about 30–35g each.
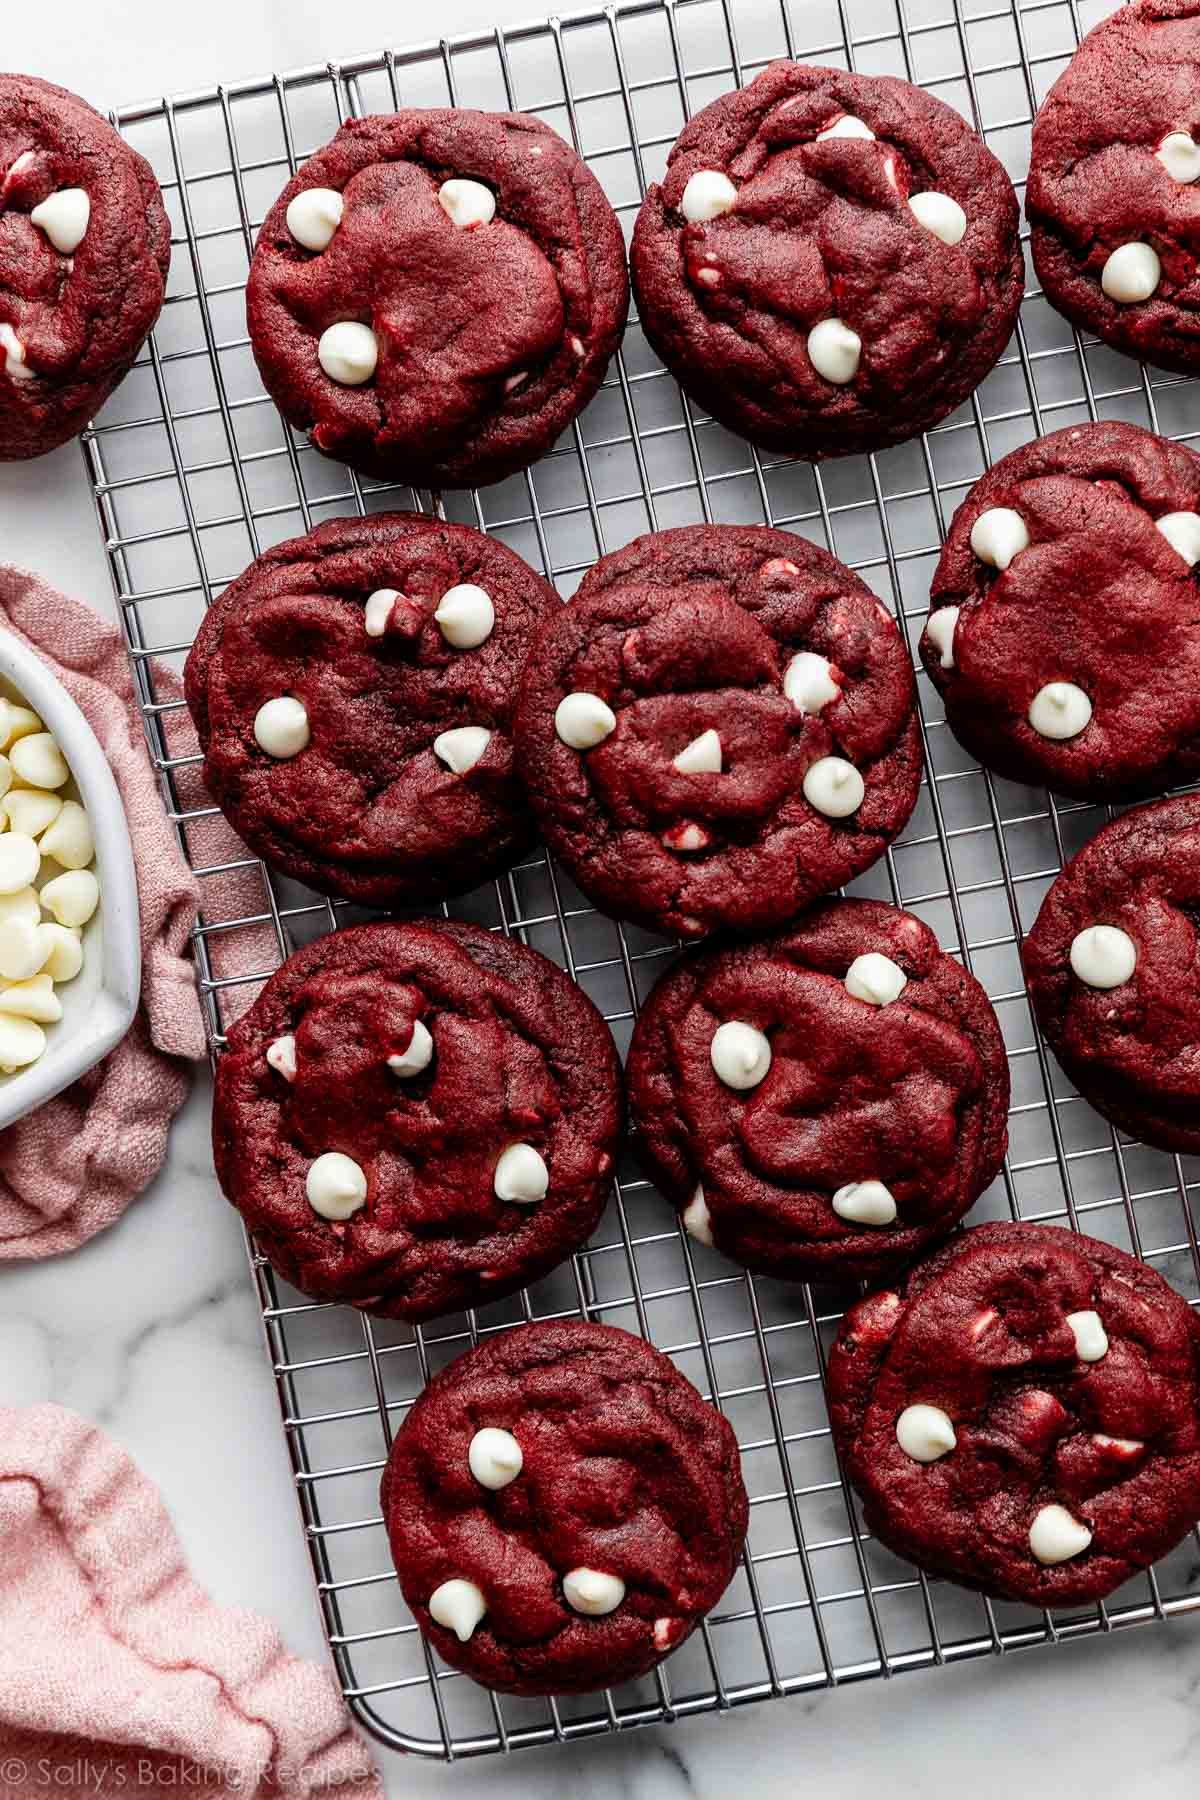
While the baked cookies are still warm, I press a few more chocolate chips into the tops. This is only for looks!
So this recipe sounds pretty easy, right? It is! Just your basic chocolate cookie recipe with a bit less cocoa, some vanilla, buttermilk, and a sprinkling of chocolate chips. A quick cookie dough chill and boom! You’ll have red velvet cookies from scratch in about 90 minutes.
Yes, absolutely. If you’d like to do that, you can keep or skip the chocolate chips in the dough. If you skip them, I recommend refrigerating the cookie dough for at least 2 hours. (They spread more without add-ins.) Roll the dough into 1.5 Tablespoon-size balls (about 30 to 35g each), and then roll each into confectioners’ sugar. 1 cup (about 120g) is enough confectioners’ sugar. Bake time is the same.

For more festive Valentine’s Day dessert recipes, try my Valentine’s day cookies, sparkle sweetheart cookies, and these Nutella-filled Valentine’s Day cupcakes!
Print
Red Velvet Chocolate Chip Cookies
- Prep Time: 1 hour, 10 minutes
- Cook Time: 12 minutes
- Total Time: 1 hour, 30 minutes
- Yield: 20 cookies
- Category: Cookies
- Method: Baking
- Cuisine: American
Description
These are soft-baked red velvet chocolate chip cookies made from scratch. Be sure to refrigerate the cookie dough for at least 1 hour, and feel free to skip the food coloring for light brown cookies.
Ingredients
- 1 and 2/3 cups (210g) all-purpose flour (spooned & leveled)
- 1/4 cup (21g) unsweetened natural cocoa powder
- 1 teaspoon baking soda
- 1/4 teaspoon salt
- 1/2 cup (8 Tbsp; 113g) unsalted butter, softened to room temperature
- 3/4 cup (150g) packed light or dark brown sugar
- 1/4 cup (50g) granulated sugar
- 1 large egg, at room temperature
- 1 Tablespoon milk (I recommend buttermilk)
- 2 teaspoons pure vanilla extract
- 3/4 teaspoon gel red food coloring (or alternative)*
- 1 cup (180g) white or semi-sweet chocolate chips (plus a few extra for tops)
Instructions
- Whisk the flour, cocoa powder, baking soda, and salt together in a medium bowl. Set aside.
- Using a hand mixer or a stand mixer fitted with paddle attachment, beat the butter, brown sugar, and granulated sugar together on medium speed until creamy, about 3 minutes. (Here’s a helpful tutorial if you need guidance on how to cream butter and sugar.) Add the egg and vanilla extract and mix on high until combined, about 1 minute. Scrape down the sides and bottom of the bowl as needed.
- Pour the dry ingredients into the wet ingredients, add the milk and food coloring, and then mix on low speed until everything is combined. The dough will be sticky. If you want a more vibrant hue, beat in more food coloring a little at a time. Add the chocolate chips and beat on low speed until just combined.
- Cover and chill the dough in the refrigerator for at least 1 hour (and up to 3 days). I recommend just 1 to 2 hours, otherwise the cookies won’t spread much. If chilling for longer than 2 hours, allow dough to sit at room temperature for at least 15 minutes before rolling and baking because the dough will be quite hard.
- Preheat oven to 350°F (177°C). Line large baking sheets with parchment paper or silicone baking mats. Set aside.
- Scoop and roll cookie dough, about 1.5 Tablespoons (30–35g) of dough each. (A medium cookie scoop is helpful here.) Arrange on the baking sheet about 3 inches apart. Bake for 11–13 minutes or until the edges appear set. Centers will look very soft. If the cookies didn’t spread, simply press down on the warm cookies with the back of a spoon to slightly flatten. If desired, lightly press a few chocolate chips into the tops of the warm cookies.
- Cool for 5 minutes on the baking sheets. Transfer to a wire rack to cool completely.
- Cover and store leftover cookies at room temperature for up to 1 week.
Notes
- Make Ahead & Freezing Instructions: You can make the cookie dough and chill it in the refrigerator for up to 3 days. (See step 4.) Baked cookies freeze well for up to 3 months. Unbaked cookie dough balls freeze well for up to 3 months. Bake frozen cookie dough balls for an extra minute, no need to thaw. They won’t spread much, so press down on the warm cookies with the back of a spoon as directed in step 6. For more information, here are my tips and tricks on how to freeze cookie dough.
- Special Tools (affiliate links): Electric Mixer (Handheld or Stand) | Baking Sheet | Silicone Baking Mat or Parchment Paper | Medium Cookie Scoop | Cooling Rack | Americolor Red Red or Super Red or Beet Powder
- Food Coloring: You can control the vibrancy of the red color. Or, if you wish, skip the red coloring altogether because it’s only for looks. I use and recommend 3/4 teaspoon of gel food coloring. You can find gel food coloring in craft stores, some grocery stores, or online. (I like Americolor Red Red or Super Red.) Liquid coloring is fine in a pinch, but you need more of it for the color to actually show up—around 1 Tablespoon. If you’re looking for a natural alternative, use 2 teaspoons of beet powder. The color stands out a lot more in cookie dough than in cake batter, and doesn’t taste like beets.
- Red Velvet Crinkle Cookies: If you’d like red velvet crinkle cookies, you can keep or skip the chocolate chips in the dough. If you skip them, I recommend refrigerating the cookie dough for at least 2 hours. (They spread more without add-ins.) Roll the dough into 1.5 Tablespoon-size balls (about 30 to 35g each), then roll each into confectioners’ sugar. 1 cup (about 120g) is enough confectioners’ sugar. Bake time is the same.
- Be sure to check out my top 5 cookie baking tips AND these are my 10 must-have cookie baking tools.


Reader Comments and Reviews
These were a huge hit for my family. My son declared them to be the best he’s ever had. Great recipe and highly recommend!
Made them with Guittard chocolate chips. The feedback ( I don’t eat any desserts) from 12 people were all positive. One texted and said they were the best cookie she ever had. Thank you for the recipe!
Sally, girl, you knew what you were doing with this one. I have never tasted red velvet cookies as phenomenal as these. These are my go to sweet treat. I refrigerate mine overnight and the chew is divine 10/10, you have done it again.
Can these cookies be made eggless?
Hi Mehtab, we haven’t tested an egg-free version of this recipe, so we’re unsure what substitute might work best. Let us know if you do any experimenting.
I made these a while ago for my friends and family, and I got nothing but compliments! Everyone loved them, and even said they’d pay to eat these. I didn’t have any brown sugar at home at the time, so I simply substituted with white sugar and honey. Turned out amazing!!! Definitely making them again soon!
I used this recipe over and over!! I absolutely love it!
Do I have to refrigerate
Hi Max, no need to refrigerate the baked cookies. See step 8 of the instructions: Cover and store leftover cookies at room temperature for up to 1 week. Enjoy!
Can I also add in some marshmallows? My daughter wanted to have it with marshmallows
Hi Bons, can’t see why not!
Hi Sally! I want to make this a bigger cookie. How many grams do you recommend and how long to bake for?
Hi Sharon, you could certainly make these as larger cookies. Any weight should be fine, you could try about 60g for an extra-large cookie, and add a few minutes of bake time. Keep a close eye on them. Enjoy!
These were really easy to make, and came out really nice. A new house hold favorite!
Thick, chewy, devine! Thank you
Any tips for making this into a cookie cake for a birthday boy who loves cookie cake?
Hey Daria! I made this into a cookie cake, in a 9inch springform. I didnt refrigerate the dough since it was baking in the springform and wasn’t worried about spreading- it did about 35 mins at 350F in middle rack – let cool completely and then piped a cream cheese frosting to give it more of a “birthday cake” vibe! Turned out great
Just made these. Came out great. Reduced sugar by 50gms, also added top vinegar to the final mix. Greetings from Western Australia
Hi Amma, see step 3: “Pour the dry ingredients into the wet ingredients, add the milk and food coloring, and then mix on low speed until everything is combined.” Hope you enjoy the cookies!
Hello! I love this recipe. I was wandering can I use brown butter? If so, will i need to add a tbsp or 2?
Hi Brittani, we haven’t tried that here, but let us know how they turn out if you do!
Really good and tasty but I added half of the amount of sugar and it was plenty. No need for 200 gram sugar!!! 100 grams is totally enough.
These cookies were amazing!! I just baked them last night and they were a hit with all my friends and family! I did have to add a lot more food colouring than written to get that sigature red colour but other than that I’ll definitely be making them again.
My cookies were soft throughout
I wanted a red cookie for a particular occasion, which is why I chose this recipe. I followed the instructions exactly, used gel coloring in the amount specified in the recipe, and the cookies came out just plain brown – not a hint of red color! I love the texture of the cookies, but they’re too sweet for me, and the white chips are made with very unhealthy ingredients. I knew all that going in, but followed the recipe just to get the color, which was a big failure. Does Sally used much more gel than she calls for? This is the first of Sally’s recipes that hasn’t worked. Disappointing!
What about making the dough, rolling into balls THEN refrigerating? Thinking then I could simply grab some from the fridge and bake.
Hi Steve, that can work, but the dough is a bit sticky to roll right away. You might try chilling for a quick 30 minutes, rolling into balls, and then completing the required chill time.
Hi why my cookies are having like bready texture? I spooned & leveled the flour though
Hi Lu! Bready cookies are almost always caused by over-measuring the flour. Do you have a kitchen scale, by chance? That’s the most accurate way to measure flour and cocoa powder. Also be careful not to over-bake, which will dry out the cookies as well.
Hi if i want exclude red colour, will it be double choc chip cookie?
Hi Jieun! If you’re looking for a double chocolate chip cookies, we recommend this recipe instead!
I have no buttermilk but want that special red velvet taste. Can I use a bit of white vinegar?
Hi Courtney, you can certainly try adding a bit. Add it when you do the vanilla. Let us know how you like the cookies!
I added 3 teaspoons of white wine vinegar along with the vanilla extract. They were fantastic! Actually has that bit of red velvet tang. Will make again
Hi what can we substitute for buttermilk? And can we make them in an airfryer?
Hi Rab, you can use another type of milk in a pinch. We haven’t tested them in an air fryer, but let us know if you do.
Hi can use red velvet emulco for colouring? Because i put more than 3/4 tsp but the colour still doesn’t show up. It’s like dark red
Hi Danishah! We always recommend using gel food coloring for the most vibrant colors. Are you using gel?
It’s bit thick than gel. But if i want to use red velvet emulco, do i need to remove any ingredients? And do i have to sieve coco powder? Because it tastes more coco
Love love these cookies! I was wondering if I could use Plain Flour instead of All-Purpose flour?
Hi Angelina, Depending on where you live the terms plain flour and all purpose flour are used interchangeably. It’s a white flour made from wheat, typically with a protein content between 10-12% and does not include leavening agents. If you flour matches that description you can use it.
Can I use powdered buttermilk?
Hi Denise, we haven’t personally tried it but can’t see why not. Just follow the directions on the powdered buttermilk packaging to make the amount needed for the cake. Hope you enjoy it!
I have an interesting question. I found out that I can make 15 cookies, (one batch) in my 5qt mixing bowl kitchenaid mixer. Is it possible to double the recipe (2 batches) in the 5qt mixing bowl to produce more cookies?. I would like to make cookies for my nephew’s birthday.
You could double this recipe if you wish, Steven. Simply double all the ingredients. Enjoy!
Don’t have butter can your red velvet choc chip cookies be made with oil?
Thanks
Hi Linda! You really need butter to cream with the sugar as the base of these cookies.
I would like to try this. But my concern is that there’s no buttermilk in my country in liquid form. Only the powder one is available. Will that do?
Hi Denise, any milk is fine here.
Is it ok I don’t have an electric mixer if so what can I use instead
Hi Mariana, You can certainly mix it by hand if necessary, but it will take quite a bit of arm muscle! Particularly when it comes to properly creaming the butter and sugars. We find a sturdy wooden spoon works best. Let us know how it turns out for you.
These are so good! Perfect amount of sweetness and chewiness, and pretty easy too. I don’t have an electric mixer, so I whipped by butter by hand but it still worked. I tried using the 2 teaspoons of beet powder, but they ended up being more of a brown with maybe a slight tinge of red. I don’t mind tho because they taste so good!
So I think I messed up. It tastes a little dry and bready. What did I do wrong? Should I add more butter and less flour? Should I bake less. I’m an awful baker so I know this is my error. I don’t have a good scale so I’m trying to figure out what went wrong.
Hi Molina! Happy to help. How did you measure the flour? Make sure to spoon and level (instead of scooping) to avoid packing in too much flour into your measuring cups – or use a kitchen scale. You can read more about properly measuring baking ingredients in this post.