

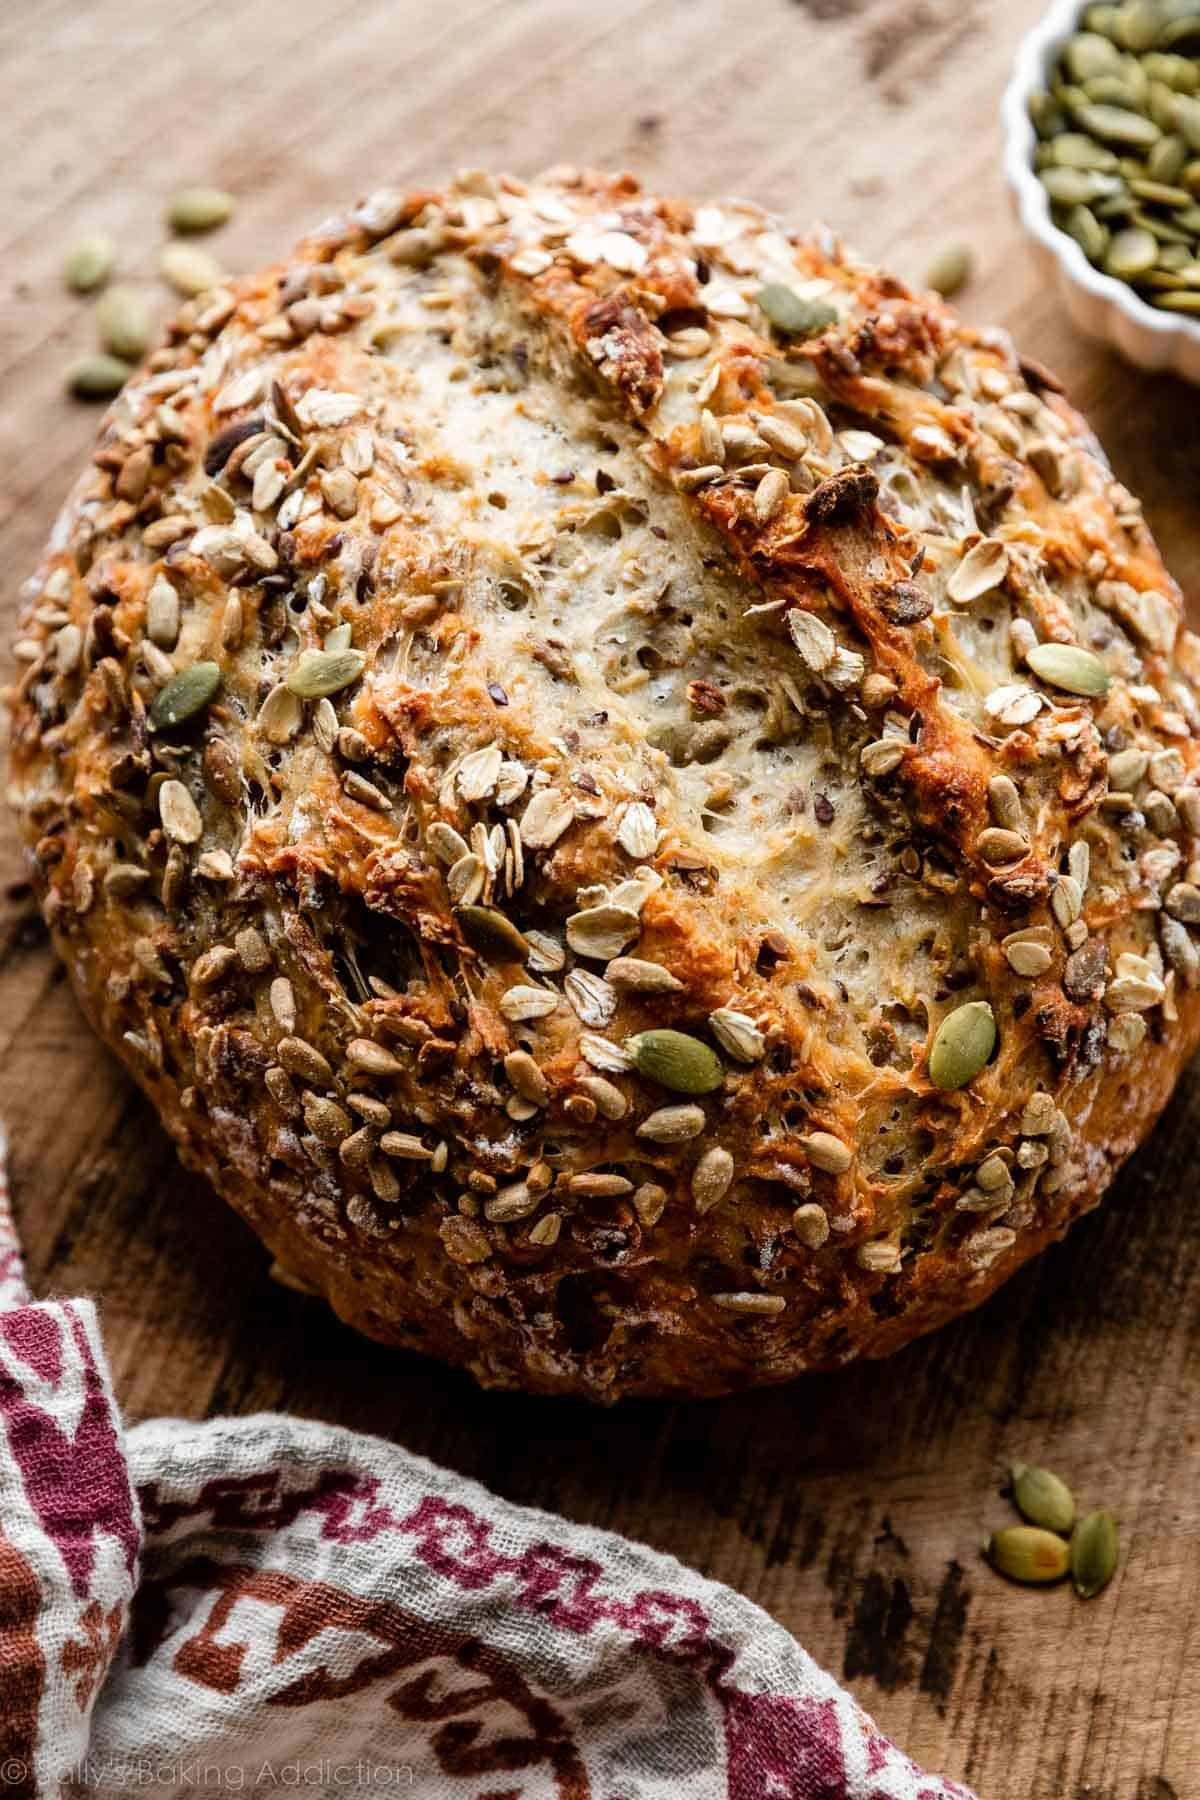
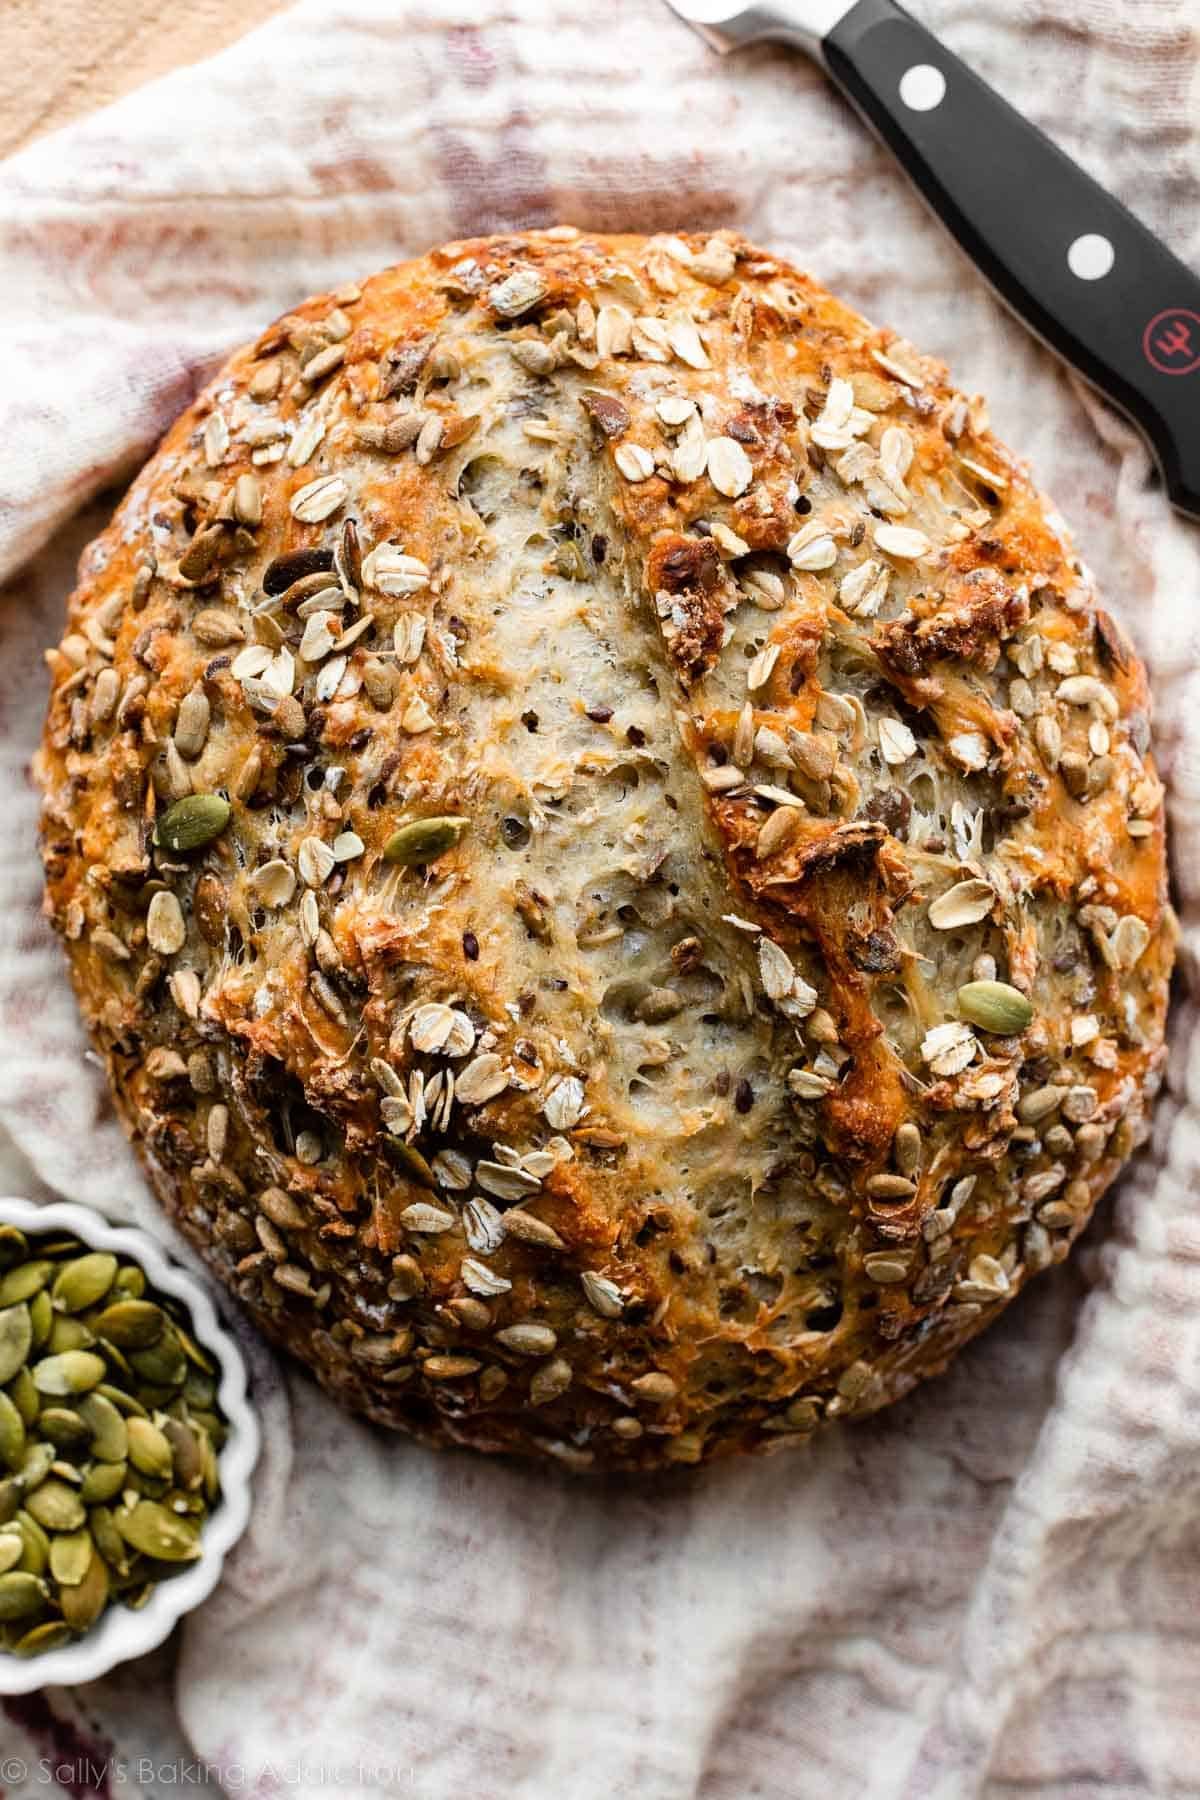
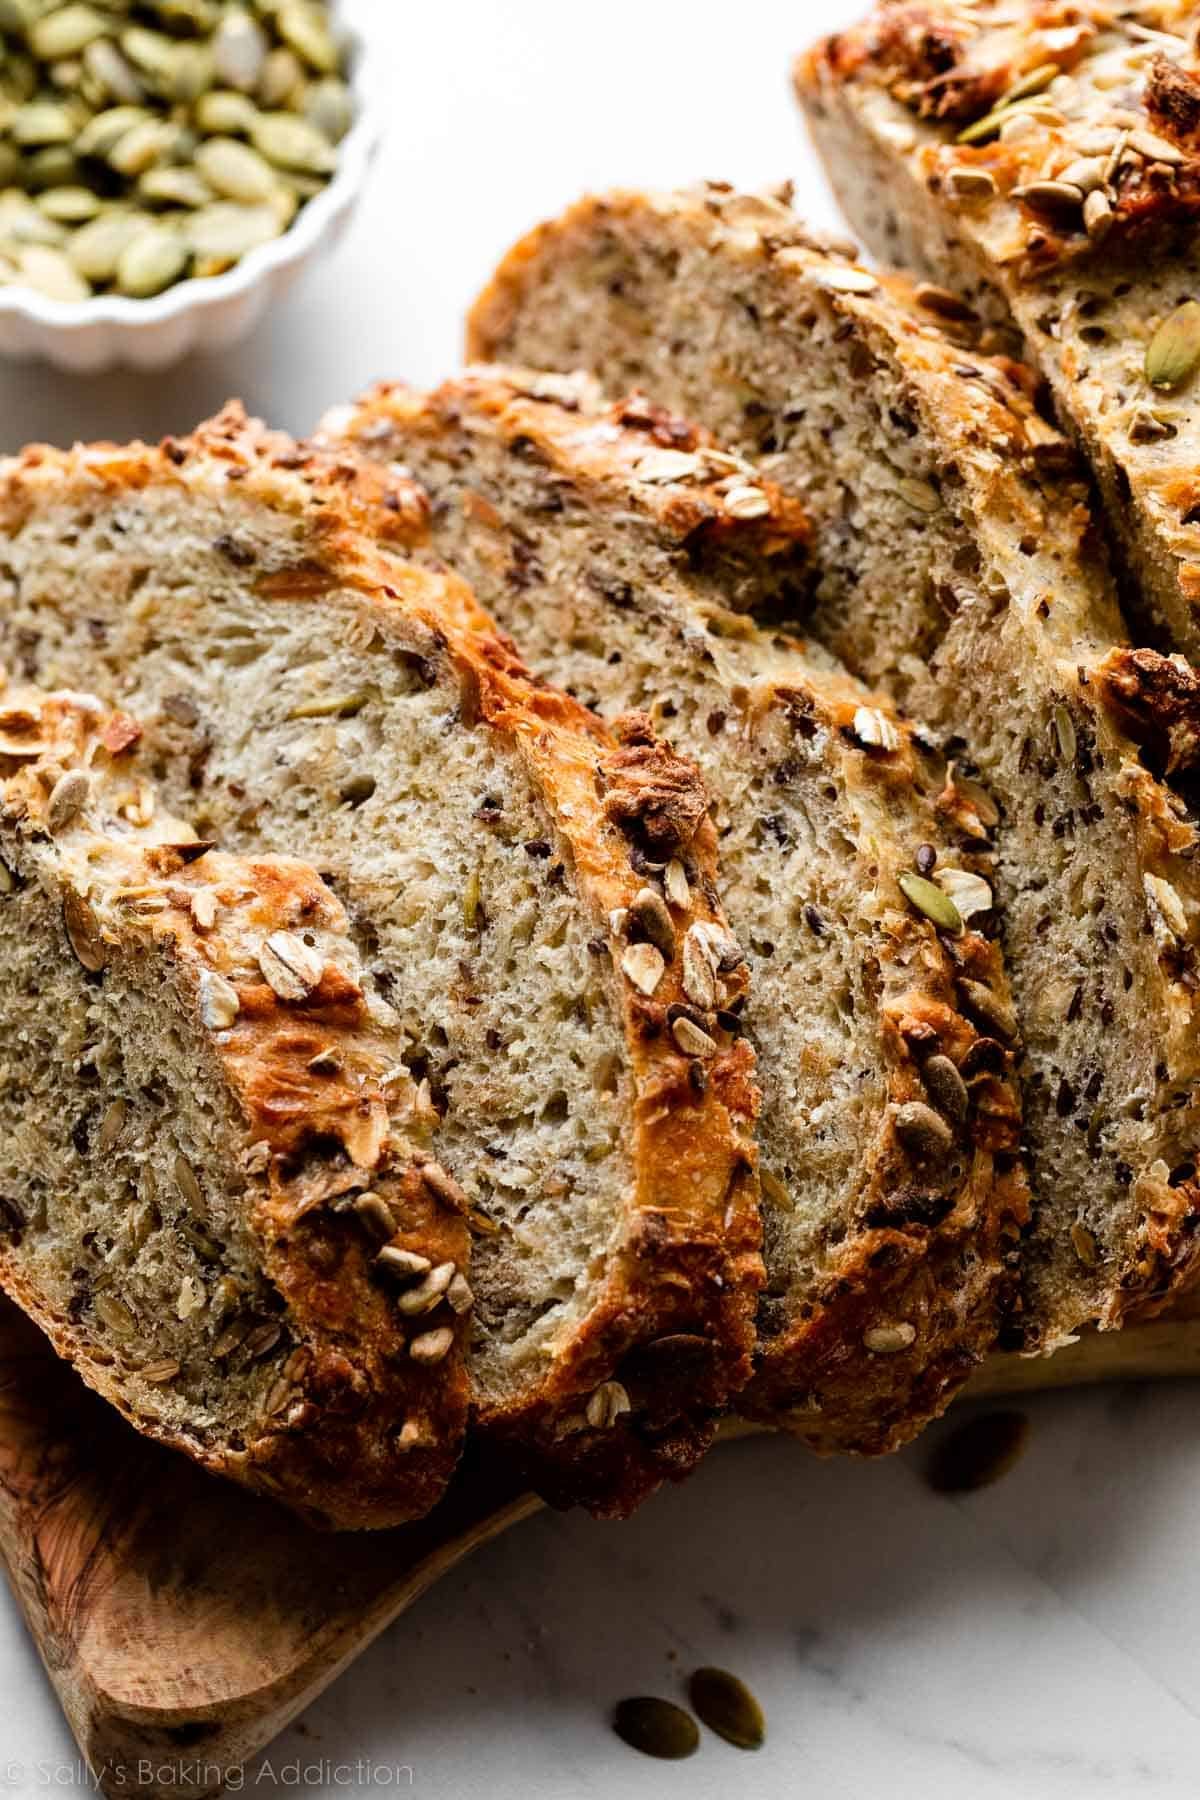
This seeded oat bread is crusty on the outside, chewy on the inside, and has the most delicious crunch in every bite, thanks to all the seeds. This is a hearty loaf that can stand up to any meal, from thick and chunky stews to delicate poached eggs. You’ll use an easy no-knead method to make this yeast bread, which produces a beautiful homemade loaf with minimal hands-on work.
This recipe is brought to you in partnership with Red Star Yeast.
One reader, Rob, commented: “Best bread we’ve had in a long time! Crusty, chewy, flavorful, nutty, and delicious with some good butter. Will definitely be making this again. Thank you. ★★★★★“
You know those gorgeous seed-encrusted loaves of bread you see in bakery windows?
The kind that look like they took ages to make, and you wonder how much kneading, shaping, and work went into just 1 loaf? Well, you can make those same beautiful seeded loaves right at home, with hardly any work involved. No kneading, no complex shaping, no mixer needed.
Yes, this crusty, chewy, golden-brown, seed-speckled oat bread doesn’t require any complicated work.
This bread, like my homemade cranberry nut no-knead bread, asiago-crusted skillet bread, pizza bread, and olive bread, will convince anyone that you either bought it from a bakery or spent all day in the kitchen making it—which, of course, you didn’t. Don’t feel like you have to let them in on our little secret. 😉
Hearty Homemade Bread for Beginners
This texture-lover’s seeded oat bread recipe is based off of my homemade artisan bread, a wonderfully easy and widely popular no-knead bread that’s used by both beginners and experts.
If you’re nervous to try homemade bread, this recipe is a great introduction. Even though the recipe is easy, the bread does NOT skimp on flavor. It’s just a simple way of baking homemade bread inspired by the no-knead technique originating from bread expert Jim Lahey.
Here’s why it’s so simple:
- Absolutely no kneading (just like homemade English muffins)
- Zero complicated shaping
- No mixer required
- 90% of the time is totally hands off
- Dough can rest in the refrigerator for up to 3 days—a great make-ahead recipe
- Can bake in a dutch oven or on a baking sheet
The trick is giving the risen dough a rest in the refrigerator. The cool air slows the fermentation process and helps develop better flavor.
Grab These Ingredients:
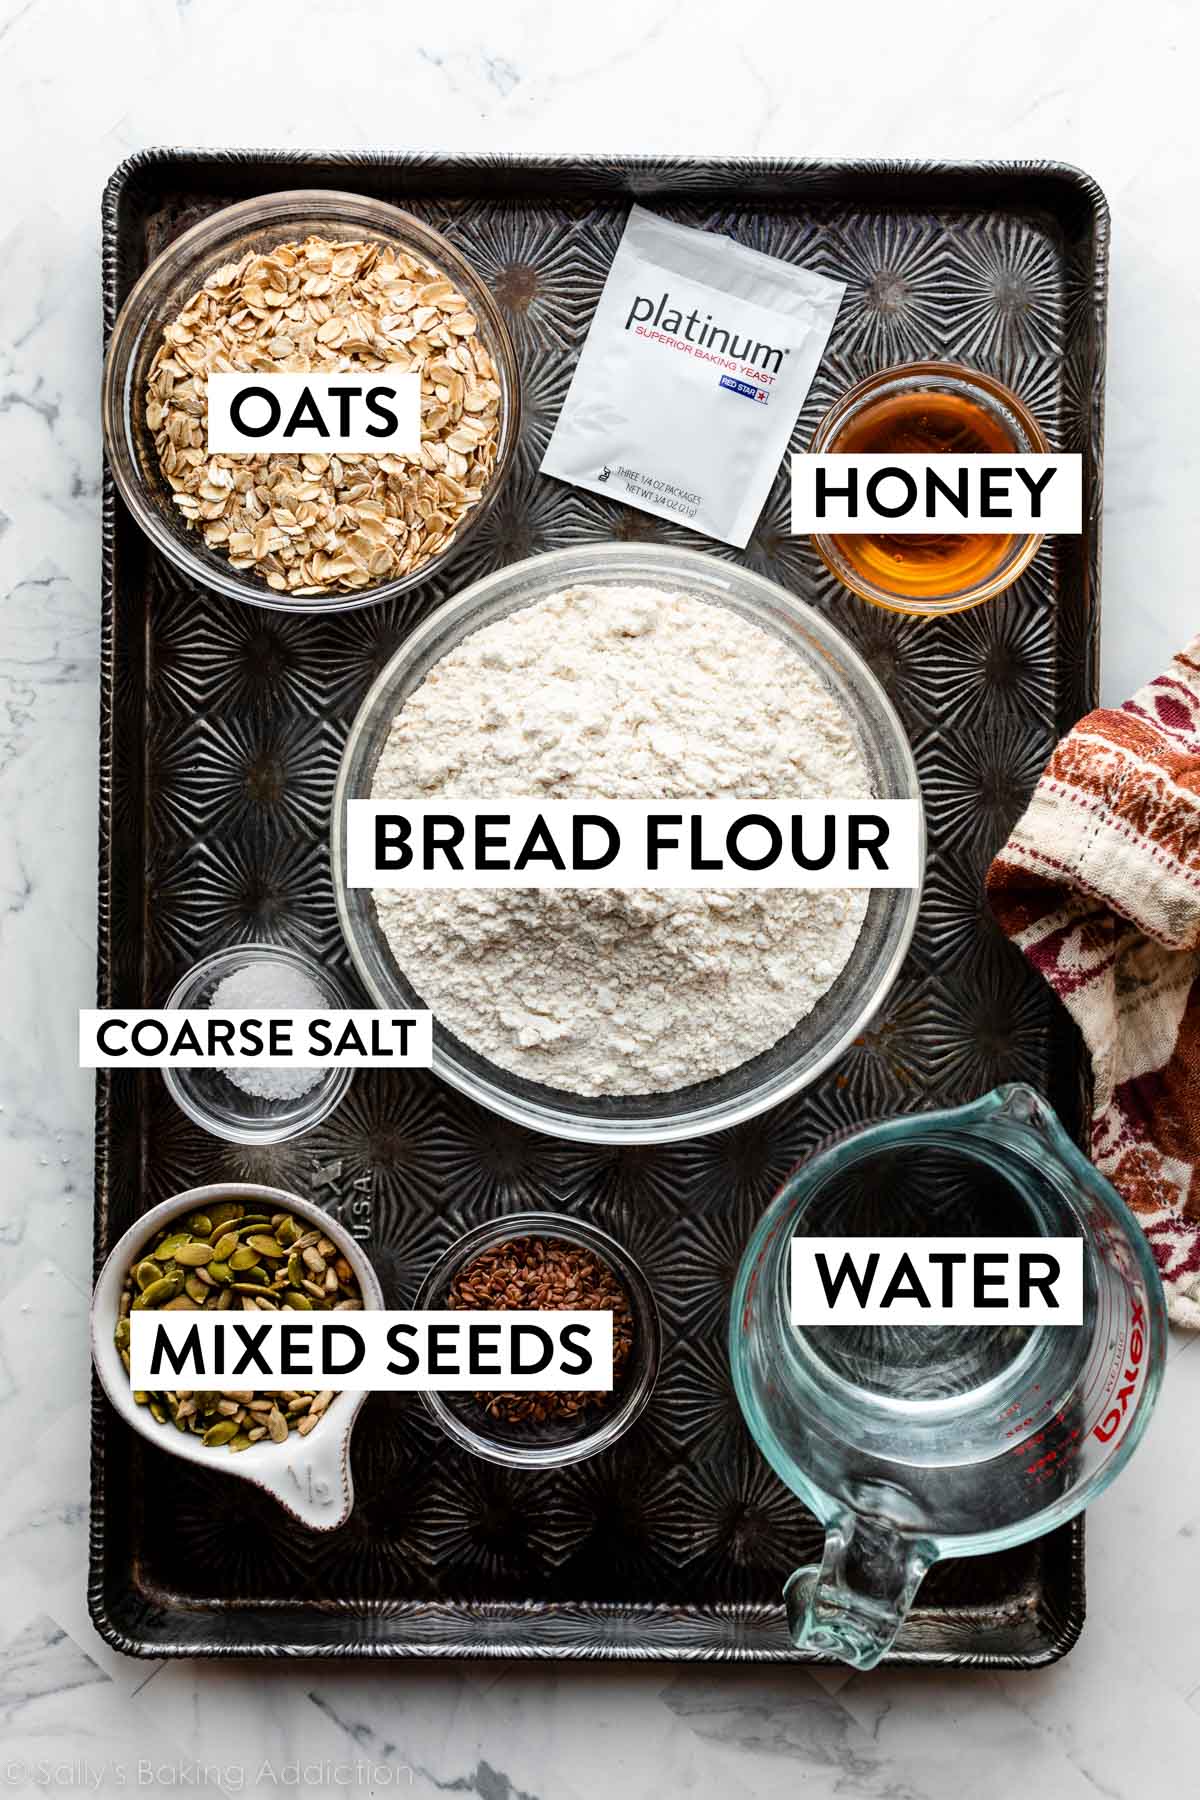
Here’s why each ingredient is so important:
- Bread Flour: While you could use all-purpose flour in this recipe, I strongly recommend using bread flour. Bread flour produces a stronger, chewier bread, and that makes a big difference in an artisan-style loaf like this oat bread.
- Oats: Oats provide a little wholesome texture. As the dough rises, the oats soak up some moisture and expand. Whole rolled oats are best, but you can use quick oats if needed.
- Salt: I recommend using coarse sea salt because I find the bread’s flavor lacking with regular table salt.
- Instant Yeast: I always use Platinum Yeast by Red Star, which is an instant yeast (aka “quick rise” yeast). 2 teaspoons is a little less than 1 standard packet. (If using active dry yeast, there are no changes needed to the recipe. The rise time may just take slightly longer.) I use more yeast in this recipe compared to my cranberry nut no-knead bread and jalapeño cheddar bread. Why? Those doughs rest and rise at room temperature. However, for more flavor and just as much rise, I use more yeast and let this dough rest in the refrigerator.
- Seeds: Pumpkin, sunflower, and flax seeds are all highly nutritious—they’re pretty much superfoods. I love that these 3 types of seeds vary so much in size and texture, but if you’d like to change up the types of seeds in this mixture, go for it. I use a medley of seeds in this multigrain bread, too. (And even these quinoa snack bars!)
- Honey: Honey helps give this bread a springy, spongey texture. It also adds a little sweetness, but we’re using half as much honey here than in my honey oat bread recipe, so the bread isn’t super sweet.
- Water: You’ll also need a little warm water to bring all the ingredients together. I use cool, room temperature water in olive bread and artisan homemade bread, two other no-knead doughs, but with the addition of oats today, the yeast has to work harder, and warm water helps it work quicker.
Let Me Show You How to Make This Seeded Bread
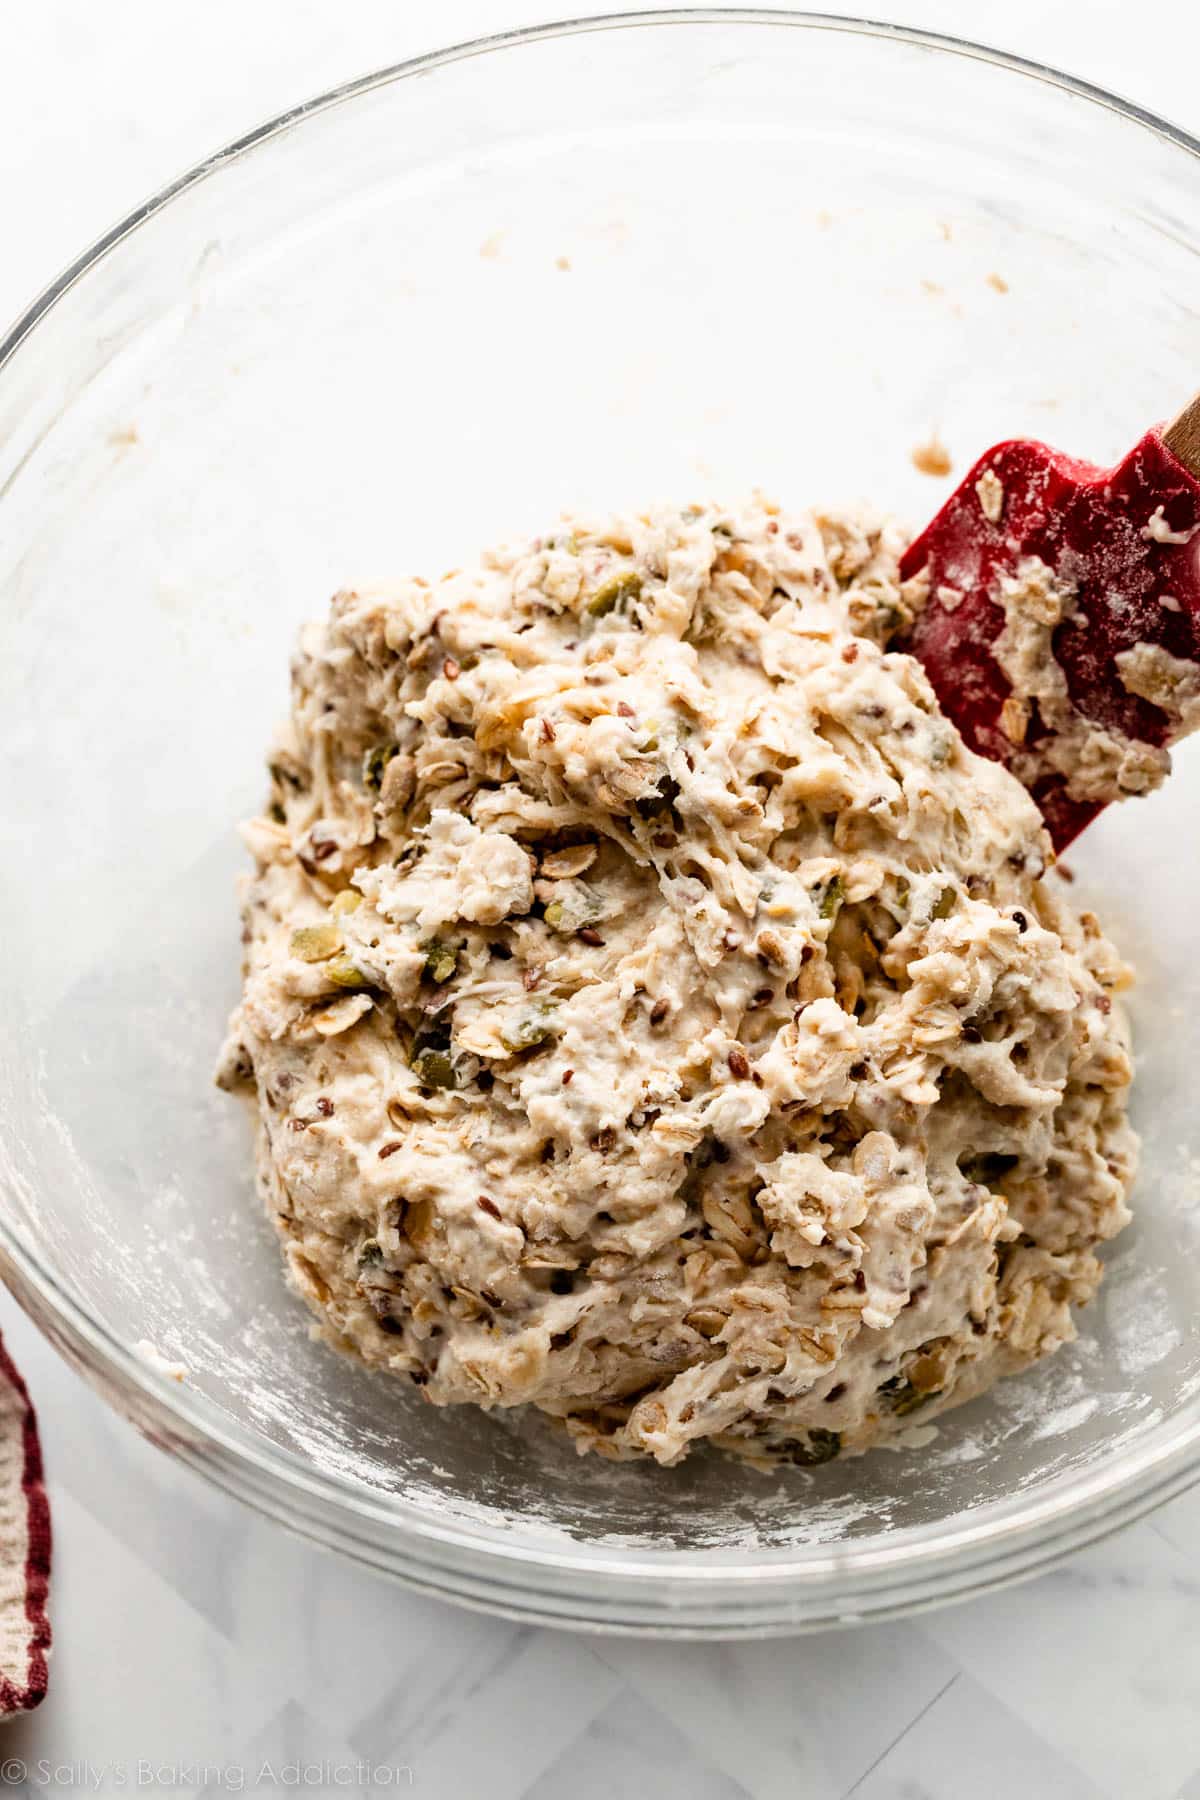
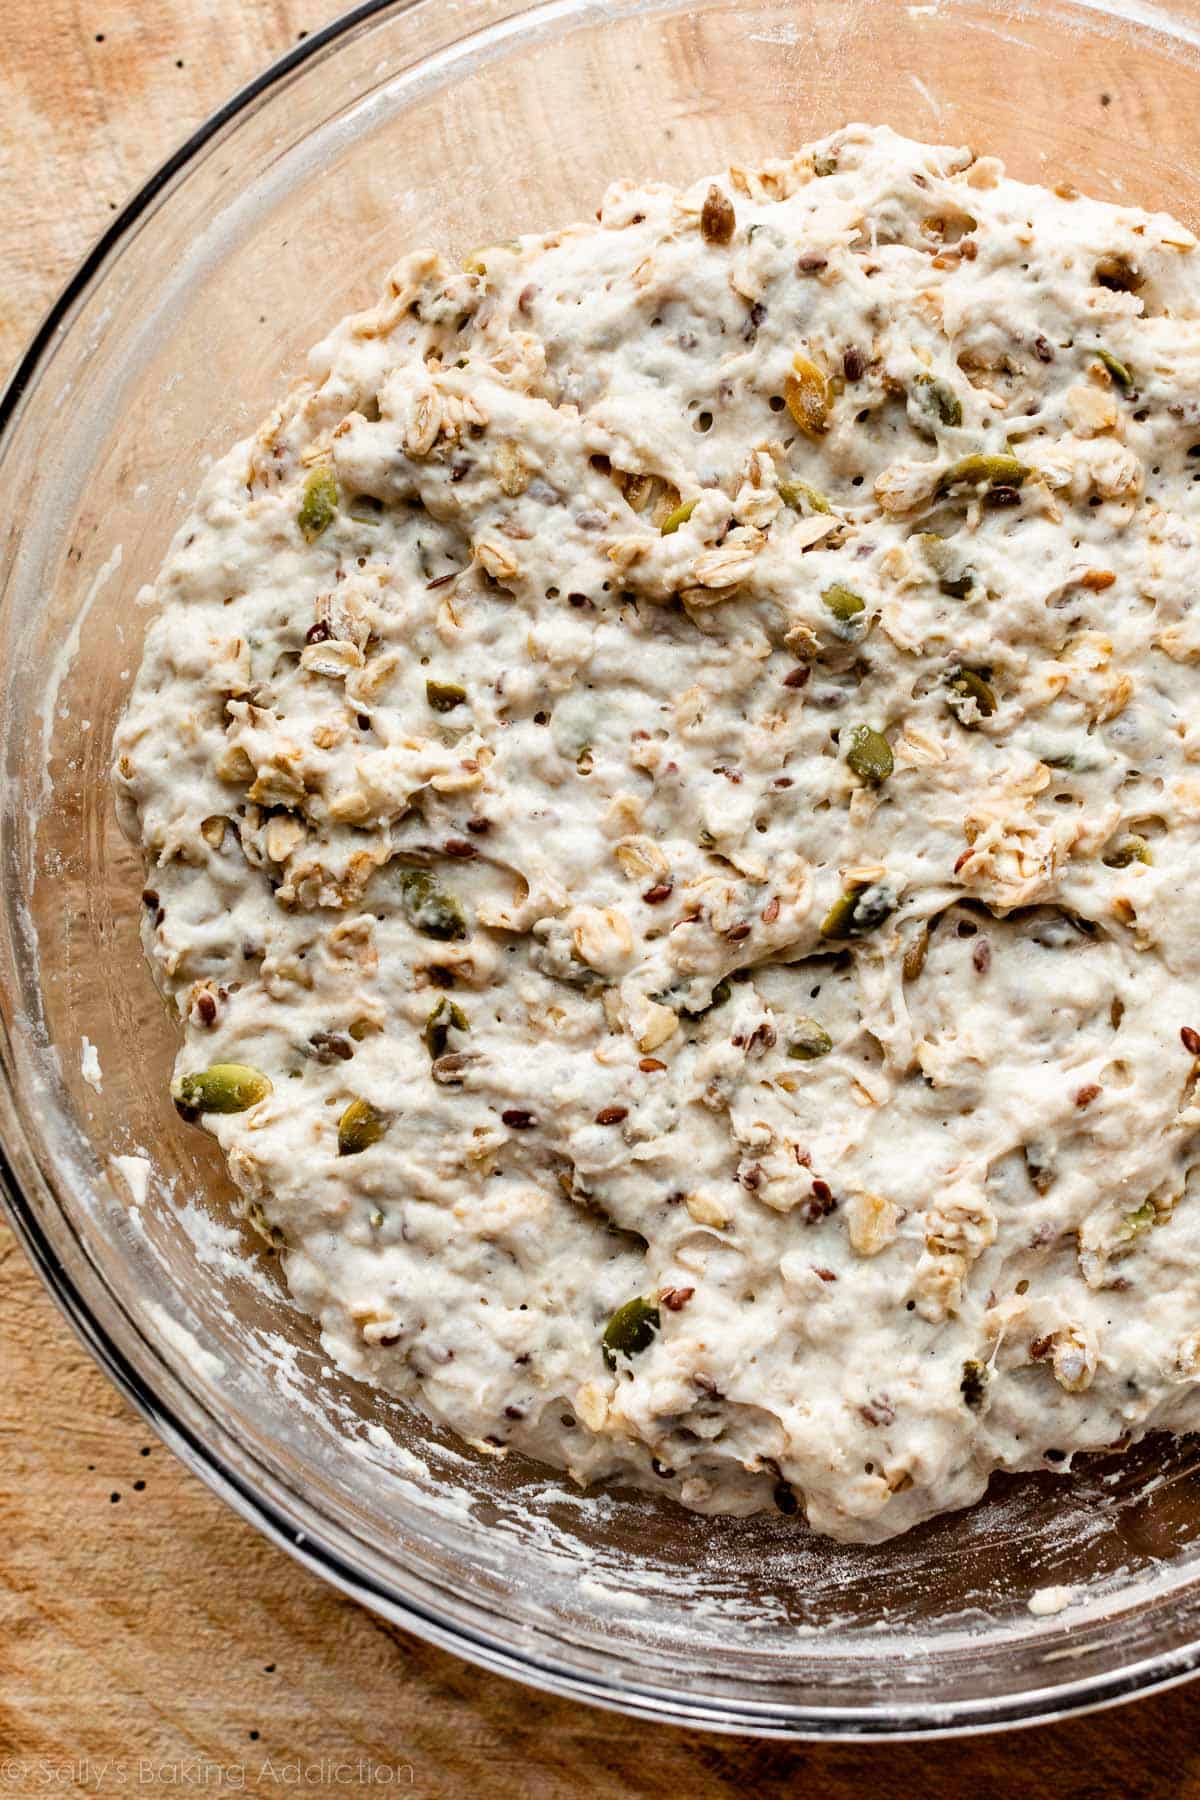
The full written recipe is below, but use the following explanations and step photos to help you get started. Bring the dough ingredients together as instructed in the recipe. At first the dough will seem very dry and shaggy and you’ll question if it will even come together. It will. In fact, the dough is a little sticky after it has been thoroughly mixed:
Let it rise. Cover the dough and let it rise at room temperature for about 3 hours. Notice that the dough rises OUT more than it rises UP. That’s ok.
You can move on to shaping and baking the dough, but for best flavor, I strongly recommend refrigerating the risen dough, even if it’s just for a couple hours. I usually refrigerate it for 12 hours.
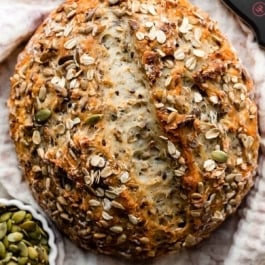
After the dough rises and rests in the refrigerator, use generously floured hands to shape the dough into a round boule or ball-like shape.

Use a Baking Sheet or Dutch Oven
Baking the seeded oat bread in a covered dutch oven traps steam inside the pot, creating that perfect crispy crust. If you plan to bake a lot of bread in the future, you won’t regret buying a dutch oven. If you don’t have a dutch oven, a nonstick baking sheet is best. (I use a baking sheet in the video tutorial below. And even have a trick for creating a steamy oven!)
- Baking Sheet: If you’re using a baking sheet, dust the pan with cornmeal and/or a little flour. Place the dough on top, cover it, and let it rest as the oven preheats. You will find these detailed instructions in the recipe below, along with my optional steamy oven trick for a crispy crust in step 10. (Adding boiled water to a pan beneath the baking bread. Works great!)
- Dutch Oven: Place the empty dutch oven with lid in the oven as it preheats. Place the ball of dough on high-heat-resistant parchment paper (I use this parchment paper), and then fit it inside a bowl. Cover and let the dough rest as the oven preheats, then place it (with the parchment) in the hot dutch oven before baking. You will find these detailed instructions in the recipe Note below.
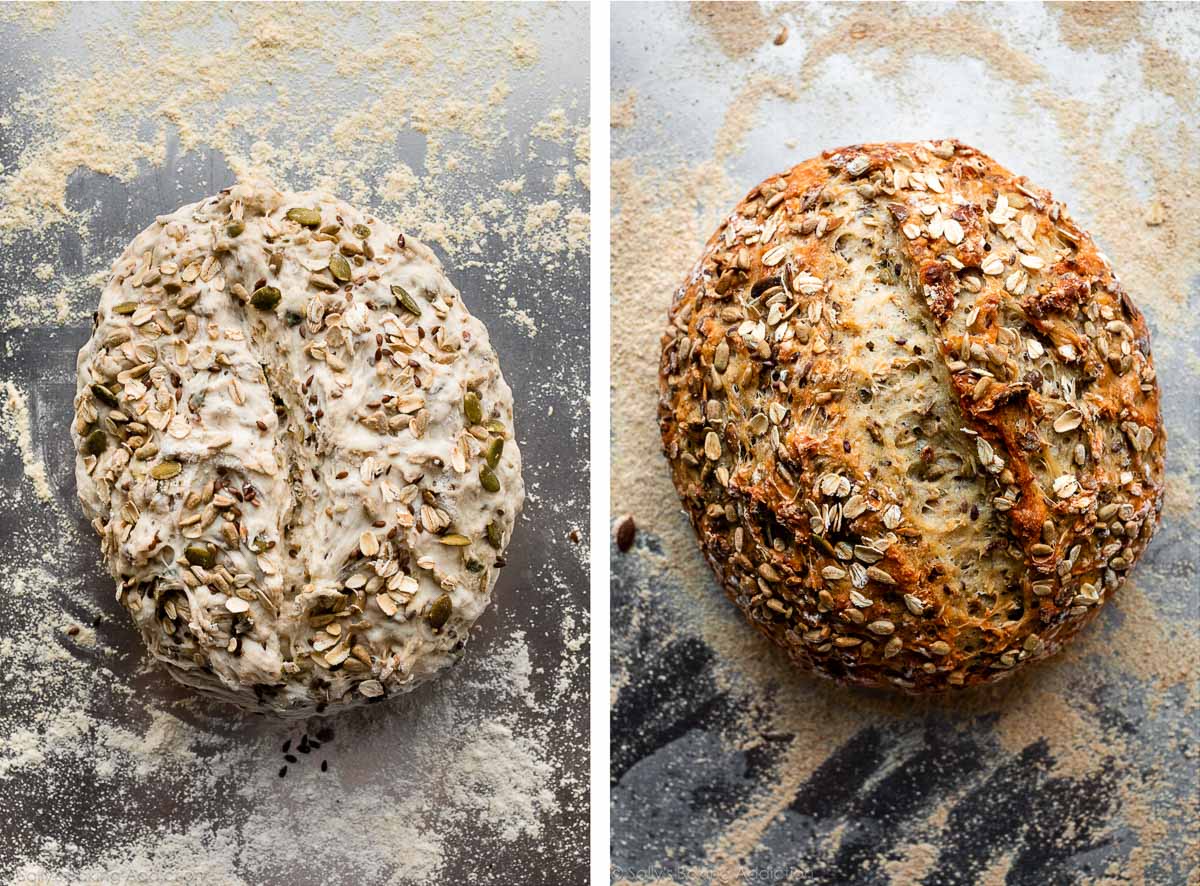
Whichever baking method you use, don’t forget to add seeds/oats to the exterior of the dough (I usually just press them on). And make sure you score the dough with a bread lame or sharp knife before baking. Scoring allows the wet, airy dough to “breathe” as it expands and bakes.
Baking sheet method:
Dutch oven method:
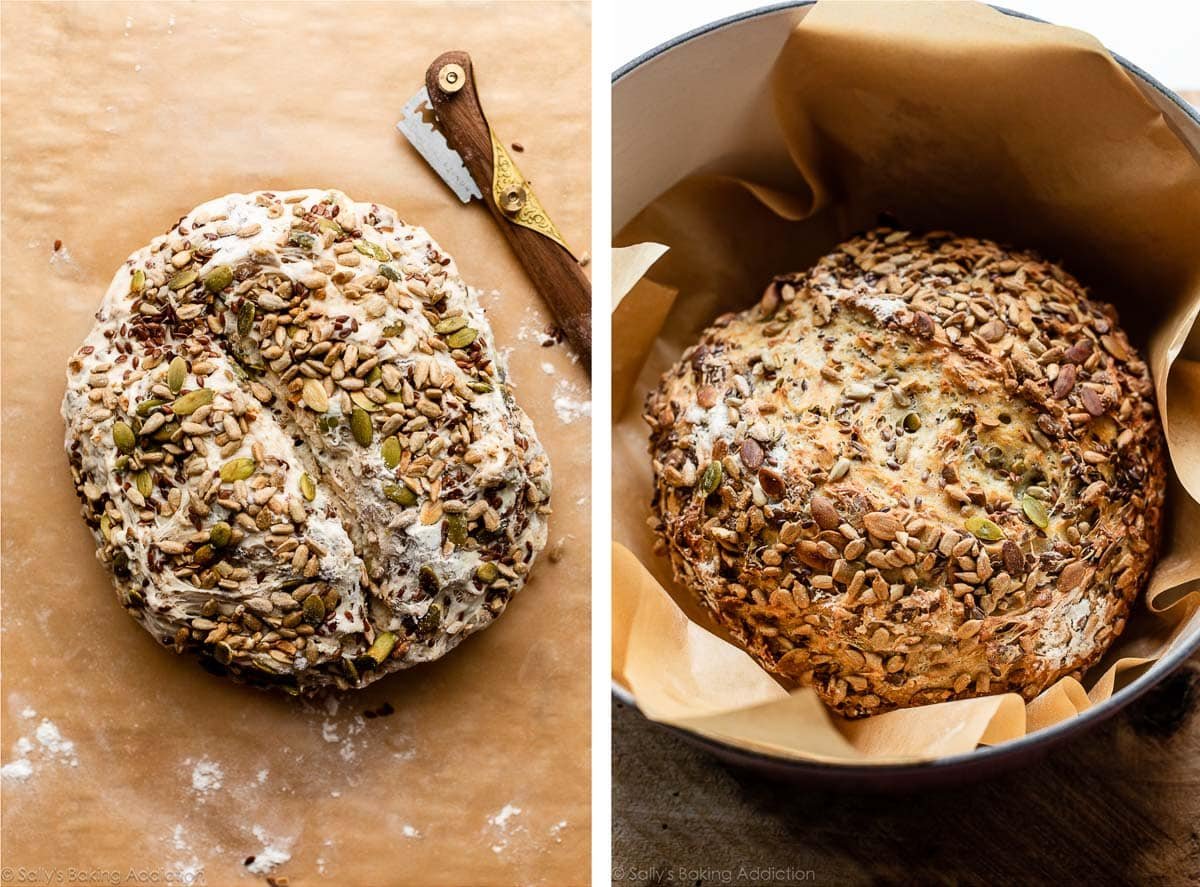
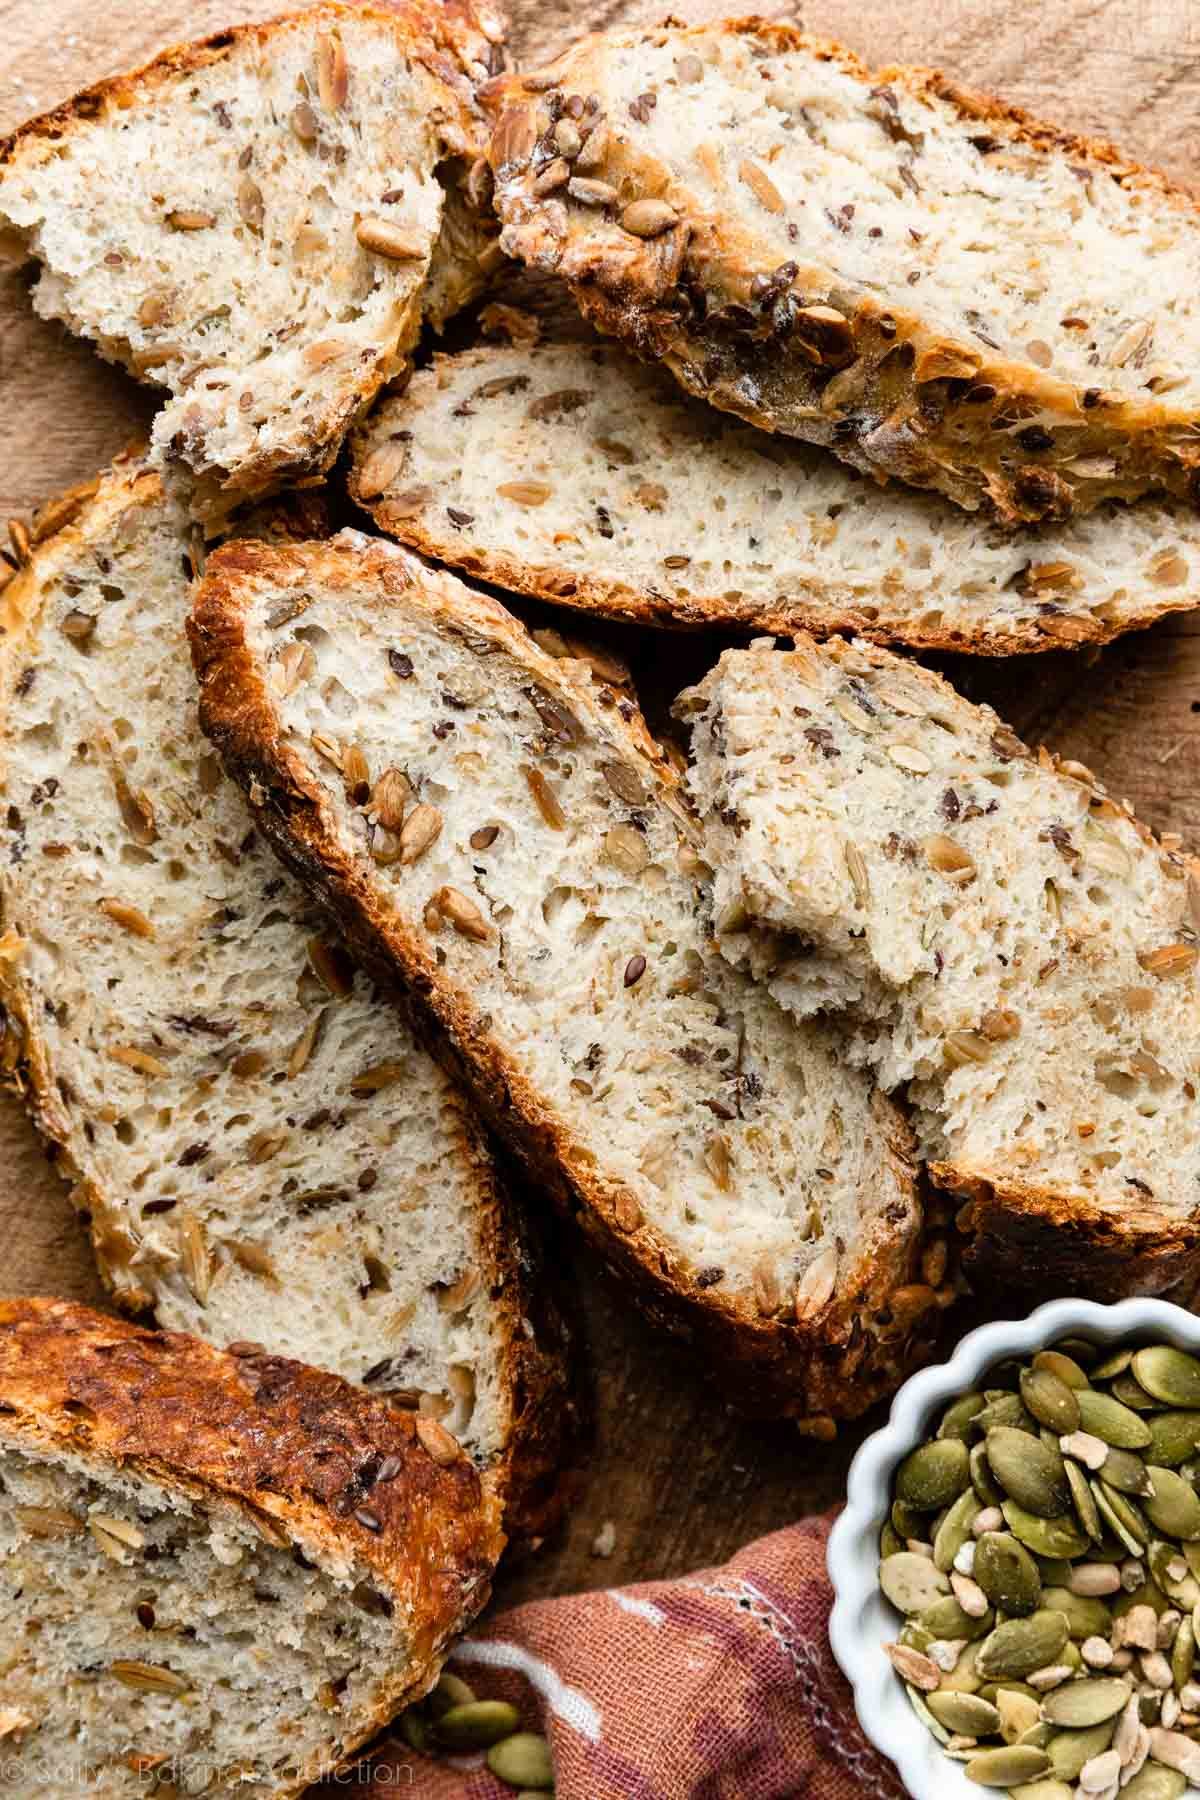
The bread is unbelievable when it’s fresh from the oven—warm, crispy, crusty, soft, and loaded with texture inside and out!
What Do I Serve With Seeded Bread?
Honestly, it’s fantastic plain, with a swipe of butter or a dip-dish of olive oil. The bread would also be delicious paired with homemade pesto or homemade honey butter.
But I especially love serving this seeded oat bread alongside a soup, like this creamy chicken noodle soup or homemade alphabet soup. It also gives phenomenal texture to grilled cheese sandwiches, and makes a hearty base for creamy smashed avocado and soft eggs.
If you manage to have any leftover, make use of the stale bread in this easy breakfast casserole!
Yeast Bread Success Tips
If you’re a bread beginner, reference this Baking with Yeast Guide for helpful, easy-to-understand answers to many yeast FAQs.
No Knead Seeded Oat Bread
- Prep Time: 4 hours
- Cook Time: 40 minutes
- Total Time: 5 hours (includes slight cooling)
- Yield: 1 loaf; 10-12 servings
- Category: Bread
- Method: Baking
- Cuisine: American
Description
Follow this easy no-knead recipe for a hearty loaf of homemade seeded oat bread. Review Notes before beginning. If you’re new to working with yeast, reference my Baking with Yeast Guide for answers to common yeast FAQs.
Ingredients
- 3 cups (390g) bread flour (spooned & leveled), plus more as needed for shaping and pan
- 2 teaspoons (about 6g) Platinum Yeast from Red Star instant yeast
- 1 cup (85g) old-fashioned whole rolled oats
- 1/4 cup (30g) unsalted pumpkin seeds (pepitas)
- 1/4 cup (30g) salted or unsalted sunflower seeds
- 2 Tablespoons (18g) flax seeds or sesame seeds
- 2 teaspoons coarse salt
- 2 Tablespoons (43g) honey
- 1 and 1/2 cups (360ml) warm water (about 95°F (35°C))
- optional: cornmeal for dusting pan
Topping
- 1 Tablespoon (5g) old-fashioned whole rolled oats
- 1 Tablespoon (8g) pumpkin seeds (pepitas)
- 1 Tablespoon (8g) sunflower seeds
- 1 teaspoon flax seeds or sesame seeds
Instructions
- Watch the video below before you begin, and let that be your visual guide for this recipe.
- In a large un-greased mixing bowl, whisk the flour and yeast together. Add the oats, pumpkin seeds, sunflower seeds, flax seeds, and salt and whisk to combine. Mix the honey and water together, and then pour over the dry ingredients. Using a silicone spatula or wooden spoon, gently mix together. The dough will seem dry and shaggy, but keep working it until all the flour is moistened. If needed, use your hands to work the dough ingredients together. The dough will be very sticky. Shape into a ball in the bowl as best you can. (Tip: Stir dough by hand. Dough is too sticky for a mixer.)
- Keeping the dough in the bowl, cover the dough tightly with plastic wrap or aluminum foil and set on the counter at room temperature (honestly any normal room temperature is fine). Allow to rise for 3 hours. The dough will just about double in size, stick to the sides of the bowl, and have a lot of air bubbles.
- You can continue with step 5 immediately, but for absolute best flavor and texture, I strongly recommend letting this risen dough rest in the refrigerator for at least 12 hours and up to 3 days. (Even just a couple hours is good!) Place covered dough in the refrigerator for up to 3 days. The dough will puff up during this time, but may begin to deflate after 2 days. That’s normal and nothing to worry about.
- Lightly dust a large nonstick baking sheet (with or without rims, and make sure it’s nonstick) with a little flour and/or cornmeal. Using generously floured hands and gentle pressure so as to not deflate the dough too much, shape the risen dough into a ball. (I just do this right inside the bowl it’s in, or you can do this on a lightly floured work surface.) Dough is very sticky.
- Transfer ball to prepared baking sheet. Mix topping ingredients together. Sprinkle on top of dough, and if the seeds aren’t sticking, press them into the dough as best you can. Loosely cover and allow dough to rest for 45 minutes. You will bake the dough on this prepared baking sheet. See recipe note if you want to use a pizza stone or dutch oven.
- During this 45 minutes, preheat the oven to 425°F (218°C).
- When ready to bake, using a very sharp knife or bread lame (you could even use kitchen shears), score the dough with a slash or X about 1/2 inch deep. (“Score” = shallow cut.) If the shaped loaf flattened out during the 45 minutes, use floured hands to reshape.
- Place the shaped and scored dough (on the flour/cornmeal-dusted pan) in the preheated oven on the center rack.
- Optional for a slightly crispier crust: Place a shallow metal or cast iron baking pan or skillet (I usually use a metal 9×13-inch baking pan) on the bottom oven rack. Carefully and quickly pour 3–4 cups of boiling water into the shallow pan. Quickly shut the oven to trap as much steam inside. The steam helps create a crispier crust.
- Bake for 40 minutes or until the crust is golden brown. If you notice the exterior browning too quickly, tent the bread with aluminum foil. How to test for doneness: Give the warm bread a light tap. If it sounds hollow, it’s done. For a more accurate test, the bread is done when an instant read thermometer reads the center of the loaf as 195°F (90°C).
- Remove the bread from the oven and allow to cool for at least 10–20 minutes before slicing and serving.
- Store leftovers loosely covered at room temperature for up to 3 days or in the refrigerator for up to 10 days.
Notes
- Make Ahead & Freezing Instructions: The dough can sit in the refrigerator for up to 3 days (step 4), so this is a wonderful recipe to begin ahead of time. You can also bake the bread, allow it to cool, and freeze for up to 3 months. Thaw in the refrigerator and allow to come to room temperature before serving. You can also freeze the dough. Complete the recipe through step 5. Wrap in plastic wrap and place in a freezer-friendly container. Freeze up to 3 months. To bake, allow dough to thaw overnight in the refrigerator, or for 2–3 hours at room temperature. Continue with step 6, including allowing dough to rest for 45 minutes before baking. Keep in mind that the bread tastes a little heavier after freezing/thawing the dough and then baking it.
- Special Tools (affiliate links): Glass Mixing Bowls | Silicone Spatula or Wooden Spoon | Baking Sheet | 2-cup Measuring Cup | Bread Lame | Instant-Read Thermometer | Coarse Salt
- Flour: For absolute best flavor and chewy texture, I strongly recommend using bread flour. You can use a 1:1 substitution of all-purpose flour in a pinch with no other changes to the recipe. I recommend avoiding whole wheat flour in this dough; however, if necessary, you can replace up to 1 cup (about 130g) of the bread flour with whole wheat flour. The bread will taste a bit heavy.
- Yeast: I always use Platinum Yeast from Red Star, an instant yeast. You can use any instant yeast in this dough. If using active dry yeast, the 1st rise time is usually slightly longer, about 3.5–4 hours. Reference my Baking with Yeast Guide for answers to common yeast FAQs.
- Salt: Use a coarse salt, such as coarse sea salt, in this bread. I find the flavor slightly lacking when using regular table salt. If you only have table or fine salt, reduce to 1 and 1/2 teaspoons.
- Seeds: Feel free to use more/less of a particular seed you love, or skip any seeds if you wish. Around 1/2 cup of larger seeds and 2 Tablespoons of smaller seeds is ideal. I usually use unsalted pepitas and salted sunflower seeds. Salted or unsalted are fine, but I don’t recommend 1/2 cup of salted seeds, so if you want to use salted, use 1/4 cup of salted and 1/4 cup unsalted. If you want to add poppy seeds, replace 1 Tablespoon of flax seeds/sesame seeds with poppy seeds. Or just use 1 Tablespoon poppy seeds and skip the flax/sesame.
- Using a Dutch Oven: You need a 6-quart or larger dutch oven or any large oven-safe pot with a lid. Prepare dough recipe above through step 4, including refrigerating the risen dough for at least 12 hours. After refrigerating, turn the dough out onto a lightly floured work surface and, using lightly floured hands, shape into a ball as best you can. Doesn’t have to be perfect. Transfer dough to a large piece of parchment paper. (Large enough to fit inside your pot and one that is safe under such high heat. I use this parchment and it’s never been an issue.) Lift the parchment paper and dough up and place it all into a large mixing bowl. Cover dough lightly with plastic wrap and leave alone for 30 minutes. During this 30 minutes, preheat the oven to 425°F (218°C). Place your dutch oven (with the lid) inside for 30 minutes so that it’s extremely hot before the dough is placed inside. After 30 minutes, sprinkle seed topping all over dough. Using a bread lame or sharp knife, gently score a 1/2-inch-deep slash or X into the top. Remove the dutch oven from the oven and carefully place the dough inside by lifting it up with the parchment paper and placing it all—parchment paper included—inside the pot. Cover with the lid. Bake for 30 minutes with the lid on. Carefully remove the lid and continue baking for 10 more minutes or until the bread is golden brown. You can test for doneness exactly how you would in step 11 above. Remove pot from the oven, carefully remove the bread from the pot, and allow to cool on a wire rack for 10–20 minutes before slicing/serving.
- Using a Pizza Stone: If you want to bake your bread on a pizza stone, place pizza stone in the preheating oven. Remove hot pizza stone, dust with cornmeal or a little flour, and then transfer shaped and scored dough to hot pizza stone and bake as directed.
- No Nonstick Pan? If you don’t have a nonstick baking sheet, line it with parchment paper instead. Coat with a dusting of flour and/or cornmeal before placing the dough on top. Parchment paper can burn, so it’s best to check the box to see how much heat yours can tolerate. Lower your oven heat if necessary, and bake the bread for longer until it’s golden brown and sounds hollow when tapped.


Reader Comments and Reviews
I gave this 5 stars because I couldn’t give it 10! Amazing and so easy! One question: can I add the seeds to your Artisan Bread recipe?
Yes, you can absolutely add seeds to the other bread recipe!
I’d really rather make this with whole wheat flour. Can you provide guidance?
We really recommend avoiding whole wheat flour in this dough; however, if necessary, you can replace up to 1 cup (about 130g) of the bread flour with whole wheat flour. The bread will taste a bit heavy.
I have made this recipe about 5 times now (so yes- we love it). After reading the comments and tweaking, what’s worked best for me is using about 2-3 tablespoons additional water, stretching and folding the dough 2 or 3 times during the initial rise, refrigerating overnight (haven’t tried longer- bet that would be good), an egg wash to keep on the topping, and using a dutch oven. My baking time at 425 is 20 minutes with the lid on and 20 without. Great bread with rave reviews from family. Hope everyone enjoys it.
This worked like a charm.
Can I use gluten-free flour in your recipes. They look amazing.
Thank you!
Hi Sandie, Although some readers report using an all-purpose 1:1 gluten-free flour in many of our recipes with success, you should expect slightly different results anytime you substitute ingredients. If you’re interested, here are all of our naturally gluten free recipes.
I want to like this recipe. Sadly, I agree with other reviews that say the bread has no flavor, is super dense and underbaked (even after adding additional baking time). I am an experienced no knead bread maker and there are better recipes out there. After 24 hour bulk ferment, the dough had completely deflated and was super dense. I let it warm up for extra time after the recommended time while my Dutch oven preheated. It gave it some rise, but was still pretty solid… not really sure what went wrong?! Lacked stretch and folds? The bread won’t go to waste. I’ll turn it into croutons for salads.
I’m gluten free…ugh. But made this for another family. They asked for the recipe, saying this bread was amazing!
Made this & kept to the directions. Baked in cast iron pot. Looked great. Nice crust on it. The texture was great but felt it lacked in flavor.
Thank you for trying it, and for your feedback!
Could I make this with my sour dough starter?
Hi Andrea, we haven’t tested this recipe with sourdough starter, but let us know if you give it a try.
This recipe is so delicious and easy. I had my eleven year old granddaughter make it for her family. She watched the video and then I read out the ingredients as she added them and mixed it together. It turned out perfect and her family was very happy!
Fabulous no knead bread! Made it exactly as written and allowed about 2 days of resting in the fridge. It is dense but I love love the hearty and crunchy flavour. I’ll avoid the seeds on the top next time, they make too much of a mess when slicing. This moves to the top of my easy-to-make bread list, thank you!
Absolutely delicious! Enjoyed today with homemade tomato soup topped with goats cheese, swiftly followed by another slice with unsalted butter (just to be sure). Heaven. A definite keeper.
I am new to bread making and excited to try this recipe. When I store the dough in the fridge, should I leave the plastic wrap tightly on the bowl from time it is mixed until time to top/rest/score/bake? Thanks!
Hi Clint, yes, keep the bowl covered in the fridge. Hope it turns out great!
This bread came out amazing!! I added coarse salt and rosemary to the topping – yum…
Can you use gluten free flour instead?
Hi Eva, we haven’t tested a gluten-free version, so we’re unsure of the results. Although some readers report using an all-purpose 1:1 gluten-free flour in many of our recipes with success, you should expect slightly different results anytime you substitute ingredients. Let us know if you give it a try.
Loved baking this. The taste was amazing. Few things that caught my attention however,
1. Is it normal for the dough to be almost stiff after final refrigeration? Did oats soak up water a lot?
2. I baked in the dutch oven. Took 15 mins extra to brown on top.
3. After resting for over 40 minutes, the loaf was still steamy when cut and appeared extremely moist.
I wonder if others also are facing similar issues. But otherwise, really tasty bread!!
Thank you!! Easy and absolutely DELICIOUS!!!
So tasty. Followed recipe as written and it was perfect. Left in the fridge over night and baked this morning. My only complaint is many of the seeds fell off when it was cut. Still five star though!
Use an egg white wash on top of the loaf before you put the seeds on top. I tried it. Works great to keep the seeds from falling off, makes the crust crunchier too.
Can I make this in a loaf pan?
Hi Michael, you can certainly try a loaf pan. You may want to try this honey oat bread instead, and you can add seeds to that dough.
Hello
This looks very good !!
Just wondering if maple syrup could be used in place of the honey for a plant based bread.
Hi Donna, Yes, maple syrup can be used instead, or even brown sugar.
I tried many of your recipes and they are always simple and delicious. My husband and I like bread “a Lot” but we are closely watching our sodium intake. Could you tell me how much sodium is in this bread? What will I get if I reduce the salt? Thanks
Hi Marilyn, We don’t usually include nutrition information as it can vary between different brands of the same ingredients. Plus, many recipes have ingredient substitutions or optional ingredients listed. However, there are many handy online calculators where you can plug in and customize your exact ingredients/brands. Readers have found this one especially helpful: https://www.verywellfit.com/recipe-nutrition-analyzer-4157076 You can reduce the salt if you wish, but will lose out on some taste. Hope you enjoy this one!
Looking forward to trying the recipe! If I leave out the oats – should I sub an extra of flour?
Thanks!
Hi Marcia, you can leave out the oats and add an extra 1/4 cup (about 35g) of bread flour. Or, you might enjoy trying our artisan bread recipe instead.
Second time in my life making bread, and this was my first no kneed. The recipe was very easy to follow. I got a beautiful crust with the steam trick. I did have a couple of execution issues I’m hoping to get help with for the next time I bake. The bread took much longer to bake (about 15 min more) and I still think it was a bit underdone because it was a tiny bit on the doughy/dense side. The thermometer didn’t immediately go to 195, but rose to that temp. Is that ok? (Side note, my oven seems to run cooler).
Also, I used the exact same yeast. I measured right out of the package and 2tsp used the whole 7g pks. Perhaps I didn’t level well enough and ended up with too much yeast. Would that increase the density?
It tastes delicious and I’m looking forward to trying again!
Hi Ainslie, We are so happy that you enjoyed this bread! This isn’t meant to be a fluffy bread. It’s definitely on the more dense and hearty side, but shouldn’t be doughy. If your oven is known to run a bit cool, it would be expected for it to take a bit longer to bake but try extending the bake time even just a few minutes longer next time if it was still doughy. And make sure to handle the dough with care to leave the air bubbles in tact for the best results. Hope this helps!
Just mad this today and it looks great! Sally, your recipes never disappoint! You should be on the Food Network! Thanks
Really lovely recipe, nutritious and tasty
My sister sent me one of your recipes. I hunted down some more and love how easy you make baking !!! I love the directions and options of substitutes and especially the raves I get when I make your breads!!!
Really like this recipe as is, but also really like your cranberry walnut version. Have started mixing the two together so I can enjoy the seediness and the sweet together. I use this as my base using the ingredients as written (except using the whole packet of yeast because it’s easier) and adding about 70-80g each of the cranberries and walnuts. Works great!
Hi, could I have success with this recipe using almond or coconut flour?
Hi Alyson, we don’t recommend those swaps. They have very different baking properties and wouldn’t necessarily be a 1:1 swap. Best to stick with bread flour (or all-purpose flour if needed–see recipe Notes for more details).
Fantastic!
This bread exceeded all of my expectations!
I made it as directed in the recipe – – I did use rapid rise yeast instead of instant ( just activating it, and warm water ahead of time, and reducing the water added later). It was generally a heavy dough and did not rise a ton.I let it sit for 24+ hours in the refrigerator and used a preheated dutch over. It did bake a few minutes longer than the recipe, but that’s where having the temperature was super helpful and spot on—It smelled amazing and came out with a nice crisp, outer crust, and a moist, incredibly flavorful crumb. This is, hands down, my new favorite no knead bread – – the depth of flavor is
excellent! I think it will be versatile, too. Served with soup last night and I can’t wait to go toast a slice for breakfast!
I can’t find the Platinum variety of Red Star Yeast where I live. I have both the Red Star Active Dry and Red Star Quick Rise Instant yeast. Would either of those work?
Hi Susan, yes, either of those will work well. If using active dry yeast, the 1st rise time is usually slightly longer, about 3.5–4 hours.
LOVE THIS BREAD! So easy and delicious! I used toasted sesame seeds instead of the flax seeds. Came out perfect the first try!