

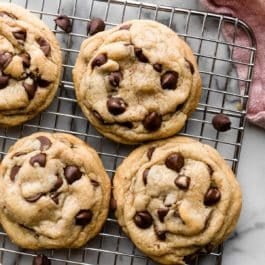
With 30 million page views and counting since 2013, these super soft and chewy chocolate chip cookies are the most popular cookie recipe on my website. Melted butter, more brown sugar than white sugar, cornstarch, and an extra egg yolk guarantee the absolute chewiest chocolate chip cookie texture. And you don’t even need a mixer!
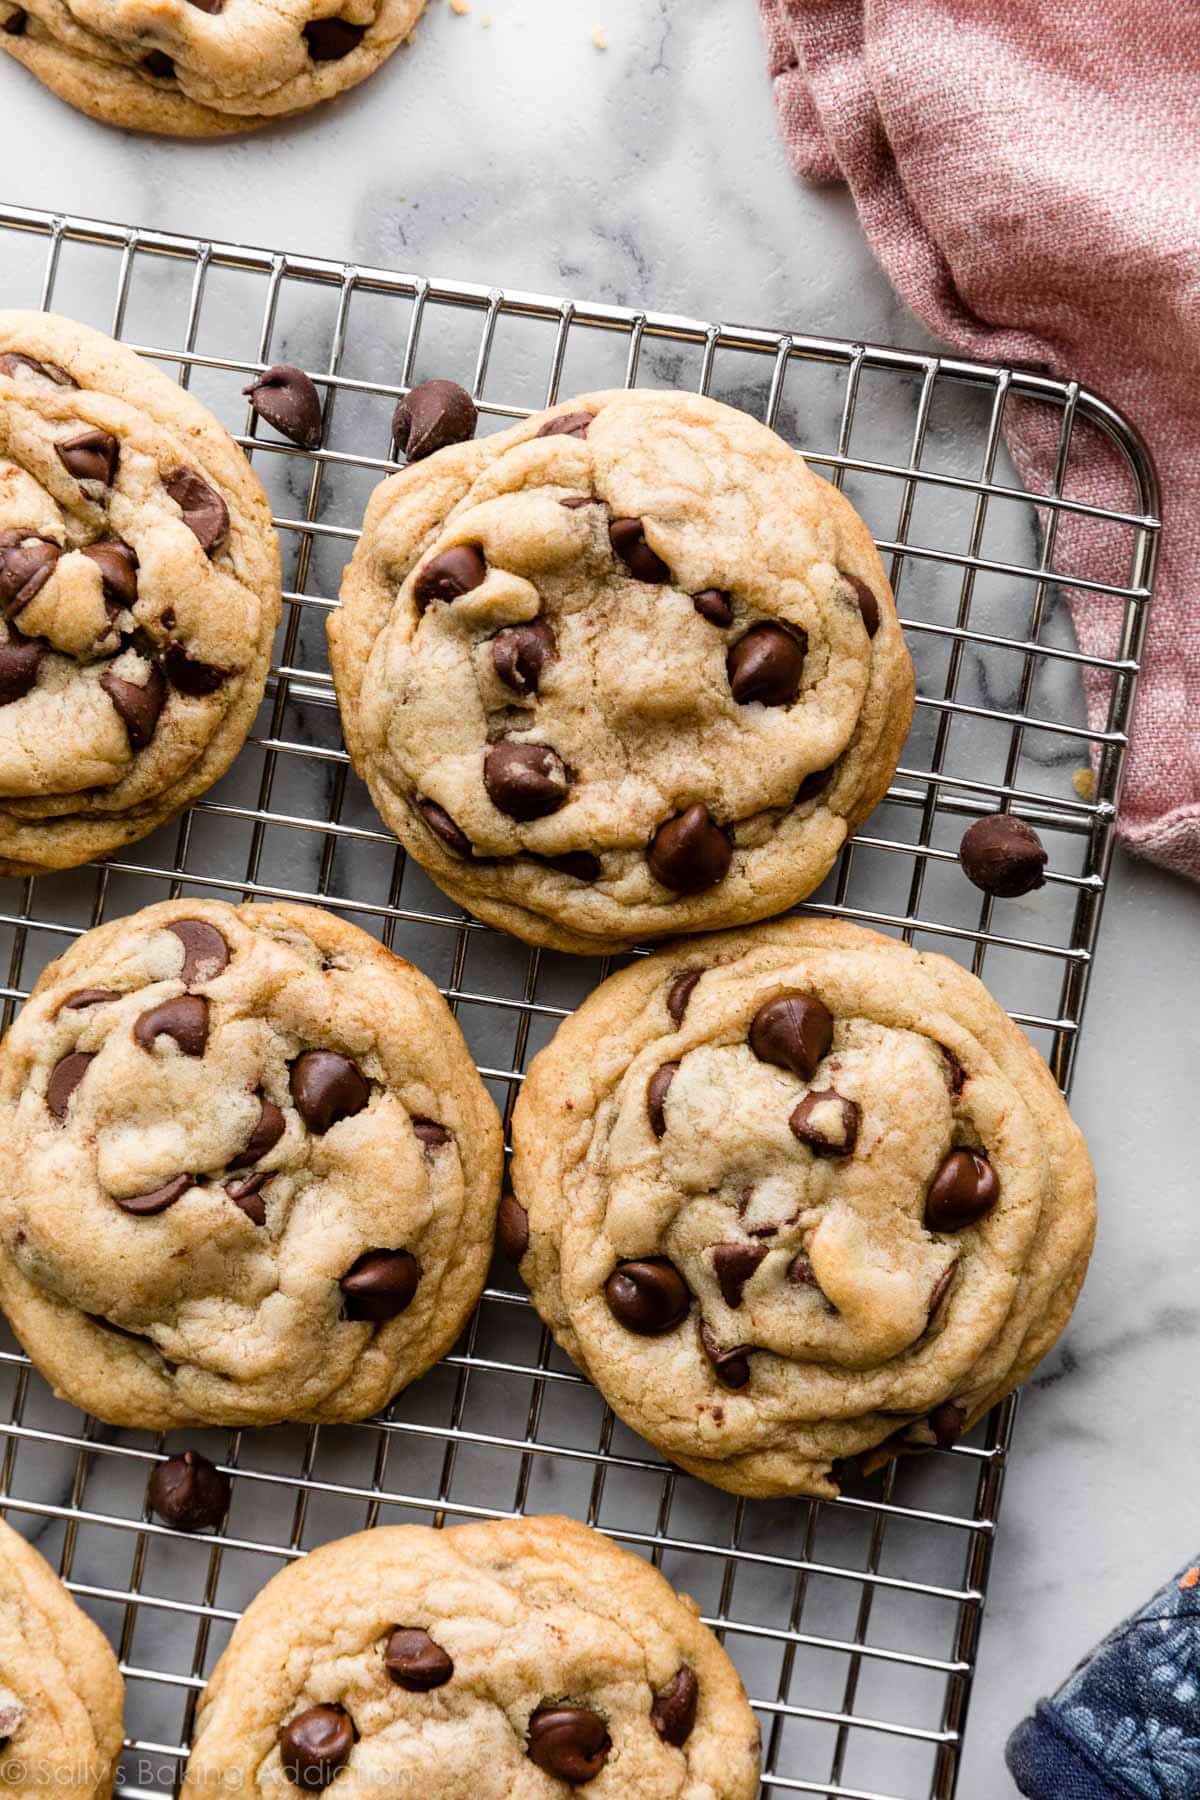
I originally published this recipe in 2013 and have since added new photos, a video tutorial, and more helpful success tips. This recipe is such a fan (and personal) favorite that I included it in my New York Times best-selling cookbook, Sally’s Baking 101.
One reader, Adrienne, commented: “These are the best cookies I’ve ever had. Incredible. Don’t cut corners or you’ll miss out. Do everything she says and you’re in for the best cookies of your life. ★★★★★“
There are thousands of chocolate chip cookies recipes out there. Everyone has their favorite and this one is mine. Just a glance at the hundreds of reviews in the comments section tells me that this recipe is a favorite for many others too! In fact, if you asked me which recipe to keep in your apron pocket, my answer would be this one. (In addition to a classic cut-out sugar cookies and flaky pie crust, of course!) Just read the comments on a post in our Facebook group. These cookies are beloved… and, a warning: they disappear FAST.
Why Are These My BEST Chocolate Chip Cookies?
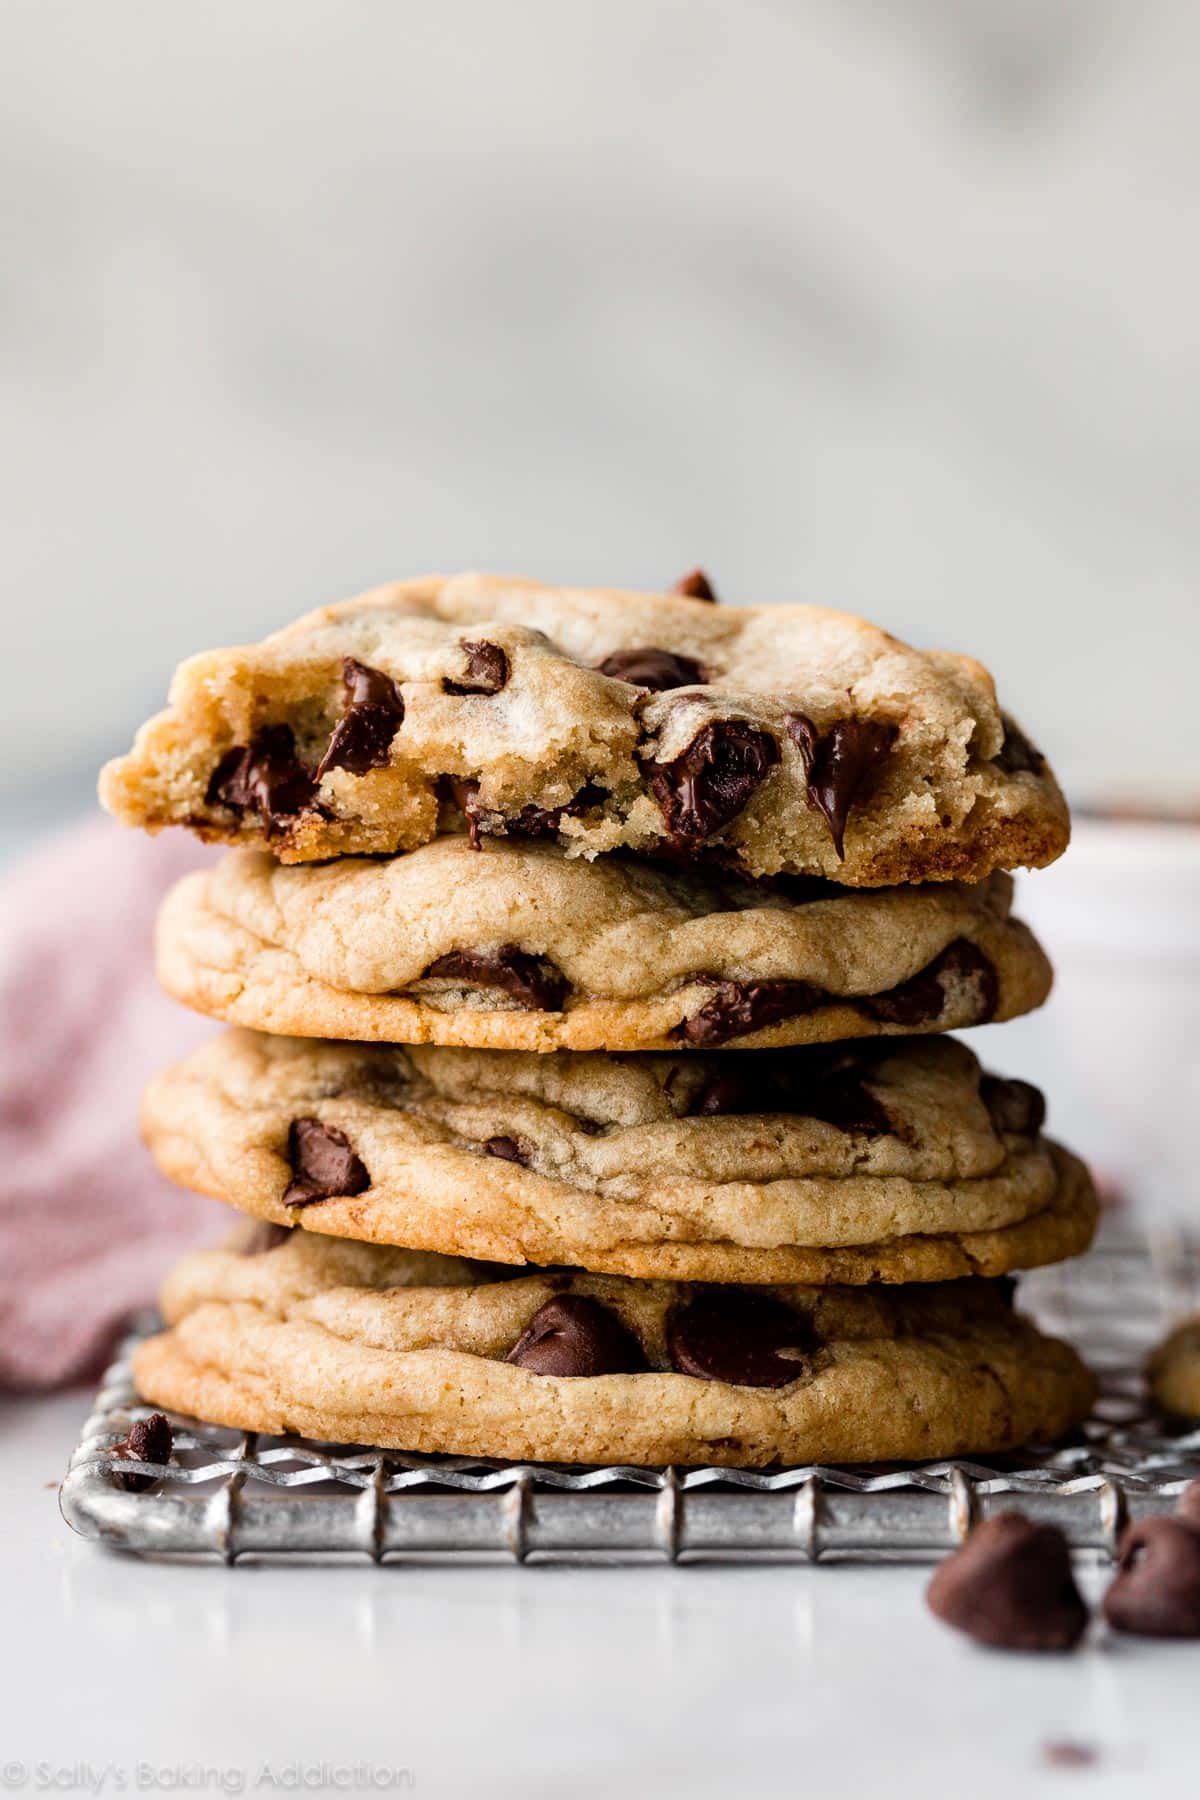
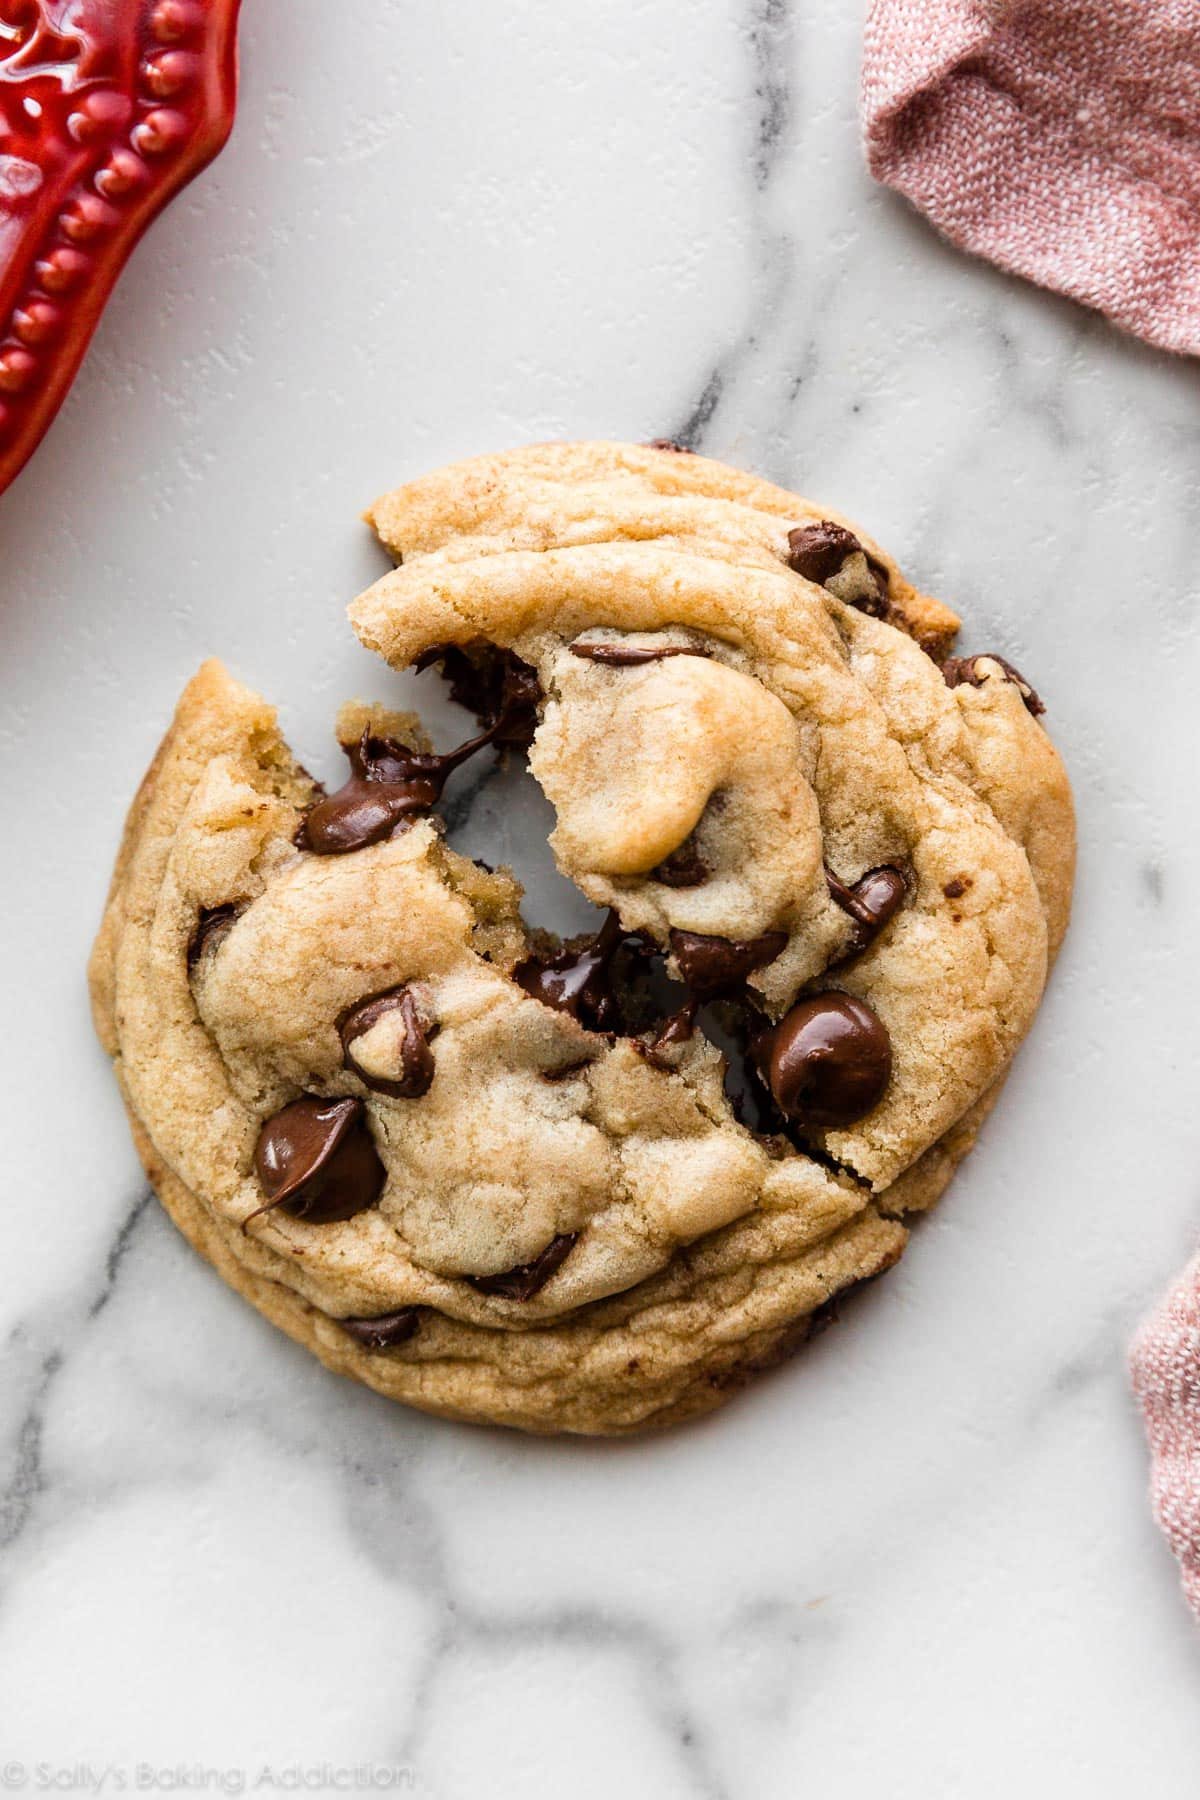
- The chewiest of chewy and the softest of soft.
- Extra thick just like my favorite peanut butter cookies!
- Bakery-style BIG.
- Exploding with chocolate.
I’ve tested this cookie recipe over and over again to make sure they’re absolutely perfect. I still have a big space in my heart (and stomach) for these soft chocolate chip cookies. Today’s recipe is similar, but I increased the chewiness factor.
One reader, A.Phillips, commented: “Look no further. This is it. This is the perfect cookie recipe. Follow her instructions exactly and the cookies will be chewy and amazing. … These are the most perfect cookies I’ve made and I’ve tried at least 20 different recipes. ★★★★★“
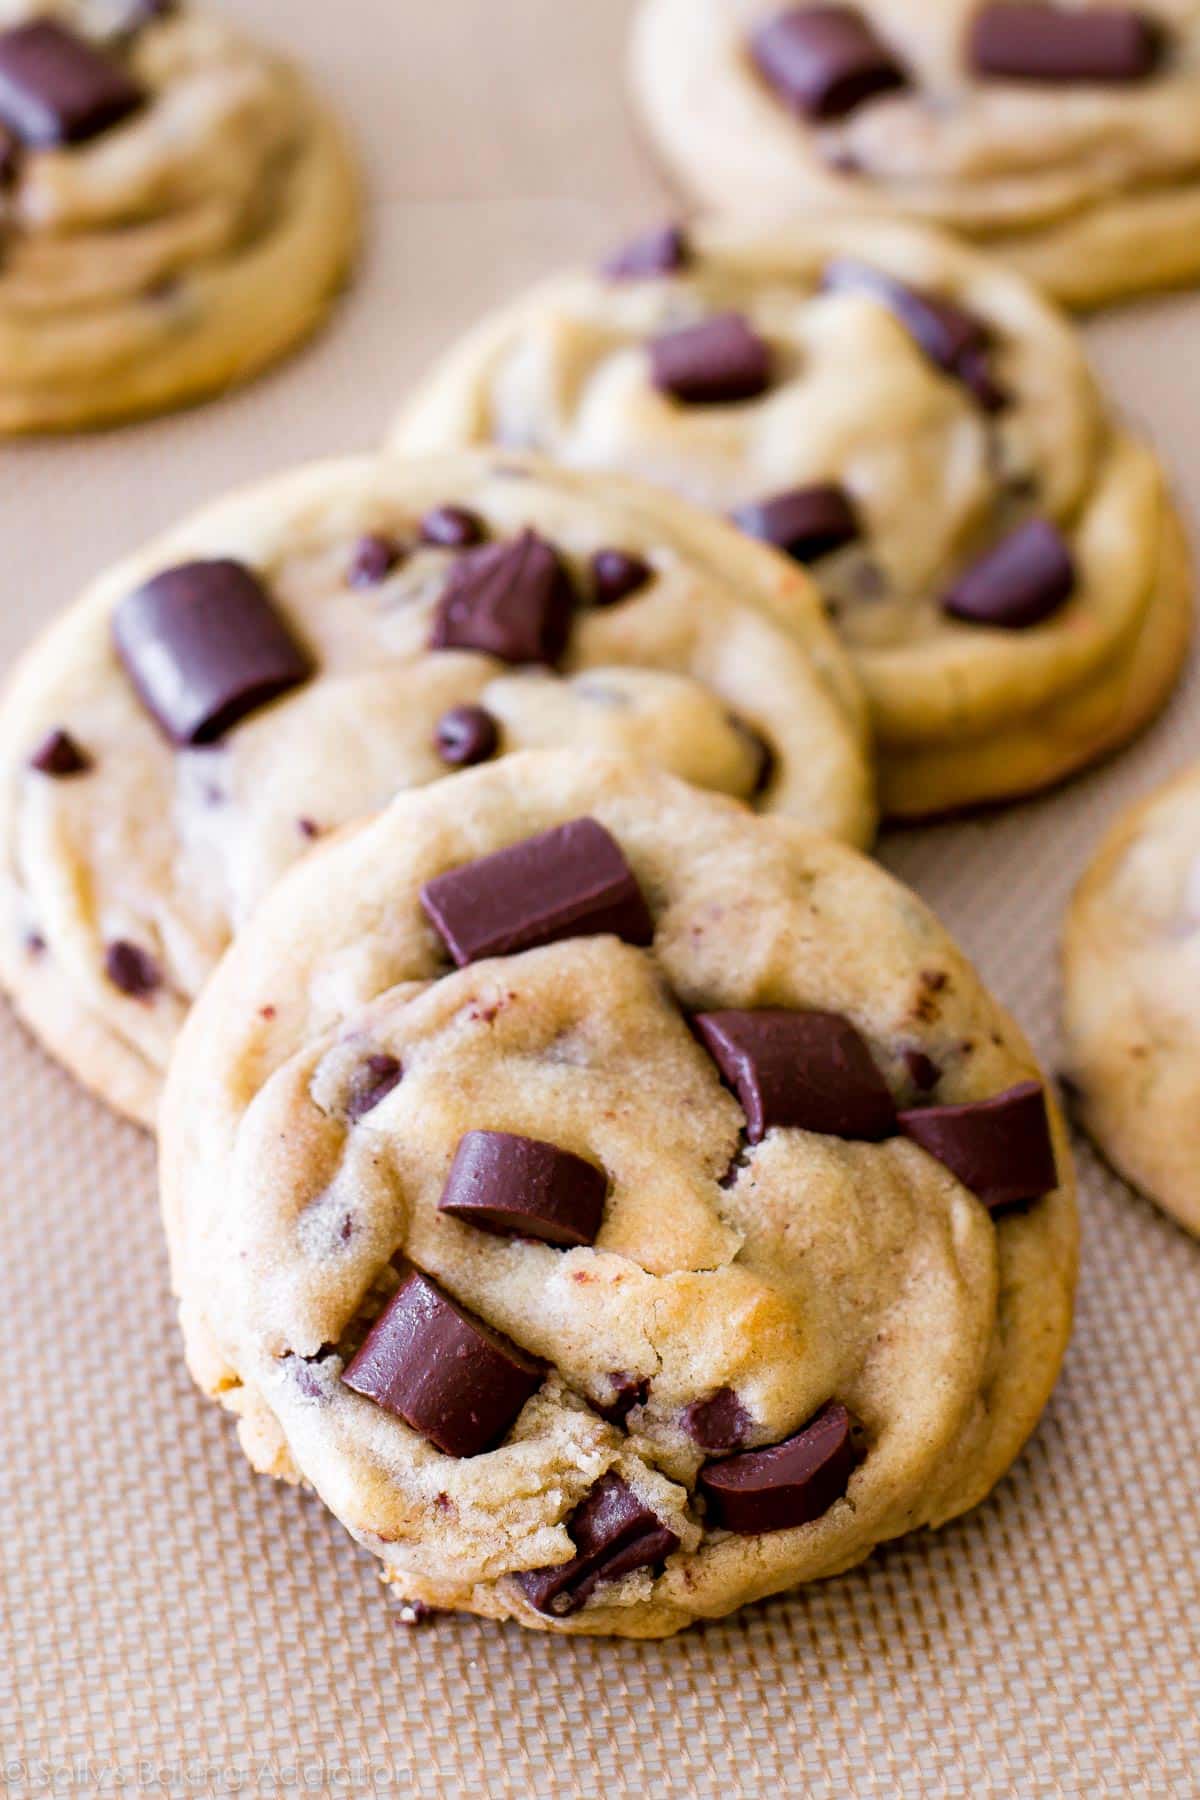
You can make them with chocolate chips or chocolate chunks.
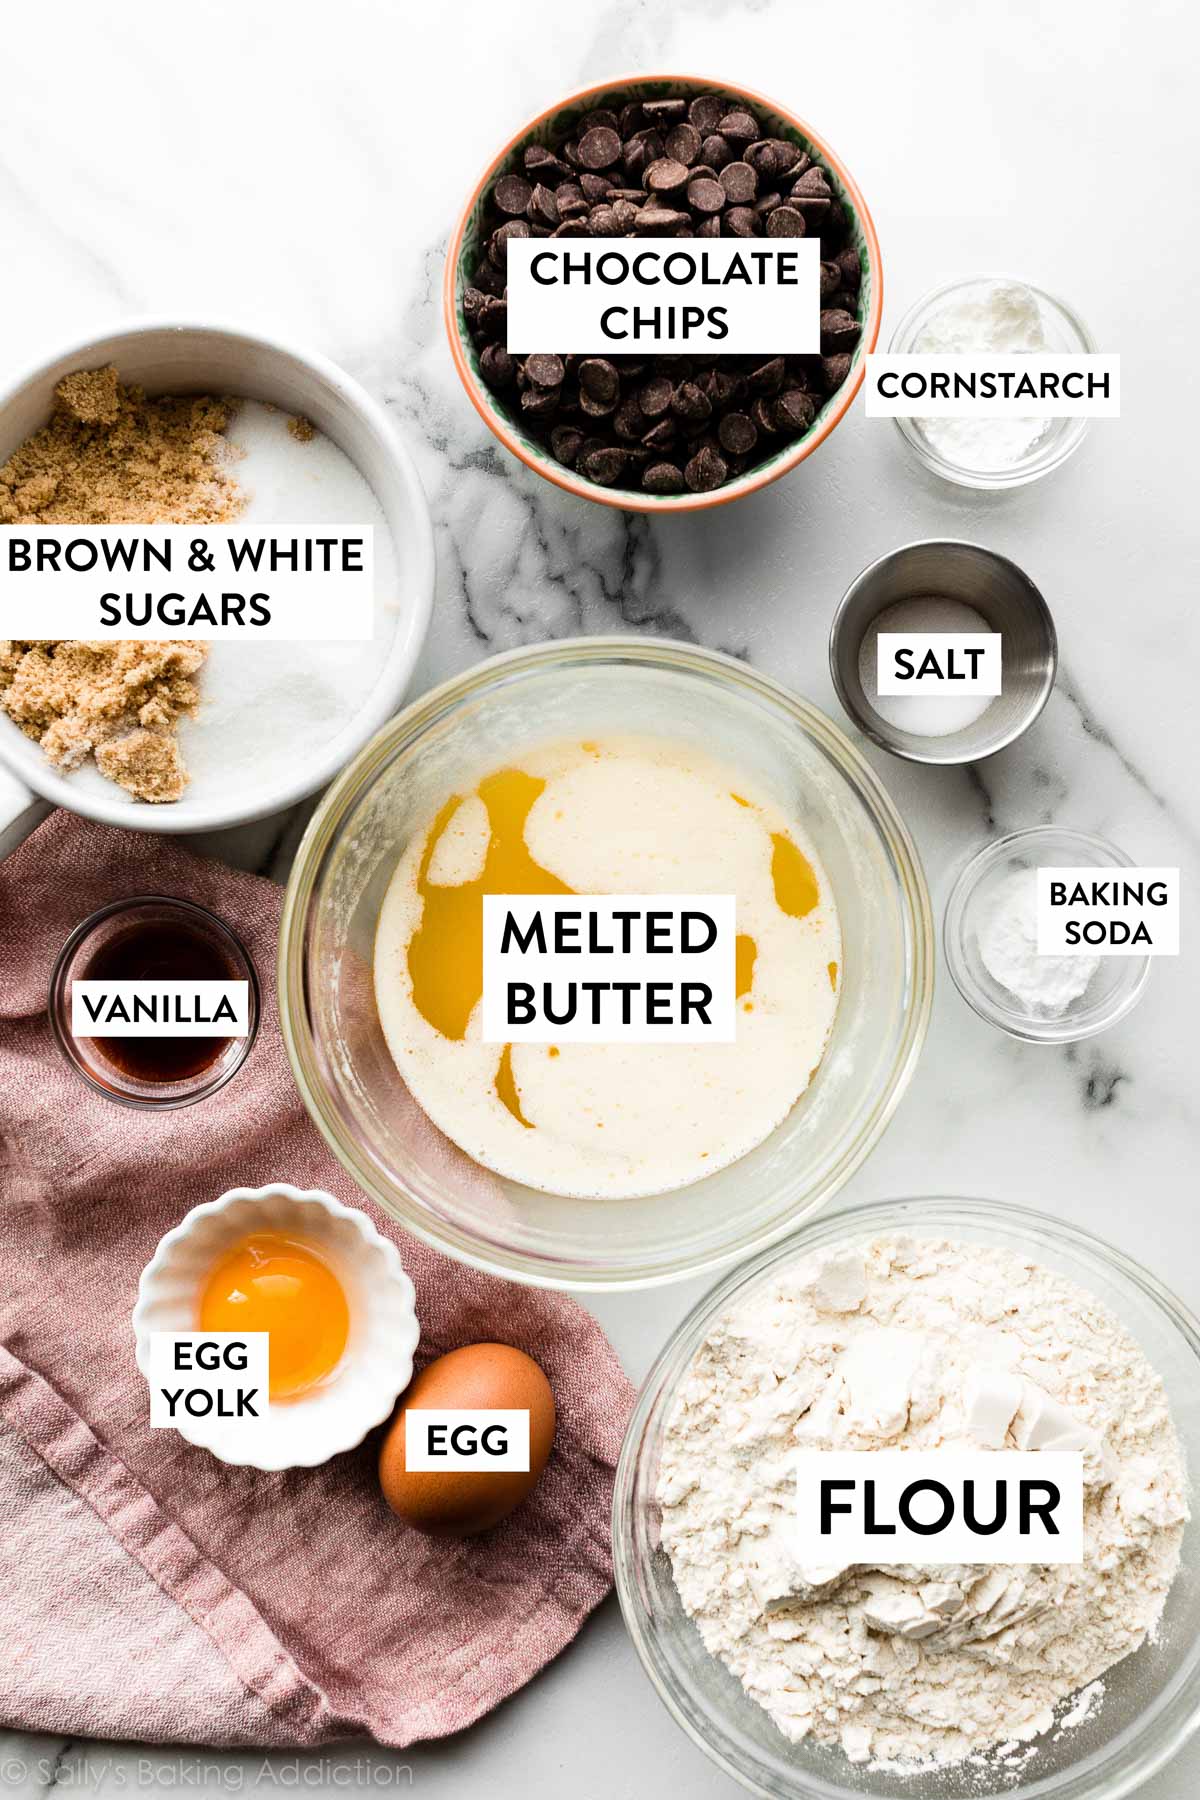
Key Ingredients for Chewy Chocolate Chip Cookies
The cookie dough is made from your standard cookie ingredients: flour, leavener, salt, sugar, butter, egg, and vanilla. It’s the ratios and temperature of those ingredients that make this recipe stand out from the rest.
- Melted butter: Melted butter produces the chewiest cookies. It can, however, make your baked cookies greasy, so I made sure there is enough flour to counteract that. And using melted butter is also the reason you don’t need a mixer to make these cookies, just like these pumpkin chocolate chip cookies, pumpkin crumb cake cookies, salted butterscotch blondies, and M&M cookie bars.
- More brown sugar than white sugar: More brown sugar than white sugar: The moisture in brown sugar promises an extra soft and chewy baked cookie. White granulated sugar is still necessary, though. It’s dry and helps the cookies spread. A little bit of spread is a good thing.
- Cornstarch: Why? Cornstarch gives the cookies that ultra soft consistency we all love. Plus, it helps keep the cookies beautifully thick. We use the same trick when making shortbread cookies.
- Egg yolk: Another way to promise a super chewy chocolate chip cookie is to use an extra egg yolk. The extra egg yolk adds richness, soft tenderness, and binds the dough. You will need 1 egg + 1 egg yolk, at room temperature, just like in these brown butter marshmallow crispy cookies. See the recipe Notes for how to bring your eggs to room temperature quickly.
The dough will be soft and the chocolate chips may not stick because of the melted butter. Just keep stirring it; I promise it will come together. Because of the melted butter and extra egg yolk, the slick dough doesn’t even look like normal cookie dough! Trust the process…
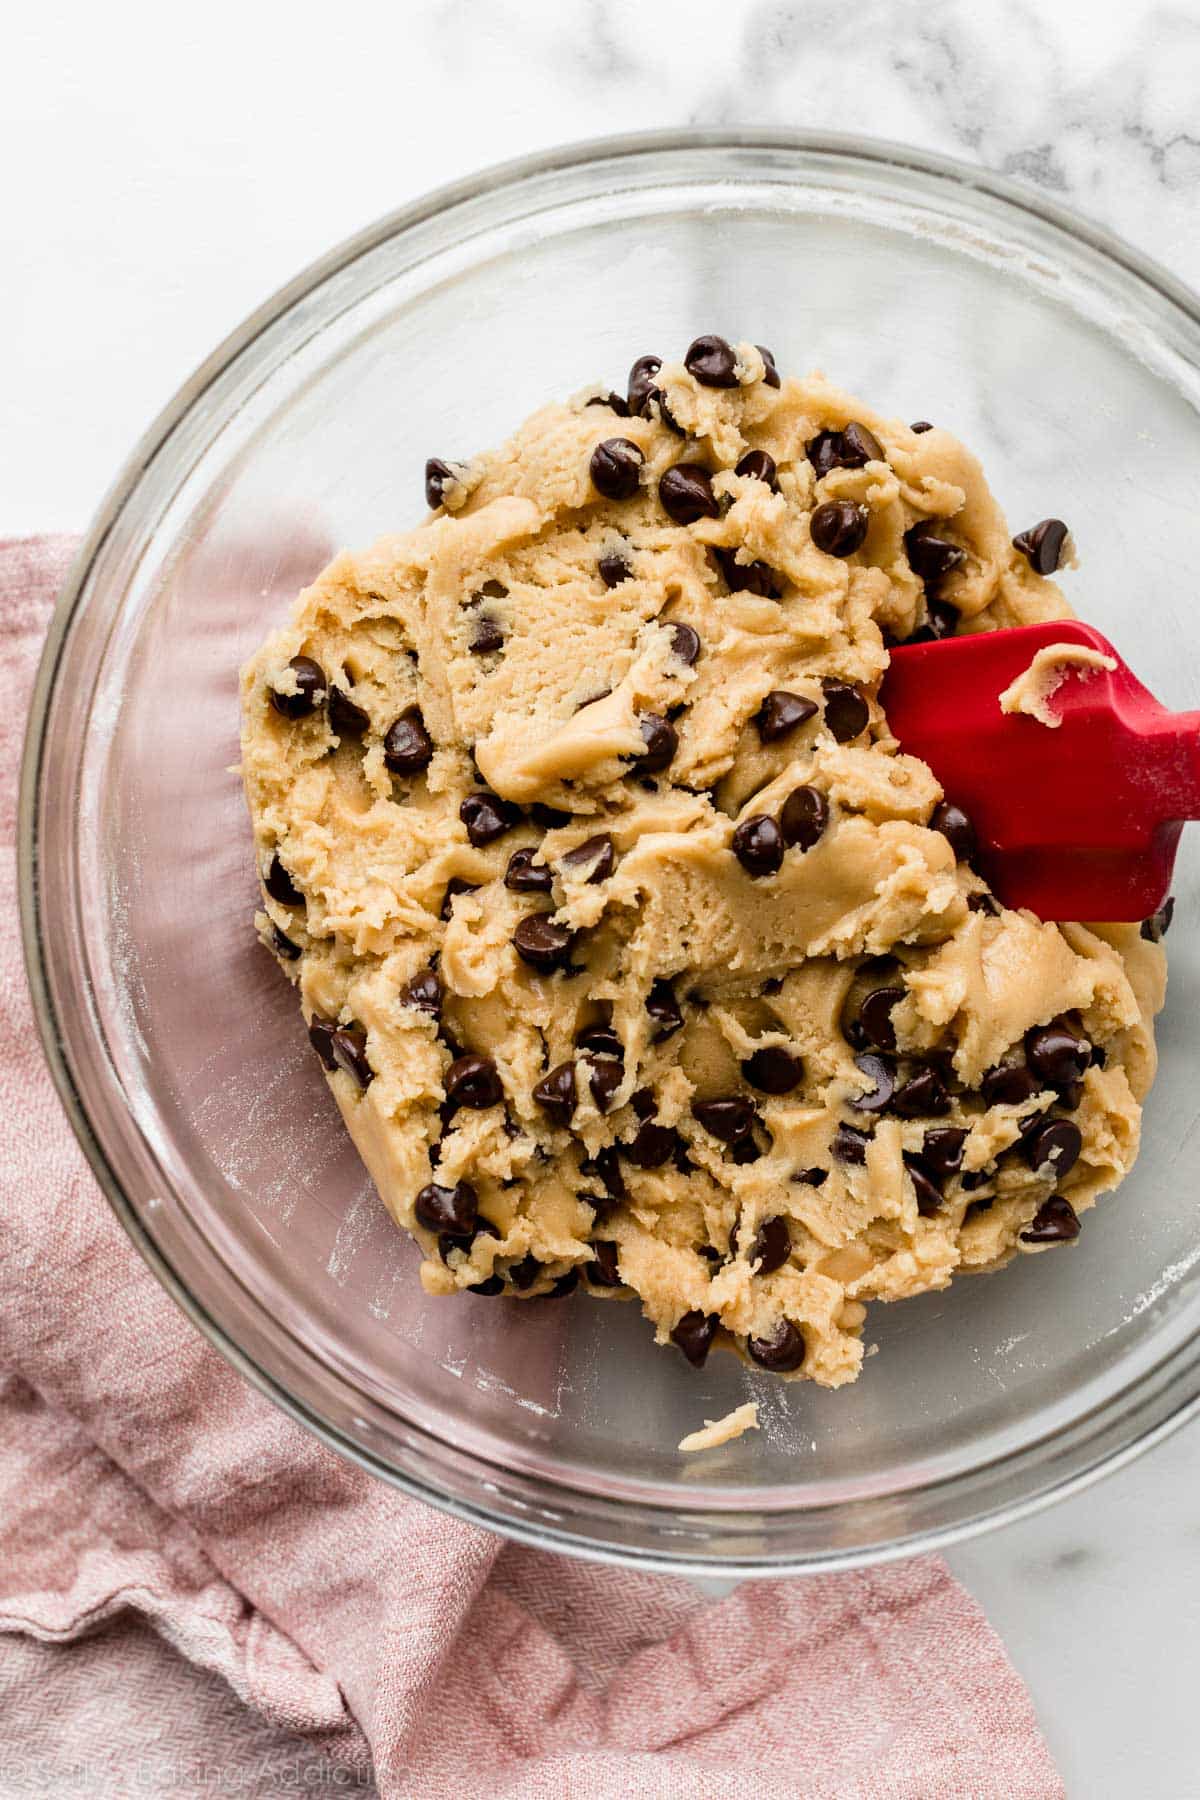
The most important step is next.
2 Major Success Tips
1. Chill the dough. Chilling the cookie dough is so important in this recipe! Unless you want the cookies to spread into a massive cookie puddle, chilling the dough is mandatory here. It allows the ingredients to settle together after the mixing stage but most importantly: cold dough results in thicker cookies. Cover the cookie dough and chill for at least 2–3 hours or up to 3 days. I usually chill it overnight.
(No time to chill? Make these soft & chewy chocolate chip cookie bars, giant chocolate chip cookies, chocolate chip cookie cake, or crispy chocolate chip cookie bark instead!)
- Further reading: How to Prevent Cookies from Spreading
2. Roll the cookie dough balls extra tall. After the dough has chilled, scoop out a ball of dough that’s 3 Tablespoons for XL cookies or about 2 heaping Tablespoons (1.75 ounces or 50g) for medium-large cookies. I usually use this medium cookie scoop and make it a heaping scoop. But making the cookie dough balls tall and textured, rather than wide and smooth, is my tried-and-true trick that results in thick and textured-looking cookies. We’re talking thick bakery-style cookies with wrinkly, textured tops. Your cookie dough should look less like balls and more like, well, lumpy columns, LOL.
Watch the video below to see how I shape them. I also demonstrate how I use a spoon to reshape them during baking if I see they’re spreading too much.
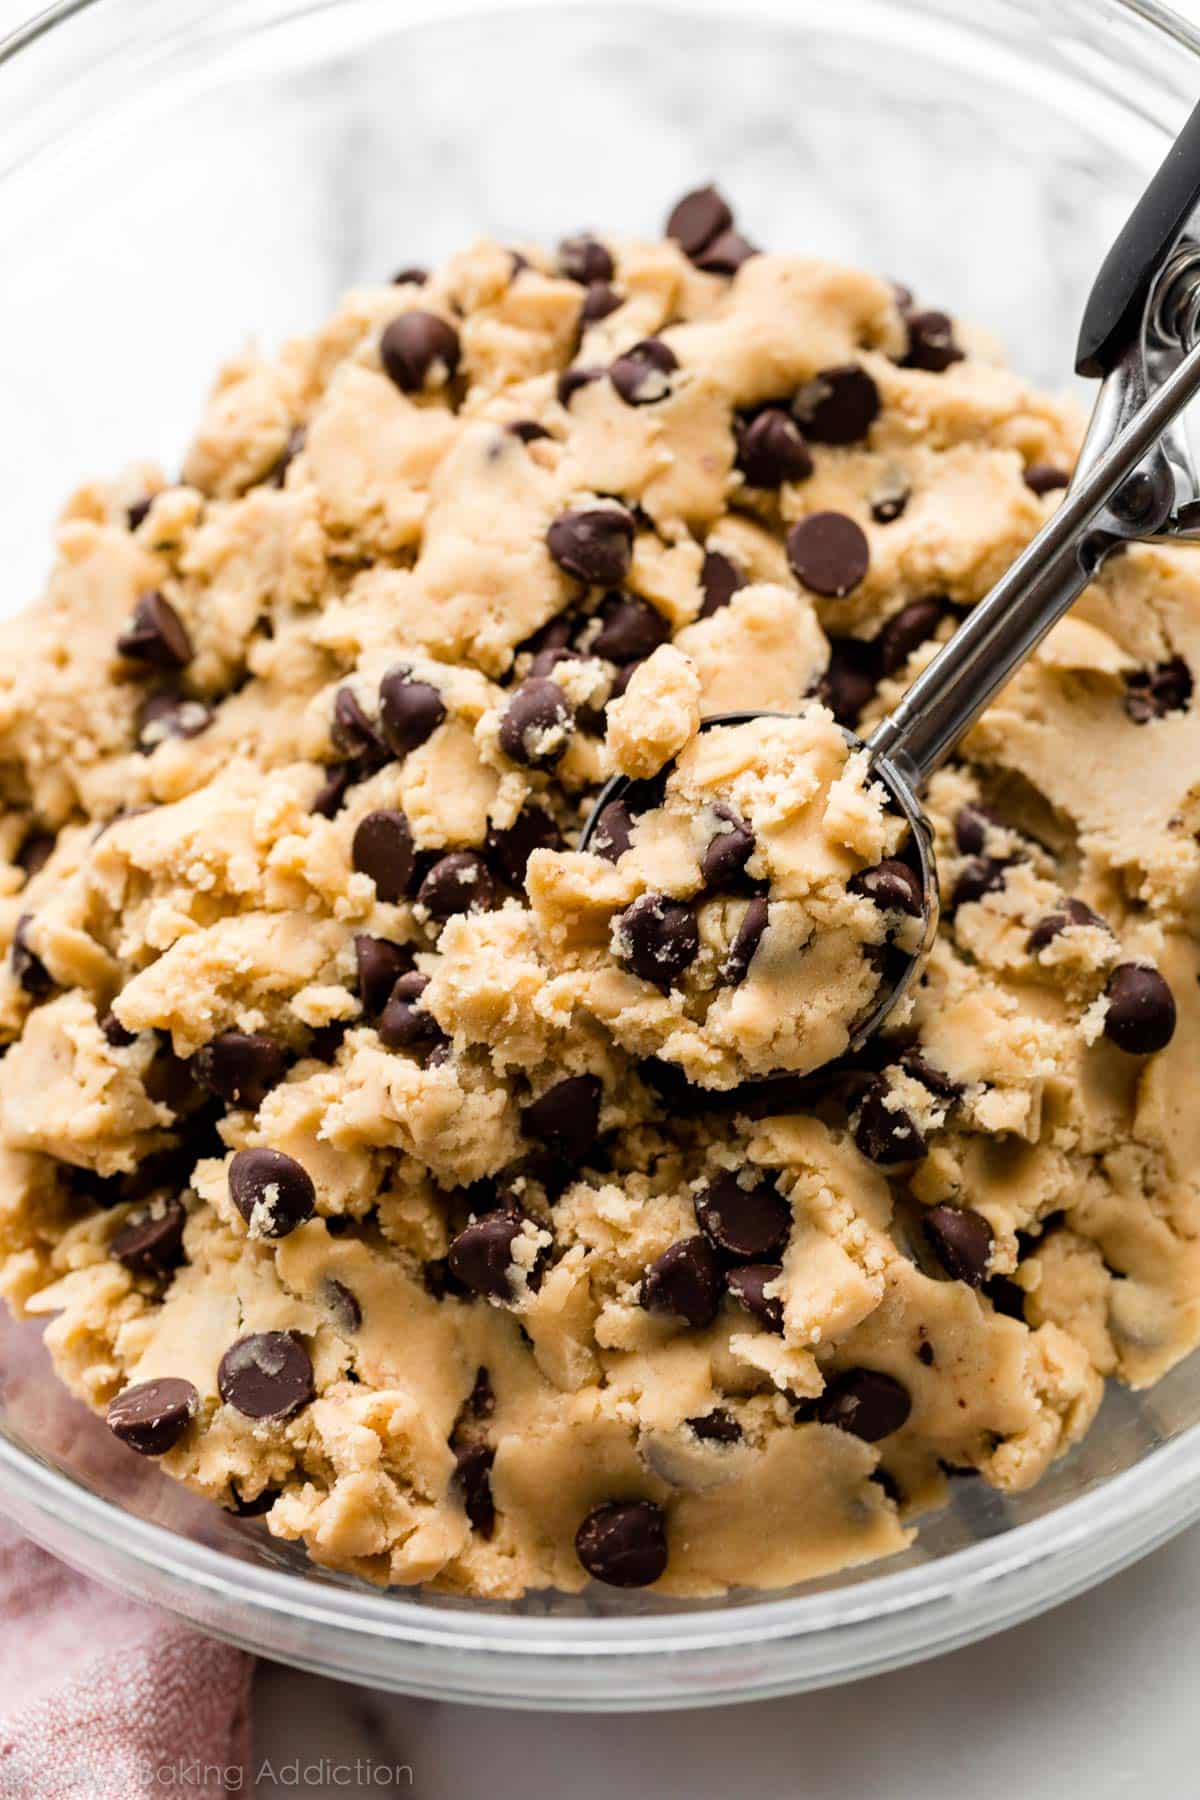
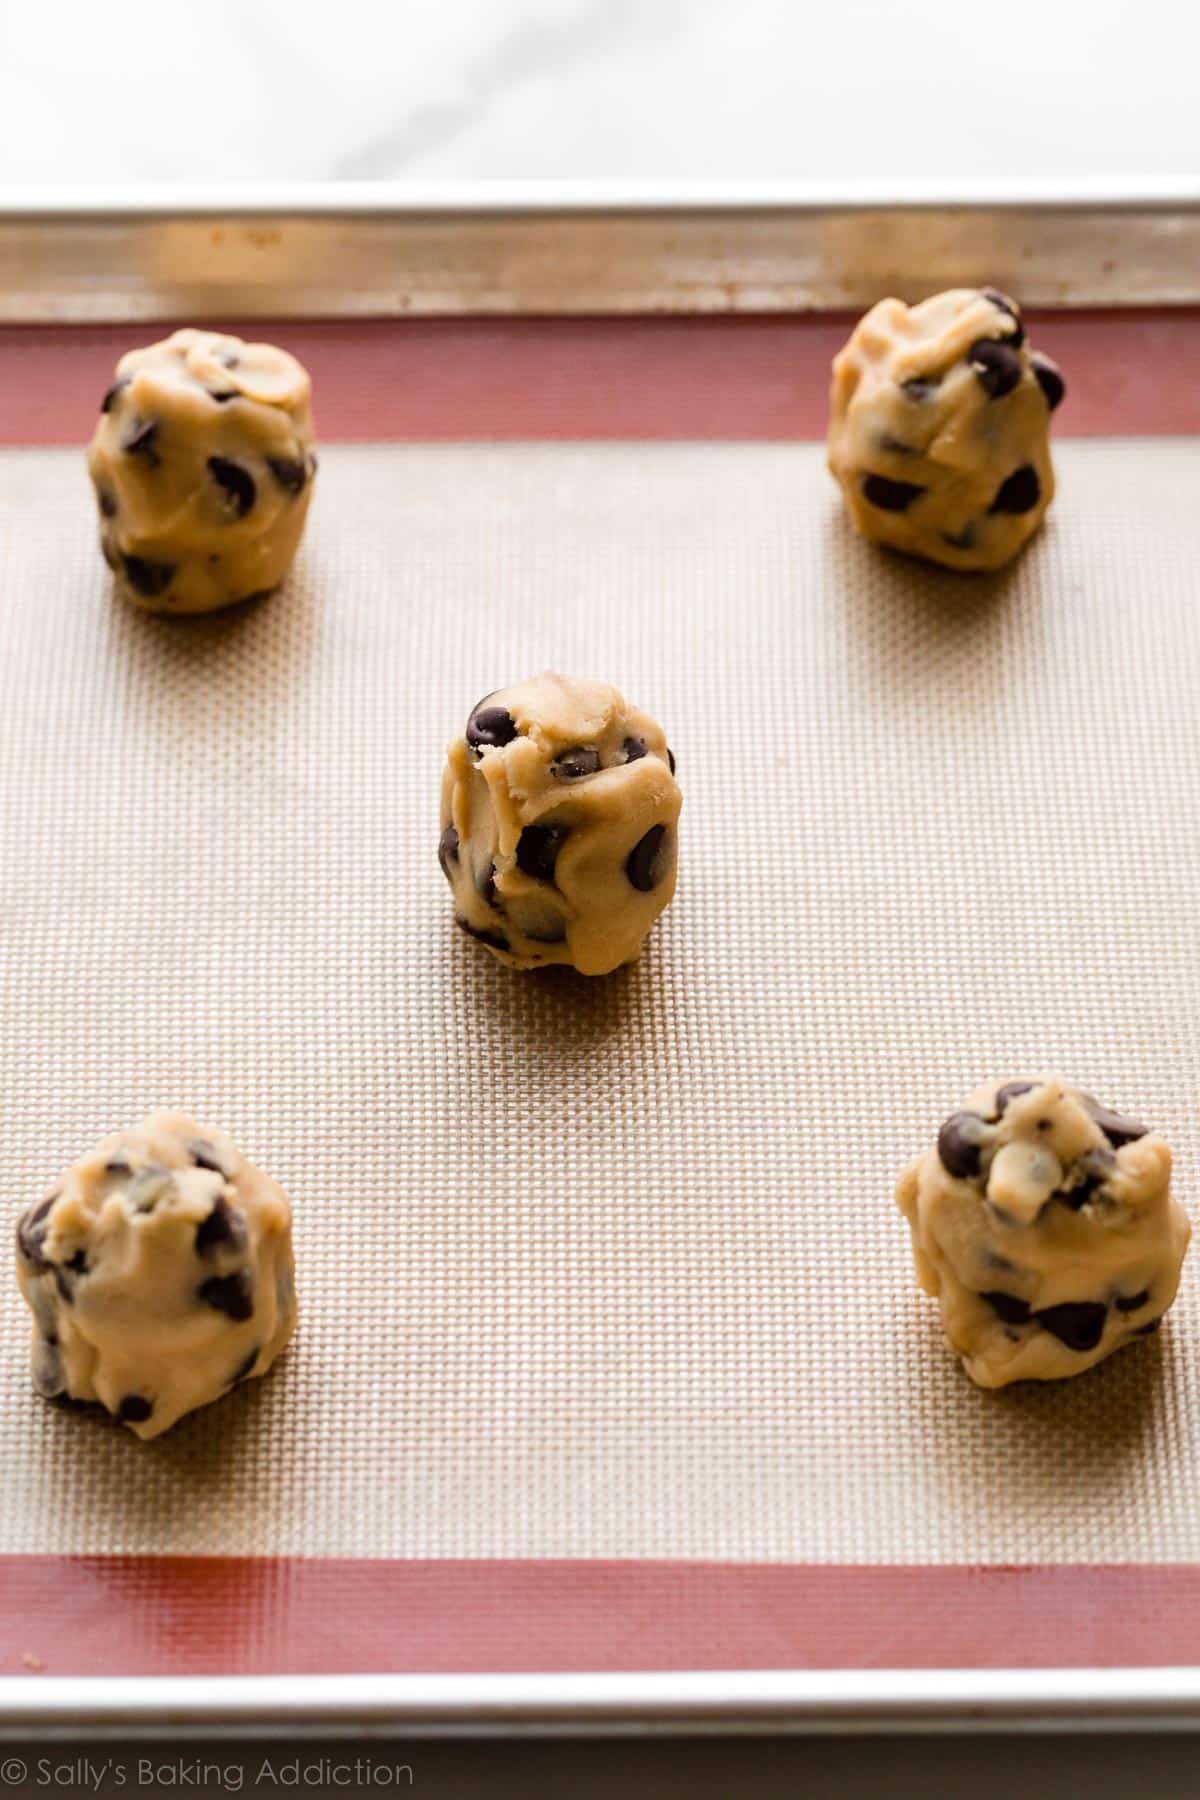
Because of the melted butter in this dough, the dough is very soft and a little greasy before chilling, so it’s harder to shape the cookie dough balls. We recommend chilling first, then shaping. If after chilling the dough is very hard and difficult to scoop, let it sit at room temperature for 15 minutes and then try again.
We typically do not recommend jumping right to the freezer without chilling the dough first. A quick freeze like that can cause the dough to chill unevenly and then spread unevenly during the baking process. For best results, we recommend following the recipe as written. If you don’t have time to wait for the dough to chill, try this recipe for 6 giant chocolate chip cookies instead, which doesn’t require dough chilling (see recipe Notes in that post for details on using the dough to make 24 regular-size cookies).
You can certainly use brown butter here, and the flavor is outstanding! But they can be a little crumbly using brown butter. Instead, for best results, I suggest trying these Brown Butter Chocolate Chip Cookies.
Tools I Recommend for This Recipe
I’ve tested many baking tools and these are the exact products I use, trust, and recommend to readers. You’ll need most of these tools when making sugar cookies and snickerdoodles, too!
- Baking Sheets
- Silicone Baking Mats or Parchment Sheets
- Medium Cookie Scoop
- Cooling Racks
- See More: Best Cookie Baking Tools and 8 Best Baking Pans
Can I Freeze This Cookie Dough?
Yes, absolutely. After chilling, sometimes I roll the cookie dough into balls and freeze them in a large zipped-top bag. Then I bake them straight from the freezer, keeping them in the oven for an extra minute. This way you can bake just a couple of cookies whenever the craving hits. (The chewy chocolate chip cookie craving is a hard one to ignore.)
If you’re curious about freezing cookie dough, here’s my How to Freeze Cookie Dough page (with video tutorial).
Facebook member, Leigh, commented: “These are the only CC cookies I’ve made for years (and this recipe is how I came to be such a fan of SBA!) This recipe worked great when I lived in Denver and had issues with baking at altitude, and it’s still our favorite now that we’re back at sea level. I usually make 4x-6x batches and freeze tons of cookie balls to bake later.“
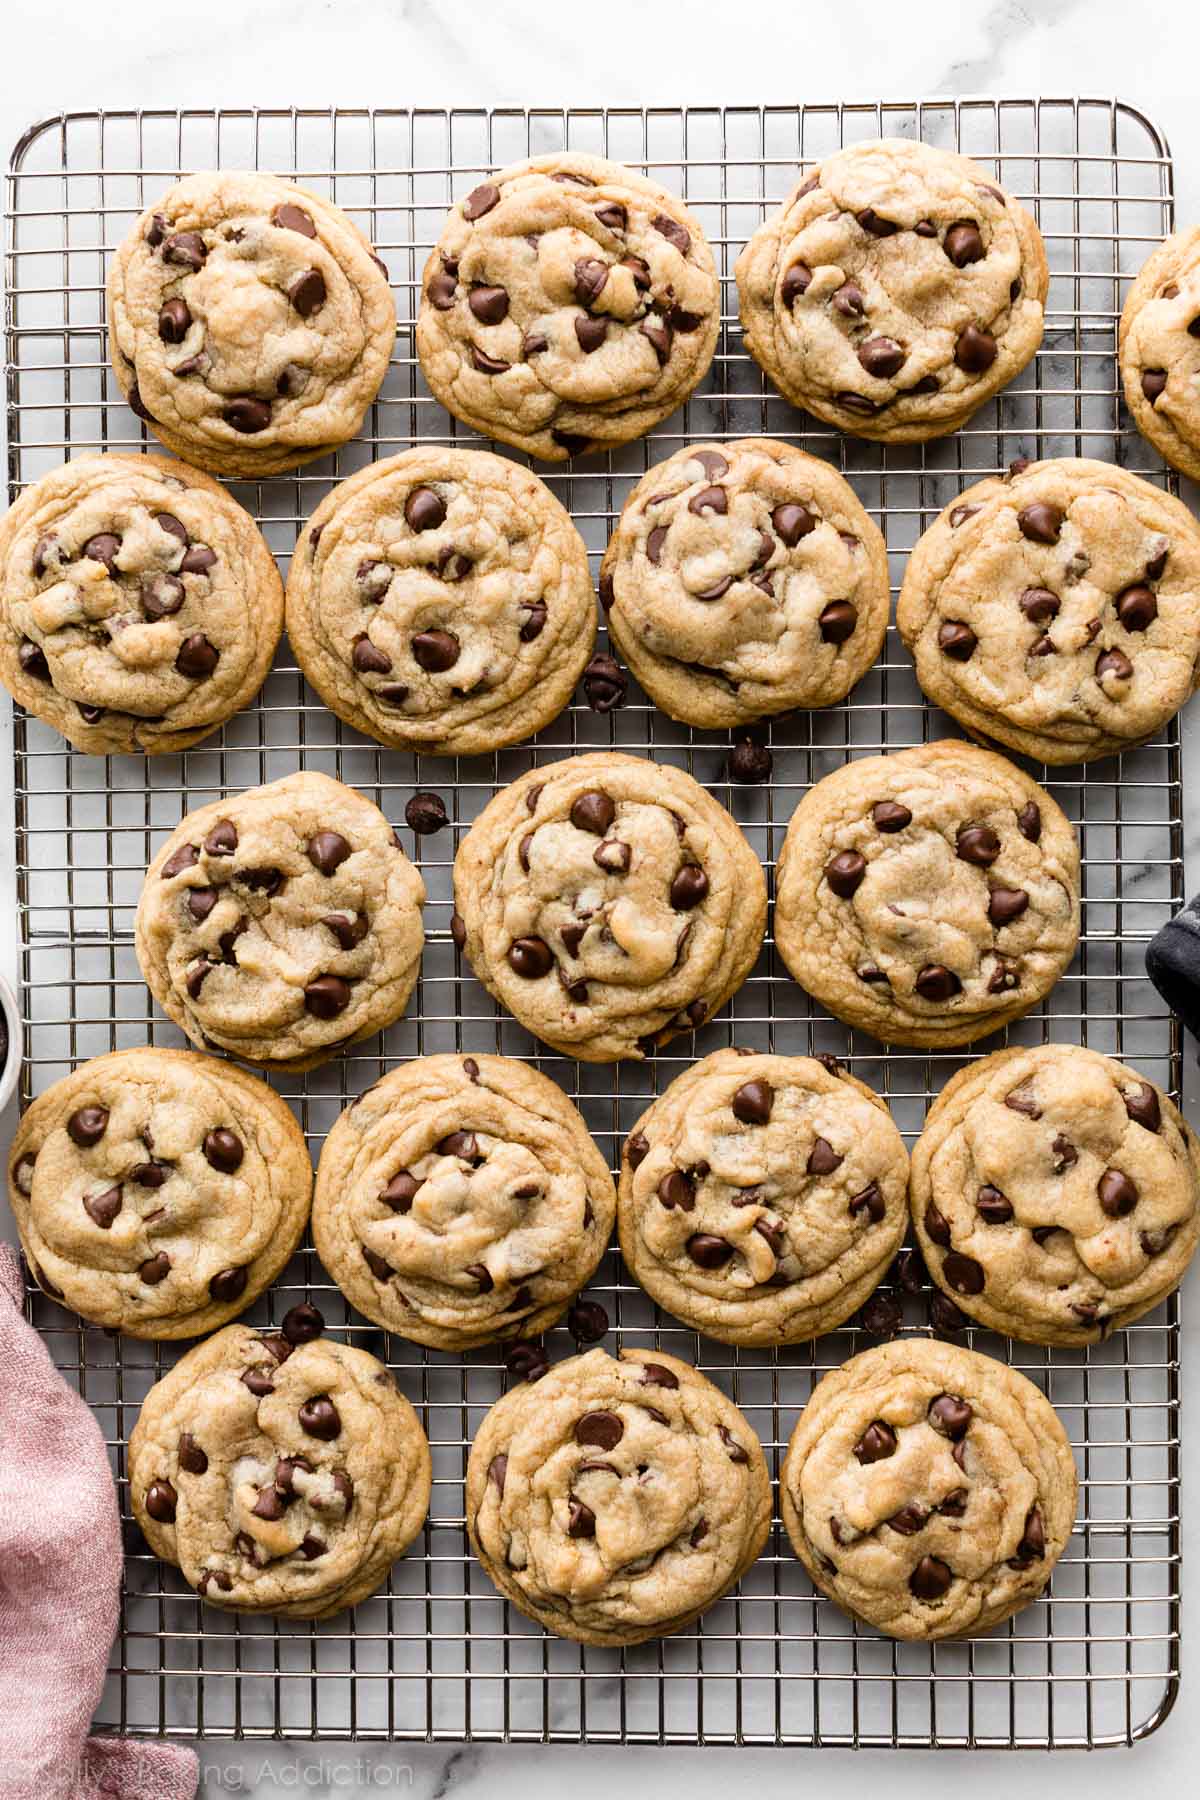
In Short, Here Are the Secrets to Soft & Chewy Chocolate Chip Cookies:
- Cornstarch helps product soft and thick cookies.
- Using more brown sugar than white sugar results in a moister, softer cookie.
- An extra egg yolk increases chewiness.
- Rolling the cookie dough balls to be tall and lumpy instead of wide and smooth gives the cookies a bakery-style textured thickness. It’s a trick we use for cake batter chocolate chip cookies, too.
- Using melted butter (and slightly more flour to counteract the liquid) increases chewiness.
- Chilling the dough results in a thicker cookie. Almost as thick as peanut butter oatmeal chocolate chip cookies, or their gluten-free counterparts, flourless peanut butter oatmeal cookies 🙂
Q: Have you baked a batch before?

Chewy Chocolate Chip Cookies
- Prep Time: 15 minutes
- Cook Time: 13 minutes
- Total Time: 2 hours, 45 minutes
- Yield: 16 XL cookies or 20 medium/large cookies
- Category: Dessert
- Method: Baking
- Cuisine: American
Description
These super soft and chewy chocolate chip cookies are the most popular cookie recipe on my website for good reason. Melted butter, more brown sugar than white sugar, cornstarch, and an extra egg yolk guarantee the absolute chewiest chocolate chip cookie texture. The cookie dough is slick and requires chilling prior to shaping the cookies. This recipe is also in my New York Times best-selling cookbook, Sally’s Baking 101.
Ingredients
- 2 and 1/4 cups (281g) all-purpose flour (spooned & leveled)
- 1 teaspoon baking soda
- 1 and 1/2 teaspoons cornstarch*
- 1/2 teaspoon salt
- 3/4 cup (170g/12 Tbsp) unsalted butter, melted & cooled for 5 minutes
- 3/4 cup (150g) packed light or dark brown sugar
- 1/2 cup (100g) granulated sugar
- 1 large egg + 1 egg yolk, at room temperature
- 2 teaspoons pure vanilla extract
- 1 and 1/4 cups (225g) semi-sweet chocolate chips or chocolate chunks
Instructions
- In a large bowl, whisk the flour, baking soda, cornstarch, and salt together. Set aside.
- In a medium bowl, whisk the melted butter, brown sugar, and granulated sugar together until no lumps remain. Whisk in the egg and egg yolk until combined, then whisk in the vanilla extract. The mixture will be thin. Pour into dry ingredients and mix together with a large spoon or spatula. The dough will be very soft, thick, and shiny. Fold in the chocolate chips. The chocolate chips may not stick to the dough because of the melted butter, but do your best to combine them.
- Cover the dough tightly and refrigerate for at least 2 hours or up to 3 days. I highly recommend chilling the cookie dough overnight to prevent overspreading.
- Preheat the oven to 325°F (163°C). Line large baking sheets with parchment paper or silicone baking mats. If the dough has chilled for longer than 2 hours, let it sit at room temperature for about 15 minutes.
- Using a cookie scoop or Tablespoon measuring spoon, scoop the chilled cookie dough, about 3 scant Tablespoons (about 2 ounces, or 60g) of dough for XL cookies or 2 heaping Tablespoons (about 1.75 ounces, or 50g) of dough for medium-large cookies. Roll into a ball, then use your fingers to shape the cookie dough so that it’s taller rather than wide—almost like a cylinder. This helps the cookies bake up thicker. Repeat with remaining dough. Arrange the cookies 3 inches apart on the prepared baking sheets.
- Bake the cookies for 13–14 minutes or until the edges are very lightly browned. The centers will look very soft, but the cookies will continue to set as they cool. Cool on the baking sheet for 10 minutes before transferring to a cooling rack to cool completely. While the cookies are still warm, I like to press a few more chocolate chips into the tops—this is optional and only for looks!
- Store tightly covered at room temperature for up to 1 week.
Notes
- Make Ahead & Freezing Instructions: You can make the cookie dough and chill it in the refrigerator for up to 3 days. Allow to come to room temperature, then continue with step 5. Baked cookies freeze well for up to 3 months. Unbaked cookie dough balls freeze well for up to 3 months. Bake frozen cookie dough balls for an extra minute, no need to thaw. Read my tips and tricks on how to freeze cookie dough.
- Special Tools (affiliate links): Glass Mixing Bowls | Whisk | Wooden Spoon or Rubber Spatula | Baking Sheets | Silicone Baking Mats or Parchment Paper | Medium Cookie Scoop | Cooling Rack
- Cornstarch: If you don’t have cornstarch, you can leave it out. The cookies are still very soft.
- Egg & Egg Yolk: Room-temperature egg + egg yolk are best. Typically, if a recipe calls for room-temperature or melted butter, it’s good practice to use room-temperature eggs as well. To bring eggs to room temperature quickly, simply place the whole eggs in a bowl of warm water for 5 minutes.
- Can I Add Nuts or Different Add-ins? Yes, absolutely. As long as the total amount of add-ins is around 1 to 1 and 1/4 cups, you can add anything including chopped nuts, M&Ms, white chocolate chips, dried cranberries, chopped peanut butter cups, etc. I love them with 3/4 cup (135g) butterscotch morsels and 1/2 cup (100g) Reese’s Pieces. You could even add 1/2 cup (80g) sprinkles to make a sprinkle chocolate chip cookie.
- Can I Use Brown Butter Instead of Melted Butter? You can certainly use brown butter here, and the flavor is outstanding! But they can be a little crumbly using brown butter. Instead, for best results, I suggest trying these Brown Butter Chocolate Chip Cookies.
- Be sure to check out my top 5 cookie baking success tips AND these are my 10 must-have cookie baking tools.














Reader Comments and Reviews
Really excellent cookies. Next time I’ll have to double the batch.
this is so good I make it every time I bake and everyone around me keeps asking for more
Probably the best chocolate chip cookie recipe I’ve tried! We like to keep the dough in the freezer and make a couple in the evening.
I’m wondering if anyone has tried using the air fryer to cook them (we have a solid tray)
Hi Terri, We have not tested these in an air fryer but let us know if you try it.
Hey! i have tried this multiple times and it has always been a hit. Today i want to halve the number but how do i reduce the size of the egg as it’s a bit tricky..should i go with just one whole beaten egg
Hi Su, To halve the recipe, you would have to use half of one egg and half of one egg yolk. We would recommend making the whole recipe, freezing any extra dough balls, and then just baking as many as you want at a time.
Actually that makes more sense. Thanks for the tip.
The best recipe I have tried so far! Chewy and super chocolatey! I added flake salt on top. So good.
Question?
Flour use bleached or unbleached which is the better choice?
Hi Jr., you can use either, but we usually use bleached flour for cookies.
I have made these cookies in the past and this is my “go to” chocolate chip recipe. Love the pro tip of making little domes so during the baking process they sink just right to look like bakery cookies.
I followed the directions exactly as written but after I refrigerate the cookie dough for 2 hours, the dough is so hard. It’s too hard to scoop out with a cookie scoop. Any help or ideas are welcomed!
Hi Marian, if it is too hard, let it sit at room temperature for 10 minutes or so.
THANK YOU! I have been trying to figure out to make cookies with the wrinkle for years. Maybe 15 years. Never thought to roll them in columns, thank you SO much.
If I cream room temp. butter with the sugars and eggs instead of melting the butter, how will this change the appearance and/or texture of the cookie?
Hi Joanne, this recipe is written for melted butter. You may love this cookie recipe that uses room temperature butter instead.
Hello! Can I use the cream filling from homemade Oreos in this recipe for a sandwich cookie? Thank you!
Hi Christine, Yes, sounds delicious! Or you could try the filling from these oatmeal cream pies.
Won 3rd place in a chocolate chip cookie contest with this recipe. It’s that good!
could i sub. baking soda for baking powder? Read online that powder should make a chewier cooking but I wanted to ask and be sure!
Hi Kaelyn. Baking powder and baking soda are not a good swap for one another. This post on Baking Powder vs. Baking Soda goes into detail if you’re interested in reading more!
Help! My cookies keep coming out as greasy, flat pancakes.
I’ve done everything short of changing the recipe: I measure my ingredients by weight, I let the melted butter cool, I chill the dough overnight, I shape the dough into tall cylinders, and I even freeze the shaped dough before baking. Could it be something with the ingredients themselves or the weather? I live in a warm, humid climate and use European butter, if that could possibly be affecting my final product.
Hi Beatriz, we’re so sorry you’re having troubles with these cookies. It sounds like you’re doing everything right here, but the European butter could be the culprit. European style butters often aren’t ideal for baking smaller items with short bake times such as cookies and cupcakes. Larger items like quick breads are usually fine, but these higher fat butters create excess spread in cookies. We hope this helps for next time!
I used regular butter; not European and my cookies spread like pancakes too. I followed the directions as well. I think melting the butter vs. being softened at room temperature is the culprit. I will not be using this recipe again.
WOW. SO GOOD. How long do they stay fresh without refrigerating?
Hi Kathy! Store tightly covered at room temperature for up to 1 week.
I finally found a chocolate chip cookie recipe that I know will come out delicious each time. I just made them and they for some reason don’t really flatten or spread out.. what am I doing wrong or what do I need to change?
Hi Valeria! Could there be too much flour in your dough? That can cause cookies to not spread enough. Make sure to spoon and level (instead of scooping) to avoid packing in too much flour into your measuring cups–or use a kitchen scale to weigh the ingredients. You can read more about properly measuring baking ingredients in this post.
Hi, I was just wondering if they would work if I halved all the ingredients, then only made the cookies 35 grams each?
Hi Sofia, that should be fine! The smaller cookies will bake faster.
So good has become my go to cookie recipe for all events, they remain soft and chewy but with crispy edges and so versatile for topping varieties
I’ve made these cookies so many times, they’re my go to’s. Everyone I’ve made these for have asked for the recipe and I gladly shared it.
Love these so much!!
Hello! I am wondering how many cookies this will make if they are on the smaller side? I am hoping to get at least 22 for my son’s class. He requested CCC for birthday treat to share! Looking to go to the store only once! I have most ingredients and just need to grab some vanilla!
Hi MaryBeth! This recipe yields 16 XL cookies or 20 medium/large cookies. If you made them slightly smaller, you could definitely get 22.
I’ve tried many recipes but failed. Your recipe just worked on my first attempt! My kids loved it.
Can I add chocolate powder?
Hi Angeline, We are so happy these were a hit! Here is our recipe for chocolate chocolate chip cookies.
Hehehaha good cookie
So delicious! Would definetly make again!
Hi, this recipe is very good but it is too sweet.How do I make this less sweet.
Hi Rachel, feel free to slightly reduce one or both of the sugars, but keep in mind that if you decrease the sugar the cookies will not have the same texture (it’s used for texture and moisture in addition to taste) and it can impact the spread of the cookies, too.
The chewy chocolate cookies are so much fun and exciting to make . I made them with my mum (well my mum helped a little bit like the butter melting and the measuring).
These are maybe the best cookies I’ve ever eaten/made. I left them in the fridge for a few days before baking and wow amazing.
absolutely banging made these 4 weeks in a row and they were gone by day 2. so nice and soft
Hi! i was wanting to give these a try today. Could i add peanut butter to this recipe? Wanting to make peanut butter chocolate chip cookies!
Hi Jennifer, We recommend using our peanut butter chocolate chip cookies recipe instead, since adding peanut butter to cookie dough takes some other adjustments.
Can I use a mixer with this recipe? I double the recipe and with the arthritis in my hands it is hard to mix it.
Hi Jan, yes, you can use a mixer if you prefer.
I just made these today and followed the exact recipe. I put the dough in fridge for about 2 hours took the dough out let sit for 20 mins then tried to use my cookie scoop. The dough was very hard still. I managed to put 12 on a baking tray and baked for 15 mins they did not spread at all. They actually look like golf balls. Not impressed at all will stick to my original recipe!
Hi Nada! Could there be too much flour in your dough? That can cause cookies to not spread enough. Make sure to spoon and level (instead of scooping) to avoid packing in too much flour into your measuring cups–or use a kitchen scale to weigh the ingredients. You can read more about properly measuring baking ingredients in this post.