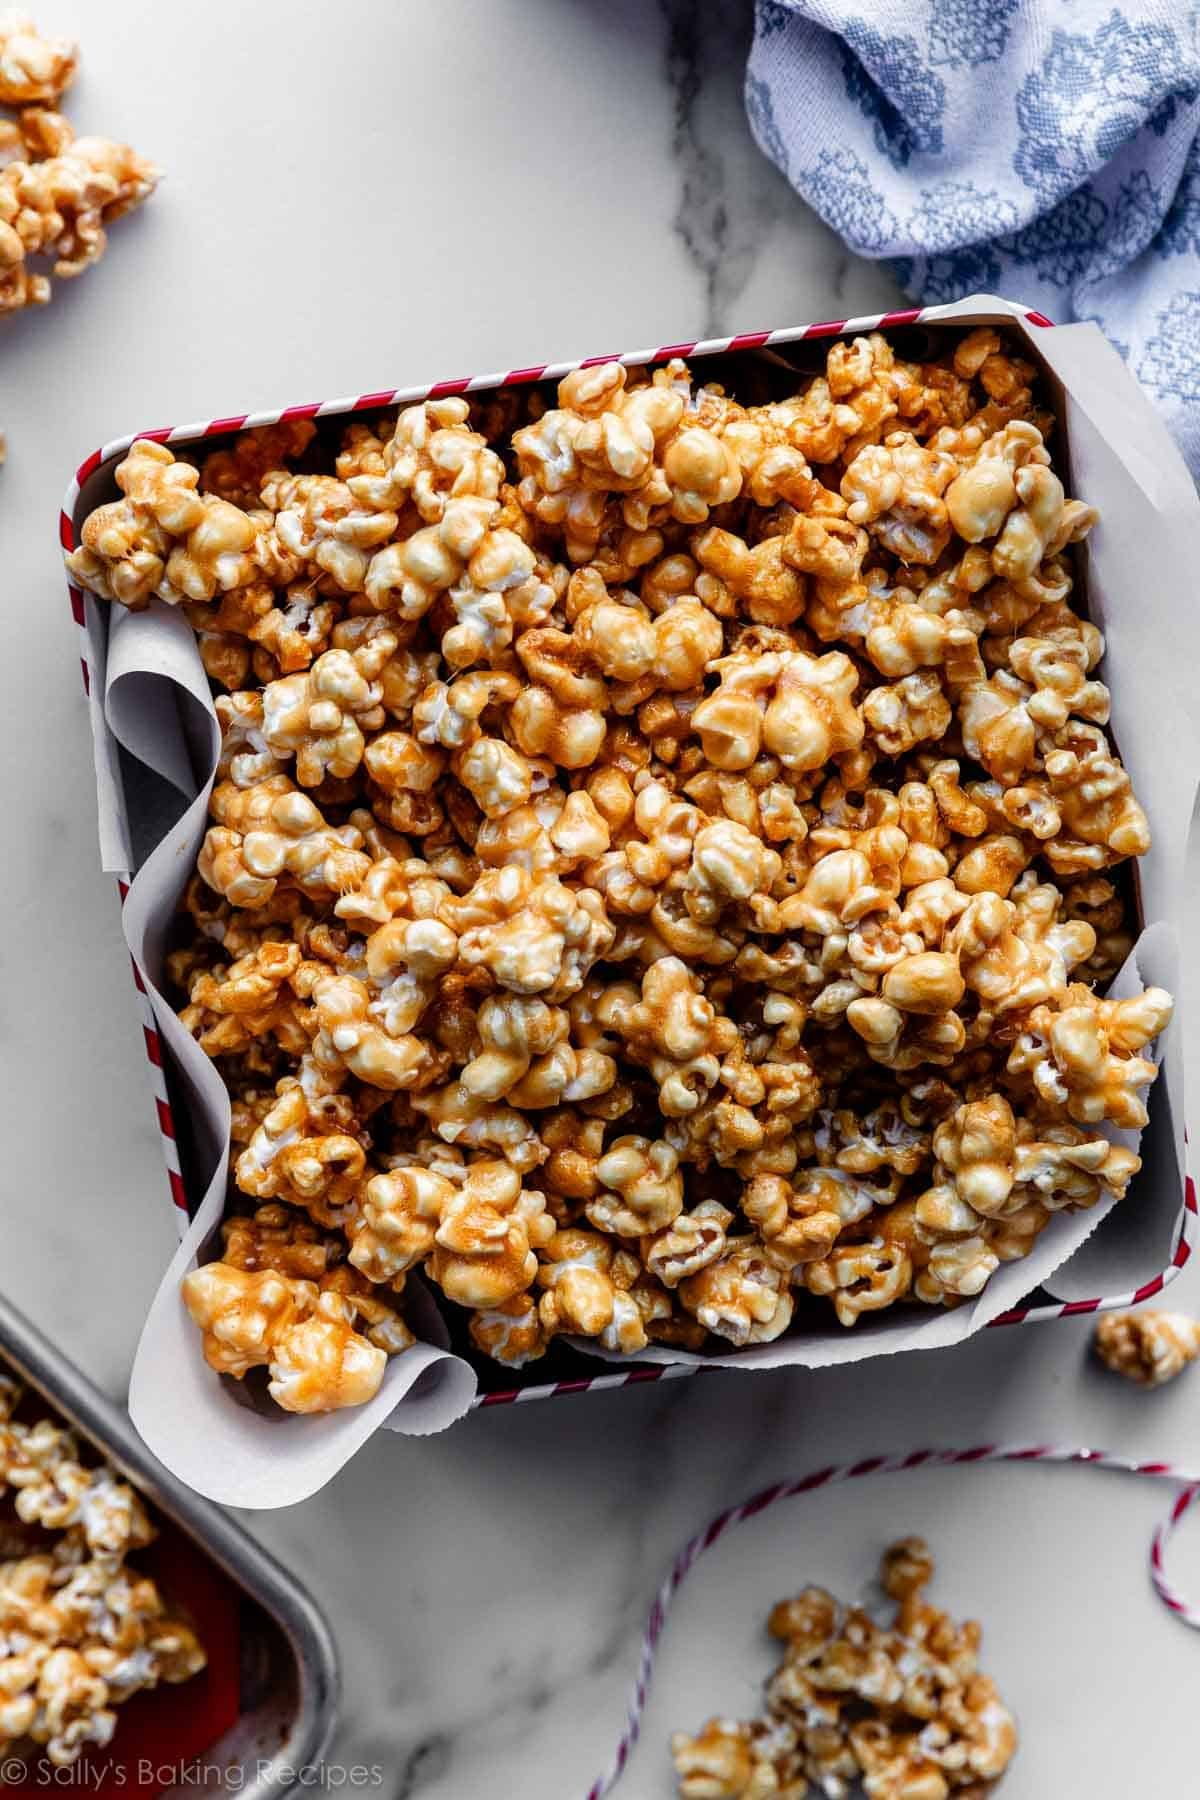
This is my late grandmother’s recipe for homemade caramel corn. Brimming with buttery flavor, sweet crunch, and from-scratch caramel, each handful (you’ll want to eat it that way!!) is undeniably irresistible. You’ll make the 6-ingredient caramel sauce on the stove, and while a candy thermometer is helpful, you certainly can get by without one. The recipe below is for plain caramel popcorn, but if you want to dress it up, go ahead and add nuts, melted chocolate, and/or a dash of cinnamon.
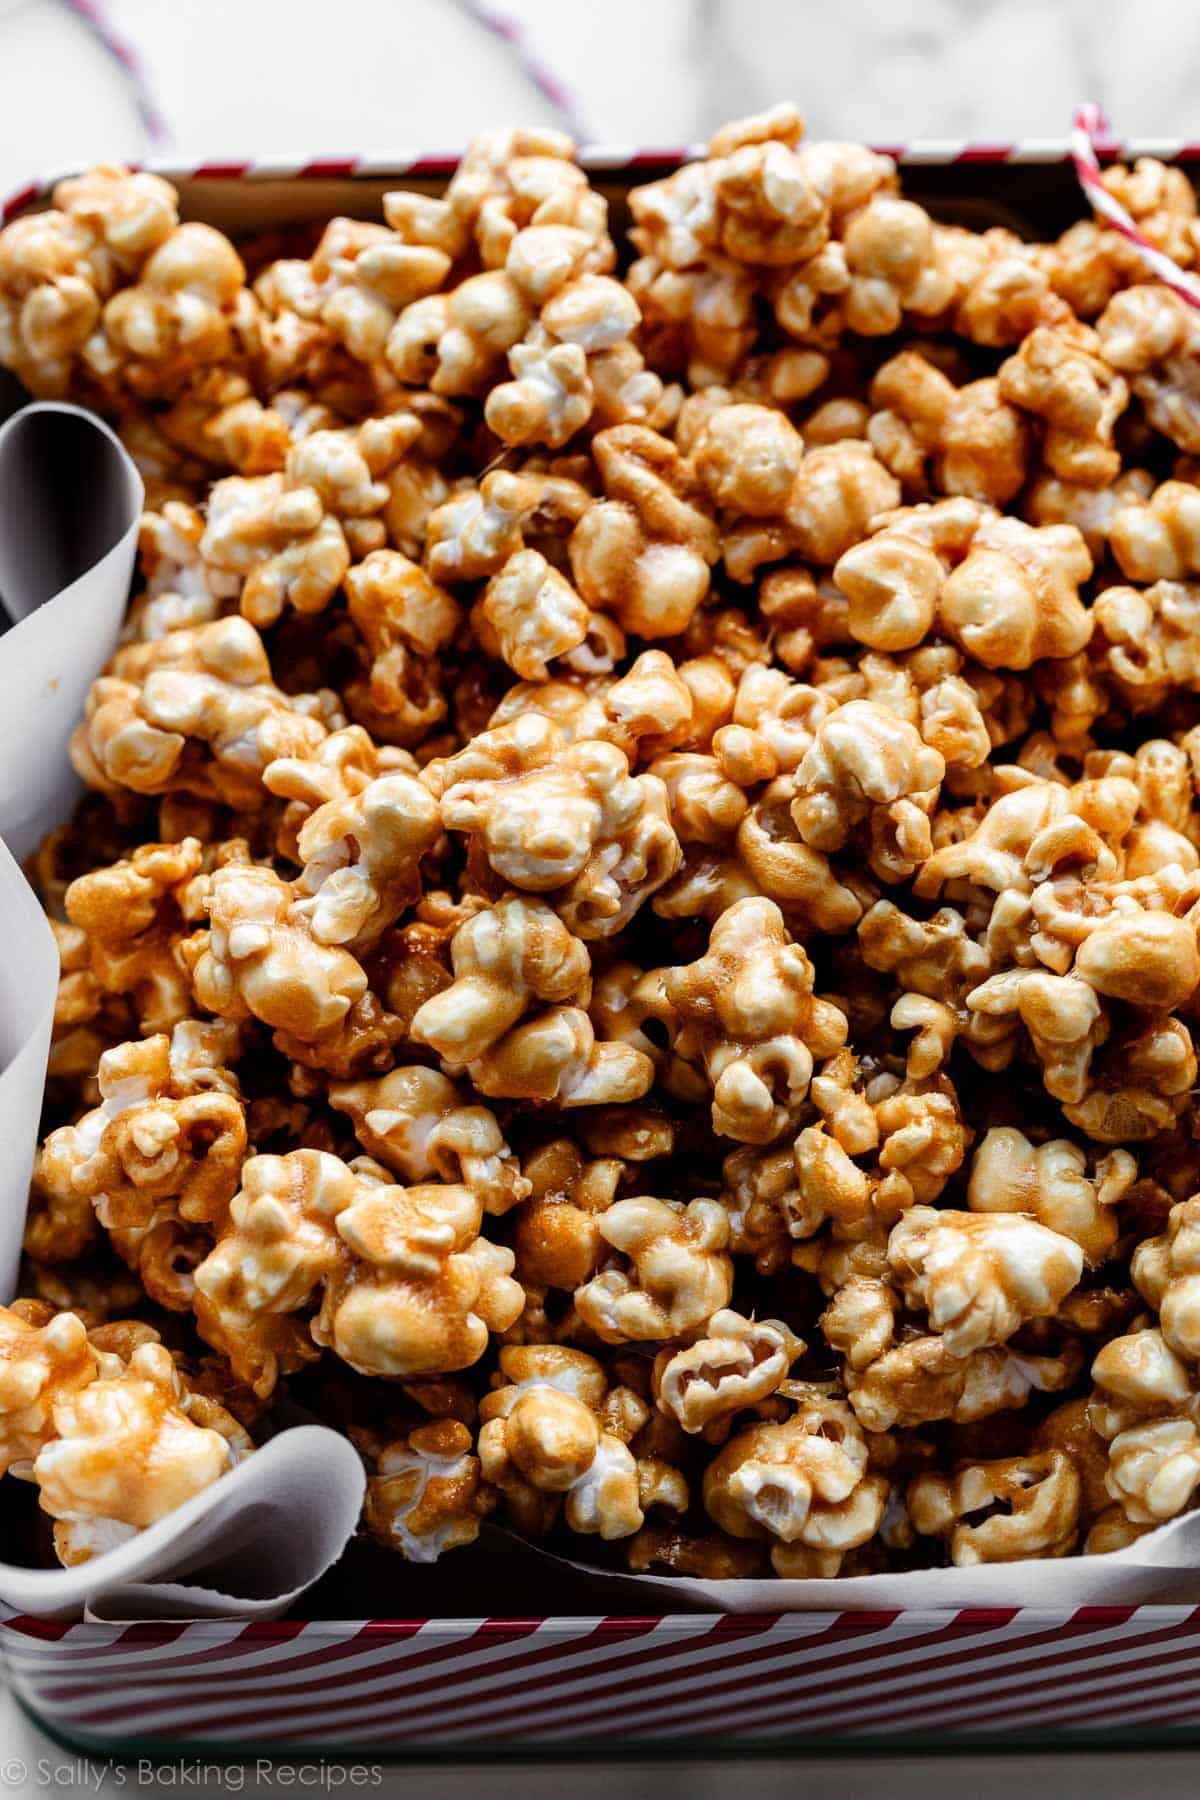
Every holiday season when I was growing up, my late grandmother made a double batch of this beloved homemade caramel corn. Friends and family would flock to the sweet and salty snack, and it never lasted more than a couple of days. Grandma was happy to repeat the process; serving it brought her so much joy.
I started this website 2 weeks after she passed away back in 2011, and I originally published this recipe a few years later. I also included a variation of it in two of my published cookbooks (Sally’s Baking Addiction and Sally’s Candy Addiction).
Over the years, I’ve scaled down the amount of air-popped popcorn, so every piece is generously coated. Today I’m sharing some new step-by-step photos, and a video tutorial is coming soon!
Here’s Why You’ll Love This Caramel Corn
- Just 7 ingredients
- Salty, buttery, sweet
- Nothing beats the homemade flavor
- The caramel is chewy-crisp, not a break-your-teeth situation 😉
- Enjoy plain or add some flair with nuts, chocolate, or spices
- Make-ahead; the caramel corn keeps for days (if taste testers can resist!)
I cannot make this stuff fast enough. It’s INCREDIBLY irresistible, and a great holiday snack. In fact, it’s been tradition in our family to serve it along with a batch of spicy honey chex mix or seasoned pretzels as we decorate Christmas sugar cookies. Just a suggestion if you’re hosting a cookie decorating day and need some snack ideas!
Grab These 7 Ingredients:
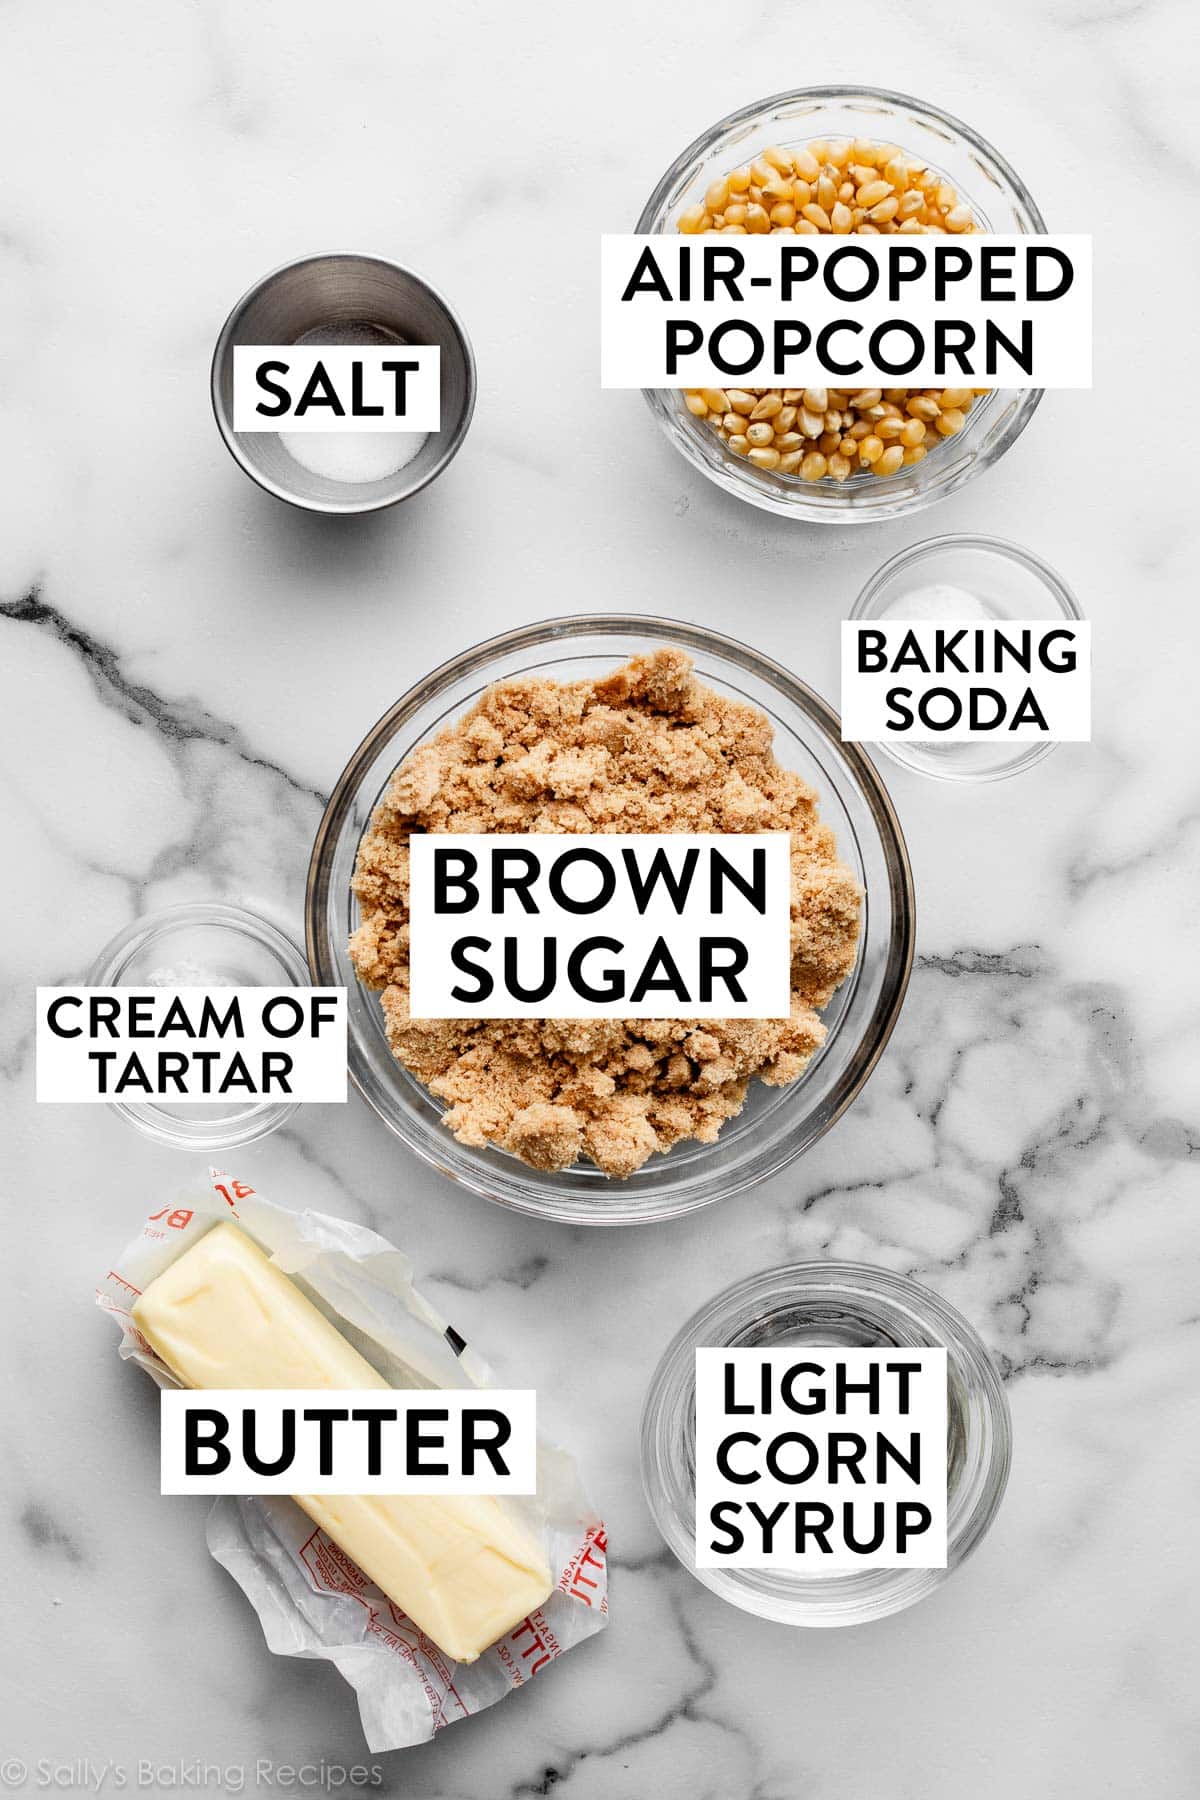
- Popcorn: I find that 10–11 cups of air-popped popcorn is the perfect amount for the quantity of caramel you’ll have.
- Brown Sugar: For that essential brown sugar flavor and softness. Typical homemade caramel is made from regular granulated sugar, and brown sugar is usually saved for homemade butterscotch sauce. For caramel corn, however, you want a softer caramel texture, and brown sugar helps achieve that.
- Light Corn Syrup: This is an imperative ingredient that gives the caramel a softer, chewier consistency. Also, and more importantly, corn syrup helps prevent the cooking caramel from crystallizing into a gritty, grainy texture.
- Butter: A main ingredient in caramel candies and caramel sauces.
- Cream of Tartar: Cream of tartar, an acid, will help prevent crystallization as the caramel cooks. If you don’t have any, you can leave it out. Corn syrup does the same job. I still like to include it, so the caramel says nice and smooth.
- Salt: To balance the sweet.
- Baking Soda: Arguably the most important ingredient! The purpose of baking soda in the caramel is to react with the acidic ingredients (brown sugar, cream of tartar, and corn syrup), which creates tiny carbon dioxide air bubbles. You’ll notice the caramel froths up when you add it. Once the caramel has cooled on your popcorn, the air bubbles inside the caramel create a softer texture. The softer texture means you won’t be biting into hard-as-cement caramel. Rather, the caramel is melt-in-your-mouth chewy and only slightly crunchy.
Do not accidentally use baking powder. I repeat: do not use baking powder.
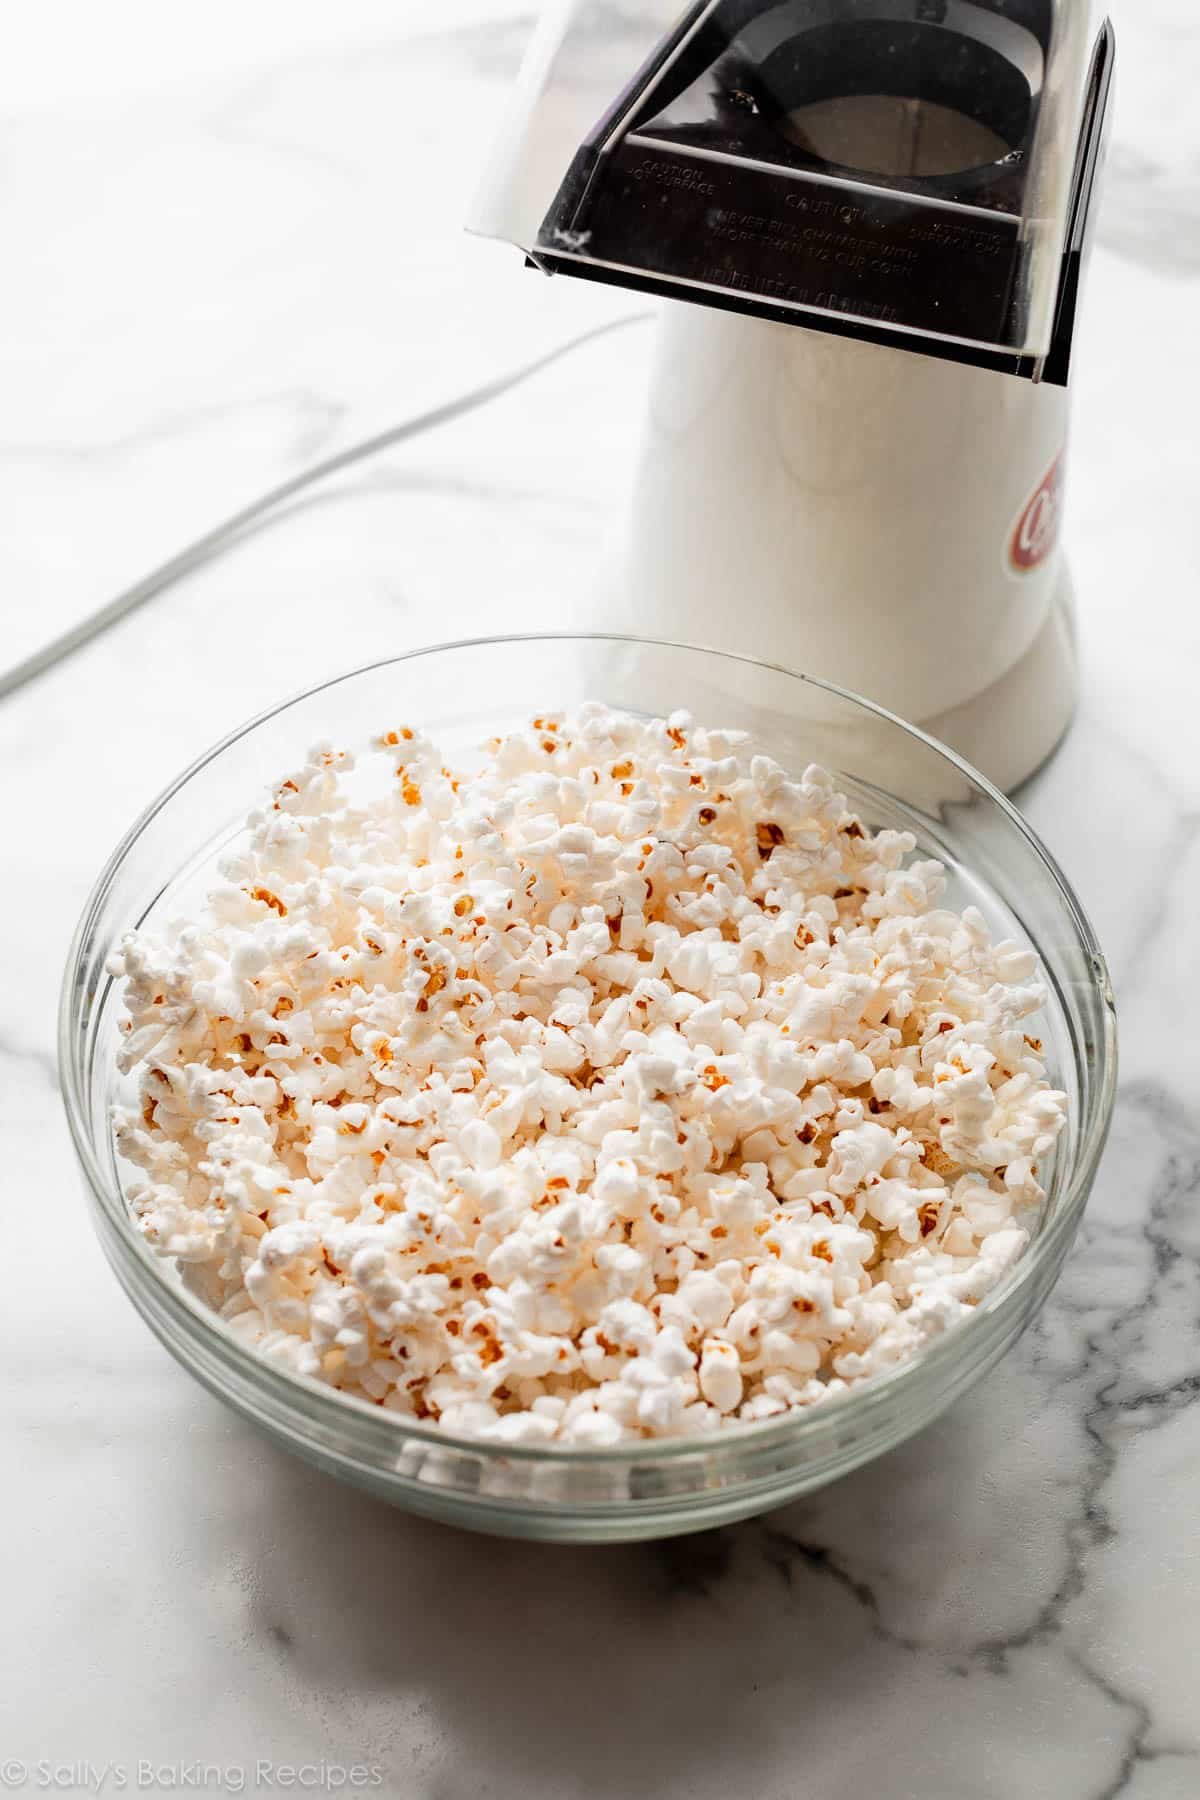
Use Air-Popped Popcorn
For best results, I recommend air-popped popcorn. I use this popcorn maker to pop the corn kernels. Obviously not everyone has a popcorn maker, but it’s a fun kitchen tool to have if you enjoy popcorn on the regular. If using microwave popcorn, look for a variety that’s pretty plain, without butter, and not overloaded with salt. If you don’t want to use store-bought microwave popcorn, try this handy trick:
- Easy Air-Popping Method: Add 3 Tablespoons of popcorn kernels to a standard lunch brown paper bag. Seal the bag tightly by folding over the top 2 times. Microwave the kernels for approximately 1 minute 45 seconds on high, or up to 2 minutes depending on your microwave. This DIY air-popped popcorn method makes 5 cups of popcorn. You’ll have to do it twice to get 10 cups, which is what our caramel corn recipe calls for.
Once you have your popcorn ready, start the caramel sauce.
Caramel Coating for Caramel Corn
The caramel is a little different from my salted caramel sauce recipe, which is more like drizzle or garnish. Today’s caramel, however, is a caramel sauce that has some elasticity (thanks to the corn syrup), and holding power. Meaning it can cling nicely to the popcorn, and not melt off.
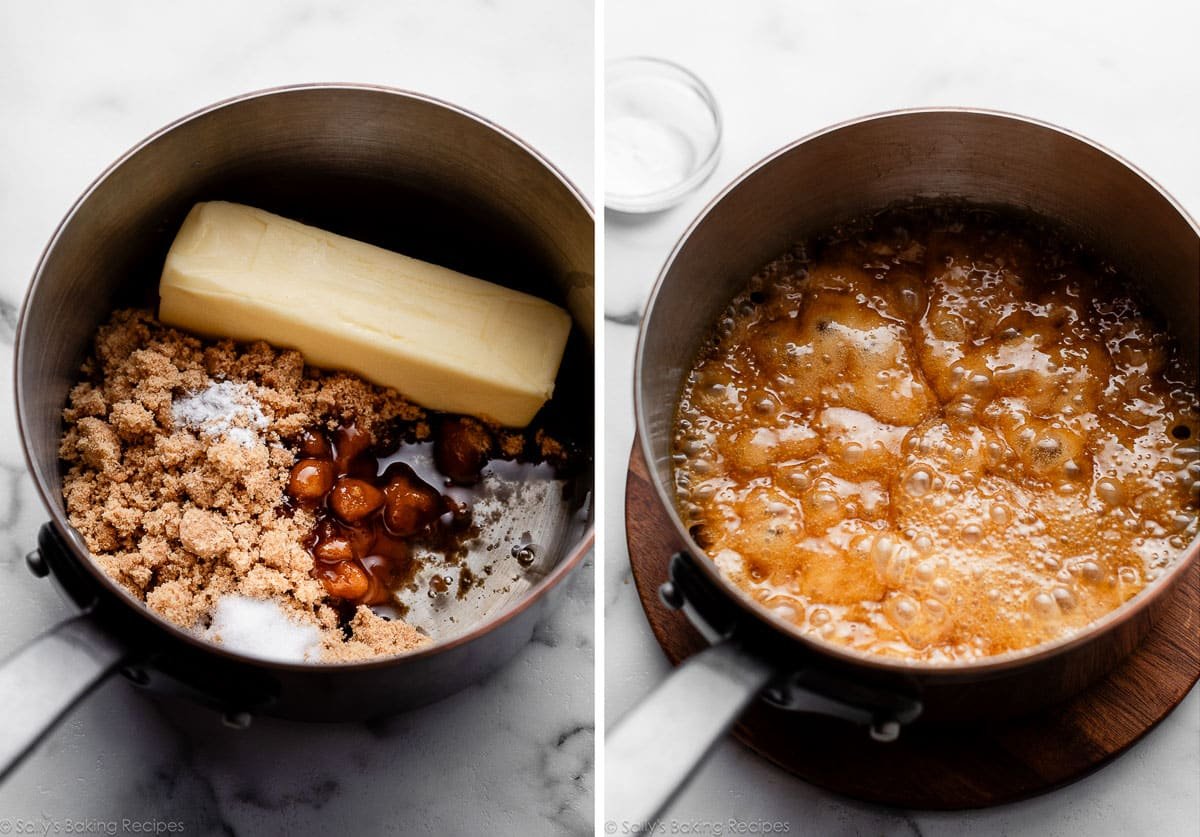
Combine the brown sugar, corn syrup, butter, salt, and cream of tartar together in a medium heavy-bottomed pot. Cook and stir over medium heat. Once the butter has melted and the mixture is bubbling around the edges, let it boil for around 4 minutes. If you have a candy thermometer (I use and love this one), use it here. Cook the mixture until it reaches 234–235°F (112–113°C).
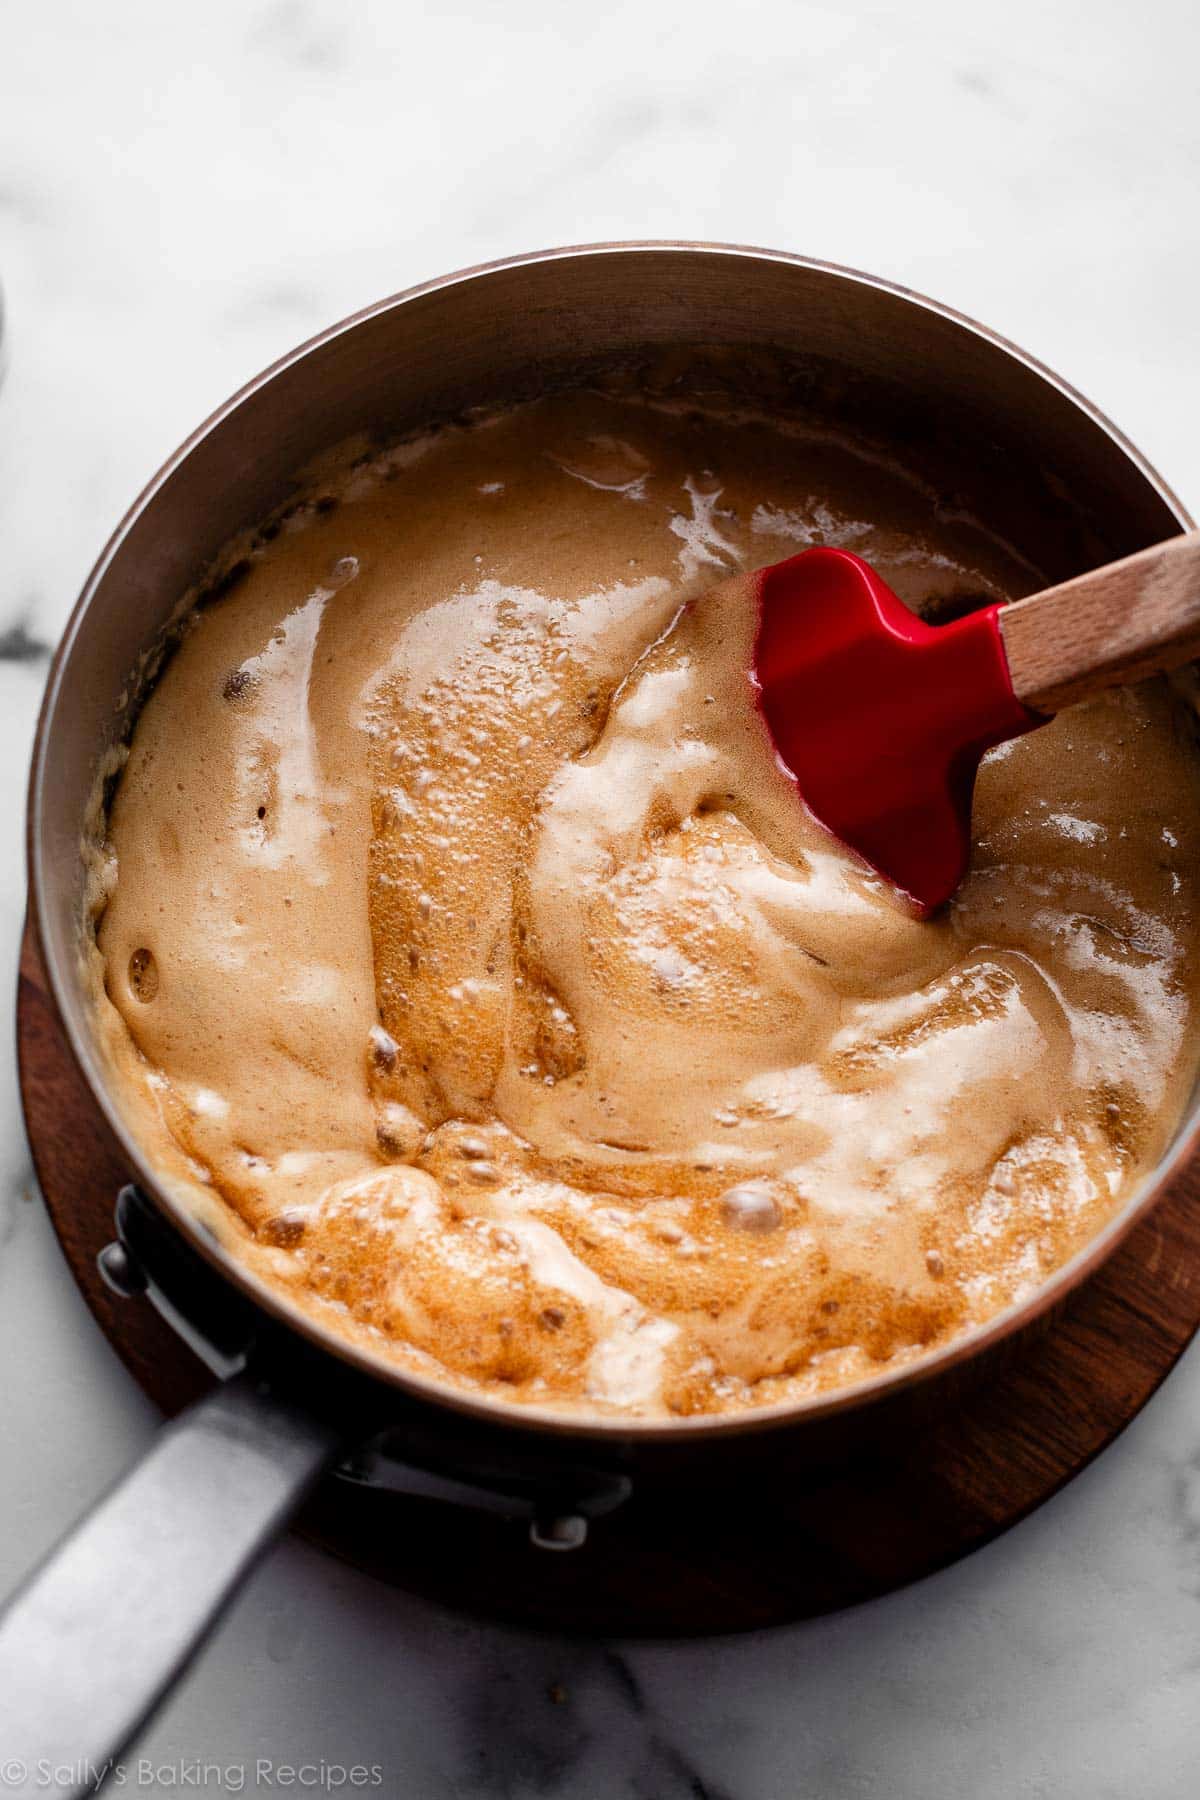
As soon as the caramel comes off the heat, stir in the baking soda. The mixture will bubble up, almost double in volume, and appear frothy on the surface as you stir; this is normal and expected:
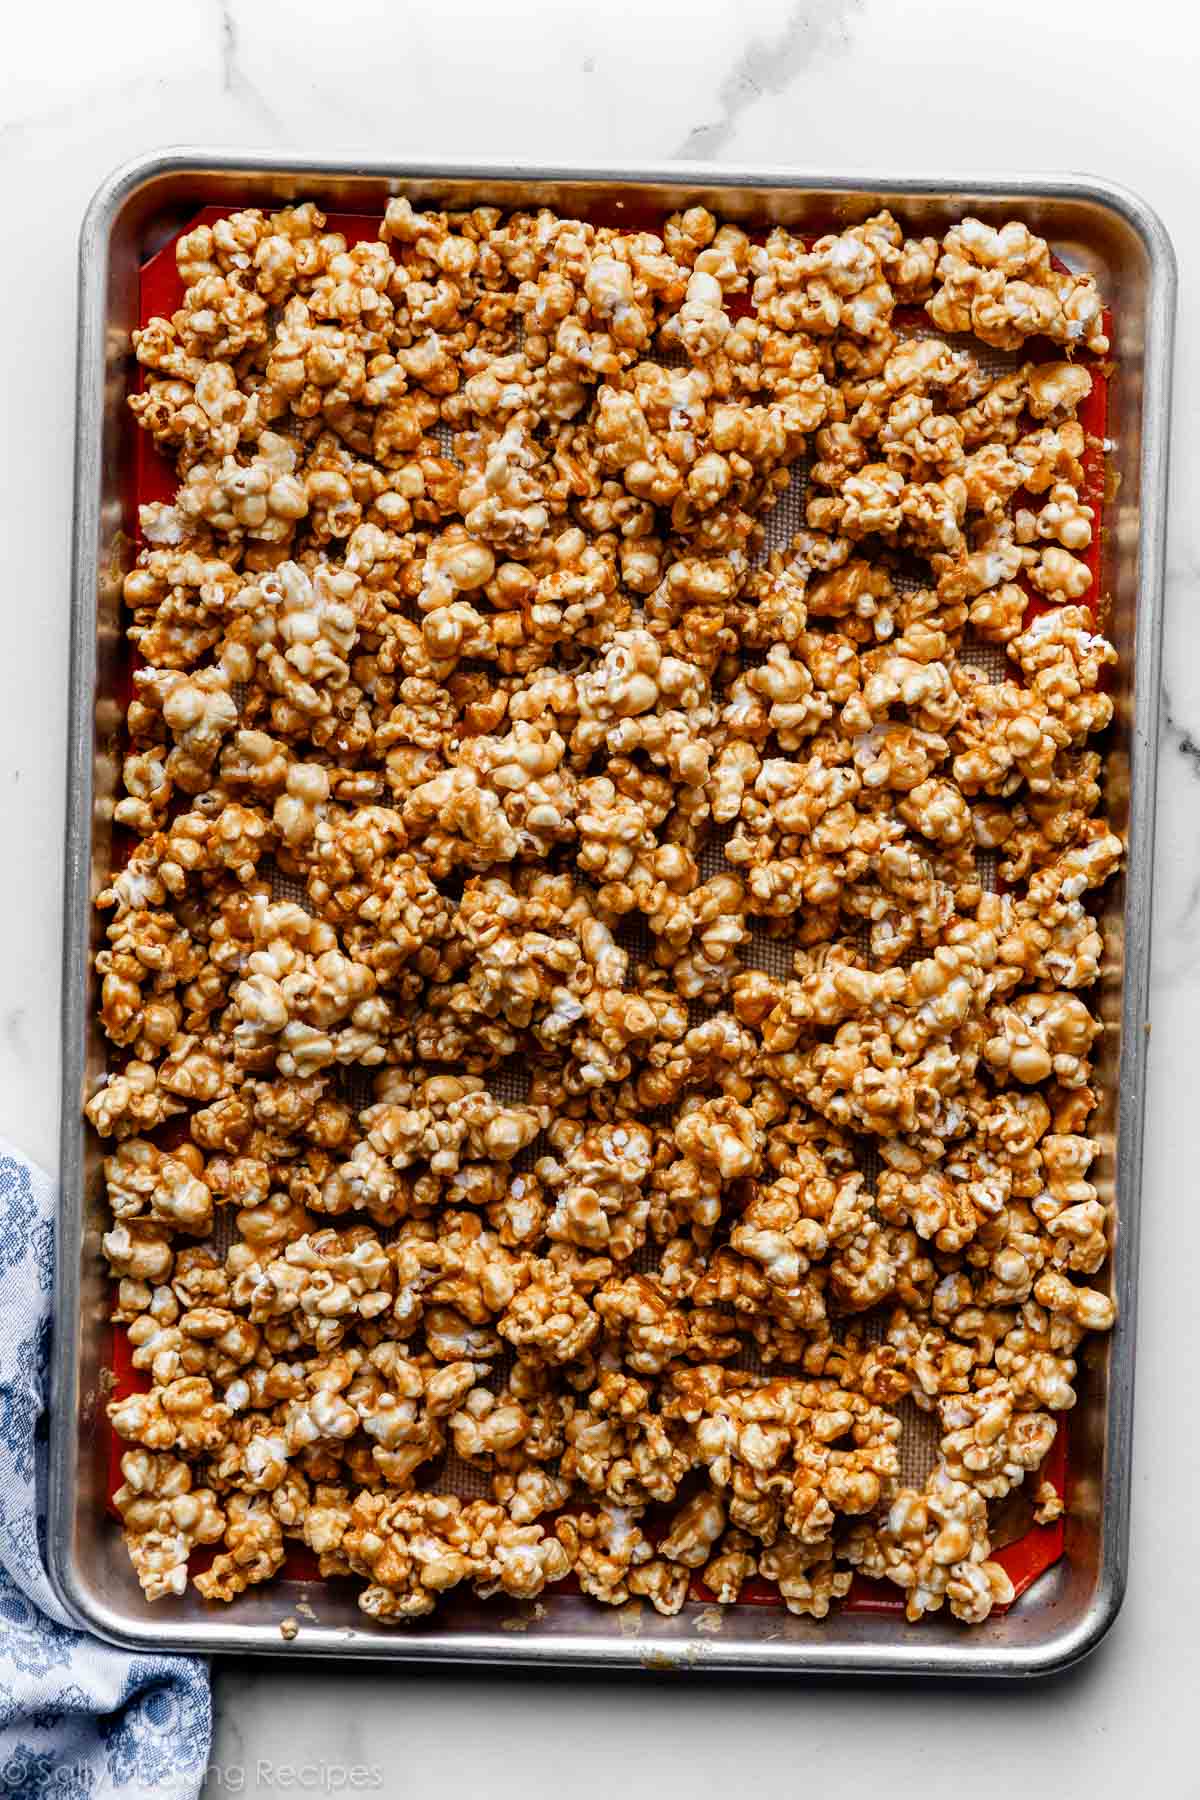
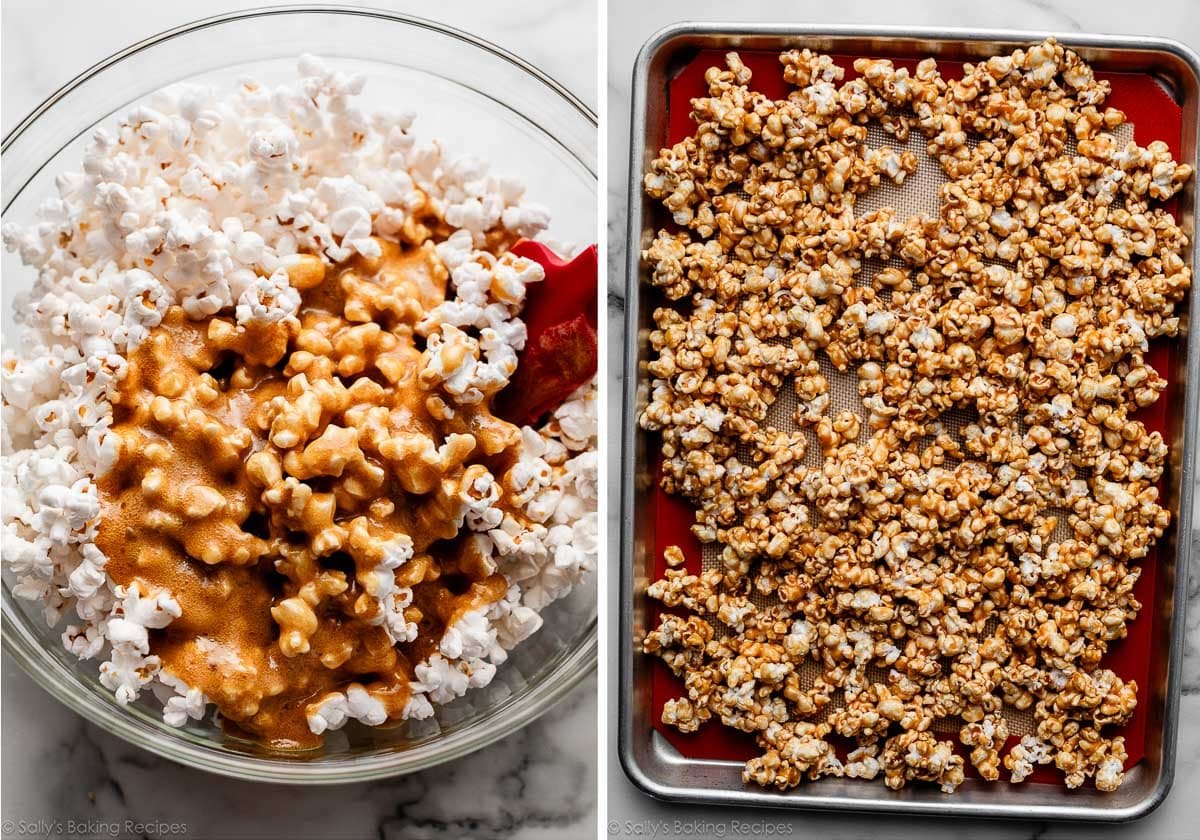
Pour over the popcorn, gently stir to combine, and then spread out onto a lined baking sheet:
Bake at 200°F (93°C) for 1 hour, stirring every 20 minutes. Baking the caramel corn is imperative and helps the caramel set evenly over the popcorn.
This recipe will not work without corn syrup; it’s a crucial ingredient that helps to prevent crystallization in the cooking caramel, and keeps the caramel soft and chewy. As an alternative, try my peanut butter caramel corn recipe instead.
If using microwave popcorn, look for a variety that’s pretty plain, without butter, and not overloaded with salt. Buttered popcorn makes greasy caramel corn, and the caramel may not set.
Yes. Baking the caramel-coated popcorn helps to set the caramel sauce. By skipping this step, the caramel corn will become soggy.
Caramel corn will taste soft and chewy right out of the oven. Give it some time to cool. If it’s still tasting soggy after 1–2 hours of cooling at room temperature, you may have under-baked the caramel corn. 1 hour in the oven is usually plenty. Additionally, be sure to cook the caramel on the stove for long enough. If you don’t have a candy thermometer, you’ll want to keep an eye on the clock—once it’s bubbling, let it boil for 4 full minutes.
A candy thermometer isn’t necessary for this recipe, but it’s certainly helpful, as it gives the most accurate results. A candy thermometer shouldn’t scare you away from a recipe; in fact, it’s your biggest helper when it comes to candy recipes because it ensures precise results. If you have one, I recommend using it.
Yes, absolutely. You can add 1–2 cups of your favorite salted or unsalted nuts such as peanuts or cashews to the popcorn before you stir in the caramel sauce. To add chocolate, I recommend drizzling melted chocolate or white chocolate on the cooled caramel corn. You do not want to bake the caramel corn with the chocolate on top.
Bring to bake sales, tote along on road trips, or serve as a simple finger food at holiday parties—everyone loves this stuff. It’s also a wonderful option if you’re ever in need of gluten free dessert recipes.


Homemade Caramel Corn
- Prep Time: 20 minutes
- Cook Time: 1 hour
- Total Time: 1 hour, 20 minutes
- Yield: 10-11 cups
- Category: Snacks
- Method: Baking
- Cuisine: American
Description
Brimming with buttery flavor, sweet crunch, and from-scratch caramel, each bite of this homemade caramel corn is undeniably irresistible. You’ll make the 6-ingredient caramel sauce on the stove, and while a candy thermometer is helpful, you certainly can get by without one. The recipe below is for plain caramel popcorn, but see Notes for other variations. This is a great make-ahead recipe for a party, bake sale, or gathering, and can easily be doubled.
Ingredients
- 10–11 cups (about 70–75g) air-popped popcorn*
- 1 cup (200g) packed light brown sugar
- 1/4 cup (80g) light corn syrup*
- 1/2 cup (113g) unsalted butter
- 1/2 teaspoon salt
- 1/8 teaspoon cream of tartar*
- 1/2 teaspoon baking soda
Instructions
- Preheat the oven to 200°F (93°C). Line 1 or 2 12×17-inch baking sheets with silicone baking mats or parchment paper.
- Pour the popcorn into the largest bowl you have, or spread it onto the prepared baking sheets. (Either way is fine.)
- Combine the sugar, corn syrup, butter, salt, and cream of tartar in a medium saucepan over medium heat. Stir constantly as the butter melts and mixture comes to a simmer. Once simmering around the edges, allow to bubble, without stirring, for 4 minutes. (If you have a candy thermometer, the caramel should reach 234–235°F (112–113°C).)
- Remove caramel from heat and immediately stir in the baking soda. The mixture will bubble up, almost double in volume, and appear frothy on the surface as you stir; this is normal and expected. Be careful, it’s very hot.
- Pour the caramel over the popcorn and, with a large spoon or spatula, stir gently until all of the popcorn has been coated. Go slowly here and have patience; it requires quite a few turns of the spatula/spoon as the caramel begins to harden. If it’s not already, spread the popcorn evenly onto prepared baking sheet(s).
- Bake for 1 hour, gently stirring every 20 minutes.
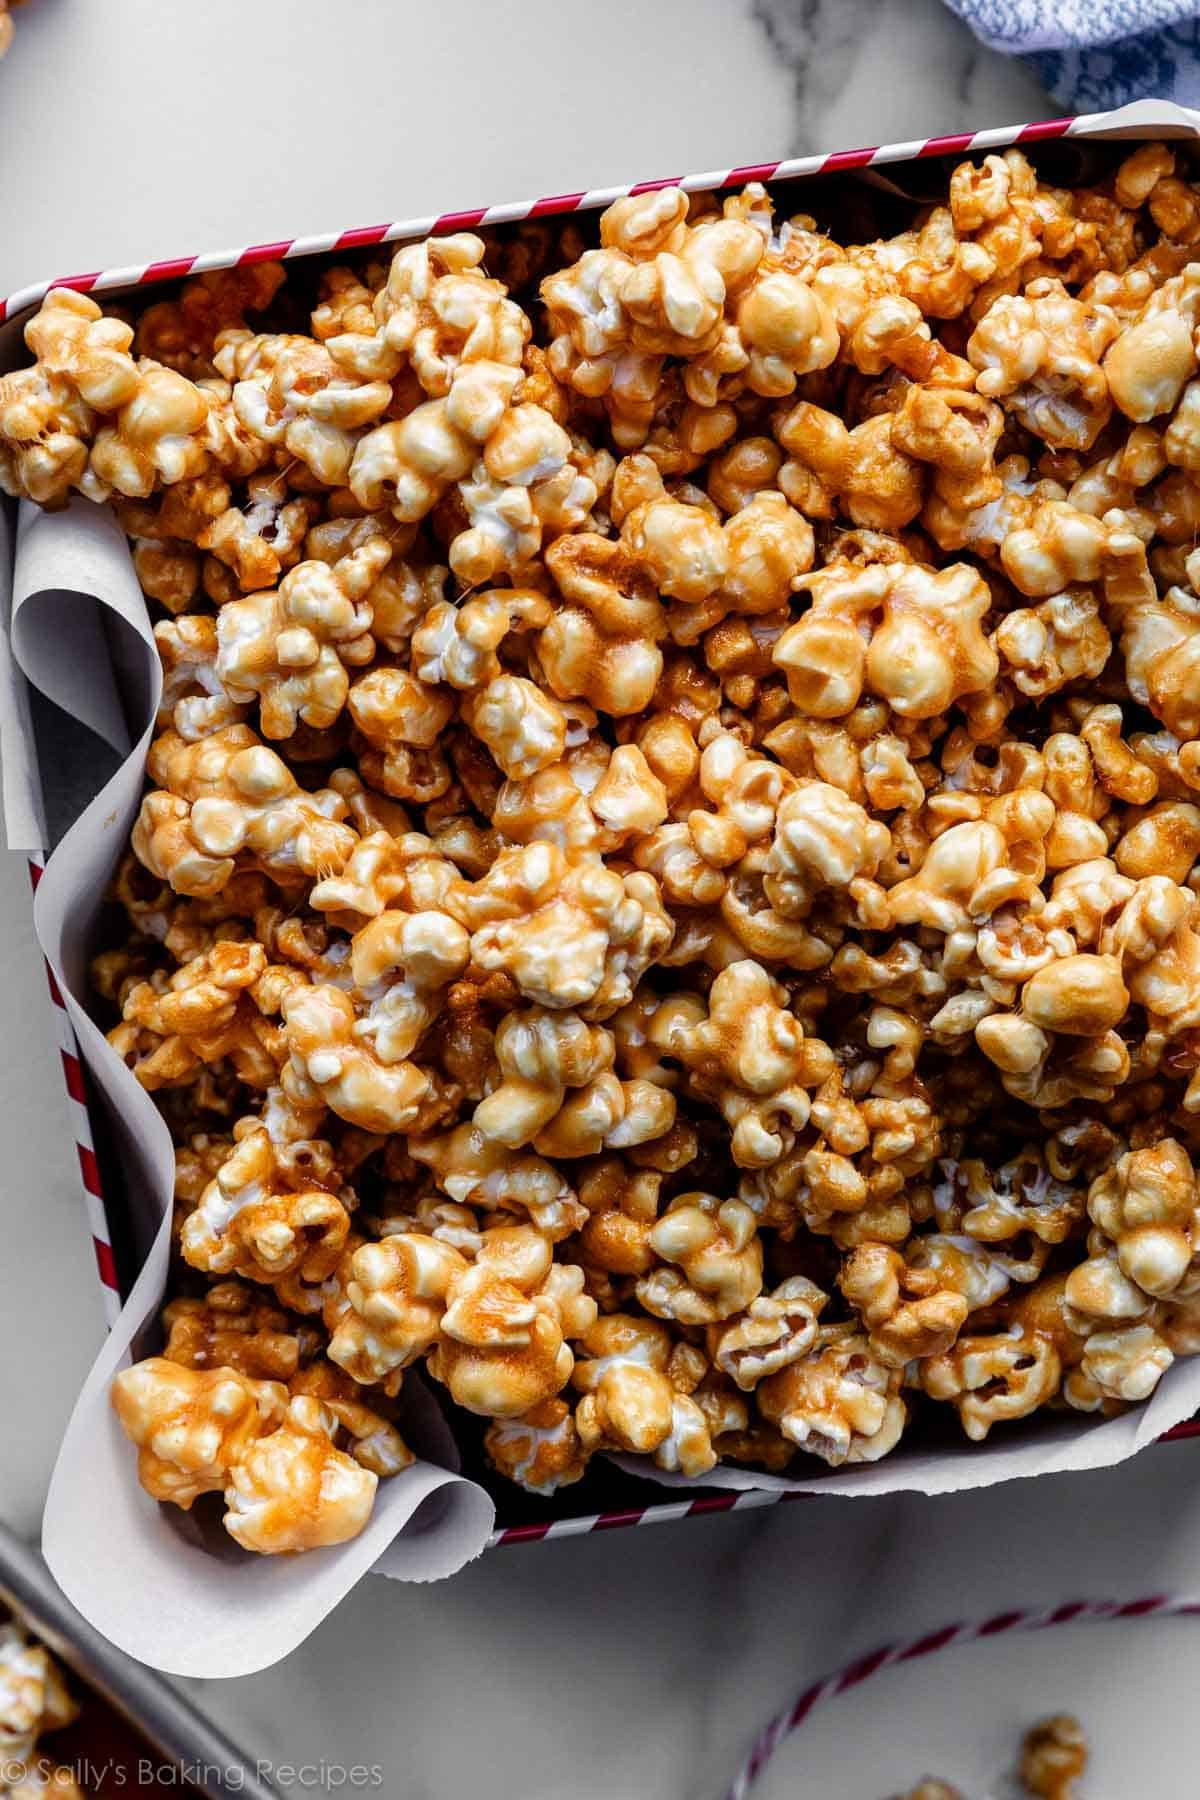
- Allow to cool on the pan for at least 30 minutes. The caramel hardens as it cools. Once cool enough to handle, you can break apart any large clusters.
- Cover the popcorn tightly once cooled. This caramel corn stays fresh for up to 2 weeks in an airtight container, so it’s a great recipe to make ahead of time.
Notes
- Special Tools (affiliate links): Popcorn Maker | Baking Sheet | Silicone Baking Mat or Parchment Paper | Medium Saucepan | Candy Thermometer
- Popcorn: You need about 1/3 cup of kernels to yield 10–11 cups of popcorn. If you do not have a popcorn maker at home, you can simply add 3 Tablespoons of popcorn kernels to a brown paper bag. Seal the bag tightly by folding over the top. Microwave the popcorn for approximately 1 minute, 45 seconds on high power, or up to 2 minutes, depending on your microwave. This method will make 5 cups, so you’ll have to do it twice. Alternatively, you can use store-bought natural-style microwave popcorn that has no butter added to it. If you use buttered popcorn, the caramel may not set and the caramel corn will be greasy.
- Corn Syrup: Use light corn syrup, not dark corn syrup. This recipe will not work without this ingredient; it’s crucial to help prevent crystallization in the cooking caramel, and keeps the caramel soft, stretchy, and chewy. As an alternative without corn syrup, try my peanut butter caramel corn recipe instead.
- Cream of Tartar: Cream of tartar helps to prevent crystallization in the cooking caramel. If you’re all out, you can make the caramel corn without it. Just know that its acidity helps to prevent crystals from forming in your caramel. Corn syrup does the same job, too.
- Add Nuts, Chocolate, or Spices: You can add 1–2 cups of your favorite salted or unsalted nuts such as peanuts or cashews to the popcorn before you stir in the caramel sauce in step 5. To add chocolate, I recommend drizzling melted chocolate or white chocolate on the cooled caramel corn. You do not want to bake the caramel corn with the chocolate on top. You can also add 1/2 teaspoon of ground cinnamon, and/or 1/4 teaspoon of ground nutmeg to the caramel after you take it off heat, when you stir in the baking soda.
- How to double: Double all of the ingredients. In step 3, let the caramel bubble for 7 minutes, or use a candy thermometer. The candy thermometer temperature remains the same. The bake time also remains the same. Do not over-crowd the baking sheets; you’ll likely need 3.
Originally published in 2014, and also published in Sally’s Baking Addiction.


I’ve made this recipe as is and I love it! I’m curious if I can sub dairy free butter instead of regular butter for my vegan friends?
I made this yesterday, but I doubled the caramel recipe and it took about 1 hour and 20 minutes for the caramel to harden in the oven but it was delicious! In Jordan, the movie theaters serve caramel popcorn and I always get the mixed option, so I mixed the caramel popcorn with salted popcorn and served it in a bowl!
Amazingly easy to make and it hits the spot.
This caramel popcorn is almost as good as the popcorn I grew up eating from Margaret Junkins Candy shop in Hampton Beach, NH. Thanks for bringing back great famuly vacation memories.
I made this today and my grandson loves it. Thanks for sharing this recipe
I have made about 5 batches of this, soooooooo good. Easy easy
Thank you for sharing your recipe
So easy and absolutely delicious! Put on your fat pants and enjoy because once you take a bite there’s no stopping!!!
I made this recipe today, it came out perfect!!! I added 1/2 cup peanuts and still got great coverage of the caramel on popcorn. Awesome recipe.
This might be a stupid question, but in a pinch, can you skip the baking and just eat the caramel corn as soon as it’s mixed together or done it HAVE to be baked for an hour? My kids are demanding caramel corn right now and I just came across this recipe lol
It will just be gooey caramel on top of soggy popcorn 🙂 I suggest baking.
I made this and my husband, grandkids and me loved it. Thank you I never made it before good stuff.
I have made your recipe a lot of times and it is a great recipe, thanks so much!!!
Hello! I tried making this and i’m not sure what went wrong, boiled for only 4 and a half min and then tried to coat the popcorn but it set up way too fast to coat it all evenly, then it burned within 15 min in the oven… help? LOL
Hi Megan! Do you think the heat was too high on your stove? Even if it wasn’t– and you want to try this again– boil for less time, maybe only 3 minutes.
Hi Sally,
Your Grandma’s caramel corn recipe is the last one I will ever need to try. My granddaughter is allergic to nuts and peanuts so on many occasions she watched others indulging in caramel corn without complaining. I made up my mind to find a good recipe and have some for her to try .
I made your recipe (2X now) and everyone loved it. My sweet granddaughter was very impressed – went home and told her dad that Nana made caramel corn without nuts so that she could have some and it was delicious!
Thanks, Sally! Your recipes are the best!
I attempted this recipe for the second time today, this time doubling the caramel and boiling for four minutes rather than five, since the first time I made it, there wasn’t enough caramel to coat the popcorn and it seemed too thick. This time, I was able to coat the popcorn, but while much of the popcorn turned out to be perfectly crispy, many pieces have globs of softer, chewy caramel stuck to them (this seems to be caramel that pooled underneath the popcorn in the pan). Is this because perhaps I used too much caramel? The only other thing I did differently was that I popped the popcorn on the stovetop with a little bit of refined coconut oil.
It’s the coconut oil. That extra fat coating the popcorn seems to be combining with the caramel, so the caramel isn’t really becoming crunchy. Know what I mean?
How does it taste? Because I’m sure it’s delicious!
I just made this popcorn! It’s amazing! Next time a double batch! Thank you for the awesome recipe!
I made this for the first time today, and there was not enough caramel to coat all of the popcorn. Next time I would use only half or three-quarters of the amount of popcorn suggested.
this recipe is so delicious! seriously addicting! my only problem was my caramel mixture seemed to a be a bit thicker than it seemed to suppose to be so I couldn’t really coat the popcorn very much, just bigger chunks of caramel and some without out, I’m thinking I may have boiled the mixture to long….any help?!
I have just made my first batch of your caramel corn and it’s heavenly. Wanted to do a trail run so I can make for Christmas party. Now I KNOW FOR SURE I WILL. Easy to make also. Thanks so much for sharing!
Hello Sally, I have been making this caramel corn for sometime now. It is amazing. But just wondering how far in advance I can make it. My daughter is getting married in 4 weeks and we are wanting to make it for wedding favors. Would it be to early to start making it and sealing it large ziplock bags?
Love your story about your grandmother. We both are lucky to have such strong women in our lives. I miss my Nana so bad. She was an amazing woman. She taught me about canning, cooking, and quilting. She was also a very hard worker. She and my Papaw farmed their whole married life together and passed that tradition on to my family. To me the is no better life:). Thanks for your story. .
Thanks for such a kindhearted comment, Deedee. Very much appreciated. You can absolutely go ahead and make the caramel corn now for the upcoming wedding. It’s great for several weeks. Congrats to your daughter. My 1 year anniversary is in a few weeks!
This was fab the first time I made it. Subsequent tries though left my caramel popcorn a little too chewy post baking and cooking. I live in Singapore where it is humid so it doesn’t store too well and gets soft under the caramel. I really love this recipe and hence wondering if you could help me trouble shoot? Need to cook the caramel longer maybe or less caramel? Thanks much!
It’s most definitely the humidity. How about leaving it in the oven a little longer.
What a find! This is a gem of a recipe! Made it last night and it was absolutely PERFECT! I used white air popped popcorn. All I had on hand was salted butter so I cut back the salt just by a tad.
Yummy yummy yummy!
I have been crushing unsalted, roasted cashes and adding to this. So good. Thanks for this recipe; your grandma, your blog, and, of course, you all rock!
I made five batches of this yummy caramel corn this Christmas! My first batch was a disaster and the following batches were perfect after I followed these tips. Using a deep disposable aluminum roasting pan sprayed with cooking spray makes it so much easier to stir the caramel and popcorn for even coating. I found that a temperature of 225-250 made the caramel easier to work with during baking. Also, stir the caramel corn with 2 rubber spatulas sprayed with cooking spray. I made a couple of batches dark brown sugar instead of light brown sugar, resulting in a caramel corn that almost tastes like toffee!
I cannot make this fast enough…everyone who has tried it wants MORE! Just make this recipe, no need to search for a better one 🙂
Sally,
Your blog compliments your grandmother; her life, and her values. Showing your friends, and family love throughout the year, not just through the holidays. I’m sure she is smiling from above. Thank you for this recipe. Next years personalized gifts for our neighbors. Merry Christmas! Steve
Made this with microwave popcorn. Could not find it without butter, but I bought the one that had the least amount of butter added. I followed the directions exactly. The caramel was pretty hard to “pour” out onto the popcorn. I thought it was going to be a disaster, at first, but I proceeded with putting in the oven and mixing every 20 minutes. It ended up being perfect in the end. I made a second batch of the caramel in a smaller sauce pan and did not quite boil it for 5 minutes. It was much easier to pour the second time around and came out perfect! Making this for Christmas gifts for neighbors. Thanks for sharing your Grandmother’s recipe!
Just made this and it’s DELICIOUS!! I’m gonna try not to eat it all tonight!
Thank you for this recipe Sally! I made a batch 3 days ago, but we finished it in 1 day, literally. (I know so embarrassing). Right now I have a double batch in the oven, my husband is a teacher and its for his students. But of course, I’ll take some out for myself. Thank you again for sharing you Grandma’s amazing recipe.
Dear Sally….this recipe was so easy and my stove top pop corn was perfect.
Bravo to your Grandmother…she left you many happy baking memories!
This is the greatest Caramel Corn recipe ever! I made it not once, but TWICE this weekend! Thanks for another great recipe Sally 🙂