

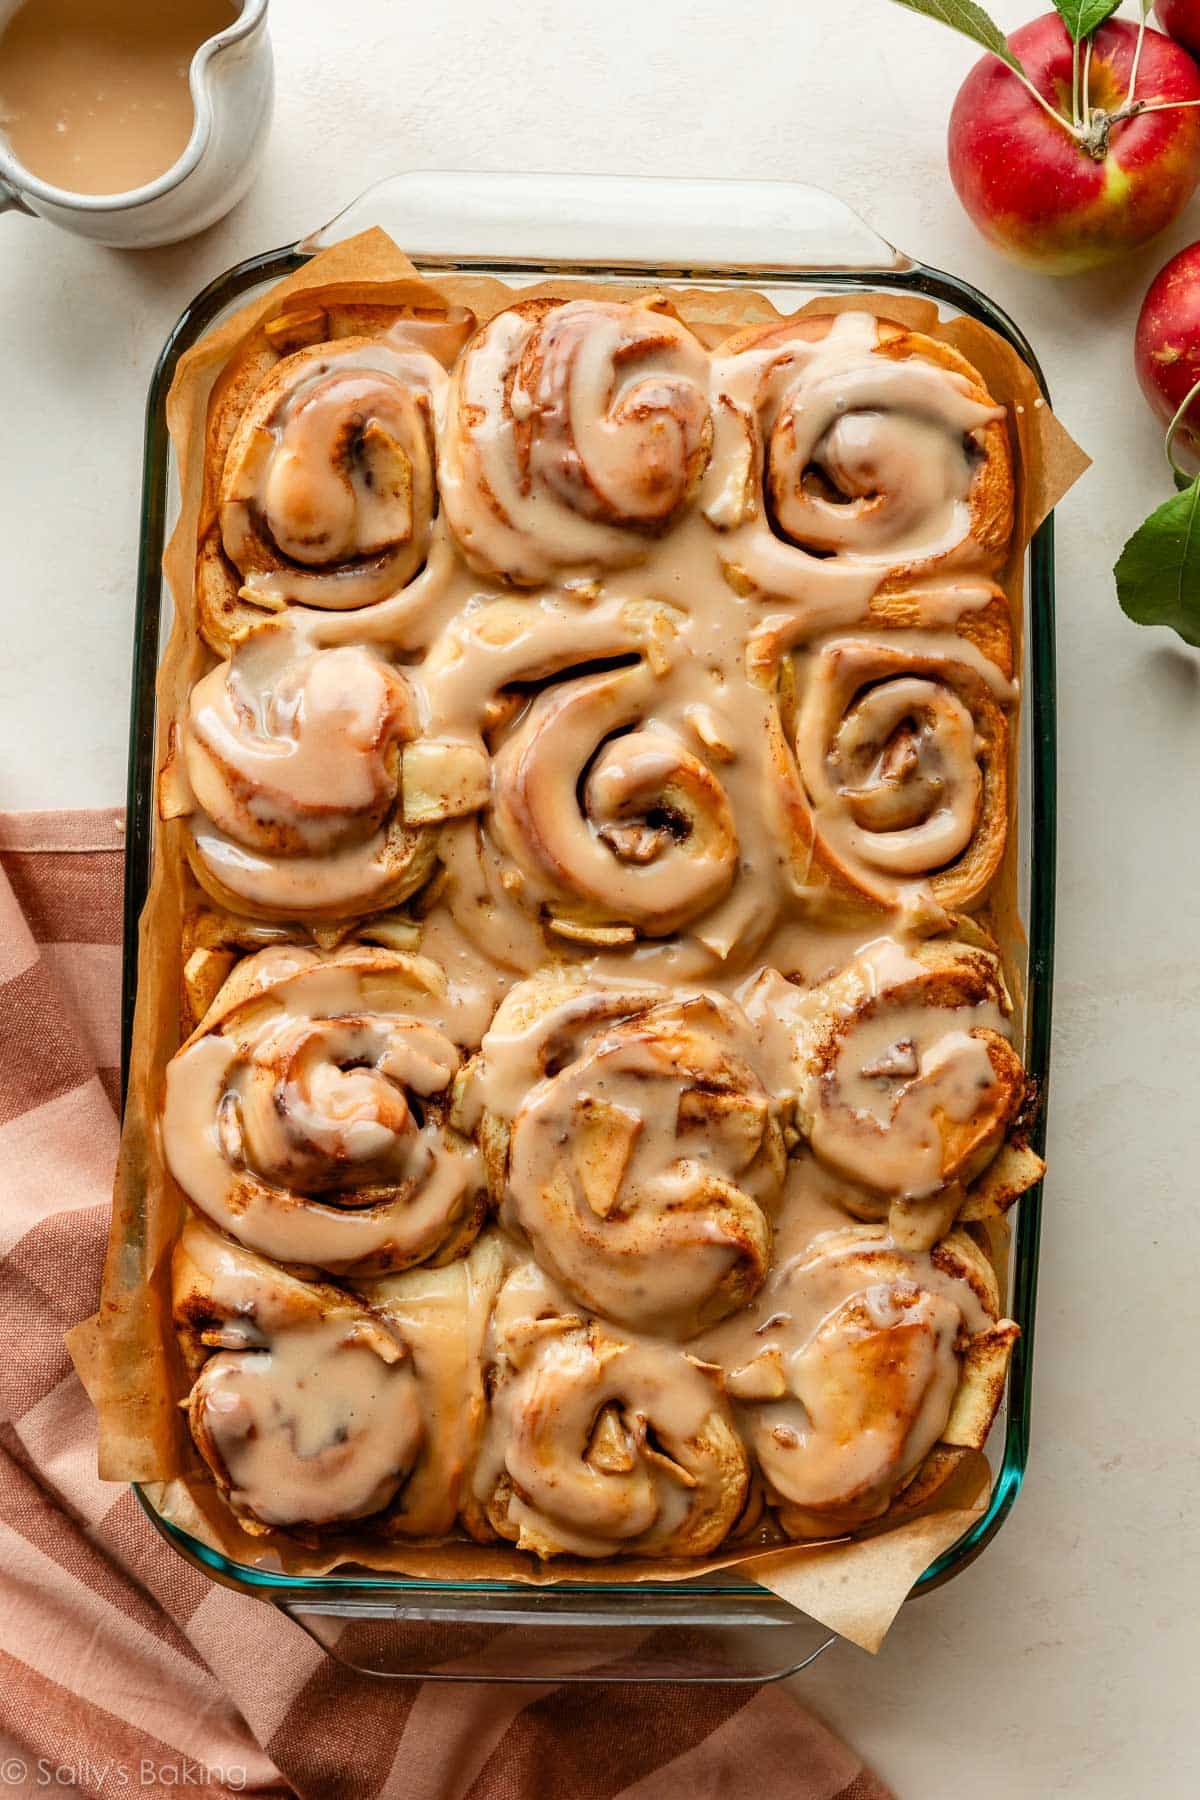
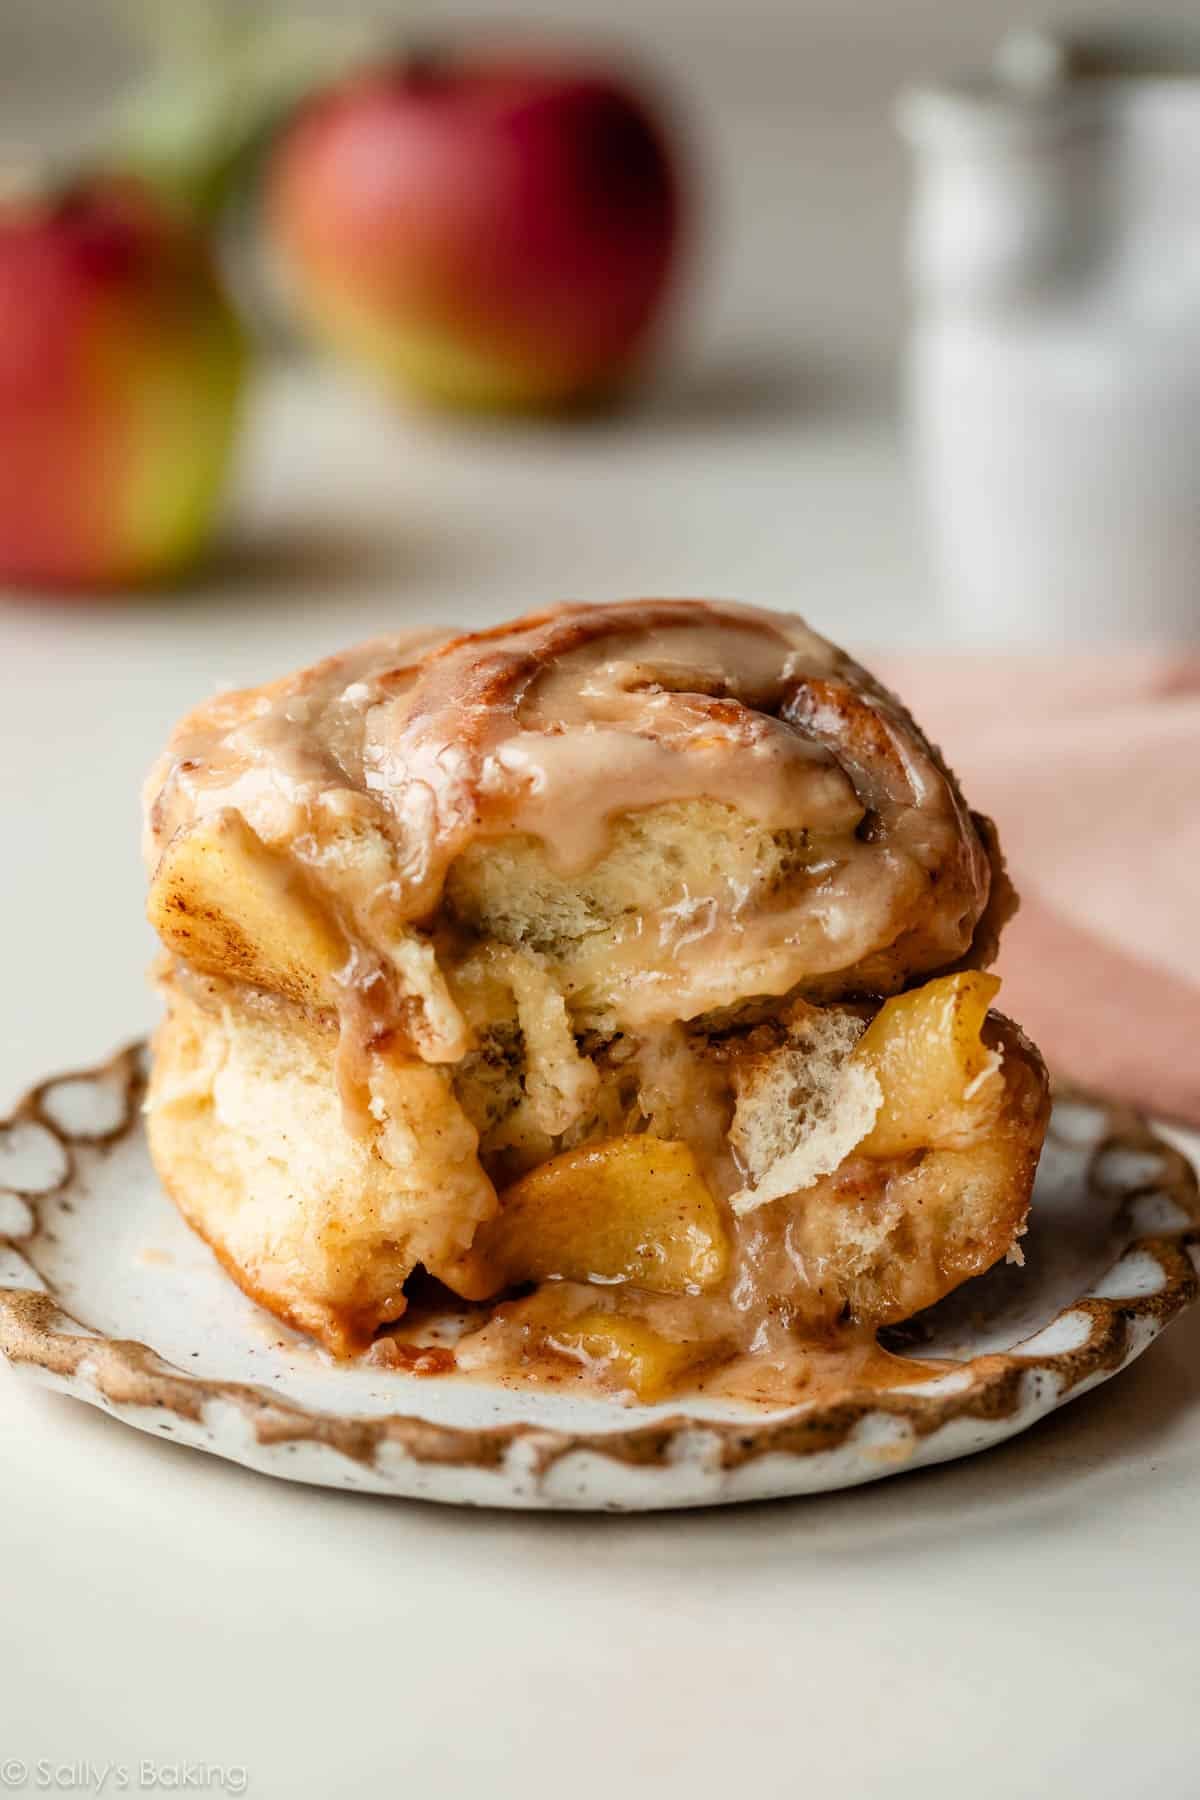
Homemade apple cinnamon rolls combine soft and buttery cinnamon rolls with a warmly spiced apple filling and sweet salted caramel icing. You can prepare them the night before, making these a wonderful choice for fall weekends, Thanksgiving, or holiday breakfasts.
This recipe is brought to you in partnership with Red Star Yeast.
I originally published this recipe in 2017 and have since updated it with new photos, additional success tips, and one small but helpful step: pre-cooking the apples before adding them to the filling. Giving the apples a quick head start on the stove ensures they’re perfectly tender inside the baked rolls.
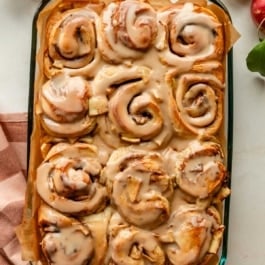
These homemade apple cinnamon rolls are essentially the best parts of apple pie and homemade cinnamon rolls rolled into one delicious breakfast treat. The rolls bake up soft and fluffy with gooey centers, golden brown edges, plenty of cinnamon-spiced apples, and a generous drizzle of salted caramel icing.
The dough is rich and buttery, but very manageable. And while homemade cinnamon rolls take some time because the dough needs to rise twice, most of that time is hands-off. You can also prepare the rolls the night before and bake them fresh in the morning.
Are You a Yeast Beginner?
If you’re new to baking with yeast, my Baking with Yeast Guide is a wonderful resource for all bread beginners!
Why You’ll Love These Apple Cinnamon Rolls
- Soft, buttery dough: This is a rich yeast dough that bakes up fluffy and tender.
- Plenty of apples: Pre-cooking the apples helps them soften before they’re rolled up with brown sugar and cinnamon.
- Salted caramel icing: A little homemade salted caramel takes the simple vanilla icing to another level.
- Make-ahead friendly: Prepare the rolls the night before, refrigerate, and bake them fresh in the morning.
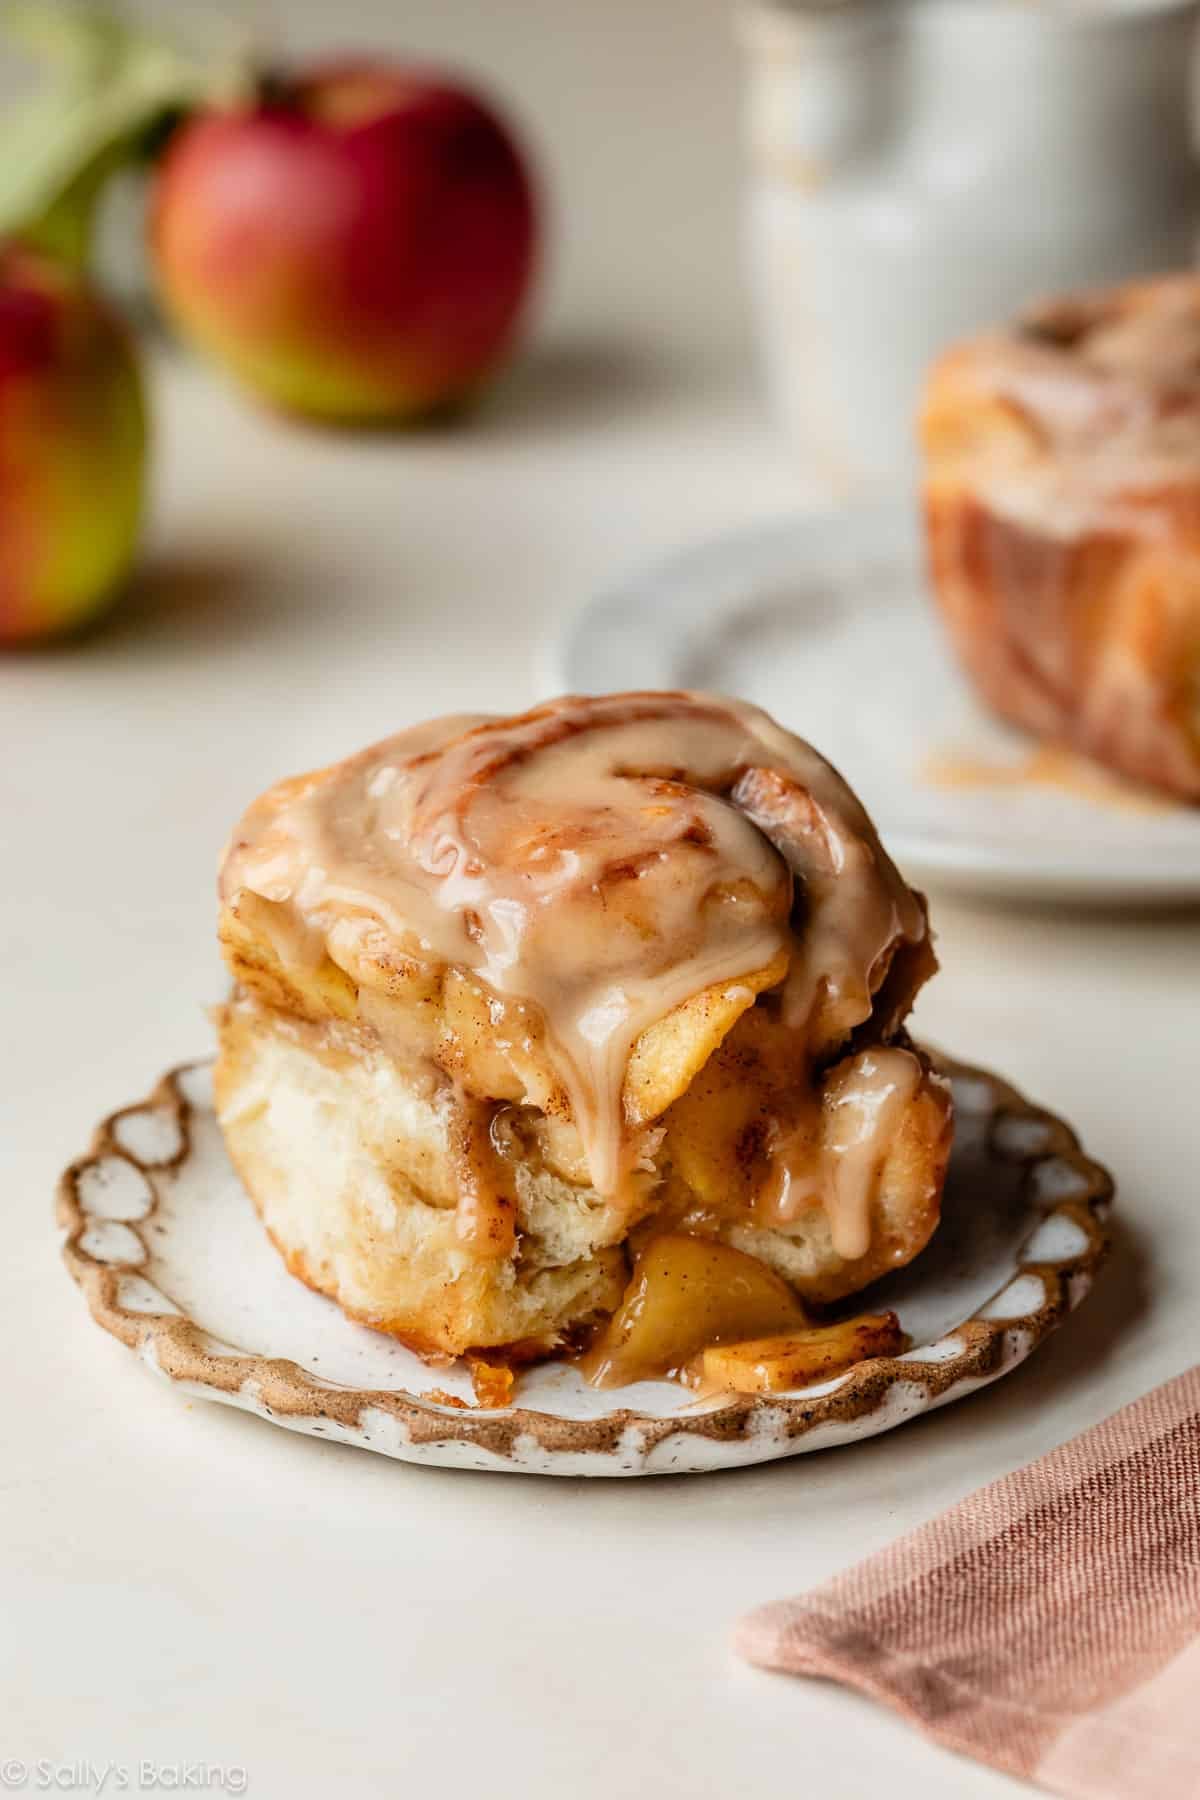
One reader, Alice, commented: “Awesome recipe! I followed the overnight directions and they turned out so soft, gooey, and moist. My family absolutely adored these rolls, and many went to have seconds (and even thirds!!). Recipe was also easy to follow for someone with limited experience with yeast...★★★★★”
Another reader, Nicole, commented: “This recipe is a keeper. Came out perfect. My family asked me to do another batch! ★★★★★”
Ingredients for Apple Cinnamon Rolls
The dough for these apple cinnamon rolls is a rich dough, meaning it’s made with enriching ingredients like milk, butter, and eggs. These ingredients produce a soft, tender bread with plenty of buttery flavor. It’s similar to the doughs we use for dinner rolls, glazed doughnuts, and these homemade apple fritters.
You need 7 ingredients for the dough:
- Milk: Whole milk produces the best flavor and texture, but lower-fat or nondairy milk can work in a pinch.
- Yeast: You can use active dry or instant yeast. I recommend Platinum Yeast from Red Star, an instant yeast blended with natural dough improvers.
- Sugar: Sugar feeds the yeast and helps tenderize the dough.
- Eggs: Add richness and structure.
- Butter: Adds flavor and keeps the dough soft and rich.
- Salt: Essential for flavor.
- Flour: All-purpose flour provides the dough’s structure.
And just a few more ingredients:
- Filling: Butter, brown sugar, cinnamon, and apples
- Glaze: Confectioners’ sugar, vanilla extract, milk, and salted caramel
What Are the Best Apples for Cinnamon Rolls?
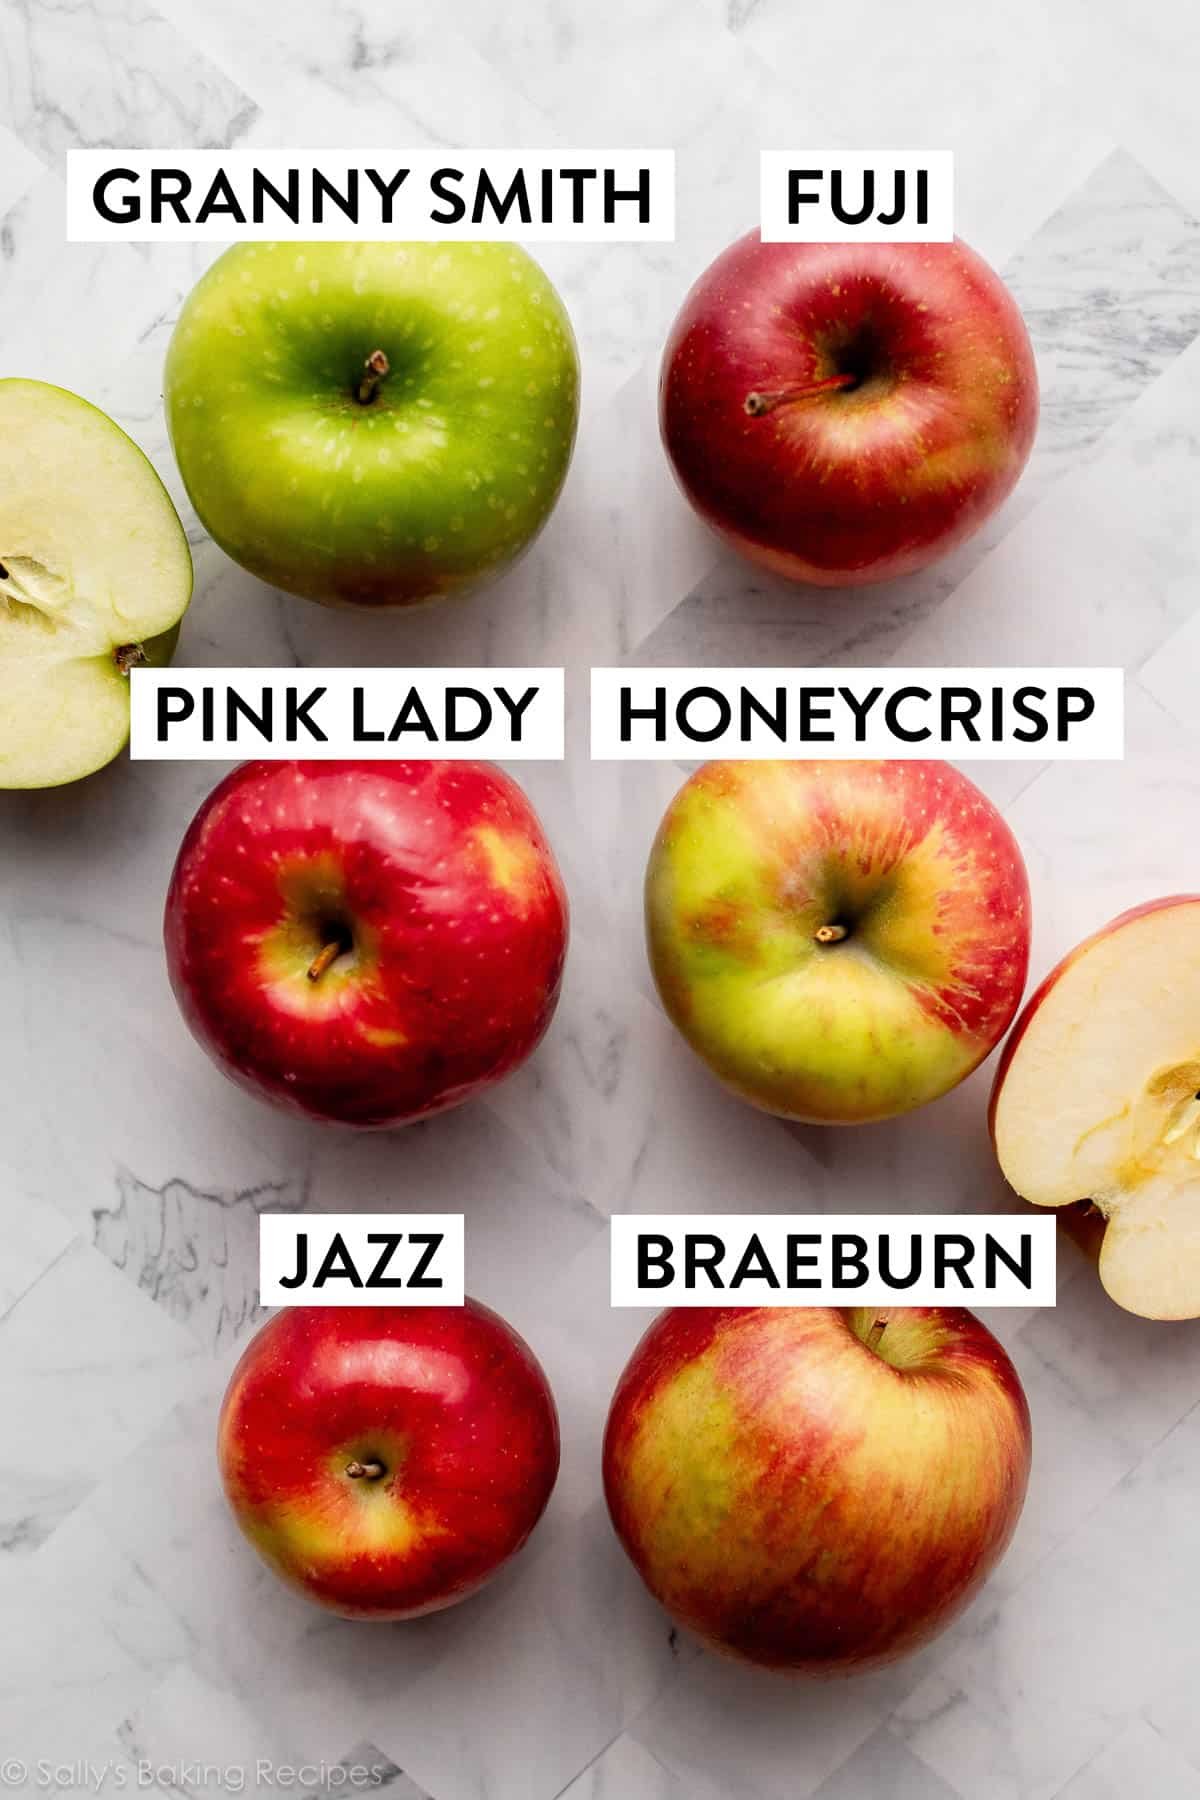
Use a firm apple that holds its shape when cooked. Granny Smith, Honeycrisp, Pink Lady, or a combination of your favorite baking apples all work well. If you’re interested in learning more, see my guide to the best apples for baking.
Peel and thinly slice or finely chop the apples before you begin. We’ll give them a quick head start on the stove before adding them to the filling, which helps ensure they’re perfectly tender in the baked rolls.
How to Make Apple Cinnamon Rolls
Making cinnamon rolls from scratch takes some time because the dough needs to rise twice, but most of that time is hands-off. You can make and bake the rolls in one day, prepare them the night before, or freeze the cinnamon rolls to prep even further ahead.
Prepare the dough: After the dough comes together in the mixing bowl, it’s time to knead. If you have a stand mixer with a dough hook, you can use that for this step, or you can knead the dough by hand.
See my How to Knead Dough video tutorial if you need extra help with this step:
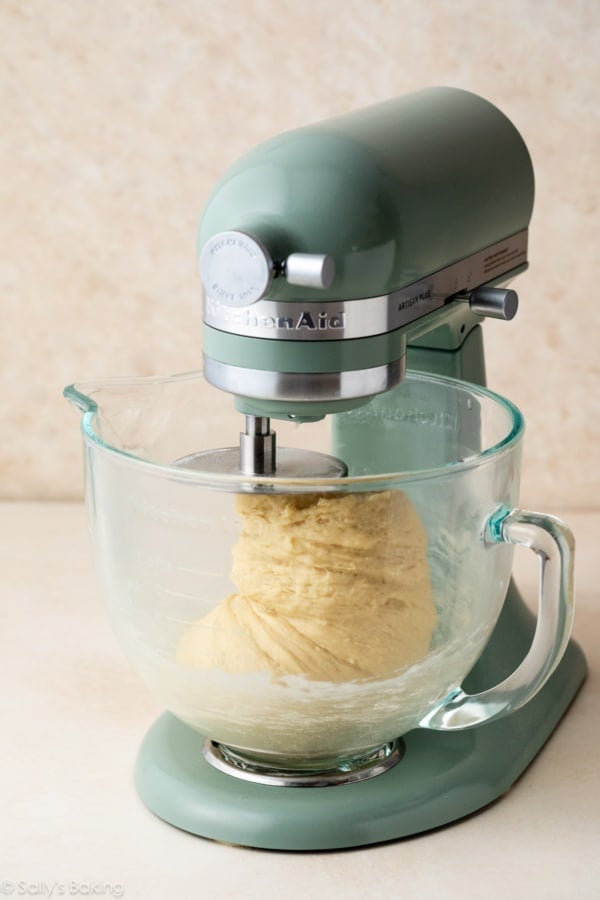
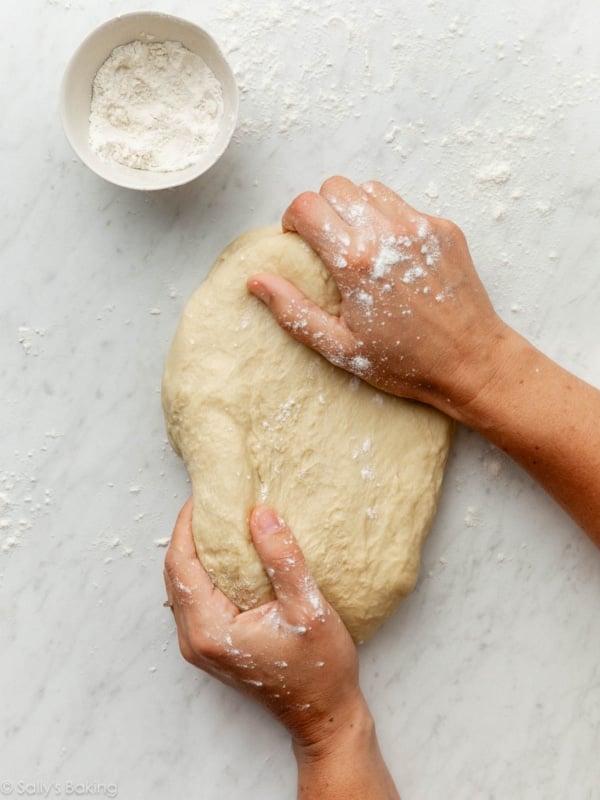
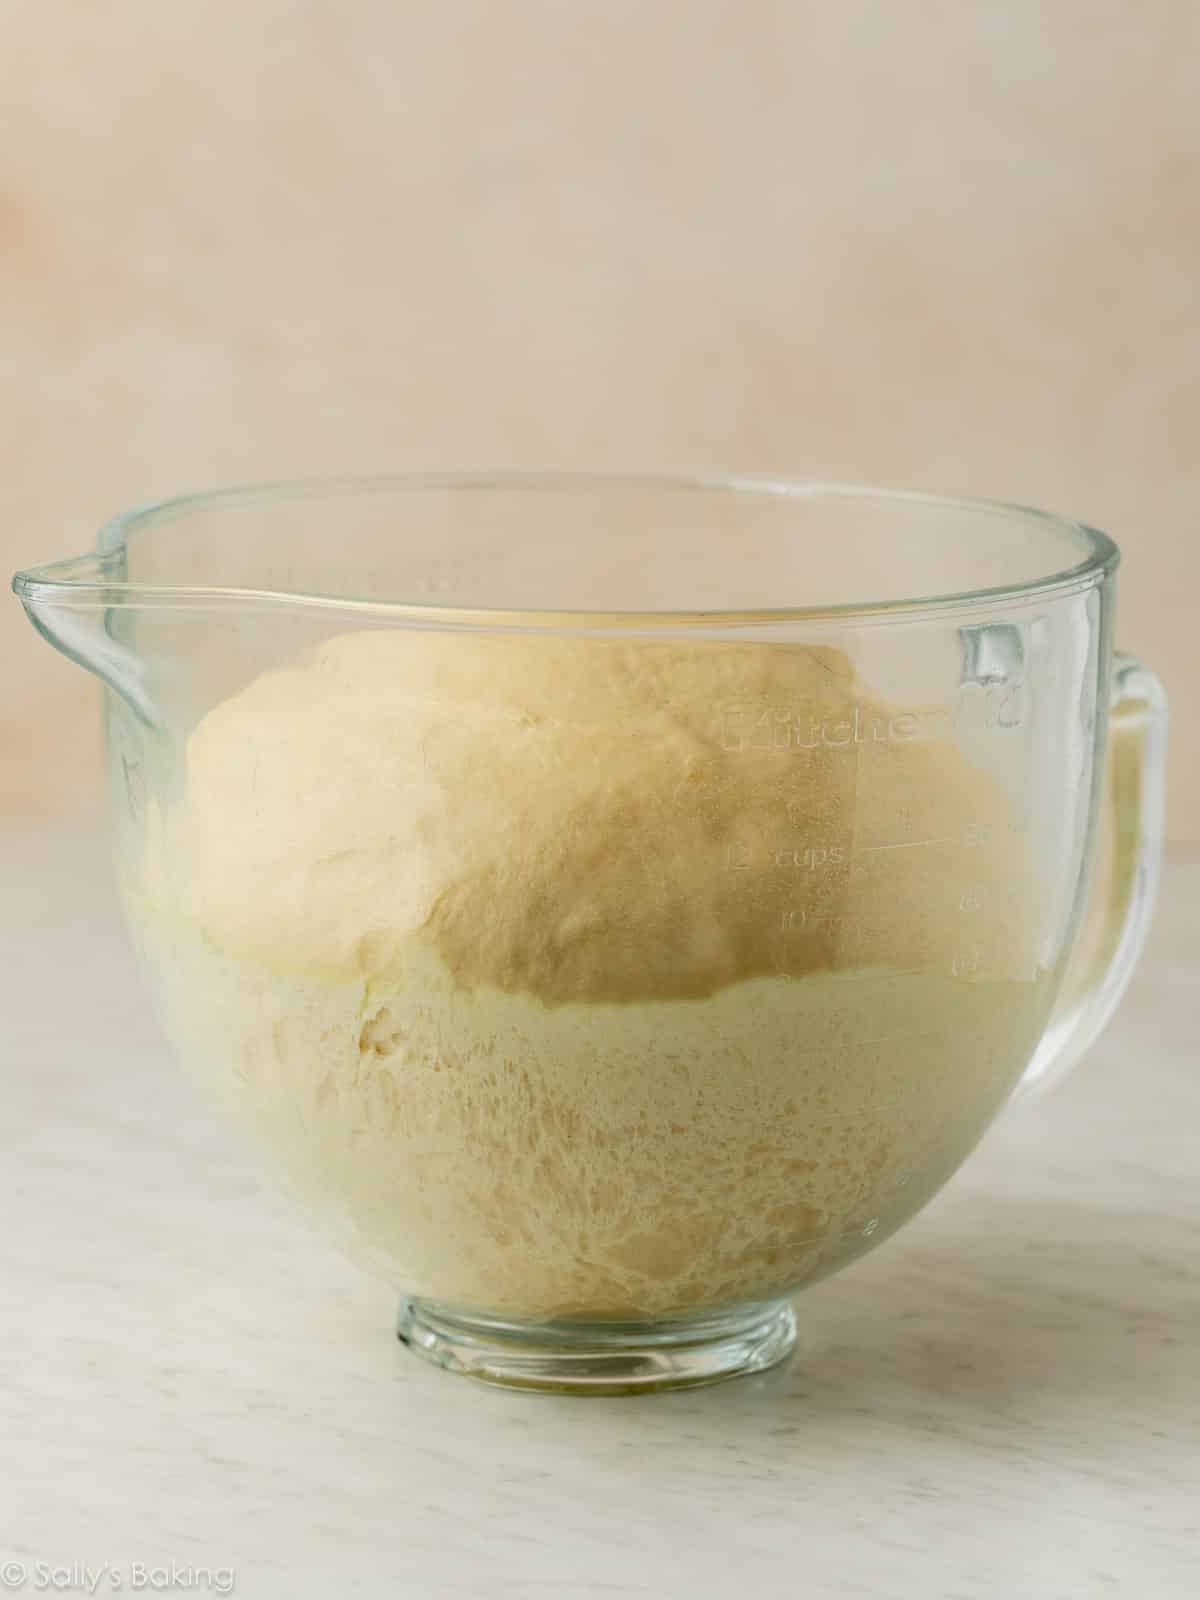
Let the dough rise: The dough rises in about 1–2 hours. During this time, you can get your filling ingredients ready and quickly pre-cook the apples.
Why pre-cook the apples? This extra 5-minute step makes a big difference. Over the years, some readers have commented that the apples were still a bit crunchy after baking, so I added this brief step to give them a head start. Simply cook the apples in a skillet with a splash of water until they begin to soften. This helps ensure they’re perfectly tender by the time the cinnamon rolls are baked through.
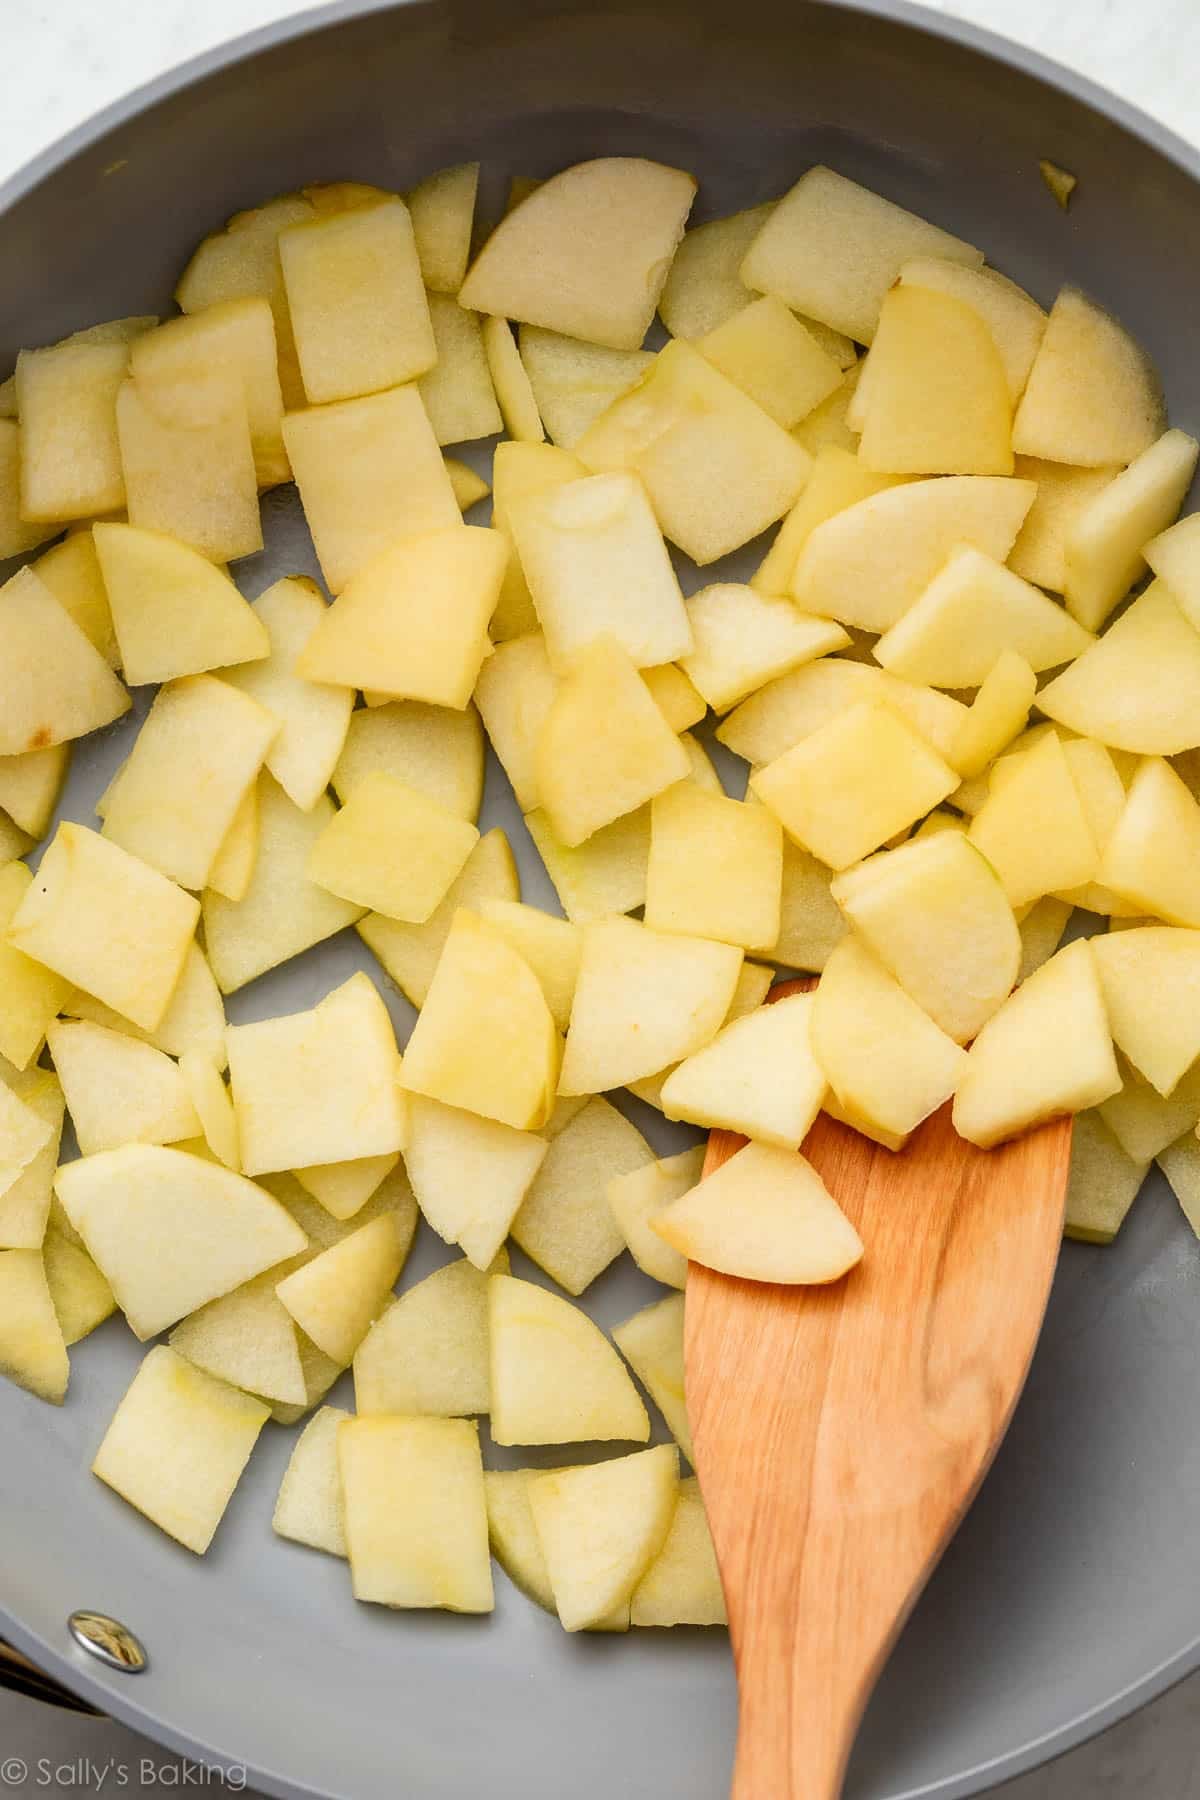
Shape and fill the apple cinnamon rolls: Punch down the risen dough, then roll it into a 12×18-inch rectangle.
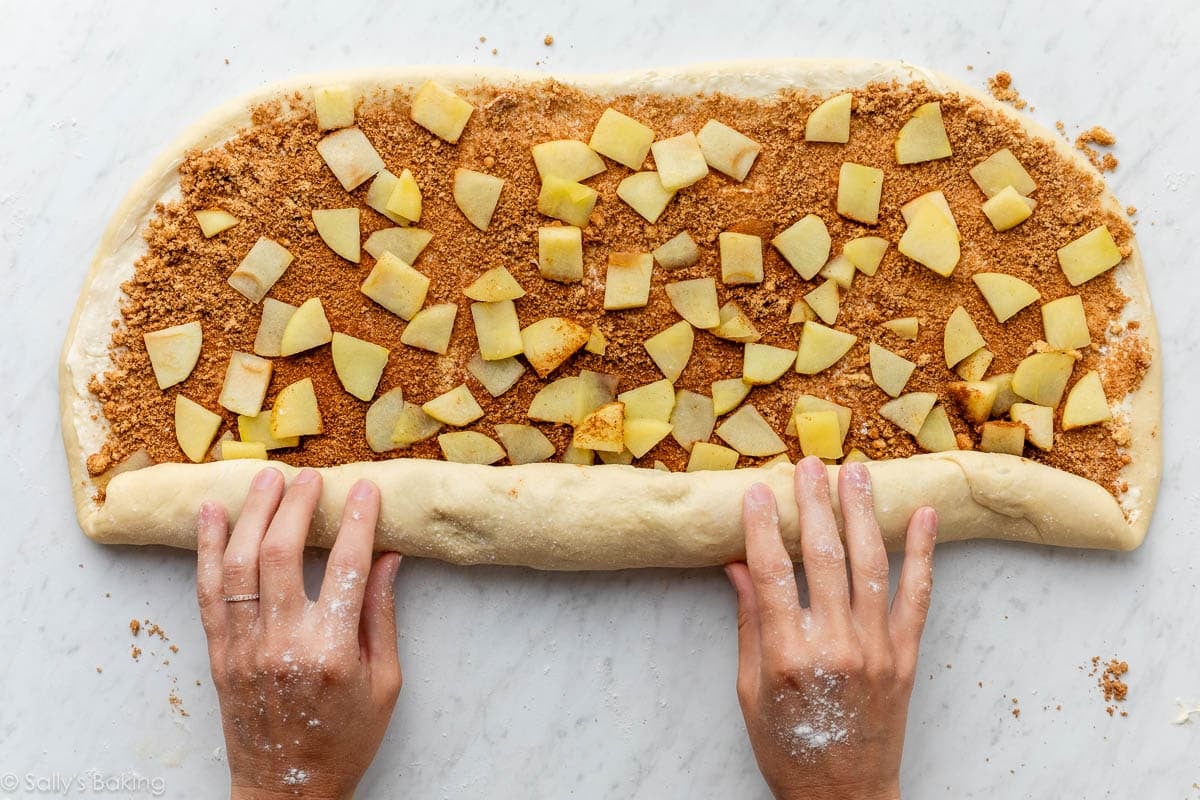
Spread the butter on top and sprinkle evenly with the brown sugar and cinnamon. Scatter the pre-cooked apples over the filling, tightly roll up the dough, and cut into 12 rolls.
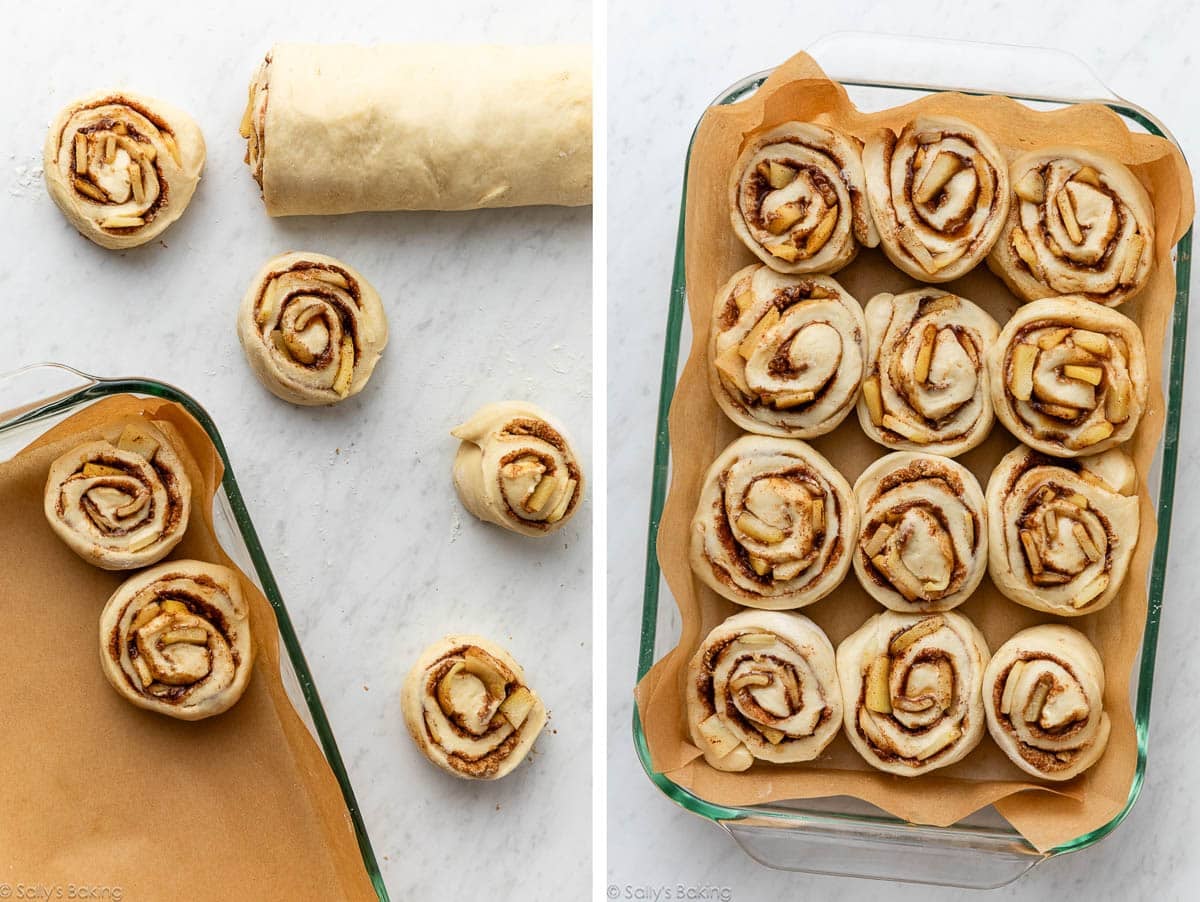
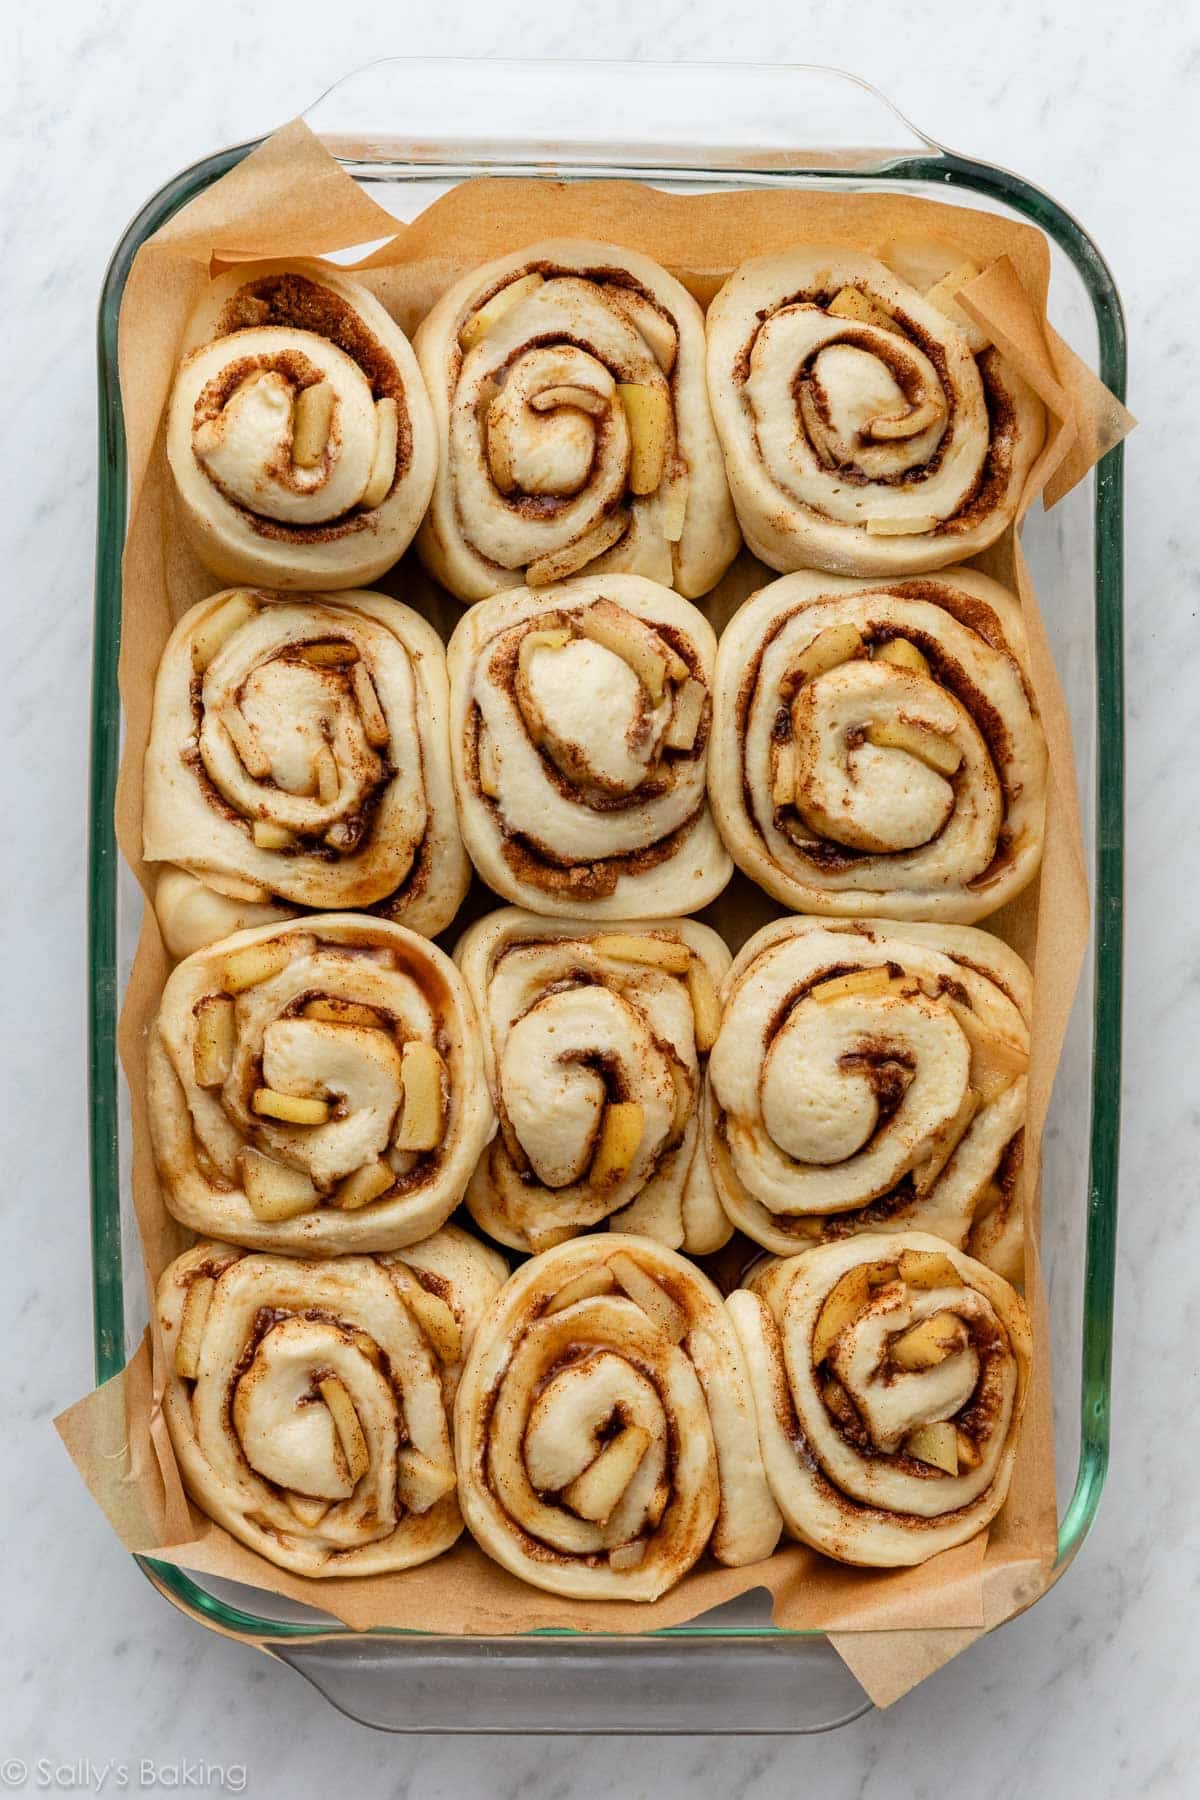
2nd rise: Arrange in a greased or lined 9×13-inch pan and cover to let rise one more time.
The rolls will be puffy:
Bake until the rolls are lightly browned. About halfway through the bake time, I like to cover the rolls loosely with aluminum foil so the tops don’t brown too much before the centers have a chance to bake through.
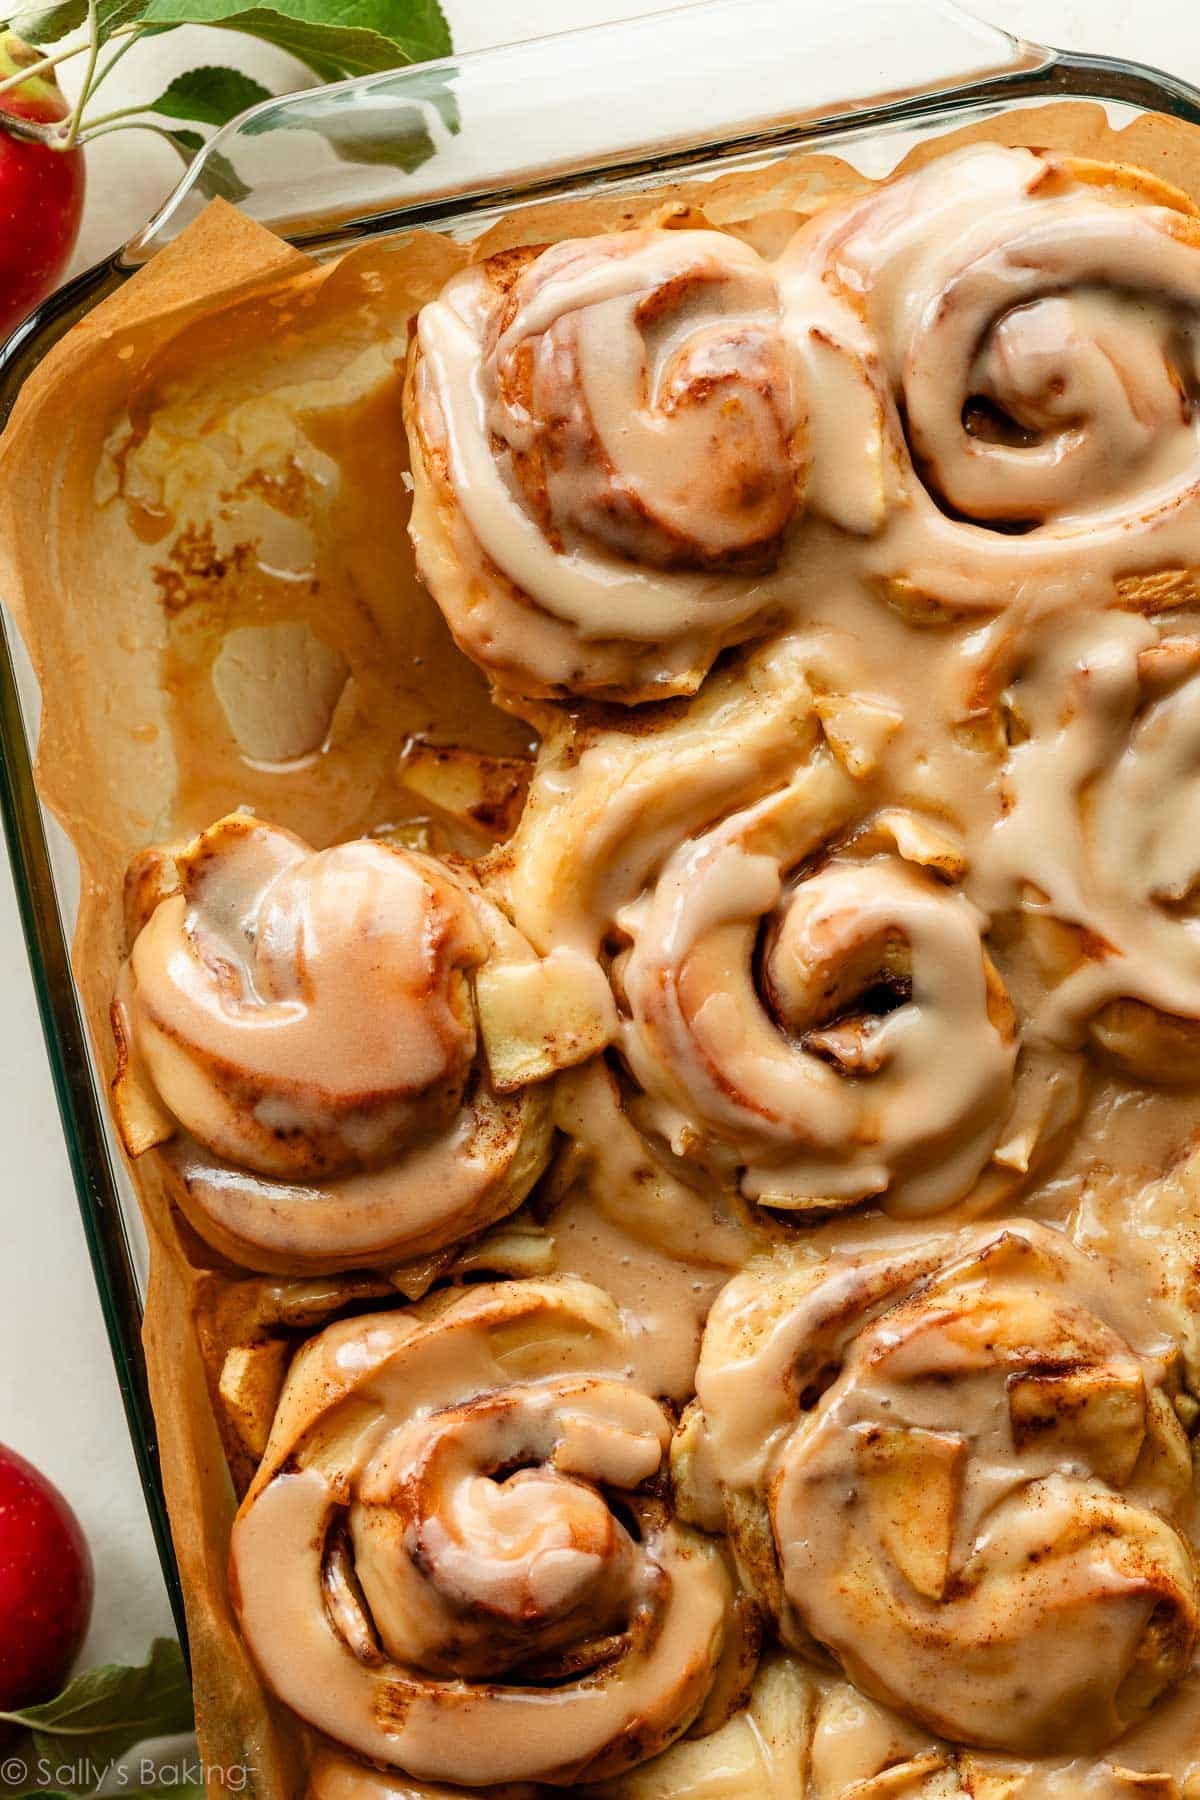
Drizzle with icing: Whisk all of the icing ingredients together and drizzle over the warm rolls.
You Have Icing Options
My favorite topping for these apple cinnamon rolls is the salted caramel icing included in the recipe below. It’s a simple vanilla icing with a couple spoonfuls of homemade salted caramel mixed in. The caramel + apple + brown sugar + cinnamon combination is hard to beat.
But you have plenty of other delicious options:
- Cream cheese icing from these big giant cinnamon rolls
- Maple icing from maple cinnamon rolls
- Simple vanilla icing
- Brown sugar icing from pumpkin donuts
- Or skip the icing and drizzle the warm rolls with salted caramel
By the way, if you can’t get enough of apples and cinnamon for breakfast, try my apple cider French toast next!





Apple Cinnamon Rolls
- Prep Time: 4 hours (includes rises)
- Cook Time: 25 minutes
- Total Time: 4 hours, 40 minutes (or overnight)
- Yield: 12 rolls
- Category: Breakfast
- Method: Baking
- Cuisine: American
Description
Soft homemade apple cinnamon rolls filled with buttery brown sugar, cinnamon, and tender apples, then topped with sweet salted caramel icing. Prepare them the night before for an extra-special fall or holiday breakfast. You can also freeze the cinnamon rolls; see instructions below.
Ingredients
Dough
- 1 cup (240g/ml) whole milk, warmed to about 110°F (43°C)
- 2/3 cup (135g) granulated sugar, divided
- 1 and 1/2 Tablespoons (14g) Platinum Yeast from Red Star (2 standard packets)*
- 1/2 cup (8 Tbsp; 113g) unsalted butter, softened to room temperature and cut into 4 pieces
- 4 and 1/2 cups (563g) all-purpose flour or bread flour (spooned & leveled), plus more as needed
- 2 large eggs, at room temperature
- 1/2 teaspoon salt
- 2 teaspoons oil or butter for the bowl (or use nonstick spray)
Filling
- 2 cups (250g) peeled chopped apples (about 2 medium apples)
- 6 Tablespoons (85g) unsalted butter, softened to room temperature
- 1/2 cup (100g) packed light or dark brown sugar
- 1 and 1/2 Tablespoons ground cinnamon
Icing
- 1 cup (120g) confectioners’ sugar
- 1/2 teaspoon pure vanilla extract
- 2 Tablespoons milk
- 2 Tablespoons warmed salted caramel
Instructions
- Prepare the dough: Whisk the warm milk, 2 Tablespoons of sugar, and the yeast together in the bowl of your stand mixer fitted with a dough hook attachment. Cover and allow mixture to sit for 5–10 minutes or until foamy on the surface. If you do not own a mixer, you can do this in a large mixing bowl and in the next step, mix the dough together with a large wooden spoon/silicone spatula. It will take a bit of arm muscle. A hand mixer works, but the sticky dough repeatedly gets stuck in the beaters. Mixing by hand with a wooden spoon or silicone spatula is a better choice.
- Add the remaining sugar (1/2 cup or 100g) and the butter and beat on medium speed until the butter is slightly broken up. Add about 1 cup (125g) of the flour, the eggs, and salt, and beat on low speed for 30 seconds. Scrape down the sides of the bowl, then add the remaining flour. Beat on medium speed until the dough comes together and pulls away from the sides of the bowl, about 2 minutes. Dough will be soft. If it seems too sticky and clings to the sides of the bowl instead of forming a rough mass around the dough hook or spoon, add more flour, 1 Tablespoon at a time, and continue to mix until the dough pulls away from the sides of the bowl but is still moist and tacky. If it feels dry and crumbly, add more milk, 1 teaspoon at a time, mixing well after each addition.
- Knead the dough: Keep the dough in the mixer and beat on low speed for an additional 5–8 full minutes, or knead by hand on a lightly floured surface for 5–8 full minutes. (If you’re new to bread-baking, my How to Knead Dough video tutorial can help here.) If the dough becomes too sticky during the kneading process, sprinkle 1 teaspoon of flour at a time on the dough or on the work surface/in the bowl to make a soft, slightly tacky dough. Do not add more flour than you need because you do not want a dry dough. After kneading, the dough should feel smooth, supple, and elastic. Poke it with your finger—if it slowly bounces back, your dough is ready to rise. You can also do a “windowpane test” to see if your dough has been kneaded long enough: tear off a small (roughly golfball-size) piece of dough and gently stretch it out until it’s thin enough for light to pass through it. Hold it up to a window or light. Does light pass through the stretched dough without the dough tearing first? If so, your dough has been kneaded long enough and is ready to rise. If not, keep kneading until it passes the windowpane test.
- 1st Rise: Lightly grease a large bowl with oil or butter (or use nonstick spray). Place the dough in the bowl, turning it to coat all sides. Cover the bowl with plastic wrap or a clean kitchen towel. Allow the dough to rise at room temperature for 1 and 1/2 to 2 hours or until doubled in size. (I always let it rise on the counter and it takes about 2 hours. For a tiny reduction in rise time, see my answer to Where Should Dough Rise? in my Baking with Yeast Guide.)
- Pre-cook the apples: While the dough finishes rising, place the chopped apples in a skillet with 1 Tablespoon water. Cook over medium heat, stirring frequently, for about 5 minutes, or until the apples are beginning to soften. Remove from the heat and set aside to cool slightly while you roll out the dough.
- Grease the bottom and sides of a 9×13-inch baking dish (glass or metal) or line it with parchment paper.
- Roll out the dough: Punch down the dough to release the air. Place dough on a lightly floured work surface and, using a lightly floured rolling pin, roll dough into a 12×18-inch rectangle. Make sure the dough is smooth and evenly thick. If the dough keeps shrinking back as you roll it out, cover it lightly and let it rest for 10 minutes to relax the gluten, then continue rolling.
- Fill the rolls: Spread the softened butter all over the dough. The softer the butter is, the easier it is to spread in this step. (Microwave it for a few seconds to soften if needed.) In a small bowl, mix the brown sugar and cinnamon together, then sprinkle evenly over the butter. Scatter the pre-cooked apples evenly over the filling. Tightly roll up the dough to form an 18-inch-long log. If some filling spills out, sprinkle it on top of the roll. With an extra-sharp knife, cut into 12 even rolls, about 1.5 inches wide. Arrange in the prepared baking pan.
- 2nd Rise: Cover the pan and allow the rolls to rise until puffy, about 1 hour. (Or use the overnight option in the Notes below.)
- Preheat the oven to 350°F (177°C).
- Bake for about 26–29 minutes or until they are lightly browned on top, rotating the pan halfway through. If the tops are browning too quickly, loosely tent aluminum foil over the top of the pan. Remove pan from the oven and place pan on a cooling rack for about 10 minutes while you make the icing.
- Make the icing: Whisk the confectioners’ sugar, vanilla, milk, and warmed salted caramel together until smooth. Drizzle over the warm rolls and serve.
- Cover leftover frosted or unfrosted rolls tightly and store at room temperature for up to 2 days or in the refrigerator for up to 5 days.
Notes
- Make Ahead Instructions – Overnight: To prepare the night before serving, prepare the rolls through step 8. Cover the rolls and refrigerate for 8–12 hours. (16 hours max. 8–12 hours is best, but 16 hours is OK if absolutely needed. Do not exceed 16 hours.) The next morning, remove from the refrigerator, keep covered, and allow to rise for 1–2 hours at room temperature before continuing with step 10.
- Make Ahead Instructions – Freezing: You can freeze cinnamon rolls for up to 3 months, and I recommend a few different methods for freezing cinnamon rolls. The first method is to freeze them after shaping, before they’ve had their 2nd rise (step 8). Thaw in the refrigerator overnight, then let rise for 1.5–2 hours at room temperature before baking. The second method is to par-bake the risen rolls for 10 minutes, let cool completely, then cover and freeze. Thaw in the refrigerator overnight, then let sit at room temperature for 30 minutes before baking. Finish baking for 15–20 minutes. You can also freeze fully baked cinnamon rolls. See How to Freeze Cinnamon Rolls for more details about all of these methods.
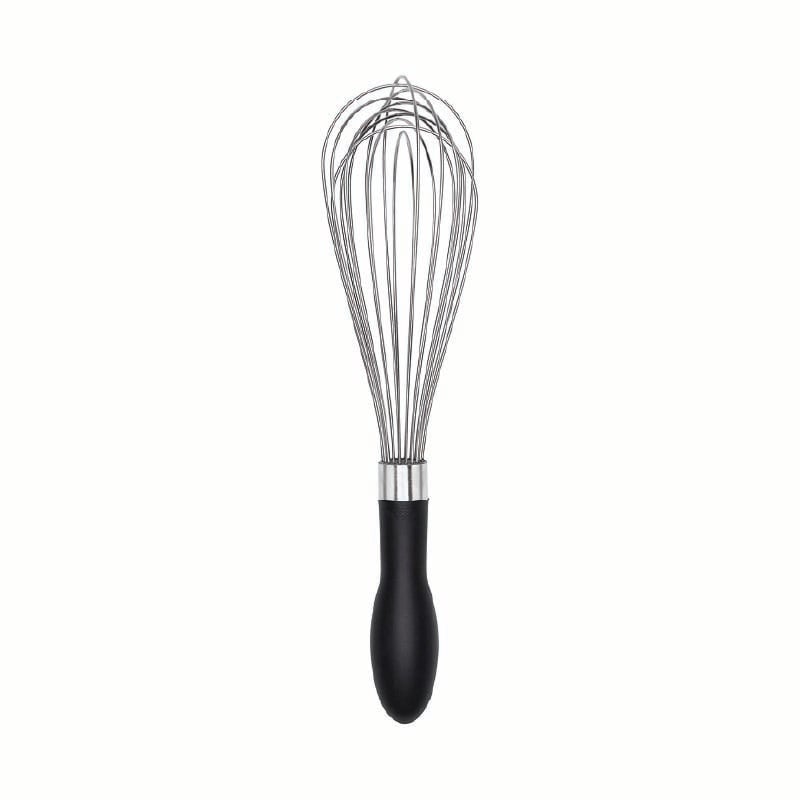
- Special Tools (affiliate links): Stand Mixer or Glass Mixing Bowl and Silicone Spatula / Wooden Spoon | Rolling Pin | 9×13-inch Glass Baking Pan or Metal Baking Pan | Cooling Rack | Whisk
- Milk: I recommend using whole milk for the best, richest-tasting dough. You could also use buttermilk. Reduced-fat, low-fat, or nondairy milk works in a pinch. Do not use nonfat milk.
- Yeast: I always use Platinum Yeast from Red Star, an instant yeast. You can use an active dry yeast instead, if needed. The rise times could be slightly longer. Reference my Baking with Yeast Guide for answers to common yeast FAQs.
- Other Icing Options: Instead of the caramel icing, you can top the rolls with cream cheese icing from giant cinnamon rolls, maple icing from maple cinnamon rolls, simple vanilla icing, brown sugar icing from pumpkin donuts, or skip the icing and drizzle the warm rolls with salted caramel.
- Gluten Free: We have not tested this recipe with gluten-free flour, so we are unsure of the results.












Reader Comments and Reviews
Delicious rolls, I left in for 10mins longer, and they were still raw so cooking time should be adjusted but otherwise perfect!
Skeptical. It took way longer than 5 mins kneading by hand to even get a remote windowpane effect in my dough. Who knows if it will even work. Then the caramel was a COMPLETE fail to the point I have to throw my pot in the garbage, there should be better instructions to help avoid mishaps. I have to walk a couple miles to the store now (no car) to buy caramel, if these rolls are even are edible. Clearly I’m cranky due to this recipe attempt. Be forewarned, this isn’t for novice bakers.
I’m so disappointed for you.
I find them absolutely amazing. Will never use another recipe or buy store bought again.
Whoops, sounds like you didn’t read the instructions thoroughly before you jumped in. I hope you didn’t give up after your first attempt!
So delicious!!! The dough was so easy to make and to work with. I’ve never had dough work out so well before. If you make these I definitely recommend adding more filling. I probably added a little less than 1/4 cup extra brown sugar and more cinnamon and apples and it could use more. I’d suggest a full cup of brown sugar and as much cinnamon as your heart tells you. I did 3 apples and it was a good amount. The apples were still a little crunchy but I like them that way, it gives it a good texture
Great recipe.!!! Has anyone tried the prebake for 10 minutes option?
Can Swerve sugar substitute be used with the yeast? If yes, does it have to granulated or can it be confectioner’s or brown? Thank you
Hi Lauren, honestly I have not tested it so I can’t be certain of the results, or know which is best. Let me know if you try anything!
This turned out so well, but I added an extra 2 tablespoons of butter for the filling as 6 seemed just a hair scant. Otherwise, this was flawless.
Can you use a bread machine to make the dough? If so, would the recipe need to be adjusted at all?
Hi Patty, we haven’t tested this recipe in a bread machine, but a few readers have reported success doing so. Let us know if you give it a try!
Can I use store bought caramel sauce, like the ice cream topping stuff, instead of making sauce? It’d be a time saver.
IT’S SO FLUFFY! I forgot to salt my dough but a little flakey salt on top made them heavenly. These made the perfect breakfast with some maple breakfast sausage and fruit.
Made these, super good! Was curious if I could somehow incorporate tangzhong to the dough?
We’ve never tested it, Vanessa! Glad you enjoyed these.
“These are literally the best cinnamon rolls I’ve ever had” -My fiance, after the first bite
And I’d second that statement! SO fluffy, buttery, and delicious, without being cloyingly sweet. I used half AP and half bread flour, and substituted half of the cinnamon for pumpkin pie spice. I whipped these up in between calls while working from home, so they did get a decent amount of extra proof/rise time, not sure how much that contributed to the fluffiness I got vs if I had done things on a shorter timeline, but I’m loving it! I did end up covering the outer row of rolls (on the short edges of the pan) with foil and throwing the rolls back in the oven for an extra 5 minutes to cook the middle a bit more at the end, since the middle ones were a little soft, and got perfectly golden tops on them all after that!
Also: Once I rolled out the dough and spread the cinnamon/sugar mixture, I used a pizza cutter to cut the dough into 12 slices before topping with apples and rolling them up. So much easier that rolling up the huge log and slicing after!
So glad these were a hit, Sonia!
I made these and the raspberry rolls. Turned out great. I noticed though that the next day they seemed a little drier. After 24 hours, is that common?
Hi Gretchen, the cinnamon rolls are definitely best on day 1, but be sure to keep them tightly covered to preserve freshness for the leftovers.
Made these for Teacher appreciation week. They are a labor of love. Lots of steps and time. The dough rose a lot more than I expected and they barely fit in a 9×13. The dough was still raw in the middle after 35 minutes. Tasted and smelled good but just had to pick around the raw centers. I added a little more salt as well. Overall a good recipe but will go with something easier next time.
Would apple sauce work instead of apples for this recipe? I was going to try both ways.
Hi Ruth, we haven’t tried applesauce here!
I tried the applesauce today and it was very good. Although the diced apples is like an apple fritter and cinnamon bun combo. Both are delicious. But I do like the apples better.
Can I use something else like icing sugar or apple jam instead or the granulated sugar as I don’t prefer the grittiness
Hi Tanzin, we don’t recommend swapping out the granulated sugar in the rolls. The texture isn’t gritty in the final baked rolls. You could try using apple jam as the filling if you wish.
Has anyone tried subbing a GF all purpose flour!?!
Hi Sally, what happened to your Caramel Apple Cinnamon Rolls recipe, I can’t find it? love love love!
Hi Bixie! We were no longer satisfied with the outcome of that older recipe, so we unpublished it. We still have it, so send us an email and we can forward it to you. sally@sallysbakingaddiction.com
To make caramel apple rolls, I combine this recipe with Sally’s Maple Pecan sticky bun recipe. The dough is actually the same for both recipes, so just make the filling from this recipe, but follow the instructions from the sticky bun recipe for the caramel topping. I like to replace the maple syrup with honey in the caramel topping and use walnuts instead of pecans as well. Bake at 375F like this recipe says because the apples take too long to cook at 350F. It’s delicious and super easy!
Absolutely amazing recipe! Concise instructions and lots of great tips and hints.
Just love Sally’s baking addition.
I ended up using 2 x 9″ pie pans and my dough ended up getting 14 bun cut.
I did find the dough still looked supple and “jiggly” as the suggested oven time, so I adjusted and kept them in longer.
Caramel and apple in a cinnamon bun?? – absolutely!
Glad you enjoyed these! All ovens are different and for such large rolls, the bake time can definitely be within a wide range.
Can you use frozen apples and still let them rise over night in the fridge
Hi Chanti, we haven’t tested it, but fear the apples would let off too much moisture as they thaw overnight in the fridge.
I used buttermilk and when adding yeast, hard to tell if yeast bloomed. I also don’t think my dough has risen but can I use it anyway?
Hi Kat! The rolls will be dense if it hasn’t risen enough. A slightly warmer spot may help the dough rise!
Took these right from the oven to my swimming class. To say they were a big hit is a huge understatement. I’m told to only make these from now on Thank you for the warning about the separation with the caramel sauce. Almost had minor heart attack.
These are the best . I did add some great vanilla from Mexico to the cooking apples also extra to the icing. Oh and if you don’t have cream cheese you can use sour cream. I have done both and so so so good. Thanks for this they are so good.
Hands down best cinnamon buns I’ve ever made, and SO EASY. Followed the instructions as is, and they were absolutely moist, light and so gooey!
This recipe is a keeper. Came out perfect. My family asked me to do another batch!
Hi Katie, Enjoyed it but was a little soft inside so would recommend at least another 5-10 mins. baking
I felt the same and baked 5 minutes longer. Delicious!
My family has asked me to redo this reciepe over and over again!!
Thank you for this great reciepe.
These totally hit the spot! Don’t skip the salted caramel addition to the icing – holy moly! I had to sub milk and butter in place of the heavy cream in the salted caramel sauce, and it worked out just fine! I ended up wanting more icing because I wanted to drench these babies, so I needed a triple batch of the icing to get to that level. I will absolutely make these again and again!
we made this recipe but it ended up having to rise in the fridge (we did the overnight option) for more like 16 hours, is that ok? they look pretty risen now should we still set them out to rise for another hour like the instructions say? I don’t know. they look very yum though.
Hi Lexi, yes, remove from the refrigerator and allow to rise on the counter for 1-2 hours before continuing with step 6. Enjoy!