

With step-by-step pictures, a full video tutorial, and plenty of helpful tips, learn how to make simple white sandwich bread using a few baking ingredients like flour, water, yeast, salt, and milk. Bread flour promises a super soft interior with an extra chewy crust. This recipe yields 1 loaf, so it’s perfect if you only have 1 loaf pan.
If you’re new to working with yeast, reference my Baking with Yeast Guide for answers to common yeast FAQs. This recipe is brought to you in partnership with Red Star Yeast.
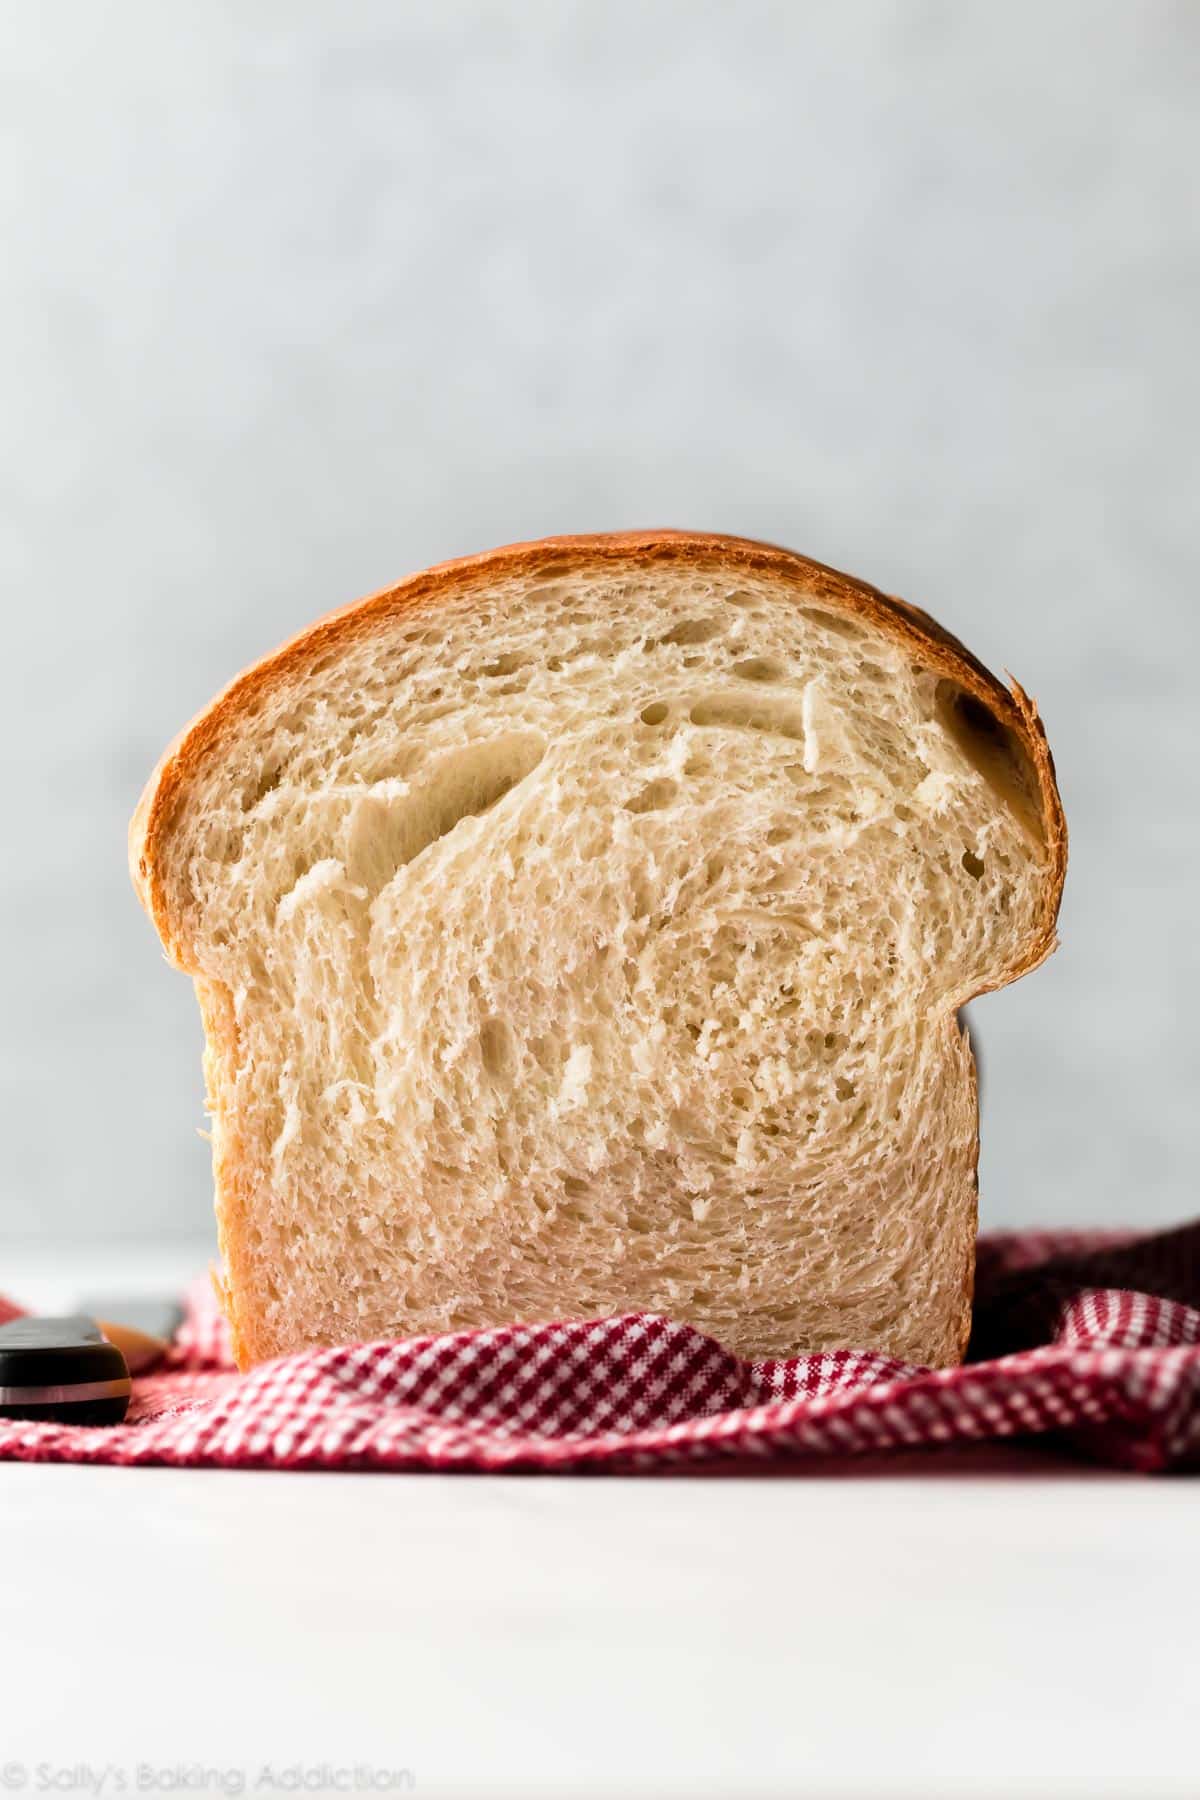
Let’s make homemade sandwich bread. This is a basic staple in any bread baker’s repertoire, but it’s also a recipe that shouldn’t be overlooked. There’s nothing on earth quite like homemade bread and my recipe is loaf perfection—rising tall, tasting buttery-soft, and making the most epic sandwiches. It’s truthfully the best homemade bread I’ve ever tasted and it all comes from just 7 ingredients. And if you’re nervous to bake with yeast, I guarantee you will finally feel confident with this no-fuss recipe.
This Sandwich Bread Is:
- Soft white bread with an extra chewy exterior
- Crisp right out of the oven!
- Made from 7 easy ingredients
- Golden brown with a super impressive rise
- Extraordinary on its own or as the base of a sandwich
- Simple to make
- Easy to make ahead or freeze
Looking for a no yeast alternative? Here’s my no yeast bread.
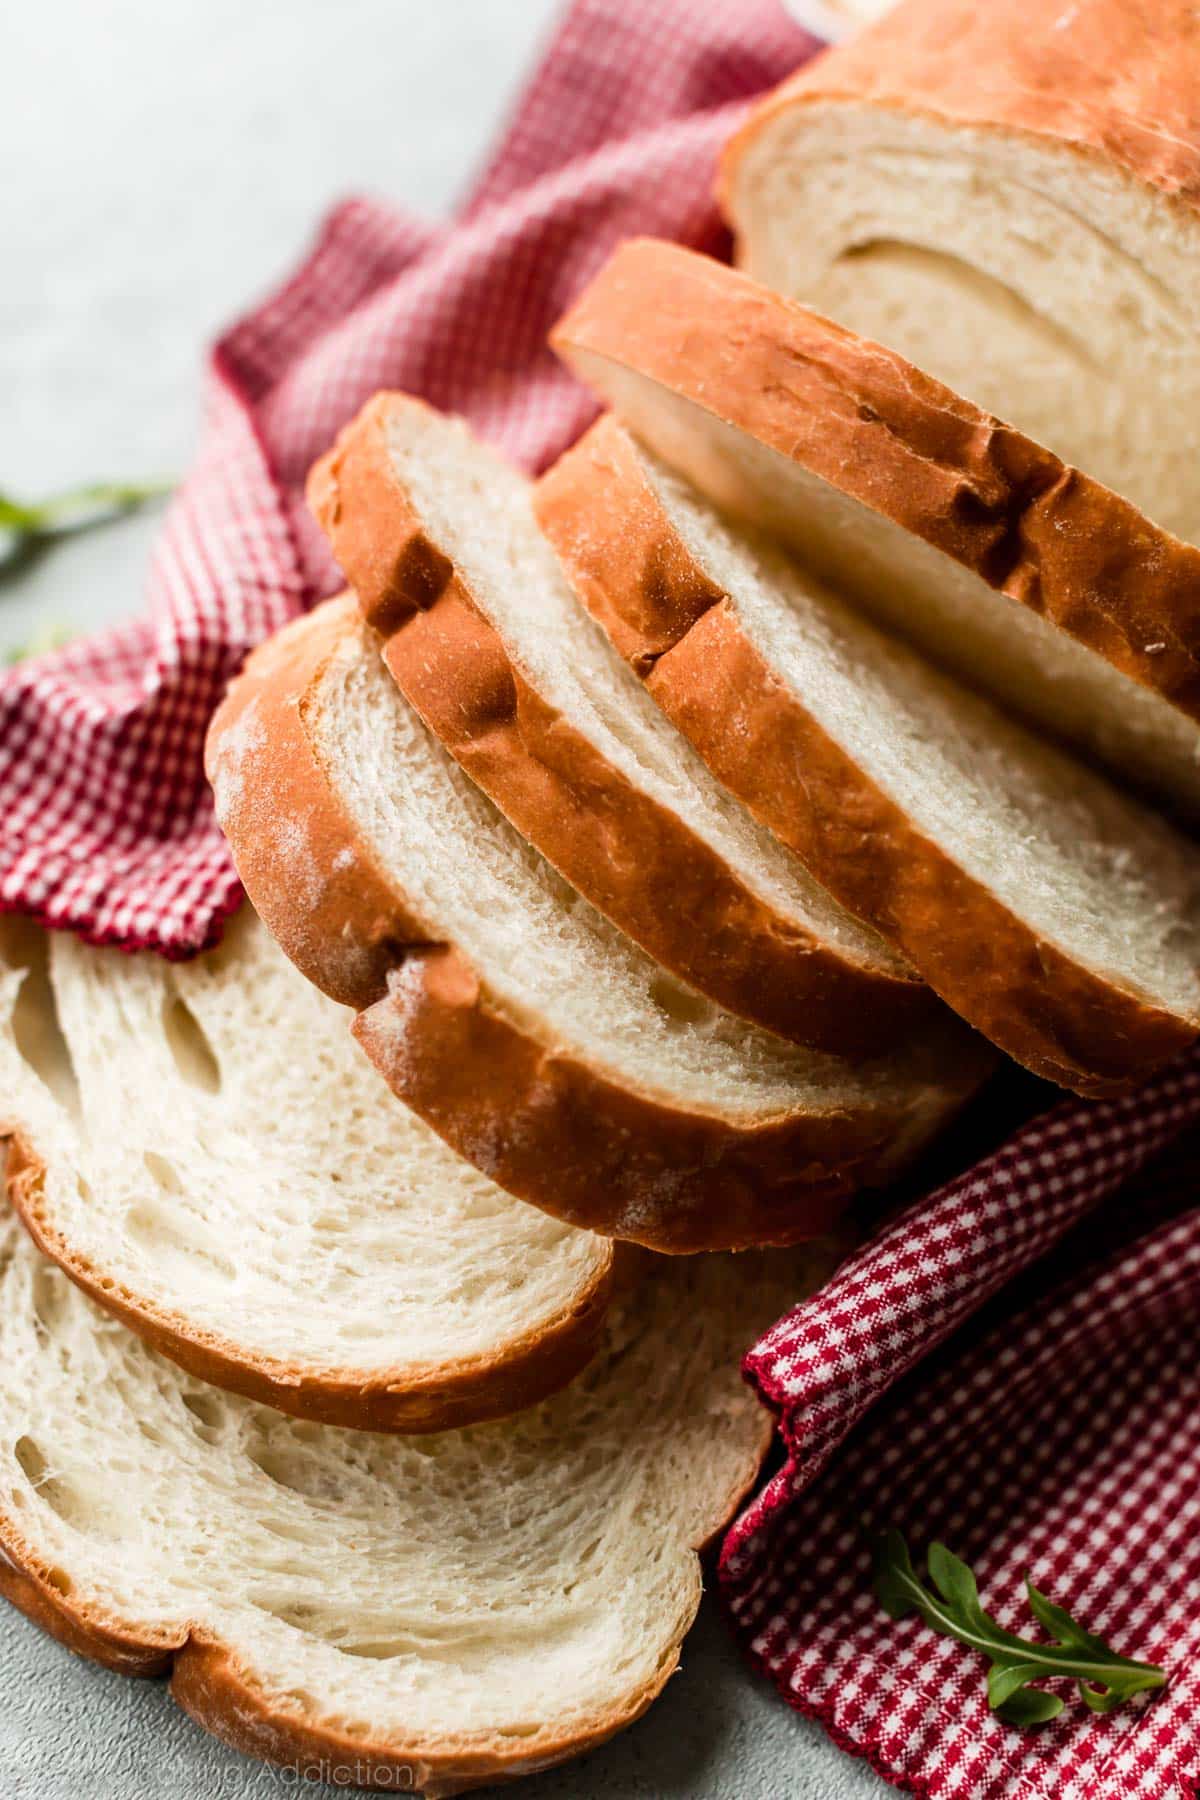
Just 1 Loaf of Bread
Besides the simplicity of the process, you’ll appreciate that this sandwich bread recipe yields just 1 loaf. You don’t need a crazy amount of flour, multiple loaf pans, and you’re not left with 2-3 leftover loaves on your hands. (Which wouldn’t necessarily be a bad thing.) Just 1 loaf to prepare, rise, shape, and bake—convenient, approachable, and straightforward. My recipes for multigrain bread, homemade cinnamon swirl bread, and honey oat bread both produce just 1 loaf as well.
Overview: How to Make Sandwich Bread
- Make the dough. Continue below to learn more about this dough recipe.
- Knead the dough. Reference my How to Knead Dough video tutorial for extra help with this step.
- Cover the dough and let it rise. The dough rises in about 1-2 hours in a relatively warm environment.
- Punch down the dough to release the air.
- Shape the dough into a large rectangle, then roll it into loaf.
- Let the loaf rise for about 1 hour.
- Bake for 30-34 minutes until golden brown.
As shown in the video tutorial below, the dough comes together with a mixer. You can use a paddle attachment or a dough hook. You can also make the dough by hand, but it requires a bit of arm muscle. After the dough comes together in the mixing bowl, it’s time to knead. You can continue beating the dough with the mixer for this step or you can knead the dough by hand. If you’re new to bread baking, my how to knead dough post and video can help with this step.
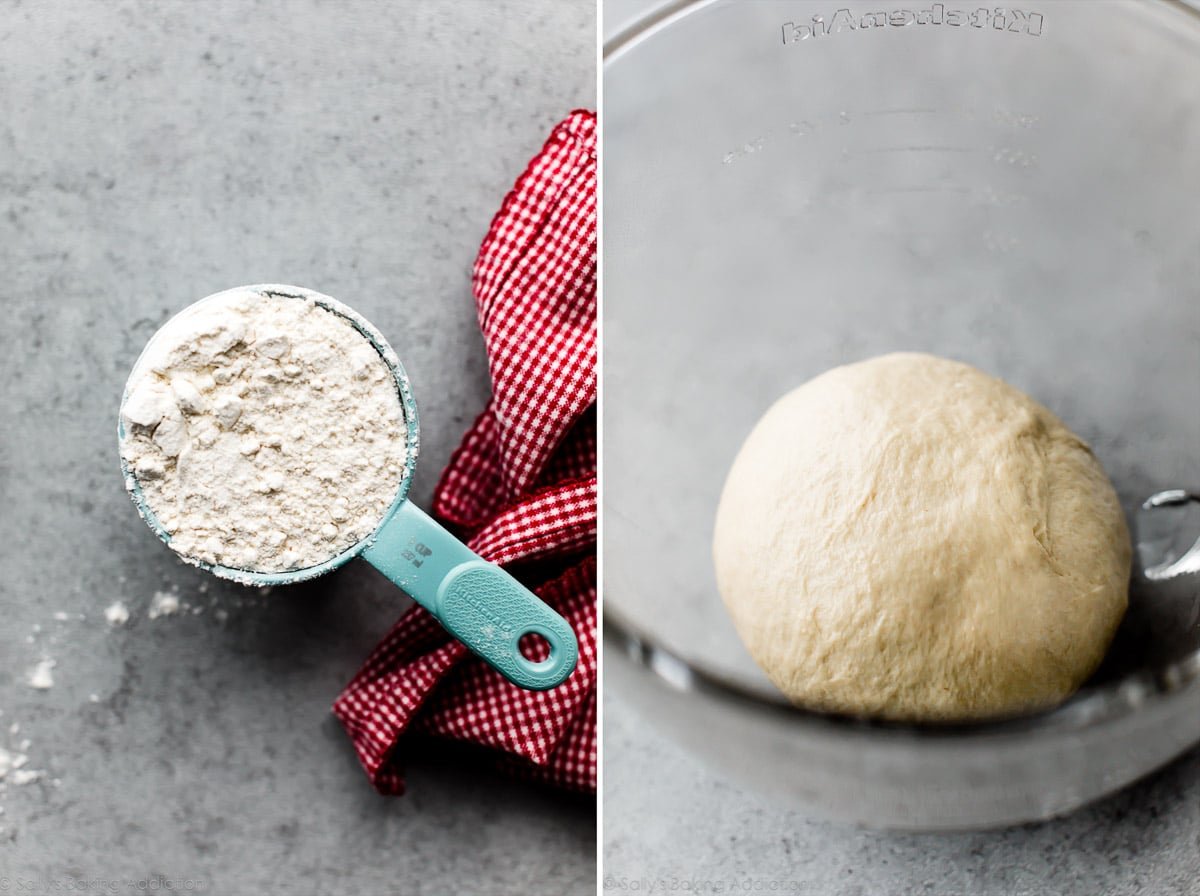
Sandwich Bread Ingredients
You need 7 ingredients—practically the same as my homemade cinnamon swirl bread but less sugar. Likewise, they’re basically the same ingredients as my soft dinner rolls too, but in order to bake a bread that rises tall and has legitimate structure, we’ll leave out some of the fat. Swap some of the milk for water and leave out the egg.
- Water: Liquid activates yeast. I use mostly water in this dough because we need a bread that has structure. Using all milk, like I do for my dinner rolls, would yield a flimsy bread without much texture.
- Milk: To make a soft bread, you need fat in the dough so make sure 1/4 cup of the liquid is milk. Low fat milk works too, but whole milk produces phenomenal texture.
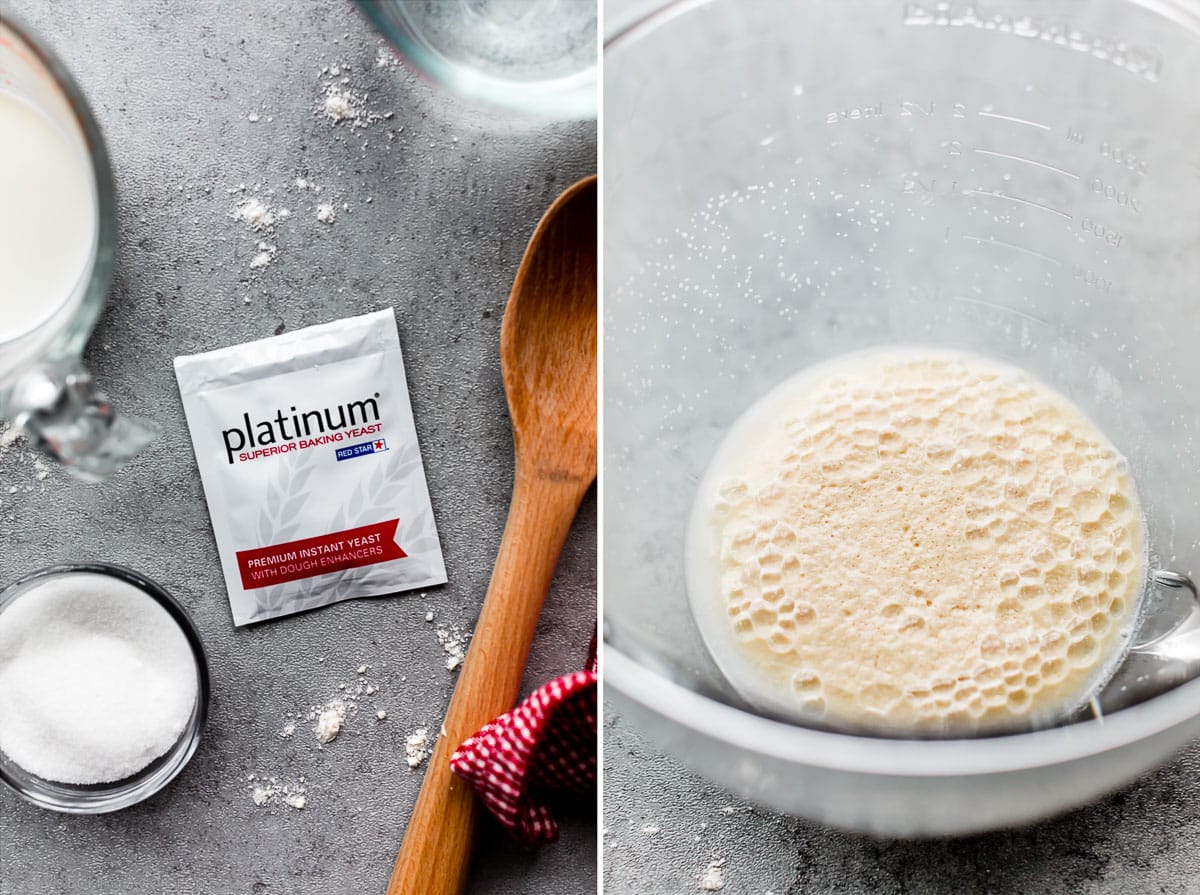
- Yeast: You can use active dry yeast or instant yeast. If using active dry, the rise times will be a bit longer. I recommend Platinum Yeast from Red Star, which is an instant yeast blended with natural dough improvers. It’s my go-to for all bread.
- Sugar: Sugar feeds the yeast, increases its activity, and tenderizes the dough.
- Butter: Butter promises a flavorful loaf. I tested this recipe with melted butter, softened butter, and even olive oil. We liked the loaf made with softened butter the best because it had pronounced buttery flavor and a softer (yet still sturdy) interior.
- Salt: You can’t make flavorful bread without salt!
- Flour: You can use all-purpose flour or bread flour. All-purpose flour is convenient for most, but bread flour produces a chewier crust. There are no other changes to the recipe if you use bread flour. For best taste, I highly recommend bread flour. It’s what I always use when I make artisan bread. If you wish to use whole wheat flour, follow my recipe for whole wheat bread instead.
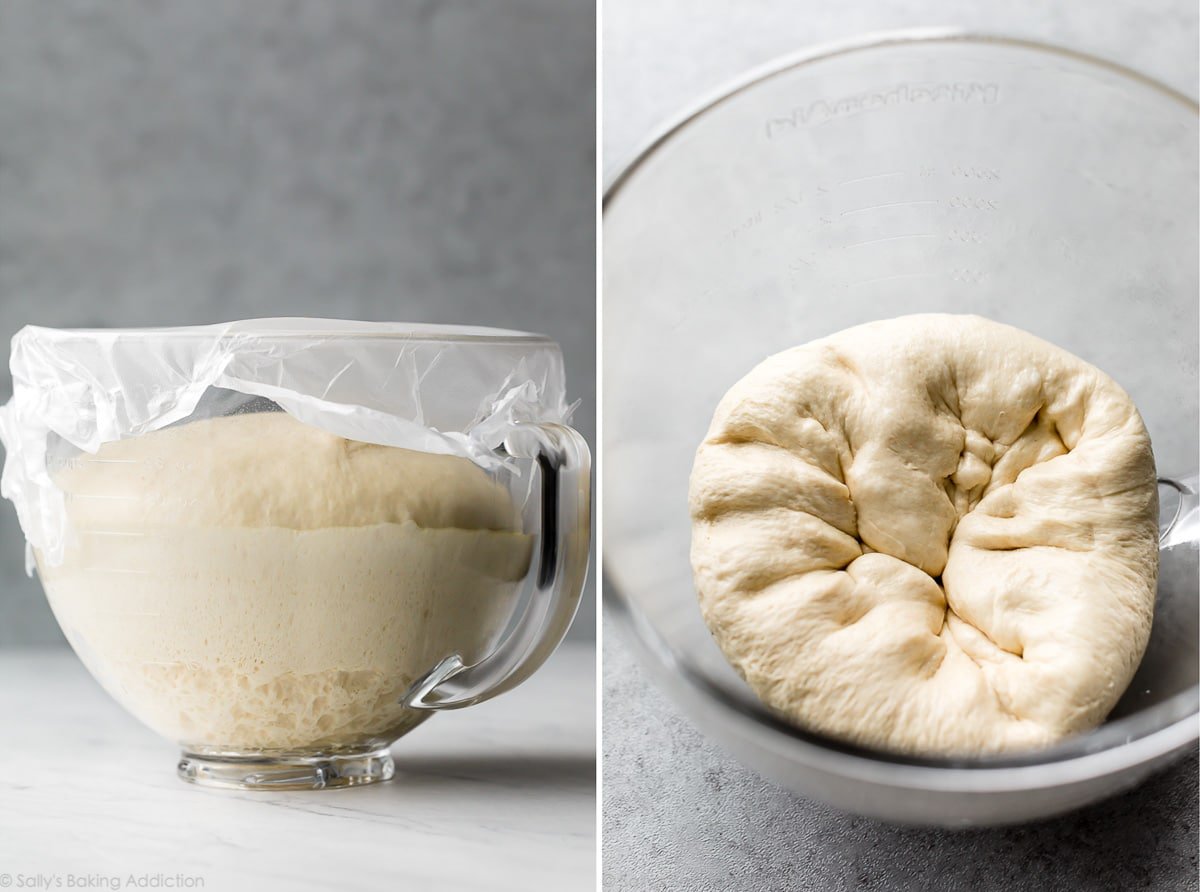
After you make and knead the dough, let it rise. Then, punch it down to release the air:
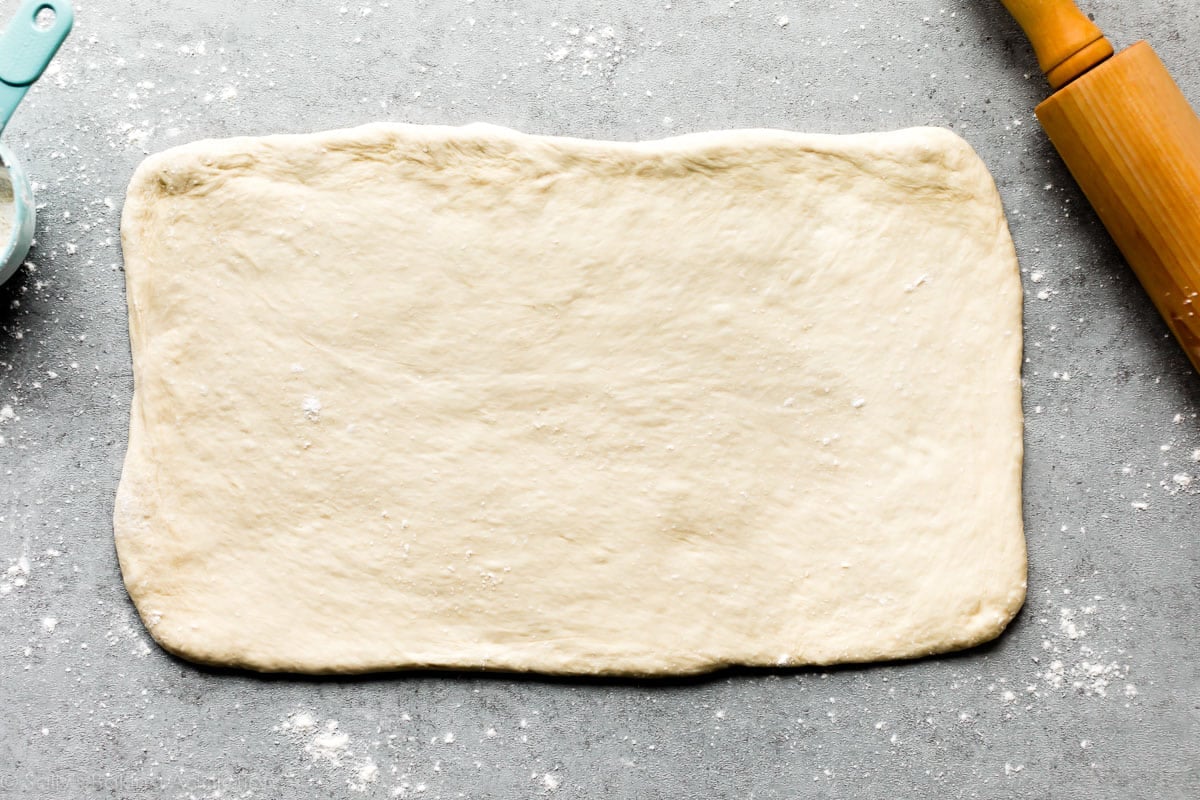
Roll it out into an 8×15-inch rectangle:
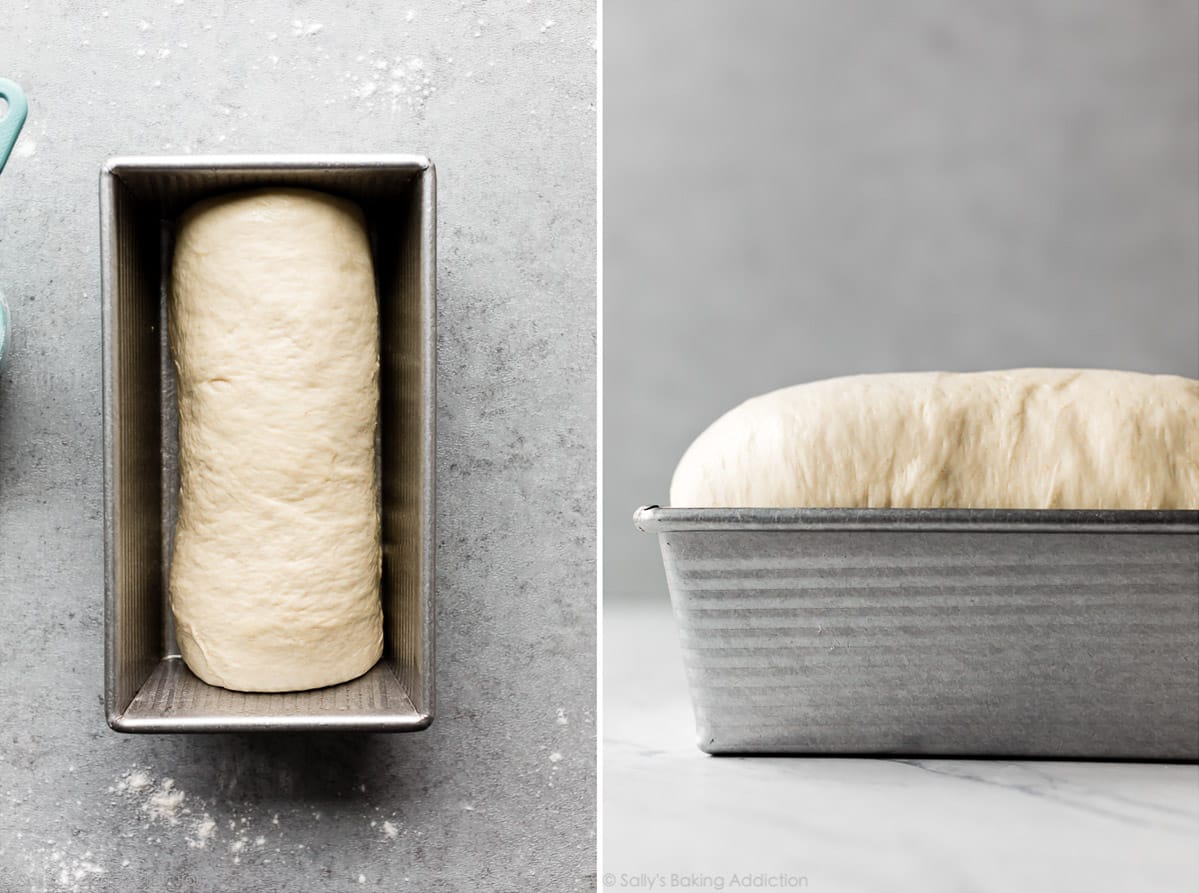
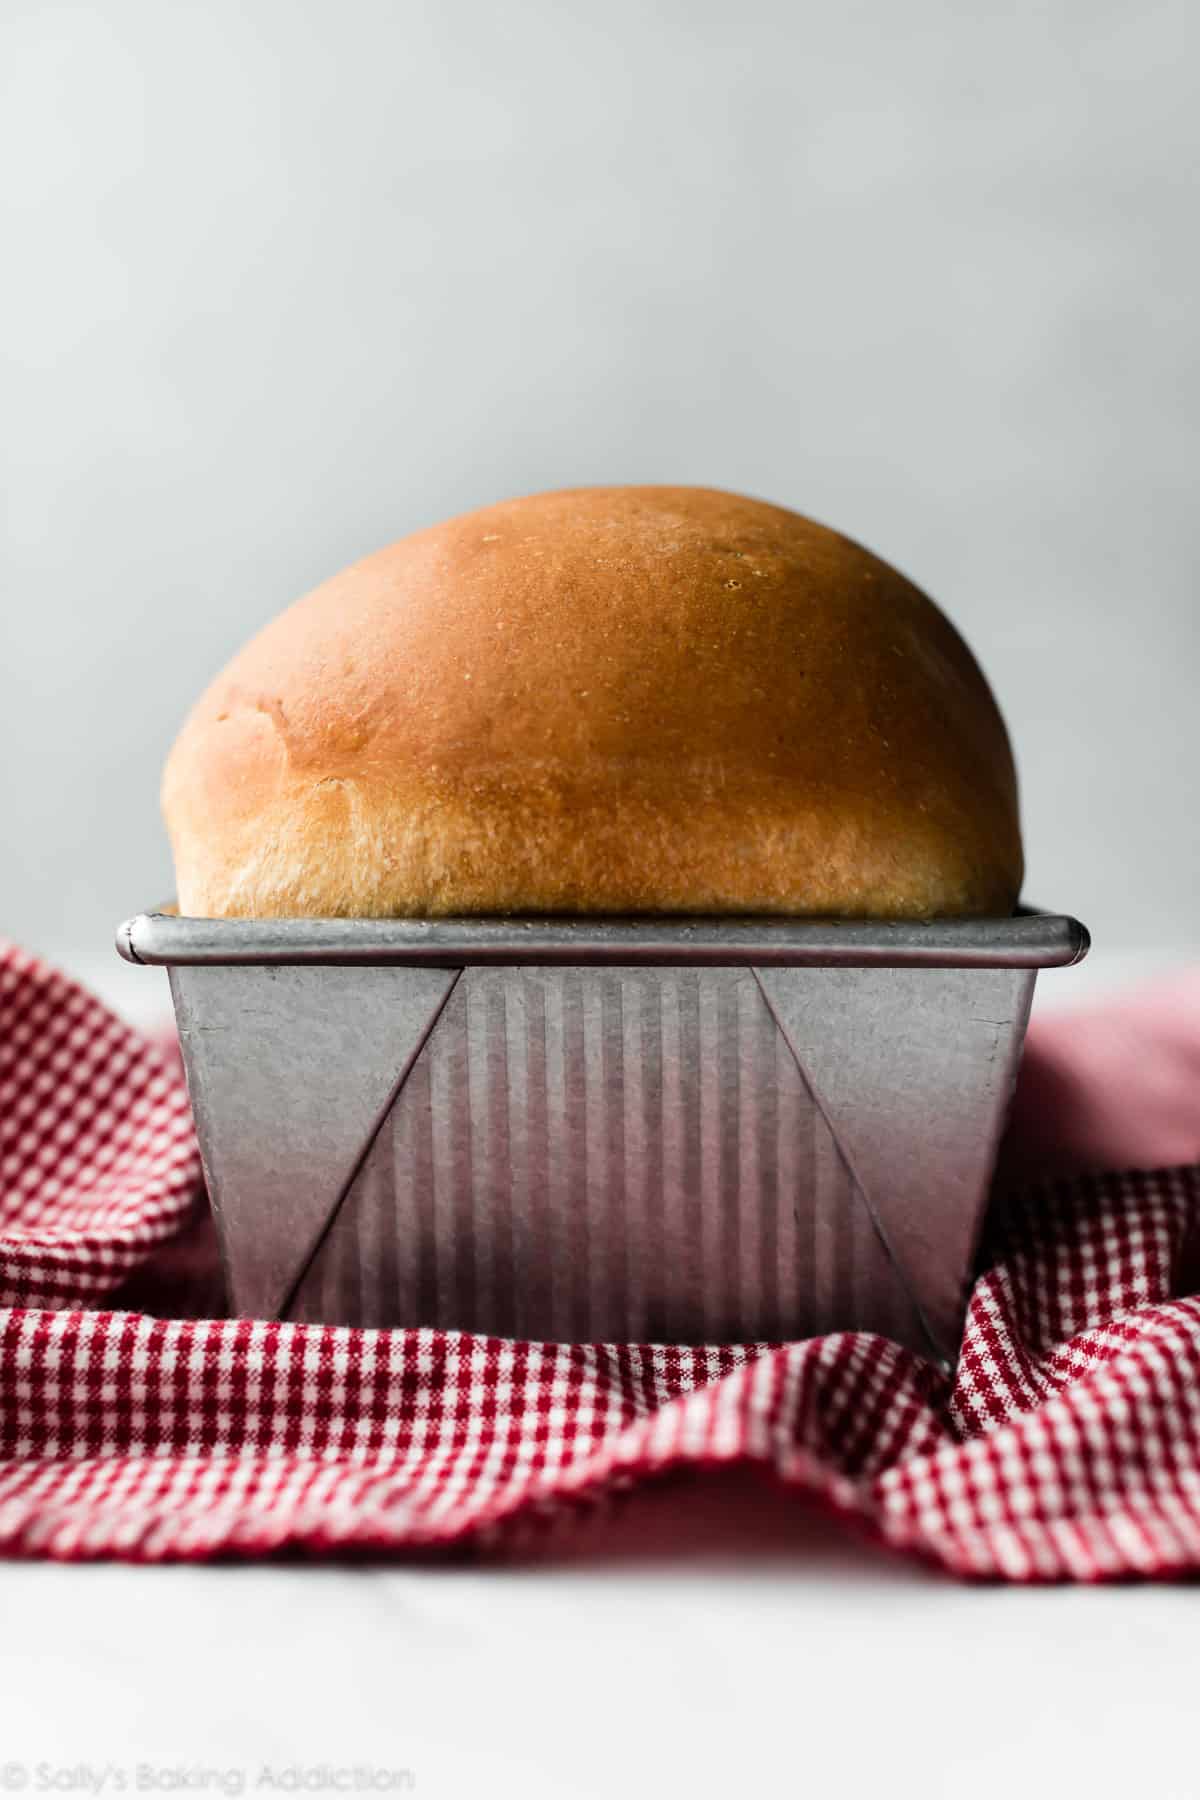
Roll it up tightly starting with the 8-inch side, so you have an 8-inch roll to fit into your 9×5-inch loaf pan. (Unlike cinnamon rolls where you roll up the dough starting with the larger side.) Let it rise until it’s 1 heaping inch above the rim of the pan:
Bake until golden brown, about 30-34 minutes.
Uses for Homemade Sandwich Bread
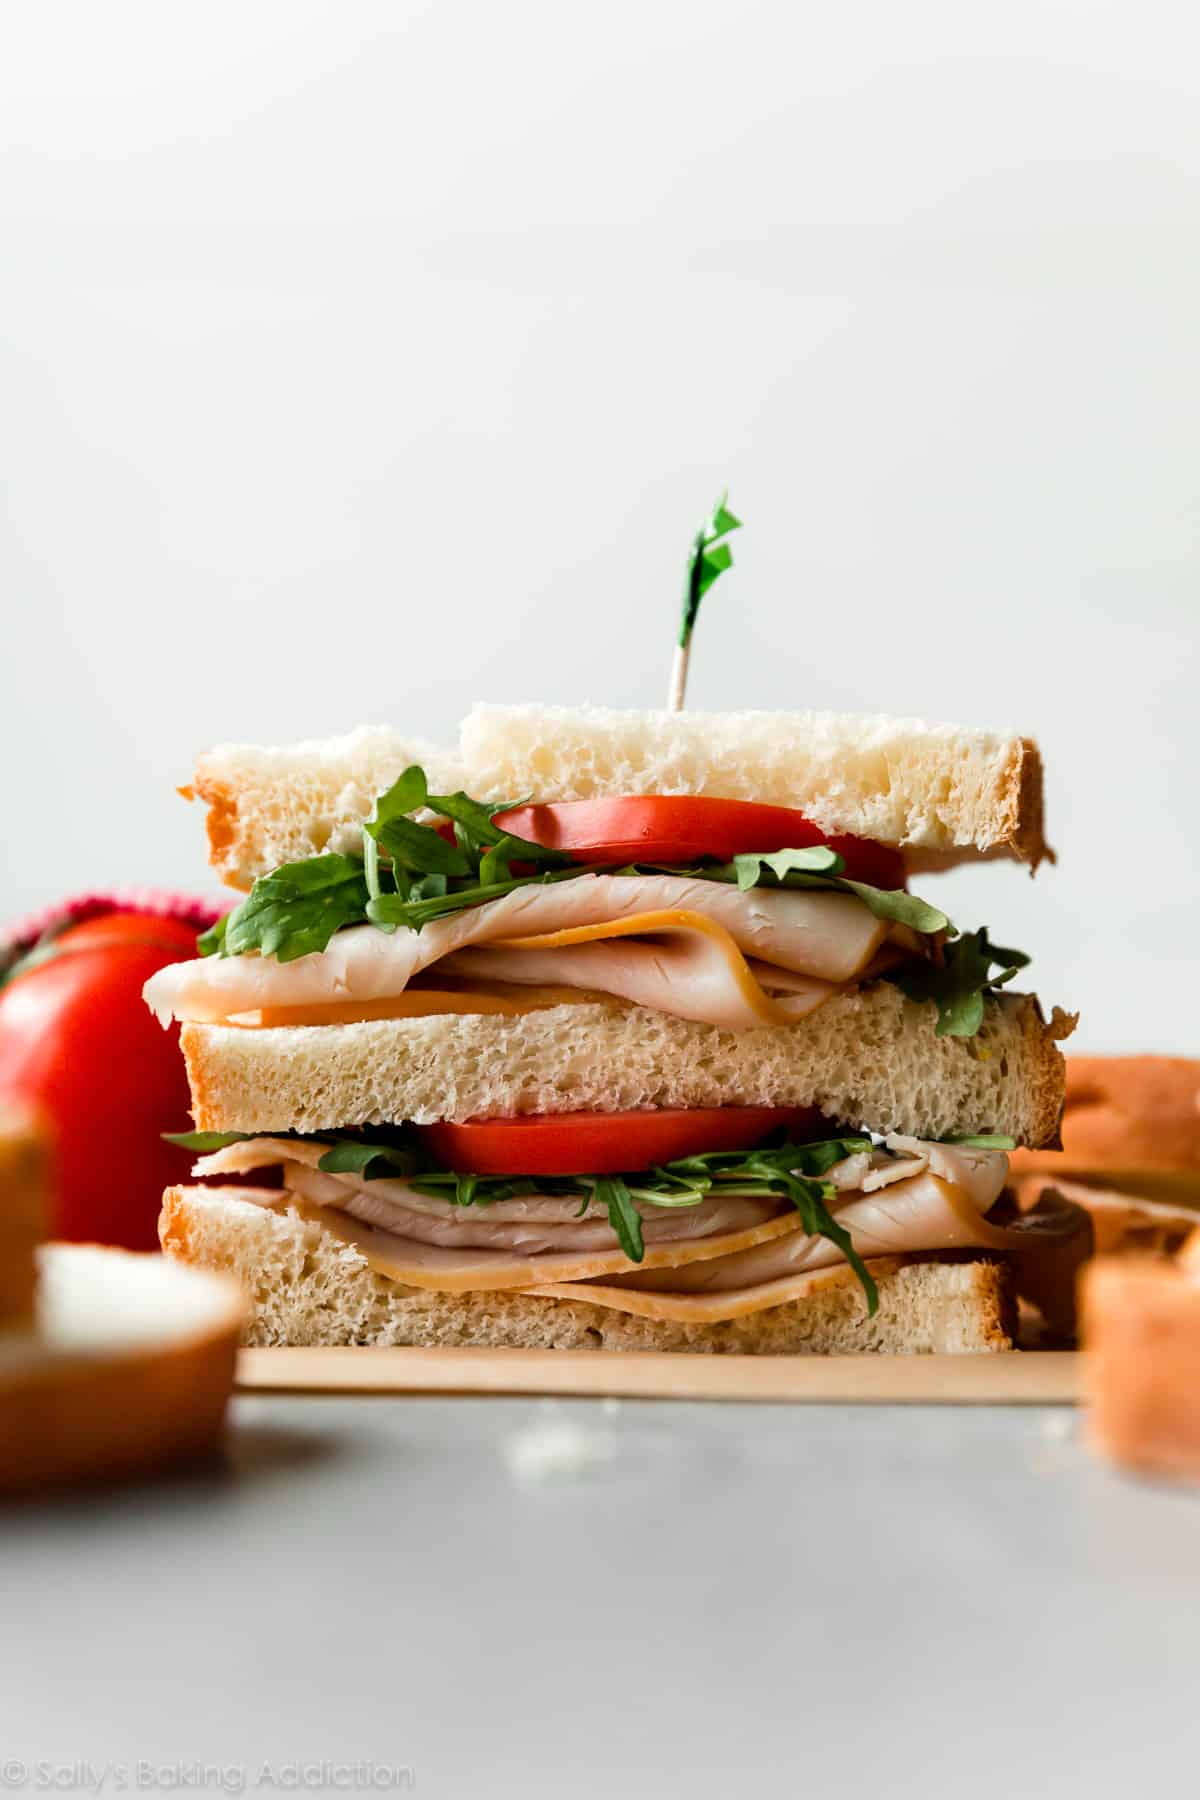
- Any sandwich. Like the Ross Geller’s Turkey Moist-Maker Sandwich 🙂
- BLT or grilled cheese
- Avocado toast or bacon & egg sandwiches
- Soup dipper
- Make croutons
- French toast or Blueberry French Toast Casserole
- Or in savory recipes like Breakfast Casserole and Sausage & Herb Stuffing
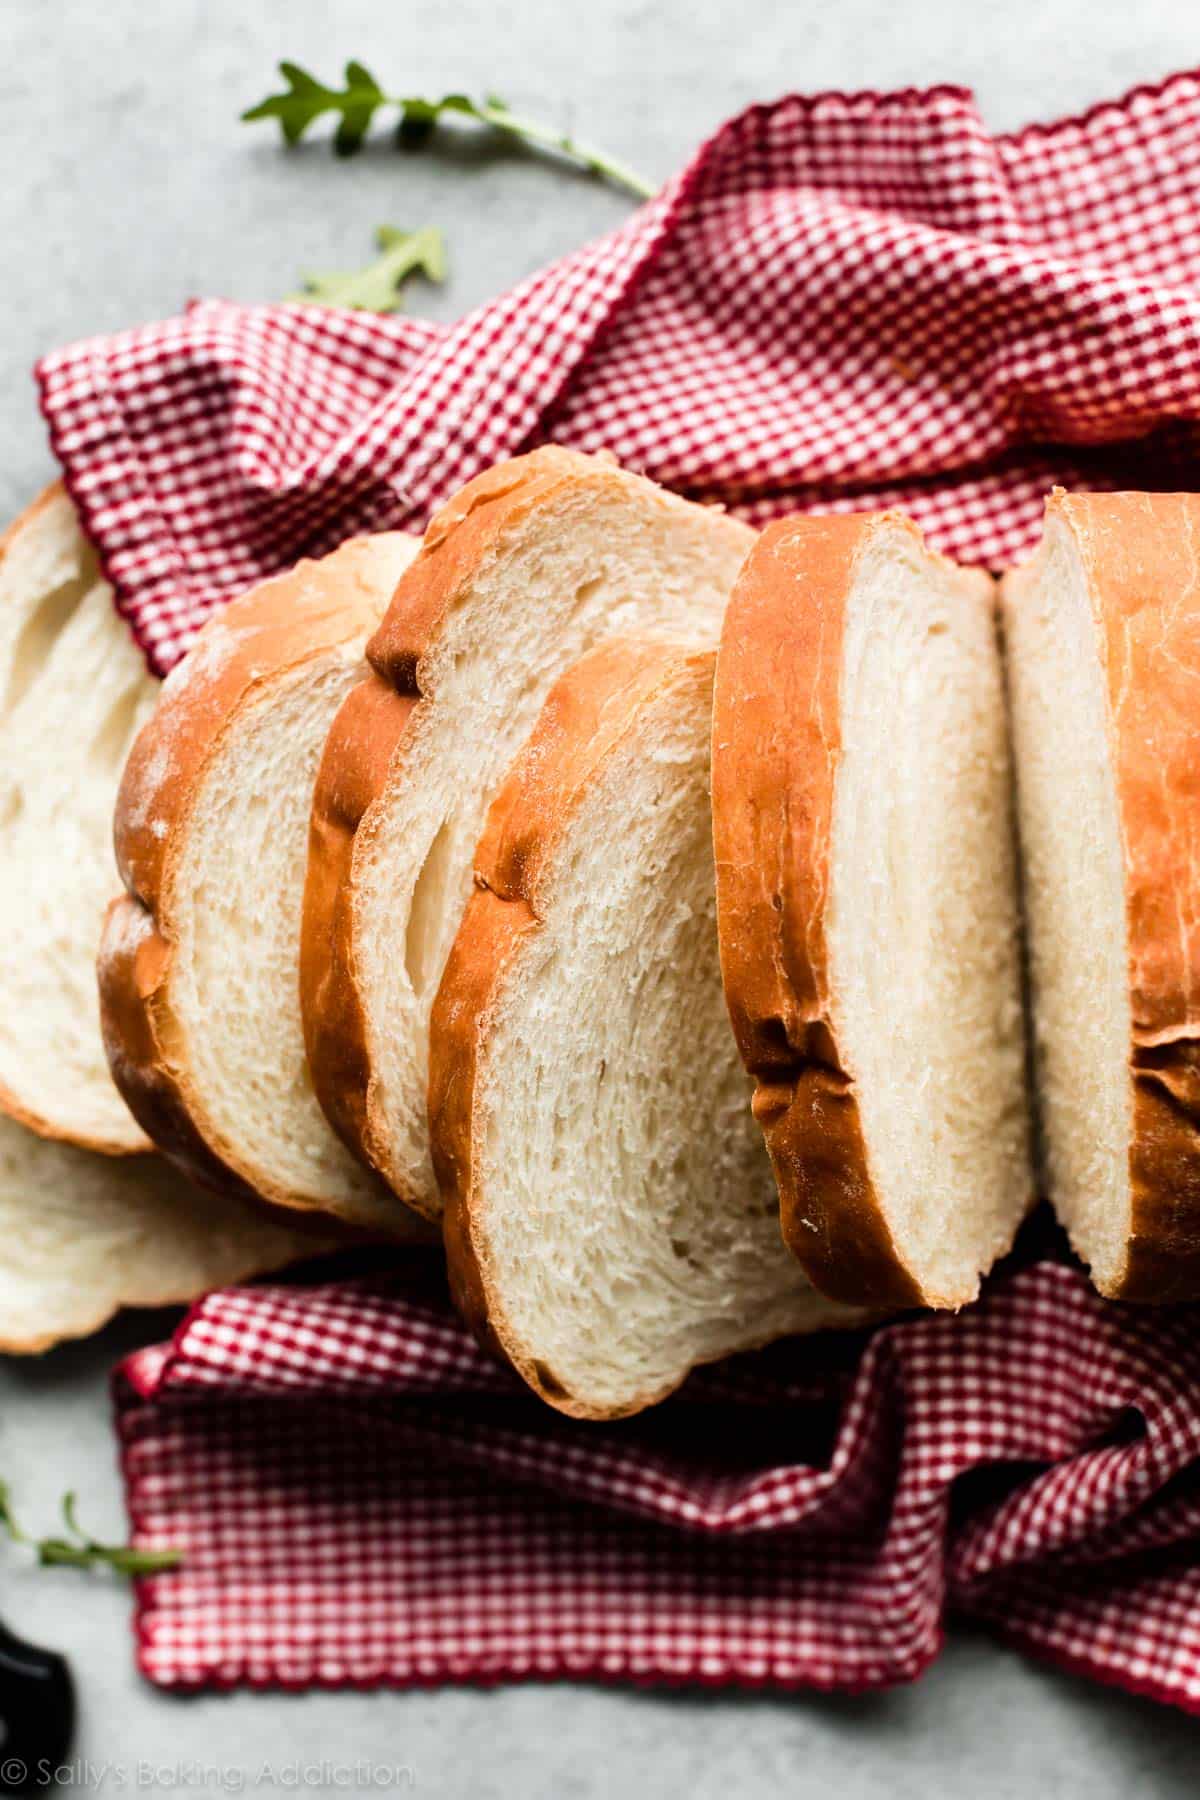
But our favorite way is simply warm toast with regular butter or honey butter & jam. Honestly, toast made from mass-produced bread doesn’t even compare. You can actually taste the soft and buttery toasty crumbs here. Or make an easy turkey sandwich—store-bought bread can’t make a sandwich taste as PERFECT as this.
I understand there’s a major convenience with store-bought bread and I’m not asking you to only make homemade bread for the rest of you life, but try it at least once. It takes a few hours one afternoon and most of the work is hands-off while the dough rises. Fresh-baked sandwich bread smells incredible, tastes even better, and I’m confident there’s no better baked good than this perfect loaf. You won’t regret trying this.
More Easy Bread Recipes
- Focaccia
- Multigrain Bread
- Artisan Bread
- Cheesy Breadsticks
- Pizza Crust
- Homemade Soft Pretzels
- Bread Bowls
- Homemade Breadsticks
- Olive Bread
- Cranberry Nut No-Knead Bread
Sandwich Bread
- Prep Time: 3 hours, 20 minutes
- Cook Time: 32 minutes
- Total Time: 4 hours
- Yield: 1 loaf
- Category: Bread
- Method: Baking
- Cuisine: American
Description
You only need 7 ingredients to make this simple sandwich bread. Soft and buttery with a chewy/crisp crust, this fresh loaf of bread will quickly become a staple in your kitchen. See recipe notes for freezing and overnight instructions. You can also reference my Baking with Yeast Guide for answers to common yeast FAQs.
Ingredients
- 1 cup (240ml) water, warmed to about 110°F (43°C)
- 1/4 cup (60ml) whole milk, warmed to about 110°F (43°C)
- 2 and 1/4 teaspoons (7g) Platinum Yeast from Red Star instant yeast (1 standard packet)
- 2 Tablespoons (25g) granulated sugar
- 4 Tablespoons (1/4 cup; 56g) unsalted butter, softened to room temperature
- 1 and 1/2 teaspoons (9g) salt
- 3 and 1/3 cups (about 420–430g) all-purpose flour or bread flour (spooned & leveled), plus more as needed
Instructions
- Prepare the dough: Whisk the warm water, warm milk, yeast, and sugar together in the bowl of your stand mixer fitted with a dough hook attachment. Cover and allow to sit for 5 minutes.
- Add the butter, salt, and 1 cup flour. Beat on low speed for 30 seconds, scrape down the sides of the bowl with a silicone spatula, then add another cup of flour. Beat on medium speed until relatively incorporated (there may still be chunks of butter). Add the remaining flour and beat on medium speed until the dough comes together and pulls away from the sides of the bowl, about 2 minutes. *If you do not own a mixer, you can mix this dough with a large wooden spoon or silicone spatula. It will take a bit of arm muscle!*
- Knead the dough: Keep the dough in the mixer and beat for an additional 5–8 full minutes, or knead by hand on a lightly floured surface for 5–8 full minutes. (If you’re new to bread-baking, my How to Knead Dough video tutorial can help here.) If the dough becomes too sticky during the kneading process, sprinkle 1 teaspoon of flour at a time on the dough or on the work surface/in the bowl to make a soft, slightly tacky dough. Do not add more flour than you need; you do not want a dry dough. After kneading, the dough should still feel a little soft. Poke it with your finger—if it slowly bounces back, your dough is ready to rise. You can also do a “windowpane test” to see if your dough has been kneaded long enough: tear off a small (roughly golfball-size) piece of dough and gently stretch it out until it’s thin enough for light to pass through it. Hold it up to a window or light. Does light pass through the stretched dough without the dough tearing first? If so, your dough has been kneaded long enough and is ready to rise. If not, keep kneading.
- 1st Rise: Lightly grease a large bowl with olive oil or nonstick spray. Place the dough in the bowl, turning it to coat all sides in the oil. Cover the bowl and allow the dough to rise in a relatively warm environment for 1-2 hours or until double in size. (I always let it rise on the counter. Takes about 2 hours. For a tiny reduction in rise time, see my answer to Where Should Dough Rise? in my Baking with Yeast Guide.)
- Grease a 9×5-inch loaf pan.
- Shape the bread: When the dough is ready, punch it down to release the air. Lightly flour a work surface, your hands, and a rolling pin. Roll the dough out into a large rectangle, about 8×15 inches. It does not have to be perfect—in fact, it will probably be rounded on the edges. That’s ok! Roll it up into an 8 inch log and place in the prepared loaf pan.
- 2nd Rise: Cover shaped loaf with aluminum foil, plastic wrap, or a clean kitchen towel. Allow to rise until it’s about 1 inch above the top of the loaf pan, about 1 hour. (See video and photo above for a visual.)
- Adjust oven rack to a lower position and preheat oven to 350°F (177°C). (It’s best to bake the bread towards the bottom of the oven so the top doesn’t burn.)
- Bake the bread: Bake for 32-36 minutes or until golden brown on top. If you notice the top browning too quickly, loosely tent the pan with aluminum foil. (I usually add aluminum foil over the loaf around the 20 minute mark.) To test for doneness, if you gently tap on the loaf, it should sound hollow. For a more accurate test, the bread is done when an instant-read thermometer reads the center of the loaf as 195–200°F (90–93°C).
- Remove from the oven and allow bread to cool for a few minutes in the pan on a cooling rack before removing the bread from the pan and slicing. Feel free to let it cool completely before slicing, too.
- Cover leftover bread tightly and store at room temperature for 6 days or in the refrigerator for up to 10 days.
Notes
- Freezing Instructions: Prepare recipe through step 6. Place shaped loaf in a greased 9×5-inch loaf pan or disposable loaf pan, cover tightly, and freeze for up to 3 months. On the day you serve it, let the loaf thaw and rise for about 4-5 hours at room temperature. Bake as directed. You can also freeze the baked bread loaf. Allow the bread to cool completely, then freeze for up to 3 months. Thaw in the refrigerator or at room temperature, then reheat as desired.
- Overnight Instructions: Prepare the recipe through step 6. Cover the shaped bread tightly and refrigerate for up to about 15 hours. At least 3 hours before you need the bread the next day, remove from the refrigerator, keep covered, and allow to rise on the counter for about 1-2 hours before baking. Alternatively, you can let the dough have its 1st rise in the refrigerator overnight. Cover the dough tightly and place in the refrigerator for up to 12 hours. Remove from the refrigerator and allow the dough to fully rise for 2 more hours. Continue with step 5.
- Special Tools (affiliate links): Electric Stand Mixer or Large Glass Mixing Bowl with Wooden Spoon / Silicone Spatula | 9×5-inch Loaf Pan | Rolling Pin
- Yeast: Platinum Yeast from Red Star is an instant yeast. Any instant yeast works. You can use active dry yeast instead. Rise times will be slightly longer using active dry yeast. Reference my Baking with Yeast Guide for answers to common yeast FAQs.
- Flour: You can use all-purpose flour or bread flour. All-purpose flour is convenient for most, but bread flour produces a chewier loaf of bread and I highly recommend it. The bread is still soft no matter which you use. Either flour is fine and there are no other changes to the recipe if you use one or the other. I don’t recommend whole wheat flour because it doesn’t have the same baking properties as white flour or bread flour (the gluten levels are different). If you wish to use whole wheat flour, try my recipe for whole wheat bread instead.
- Doubling this recipe: For best results, I recommend making two separate batches of dough. However, if you want to double the recipe all in 1 mixing bowl, double all of the ingredients except for the yeast and butter. Use 3 and 1/4 teaspoons yeast and 6 Tablespoons of butter.
- Bread Machine Questions: I don’t own a bread machine so I have not tested it, but some readers in the comments section have had success.
- Adapted from Homemade Cinnamon Swirl Bread














Reader Comments and Reviews
I love all of your recipes. I’m new to baking bread though. Everything went well, first rise great, second rise was great and rose over an inch over the pan, but when I then baked it in the oven, it didn’t rise any further than when I had put it in the oven. Is that normal or did I do something wrong?
Hi Nicole, how was the texture of the final bread? It won’t get a ton of extra height during baking, so if it didn’t collapse or have a doughy texture, it doesn’t necessarily sound like you did anything wrong. If you are new to baking bread, we’d also recommend checking out our Baking with Yeast Guide for all our best tips and tricks. We hope you enjoyed the bread!
Delicious. I made it non-dairy by just using water and a non-dairy margarine that I get at Aldi (Imperial). I also used the dough cycle of a bread machine and for the final rising I stuck the 9×5 pan covered with a towel in the oven at 170 F for 20 minutes before baking it at 350 F for 32 minutes. My instant read thermometer had it at about 207 degrees at that point so I could probably have taken it out a little earlier but it was still perfect as it was.
Has anyone else noticed the cups and grams isn’t the same…? I’ve made loafs with both and one ends up way more sticky than the other. Love this bread though!!!
Hi Savannah! Here’s more information on measuring baking ingredients – weighing is the most accurate method, as it is easy to pack too much flour into measuring cups.
I enjoy making this bread, but I’m having a problem. After it’s baked, it doesn’t seem to hold up well enough to cut with a knife easily. I’m using a fine-tooth bread knife. Are there any other methods that would make it easier to cut? Or shortening the Rising time? Improve that. Any comments would be appreciated
Hi Dinnie, we’re so glad this is a favorite for you! It’s definitely a softer bread, but if the texture feels a little too soft, there are a few small tweaks you can try next time. You can bake it a few extra minutes for a slightly sturdier crumb. You can also switch to all water instead of mostly water and some milk. And/or you can reduce the butter a bit. Let us know if you try it again with any tweaks!
I seen another recipe similar to this and she suggested to use a 9×15 pan for the bread. What is your opinion on this size pan?
Hi Irene, We aren’t sure what bread recipes use that size, but you will want to use a 9×5 inch loaf pan for this sandwich bread recipe.
I think I need a bigger loaf pan or divide in 2? I have a 9×5 but the bottom/middle did not seem to cook and it rose like mad. It was good, all of Sally’s recipes are, but not sure why it was doughy. Trying to split the recipe this time
Hi Kathy, we’re happy to help troubleshoot. Was the dough over-proofed by chance? Over-proofing can cause the bread to collapse in the middle when baked, which can cause the doughy middle. Was the bread cooled completely before slicing? While you can slice the bread warm, it may not be quite as sturdy as waiting for the bread to completely cool. Cutting into warm bread can make the inside seem more doughy, too. We hope this helps for your next loaf!
This is honestly some of the best bread I’ve eaten. The recipe was super simple and was a total success the first try. I will say I did have to bake mine for significantly longer than the recipe calls.
Can I increase the quantities to suit a 11”x5” pan?
295 ml water
75 ml milk
8.5 g yeast
30 g sugar
70 g butter
11 g salt
515–525 g flour
Hi Mitch, We haven’t tested this recipe at a scaled up, so we’re unsure how it would work in that pan and any modifications that may be needed. If you decide to do any experimenting, please do let us know how it goes!
I’ve made this recipe, and others like it, many times but they all seem to run out of energy before they get to one inch over the edge of the pan. They flunk the poke test which tells me they are done rising. I’ve tried starting with 75 degree liquids. I’ve tried cutting back on sugar and yeast and adding the sugar to the dry ingredients. I’m in Hawaii so the kitchen is usually warm and humid 75-80. So what am I doing wrong?
Hi Michael, There are a lot of variables that go into the consistency of dough, even down to the weather and humidity in the air. There’s nothing wrong with adding just a little more flour to bring the dough into a less sticky and knead-able consistency.
I just asked about doubling the recipe. I found an older comment so you don’t need to respond. Thank you,
Donna
Can the recipe be doubled if I want to make 2 loaves of bread?
Doesn’t seem like enough flour is 3 1/3 cup correct
Hi Sonia, the flour amount is correct!
I made this bread today and love this recipe! It turned out great. Can I use this to make rolls instead of a loaf or would I need a different recipe for that?
Hi Toni, you can definitely make smaller rolls with this dough. In step 6 punch down the dough, form into individual rolls, and continue with second rise. We’re unsure of the bake time needed. Or, here’s our favorite dinner rolls recipe!