

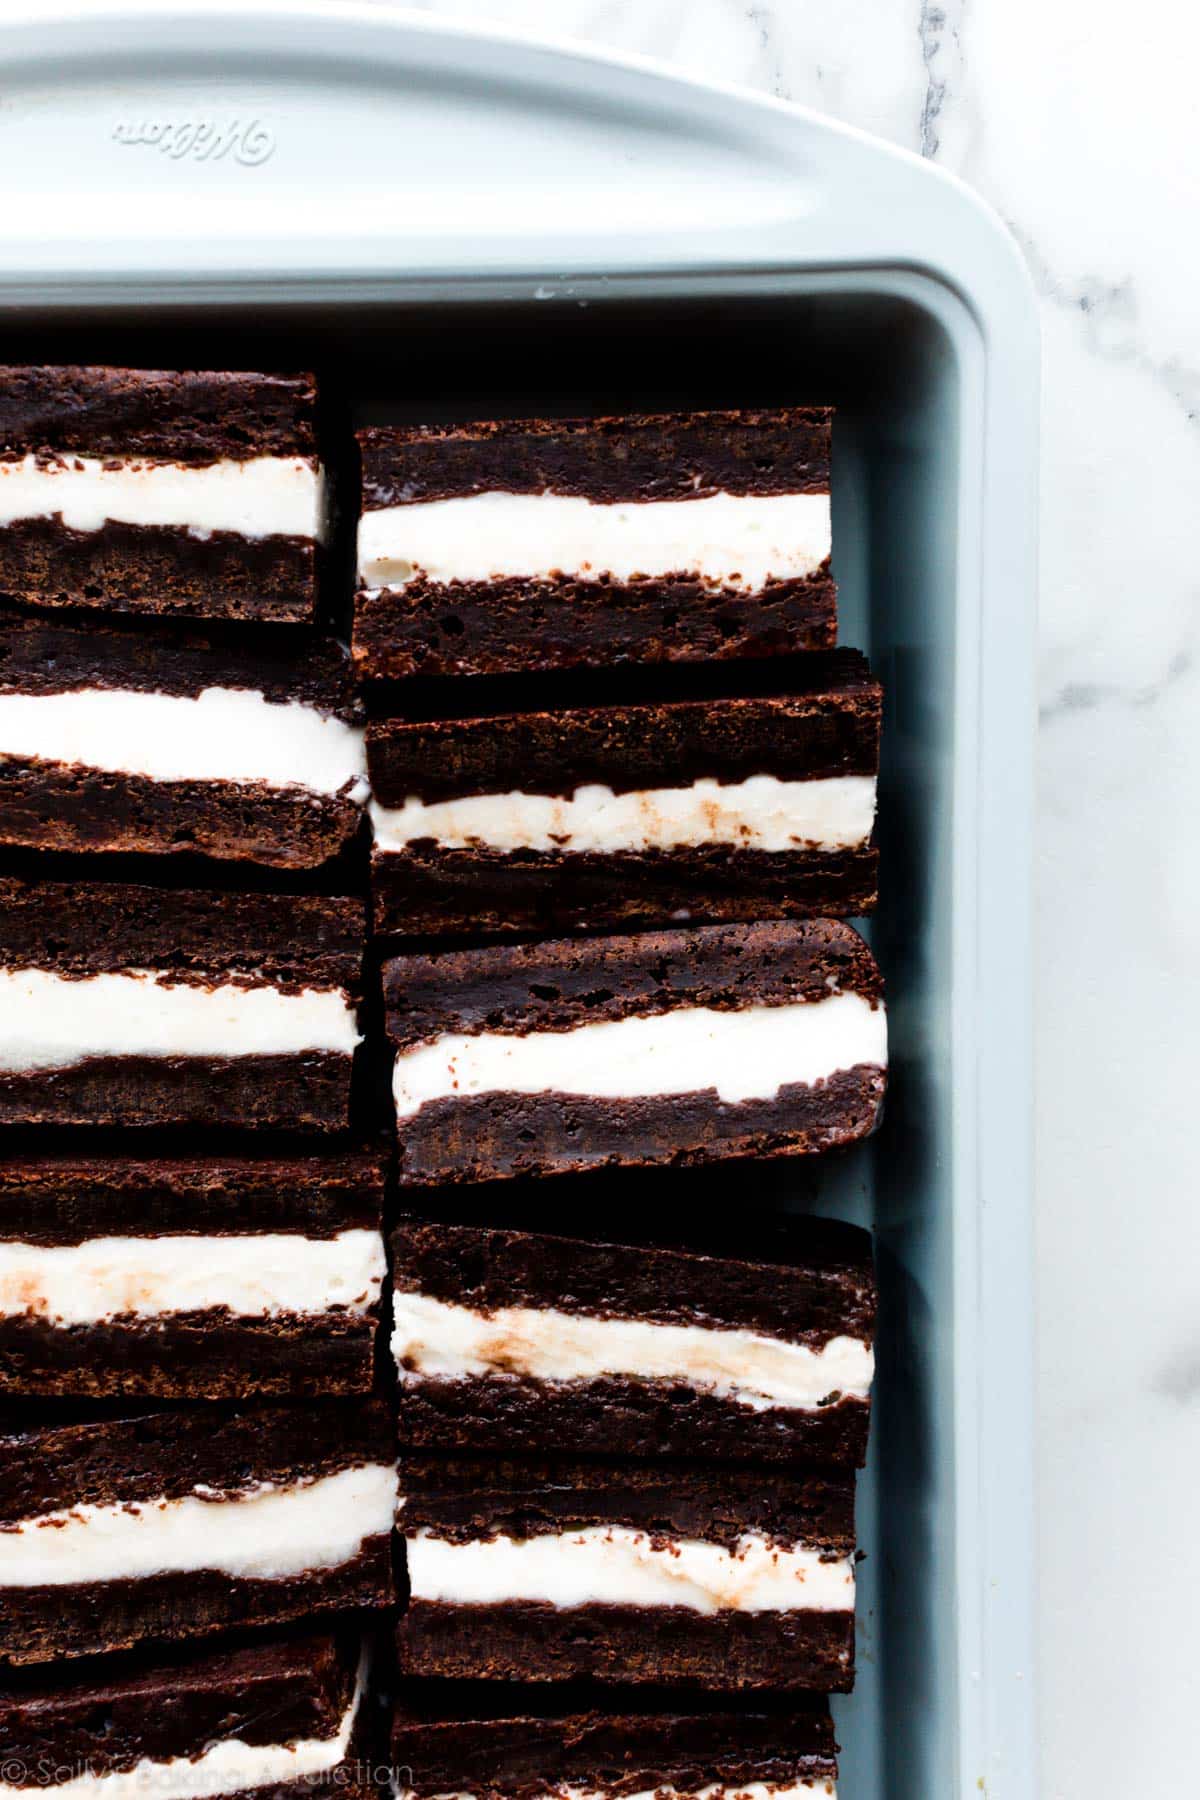
Using extra rich homemade brownies and your favorite flavor ice cream, you can make brownie ice cream sandwiches at home. My #1 tip: Give the assembled brownies plenty of time to freeze so they slice into neat squares or rectangles.
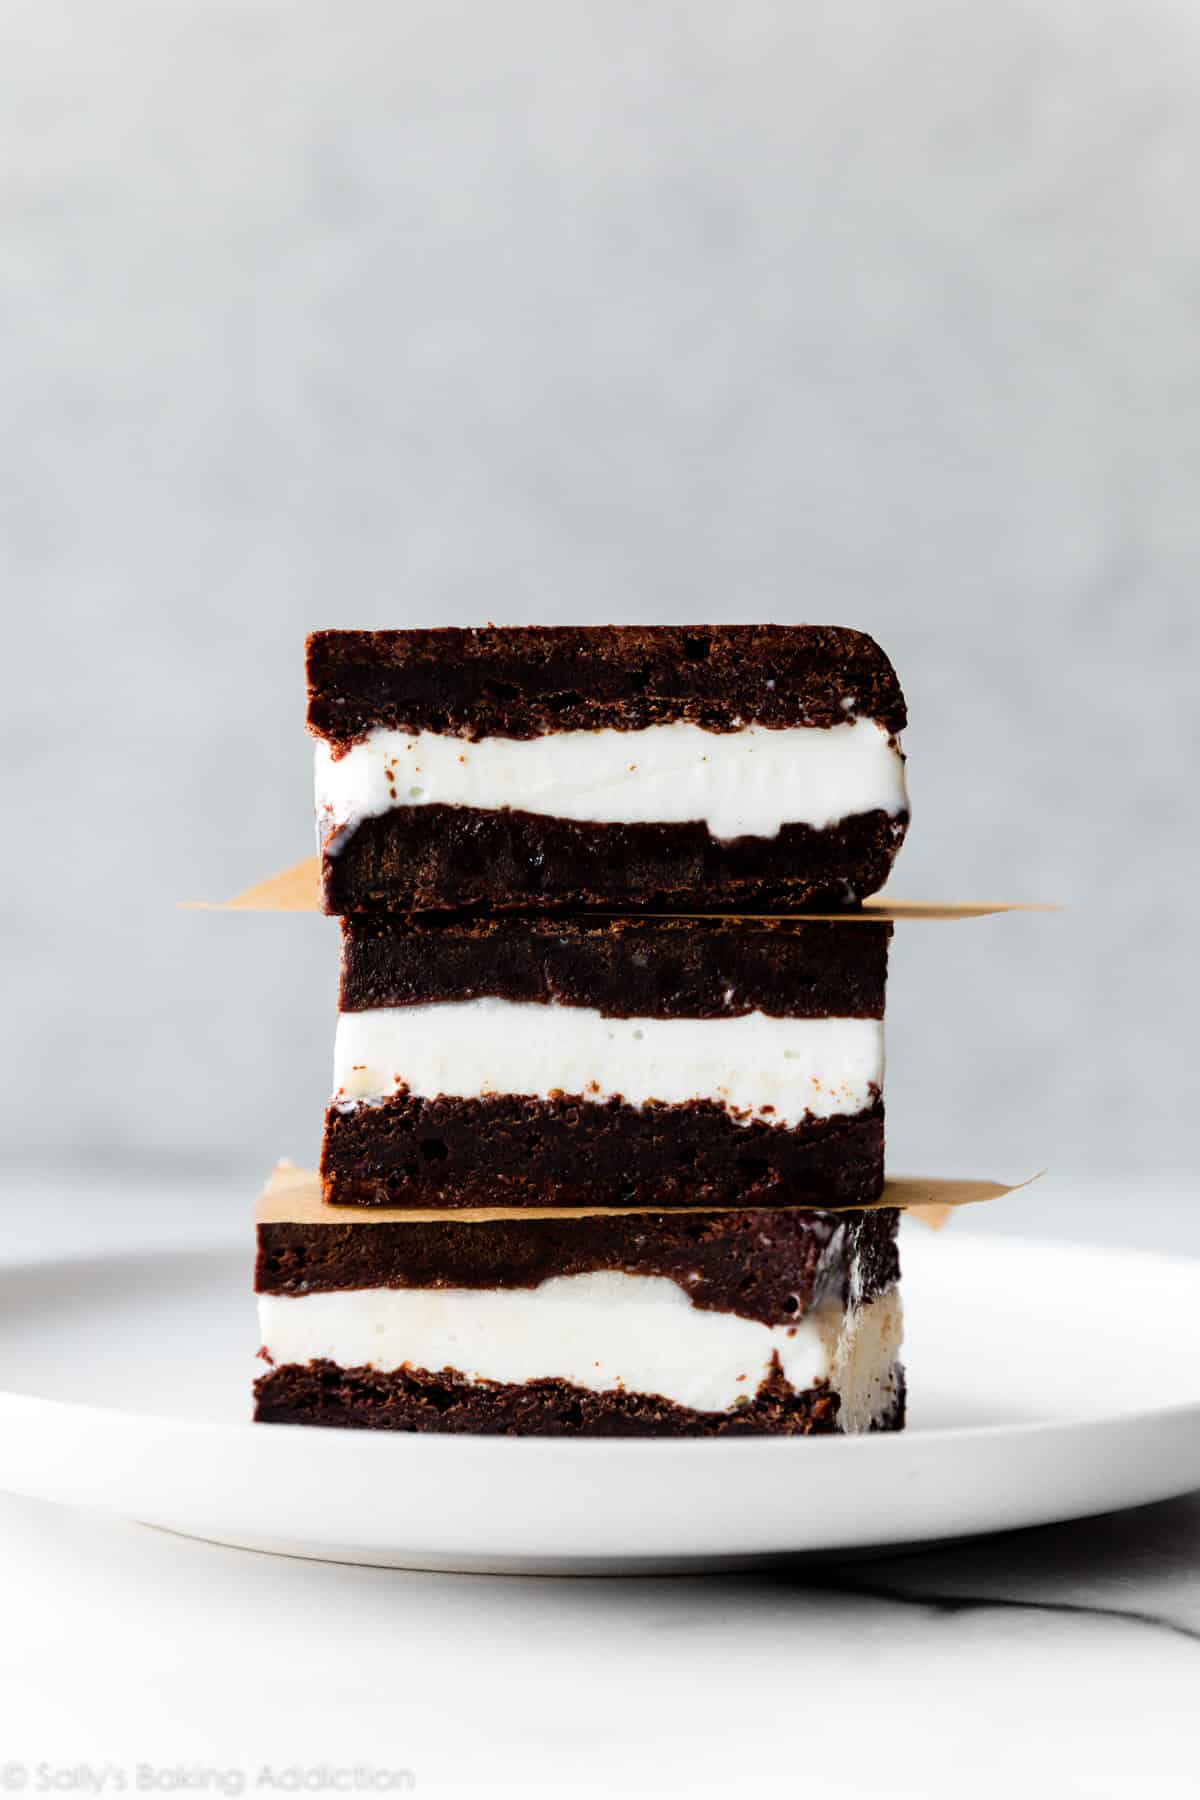
Complete with 8-ingredient homemade brownies, these brownie ice cream sandwiches are inspired by the store-bought version we all know and love. In addition to letting the assembled brownies freeze overnight, I recommend slightly under-baking the thin sheets of brownies so they aren’t rock solid after freezing. What a difference it makes!
I have a full list of success tips, as well as a video tutorial and step-by-step photos, so make sure you browse this post before getting started. I can’t wait for you to try these at home!
These Brownie Ice Cream Sandwiches Are:
- Fun to make
- Inspired by the store-bought version
- Made with extra rich homemade brownies
- Awesome with vanilla ice cream, but you must try coffee or strawberry!
- Like my ice cream cake or these chocolate chip cookie ice cream sandwiches, they’re a wonderful make-ahead treat
- Great in the freezer for up to 1 month
One reader, Tina, commented: “This is such a fun, easy, and delicious recipe! The brownies are very chocolatey and perfectly soft and chewy. I kept it simple with vanilla ice cream, but there are so many flavor possibilities. Definitely plan on making these again! ★★★★★”
**Though the full detailed instructions are written below, let me walk you through the process so you understand what you’re doing.
Overview: How to Make Chocolate Ice Cream Sandwiches
I found this recipe idea on Tasty and was thrilled to try it with homemade brownies. The most difficult part of recipe testing was finding the perfect brownie recipe that would (1) be thin enough (2) be soft enough and (3) taste good enough. A hard code to crack, but I started with my seriously fudgy homemade brownies and built on that foundation.
- Make homemade brownie batter. Using my homemade brownies as the base, I increased the butter, left out the melted chocolate, and added a bit of baking powder. I left out the chocolate so these brownies could be softer and, well, more convenient.
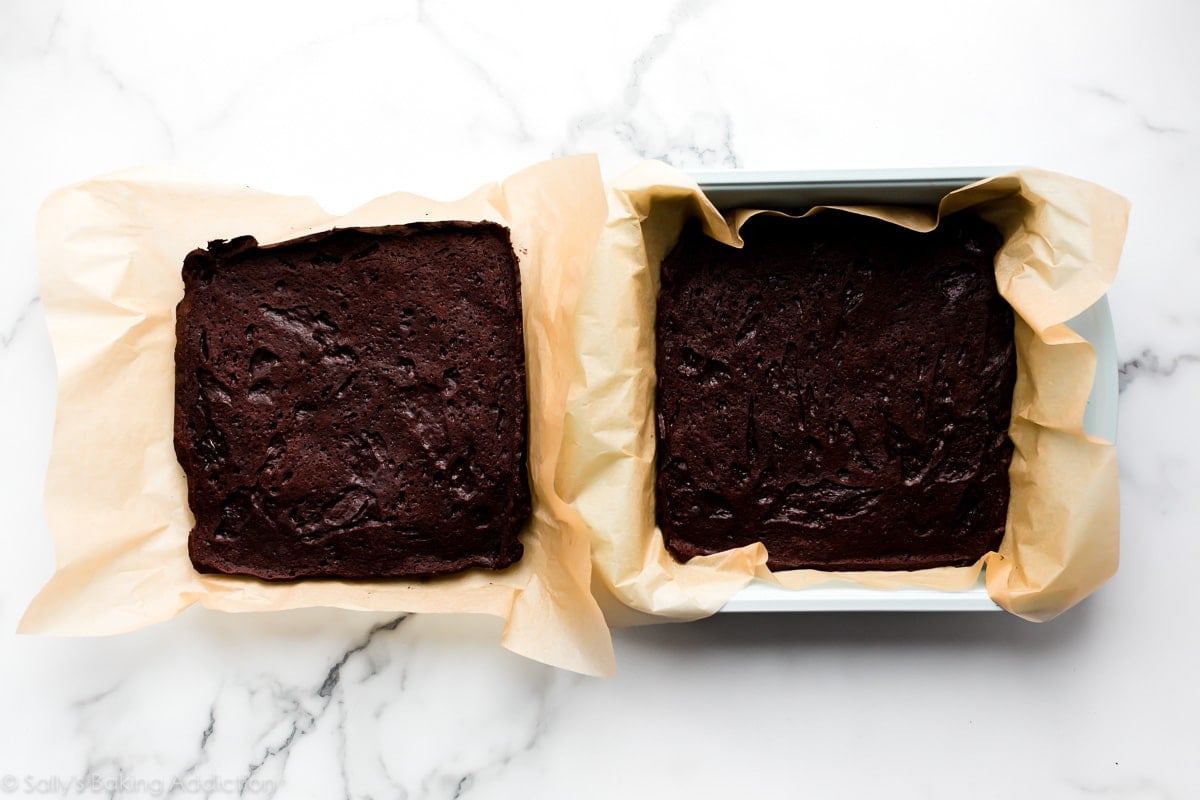
- Bake in two 9-inch baking pans. Use 2 9-inch square baking pans for the correct thickness. I only have one 9-inch square baking pan, so I bake the batter in batches. I do not recommend one 9×13-inch pan for this recipe. Though the brownie batter will fit and you could cut the cooled sheet of brownies in half, the “sandwich” will still be too thick. An 8-inch pan is too small. You could try two 9-inch round pans of brownies, but you won’t have even ice cream sandwich squares. Before baking, place a piece of parchment directly on top of the batter—this helps the brownies stay flat and prevents the brownies from puffing up too much.
- Under-bake. A quick 15-16 minutes per thin square sheet of brownies. As the brownies cool for a few minutes, remove your ice cream from the freezer so it slightly softens.
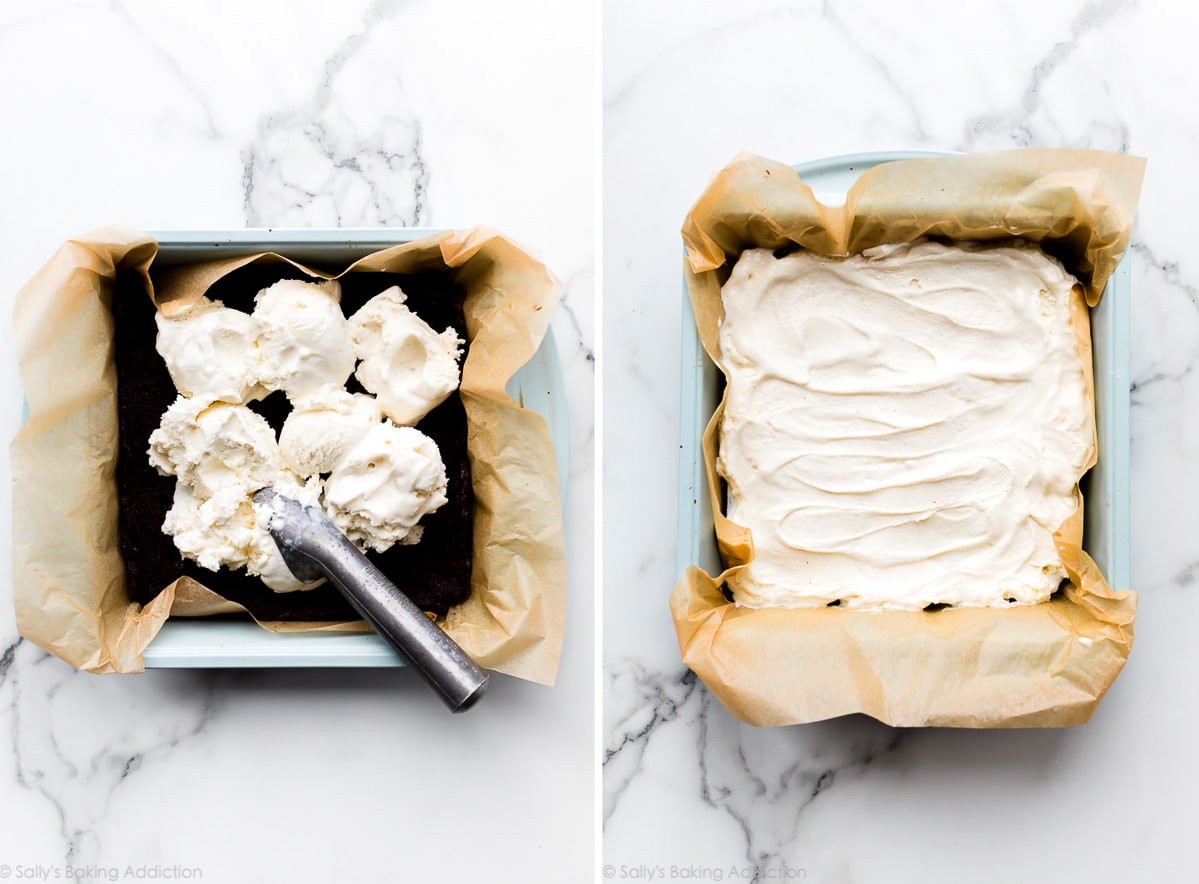
- Scoop ice cream on top of one layer of brownies. Carefully spread into an even layer.
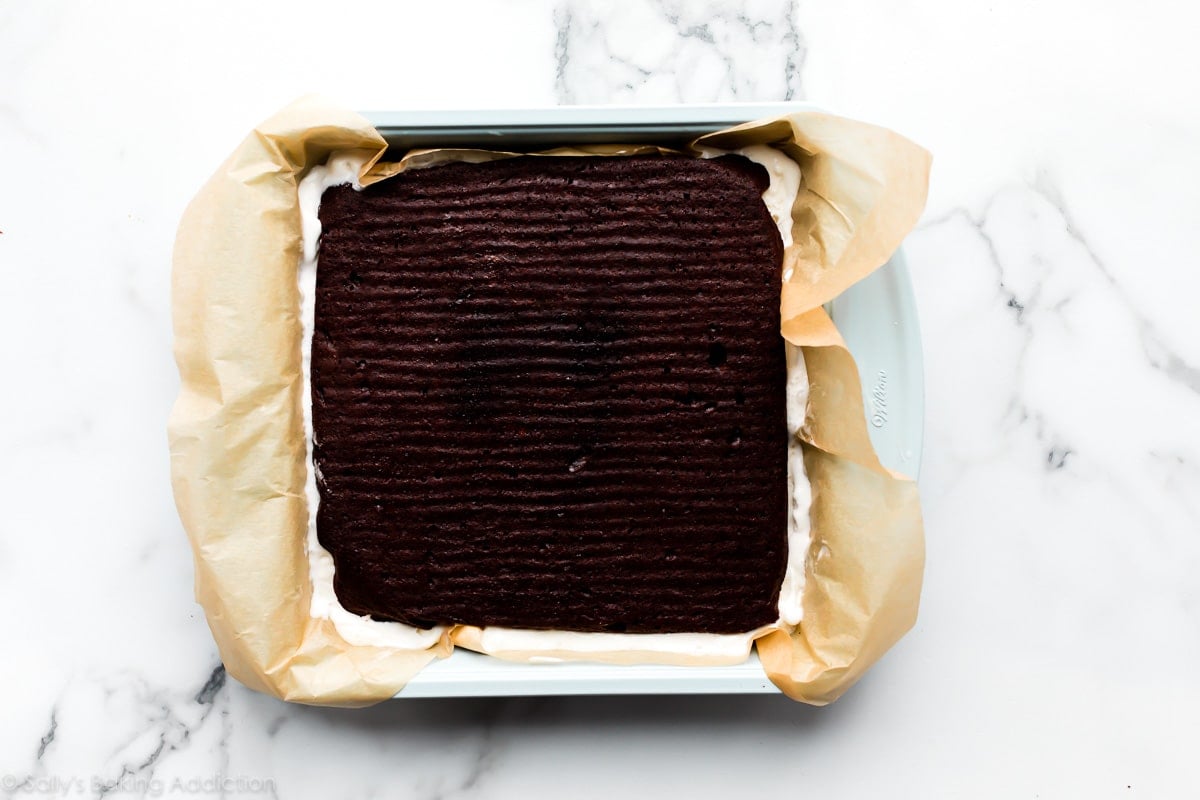
- Place 2nd square sheet of brownies on top.
- Freeze. Place the whole pan in the freezer for at least 12 hours. I find 12-18 hours is the perfect amount of time. Any less and the ice cream will still be pretty soft and squish out when you try to cut them. The longer after 18 hours, the harder the sandwiches are to cut.
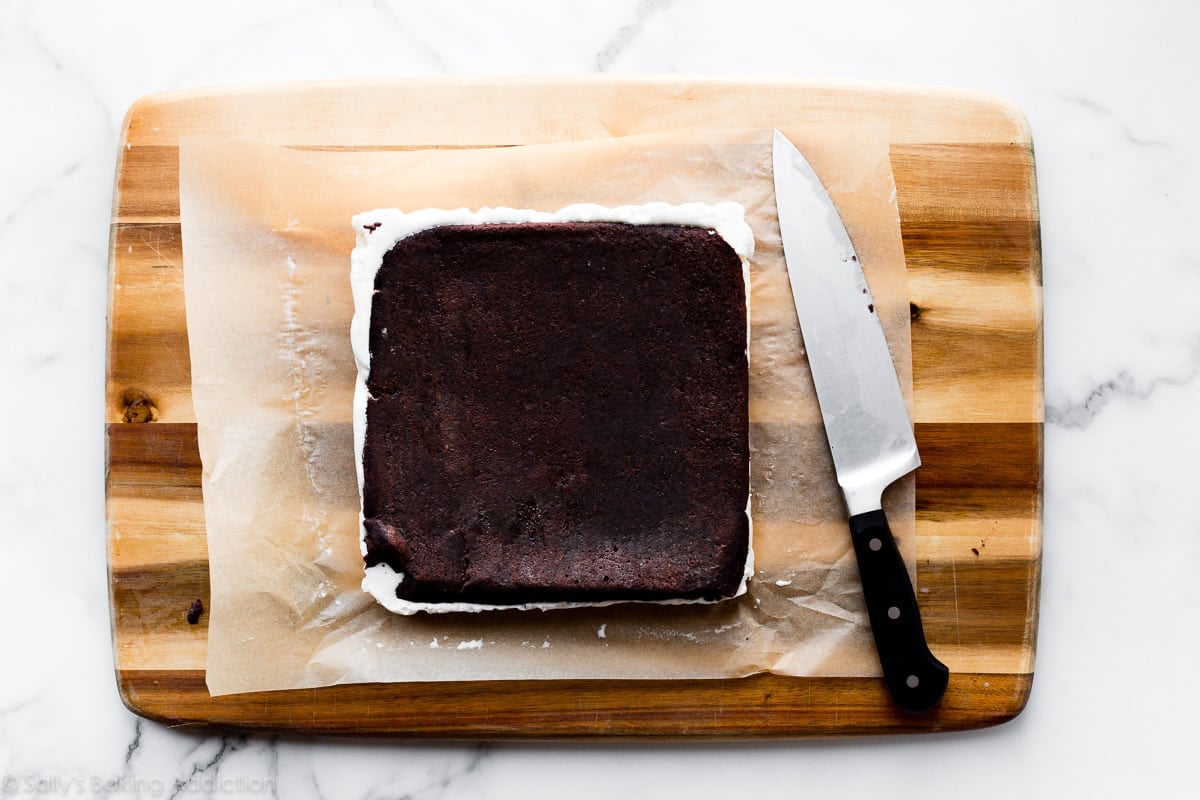
- Cut. Use a very sharp knife and some arm muscle!
Step-by-Step Photos:
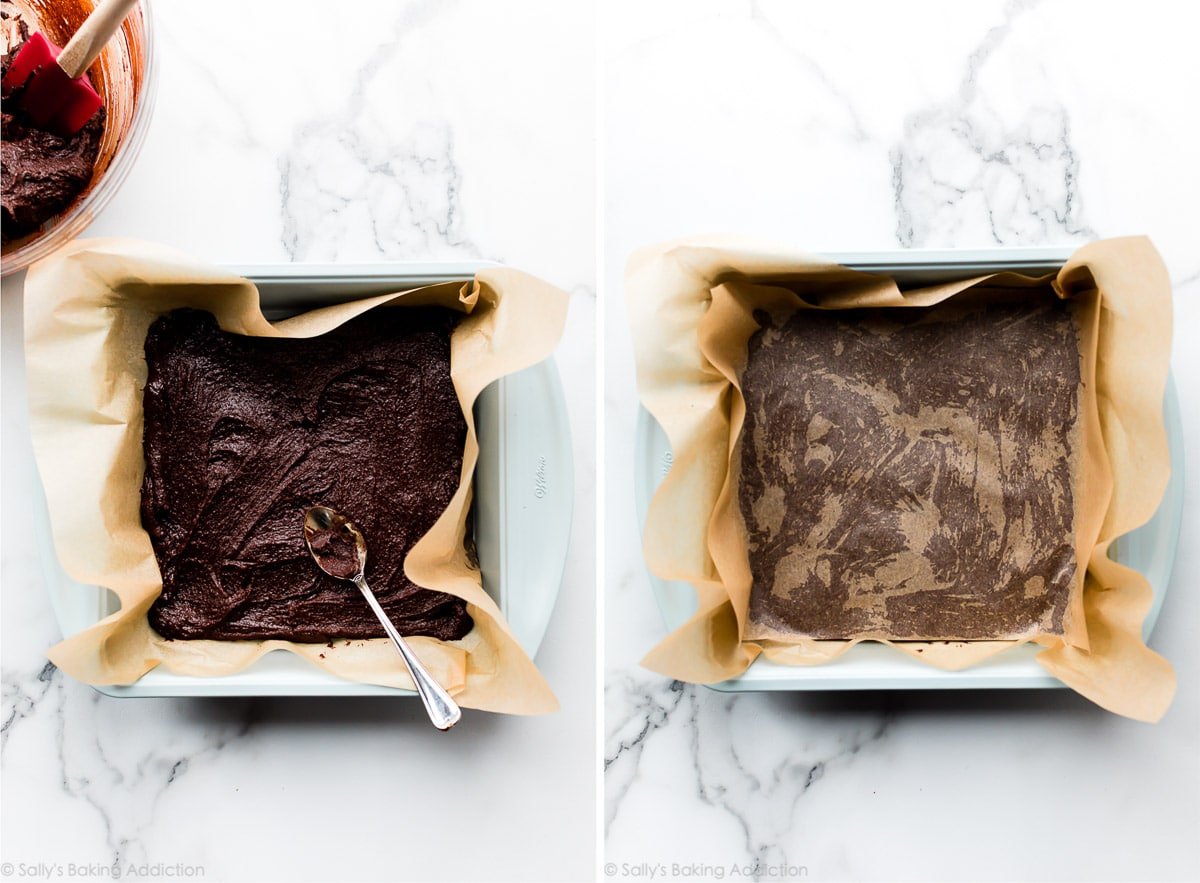
The brownie batter is thick, so do your best to spread it into your lined pan(s). Lining with parchment paper is imperative so you can easily lift the brownie square out of the pan as a whole. Bake with parchment paper directly on top, too. This prevents the brownies from puffing up too much.
You’ll have two square sheets of super thin and soft brownies.
Soften ice cream, then spread it on top.
Cover with 2nd square sheet of brownies.
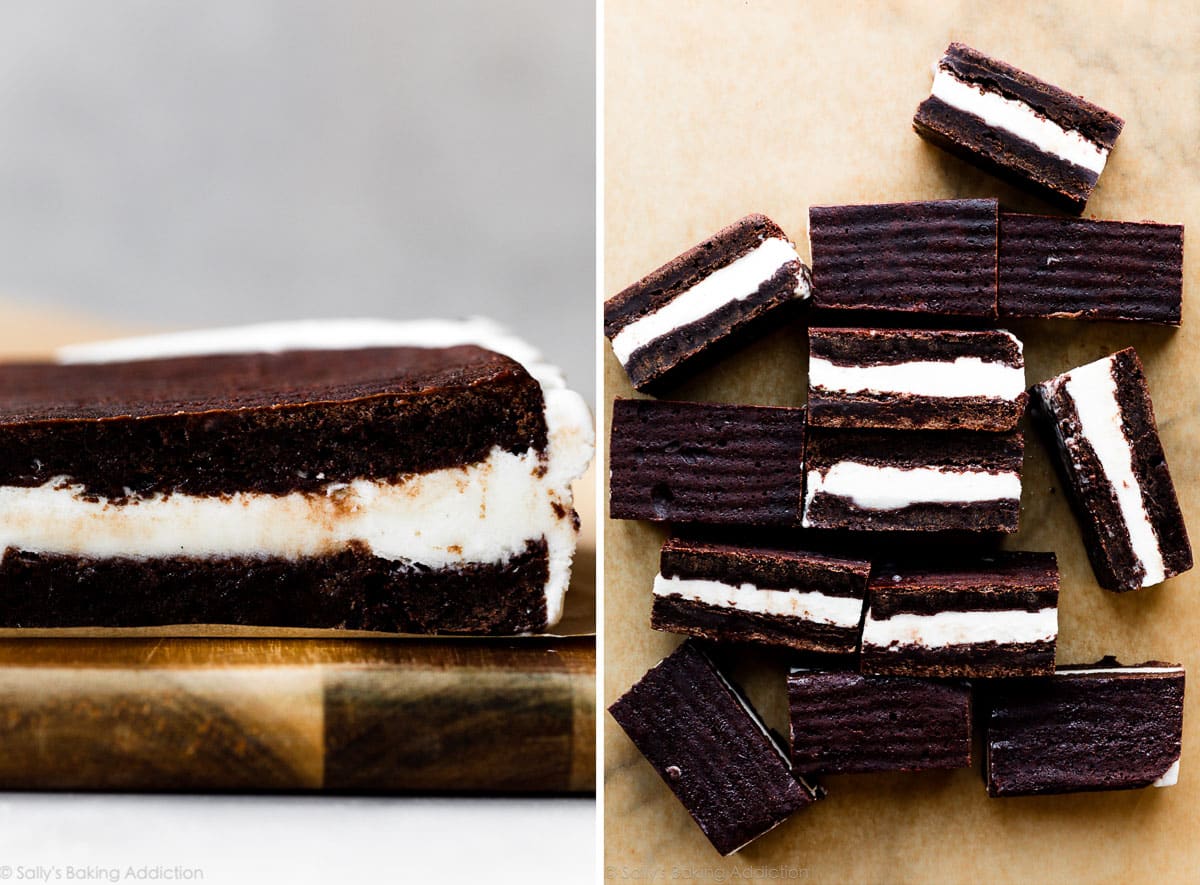
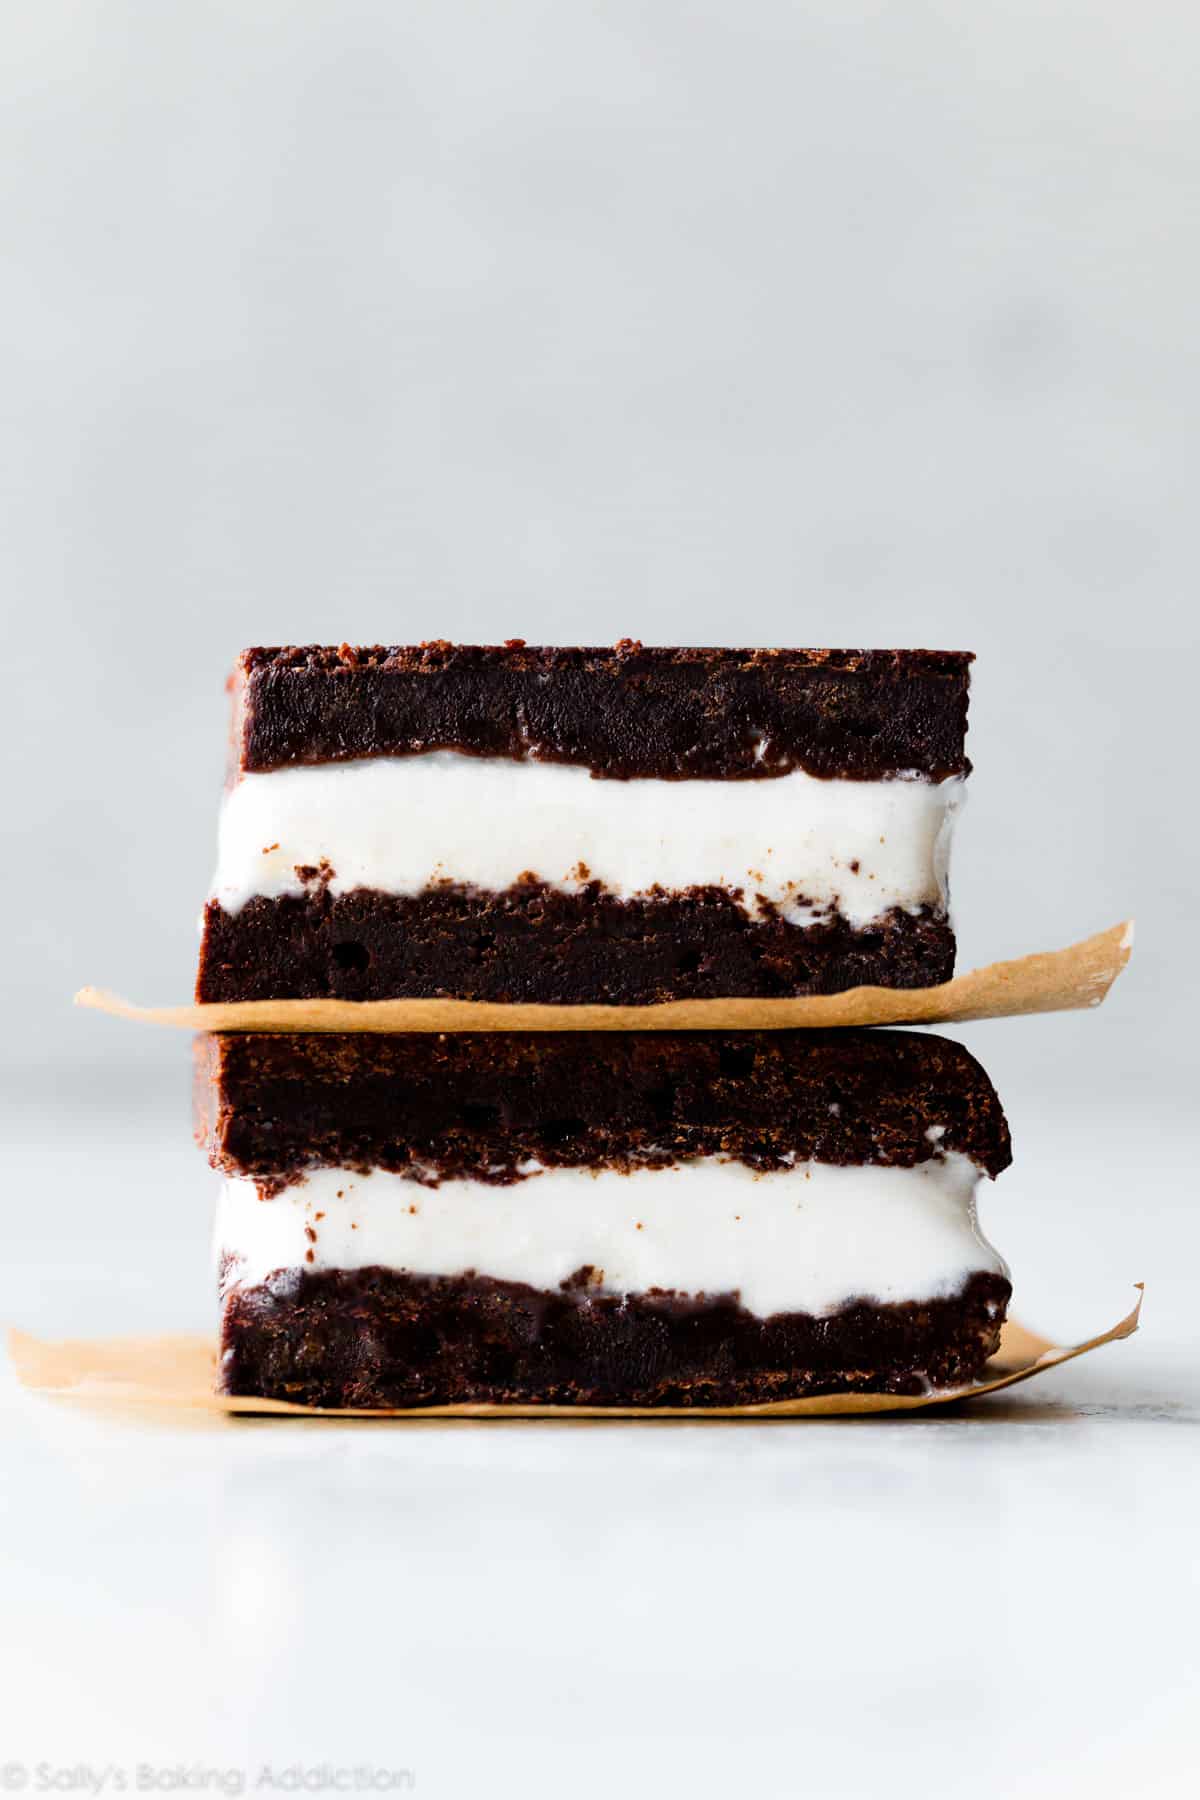
Freeze, then cut into squares or rectangles.
Success Tips (Follow These Closely)
- Use parchment paper: You need parchment paper to line the square baking pan(s) with enough overhang on the sides so you can lift the warm brownies out as a whole for assembly. You also need parchment paper placed directly on top of the brownie batter to keep them flat. I swear by these pre-cut sheets of parchment.
- Use 9-inch square pans: Best thickness for these ice cream sandwiches. See recipe notes below!
- Under-bake the square sheets of brownies: To prevent the brownies from turning break-your-teeth hard in the freezer, slightly under-bake them. Pay very close attention to this bake time. They will be very soft coming out of the oven.
- Freeze for 12-18 hours: As mentioned above, any shorter than this and your ice cream will squeeze out of the sandwich as you cut. Any longer and they’ll be delicious, just very hard to cut.
- Use your sharpest knife to cut: A super sharp knife and arm muscle works. At 8 months pregnant, this was a workout!
These are always so much fun to serve when the weather begins to warm up, especially for pool parties, Father’s Day, 4th of July, Labor Day, and every gathering in between! For more summer dessert inspiration, see my roundups of favorite Memorial Day recipes and BBQ cookout dessert recipes.
Print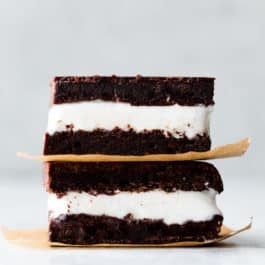
Brownie Ice Cream Sandwiches
- Prep Time: 1 hour
- Cook Time: 30 minutes
- Total Time: 13 hours, 30 minutes
- Yield: 8-12 sandwiches
- Category: Dessert
- Method: Baking
- Cuisine: American
Description
Using extra rich homemade brownies and your favorite flavor ice cream, you can make brownie ice cream sandwiches at home. My #1 tip: Give the assembled brownies plenty of time to freeze so they slice into neat squares or rectangles.
Ingredients
- 1 cup (226g) unsalted butter
- 2 cups (400g) granulated sugar
- 3 large eggs, at room temperature
- 1 Tablespoon pure vanilla extract
- 1 cup (82g) unsweetened natural or dutch-process cocoa powder*
- 1 cup (125g) all-purpose flour (spooned & leveled)
- 1 teaspoon salt
- 3/4 teaspoon baking powder
- 2 quart container (1/2 gallon) vanilla ice cream (slightly softened—you can use any flavor and you’ll have a little leftover)
Instructions
- Preliminary note: For best success, I recommend reviewing the recipe notes and video tutorial above before beginning.
- Preheat the oven to 350°F (177°C) and line a 9-inch square baking pan with parchment paper, leaving enough overhang on the sides to lift the warm brownies out. Set aside. (If you have 2 identical 9-inch square baking pans, you can line both and bake the batches of brownie batter at the same time.) I don’t recommend other size baking pans. See my recipe note.
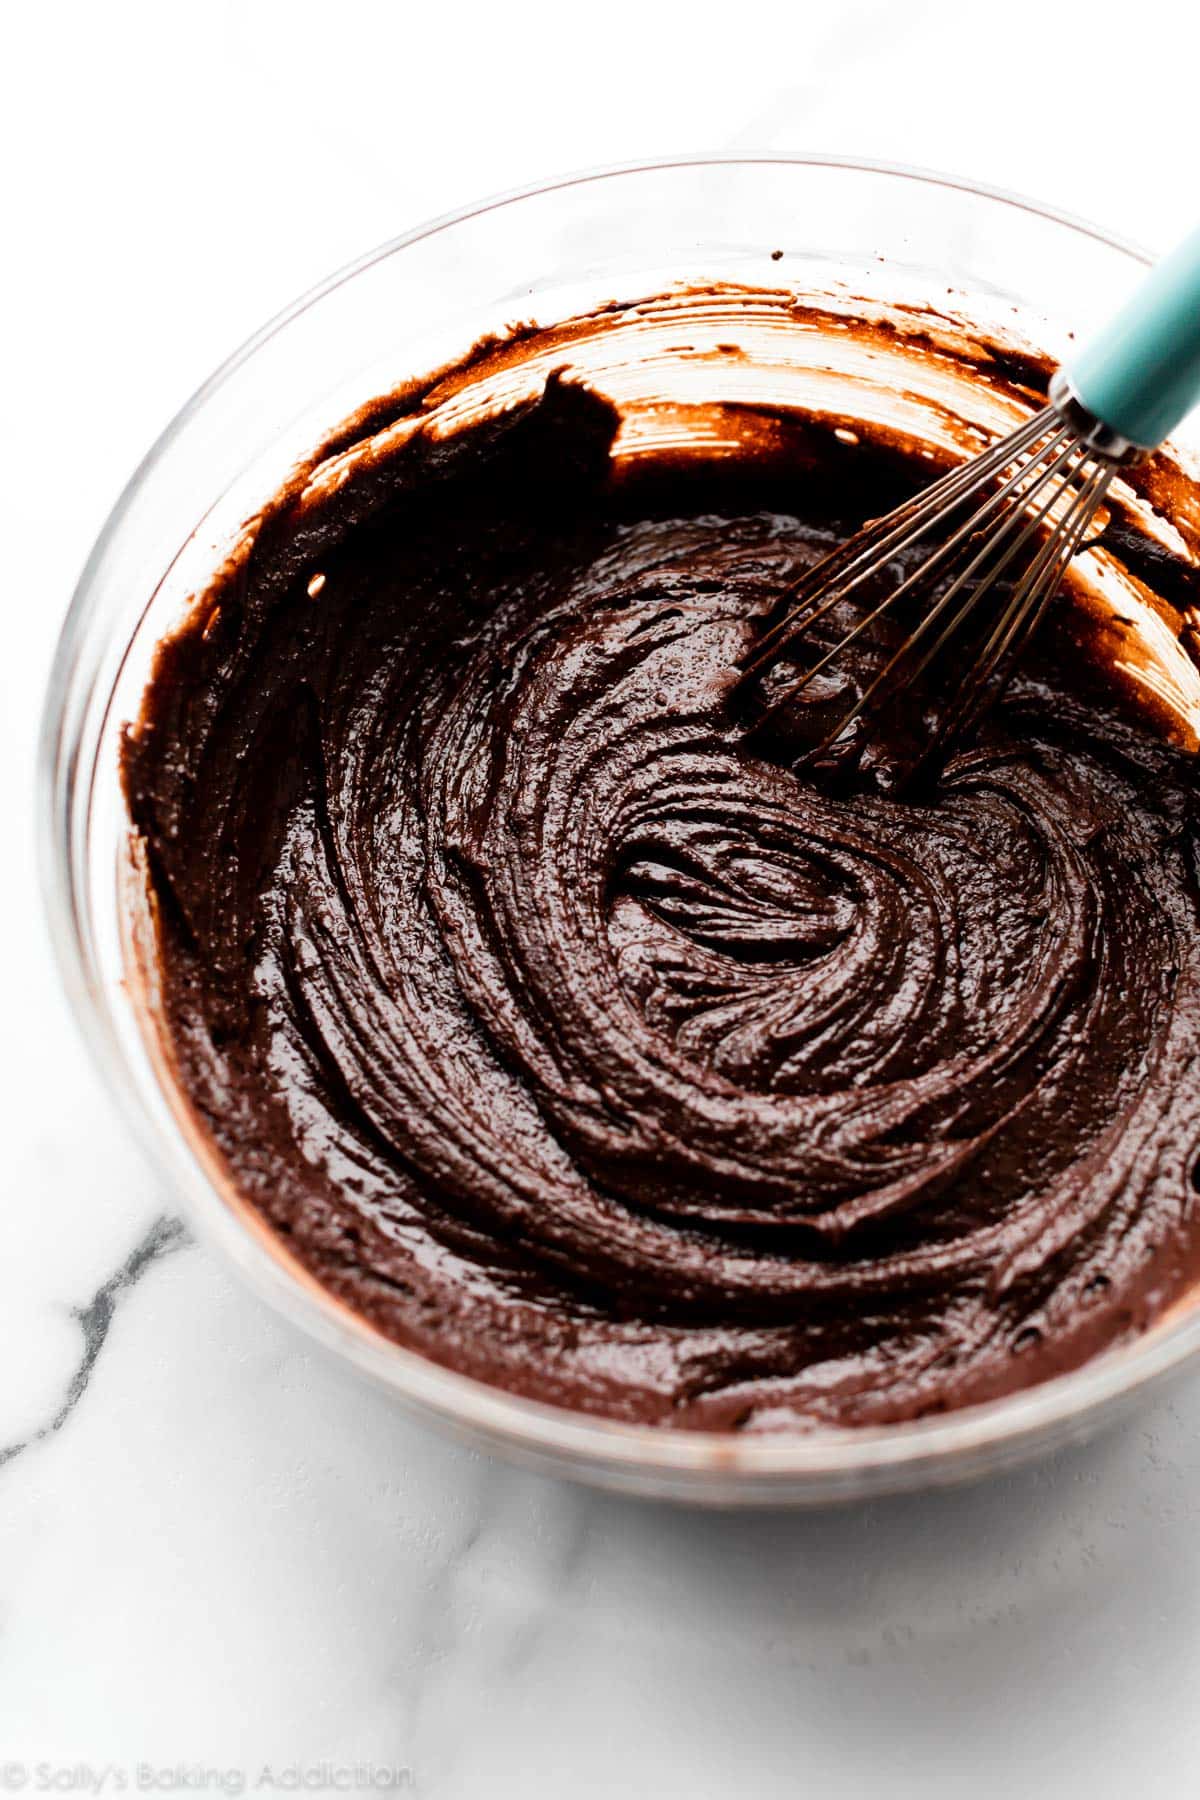
- In a microwave-safe bowl or a saucepan on the stove, melt the butter. After melting, whisk in the sugar until completely combined, then whisk in the eggs and vanilla. The batter will be a little dull looking.
- Add the cocoa powder, flour, salt, and baking powder. Fold it all together with a rubber spatula or wooden spoon. It will come together, I promise! Batter will be very thick. You will have about 4 cups of batter.
- Spoon and spread half of the batter (about 2 cups) into prepared pan. (Lightly cover remaining batter and keep at room temperature.) The batter is thick and heavy, so do your best to spread it evenly in the lined baking pan. I find the back of a spoon is most helpful. Place a small sheet of parchment paper directly on top of the brownie batter, smoothing it down as pictured in the photos and video tutorial above. The top parchment paper helps the brownies stay flat and prevents the brownies from puffing up too much.
- Bake for 15-16 minutes. I find any longer over-cooks the brownies, making the ice cream sandwiches difficult to cut and eat. Remove brownies from the oven and cool for 5 minutes in the pan. Carefully, using the overhanging parchment paper on the sides, lift the warm and soft square sheet of brownies out of the pan as a whole. Remove top piece of parchment. (You can reuse it for the top of the 2nd sheet of brownies in the next step, if desired.) Set aside.
- Line the warm pan with another sheet of parchment paper, leaving enough overhang on the sides to lift the warm brownies out. Give the remaining brownie batter a stir. It will be very thick at this point. Add a teaspoon of water to thin out if necessary. (No more.) Spoon and spread the remaining brownie batter in the pan. Place a small sheet of parchment paper directly on top of the brownie batter, just as you did before.
- Bake for 15-16 minutes. Remove brownies from the oven and cool for 15 minutes in the pan. During this cooling time, I remove the ice cream from the freezer so it has a chance to soften.
- Scoop the softened ice cream onto the warm brownie layer in the pan. You’ll use almost all of the 1/2 gallon of ice cream. Using the back of a spoon or your ice cream scoop, gently spread it into an even and thick layer.
- Carefully pick up the 1st square sheet of brownies and place on top of the ice cream layer. Gently press it down into the ice cream to help it stick. Cover the entire pan with aluminum foil or plastic wrap and freeze for at least 12 hours and up to 1 week. I find 12-18 hours is the perfect amount of time. Any less and the ice cream will still be pretty soft. The longer after 18 hours, the harder the sandwiches are to cut.
- Remove the pan of ice cream brownies from the freezer. Carefully lift them out as a whole using the parchment paper overhang on the sides. Using a very sharp knife and some arm muscle, cut into 8-12 squares or rectangles. Enjoy immediately.
- Wrap each leftover sandwich individually and store in the freezer for up to 1 month. They get a little harder the longer they sit in the freezer—if they’re super solid, let them sit out for a few minutes before enjoying.
Notes
- Special Tools (affiliate links): 9-inch Square Baking Pan | Parchment Paper | Glass Mixing Bowl | Whisk | Silicone Spatula or Wooden Spoon | Ice Cream Scoop
- Two 9-inch square pans of extra thin brownies is best. I only have one 9-inch square baking pan, so I bake the batter in batches. I do not recommend one 9×13-inch pan for this recipe. Though the brownie batter will fit and you could cut the cooled sheet of brownies in half, the “sandwich” will still be too thick. An 8-inch pan is too small. You could try two 9-inch round pans of brownies, but, obviously, you won’t have even ice cream sandwich squares. For success, I recommend following the recipe.
- Cocoa Powder: You can use either natural or dutch-process cocoa powder. I like to use this particular dutch-process cocoa powder.
- Best Ice Cream to Use: Homemade ice cream works wonderfully, but avoid homemade no churn ice cream (made with heavy cream and sweetened condensed milk) because it’s too soft. I usually use store-bought such as Breyers vanilla (or any flavor) or Dreyers/Edys classic or slow churned varieties.
Inspired by Tasty


Reader Comments and Reviews
Just made these yesterday! We don’t have the typical kind of ice cream sandwich where I live now so this was an extra nostalgic treat. I actually wish these had even more ice cream because the brownie can be a little bit overpowering but it’s it was obviously super delicious! My top layer broke when putting it together but once frozen you couldn’t tell at all.
We loved these. The brownies were fantastic, we did get a little impatient and no wait the recommended wait time and the ice cream was a bit melty (as mentioned above that it would be) but nonetheless they were delicious. Just follow the directions 🙂
Delicious! My family loved them!
I followed this recipe exactly after watching the video and reading through it thoroughly…and glad I did! Not complex, but it would be easy to miss a step or two if you don’t pay attention. The results were phenomenally mouthwatering. My family LOVED these. They also paired wonderfully with moscato wine 🙂
DELICIOUS! These ice cream sandwiches are worth every minute you have to wait for them to freeze. Although they are a little difficult to make even, they taste delicious and are definitely a hit in my family. I cut my sandwiches into 20 bite-size sandwiches and they are equally cute and yummy!
The version I made was Chocolate Chip Brownie w/Layer of Peanut Butter and White Chocolate Raspberry Ice Cream Sandwiches!! Yum Yum Yum!!!! LOVE this recipe and so does hubby! Super easy. Didn’t have any problems cutting after 24 hrs in. Cut in smaller portions when I stored them. Going to make a batch for a team building @ work this week.
Hi Sally! I am having trouble finding a 9 inch square pan anywhere other than Amazon. I really want to make these for this weekend. Would they be way too thin in a 10 inch pan?
They will be very very thin in a 10 inch pan. You can try a 9 inch round if you have one – see recipe notes.
These were to die for! The brownies were also chewy and delicious and paired perfectly with the ice cream!
I made these for the challenge and I’m surprised I’ve never made anything like this before – delicious and perfect for summer! I also learned that I’ve been constantly overbaking my brownies, and this time I finally made them just right. The only complaint was that the (store-bought) raspberry ice cream didn’t have enough raspberry 🙂
I made these for the challenge this month and they came out awesome! I did French Vanilla ice cream and they were very rich and satisfying. I will definitely be making these again!
I found that the ice cream turned very icy after it was put together and refrozen. For me, that was a big enough drawback to not make these again.
Now, the brownie batter and brownies, they were delicious and I loved them!!
Abbey, same thing happened to me. I think I was too slow and the ice cream got too soft/melted while trying to spread it around. I think next time I won’t let it sit out…I’ll just muscle through and spread while it’s still super cold!
This challenge was so much fun because it was easy to involve my 7-year old (though it was hard for him to wait 12-18 hours to eat it!). I only had one round 9-inch pan, but it worked really well. We just baked the batter in batches like the recipe says. Our baking time ended up being 17-18 minutes–the brownies were still very soft when we took them out. We froze them for about 20 hours but just put the pan on the counter for 10 or 15 minutes and they were easy to cut. I was surprised how easy they were to cut and that the ice cream didn’t squish out the sides–they really held their shape. I individually wrapped the leftover bars for later. We used strawberry ice cream and highly recommend it. This treat is great for kids, but the adults in my house appreciated the rich homemade brownies–they are delicious! Another great Sally recipe!
My girls and I loved making these today! All I had were 8×8 pans, so we used those and increased the bake time to 18 minutes. We used their favorite flavor ice cream (mint chocolate chip) and let it freeze for about 10 hours before cutting. They turned out great!
Great simple to follow recipe! Sally never fails me! I made these with a Neapolitan ice cream. The whole family enjoyed.
OMG! I just made these and they were AWESOME. Super easy to make and delicious. Everyone loved them! Thanks for a great recipe.
My family loved these! Will definitely make again!
These are delicious! I had trouble with the top layer breaking in pieces when I tried to flip it. I just continued on, and the ice cream was melting on me. When I cut them, the ice cream melted again. They were definitely fudgey and yummy though! I used strawberry and vanilla ice cream.
These are terrific! I love that you just mix everything in a bowl (no mixer needed). My top layer also fell apart a little bit when I put it in, but I also just mushed it together. You honestly couldn’t tell once they froze and I cut them. I used white chivalry raspberry ice cream – they were awesome. Great summer treat with minimal baking time.
These are terrific! I love that you just mix everything in a bowl (no mixer needed). My top layer also fell apart a little bit when I put it in, but I also just mushed it together. You honestly couldn’t tell once they froze and I cut them.
Yum just finished making these. I did not have a 9” pan. I did a lot of math in my kitchen to find out what the best alternative would be and ended up with an 11X17 baking sheet which was close area wise but baked for 2 minutes less and cut it in half… they turned our perfect!
They are currently in the freezer waiting to be eaten tomorrow
As always, another wonderful recipe from you. The brownie recipe is amazing. Will be making that alone, soon. My next batch will have some peanut butter ice cream. I’m off to the store now, not only to get the ice cream, but to buy larger sized pants!
These were a hit with the family. Started to make these and then realized a didn’t have a 9×9 pan, I did have an 11×7 so divided the batter in half and baked each in this pan. I still baked for 15 minutes and they turned out delicious. I used mint chocolate chip ice cream. Will definitely make again.
I couldn’t wait to make these as soon as I saw the recipe and they did not disappoint!! If you are a brownie and ice cream lover (and who isn’t) then this is the recipe for you. Thanks again for another great recipe!
I only have an 8″ pan so my brownies were thicker than they should’ve been. When I flipped one on top of the ice cream it broke, maybe it should have cooled longer than 15 minutes. Otherwise the brownie is perfect for this recipe, not too sweet. I’ll be making this recipe again. Thank you Sally.
Super easy to make. I am freezing some for later. I may even share with my grandchildren
I would never make ice cream sandwiches on my own! This recipe gave us the perfect chance! They were quite the treat to have on a hot summer day.
Ice cream sandwiched between 2 perfect brownies. Can it get better?! These are easy to make and taste absolutely amazing. My whole family absolutely loved them. My bro said “this is how all ice cream sandwiches should be!” Will be making again!
My first Sally’s baking challenge but not my first Sally’s recipe. I haven’t been disappointed, yet!! These are so delicious and really easy. I did have to bake my brownies a little longer then the 15/16 minute time because they were still uncooked in the center so another 3 minutes was perfect for my oven. Thank you for another super great recipe
I made this recipe for my mother in laws birthday and everyone went nuts! I used half vanilla and the other half chocolate ice cream. The middle pieces were highly coveted. 🙂
I was really happy with this recipe. The brownies did look underdone after baking 15 minutes, but Sally was right, that’s needed so they aren’t rock hard after freezing. When I told my husband his month’s challenge, I asked what kind of ice cream I should use. He immediately said salted caramel which is such a good call and my favorite! Thank you for this recipe, I am looking forward to trying it with different ice cream flavors like coffee and black raspberry chip!
Wow! These are incredibly delicious!
I had to use an 8×8 pan which I know isn’t ideal but they still came out really well!