

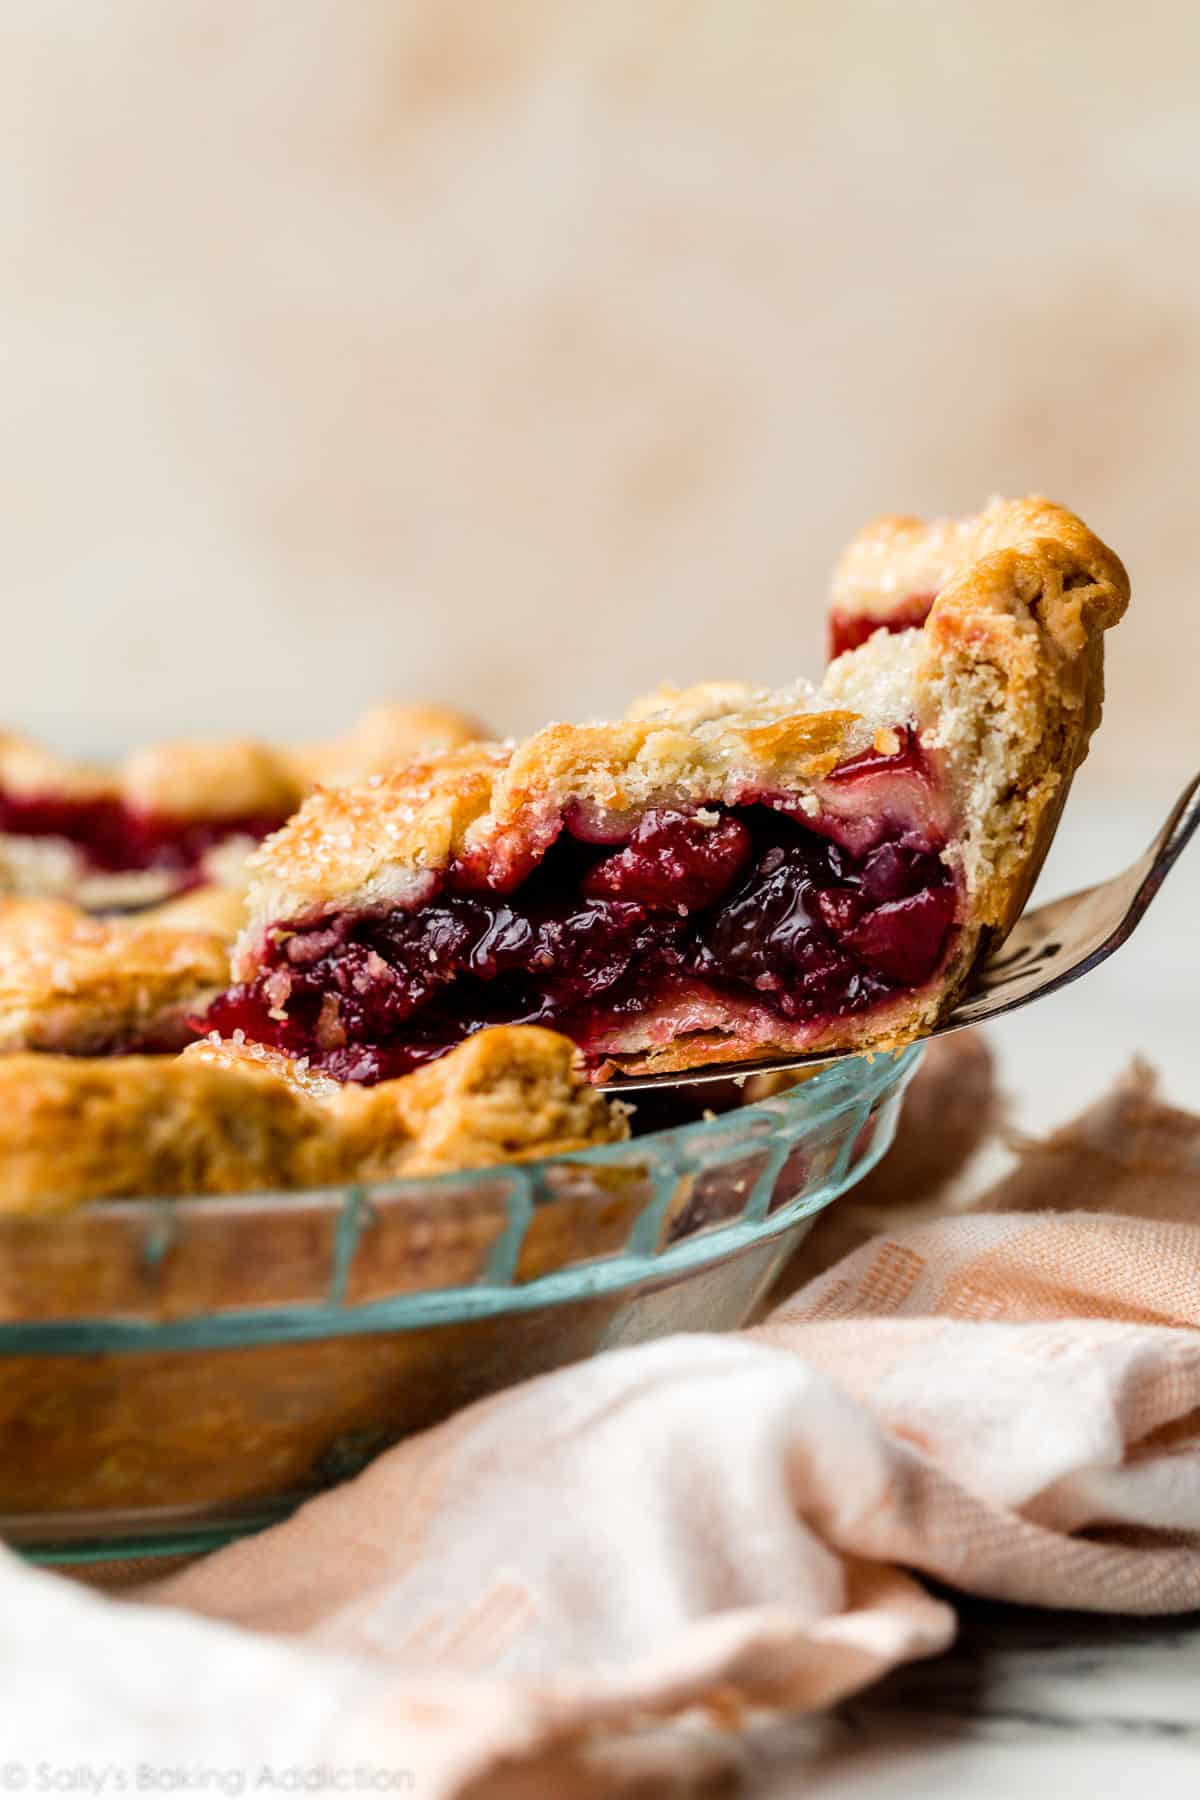
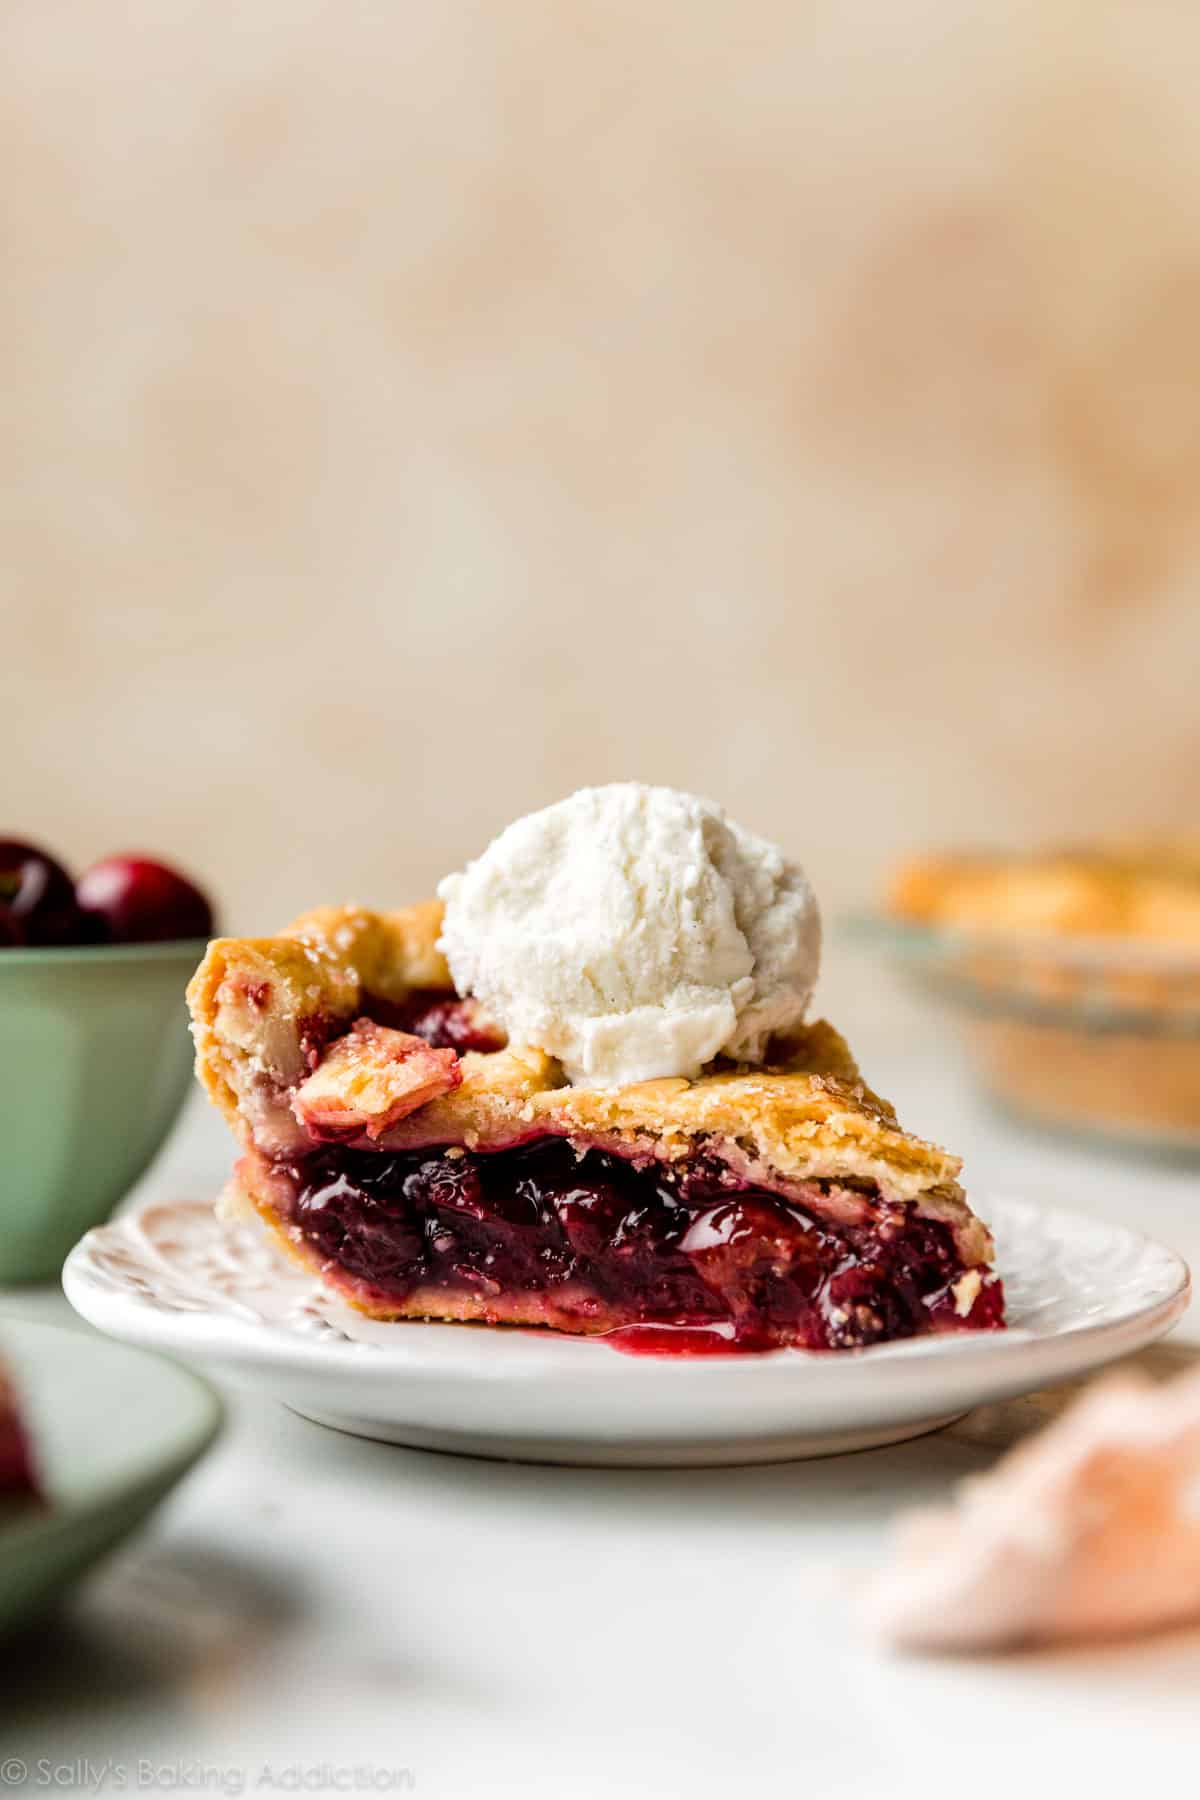
This recipe is better than ever. My homemade cherry pie is perfectly sliceable with a thick almond-hinted cherry pie filling and a golden brown buttery flaky pie crust. As always, wait for the pie to cool completely before slicing, which is a non-negotiable that helps avoid a soupy pie filling.

I originally published this recipe in 2017 and have since added new photos, a video tutorial, and more success tips, like quartering *some* of the cherries instead of halving and reducing some juices on the stovetop to guarantee the pie filling will set up perfectly.
No store-bought pie filling or pie crust because today we’re making cherry pie completely from scratch. Does making homemade pie intimidate you? I promise this dessert specialty is nothing to fear and that’s exactly why I’m sharing my recipe with you. Out of all pie flavors, cherry pie is where most bakers depend on canned filling, but I’m going to teach you how to make the most of fresh cherries and a delicious crust.
One reader, Shirlee, commented: “I’ve never tasted a cherry pie as delicious as this one. The crust is flaky, not soggy, and so delectable. The dough is easy to work with. The filling was incredible. It’s just the right consistency—not runny. The almond extract adds amazing flavor. Pitting the cherries takes a little bit of time, but once that’s done the recipe moves along quickly. Thanks, Sally, for providing such wonderful baking tips and instructions. ★★★★★“
Cherry Pie Details
- Flavor: While the cherry flavor is front and center in this pie, you’ll enjoy the notes of vanilla and almond as well. Vanilla and almond extracts add richness and depth and a touch of lemon juice keeps the overall flavor fresh and bright. (Without it, the filling can taste a little flat.) A scoop of vanilla ice cream and a dollop of homemade whipped cream pair perfectly on top of a slice.
- Texture: If you follow the recipe closely, this cherry pie filling is buttery, jammy, sturdy, and sliceable. You can use your favorite pie crust recipe, but I encourage you to try mine linked below. We use a mix of shortening and butter because they work together to make the BEST crust. Butter adds flavor and flakiness, while shortening’s high melting point keeps the crust tender and workable. It’s my go-to crust for apple pie and pumpkin pie, too. If you don’t want to use shortening, try this all butter pie crust recipe instead.
- Ease: It goes without saying that homemade pie is a labor of love, especially if you’re a beginner. Consider this recipe an activity—hopefully fun and definitely satisfying—and set aside several hours from start to finish. My time-saving tip is to prep the pie dough ahead of time because it needs to chill for at least 2 hours before you can roll it out. Plan accordingly if you want to include this cherry beauty in your lineup of Memorial Day recipes.
Best Cherries to Use for Cherry Pie
If you’re making cherry pie from scratch, it’s helpful to know which cherry variety works best. I usually choose a mix of rainier cherries and dark sweet cherries, but opted for all dark sweet cherries in the pictured pie. You can use all Rainier or all dark sweet. If using sour cherries, add a little more sugar as referenced in the recipe note below.
You can also use frozen halved or quartered cherries. Follow the recipe as written below and don’t skip the reducing step on the stove.
Pitting Cherries
Pitting fresh cherries is always a tedious and messy task, so if you want to save time and prep work, pick up a cherry pitter. If you’re anything like me, you don’t like stuffing your kitchen drawers with endless gizmos and gadgets, but a cherry pitter is most definitely an exception. I don’t bake with cherries often, but when I do, I’m VERY thankful for this tool.
- It’s also a timesaver if you’re baking cherry cobbler, cherry crisp, or cherry buckle!
Reducing the Cherry Juices on the Stove Takes Less Than 10 Minutes
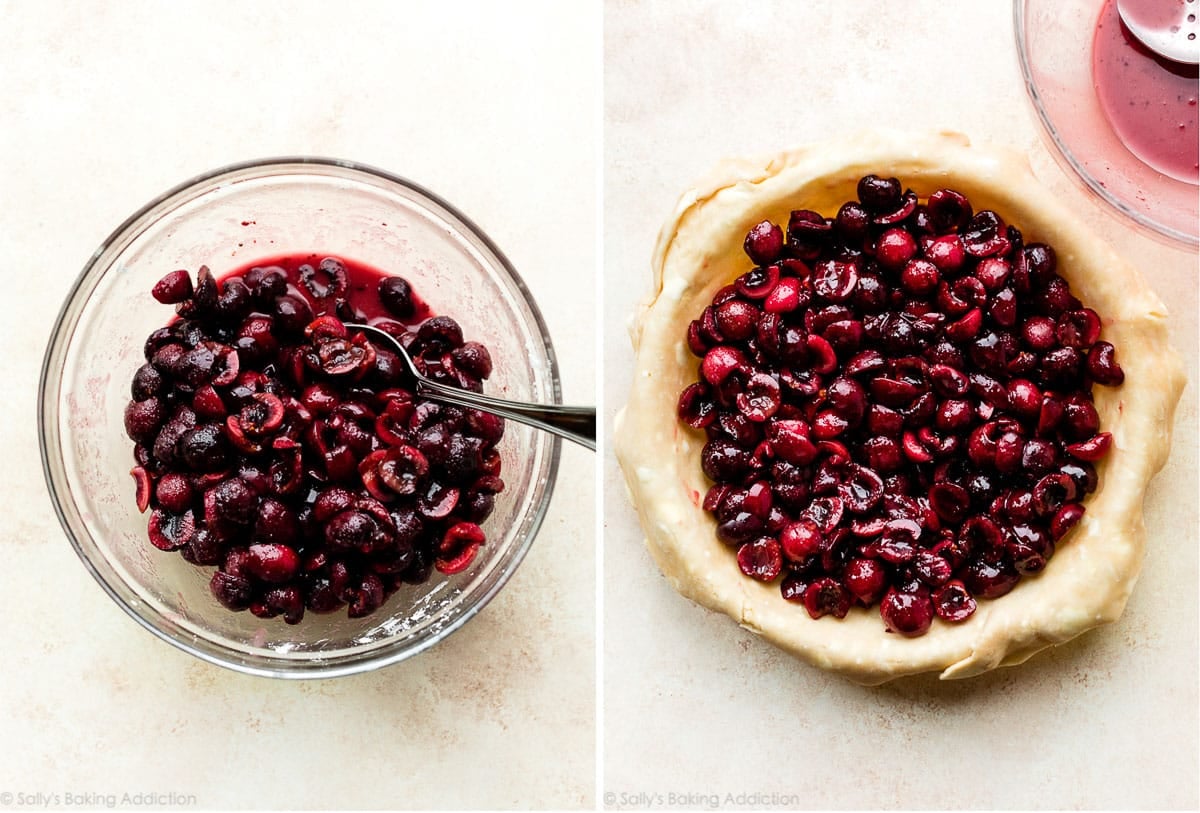
After you combine the filling ingredients together, set it aside and roll out the pie dough for your pie dish. During this time, your filling is already working as the sugar pulls juices from the cherries. Normally I discard all this juice, but it’s where a lot of the cornstarch ends up and that’s what helps thicken the filling in the oven. I use this same method in my blueberry peach pie, and it helps the filling set nicely.
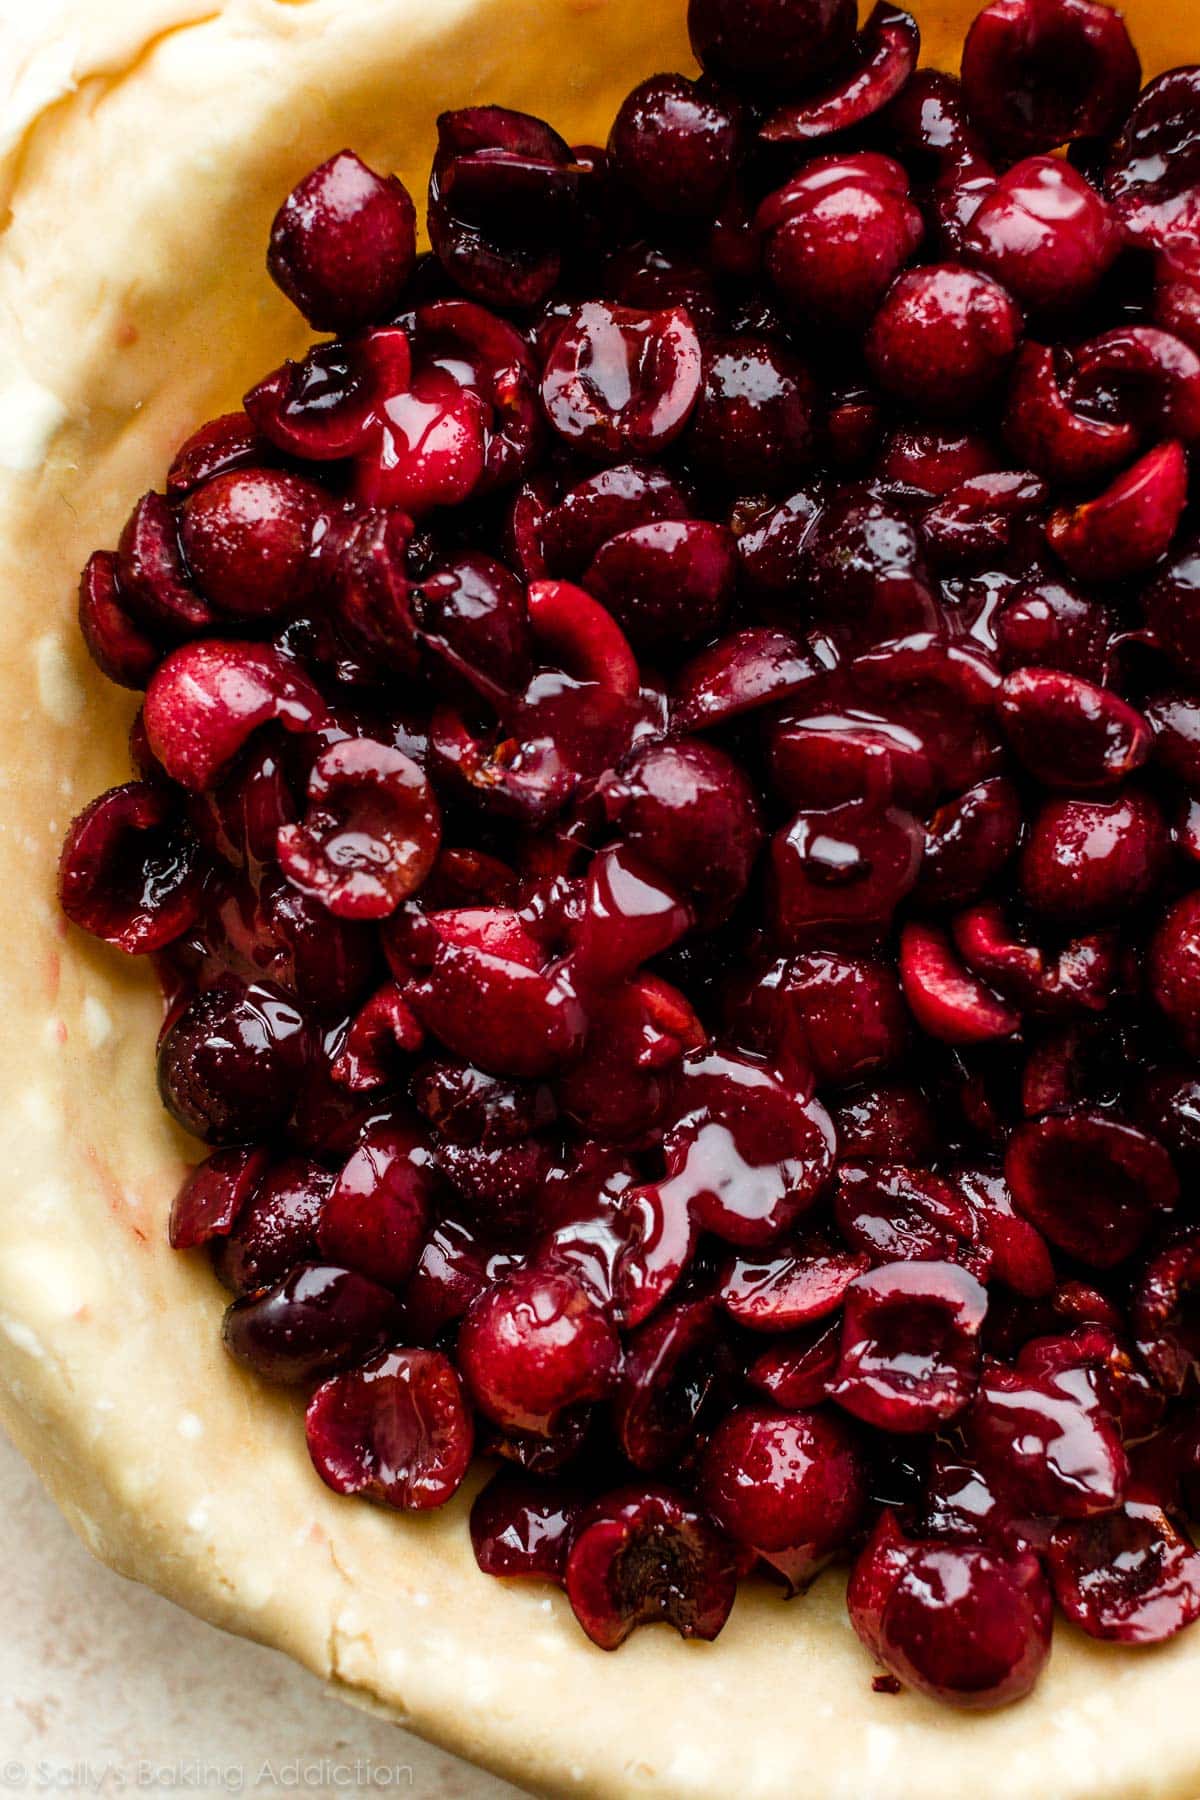
Instead, use a slotted spoon to transfer the fruit into your crust, then pour the leftover juice into a small saucepan. You’ll only have a few Tablespoons, but this juice is pure GOLD as it holds our thickening agent and a lot of flavor. Reduce on the stove over low heat for about 3-4 minutes. Cool for 5 minutes, then pour over the cherries and toss gently (in your pie dough!) to combine.
Here’s the filling in the mixing bowl. You can see all the juices at the bottom. Spoon cherries into the pie dough:
Reduce the excess juice on the stove until it has thickened:
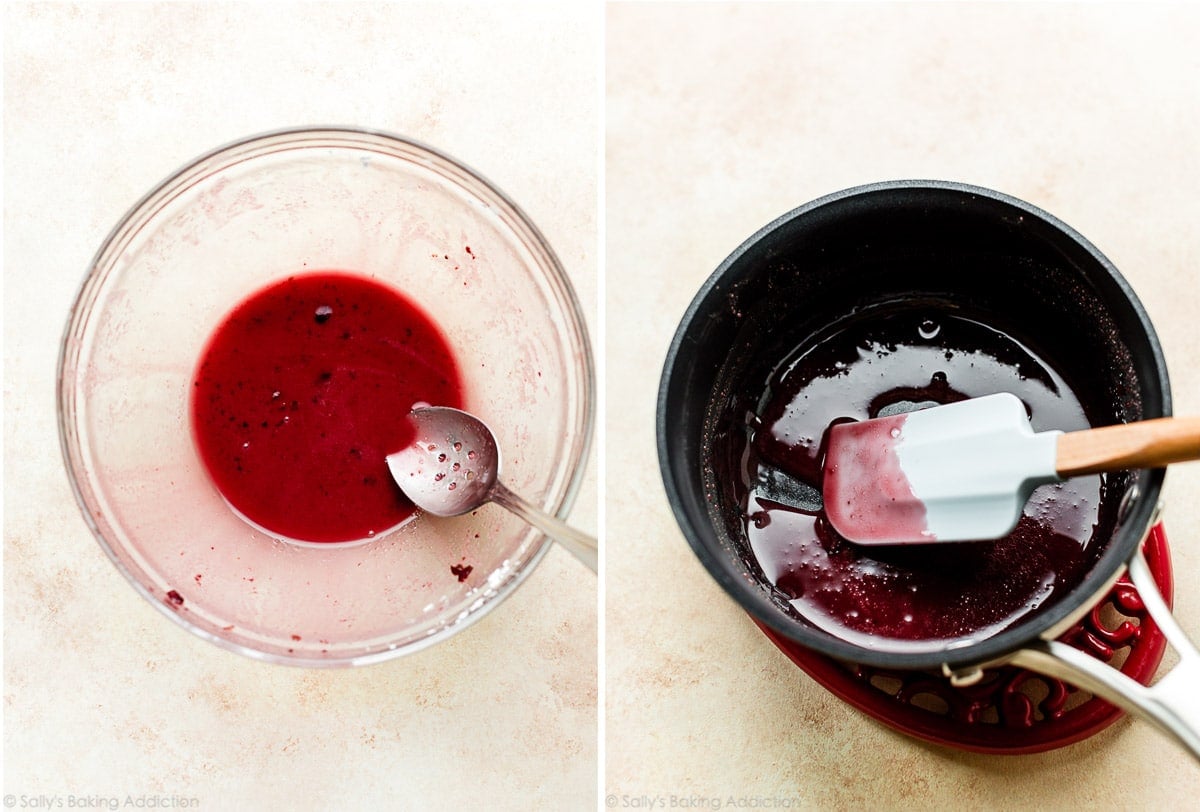
Let it cool for a few minutes, then toss into the cherries. The sugars in the reduced juice will harden and you’ll notice this “juice” become almost caramelized and stringy once it hits those cold cherries. This is NORMAL and totally fine! The “juice” will melt down in the oven, but keep the filling thick.
Don’t Forget the Extras
- Butter: Dot the pie filling with small cubes of butter before applying the top crust. Why? It adds buttery richness and actually helps prevent the formation of bubbles on the filling’s surface. We do the same thing when we make peach pie.
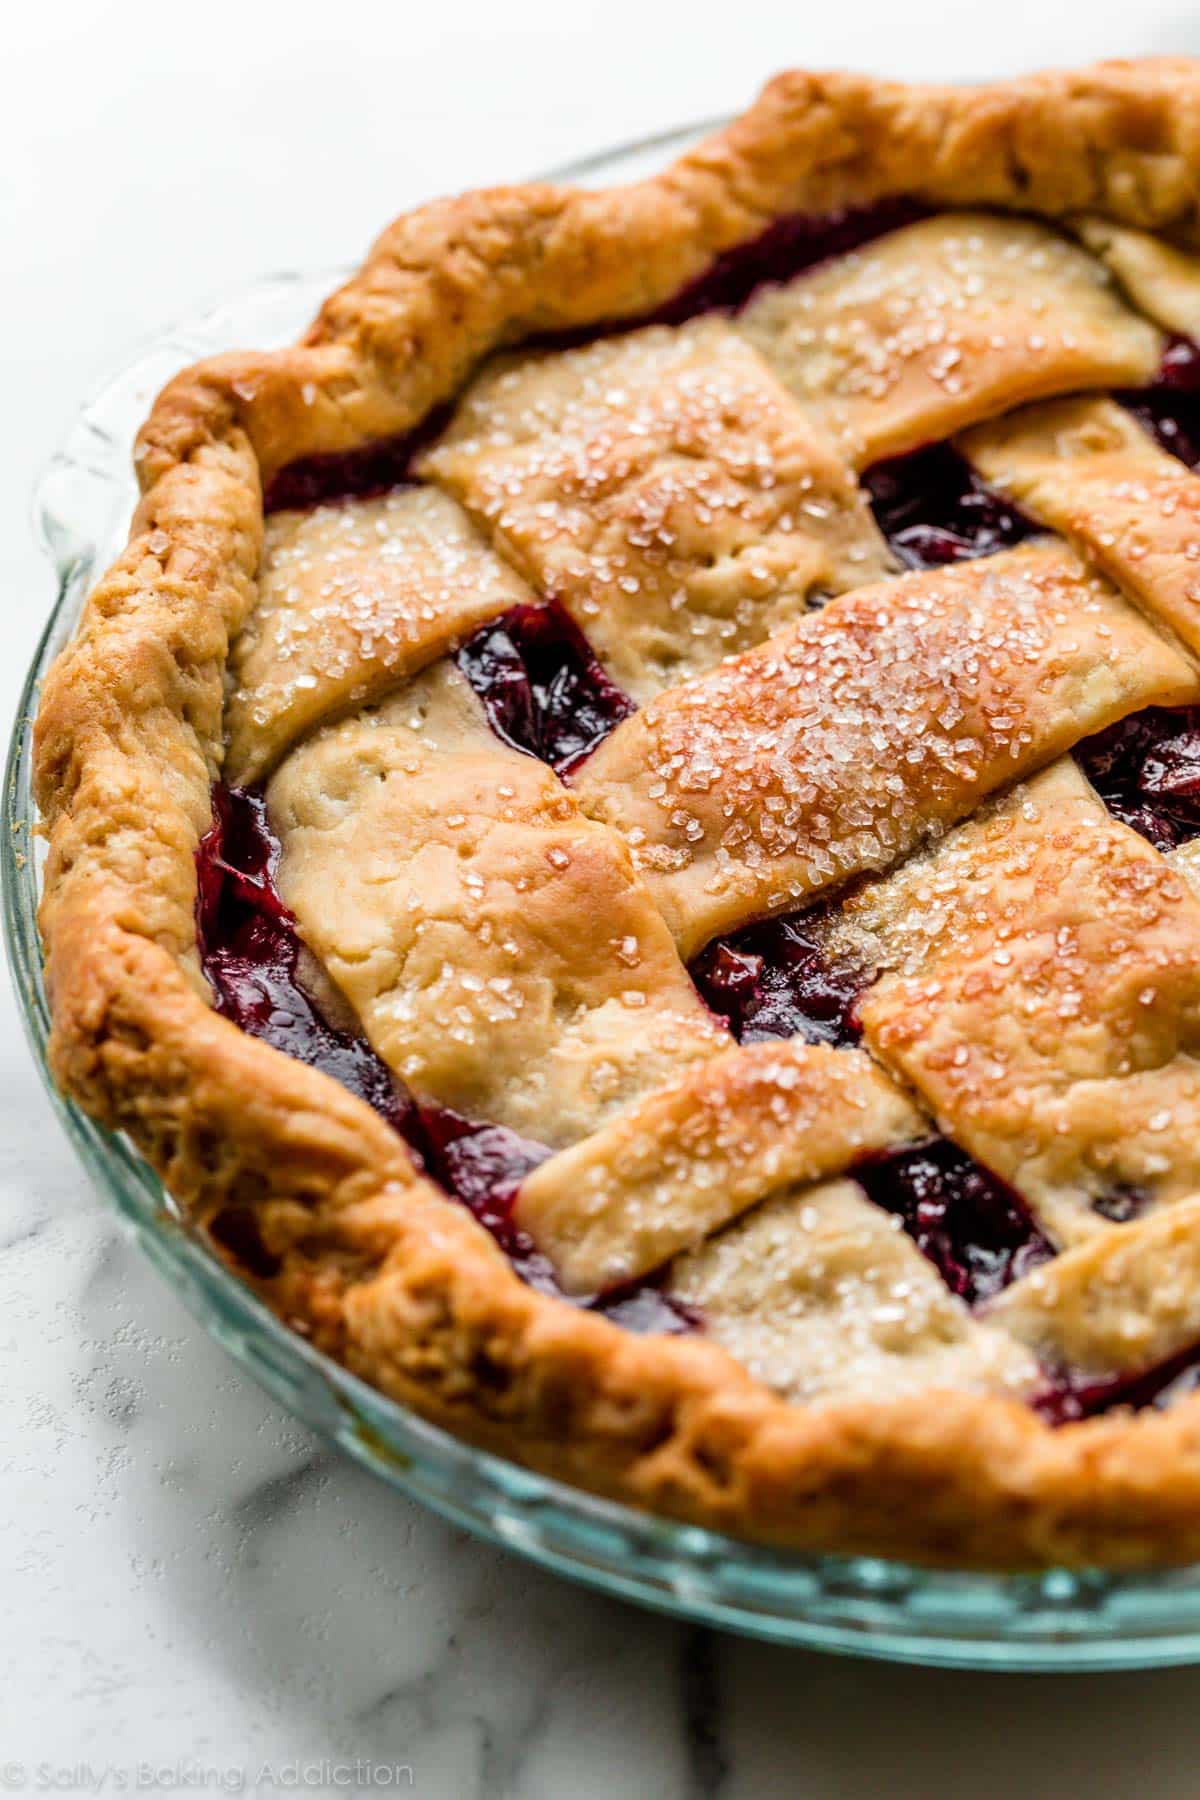
- Egg wash: An egg wash is egg mixed with milk (or water) and you use it pretty much whenever you’re baking pie dough or baking other shaped dough such as stromboli, vanilla biscotti, homemade bagels, choux pastry, croissants, etc. Egg wash promises a crispier crust and helps develop that signature golden sheen. Without it, dough is dull and lackluster.
- Coarse sugar: This is optional, but I love finishing sweet pies with coarse sugar because it adds a little crunch and sparkle. I usually use Sugar in the Raw or these coarse sugar sprinkles, both of which can be found in the baking aisle of major grocery stores.
Lattice Pie Crust
Note that our pie crust recipe yields enough dough for a double crust pie—one for the bottom and one for the top. If you’re new to working with pie dough or need a little troubleshooting, our pie crust tutorial walks you through each step in thorough detail and includes a video, step-by-step photos, and all my tips and tricks for pie crust perfection.
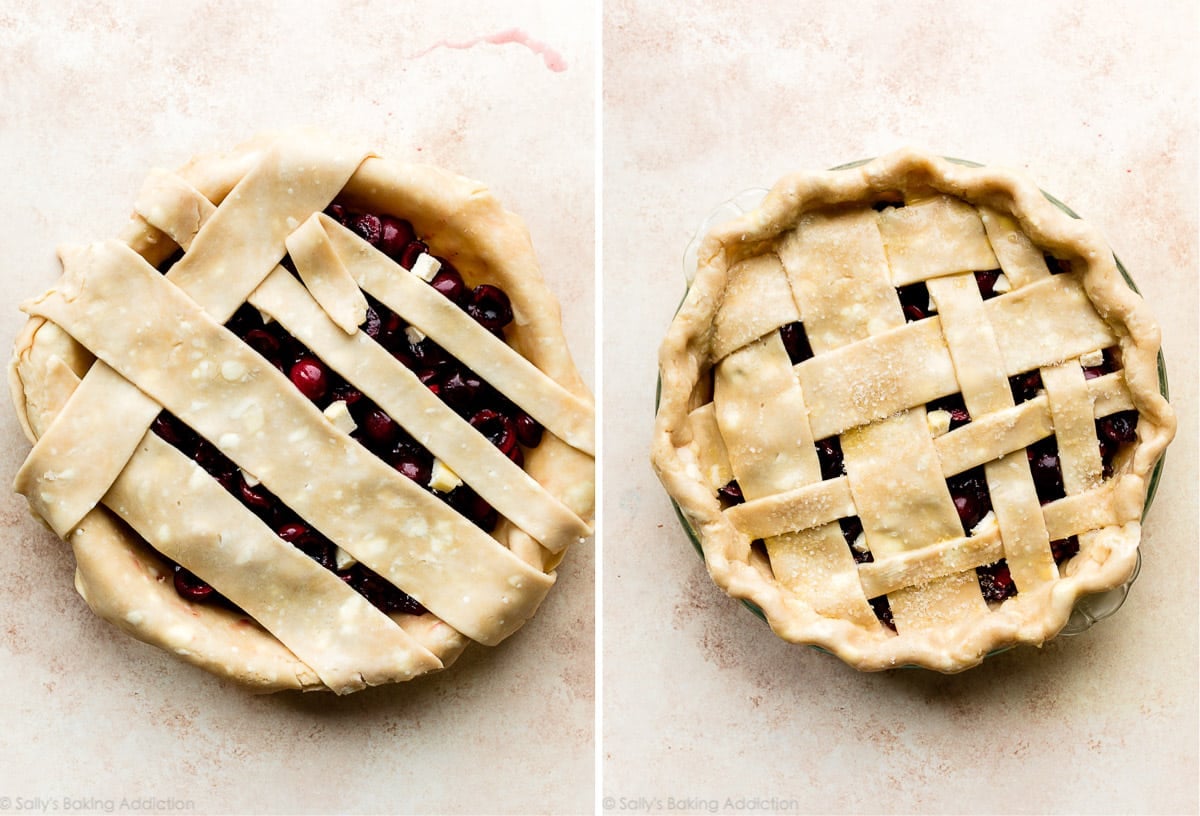
I made a simple lattice pie crust design with thick and thin strips, but decorate the pie however you’d like. Once your lattice is assembled, you’ll want to crimp or flute the pie crust to finish it off. I fluted the pie crust in these photos.
You could even skip the top crust and use the crumble topping from our blueberry crumble pie. Or if you wish to skip the pie dough completely, try these cherry pie bars instead.
Start the Pie at a High Oven Temperature
Why do some pie recipes call for an initially hot oven temperature that you eventually lower? Baking this pie at 400°F (204°C) for 20 minutes helps the pie dough set and activates the cornstarch in the filling (as does heating it on the stove). After that, reduce oven temperature down to 375°F (190°C) to continue baking the pie. We use this same trick when we make blueberry pie and triple berry pie.
Do I Need to Par-Bake The Crust for This Cherry Pie?
Before you begin, let me answer a FAQ we receive on this recipe. You do not need to par-bake or blind bake this bottom pie crust. Reducing the filling’s juice on the stove keeps excess liquid off the bottom pie dough, plus we bake the pie for long enough that the bottom crust sufficiently cooks through. It’s helpful to use a glass pie dish so you can see when the sides/bottom of the pie crust has browned.
See Your Homemade Cherry Pies!
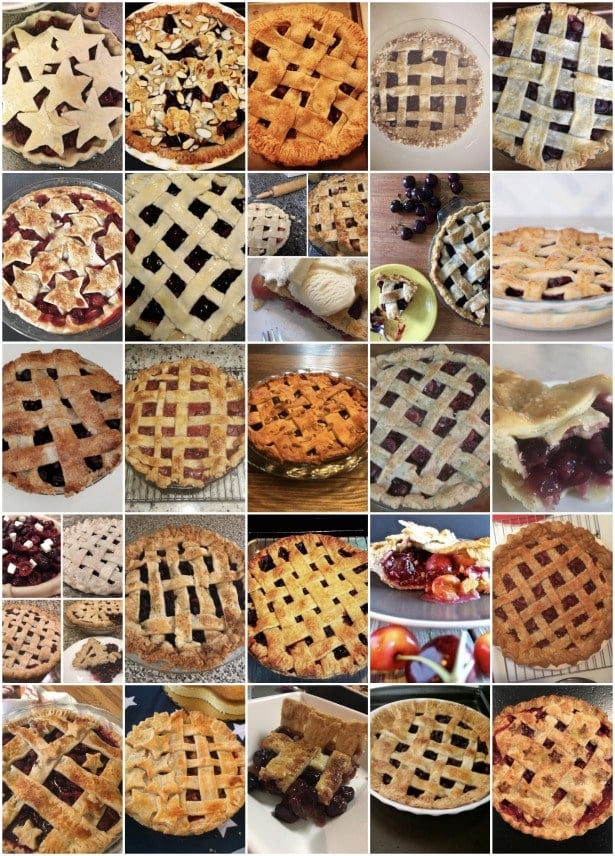
Many readers tried this recipe as part of a baking challenge! Feel free to email or share your recipe photos with us on social media. 🙂 For more pie inspiration, check out our collection of delicious summer pie recipes!
Print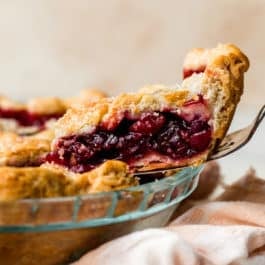
Homemade Cherry Pie Recipe
- Prep Time: 3 hours
- Cook Time: 55 minutes
- Total Time: 7 hours (includes cooling)
- Yield: 8-10 servings
- Category: Pie
- Method: Baking
- Cuisine: American
Description
This homemade cherry pie is perfectly sliceable with a thick almond-hinted cherry pie filling and a golden brown buttery flaky pie crust. The ingredients are exactly the same as when I originally published the recipe in 2017, but quartering *some* of the cherries instead of just halving and reducing some juices on the stovetop both guarantee that the pie filling will set up perfectly.
Ingredients
- Homemade Pie Crust or All Butter Pie Crust (both recipes make 2 crusts, 1 for bottom and 1 for top)
- 4 and 1/2 cups halved & quartered pitted fresh cherries (see note)
- 2/3 cup (135g) granulated sugar
- 1/4 cup (28g) cornstarch
- 1 Tablespoon (15ml) lemon juice
- 1 teaspoon pure vanilla extract
- 1/4 teaspoon almond extract
- 1 Tablespoon (14g) cold unsalted butter, cut into small cubes
- egg wash: 1 large egg beaten with 1 Tablespoon (15ml) milk
- optional: coarse sugar for sprinkling on crust
Instructions
- The crust: Prepare either pie crust recipe through step 5. The pie dough needs to chill in the refrigerator for at least 2 hours before using.
- Make the filling: In a large bowl, stir the cherries, sugar, cornstarch, lemon juice, vanilla, and almond extract together until thoroughly combined. Cover the filling and place in the refrigerator as you roll out the pie dough (or for up to 24 hours).
- Roll out the chilled pie dough: On a floured work surface, roll out one of the discs of chilled dough (keep the other one in the refrigerator). Turn the dough about a quarter turn after every few rolls until you have a circle 12 inches in diameter. Carefully place the dough into a 9-inch pie dish. Tuck it in with your fingers, making sure it is smooth. Use a slotted spoon to transfer the cherries into the crust. Reserve the juice in the bowl for the next step. Refrigerate pie, uncovered, as you reduce the juice in the next step.
- Pour the leftover juice into a small saucepan. Cook over low heat, stirring, until juice has slightly reduced and thickened, about 3–4 minutes. Cool for 5 minutes, then pour over cherries in filling. Do your best to gently toss together—doesn’t have to be perfect. The reduction will harden and thicken as a result of mixing with the cold cherries—this is normal. Dot the pieces of cold butter on top of the filling. Place the pie in the refrigerator while you roll out the top crust.
- Arrange the lattice: Remove the other disc of pie dough from the refrigerator. Roll the dough into a circle 12 inches in diameter. Using a pastry wheel, sharp knife, or pizza cutter, cut the dough into strips—for the pictured pie, I cut four strips 2 inches wide and four strips 1 inch wide. Carefully thread the strips over and under one another, pulling back strips as necessary to weave. See this post on How to Lattice Pie Crust for help with this step. Press the edges of the strips into the bottom pie crust edges to seal. Use kitchen shears or a small paring knife to trim off excess dough. Flute or crimp the pie crust edges.
- Using a pastry brush, lightly brush the top and edges of the pie crust with egg wash. Sprinkle the top with coarse sugar, if using. Place the pie in the refrigerator for 20–30 minutes while your oven preheats.
- Preheat oven to 400°F (204°C).
- Place the pie onto a large baking sheet and bake for 20 minutes. Keeping the pie in the oven, reduce the temperature to 375°F (190°C) and bake for an additional 30–40 minutes or until the top crust is golden brown and the filling juices have been bubbling up around the edges or through the lattice/vents for at least 5 minutes. *After the first 20 minutes of bake time, I recommend placing a pie crust shield on the crust’s edges to prevent it from over-browning too quickly.*
- Remove pie from the oven, place on a cooling rack, and cool for at least 3–4 hours before slicing and serving. Filling will be too juicy if the pie is still warm when you slice it.
- Cover leftovers tightly and store in the refrigerator for up to 5 days.
Notes
- Make Ahead / Freezing Instructions: There are a couple ways to make this pie ahead of time. Prepare the pie in full 1 day in advance—after pie cools, cover tightly and keep at room temperature. The pie crust dough can also be prepared ahead of time and stored in the refrigerator for up to 5 days or in the freezer for up to 3 months. Baked pie also freezes well for up to 3 months. Thaw overnight in the refrigerator and allow to come to room temperature before serving. Prepared filling (with juices) can also be frozen up to 3 months, thaw overnight in the refrigerator before spooning into dough and reducing the juice.
- Special Tools (affiliate links): Cherry Pitter | Glass Mixing Bowl | Rolling Pin | 9-inch Pie Dish | Pastry Wheel or Pizza Cutter | Pastry Brush | Pie Crust Shield | Cooling Rack
- Cherries: You need about 1.5 lbs of cherries for this recipe. Cut half of the cherries into halves and the remaining half of cherries into quarters. Using a mix of halved and quartered cherries helps keep the baked filling in tact. You can use any variety of cherries. I use all dark sweet cherries in the pictured pie, but also enjoy using a 50/50 combination of dark sweet and Rainier cherries. Feel free to use all Rainier cherries if desired. If using sour cherries, increase sugar to 3/4 or 1 cup depending how sweet you like your pie. You can also use frozen cherries. Halve/quarter them while they’re frozen, then toss with other filling ingredients as instructed. Reduce the juices as instructed as well. Bake time may be a few minutes longer.


Reader Comments and Reviews
I made this pie Friday (came out beautifully) let it cool and refrigerated it so I could make my second pie today –coconut cream–( requests for a Superbowl party tomorrow)
What I am trying to find out– how can I reheat this cherry pie tomorrow afternoon before bringing to the superbowl party– what are your recommendations? (Or your reader’s recommendations?)
Thank you so much!
Hi Mary! You can place the pie (covered) in a 300°F (149°C) for 15 minutes or until warmed before serving.
To begin, follow the instructions on both the pie recipe and the suggested crust. Crust was PERFECT! Due to winter season, only had access to sweet dark cherries. Made a test run to make two pies, the first being the test bed pie made as directed. Results: Dark Cherries only caused the pie to be soupy and the pie wasn’t to my liking. On pie #2, sautéd the cherries in a sauce pan and reduced the sugar adding 1/3rd cup sugar, then approx 1/8 cup to top of that (still using 1/4 cup cornstarch). Cooked this mixer on top of stove slowly. At same time, cooked down 2 cups of organic dried cranberries mixed with approx, 1/4 cup orange juice. As this mixture came to a slow boil, added approx. 3 Tablespoons Grand Mariner , and zest of one orange. When both mixtures were cooked, combined them both, and squeeze 1/2 orange into the mixture. Poured this mixture into pie crust (this was completely set up no runny liquid),made the lattice and baked as instructed. This pie turned out PERFECT! Had the right amount of sweet and tart that I could not get with only sweet dark cherries.
I have never attempted homemade anything but this was very easy to follow and according to my family was off the charts great!! I made the homemade crust as well! So good!!
I made this for my knitting group and they loved it and so did I. Thank you for sharing!
Despite your emphasis to not use frozen cherries, I did it anyway. Generally turned out fine. My cherries let off a lot of juice as they thawed, so I drained it off (and that is a bonus good drink). By the time I mixed up the filling, there ended up still being a fair amount of juice in it, so I should have let them thaw longer to drain off more juice. I drained off liquid after having the filling mixed up overnight, although I could have left a bit more in. The thawed cherries were a bit harder to try to halve, it would be easier to do that while frozen. I added a little bit more cherries since they were dense and wish I had added more because my filling was pretty thin. But overall, the pie turned out well. I did egg wash the pie crust before filling and no sogginess at all.
Sally, thank you for the step-by-step. It is one of the things that makes your blog so valuable! I made this cherry pie recipe and it was great. A few tweaks: I only had frozen tart cherries that I had picked over the summer (the U-pick place has a pitter, thank goodness!). So, I did two things to keep the pie from getting a soggy bottom. First, I followed your steps for blind-baking the crust (which I made from your recipe). Then, I drained the cherries and simmered them with the other filling ingredients + a little bit more sugar as suggested, until just slightly thickened. After cooling, I put them in the blind-baked shell and baked as directed. It was a big hit at Thanksgiving. Everyone wanted the cherry pie and raved about it! Thanks again.
This recipe is amazing! I used a little less sugar as I made the filling with dark red cherries, and it was delicious!!!!
This recipe is incredible. I am living in bosnia where cherries are very popular and they are very fussy about cakes and this was a HIT
Thank you
I always bake a pie for my contractor when he is doing a project at my house. This time he requested cherry! I found your recipe, and he loved it he requested another. Since, he raved about this pie I baked one for my family. This will definitely be my go to pie crust and cherry pie recipe.
This recipe is easy to follow and the pie turns out exactly as it looks. I wish I had used both sweet and sour cherries. I used only sweet so there was no real depth to the flavor of the pie. The almond extract brings out even more sweetness- and was not a good fit for my families flavor profile. I hand pitted the cherries and it took all of 20 mins. to get 4.5 cups worth. Glad I didn’t run around town searching for a Cherry Pitter. If you like Cherry pie this one is a winner.
I made the filling (but not the crust – I cheated and used store bought) and the flavor is amazing!
I saw some comments regarding concerns over a soggy bottom crust. Borrow an old gluten free baking tip from me – coat the bottom crust with the egg wash before adding the filling and use a metal pie dish to bake it. I use a durable “USA Pan.”
The egg wash will set once it hits 160°F creating a semipermeable film over the unbaked bottom crust to prevent sogginess. The metal pan conducts heat faster than glass or earthenware and further prevents problems – and bakes faster.
I cooked my filling to get rid of the cornstarch flavor and texture and if anyone does so, either add more water after the cornstarch is fully dissolved or reduce the amount of cornstarch as this thickens quite a bit. BUT, the flavors are unaffected. I also added a dash of cinnamon/clove mix. Makes the filling’s flavor really pop.
Definitely a keeper!!! Thanks.
I have never baked a pie. Ever. I’m the typical “guys don’t bake” sort of person. But I picked some cherries from a neighbor’s tree in Michigan’s Upper Peninsula, and decided to actually do something with them. I found this recipe and followed it with careful exactitude. Wow. This is the best cherry pie I’ve ever tasted. It turned out perfect in every way. I’m no longer the stereotypical “guy who doesn’t bake”. I’m now a legend in my own mind.
First time I made this pie I used cake and pastry flour and it came out fantastic. Second time I used all purpose flour and had the worst time rolling it out. I used the vodka and water for the pie crust and followed your recipe and tips to a tee! I could not roll the dough right out of the fridge. It was way too hard! The second pie I left the crust overnight wrapped in the fridge before rolling it out in the morning. It rolled out better. The first pie I rolled it out after two hours of chilling. Any suggestions? The filling is amazing. The first one everyone said should win a prize! I consider myself an intermediate pie maker so I am thinking a beginner would be ripping their hair out! Lol
Hi Arlene! I’m happy to help. Did you perhaps add too much fat or flour to the 2nd pie crust? If the pie dough is too hard, there was either too much flour or too much fat. The shortening and butter are solid when cold, so if there was too much– the dough would be too stiff. Spoon and level with all-purpose flour and stick with around 1/2 cup or 10 Tbsp of ice cold liquid.
I will make this recipe again and be sure to measure exactly. I had 1/4 cup chilled vodka and 1/4 cup ice water, but I felt I didn’t need the entire half cup of liquid as the dough would have been too sticky. I will make it again in the future using cake and pastry flour as I liked that crust better. Thank you!
I can’t speak to the pie crust recipe, because I had some leftover shortcrust pastry from a different recipe that I was thinking to use up (it was very similar to this one, though, so I imagine the effect would have been the same). The filling, however, came out AMAZING. The almond extract with the cherries is a WINNER, and the ratio of cherries to juice was just right. I erred closer to 4 1/2 cups of chopped cherries, and I did also add a few tablespoons of almond flour to the filling just to amp up the almond flavor without adding more extract–that stuff will knock you over! I also ran out of cornstarch, so I subbed some all-purpose flour for the rest of that. I did end up leaving it in a bit longer than prescribed, because my decorations on top just weren’t browning to my liking, despite using the wash… but the end result was worth it, because the filling set really well, the flavor was dead on, and the overall effect was delicious. Would definitely make this again!
I just made this for my folks. It was a huge hit. The only change I made was to cut back on the sugar a bit because the cherries I was using were so sweet. It is definitely a pie that needs to cool before eating. It looked like something out of a magazine.
Thanks Sally!
It tirned out perfect and my family loved it!
Thank you so much for doing the metric conversion, I always struggle with volume measurements like cups and ounces. Since I didn’t have a pie dish, they’re not easy to come by in Germany, I used a cheesecake dish with a 12 Inch diameter. Doubled everything and it worked very well! I also used all margarine instead of shortening and butter and added a bit more water. This is a fantastic recipe, very much appreciated!
Great pie! The Norpro deluxe cherry pitter( I found it at Ace) is a brilliant pitter. It self loads and has a spring loader arm; definitely worth it for those who have access to a cherry tree. Thanks for the recipe, it’s delicious!
Such a fabulous recipe, the pie turned out so good!! Made it on the 4th with cherries we picked fresh on Monday. I and am a little short on cherries so I did about 3 cups cherries and 1.5 cups fresh blueberries. Can’t wait to see how this one turns out!
Made this pie last night! Brought a piece to work for a co-worker and she said it was AhhhMazing!!! Just found your sight and love what I’m seeing. Thank you for this awesome recipe, I plan on making some of your other pies as well!
This is the best cherry pie I’ve ever made, the crust is so buttery and flakey while not being dry at all. The filling is to die for and all in all this pie is probably my greatest achievement to date. Thank you so much for the recipe and really easy pastry guide you goddess !!
So easy so amazing!! The Perfect Pie Crust was just that perfect!!!
I love cherry pie and this one is very delicious, thank you for the recipe.
Can I blind bake the base crust in this recipe? I only have a ceramic dish, not glass and have never made a pie that didn’t end up soggy!
I’ve made the cherry filling with fresh cherries, but as I had to leave it overnight there is so much juice now.
Should I just give it a go as is and see what happens??
Hi Jenny! You can blind bake the crust to ensure that it won’t be overly soggy. Drain the juice a bit before adding to the pie crust.
Hi, I have a couple suggestions for the dreaded soggy bottoms on pies that have worked for me for many years.
1. If using frozen fruit be sure to defrost it and cook with your sugar and thickener on your stovetop for about 15 minutes before you put it in the pie shell.
2. If it is a fruit pie brush your bottom crust with a thin layer of a complimentary jam or preserve before adding the filling. It can be the same flavor or something else you think would go well.
3. Make sure the pie is cold before it is baked, and
4. Bake the pie on a cookie sheet.
These simple steps have helped me avoid soggy bottom crusts. Hope they help your readers too.
These are so very helpful! Thank you so much for taking the time to share, Robin.
This is an excellent recipe! To combat soggy crust, make the pie and freeze it before baking. When you’re ready for a fresh pie, pull it out of the freezer and put directly in the oven and bake it as you would any store-bought frozen pie. I’ve done this for years and it works fantastic! Plus, your house smells like fresh pie when baking! YUM!
Especially handy to make holiday pies ahead of time, it eases the crunch of holiday baking.
Blind bake the crust and then brush with egg wash which will seal the crust and help prevent sogginess. Give the crust a few more minutes after the egg wash to let it dry, letting it just sit in the cooling over will be fine.
I made it for Christmas and it came out very good. The party I brought it to everyone loved it and it got eaten up really quickly. I will need to make it again.
I shared the recipe with some friends so they can also make it.
Made it today! First cherry pie ever. It looks good-my lattice was not perfect but not bad either. Luckily I have a lot of boys in my house who don’t really care what the dessert looks like-as long as its tasty!
It took a couple of tries, but I finally nailed this recipe! It’s SO delicious. The almond extract and the citrus are amazing – I LOVE this recipe. Thanks for the hard work, Sally. Recipe testing makes all the difference! And thanks for working so hard during your pregnancy so you can keep posting during your maternity leave, I don’t know what I would do without you this fall!
Made this for my family today and they loved it! I’ve always felt all butter crusts are the way to go… but I decided to just follow your recipe and not make any substitutions – delicious!! The almond extract also adds an interesting flavour to the pie that I actually really enjoyed. Great recipe, definitely one for the keeps pile. 🙂
This pie was absolutely amazing!!! I just love cherry with almond flavor, so summery and sweet! Also, I must say that I will never use a different pie crust recipe again! This one was so perfect, none of the other crusts I’ve tried even come close. And I’m pretty proud of myself with the top crustof this pie. I’ve never been able to get it to look good, and this time I did so well (if I can pat myself on the back lol)
Hi Sally, I’ve tried so many of your recipes and love them all! I made the pie and it was delicious, however, the coarse sugar on my crust burned a little. I followed the recipe exactly and the baking times you gave. Don’t know why this happened.