

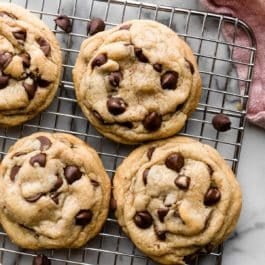
With 30 million page views and counting since 2013, these super soft and chewy chocolate chip cookies are the most popular cookie recipe on my website. Melted butter, more brown sugar than white sugar, cornstarch, and an extra egg yolk guarantee the absolute chewiest chocolate chip cookie texture. And you don’t even need a mixer!
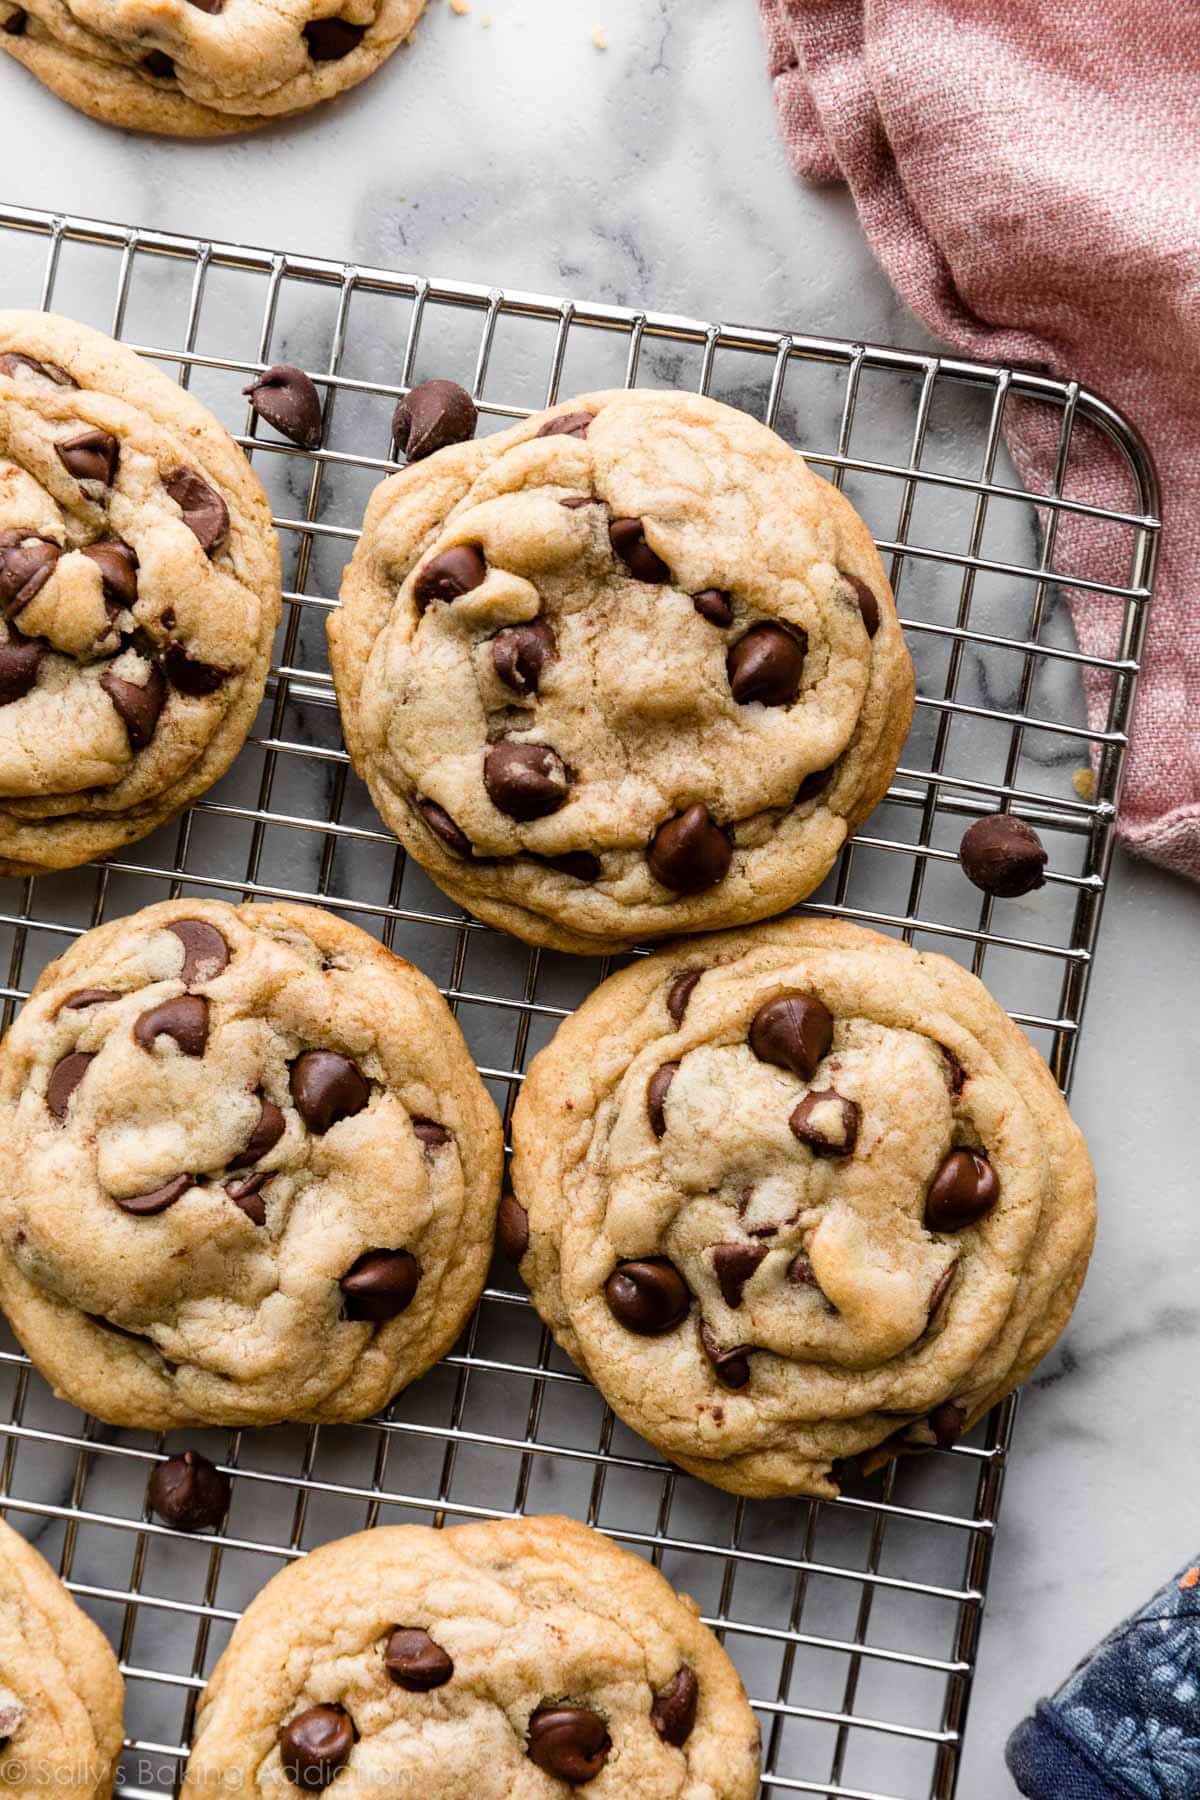
I originally published this recipe in 2013 and have since added new photos, a video tutorial, and more helpful success tips. This recipe is such a fan (and personal) favorite that I included it in my New York Times best-selling cookbook, Sally’s Baking 101.
One reader, Adrienne, commented: “These are the best cookies I’ve ever had. Incredible. Don’t cut corners or you’ll miss out. Do everything she says and you’re in for the best cookies of your life. ★★★★★“
There are thousands of chocolate chip cookies recipes out there. Everyone has their favorite and this one is mine. Just a glance at the hundreds of reviews in the comments section tells me that this recipe is a favorite for many others too! In fact, if you asked me which recipe to keep in your apron pocket, my answer would be this one. (In addition to a classic cut-out sugar cookies and flaky pie crust, of course!) Just read the comments on a post in our Facebook group. These cookies are beloved… and, a warning: they disappear FAST.
Why Are These My BEST Chocolate Chip Cookies?
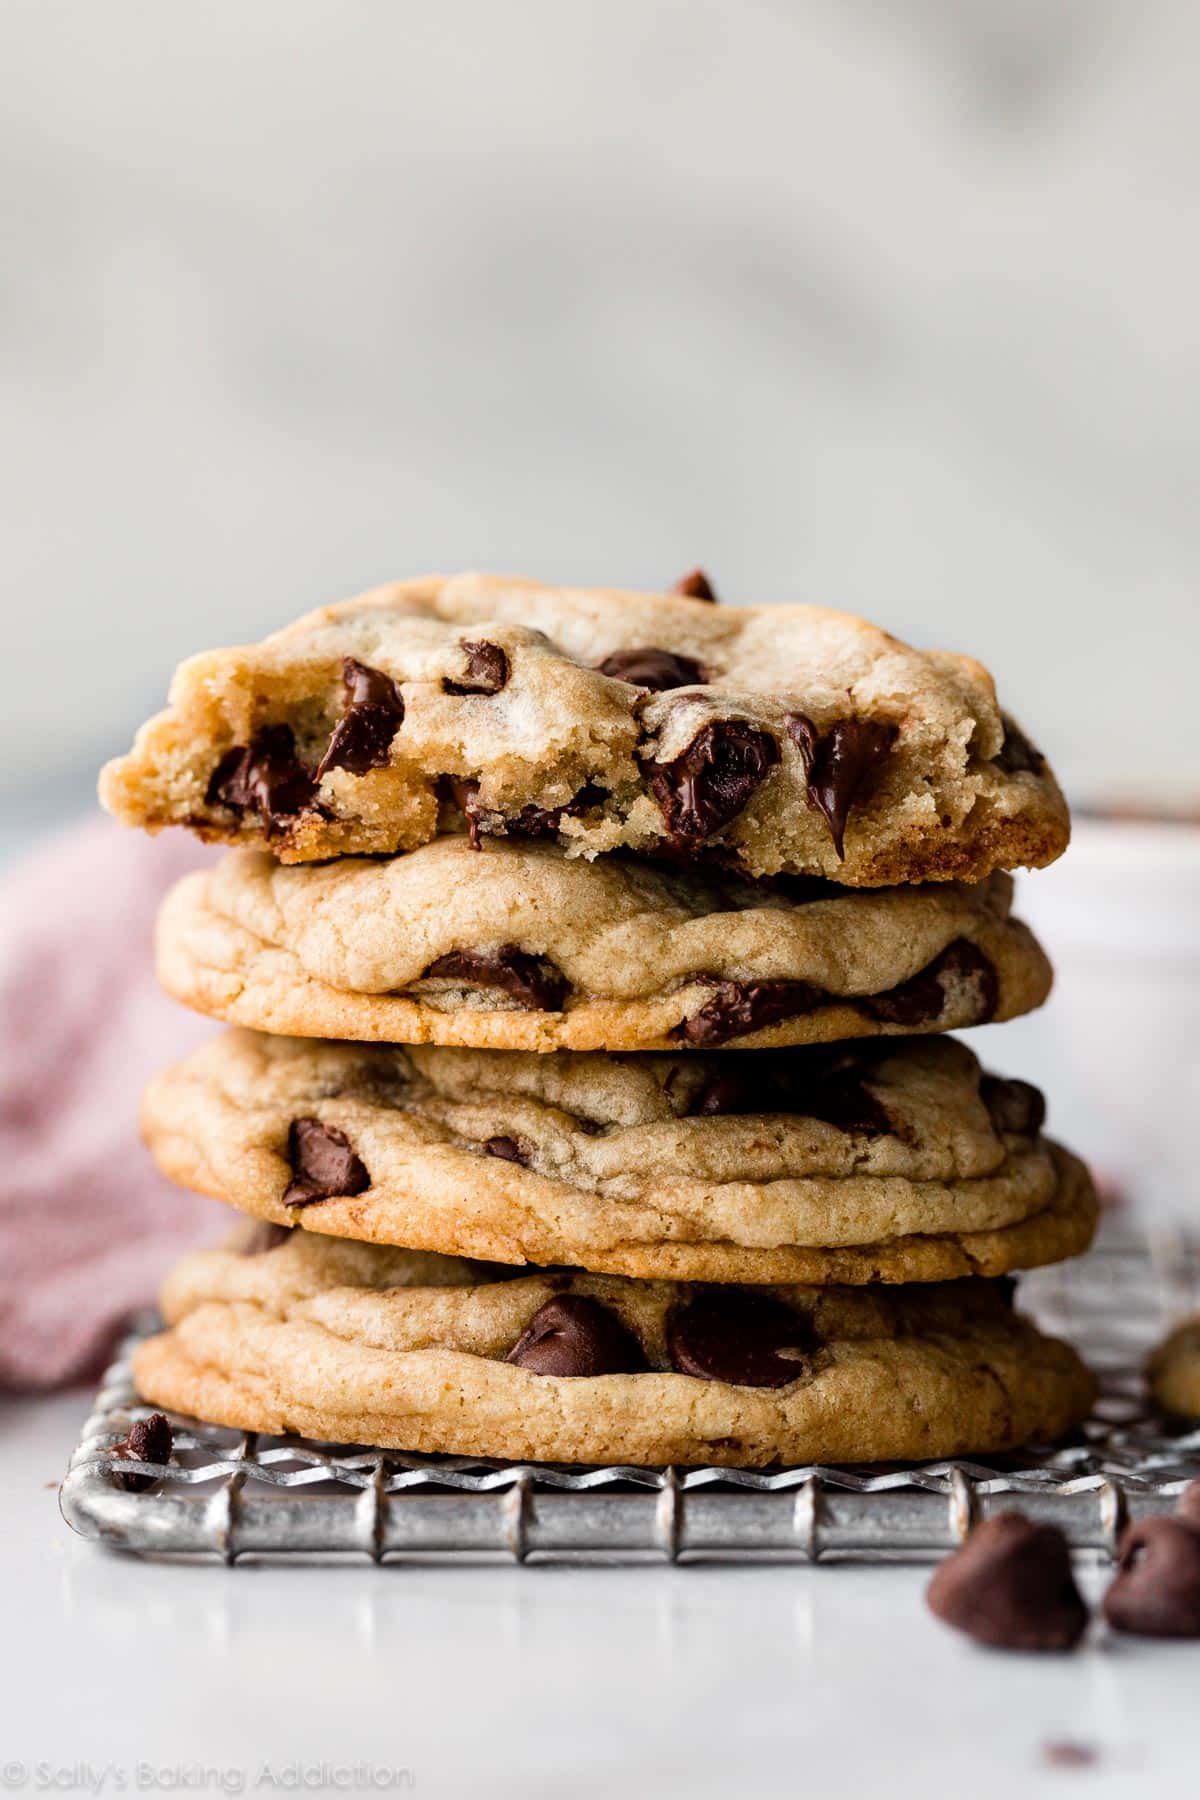
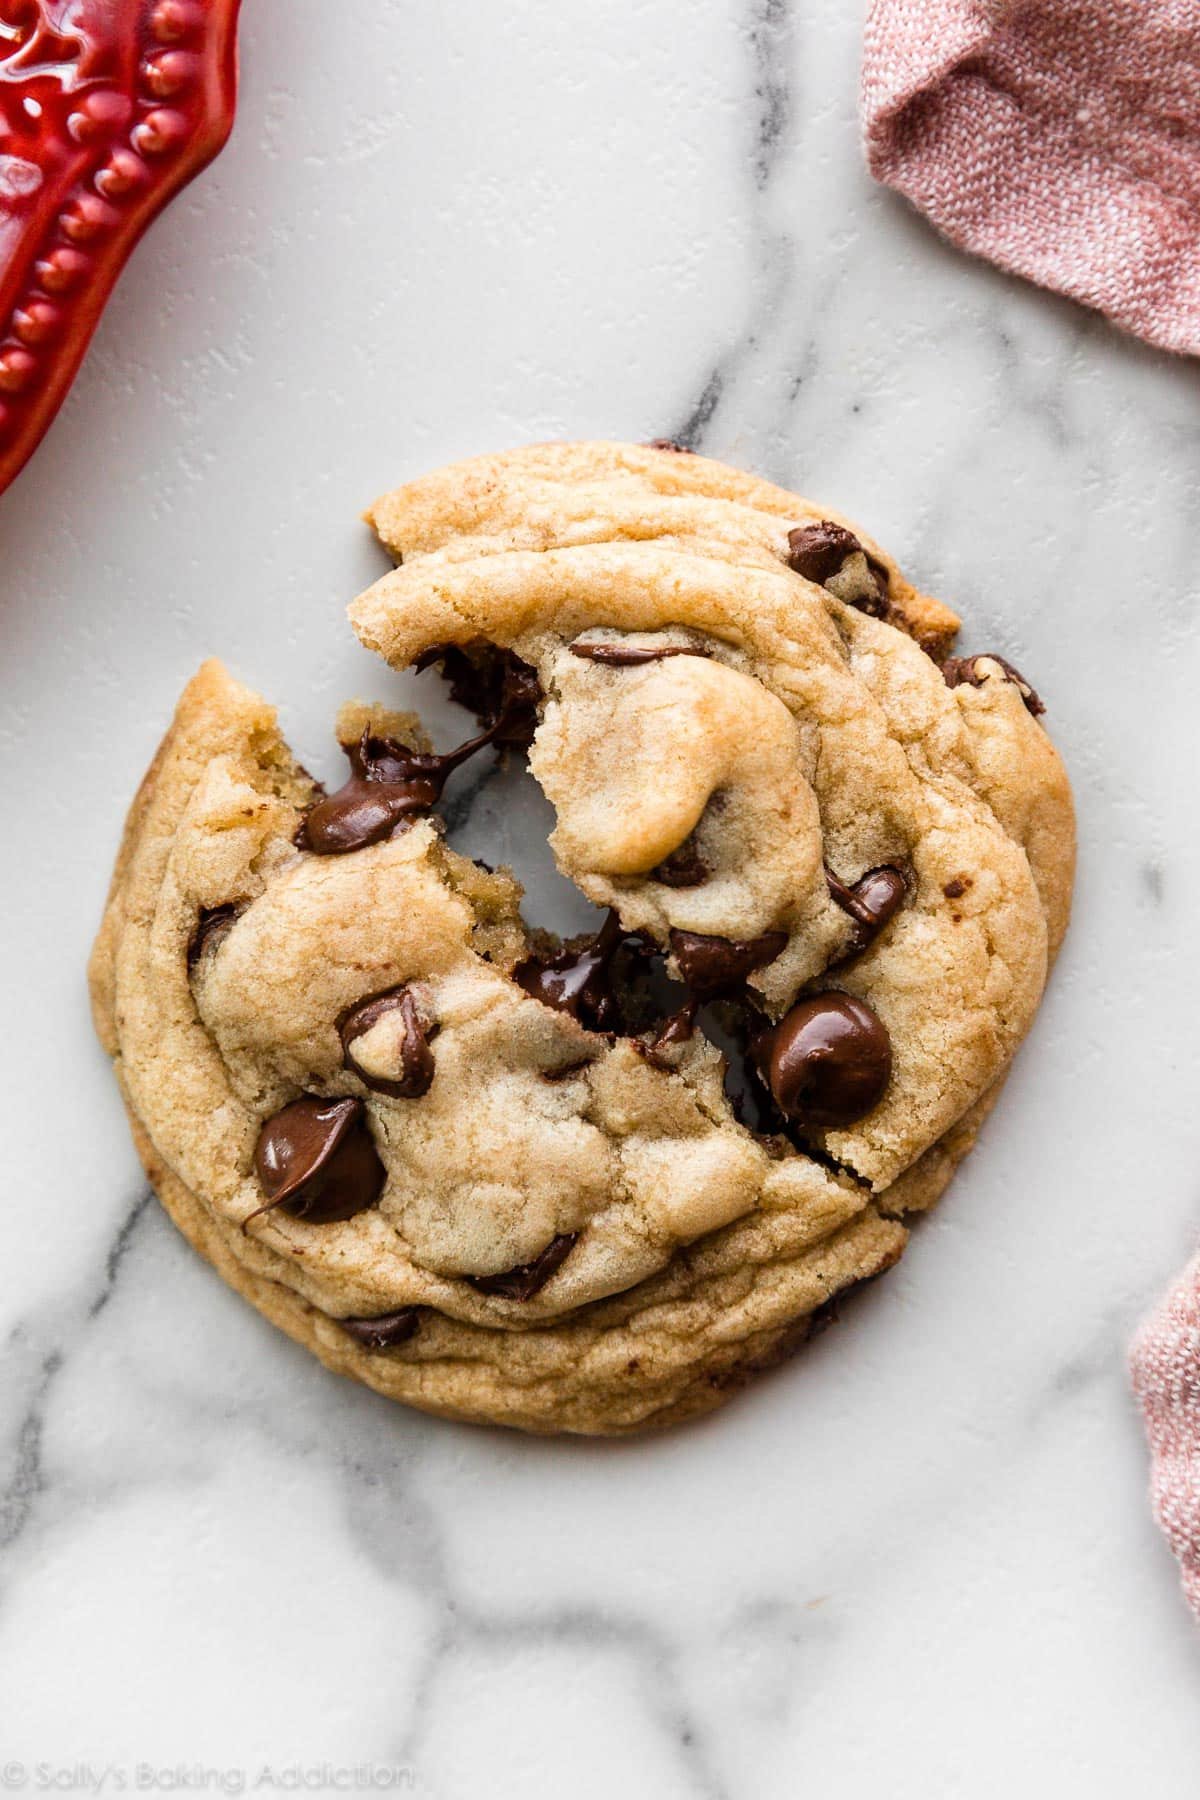
- The chewiest of chewy and the softest of soft.
- Extra thick just like my favorite peanut butter cookies!
- Bakery-style BIG.
- Exploding with chocolate.
I’ve tested this cookie recipe over and over again to make sure they’re absolutely perfect. I still have a big space in my heart (and stomach) for these soft chocolate chip cookies. Today’s recipe is similar, but I increased the chewiness factor.
One reader, A.Phillips, commented: “Look no further. This is it. This is the perfect cookie recipe. Follow her instructions exactly and the cookies will be chewy and amazing. … These are the most perfect cookies I’ve made and I’ve tried at least 20 different recipes. ★★★★★“
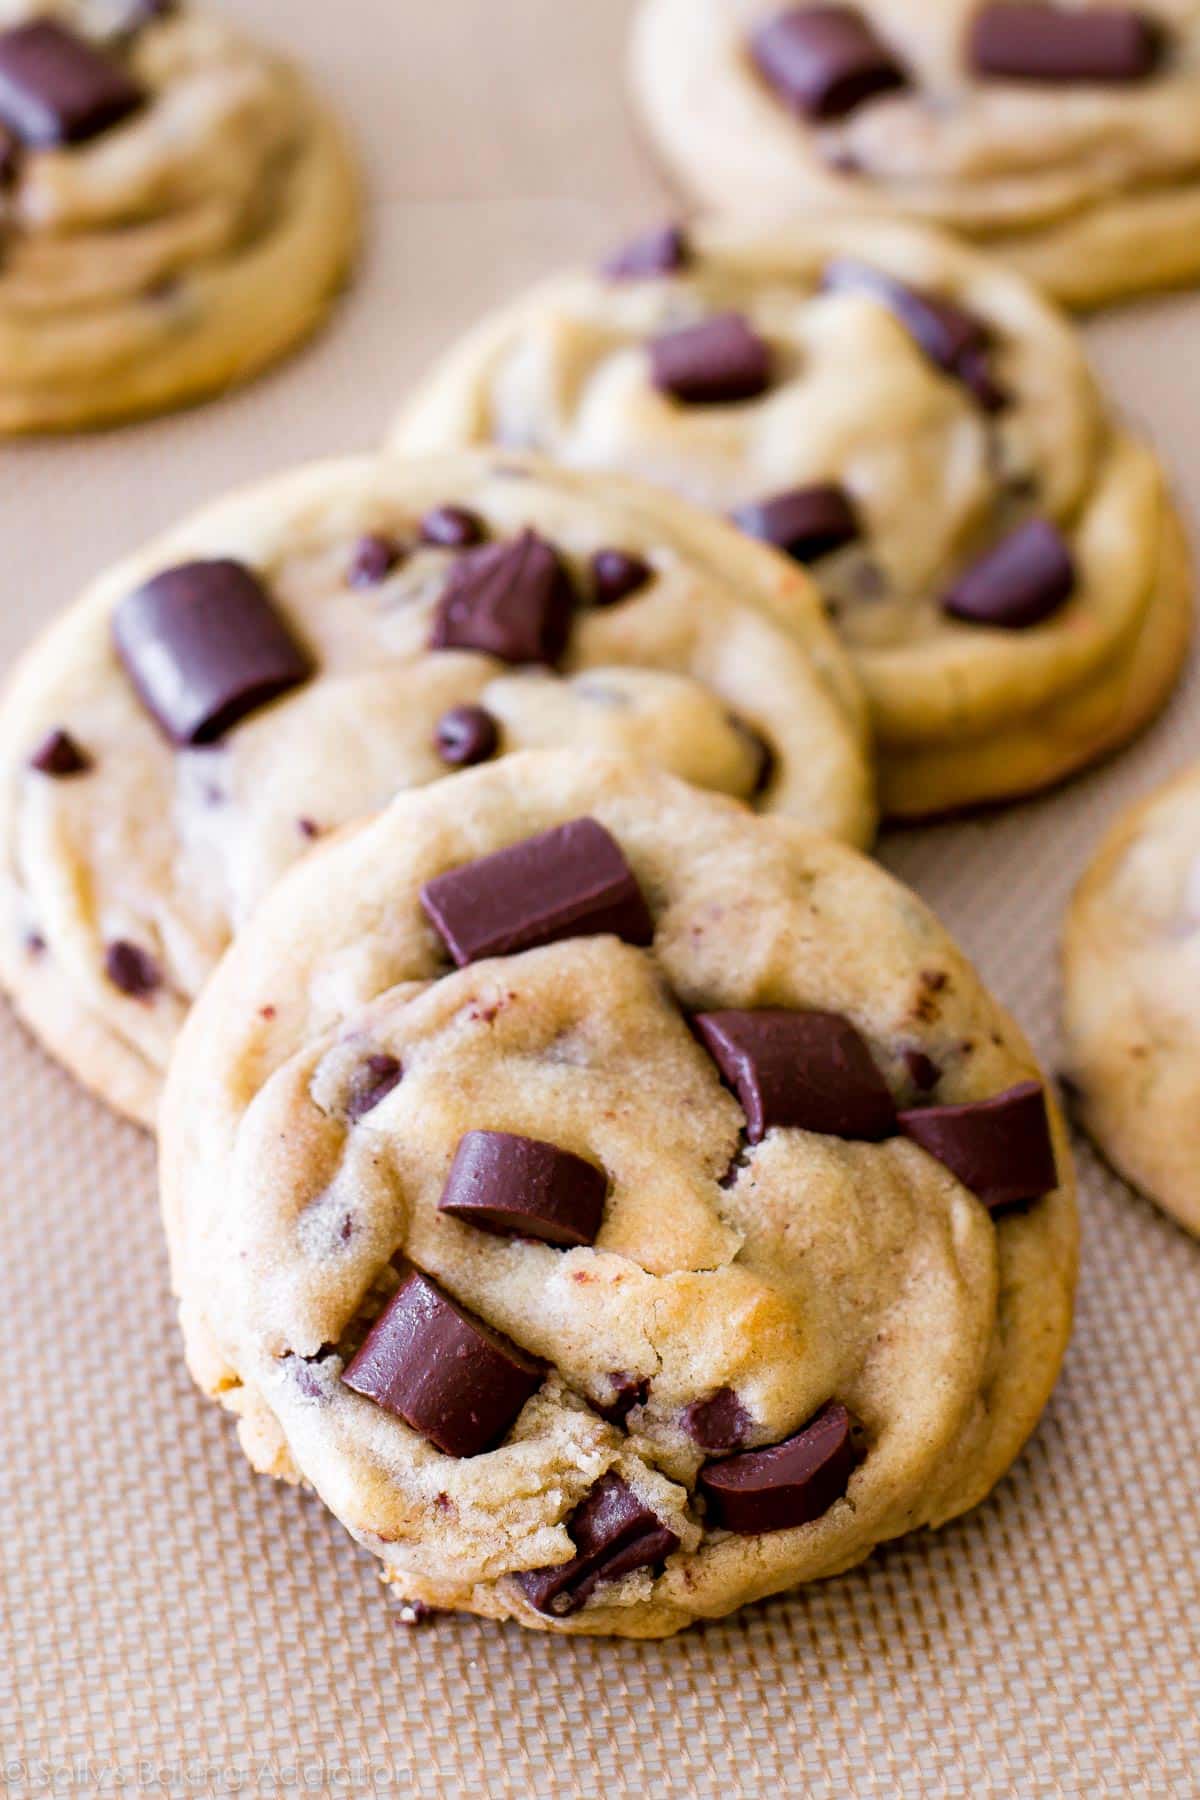
You can make them with chocolate chips or chocolate chunks.
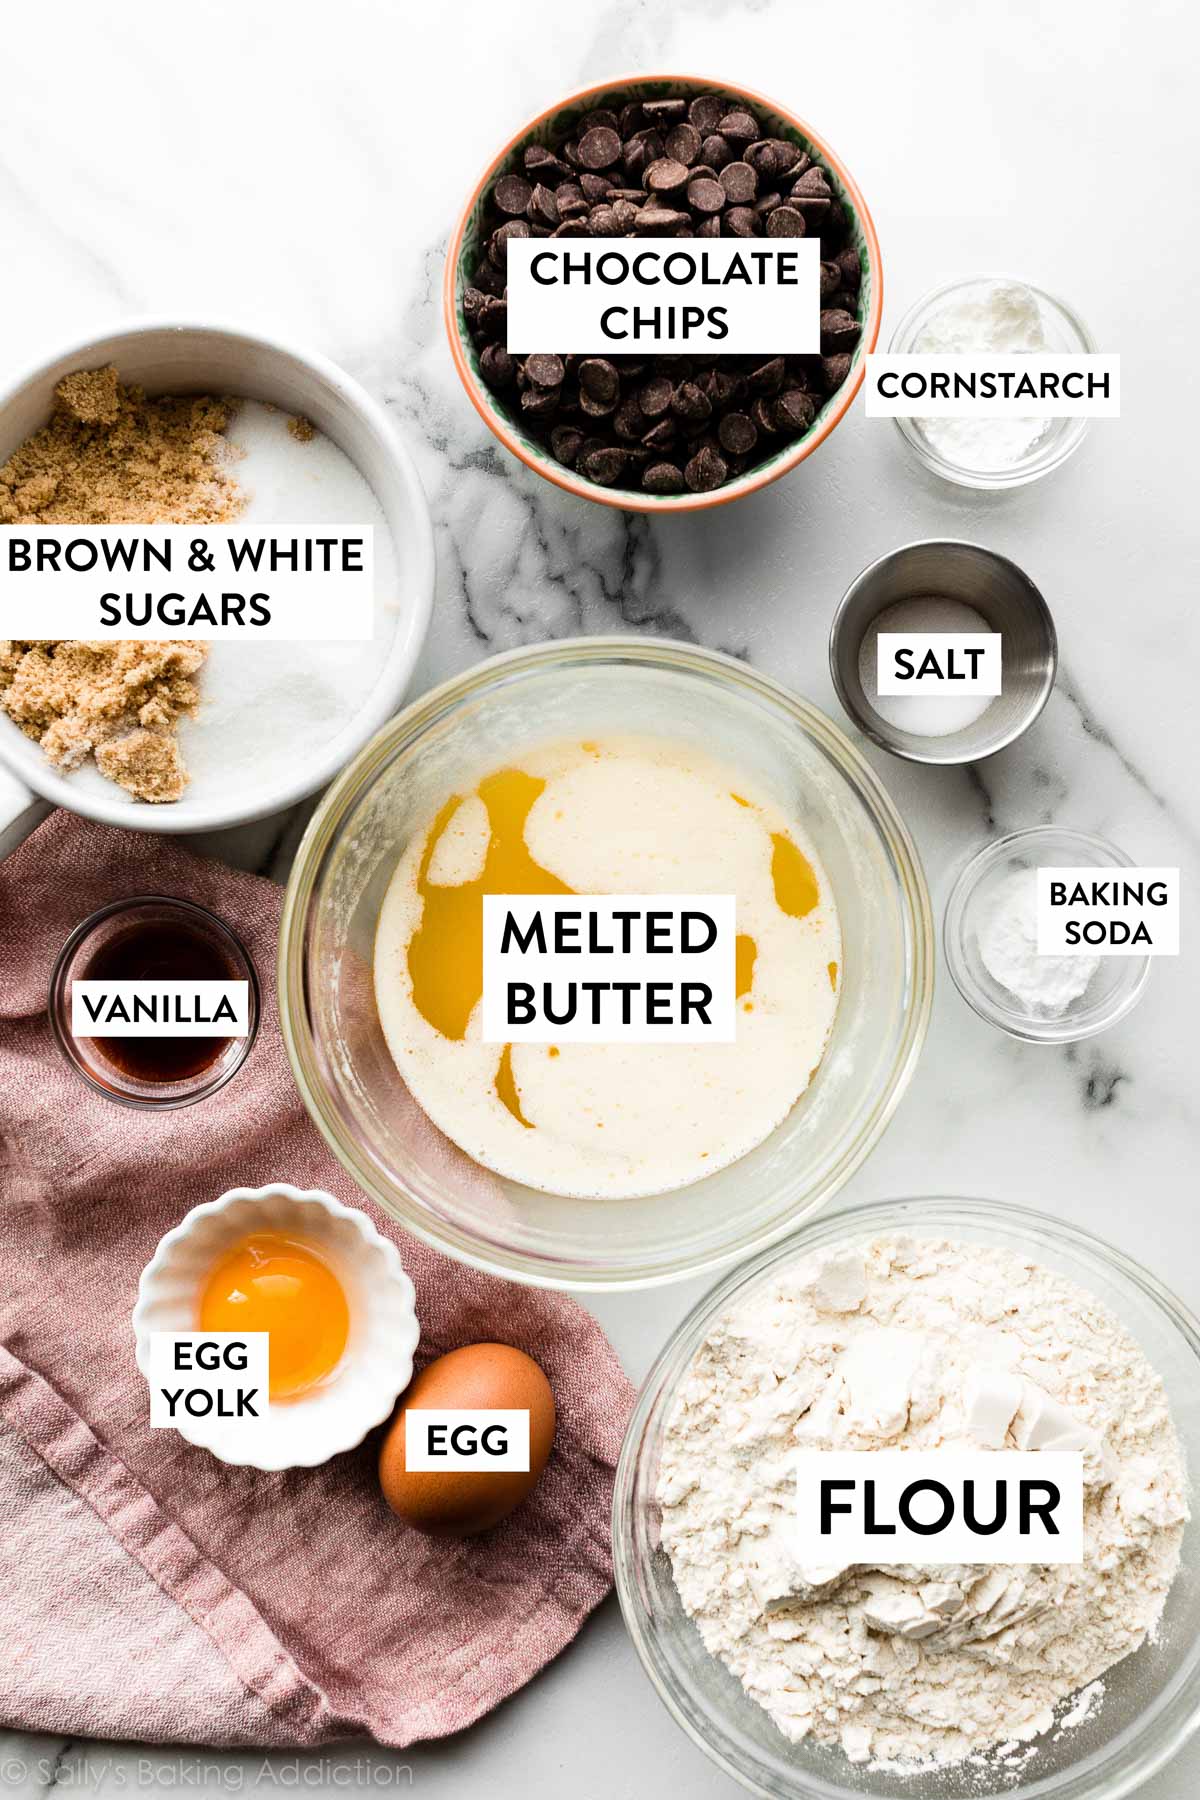
Key Ingredients for Chewy Chocolate Chip Cookies
The cookie dough is made from your standard cookie ingredients: flour, leavener, salt, sugar, butter, egg, and vanilla. It’s the ratios and temperature of those ingredients that make this recipe stand out from the rest.
- Melted butter: Melted butter produces the chewiest cookies. It can, however, make your baked cookies greasy, so I made sure there is enough flour to counteract that. And using melted butter is also the reason you don’t need a mixer to make these cookies, just like these pumpkin chocolate chip cookies, pumpkin crumb cake cookies, and M&M cookie bars.
- More brown sugar than white sugar: More brown sugar than white sugar: The moisture in brown sugar promises an extra soft and chewy baked cookie. White granulated sugar is still necessary, though. It’s dry and helps the cookies spread. A little bit of spread is a good thing.
- Cornstarch: Why? Cornstarch gives the cookies that ultra soft consistency we all love. Plus, it helps keep the cookies beautifully thick. We use the same trick when making shortbread cookies.
- Egg yolk: Another way to promise a super chewy chocolate chip cookie is to use an extra egg yolk. The extra egg yolk adds richness, soft tenderness, and binds the dough. You will need 1 egg + 1 egg yolk, at room temperature, just like in these brown butter marshmallow crispy cookies. See the recipe Notes for how to bring your eggs to room temperature quickly.
The dough will be soft and the chocolate chips may not stick because of the melted butter. Just keep stirring it; I promise it will come together. Because of the melted butter and extra egg yolk, the slick dough doesn’t even look like normal cookie dough! Trust the process…
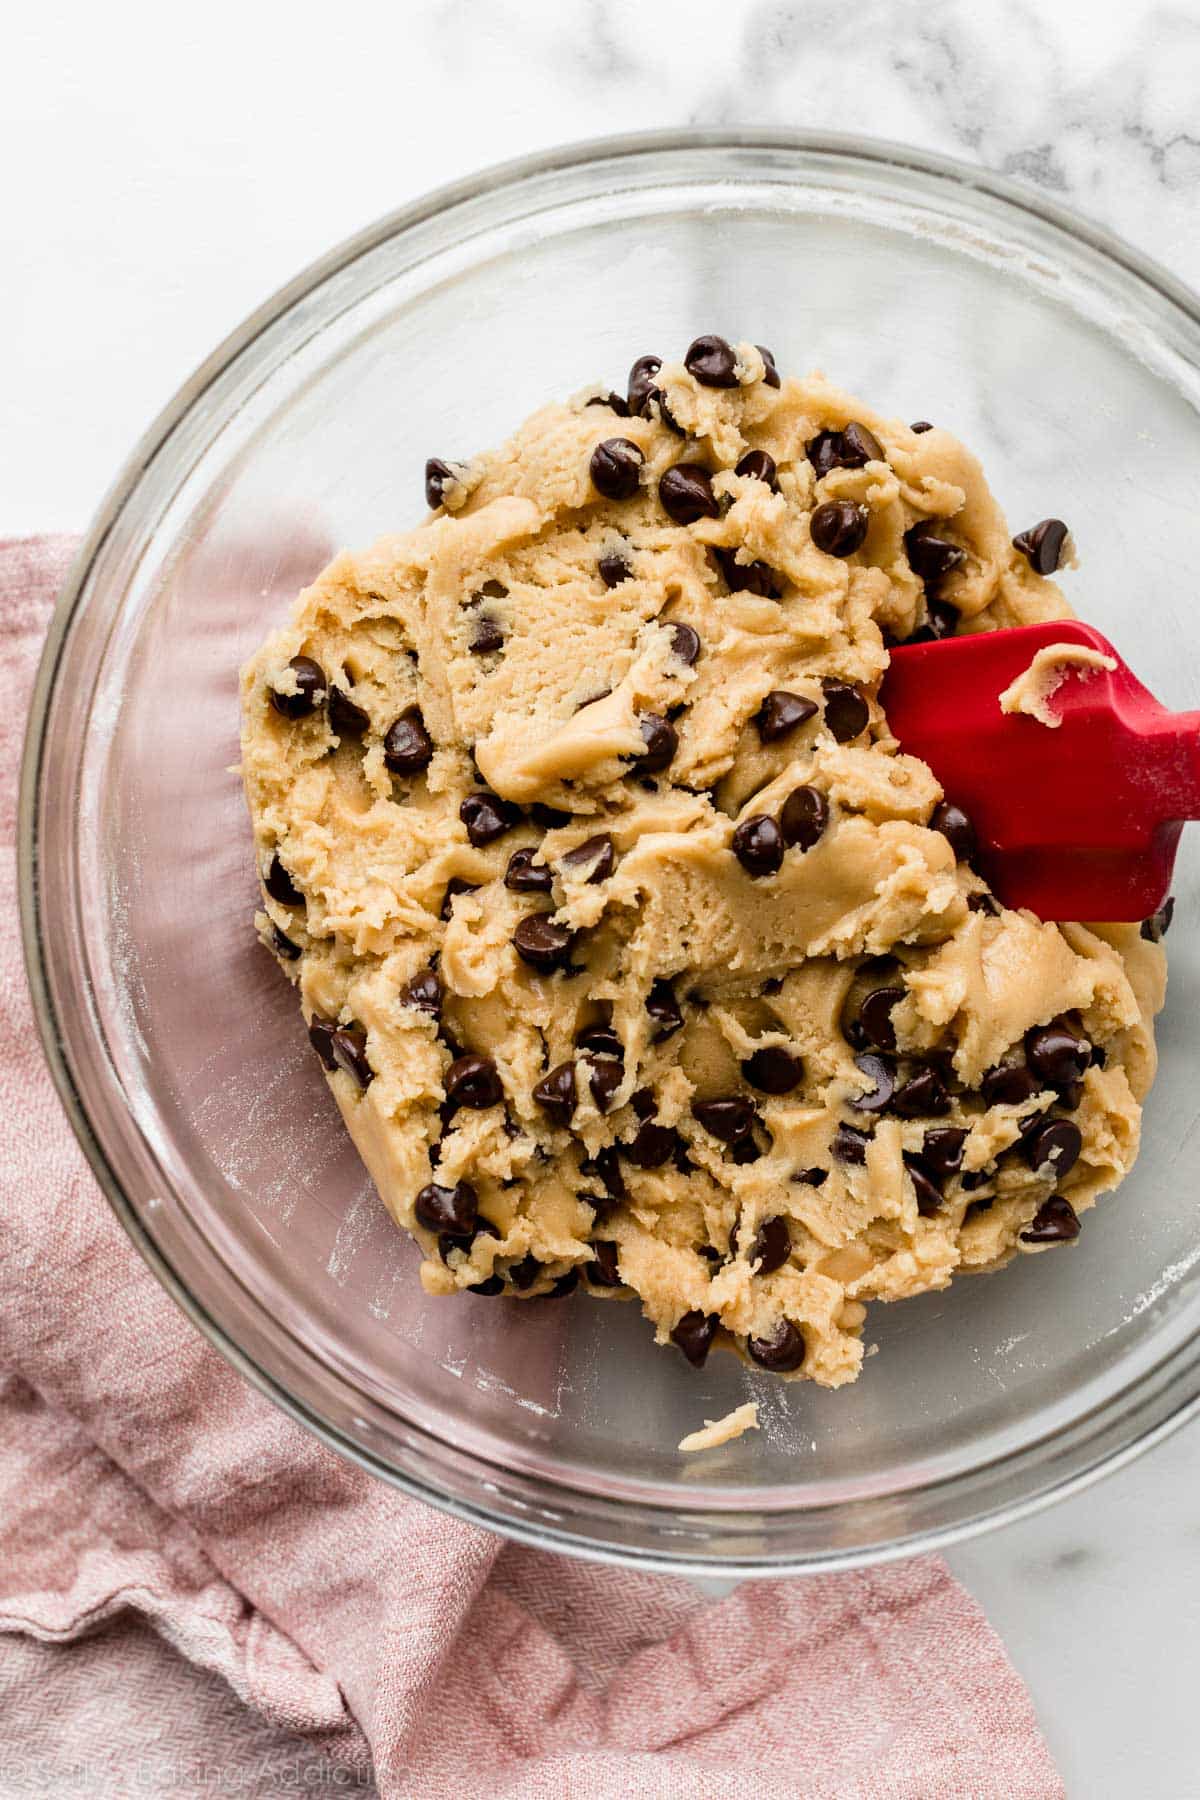
The most important step is next.
2 Major Success Tips
1. Chill the dough. Chilling the cookie dough is so important in this recipe! Unless you want the cookies to spread into a massive cookie puddle, chilling the dough is mandatory here. It allows the ingredients to settle together after the mixing stage but most importantly: cold dough results in thicker cookies. Cover the cookie dough and chill for at least 2–3 hours or up to 3 days. I usually chill it overnight.
(No time to chill? Make these soft & chewy chocolate chip cookie bars, giant chocolate chip cookies, chocolate chip cookie cake, or crispy chocolate chip cookie bark instead!)
- Further reading: How to Prevent Cookies from Spreading
2. Roll the cookie dough balls extra tall. After the dough has chilled, scoop out a ball of dough that’s 3 Tablespoons for XL cookies or about 2 heaping Tablespoons (1.75 ounces or 50g) for medium-large cookies. I usually use this medium cookie scoop and make it a heaping scoop. But making the cookie dough balls tall and textured, rather than wide and smooth, is my tried-and-true trick that results in thick and textured-looking cookies. We’re talking thick bakery-style cookies with wrinkly, textured tops. Your cookie dough should look less like balls and more like, well, lumpy columns, LOL.
Watch the video below to see how I shape them. I also demonstrate how I use a spoon to reshape them during baking if I see they’re spreading too much.
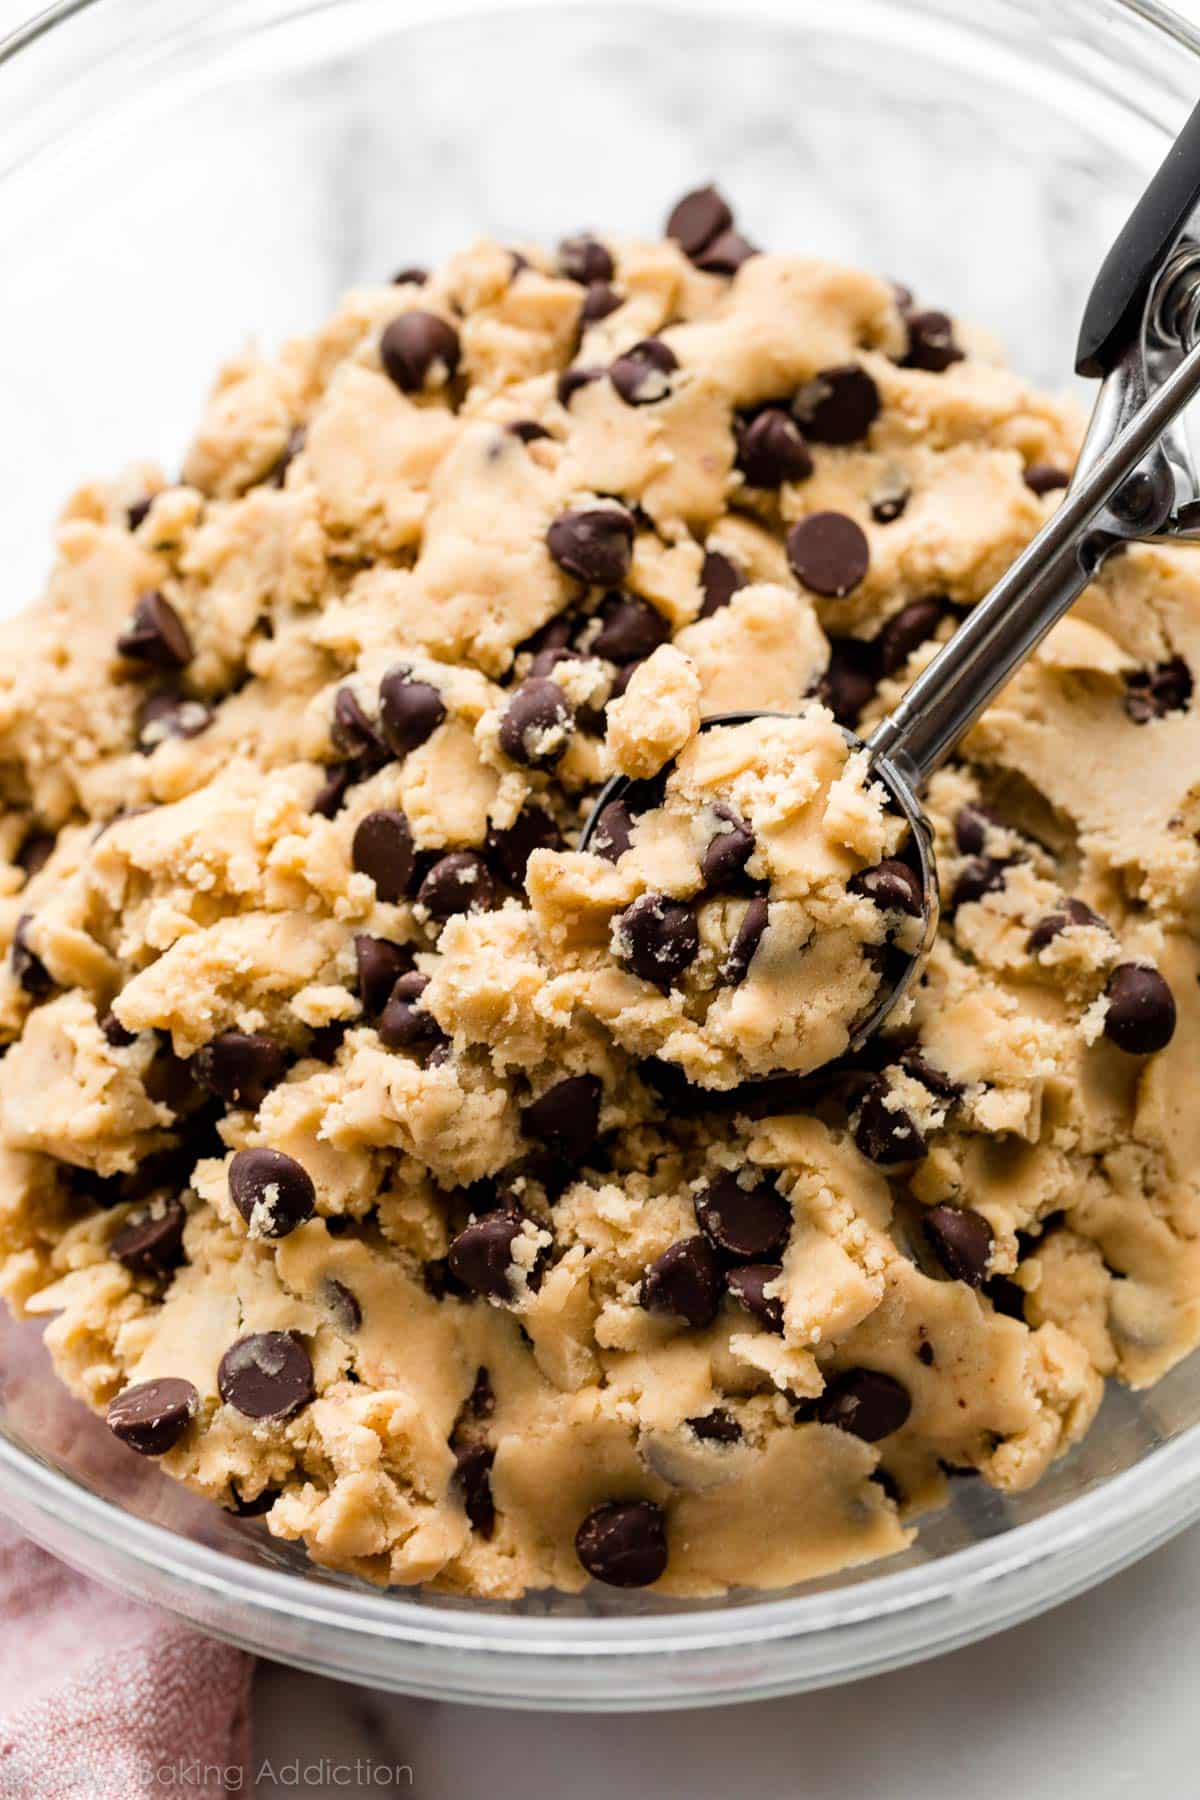
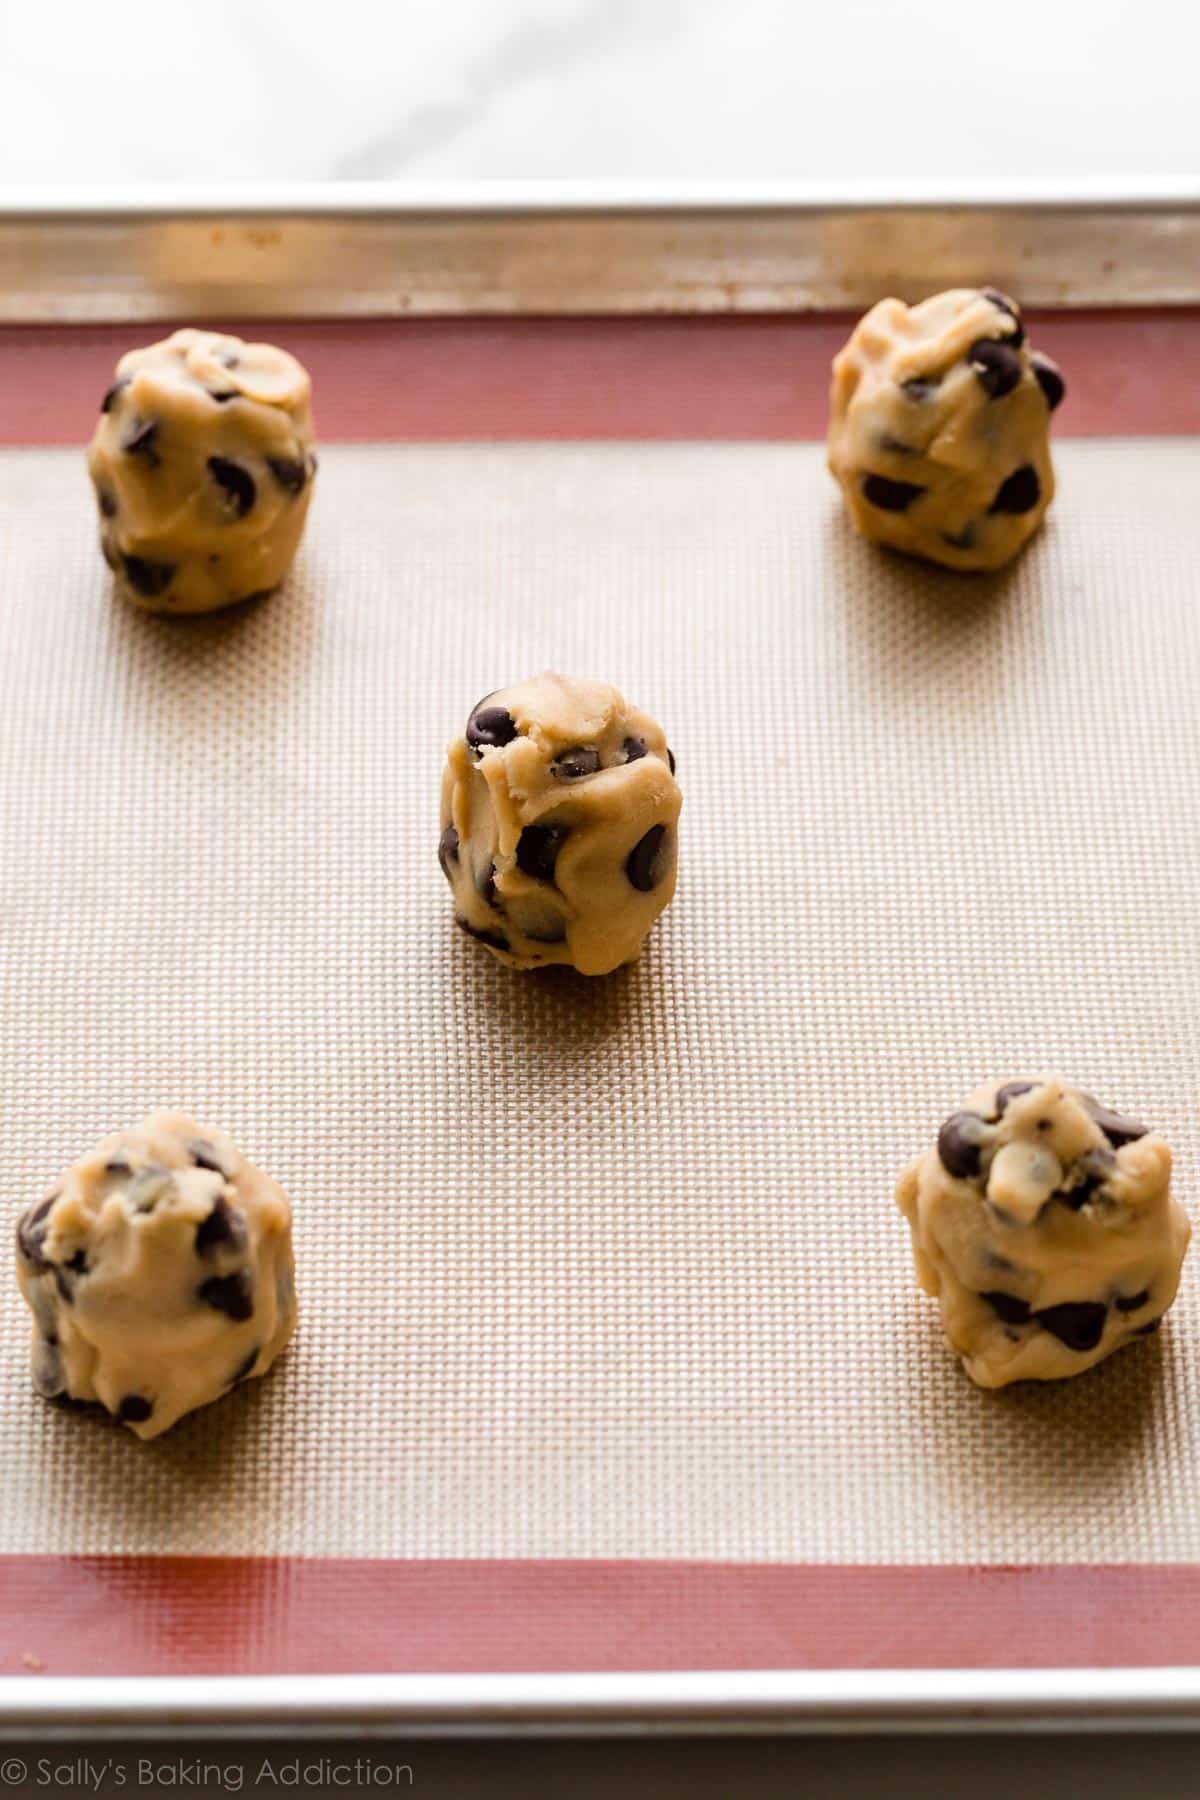
Because of the melted butter in this dough, the dough is very soft and a little greasy before chilling, so it’s harder to shape the cookie dough balls. We recommend chilling first, then shaping. If after chilling the dough is very hard and difficult to scoop, let it sit at room temperature for 15 minutes and then try again.
We typically do not recommend jumping right to the freezer without chilling the dough first. A quick freeze like that can cause the dough to chill unevenly and then spread unevenly during the baking process. For best results, we recommend following the recipe as written. If you don’t have time to wait for the dough to chill, try this recipe for 6 giant chocolate chip cookies instead, which doesn’t require dough chilling (see recipe Notes in that post for details on using the dough to make 24 regular-size cookies).
You can certainly use brown butter here, and the flavor is outstanding! But they can be a little crumbly using brown butter. Instead, for best results, I suggest trying these Brown Butter Chocolate Chip Cookies.
Tools I Recommend for This Recipe
I’ve tested many baking tools and these are the exact products I use, trust, and recommend to readers. You’ll need most of these tools when making sugar cookies and snickerdoodles, too!
- Baking Sheets
- Silicone Baking Mats or Parchment Sheets
- Medium Cookie Scoop
- Cooling Racks
- See More: Best Cookie Baking Tools and 8 Best Baking Pans
Can I Freeze This Cookie Dough?
Yes, absolutely. After chilling, sometimes I roll the cookie dough into balls and freeze them in a large zipped-top bag. Then I bake them straight from the freezer, keeping them in the oven for an extra minute. This way you can bake just a couple of cookies whenever the craving hits. (The chewy chocolate chip cookie craving is a hard one to ignore.)
If you’re curious about freezing cookie dough, here’s my How to Freeze Cookie Dough page (with video tutorial).
Facebook member, Leigh, commented: “These are the only CC cookies I’ve made for years (and this recipe is how I came to be such a fan of SBA!) This recipe worked great when I lived in Denver and had issues with baking at altitude, and it’s still our favorite now that we’re back at sea level. I usually make 4x-6x batches and freeze tons of cookie balls to bake later.“
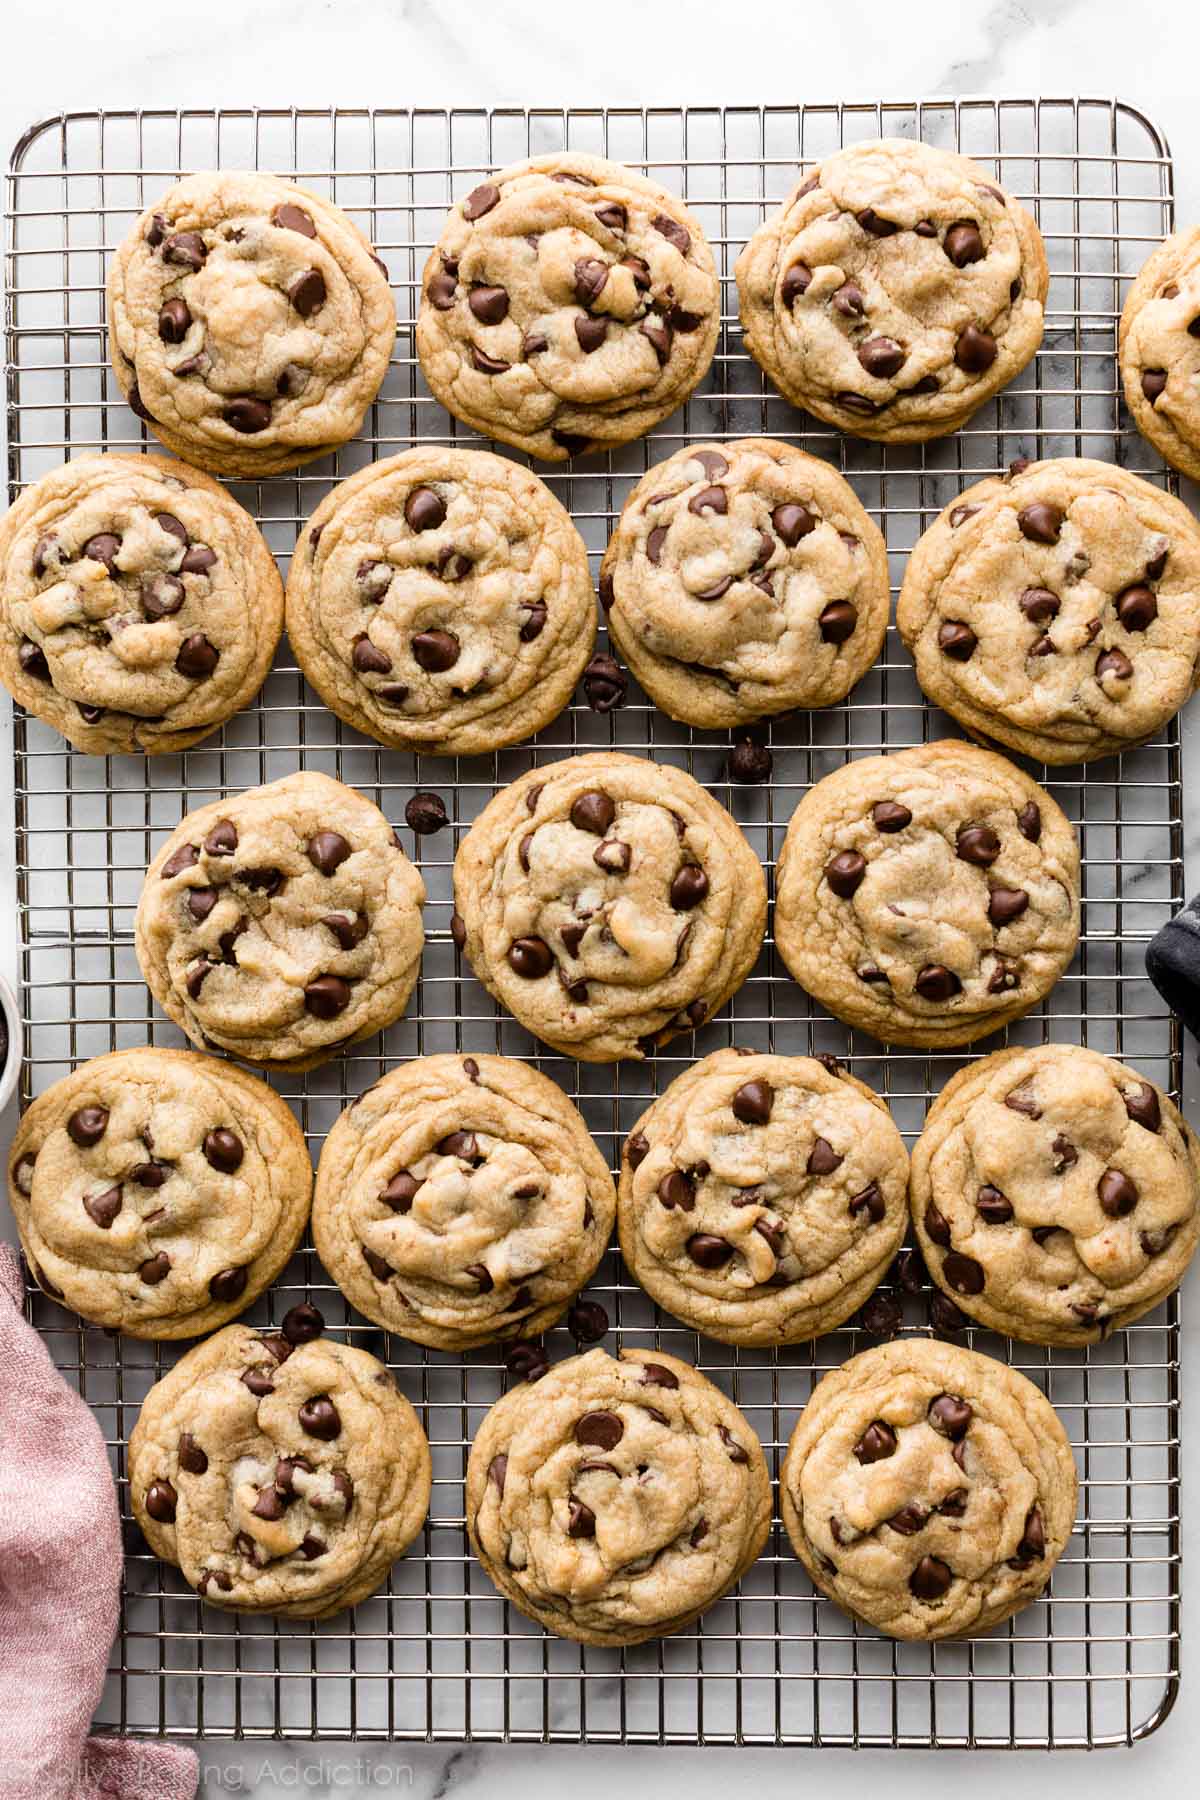
In Short, Here Are the Secrets to Soft & Chewy Chocolate Chip Cookies:
- Cornstarch helps product soft and thick cookies.
- Using more brown sugar than white sugar results in a moister, softer cookie.
- An extra egg yolk increases chewiness.
- Rolling the cookie dough balls to be tall and lumpy instead of wide and smooth gives the cookies a bakery-style textured thickness. It’s a trick we use for cake batter chocolate chip cookies, too.
- Using melted butter (and slightly more flour to counteract the liquid) increases chewiness.
- Chilling the dough results in a thicker cookie. Almost as thick as peanut butter oatmeal chocolate chip cookies, or their gluten-free counterparts, flourless peanut butter oatmeal cookies 🙂
Q: Have you baked a batch before?

Chewy Chocolate Chip Cookies
- Prep Time: 15 minutes
- Cook Time: 13 minutes
- Total Time: 2 hours, 45 minutes
- Yield: 16 XL cookies or 20 medium/large cookies
- Category: Dessert
- Method: Baking
- Cuisine: American
Description
These super soft and chewy chocolate chip cookies are the most popular cookie recipe on my website for good reason. Melted butter, more brown sugar than white sugar, cornstarch, and an extra egg yolk guarantee the absolute chewiest chocolate chip cookie texture. The cookie dough is slick and requires chilling prior to shaping the cookies. This recipe is also in my New York Times best-selling cookbook, Sally’s Baking 101.
Ingredients
- 2 and 1/4 cups (281g) all-purpose flour (spooned & leveled)
- 1 teaspoon baking soda
- 1 and 1/2 teaspoons cornstarch*
- 1/2 teaspoon salt
- 3/4 cup (170g/12 Tbsp) unsalted butter, melted & cooled for 5 minutes
- 3/4 cup (150g) packed light or dark brown sugar
- 1/2 cup (100g) granulated sugar
- 1 large egg + 1 egg yolk, at room temperature
- 2 teaspoons pure vanilla extract
- 1 and 1/4 cups (225g) semi-sweet chocolate chips or chocolate chunks
Instructions
- In a large bowl, whisk the flour, baking soda, cornstarch, and salt together. Set aside.
- In a medium bowl, whisk the melted butter, brown sugar, and granulated sugar together until no lumps remain. Whisk in the egg and egg yolk until combined, then whisk in the vanilla extract. The mixture will be thin. Pour into dry ingredients and mix together with a large spoon or spatula. The dough will be very soft, thick, and shiny. Fold in the chocolate chips. The chocolate chips may not stick to the dough because of the melted butter, but do your best to combine them.
- Cover the dough tightly and refrigerate for at least 2 hours or up to 3 days. I highly recommend chilling the cookie dough overnight to prevent overspreading.
- Preheat oven to 325°F (163°C). Line large baking sheets with parchment paper or silicone baking mats. If the dough has chilled for longer than 2 hours, let it sit at room temperature for about 15 minutes.
- Using a cookie scoop or Tablespoon measuring spoon, scoop the chilled cookie dough, about 3 scant Tablespoons (about 2 ounces, or 60g) of dough for XL cookies or 2 heaping Tablespoons (about 1.75 ounces, or 50g) of dough for medium-large cookies. Roll into a ball, then use your fingers to shape the cookie dough so that it’s taller rather than wide—almost like a cylinder. This helps the cookies bake up thicker. Repeat with remaining dough. Arrange the cookies 3 inches apart on the prepared baking sheets.
- Bake the cookies for 13–14 minutes or until the edges are very lightly browned. The centers will look very soft, but the cookies will continue to set as they cool. Cool on the baking sheet for 10 minutes before transferring to a cooling rack to cool completely. While the cookies are still warm, I like to press a few more chocolate chips into the tops—this is optional and only for looks!
- Store tightly covered at room temperature for up to 1 week.
Notes
- Make Ahead & Freezing Instructions: You can make the cookie dough and chill it in the refrigerator for up to 3 days. Allow to come to room temperature, then continue with step 5. Baked cookies freeze well for up to 3 months. Unbaked cookie dough balls freeze well for up to 3 months. Bake frozen cookie dough balls for an extra minute, no need to thaw. Read my tips and tricks on how to freeze cookie dough.
- Special Tools (affiliate links): Glass Mixing Bowls | Whisk | Wooden Spoon or Rubber Spatula | Baking Sheets | Silicone Baking Mats or Parchment Paper | Medium Cookie Scoop | Cooling Rack
- Cornstarch: If you don’t have cornstarch, you can leave it out. The cookies are still very soft.
- Egg & Egg Yolk: Room-temperature egg + egg yolk are best. Typically, if a recipe calls for room-temperature or melted butter, it’s good practice to use room-temperature eggs as well. To bring eggs to room temperature quickly, simply place the whole eggs in a bowl of warm water for 5 minutes.
- Can I Add Nuts or Different Add-ins? Yes, absolutely. As long as the total amount of add-ins is around 1 to 1 and 1/4 cups, you can add anything including chopped nuts, M&Ms, white chocolate chips, dried cranberries, chopped peanut butter cups, etc. I love them with 3/4 cup (135g) butterscotch morsels and 1/2 cup (100g) Reese’s Pieces. You could even add 1/2 cup (80g) sprinkles to make a sprinkle chocolate chip cookie.
- Can I Use Brown Butter Instead of Melted Butter? You can certainly use brown butter here, and the flavor is outstanding! But they can be a little crumbly using brown butter. Instead, for best results, I suggest trying these Brown Butter Chocolate Chip Cookies.
- Be sure to check out my top 5 cookie baking success tips AND these are my 10 must-have cookie baking tools.












Reader Comments and Reviews
I typically enjoy Sally’s recipes, but I was disappointed, as this is simply a trendy, under-cooked cookie recipe. The flavor was fine, and it was easy to make, but I’m not a fan of the doughy cookie.
Hi, may I know if I can use this recipe if I only have a microwave?
Hi Eclair, A conventional oven settings are really best for baking these cookies. We have not tried baking cookies in a microwave.
Do you think I should make any adjustments if I want to try? Like will the cookies be more liquified or too dry?
Baking cookie dough in a traditional oven uses hot, dry air to slowly brown sugars and crisp the edges. Doing it in a microwave uses waves to boil water molecules from the inside out in a very short amount of time. The result can be a rubbery, dry texture rather than the intended soft chewy cookie. Rather than use your ingredients trying something that might not work, you might want to try a recipe that is specifically formulated for a microwave (like a “mug cookie”). But if you do decide to give it a go, let us know how it turns out!
I just love your recipes, but I wish you would list nutrition information broken down with the recipes
Hi Monica, We don’t usually include nutrition information as it can vary between different brands of the same ingredients. Plus, many recipes have ingredient substitutions or optional ingredients listed. However, there are many handy online calculators where you can plug in and customize your exact ingredients/brands. Readers have found this one especially helpful: https://www.verywellfit.com/recipe-nutrition-analyzer-4157076
We loved these! A little time consuming forming them all but worth it.
my cookies turned out flat and crispy, the opposite of what i was going for. They taste great though
Hi Maggie! We’re happy to help troubleshoot. There are a few different reasons why your cookies may be over-spreading. This post on how to prevent cookies from spreading should be a helpful place to start. And if you are following all those tips and your cookies are still turning out flat, then you may need to add a couple more Tablespoons of flour to the dough. Thank you for giving these a try!
I stopped getting cookies in stores because of the ingredients. This has easily become my favorite cookie recipe, genuinely so good. The kids are obsessed too. I appreciate the texture and how easy they are to make.
The cookies were delicious! This will definitely be my go to cookie recipe from now on.
i tried this recipe because whenever i use box mix cookies or any normal recipe they get hard almost immediately. i used this recipe to make smores cookies and oh my god they were soooooo good. the softness of the cookie was just right and it was just so delicious! ill be honest, at first i was skeptical because i didnt let the butter cool for that long and i switched out baking soda with baking powder because last time i used baking soda the taste of the dessert tasted so bad and left a disgusting aftertaste. and i just have ptsd whenever i hold a bottle of baking soda. anyway. the cookies were amazing and im definitely doing this again. love ya!
Turned out great!! When I make again I’ll use just 1 C of chocolate chips and it needed a little finishing salt but this recipe was great! And mines tuned out perfectly chewy
My cookies had a cake texture, and over spread, and were very thin and cripsy. I measured the flour on a scale, let the butter set, and set the dough for 3 hours? what did i do wrong? I did use 100g both for white and brown sugar though, does that affect the results
Hi Amelia, we’re happy to help troubleshoot. There are a few different reasons why your cookies may be over-spreading. This post on how to prevent cookies from spreading should be a helpful place to start. And if you are following all those tips and your cookies are still turning out flat, then you may need to add a couple more Tablespoons of flour to the dough. Also keep in mind that if you decrease the sugar the cookies will not have the same texture (it’s used for texture and moisture in addition to taste) and it can impact the spread of the cookies, too. Thank you for giving these a try!
I love this recipe. I mix chocolate chips with dry ingredients before i add the wet ingredients and have no problem with incorporating, otherwise i follow recipe to the T. So good!
Hello! Can we use this recipe to make smores cookies as well? Thank you for sharing the recipe they came out delicious; family loved them by the way!!
You could, but we highly recommend using the soft chocolate chip cookies because they remain soft even after the marshmallows go under the broiler, an important step in the recipe.
These are the best homeade cookies I have ever had!! Me and the hubby love them!! I followed recipe and only thing I had to adjust was my baking time by just a few minutes. These stay chewy for a few days without using the old trick of putting a piece of bread in the container. I was also curious about the GF. My daughter in law tried it with the 1:1 GF flour and she said they were dry and crumbly but delicious.
Somewhere I read/ saw (America’s Test Kitchen??) that cookies won’t spread so much if you bake them on a greased cookie sheet, NOT on silpat, or a silicone mat. So that’s what I did, and they turned out great- did not spread and came out nice and thick and delish. I admit I added one extra tablespoon of flour, as my dough was seeming just a little too soft (I did not weigh, but measured). I also followed an earlier comment and shaped them about an hour into chilling, then placed my little dough columns back in the fridge for another hour, hour and a half.
My fiancé is scarfing them down.
Mine didn’t turn out to be chewy. What did I do wrong? I did reduce the amount of sugar as we don’t like too sweet
Hi Suman, Reducing the sugar will always affect the texture, since sugar adds moisture and structure as well as sweetness.
This will forever be my go to chocolate chip recipe!
I used salted butter and the batch came out great
I’ve been using this recipe for 2 months now and I love it. I use milk chocolate chips instead of semi-sweet and bake for 11 minutes and turn half-way through.
Making these cookies as part of the welcome bag for my son’s wedding. They were part of a taste test and these were the chosen winner among the family.
I’m so disappointed that these spread a lot and turned out flat! I refrigerated the dough for 8 hours and shaped them into vertical cylinders. The only thing that might be the culprit was that I used high fat European butter. Sad, flat cookies:(
Hi Ellen, European style butters often aren’t ideal for baking smaller items with short bake times such as cookies and cupcakes. Larger items like quick breads are usually fine, but these higher fat butters create excess spread in cookies.
I tried it today and wow, it was so delicious! Thank you
They tasted great but they were super thin and broke apart. I refrigerated overnight left out 15 min. Baked as directed.
Hi Amber, Are you allowing the butter to cool just slightly after it’s melted? This helps prevent any overly greasy texture and any excess spread. If the baked cookies were breaking, it could be that they were over baked. Thank you for giving this recipe a try!
Love this recipe. I have some GF people coming for dinner, am I able to swap the AP flour with 1:1 GF flour? Do any adjustments need to be made?
Hi Di, we haven’t tested these cookies with gluten free flour, but let us know if you do!
Hi Sally! I know you’ve said its best to chill the dough before shaping but if you shaped it before, would that be a game changer? I ask because I chilled the dough for about 12 hours and literally had to use a knife to hack off pieces of dough because the dough was so stiff, despite it sitting on the counter for about 30 minutes. Thanks!
Hi Stephanie, Because of the melted butter in this dough, the dough is very soft and a little greasy before chilling, so it’s harder to shape the cookie dough balls. We recommend chilling first, then shaping. You could try a quick chill to help solidify the dough a bit, take out the dough to shape, and then proceed with the full chill time. Hope this helps!