

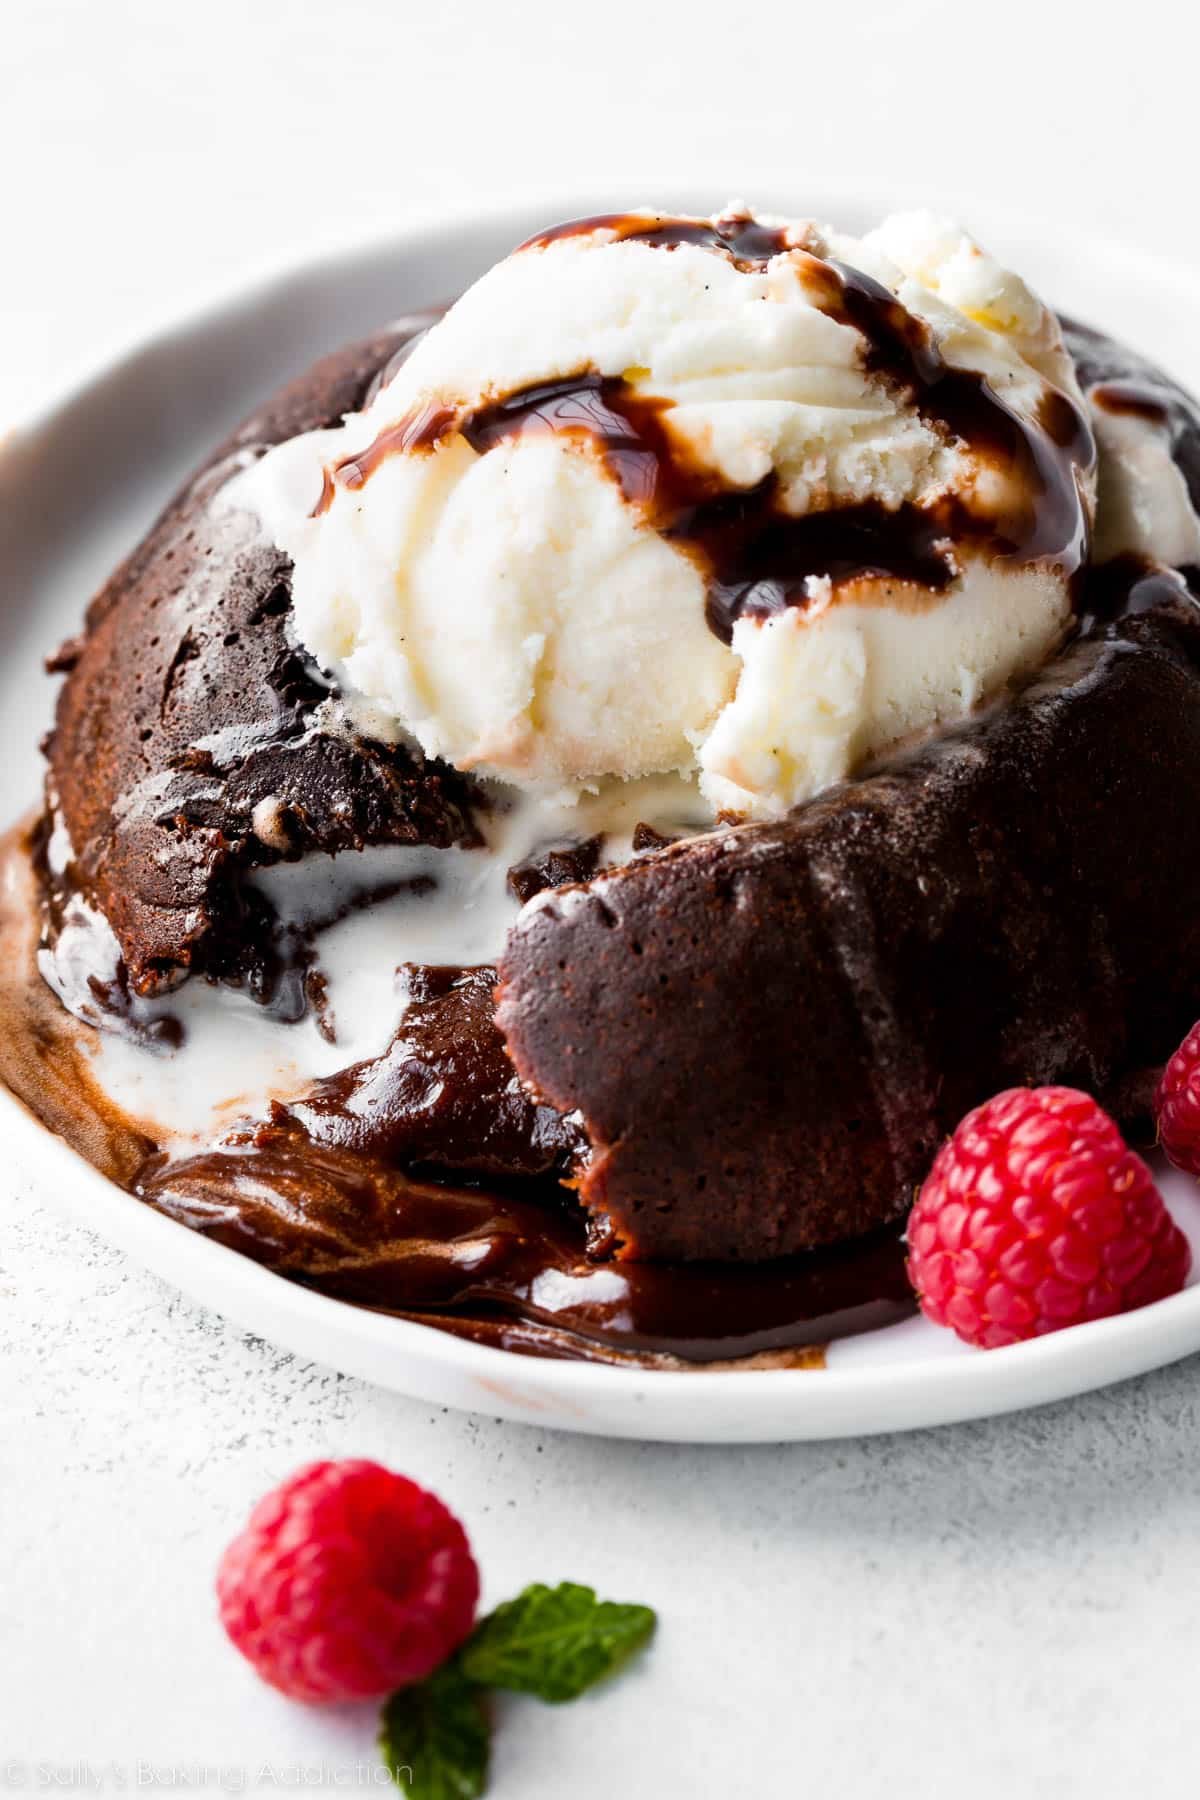
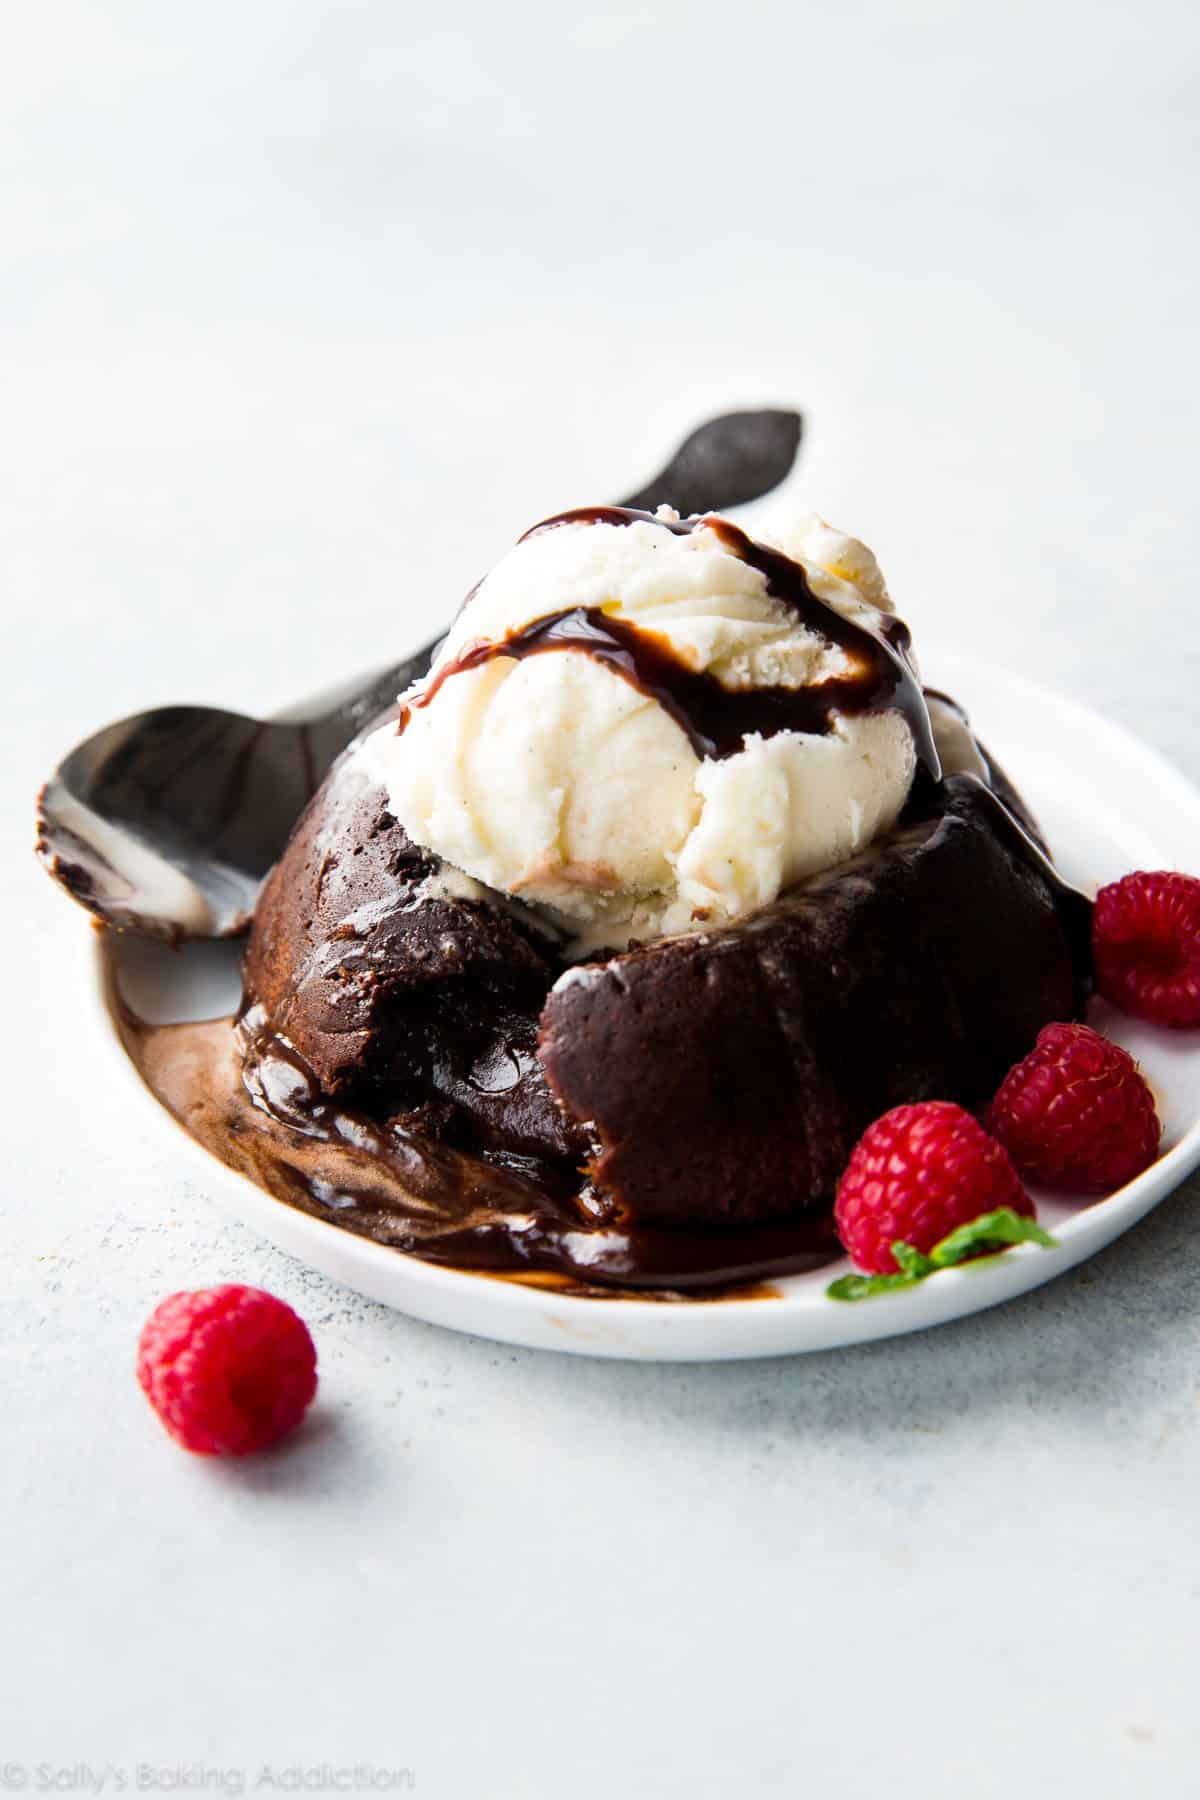
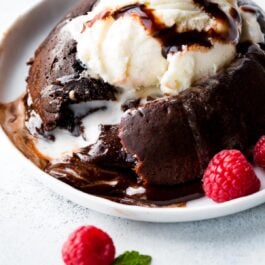
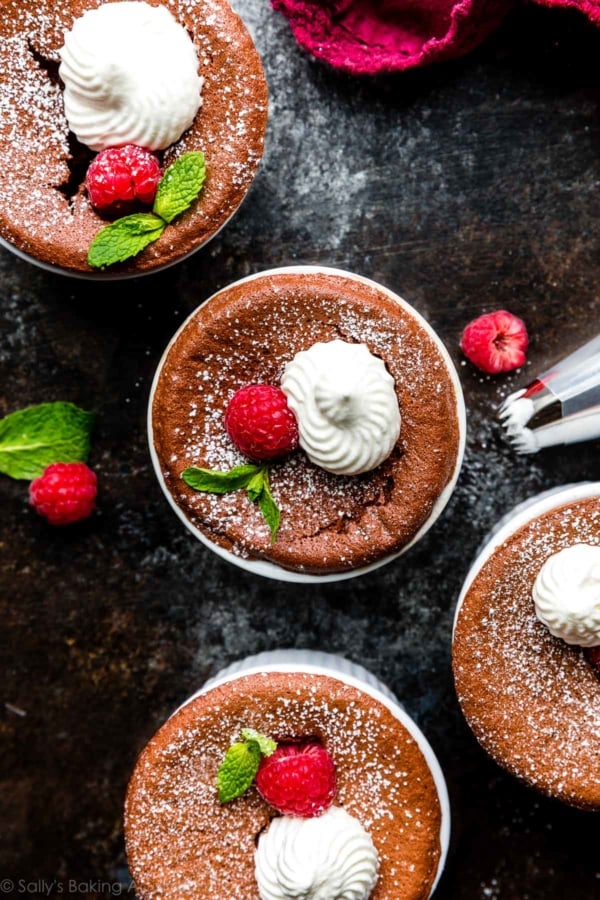
Chocolate lava cakes with their deliciously rich molten chocolate center come together with 6 simple ingredients. Ready in just 25 minutes, this surprisingly easy and quick dessert always impresses. If you don’t have ramekins, follow my instructions for using a muffin pan instead.
One reader, CB, commented: “Absolutely perfect! I made these for my family tonight and they were amazing. I included some raspberries, strawberries, and vanilla ice cream on the side. Perfect Valentine’s Day dessert! ★★★★★“
Today we’re making straight-up chocolate lava cakes. Even though peanut butter chocolate lava cakes are truly magical, I’ve received a lot of requests for a plain chocolate version.
Molten cakes are always a crowd favorite, and they’re infinitely better when made fresh at home. I included this recipe over on my Valentine’s Day dessert recipes page, but they’re just as rich and tasty without a holiday on the calendar. 🙂
Tell Me About These Chocolate Lava Cakes
- Flavor: There’s no doubt about it: rich chocolate is front and center in this lava cake recipe. They’re even more chocolatey than this reader-favorite chocolate cake!
- Texture: This lava cake pairs moist chocolate cake with an ooey-gooey molten center. Be careful not to over-bake these.
- Ease: The secret for making chocolate lava cakes? There is no secret. These lava cakes require zero complicated steps or special tools.
- Time: The best part about this recipe is that it whips up fast: Make a quick cake batter and bake in ramekins or a muffin pan. Then, serve immediately with your favorite toppings like ice cream, homemade whipped cream, or a drizzle of salted caramel. Dreamy!
If you prefer a gluten-free option, consider making this rich and fudge-like flourless chocolate cake.
In Short:
- Warm, rich chocolate cake
- Thick, gooey molten chocolate in the middle
- Quick and easy to make
- Only 6 ingredients
- No mixer required
- No cooling time!
Overview: How to Make Chocolate Lava Cakes
The full printable recipe is below, but let’s walk through it so you can see how easy these are to make.
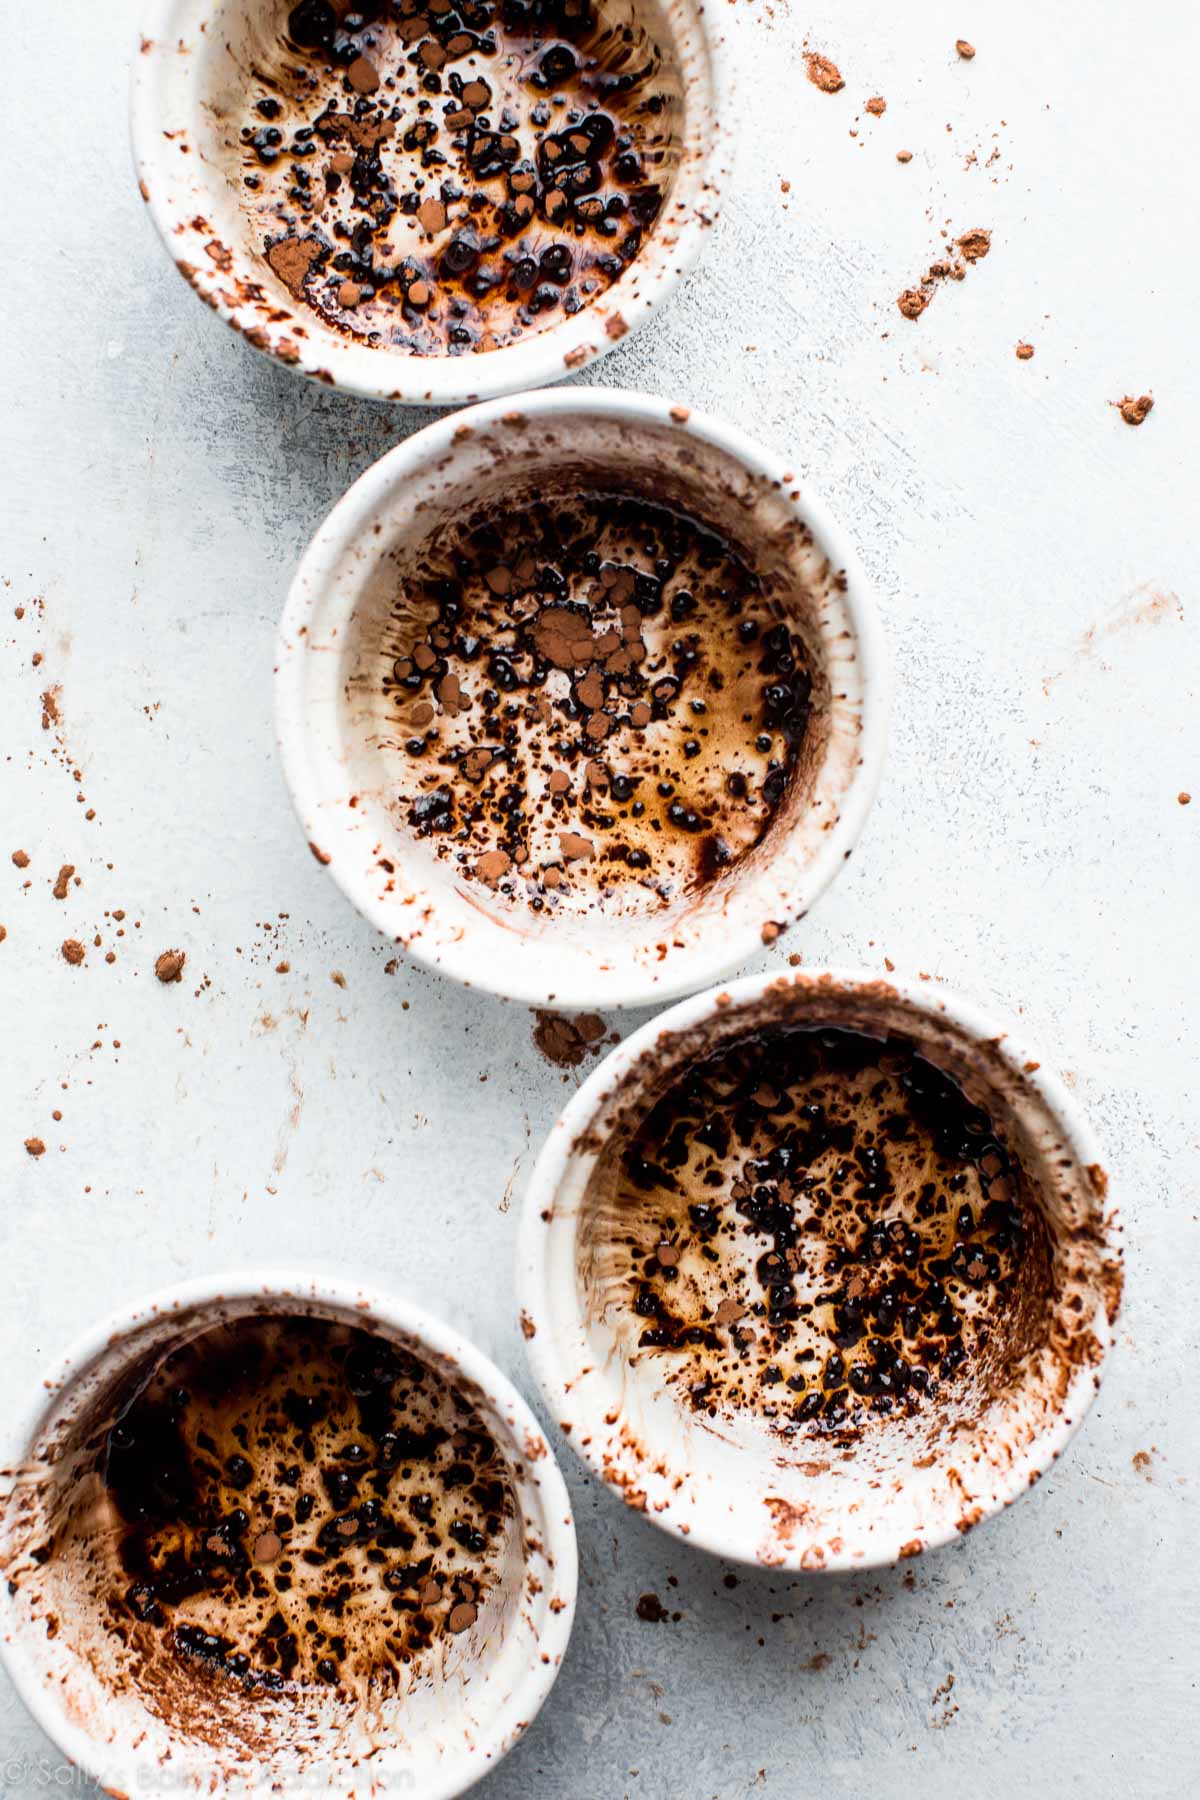
Prepare four 6-ounce ramekins. Grease each ramekin with a little nonstick spray and a dusting of cocoa powder before filling with batter. This preparation helps the baked lava cake release seamlessly from the ramekin onto the plate for serving.
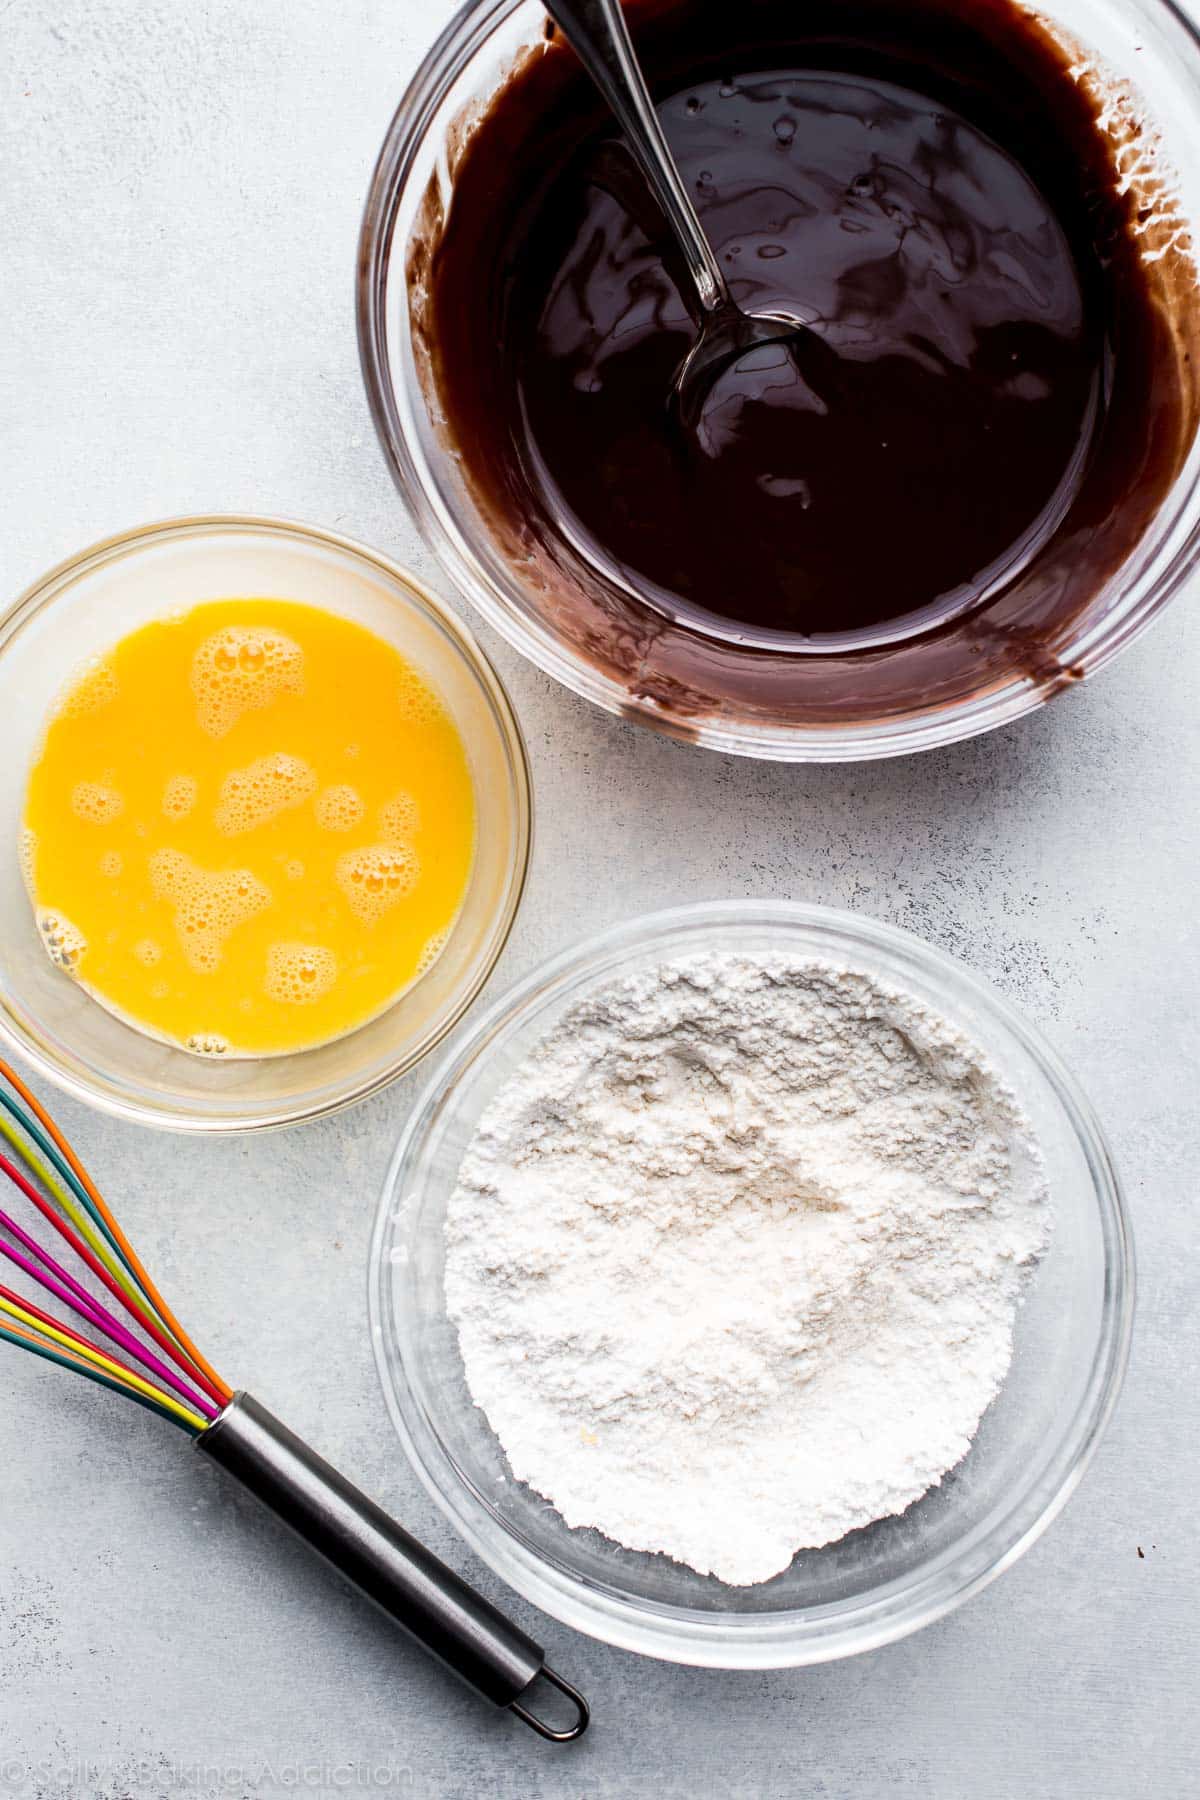
Make the chocolate cake batter.
Spoon the batter evenly into each ramekin, and bake. The high oven temperature cooks the outside of the mini cakes but leaves the center gooey. The tops may look somewhat soft.
Invert the ramekins. Carefully flip the freshly baked lava cakes upside down onto plates, and dig in while warm!
If 4 or 6 lava cakes are simply too many, try this 2-serving recipe for chocolate fudge cakes instead!
You Can Make These in a Muffin Pan Instead
I highly recommend using 6-ounce ramekins for these lava cakes—they’re the perfect size to make 4 of these single-serving portions. Plus, you can use the same ramekins for most custard recipes, chocolate fudge cakes for 2, chocolate soufflé, peanut butter chocolate lava cakes, and lemon pudding cakes.
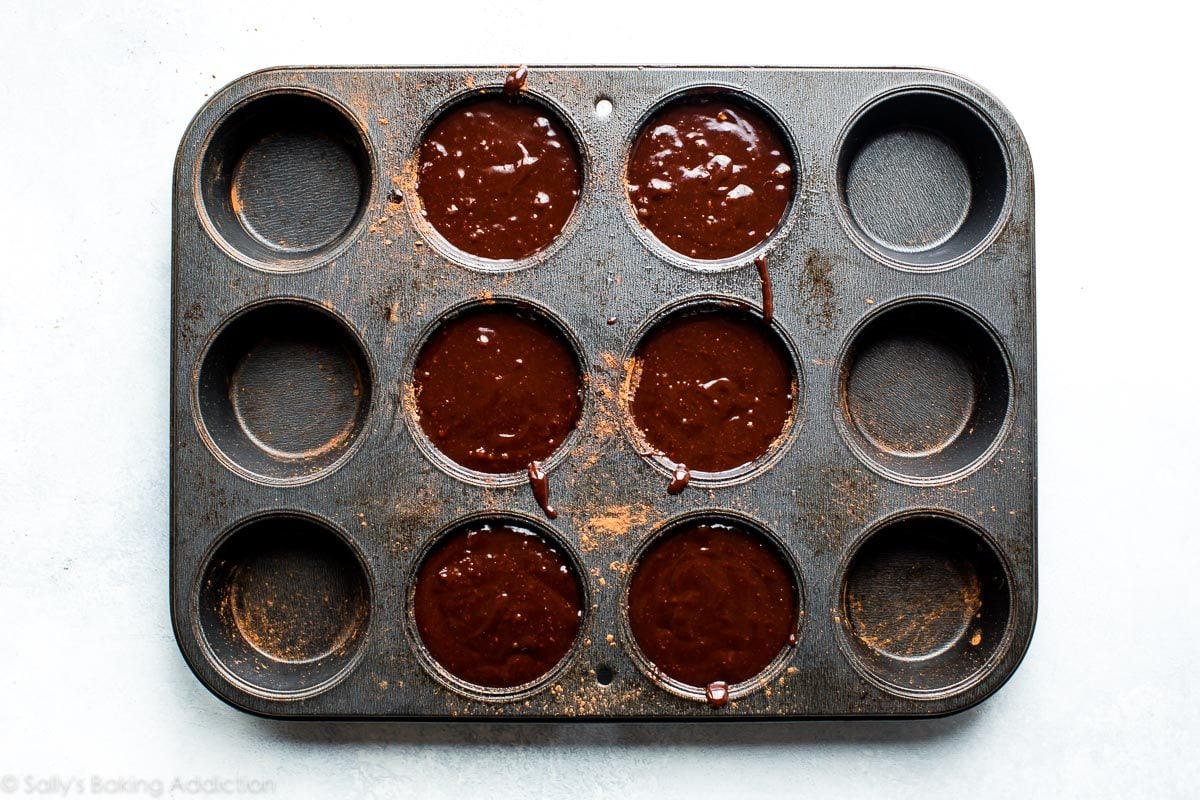
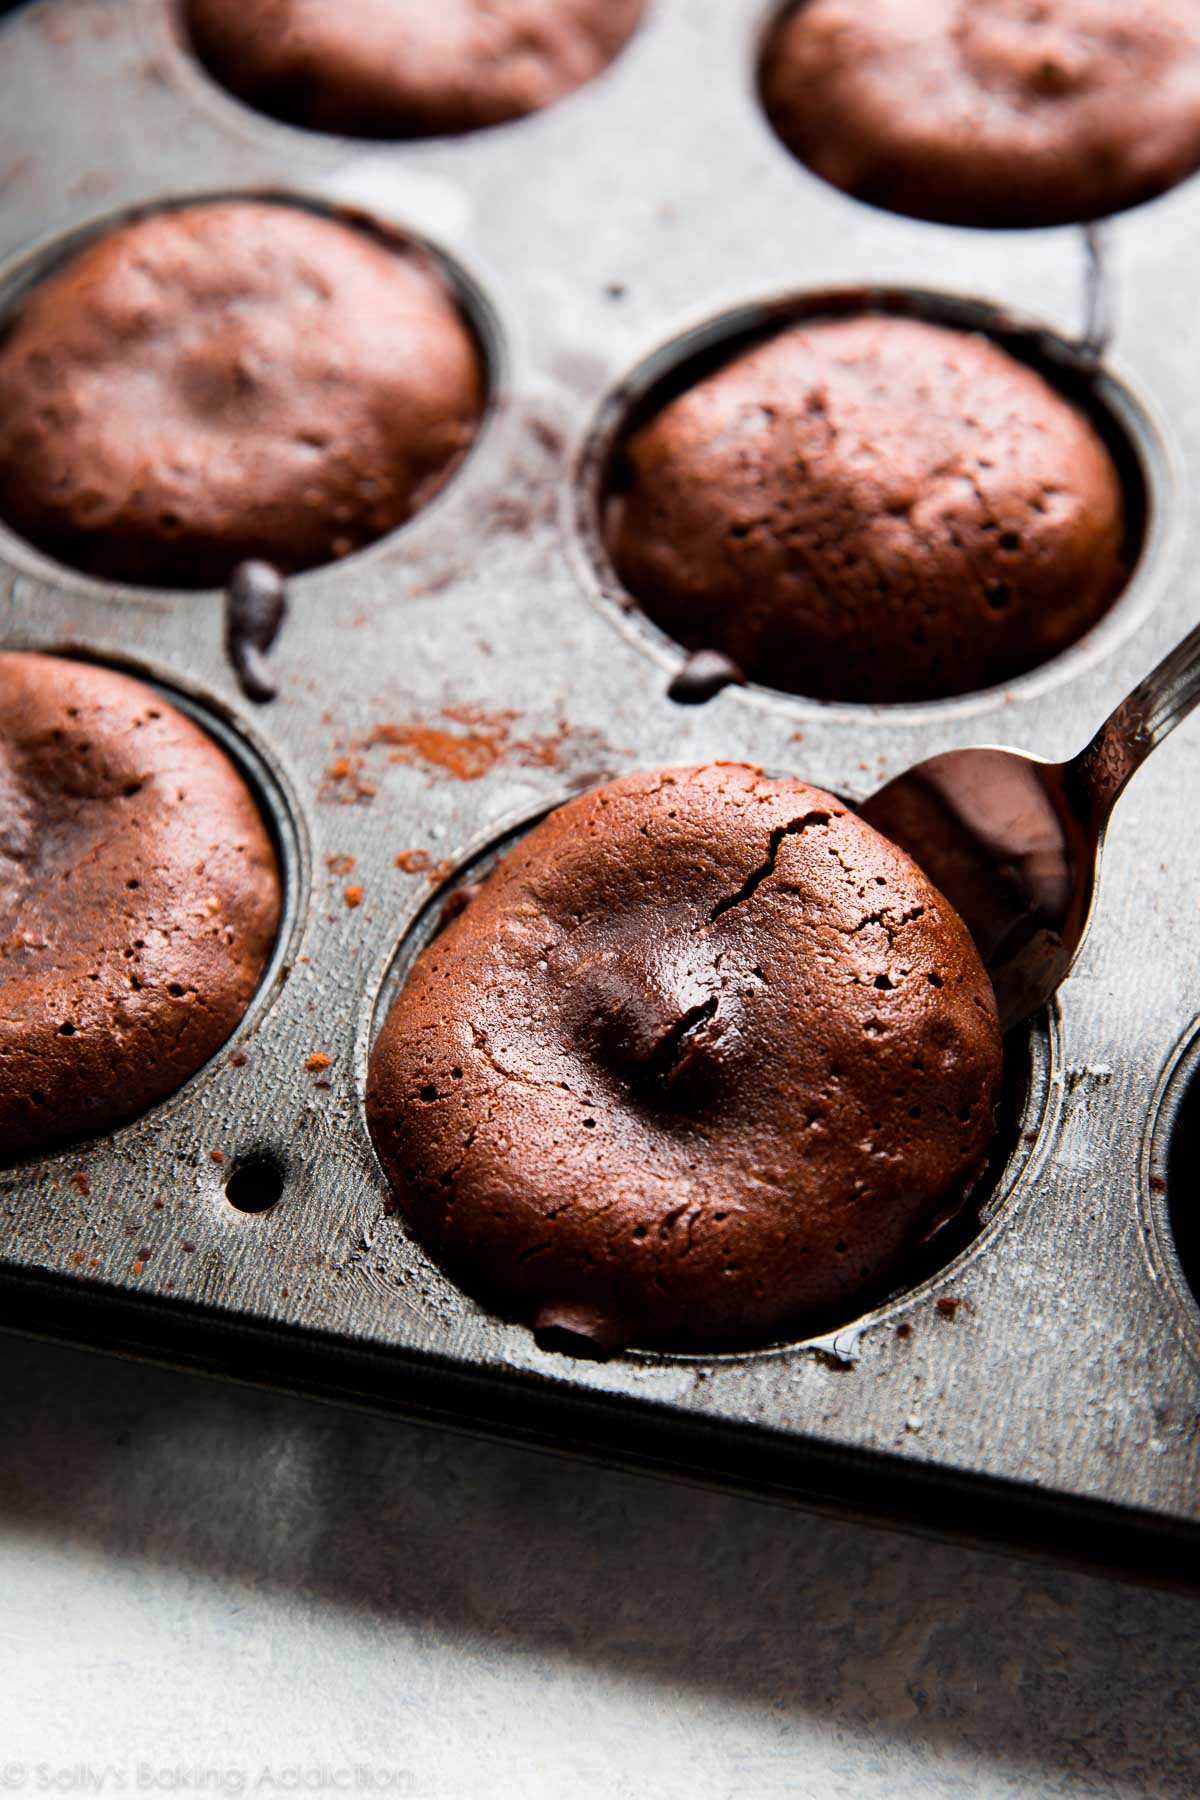
If you don’t have ramekins, you can use a standard muffin pan. Grease 6 muffin pan cups and dust with cocoa powder to prevent the lava cakes from sticking. Because your lava cakes will be slightly smaller, you’ll get 6 lava cakes instead of 4. Bake at 425°F (218°C) for 8–10 minutes. Use a spoon to release the cakes from the pan and place each upside down on plates.
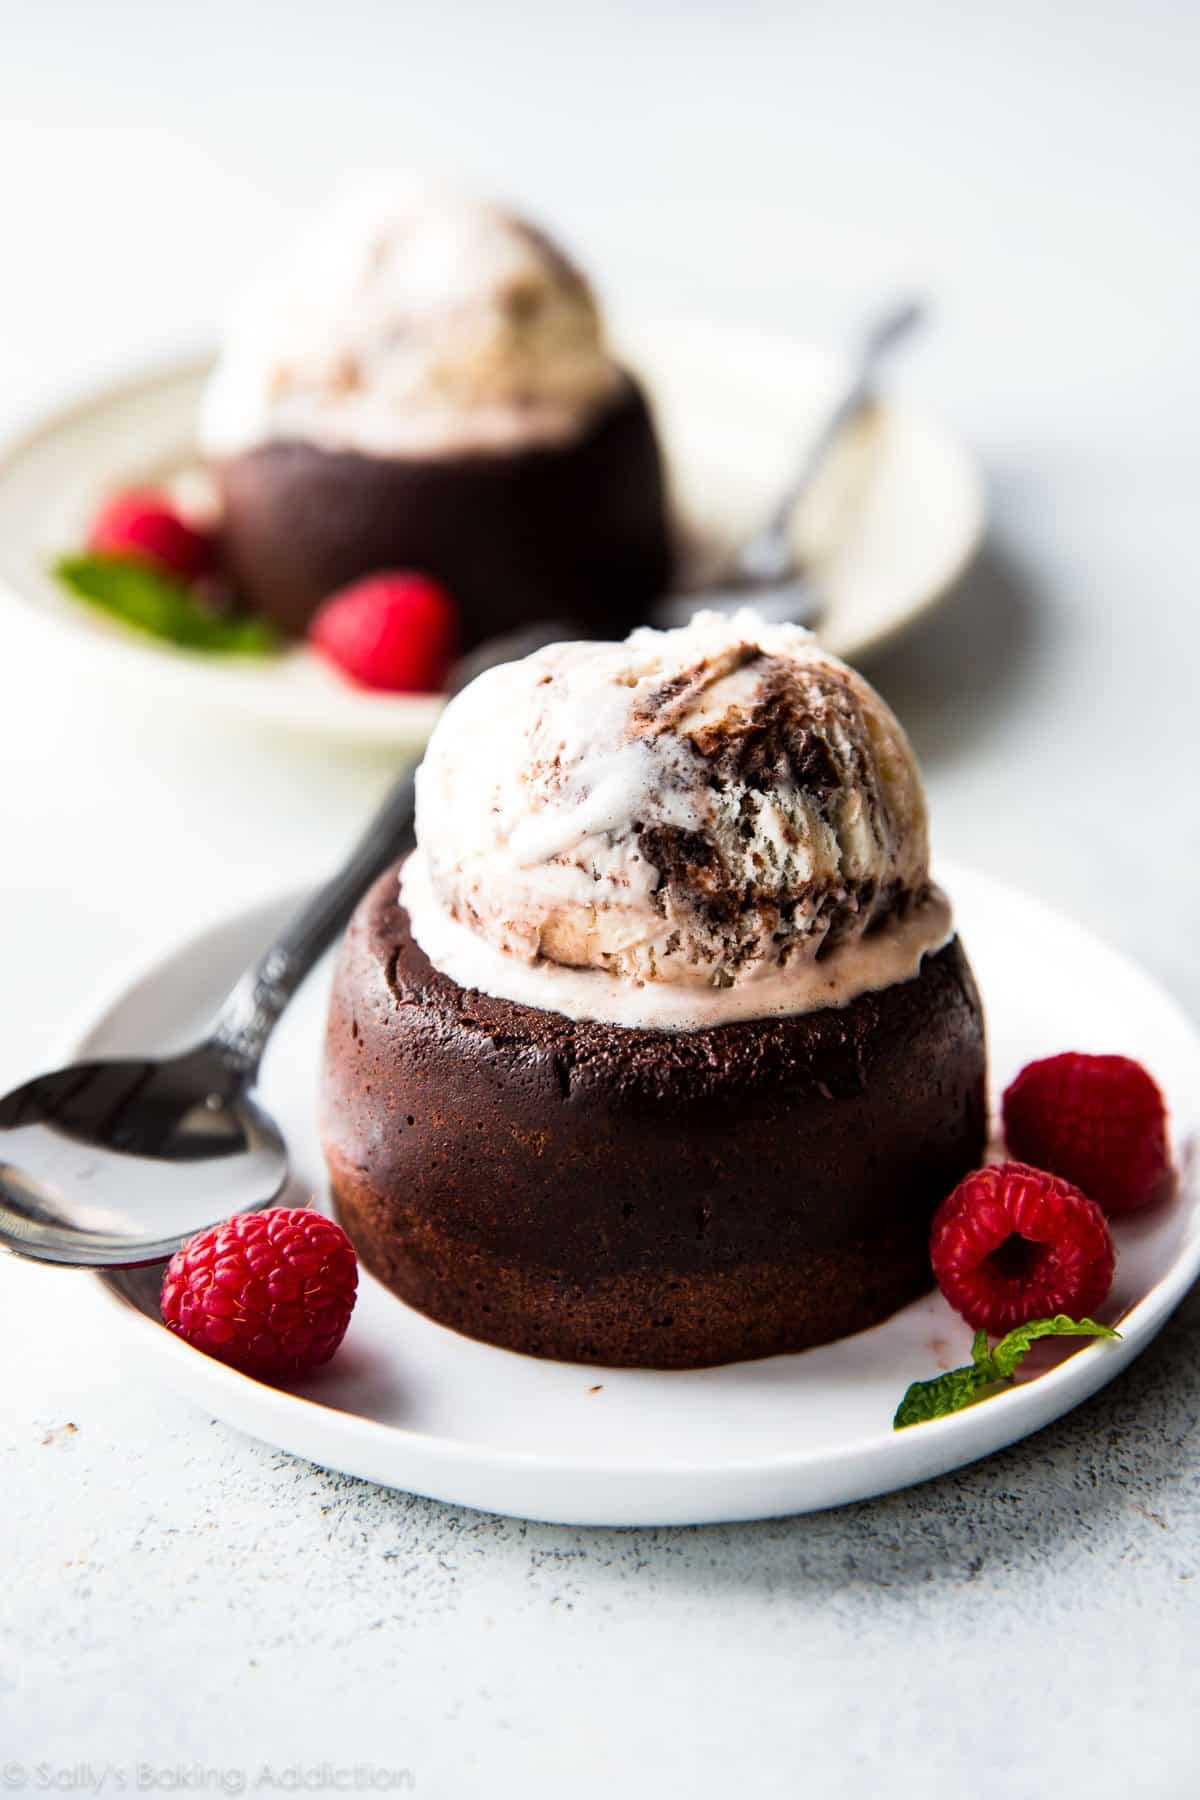
Optional Toppings
Once the warm lava cakes are inverted onto plates, the fun really begins! So many toppings pair wonderfully with these chocolate lava cakes. Here are a few of my favorites:
- Ice cream and/or whipped cream
- Raspberry dessert sauce or strawberry sauce
- Melted peanut butter or Nutella
- Salted caramel
- Mocha whipped cream from this flourless chocolate cake recipe
- Fresh berries
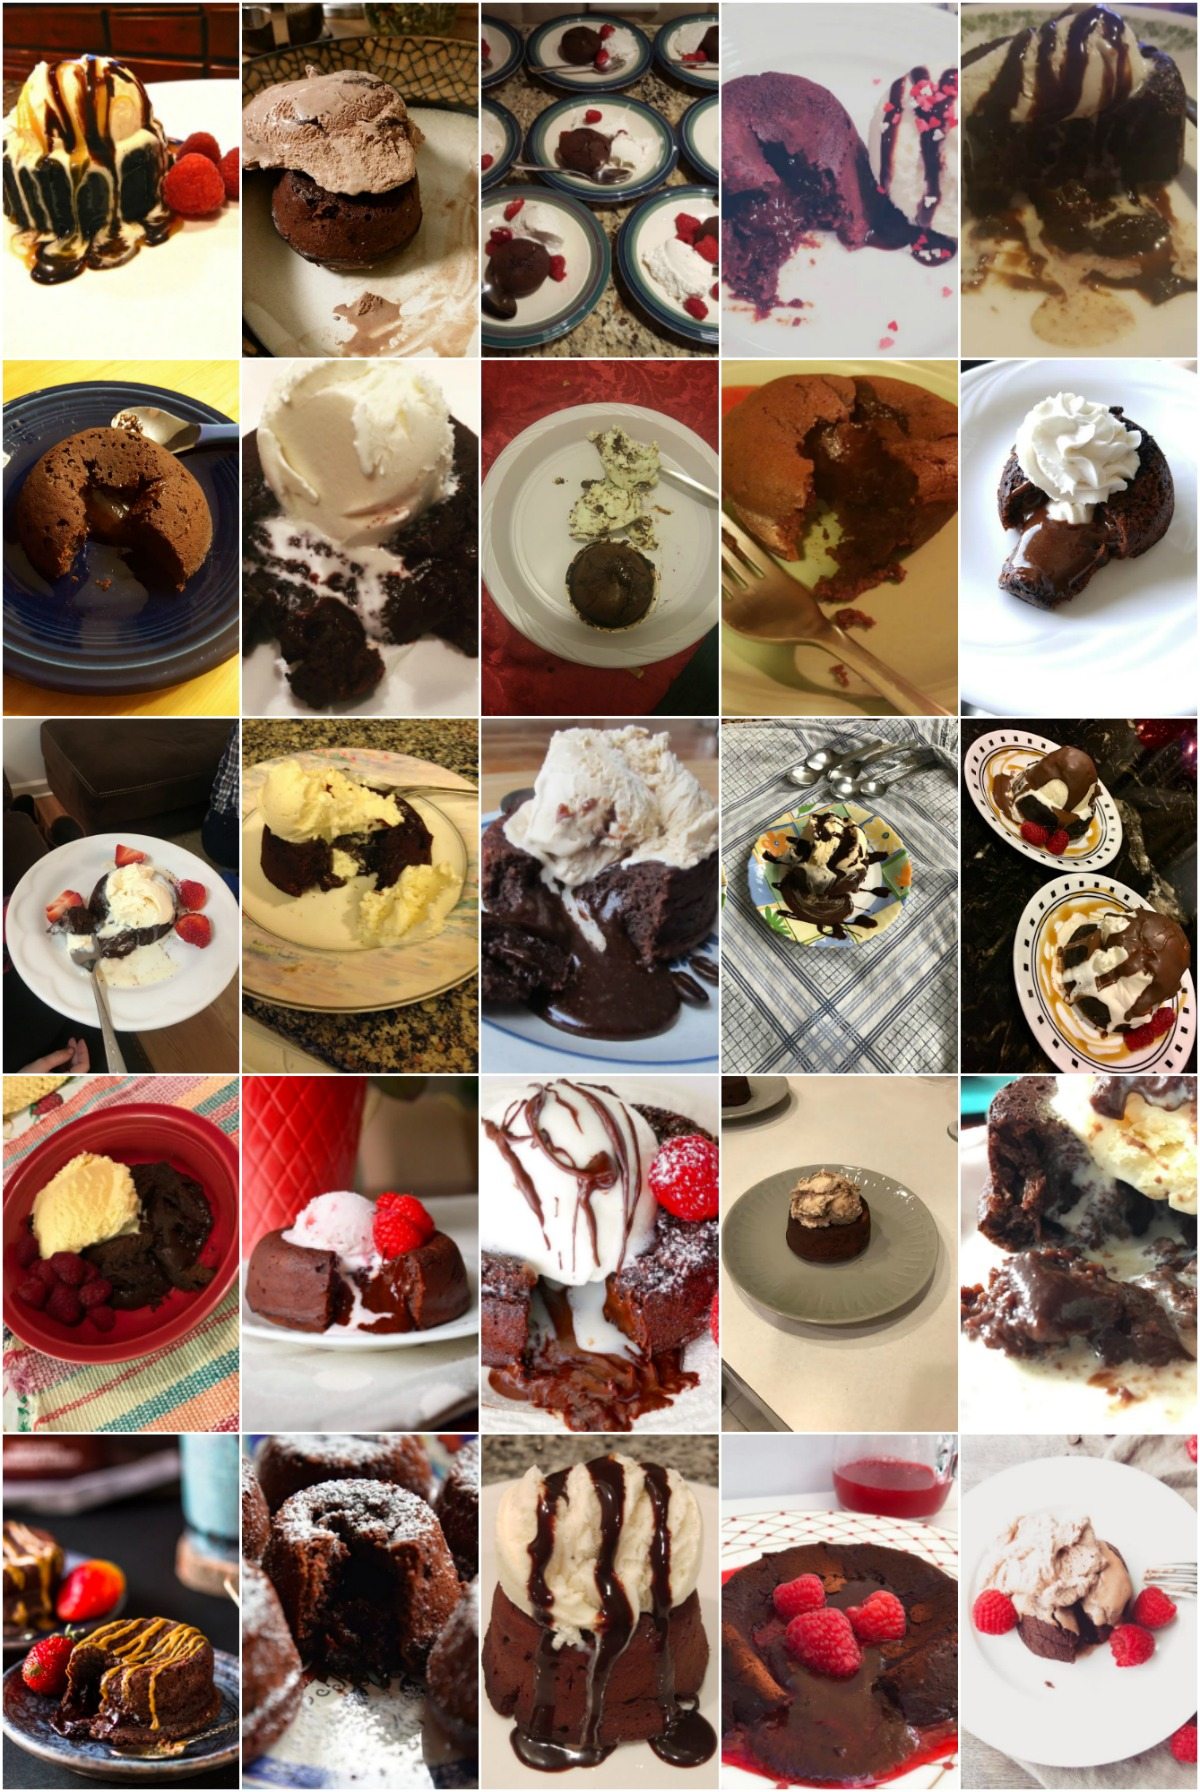
All of Your Chocolate Lava Cakes
Many readers tried this recipe as part of a baking challenge!
Chocolate Lava Cakes
- Prep Time: 10 minutes
- Cook Time: 14 minutes
- Total Time: 25 minutes
- Yield: 4 or 6 cakes
- Category: Dessert
- Method: Baking
- Cuisine: American
Description
Chocolate lava cakes with their deliciously rich molten chocolate center come together with 6 simple ingredients. Ready in just 25 minutes, this surprisingly easy and quick dessert always impresses. If you don’t have ramekins, follow my instructions for using a muffin pan instead.
Ingredients
- 6 ounces (170g) high-quality semi-sweet chocolate*
- 1/2 cup (8 Tbsp; 113g) unsalted butter
- 1/4 cup (31g) all-purpose flour (spooned & leveled)
- 1/2 cup (60g) confectioners’ sugar
- 1/8 teaspoon salt
- 2 large eggs
- 2 large egg yolks*
- optional for topping: ice cream, berries, and/or chocolate syrup
Instructions
- Spray four 6-ounce ramekins with nonstick cooking spray and dust with cocoa powder. This ensures the cakes will seamlessly come out of the ramekins when inverted onto a plate in step 7. Or spray half of a 12-count muffin pan and dust with cocoa powder. If baking in a muffin pan, the recipe will yield 6 cakes.
- Preheat oven to 425°F (218°C).
- Coarsely chop the chocolate. Place butter in a medium heat-proof bowl, then add chopped chocolate on top. Microwave on high in 10-second increments, stirring after each until completely smooth. Set aside.
- Whisk the flour, confectioners’ sugar, and salt together in a small bowl. Whisk the eggs and egg yolks together until combined in another small bowl. Pour the flour mixture and eggs into the bowl of chocolate. Slowly stir everything together using a silicone spatula or wooden spoon. If there are any lumps, gently use your whisk to rid them. The batter will be slightly thick.
- Spoon chocolate batter evenly into each prepared ramekin or muffin cup.
- Place ramekins onto a baking sheet and bake for 12–14 minutes until the sides appear solid and firm; the tops will still look soft. *If baking in a muffin pan, the cakes only take about 8–10 minutes.
- Allow to cool for 1 minute, then cover each with an inverted plate and turn over. Use an oven mitt because those ramekins are hot! The cakes should release easily from the ramekin. *If you used a muffin pan, use a spoon to release the cakes from the pan and place each upside down on plates.
- Add toppings. Serve immediately.
Notes
- Make Ahead & Freezing Instructions: You can prepare the batter through step 4. Cover tightly and refrigerate for up to 2 days. Allow to come to room temperature (takes a couple hours) before continuing with step 5. You can freeze the baked lava cakes for up to 3 months. Allow them to cool completely before freezing. Reheat in the microwave.
- Special Tools (affiliate links): 6-Ounce Ramekins or 12-count Muffin Pan | Glass Mixing Bowls | Whisk | Silicone Spatula or Wooden Spoon | Baking Sheet
- Chocolate: Make sure to use high-quality chocolate, not chocolate chips. You won’t have much “lava” with chocolate chips. I always use pure chocolate baking bars (found in the grocery store baking aisle), such as Baker’s, Ghirardelli, or Lindt. They’re typically sold in 4-ounce bars, so you will need 1 and 1/2 bars total.
- Eggs: For this recipe, you need 2 whole eggs plus an additional 2 egg yolks. (Use the 2 extra egg whites in an omelet or in any of these recipes with egg whites.) After 10–14 minutes in an oven this hot, the eggs should be cooked to 160°F, which is considered safe to eat. If you’re concerned, you can take the temperature with an instant read thermometer to be sure.


Reader Comments and Reviews
Turned out perfectly! I used 4 oz semi and 2 oz 60 % cacao cause i find Sally’s recipes to be on the sweet side for our family. Used muffin tins, and used a baking sheet to flip them out. Next time want to try GF flour with them. My 10yr old son loved them for a simple family birthday party
Hi Sally
I am working on buying ingredients to make this chocolate lava cake and noticed that there are no leveling agents to help these rise.
I do have recipe that I make Kava cakes in the microwave or oven using tamkins and or microwave mug cakes.
The recipe is great for 2
All that is needed is
1/4 cup self rising flour
1 tablespoon unsalted butter, preferably melted
1/4 cup milk
1/4 cup sugar
Pinch of salt
2 tablespoons cocoa, I use Hershey’s natural coco
1 oz square milk or dark chocolate cut in half; I buy Ghirardelli Carmel filled bars or Dove to make these.
Medium bowl, I whisk together the butter, milk, and sugar until smooth
Next I add the flour, cocoa, and salt. I stir until it is smooth.
Divide the batter into 2 mugs or ramekins. Do not fill over the half mark of the vessels being used.
Push a chocolate square half way down to each mug or ramekin and it is completely covered up by the batter.
Microwave each one for 30 seconds. You know the cake is done by feeling on top a slight sticky texture. Eat immediately, no need to remove from the vessel of choice, just need a spoon or fork and tapped with ice cream or sauce! Gotta say this so fast and easy my grown kids absolutely love these for a midnight snack.
Got this recipe from a friend.
This was absolutely amazing!! Loved it and so easy!! I liked using ramekins so every guest had their own serving!
This was absolutely amazing!! Loved it and so easy!!
We’re thrilled to read you loved these lava cakes, Lisa!
This recipe was absolutely fantastic. My sister decided to whip these up at midnight and I was blown away by how perfect they were- they taste exactly like the molten cakes at our favorite restaurant 🙂 We did underbake them a little (around 9 minutes, as other comments suggested). We always use Sally’s recipes, this is one of my favorites just because of how simple and easy it is. Thank you so much as always!!!
These absolutely flopped. Most disgusting thing I’ve ever put in my face. The wet ingredients aren’t enough to balance the sry, what exactly in the recipe actually Makes the “lava” pudding center? Hot air? Not enough sugar to balance the cocoa, so that makes it bitter. Using AI bots to make yourself feel good by boosting positive (fake) reviews is… I get why you did it w how this tirned out.
The only real differences between Pudding Cakes and Lava Cakes is when & how the moisture is added. Tomorrow I’m using this Cocoa rock to make Pudding Cake. Lies are cheap, Ingredients are Expensive.
I’m sorry to hear the recipe didn’t work out for you. Molten lava cakes get their signature soft center from a specific ratio of ingredients. When baked as directed, the edges set while the center remains warm and molten. Many readers have had success with this recipe, but baking results can vary based on ingredient measurements, oven temperature, baking time, and ramekin size. If you’d like to share your pan/ramekin size and long you baked them, I’d be happy to help troubleshoot. As for the reviews, they are submitted by readers who make the recipe and choose to leave feedback.
If I don’t have a microwave can I reheat these in the oven after freezing?
Hi Lauren, sure! There’s a chance they may dry out if reheated more slowly in the oven, but it should work.
Hi! Sally,
Thank you so much for your delicious recipes! I plan to make the Chocolate. Lava cakes for company. I only have 80z ramekins. Will they work?
Thank you,
Linda
Hi Linda! You can use the 8 oz ramekins and simply divide the batter equally among the four. The baking time will be a bit longer, but we’re unsure of the exact amount. Try another 1-2 minutes, keeping a close eye on them.
I’d really like to make these for my chocaholic son’s birthday but there will be a crowd and I’m wondering if, rather than quadrupling the recipe to make enough individual servings, it can be made as one bigger cake. I’ve seen a couple recipes that use either an 8×8 or oval casserole, but I don’t know the bakers and don’t trust them like I do you all. I’m curious to know if you’ve experimented with this, and have any suggestions/thoughts.
Thanks!
Hi Carol! We haven’t tested it, but this particular recipe needs to be in small serving sizes to get the desired texture. You might enjoy our chocolate souffle instead, which you can bake in a larger ramekin or dish. Let us know if you give it a try!
Where is the butter used?
Hi Ben! You melt it with the chocolate in step 3.
Omg, my first time making lava cakes! They turned out perfect, great last-minute Valentine’s Day dessert!
Easy breezy and delish! news to make more often but tricky for a crowd!
Absolute perfection! First time making a chocolate lava cake, and I knew that I wouldn’t be disappointed when I came by this recipe because Sally’s recipes have NEVER failed me. You’re amazing!
Prepared the batter ~3 hours in advance before baking, and it definitely thickened up (could also be because of the cold weather) that I was able to scoop the batter into even portions in the ramekins and they still baked perfectly.
A couple of changes I made:
1. Used 100g 70% chocolate, and 70g of Hazelnut Milk Chocolate (Lindt brand). YUM!
2. I only have 8oz ramekins, this recipe was enough for x3 8oz ramekins which was perfect because I only needed 3 for me and my parents.
I trust all of Sally’s recipes and this lava cake was no exception! These were very easy and fast to make and tasted amazing! A few recipes that said to use room temp eggs, to prevent a lumpy batter, so I did that and it was super smooth! I used a Ghirardelli Semi-Sweet Chocolate Premium Baking Bar and it had a very rich, chocolate flavor! I’m saving this recipe to make again and again!!
Definitely would cook these for closer to eight to 9 minutes. Mine came out and there was no molten center at all. Nice and moist but 12 and 1/2 minutes was too much.
Absolutely incredible! Made these for Valentines and my husband commented that they taste like they are from a top restaurant! Recipe is very easy to follow. I used silicone muffin tins and cooked for 8 mins. Will be making these for every occasion!!
Hello! I would love to make these for a dinner party. Could I make them an advance and heat them up right before? Or how would you recommend doing this?
Hi Katie, you can reheat them in the microwave right before serving. Or, see recipe Notes for other make ahead options. Hope they’re a hit!
I tried this by subbing in 70% dark chocolate but the cakes didn’t have a ton of flavor like the original recipe does. Is there a way to make them dark chocolate and have a richer taste?
Hi Rohini, what type/brand of chocolate did you use? You can certainly use a darker chocolate for a deeper taste. Flavor could vary a bit depending on the brand of chocolate you use.
The only downside to this recipe is that I almost always have all the required ingredients in my pantry. Simple, quick and delicious choco lava cakes! Will definitely add this recipe to my monthly rotation ❤️
These turn out perfect every single time!
I only have 4 ounce ramekins, would I still use 6 and bake according to muffin tin directions? Thank you!!
Hi Nia! You’ll need to reduce the baking time for smaller cakes. We’re unsure exactly how long they will take to bake. Let us know how they go!
I divided the batter evenly between 5- 4oz ramekins and baked for 11 minutes and oh my gosh they were perfect!! So quick and easy too. Topped with some vanilla soft serve from our ninja creami!
Not sure how this recipe is to make 6 lava cakes. Barely makes 3 6 ounces cakes for me.
Delicious tho.
Hi Marcin, this recipe should make four 6 oz lava cakes, or six lava cakes in a muffin pan.
Decadent and delicious
These are soooo good! I’m planning on serving these for a dinner party. If I want to make ahead and freeze, how long do you suggest heating each one in the mircrowave? Or can I reheat on a cookie sheet lined with parchment in the over? Thank you so much for this amazing and easy recipe.