

If you enjoy trying homemade versions of store-bought favorites, you will love these fudge chocolate pastry tarts because they’re just like chocolate pop tarts but with a homemade touch! Like my homemade brown sugar cinnamon pop tarts recipe, this is a fun baking project for a snowy or rainy day or when you’re looking for a special baking recipe to try out.
One reader, Alex, commented: “I loved this recipe!! It really challenged me because I am not an experienced baker by any means, but the pop tarts came out so great!! I loved how flaky the pastry was, and the chocolate was so decadent. I am excited to try and make the brown sugar cinnamon ones as well! ★★★★★“
Pastry tart can refer to a handful of different baked goods like actual tarts made in a full size or mini tart pan, tarts made from puff pastry, or something like hand pies—which is what I consider today’s chocolate dessert recipe. They’re like store-bought pop tarts, but I don’t suggest putting them in the toaster to reheat.
Whatever you call them, they’re perfect for anyone who LOVES chocolate.
These Fudge Chocolate Pastry Tarts Are:
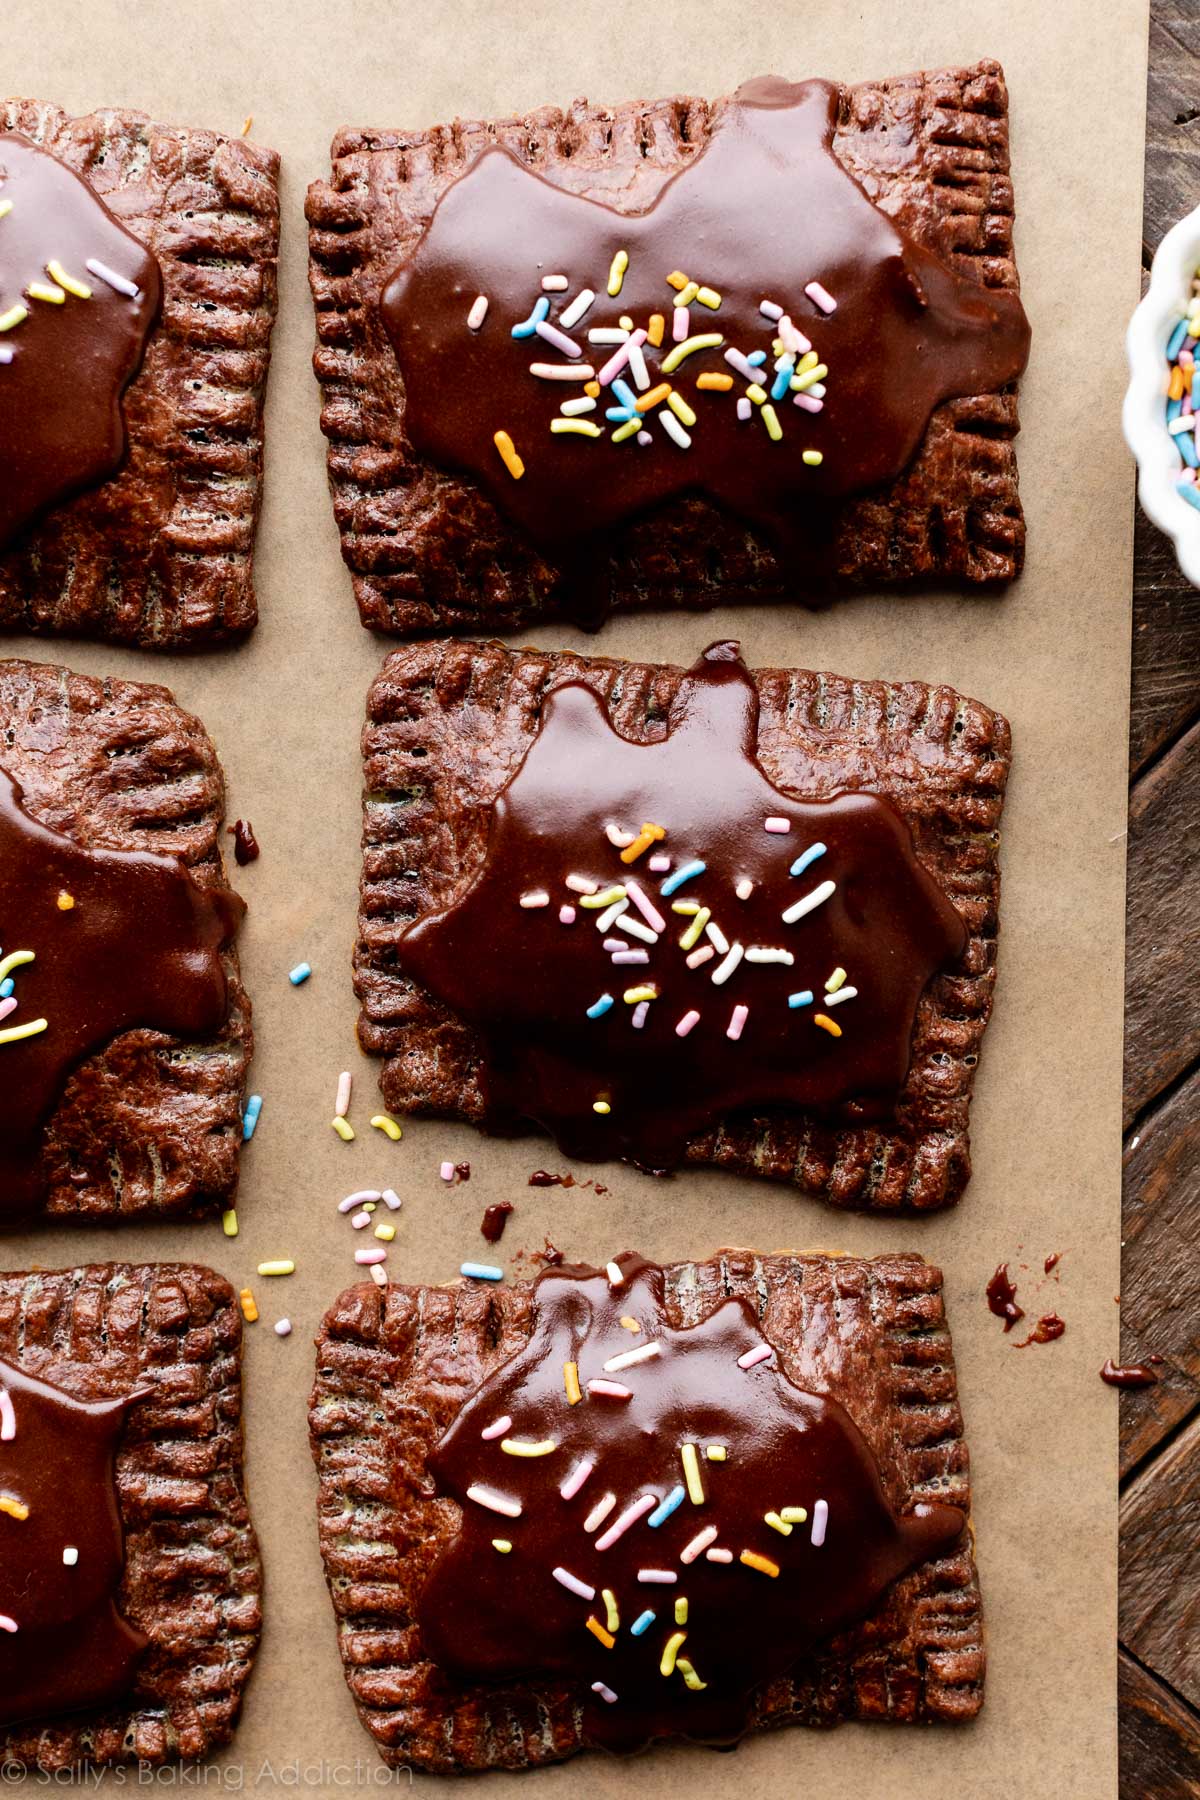
- Draped in chocolatey cocoa icing
- A homemade version of store-bought pop tarts
- Like these chocolate hand pies, but with a slightly different filling & topping
- Best after they have completely cooled
- An intermediate baking recipe and doable for most home bakers
- Definitely a dessert, but feel free to indulge for breakfast!
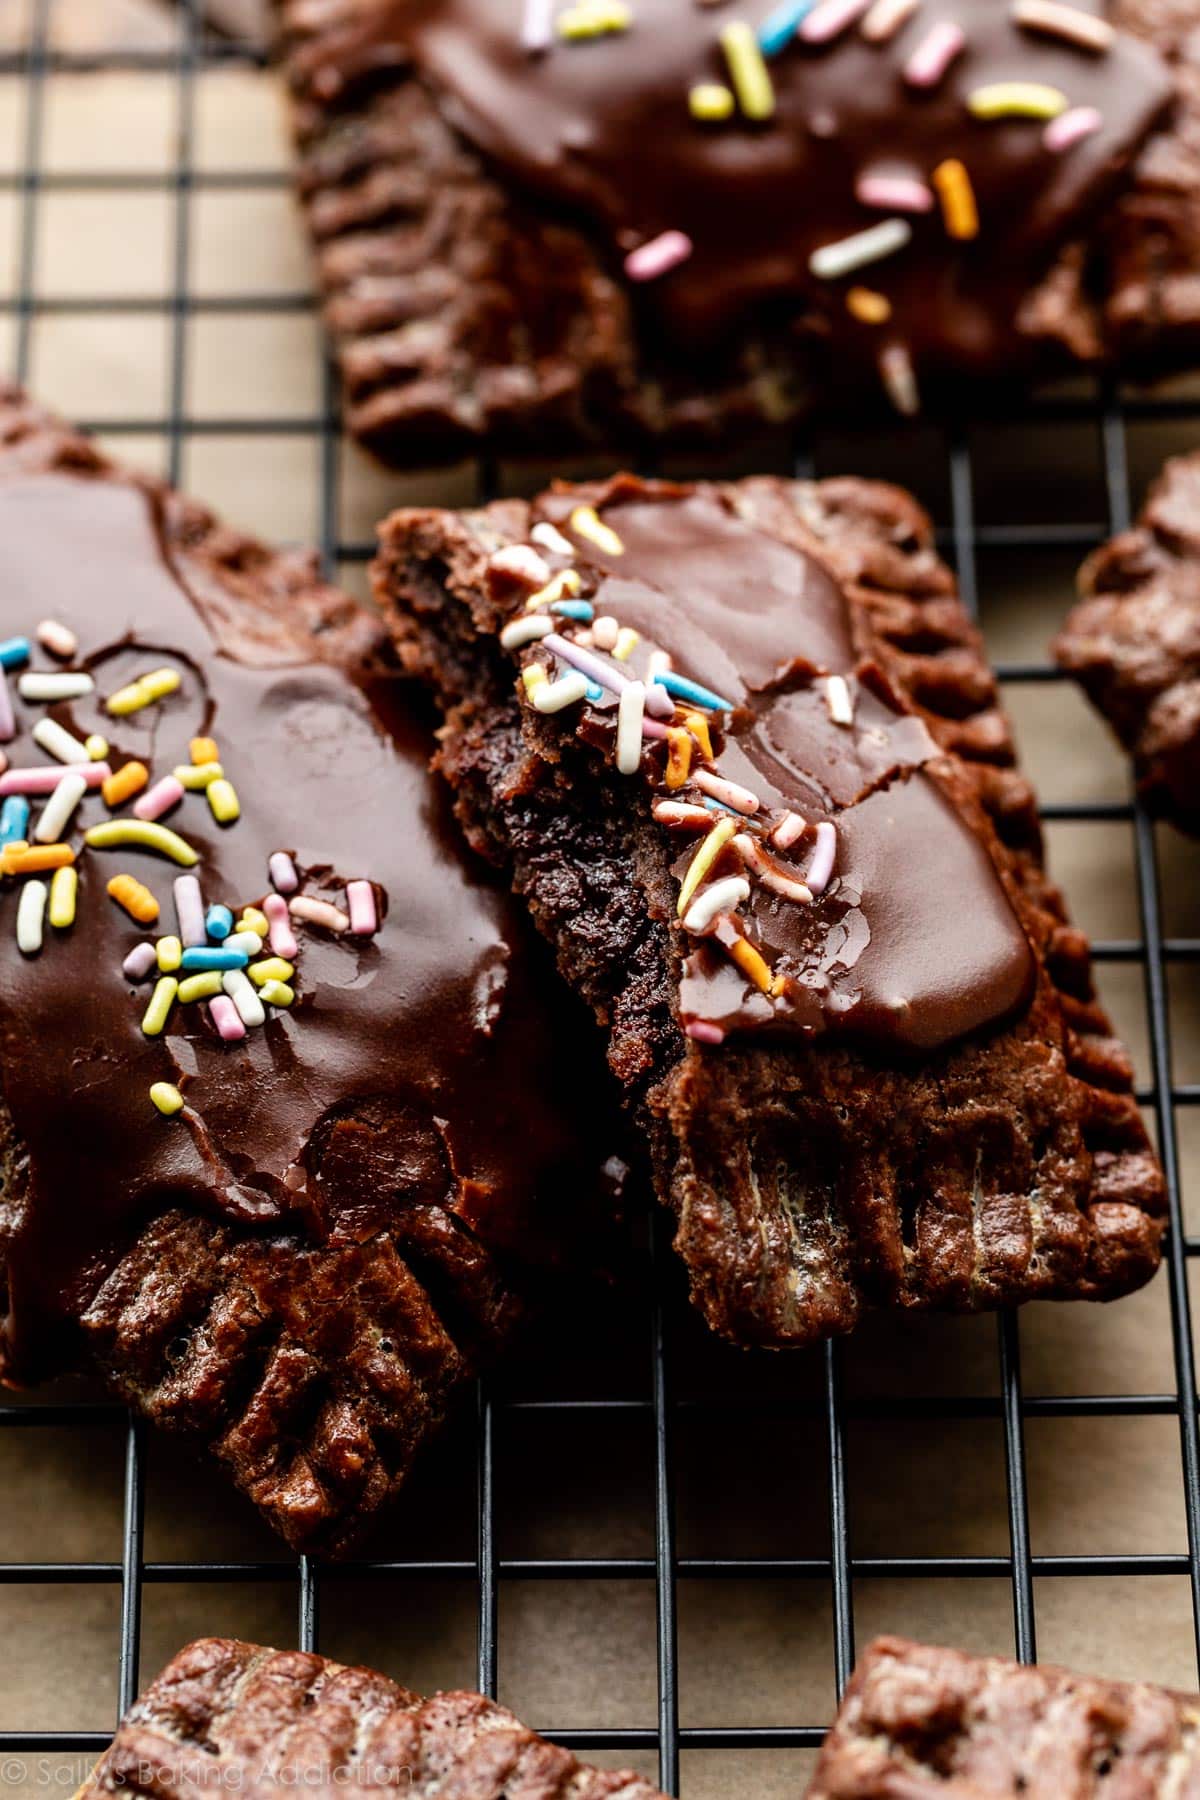
After completely cooling, the crust is deliciously crumbly, the filling has thickened, and the icing has set. If you have the self control, WAIT to eat one!
3 Parts to Homemade Chocolate Pop Tarts
There are 3 components to these homemade chocolate pop tarts and even though the ingredient list below looks long, the ingredients are mostly repeated in each part of the recipe. (For example, you use butter in all 3 components.) Here’s each part of the recipe:
- Chocolate Pastry/Pie Dough
- Fudge Filling (tastes like brownies!)
- Cocoa Icing
You need 11 ingredients total. Let me walk you through the steps so you have a better idea of the process. There is also a video tutorial in the recipe card below.
Chocolate Pie Dough
The envelope sealing in all of the fudge filling is chocolate pie crust and I recommend you make this first because the dough needs to refrigerate for at least 2 hours. This is an all butter chocolate pie dough, so you don’t need shortening which is a fat I like to combine with butter in my favorite pie crust recipe. I do have an all butter pie crust that I love as well and today’s recipe is basically a chocolate version of that. We’ll swap some flour for cocoa powder, reduce the salt, and use milk as the liquid. Since there’s no leavening, you can use either dutch-process or natural cocoa powder. (If you’re ever curious, here is the difference between dutch-process vs. natural cocoa powder.)
- Tools for Pie Dough (affiliate links to products I use and love): A food processor makes the pie dough process easier and if you don’t have one, use a pastry cutter. A blender could work, but be VERY careful not to over-work this dough. You also need a rolling pin, sharp knife or pizza cutter for shaping the dough, and a pastry brush.
- Pie Dough Success Tip: For the most successful chocolate pie dough, make sure your butter and milk are VERY cold otherwise both will incorporate into the dough too quickly and you’ll be left with unworkable dough/paste.
Instead of chocolate dough, feel free to use my favorite regular pie crust or all butter pie crust.
Where Else Can I Use This Chocolate Pie Dough?
The dough recipe yields enough for 2 pie crusts and you can use 1 for any of the following recipes—simply switch out the dough in each recipe for the chocolate version.
- Brownie Pie (blind bake as directed in that recipe)
- French Silk Pie (blind bake as directed)
- Nutella Tart (bake crust as directed in that recipe)
- Snickers Caramel Tart (bake crust as directed)
- Pecan Pie
Pie Dough Step Photos
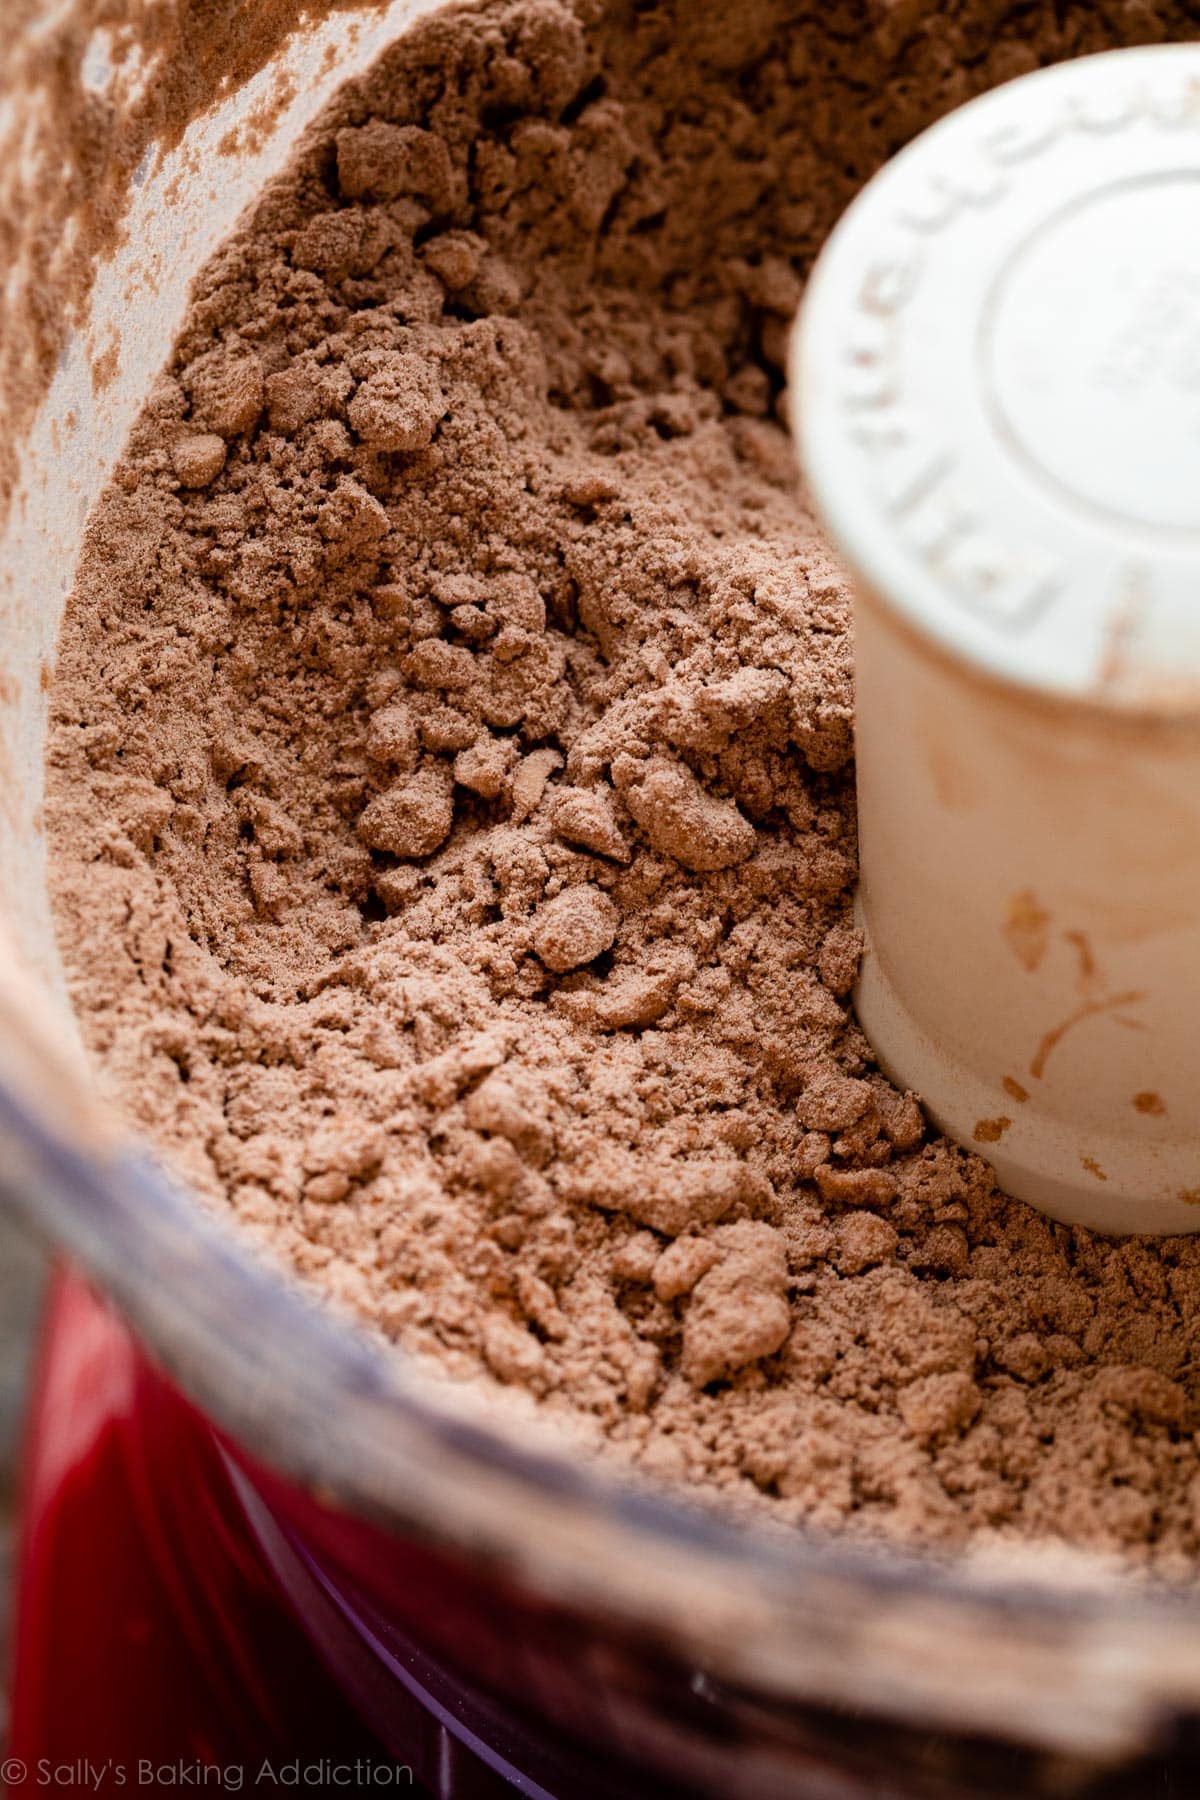
The full detailed recipe is below, but let me walk you through the step photos as they will be helpful especially when it comes to the dough. Using either a food processor or pastry cutter, pulse/cut your cold butter into a mixture of flour, cocoa powder, sugar, and salt. Just like regular pie dough, you want coarse butter crumbles coated with the dry ingredients:
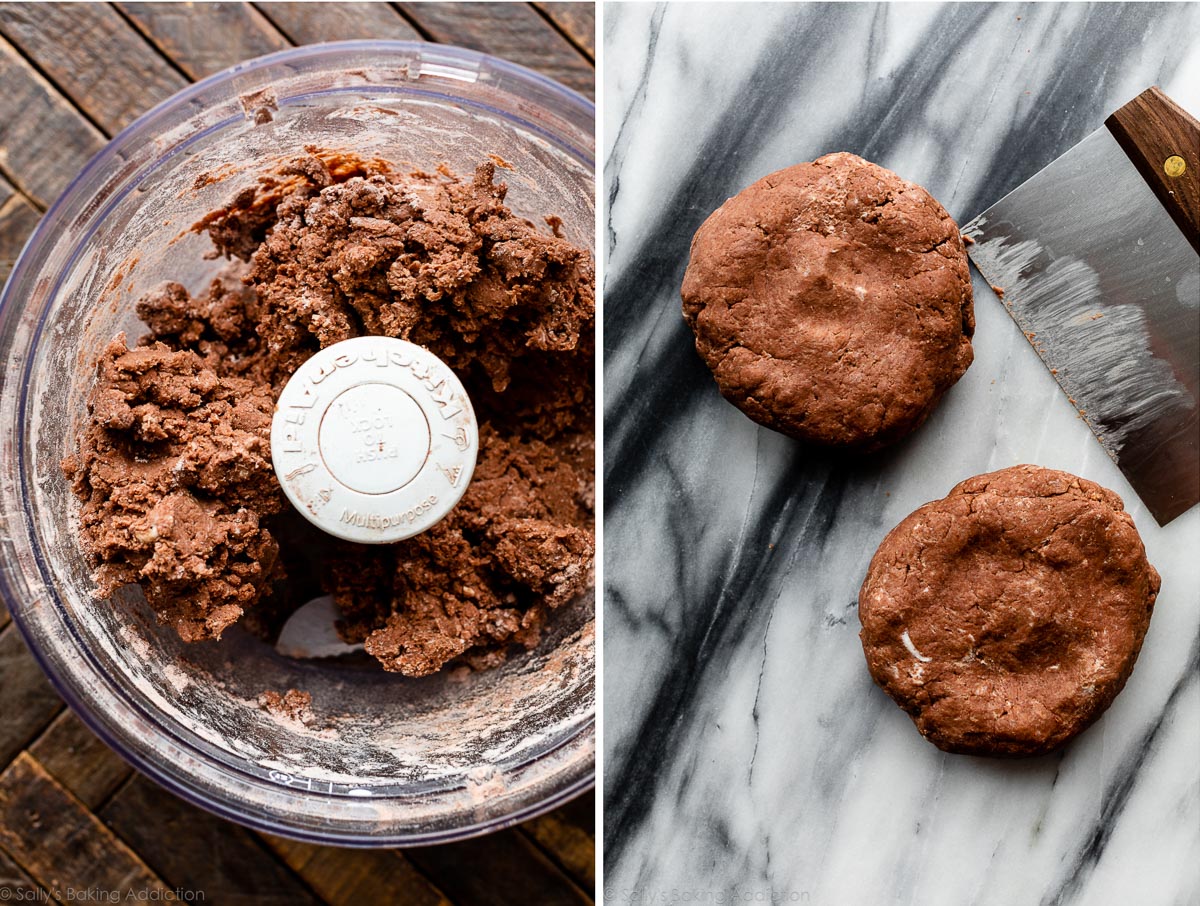
Slowly add the cold milk just until the dough clumps and comes together. Divide dough in half, flatten into discs, and then refrigerate both for at least 2 hours:
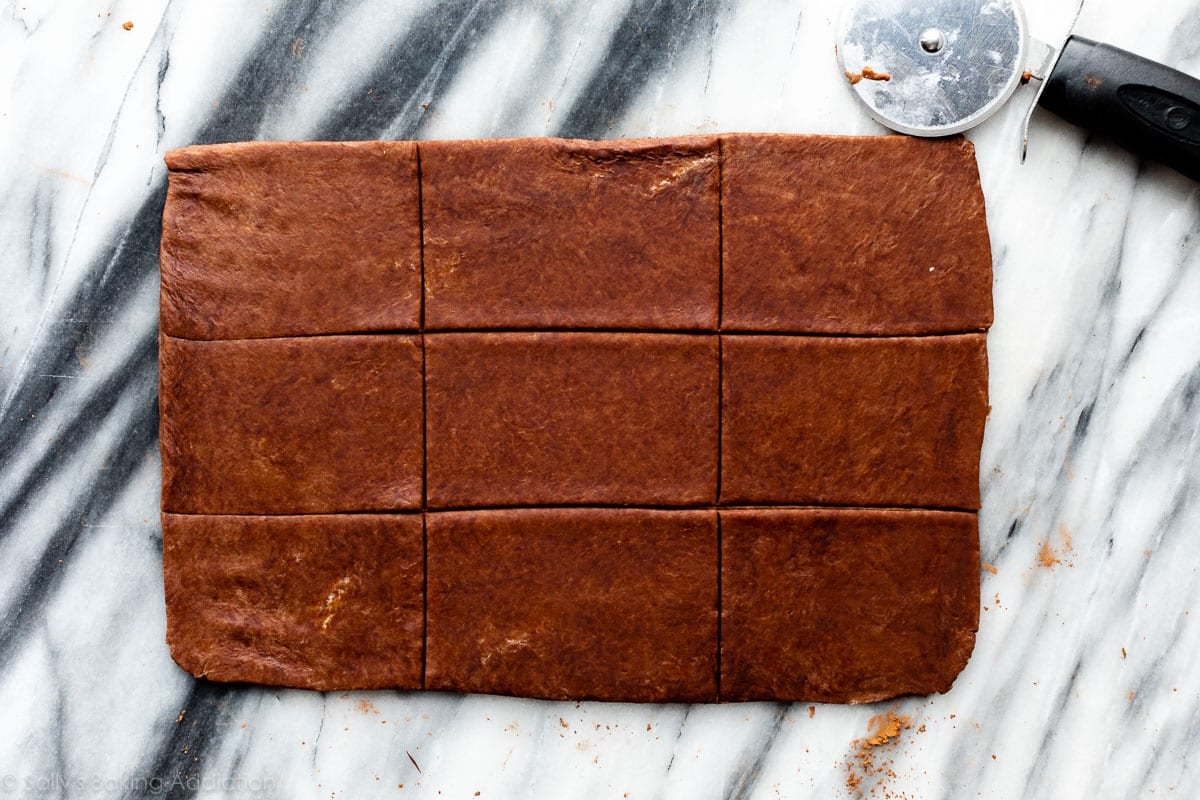
Roll out each chilled disc into a 9×12-inch rectangle and use cocoa powder instead of flour to prevent the dough from sticking. Take your time with this because the dough is quite stiff.

Then cut each rectangle into 9 3×4-inch rectangles. You’ll have 18 rectangles, which makes 9 pop tarts. Here is just 1 so you have an idea what it looks like:
The shaped dough is ready to be filled and assembled. As instructed in the recipe below, have an egg wash handy because that’s the “glue” that adheres the top and bottom doughs together.
Fudge Filling
In my regular chocolate hands pies, we use chocolate ganache as the filling. In today’s recipe, we’re making a fudge filling that when baked and cooled—tastes like homemade brownies. My goal for the filling was to make a thicker, yet less rich chocolate ganache. It worked very well!
- Make the fudge filling immediately after you prepare the pie dough because it needs to cool and thicken before you assemble the pop tarts. You need chocolate, milk, sugar, butter, and vanilla extract. Most of the ingredients come together on the stove.
You end up with about 3/4 cup (180ml) fudge filling so each pop tart gets a heaping Tablespoon. Don’t forget the egg wash border around the bottoms.
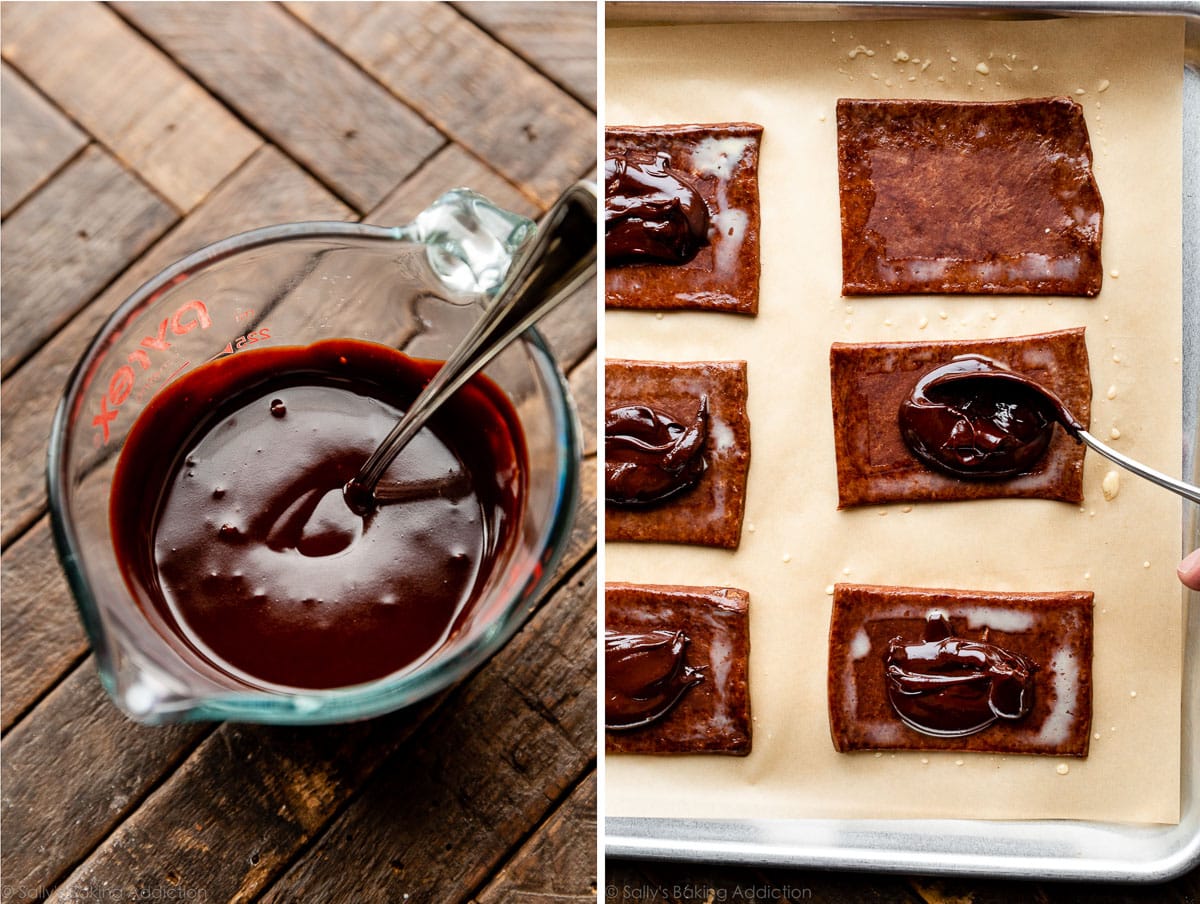
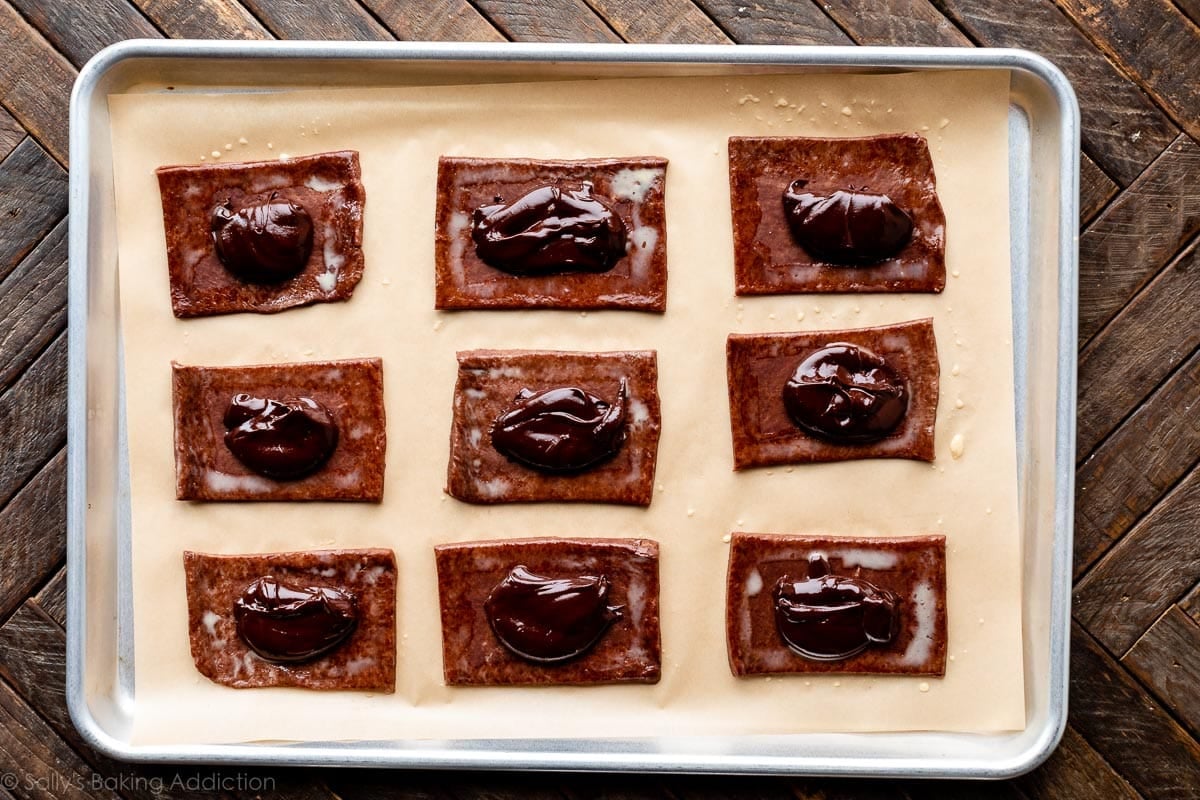
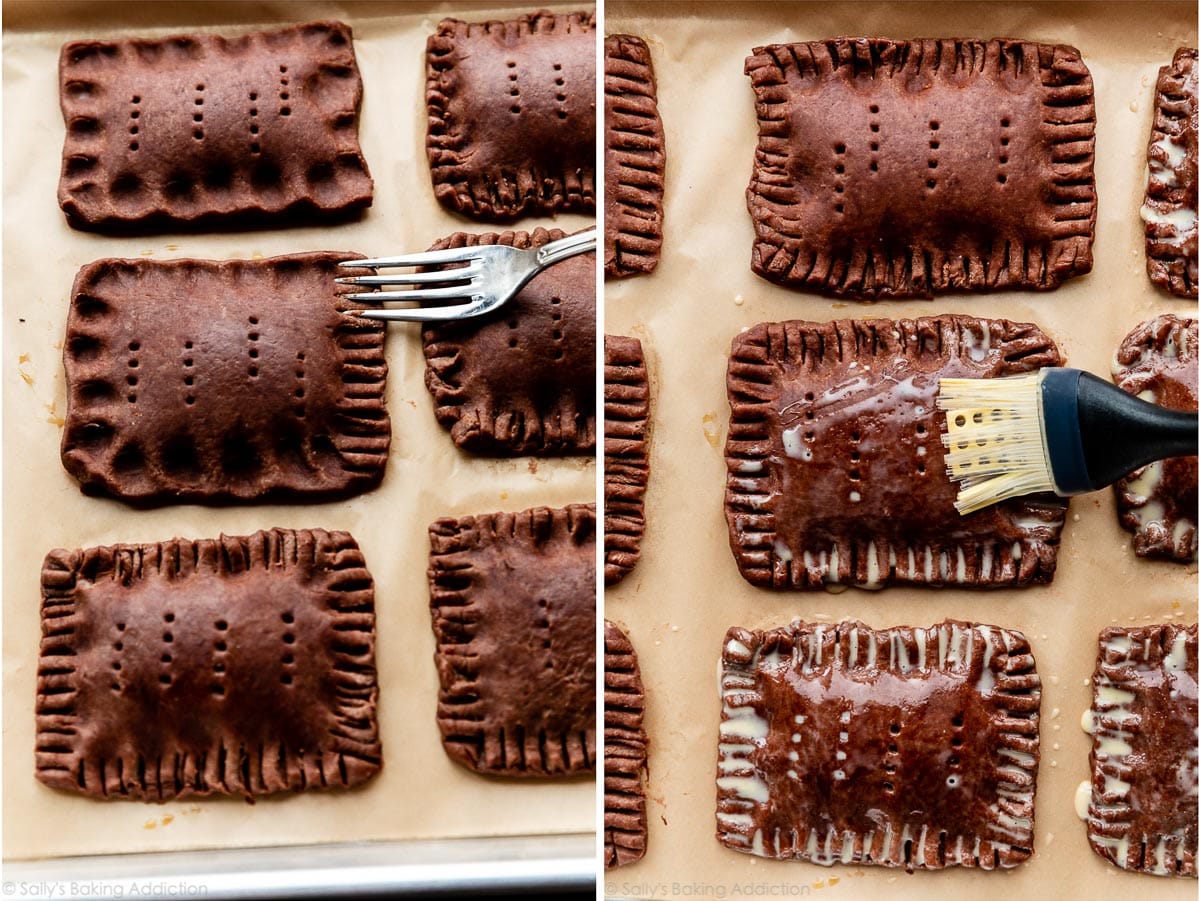
After spooning the fudge filling on the rectangles, lay the other set of pie dough rectangles on top of each and press your finger around the edges to slightly seal. Poke holes in the top pie crust with a fork or toothpick, which allows steam to escape.
To finish assembling, crimp the edges with a fork (just like when we crimp pie crust) to ensure no filling spills out (if it does, it’s not a big deal). Brush with egg wash which gives the baked tarts their glistening sheen.
As the chocolate pastry pop tarts bake, make the icing. You’re almost done!
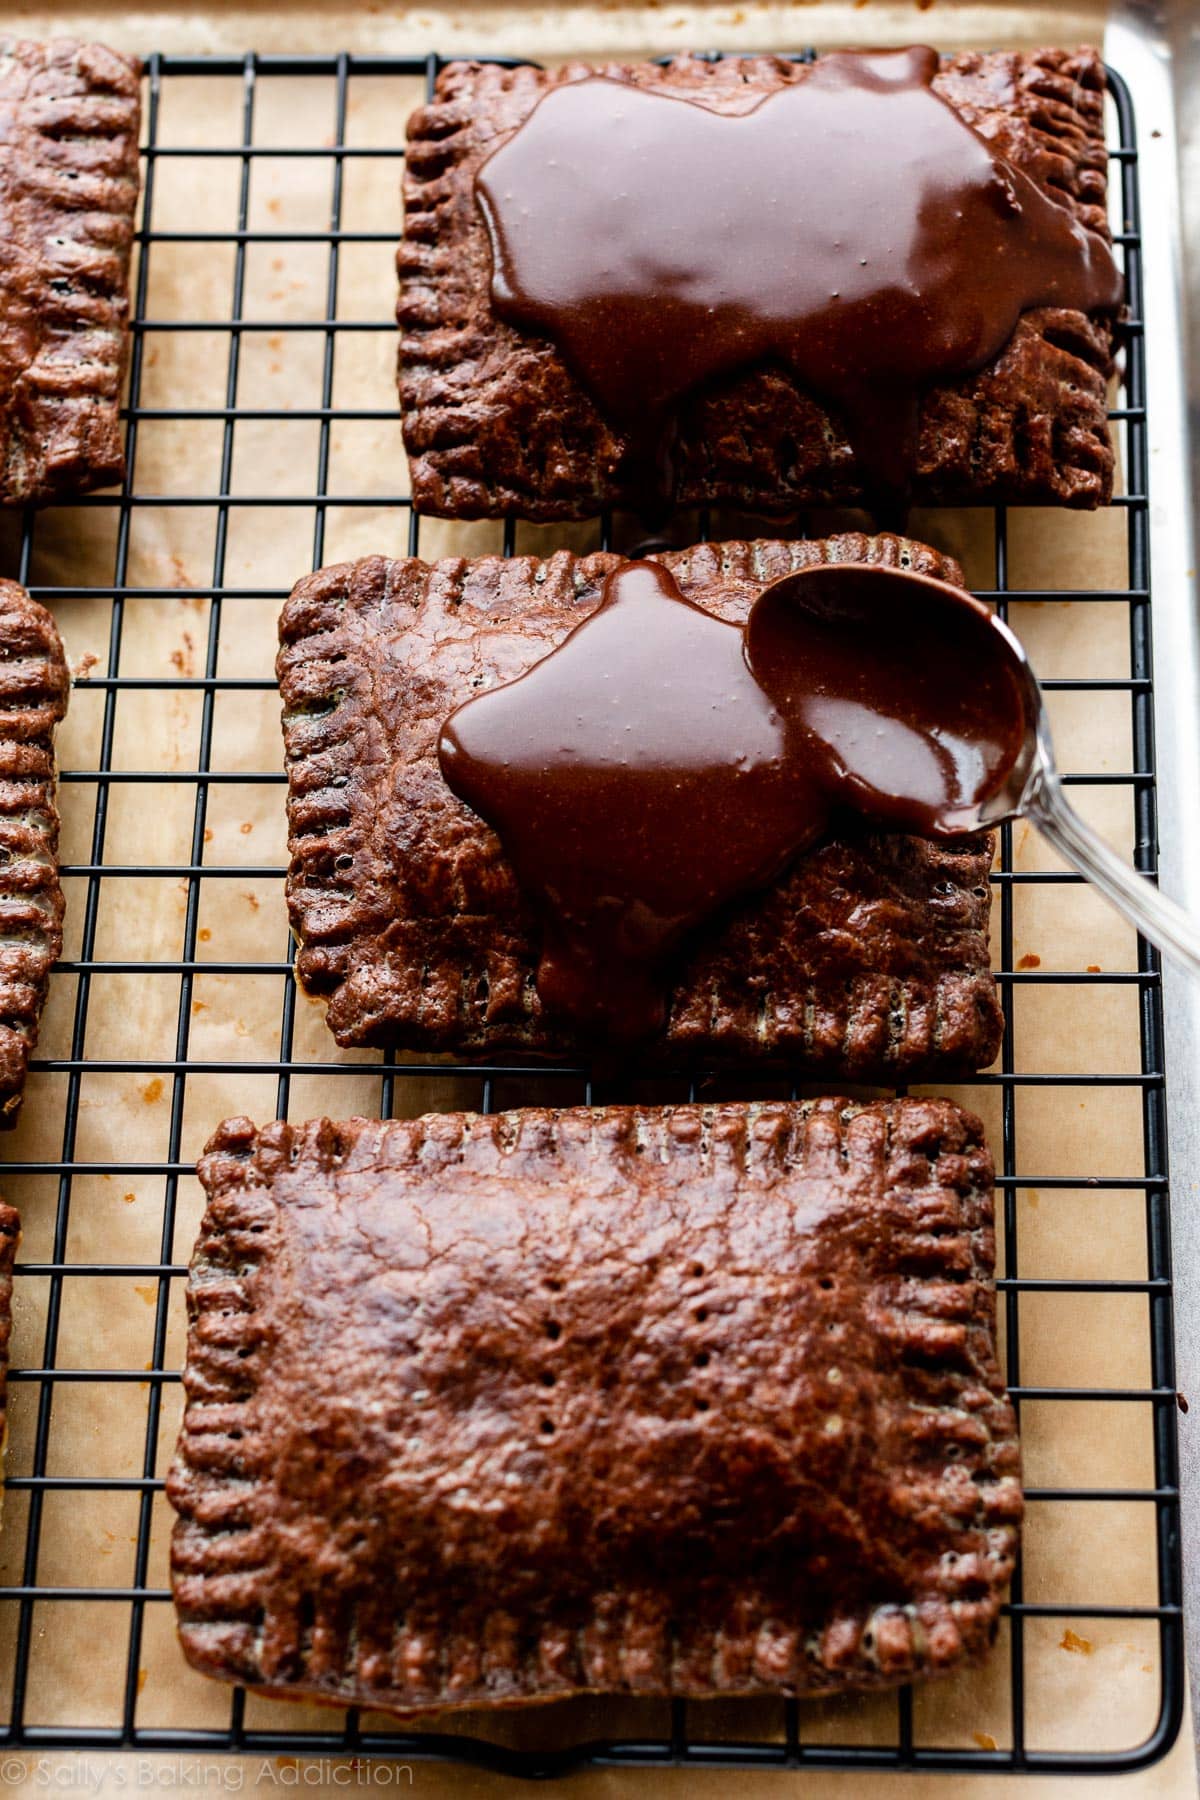
Cocoa Icing That Sets
After the chocolate pastry tarts bake and slightly cool, spoon chocolate icing on top. When testing this recipe, I often went back and forth about the icing. Did I want a chocolate version of royal icing or a simple drizzle of melted chocolate? I ultimately decided on a sweet cocoa icing that—thanks to the butter—eventually thickens and sets. You need melted butter, hot water, confectioners’ sugar, cocoa powder, and vanilla extract. You can use milk instead of water, but I find that version doesn’t set as nicely. Feel free to skip the icing if desired.
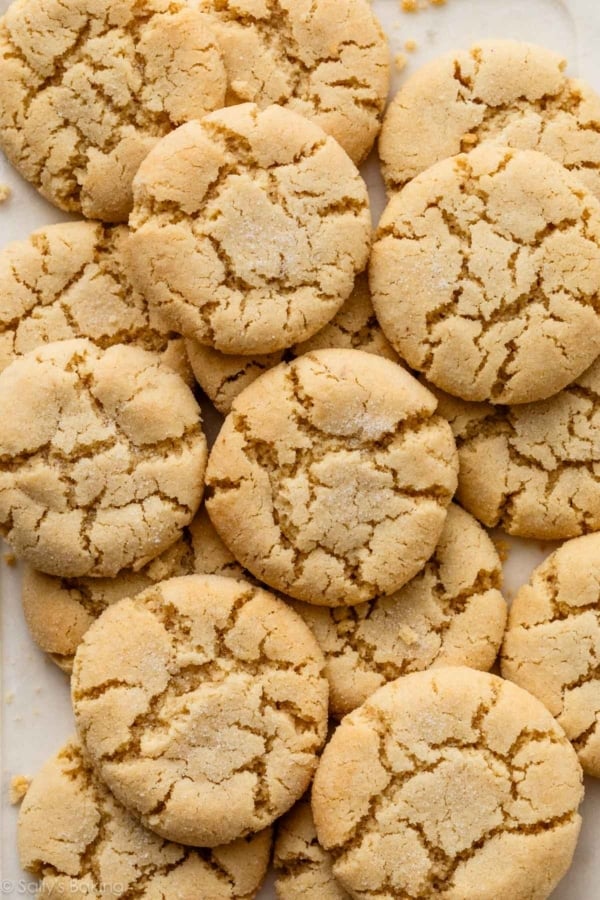
- This would be a lovely icing to use on chocolate sugar cookies, but I don’t recommend using a piping tip because it’s quite drippy. You could use it for glazed doughnuts, too!
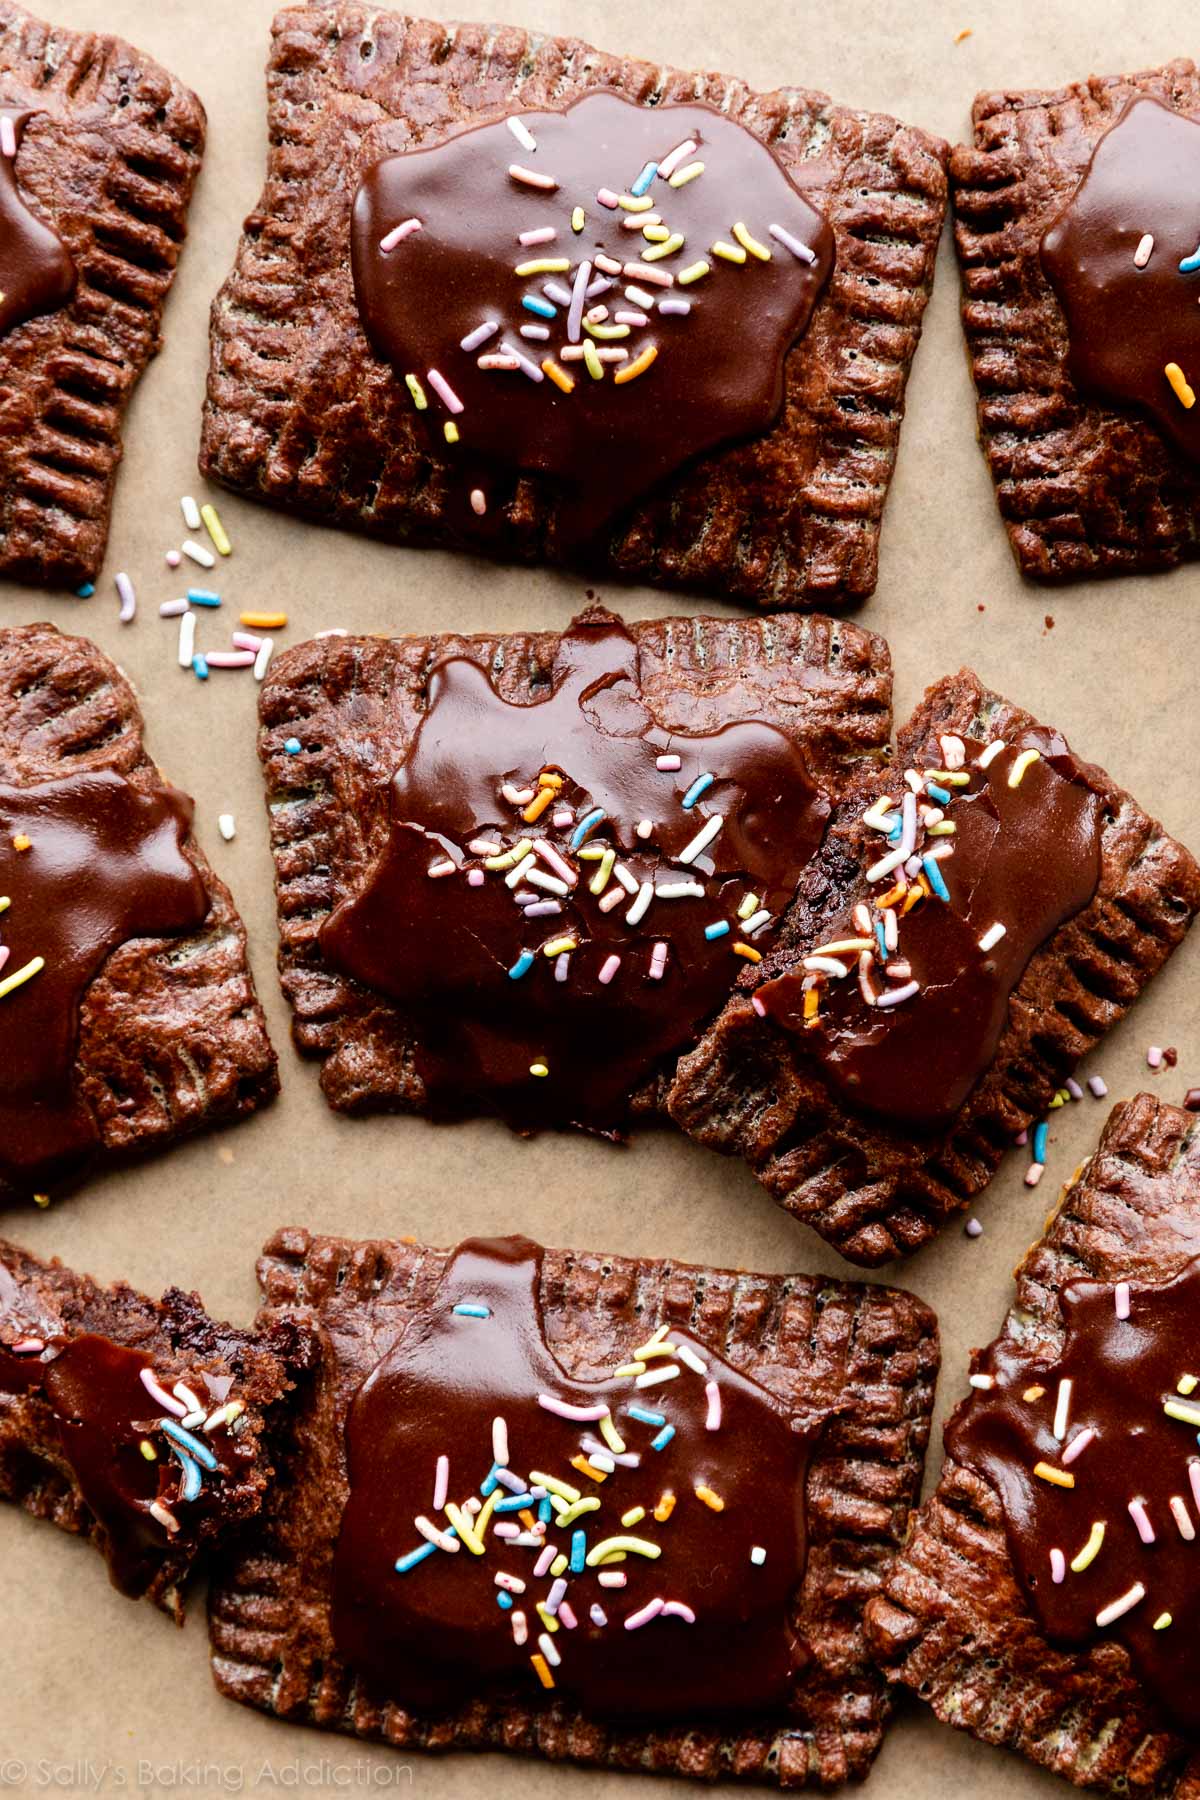
Sprinkles are the finishing touch, but you can skip them if desired. These pastry tarts are a homemade version of a fun childhood favorite and I hope you enjoy the process. (And end result!!!)
For more takes on classic childhood treats, try my rice krispie treats, cream-filled chocolate cupcakes, mini animal cracker cookies, and oatmeal creme pies.
See Your Chocolate Pop Tarts!
Many readers tried this recipe as part of a baking challenge! Feel free to email or share your recipe photos with us on social media. 🙂
Print
Homemade Fudge Chocolate Pop Tarts
- Prep Time: 3 hours, 30 minutes (includes dough chilling)
- Cook Time: 25 minutes
- Total Time: 4 hours, 10 minutes
- Yield: 9 pastry tarts
- Category: Dessert
- Method: Baking
- Cuisine: American
Description
Follow these thorough instructions to make a homemade version of store-bought chocolate pop tarts. These fudge chocolate pastry pies hold shape if they chill before baking (step 6) and taste best if they cool before you dig in!
Ingredients
Dough & Assembly
- 2 and 1/4 cups (281g) all-purpose flour (spooned & leveled)
- 1/4 cup (21g) unsweetened natural or dutch-process cocoa powder, plus more as needed for rolling
- 2 Tablespoons (24g) granulated sugar
- 1/2 teaspoon salt
- 1 cup (16 Tbsp; 226g) unsalted butter, very cold and cubed
- 1/2 cup (120ml) cold whole milk*
- egg wash: 1 egg beaten with 1 Tablespoon (15ml) milk
Fudge Filling
- 4 ounce (113g) semi-sweet chocolate bar, coarsely chopped*
- 1/4 cup (60ml) whole milk*
- 2 Tablespoons (25g) granulated sugar
- 1 Tablespoon (14g) unsalted butter, cold and cubed
- 1 teaspoon pure vanilla extract
Cocoa Icing
- 1 Tablespoon (14g) unsalted butter
- 2 Tablespoons (30ml) water
- 1 cup (120g) confectioners’ sugar
- 2 Tablespoons (10g) unsweetened natural or dutch-process cocoa powder
- 1 teaspoon pure vanilla extract
- optional: sprinkles for garnish
Instructions
- Make the dough first: Place the flour, cocoa powder, sugar, and salt into a large 8-cup capacity or higher food processor or, if you don’t have a food processor, in a large bowl. Pulse or whisk until combined. Add butter and pulse or use a pastry cutter to manually cut in until coarse pea-sized crumbs form. See photo above for a visual. In 3 additions, pour in the milk and pulse or stir after each addition. After all the milk is added, pulse or stir more until the dough clumps up and comes together. If it’s too dry, add 1 Tablespoon (15ml) of cold milk. Try not to overwork the dough. Pour onto a work surface lightly dusted with cocoa powder or all-purpose flour. Use your hands to form dough into a ball. Divide the dough in half and flatten each into 1-inch thick discs. Wrap each disc tightly in plastic wrap and refrigerate for 2 hours and up to 5 days.
- Make the fudge filling soon after you prepare the dough: The fudge filling needs to cool and thicken, so that is why I recommend making it soon after you put the pastry dough in the refrigerator. Place chocolate, milk, and sugar in a medium saucepan over medium heat. Stir frequently as chocolate melts and mixture combines. Once melted, remove from heat and stir in the butter and vanilla extract. Pour into a heatproof bowl, cover, and set aside at room temperature to cool and thicken. You want the consistency slightly thinner than peanut butter. Note: You can refrigerate the filling to thicken it, but it may become too thick and cold. If it’s too thick, reheat in the microwave for a few seconds.
- Line 1 large baking sheet with parchment paper or a silicone baking mat. Make sure there is enough room in your refrigerator for the baking sheet because the shaped pastry pop tarts must chill for 15 minutes before baking.
- Roll out the chilled pie dough: Remove 1 of the dough discs from the refrigerator and let it sit at room temperature for 10 minutes to slightly warm up because it will be quite solid. (Keep the other in the refrigerator until step 5.) Lightly dust a work surface, rolling pin, and your hands with cocoa powder or all-purpose flour. Using a rolling pin, roll the dough into a 9×12-inch rectangle. Use gentle force with your rolling pin and use your hands to help keep the edges straight. You can watch me roll out the dough in the video below if you need a visual (2:23 mark). Visible specks of butter and fat in the dough are perfectly normal and expected. Trim the edges of the rectangle to straighten if needed. Cut rectangle into 3 equal strips and cut those into thirds for a total of 9 3×4-inch rectangles. Use a ruler to help make this process easier and more accurate. Arrange the dough rectangles 2 inches apart on the prepared baking sheet and chill in the refrigerator as you roll out 2nd half of dough in the next step.
- Roll out the 2nd half of dough and cut into 9 3×4-inch rectangles like you did with the 1st half of dough in step 4.
- Assemble the pastry tarts: Remove 1st set of dough rectangles from the refrigerator. Using a pastry brush, brush edges of each of these 9 rectangles with egg wash. Spoon a heaping Tablespoon of filling into center of each. Lay the other set of pie dough rectangles on top of each and press your finger around the edges to slightly seal. Poke holes in the top pie crust with a fork or toothpick and then crimp with a fork to ensure no filling spills out (if it does, it’s not a big deal). Refrigerate the shaped pastries uncovered for at least 15 minutes and up to 3 hours. This firms up the pastry and helps set its shape. (After chilling, feel free to carefully transfer the pastries to a new lined baking sheet if you don’t want to bake them on the cold baking sheet.)
- Meanwhile, preheat oven to 375°F (191°C). And look ahead to step 9—you can make the icing as the pastries bake in step 8.
- Brush pastry tarts with egg wash and bake for 25-26 minutes or until edges appear set. Remove from the oven and allow pastries to cool for 5 minutes before transferring to a wire rack to cool completely. Pastries taste best after completely cooling—they are very soft and rich when warm.
- Make the icing: In a medium saucepan over low heat or in a medium heatproof bowl using the microwave, warm butter and water together until butter has melted. Whisk mixture with the remaining icing ingredients. Cool icing for 15 minutes before spooning onto pastries. You can add the icing when the pastries are still warm, but again, they taste best after completely cooling. Immediately top with sprinkles, if using. Note: The longer the icing cools, the thicker it gets. If you let it cool too long before spooning on the pastries, the surface will stiffen up—whisking will bring it back together though. You can also reheat on the stove or in the microwave to thin out if needed.
- Cover and store pastries at room temperature for up to 1 day or in the refrigerator for up to 1 week.
Notes
- Make Ahead & Freezing Instructions: You can make the pie dough up to 5 days in advance, see step 1. You can also make the fudge filling up to 1 day in advance. Cover and refrigerate and when ready to use, heat in the microwave for just a few seconds to slightly thin out. You can assemble and refrigerate the pastries for up to 3 hours, see step 6. Baked and cooled pastries (with or without glaze) freeze well for up to 3 months. Thaw and heat in the microwave if desired. Do not heat in a toaster.
- Special Tools (affiliate links): Food Processor (8 cup capacity or higher; in the video I use a super large 14-cup KitchenAid food processor) or Pastry Cutter | Glass Mixing Bowl | Rolling Pin | Sharp Knife or Pizza Cutter | Pastry Brush | Baking Sheet | Silicone Baking Mat or Parchment Paper
- Chocolate: For the best results, use a 4 ounce “baking chocolate” bar found in the baking aisle. I prefer Bakers or Ghirardelli brands. You can use semi-sweet or even milk chocolate. Bittersweet makes a VERY dark and rich filling, so keep that in mind if you use a very dark chocolate. We have not tested it with white chocolate, so we can’t guarantee results. You can also use chocolate chips and 2/3 cup (about 120g) would be the best amount to use.
- Milk: For best taste and texture, whole milk is ideal in the filling and pie crust. You can use lower fat or non dairy milk if needed, but avoid any milk that is fat free.


Reader Comments and Reviews
This is was SO fun (and delicious) to make! I loved mixing reg cocoa powder with the special dark- it added the perfect flavor. I can’t wait to make it again!
These are great. I made them to send to my college student for a Valentine’s Day care package. My husband didn’t want me to send them because he wanted them for himself. 😉
These are amazing. The crust is light and melts in your mouth. My family loved them.
These were super tasty!! I loved them at room temp, and they were even better from the fridge
I made this recipe as written and my family loved them. It was not as sweet as I expected since the crust is just pie crust with cocoa powder.
Delicious! I made this for the Baking Challenge, and it was a lot of fun. Took some time (mostly hands-off!) but it was a very easy-to-follow recipe and very tasty. The crust is great, and the filling and topping make it very chocolatey. I used 70% dark chocolate in the filling and if I were to make it again, I would probably use something sweeter. To me, it’s delicious, but those who aren’t big dark chocolate fans might not love it. It’s an intermediate recipe for sure but not difficult, there are just a lot of components.
I also used a barista oat milk in place of the whole milk because that’s what I had and it worked perfectly. Additionally, I took another commenter’s advice and shaped the dough into a log which worked well, but I also think a disc would have been fine. However, I only chilled my dough for almost exactly 2 hours, so it wasn’t solid to where it was hard to roll – that may have been a different story if I chilled it longer. I would love to try making this again and mixing up the flavors!
This was a fun recipe to try. I split it up across two days: made the dough and fudge on day 1 and assembled and baked on day 2. I had some trouble rolling out the dough into a nice rectangle but it still turned out fine! I let them cool completely before trying and thought they were just okay. But then I decided to reheat one a bit in the oven and I definitely preferred it warm with the filling a bit gooey. The dough on its own wasn’t super tasty but all together I enjoyed it.
I love all things chocolate, so these were calling my name. Soft and fudgy texture. Perfect for Valentine’s Day. A must make for any chocolate lover.
These were sooo good.
I do have a few questions on this recipe though.. Can you make these mini sized?
Also, my high school government class is doing a project on selling treats to other students in the school, I was wondering if you had any suggestions for smaller desserts or candies that me and my classmates can make that is smallish.
Thank you all so much in advance,
Hi Lexi, You can certainly cut these into mini tarts – the bake time will be less but we are unsure of exactly how long they will take. Any muffins, cupcakes, or cookies can easily be made mini size (and for cupcakes and muffins we usually have a reduced bake time listed in the recipe notes). Happy baking!
This recipe was good. I ate mine when it wasn’t warm but it wasn’t cold, and i wish i would have eaten mine warm…But either way they were yummy!!! I didn’t like them much after they had cooled completely off the next day. I don’t have a microwave so i couldn’t heat them up easily:( I would defiantly make these if you LOVE chocolate:):)
These are very chocolatey but so good if you are in the mood for chocolate. I learned alot about how to shape dough into the shape you need from the videos. Thanks for another great receipe!
This was just fun to make. I can see endless flavor options with plain pastry and various fillings. I’m happy I branched out and tried something new.
These taste like the better version of chocolate pop tarts! They are so delicious! They are perfect for Valentine’s Day and, along with a cup of coffee, will brighten up any dreary February morning!
Very tasty and fun to make! I thought they might be over-chocolatey, but actually everything has a very nice balance to it. The crust has just enough cocoa flavor without being overpowering and makes a good contrast to the fudgy filling. A little time consuming, but worth it.
Taste superb. I probably (as usual) overworked the dough a touch – wasn’t super flaky. I also split the dough – half (8 rectangles) into 4 pop tart style, the remainder cut circular and made empanada style hand pies. I wonder about getting the filling consistency to be more like undercooked gooey brownie batter – mine were more fudge consistency. Also with the empanada style – I would make more of the inner filling.
Didn’t see the suggestion until too late about grating the sugar for icing – good idea – mine was a wee grainy as well.
Touche on the prior suggestion about initially forming the dough into a log. I did that and it really helped roll out the dough into a rectangle.
Forgot to give this a rating.
As a child of a woman who thought all things processed were good for my sister and I, I am no stranger to the “breakfast” known as a Pop Tart. They weren’t served daily but on weekends or other special days. Special or not, I could never tolerate the edges of the store-bought pastries. Whether I was 6 or 46, the edge of the dough was too dry, and I always threw it away. (This DID NOT go over well with a grandmother who lived thru the depression!) Back to the recipe at hand…… the pastry was excellent! Moist from the inner point to the far reaches. I didn’t feel the need to bolt for the milk; a common behavior with “the other pastry”. And the filling was yummy, both in the Pop Tart and before it got there. With my limited baking skills (see reference to mother above), I felt that the pastry and filling instructions were very easy to follow, and the only thing lacking was my skill set. I did have a bit of an issue with the glaze. As described by Sally, it sure did set up quickly. I had hoped to use 3 different sprinkles but found that by the time I spread the glaze on three tarts they were set, and the sprinkles rolled away (literally, I’m still finding them in the strangest places). I wound up reheating after each tart which worked, it just wasn’t as pretty as I would have liked. I’d love to know what I was doing wrong. In the whole, this will be added to the special occasion breakfast rotation.
No need to buy pop tarts EVER again – there is seriously no comparison between the packaged product and these gorgeous chocolatey pastries. The filling is so yum and the pastry flaky and delicate. I made this with my 7 year old and we had so much fun doing this together. Thanks Sally
Great recipe and very tasty! They turned out so cute too!
I’m chocolate obsessed, so I had to try these. They’re very time consuming to make! I also want to share a few small tips for everyone… 1) if you shape your dough into logs rather than rounds, it makes it easier to roll into a rectangle. 2) if you use a dough scraper, it’s much easier to lift the dough pieces. 3) Sift your powdered sugar before making the icing. I thought it’d just melt the clumps, but it didn’t.
I think these are tasty. The filling is delicious. I don’t care for the icing. For some reason mine is real gritty and not too pleasant. The pastry is delicious and flaky.
As usual the recipe tips were such a huge help. And I absolutely love the video. I was really intimidated by making pastry but these came out great! My family ate half of them before I could even frost them. I will definitely try another variation of these from your blog!
I made these this past weekend and they are by far my favorite thing that I have made in awhile. They are just delicious. I followed the recipe for the dough and the fudge to a T, but made a cream cheese royal icing and topped with pink sprinkles for a valentines day twist. My whole house was raving about them!
I made these as part of the Sally’s Baking Challenge. The recipe was easy to follow and they turned out great. Just like a pop-tart, flaky crunchy outside with a gooey chocolate middle. I was super impressed with how light and flaky the outer shell turned out to be. I froze some of them and they thawed to their former perfection in the refrigerator. Thanks for the great recipe!
This was my 1st time making anything like this. It wasn’t as hard as I originally thought it might be. I agree with one of the other post I think I would roll out and cut out my pastries before chilling it was hard to roll out the dough. Otherwise it was fun and they taste good.
I’ve been wanting to try making homemade “pop-tarts” for the longest time. This was the perfect recipe to try first. The dough came together quickly and easily. I was expecting the filling or icing to call for heavy cream, but I’m glad it didn’t. I don’t always have it on hand, but I do always have whole milk. And of course, you can’t go wrong with chocolate on chocolate with more chocolate!
We have made your “pop tart” recipes many times, all with different fillings and icings. First time with the fudge filling and chocolate frosting. Family thought it might be too chocolatey, but once they tried them they could do nothing but rave about how perfect they were ! Winner recipe, not too difficult.
These were a hit !
Super chocolatey but delicious. They weren’t too hard to make but some of the filling leaked out of a couple of them so I must have not sealed the edges enough.
Very well balanced flavor for it to be a triple chocolate treat! Learned that measuring the pastry cuts is crucial!
Fancy pop tarts for the win. The flaky crust really took these to a whole new level. I bet you could do a spin with raspberry or strawberry filling that would also be delicious, but for the chocolate lovers in our house this was perfect. If I made it again, I might shape the dough into rectangles before refrigerating to make them easier to roll to size.
I have never made “toaster pastries” before and these were fun. My child has dairy and egg allergies, but I was able to successfully substitute Earth Balance for the butter, dairy-free chocolate for the regular chocolate, and Ripple milk for the milk. I was able to skip the egg wash without any problems, possibly because Earth Balance makes things just slightly softer. It never gets as hard as butter in pastries in my experience so I made sure to do all my chilling of the pastries before baking in the freezer to make sure it got extra cold. My son loved these and said he would definitely make these again. He’s 4 and had fun helping with measuring the dough and stirring the filling on the stove, since it doesn’t get very hot at all.
It was likely the Earth Balance, but I felt like the pastry was just slightly greasy, but not enough to make my hands messy. I think if I made them using Earth Balance again, I would freeze the butter before processing. The filling was excellent and not too sweet. The glaze was very tasty and I will definitely be using that one for other treats! If I made these again, I think it would be fun to try a cooked cherry filling! Thanks for the fun recipe!