

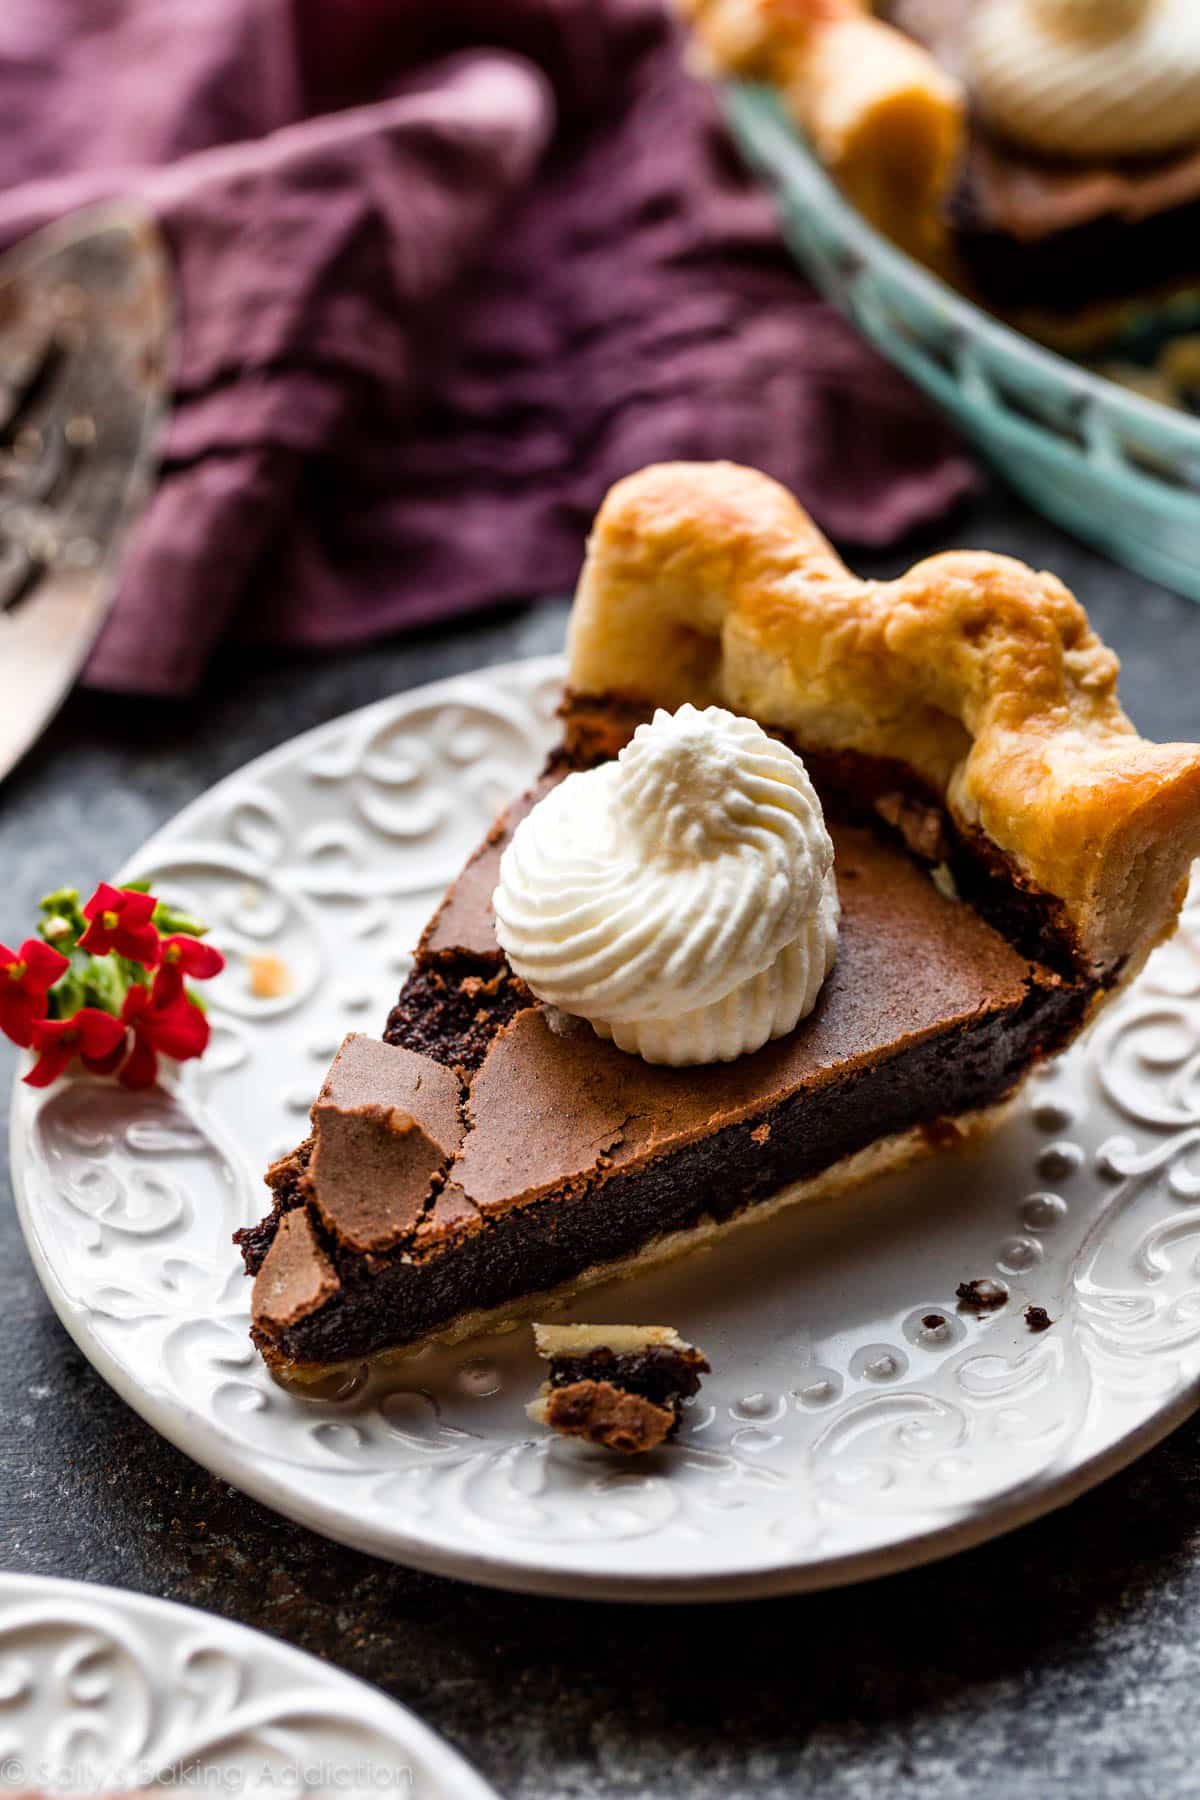
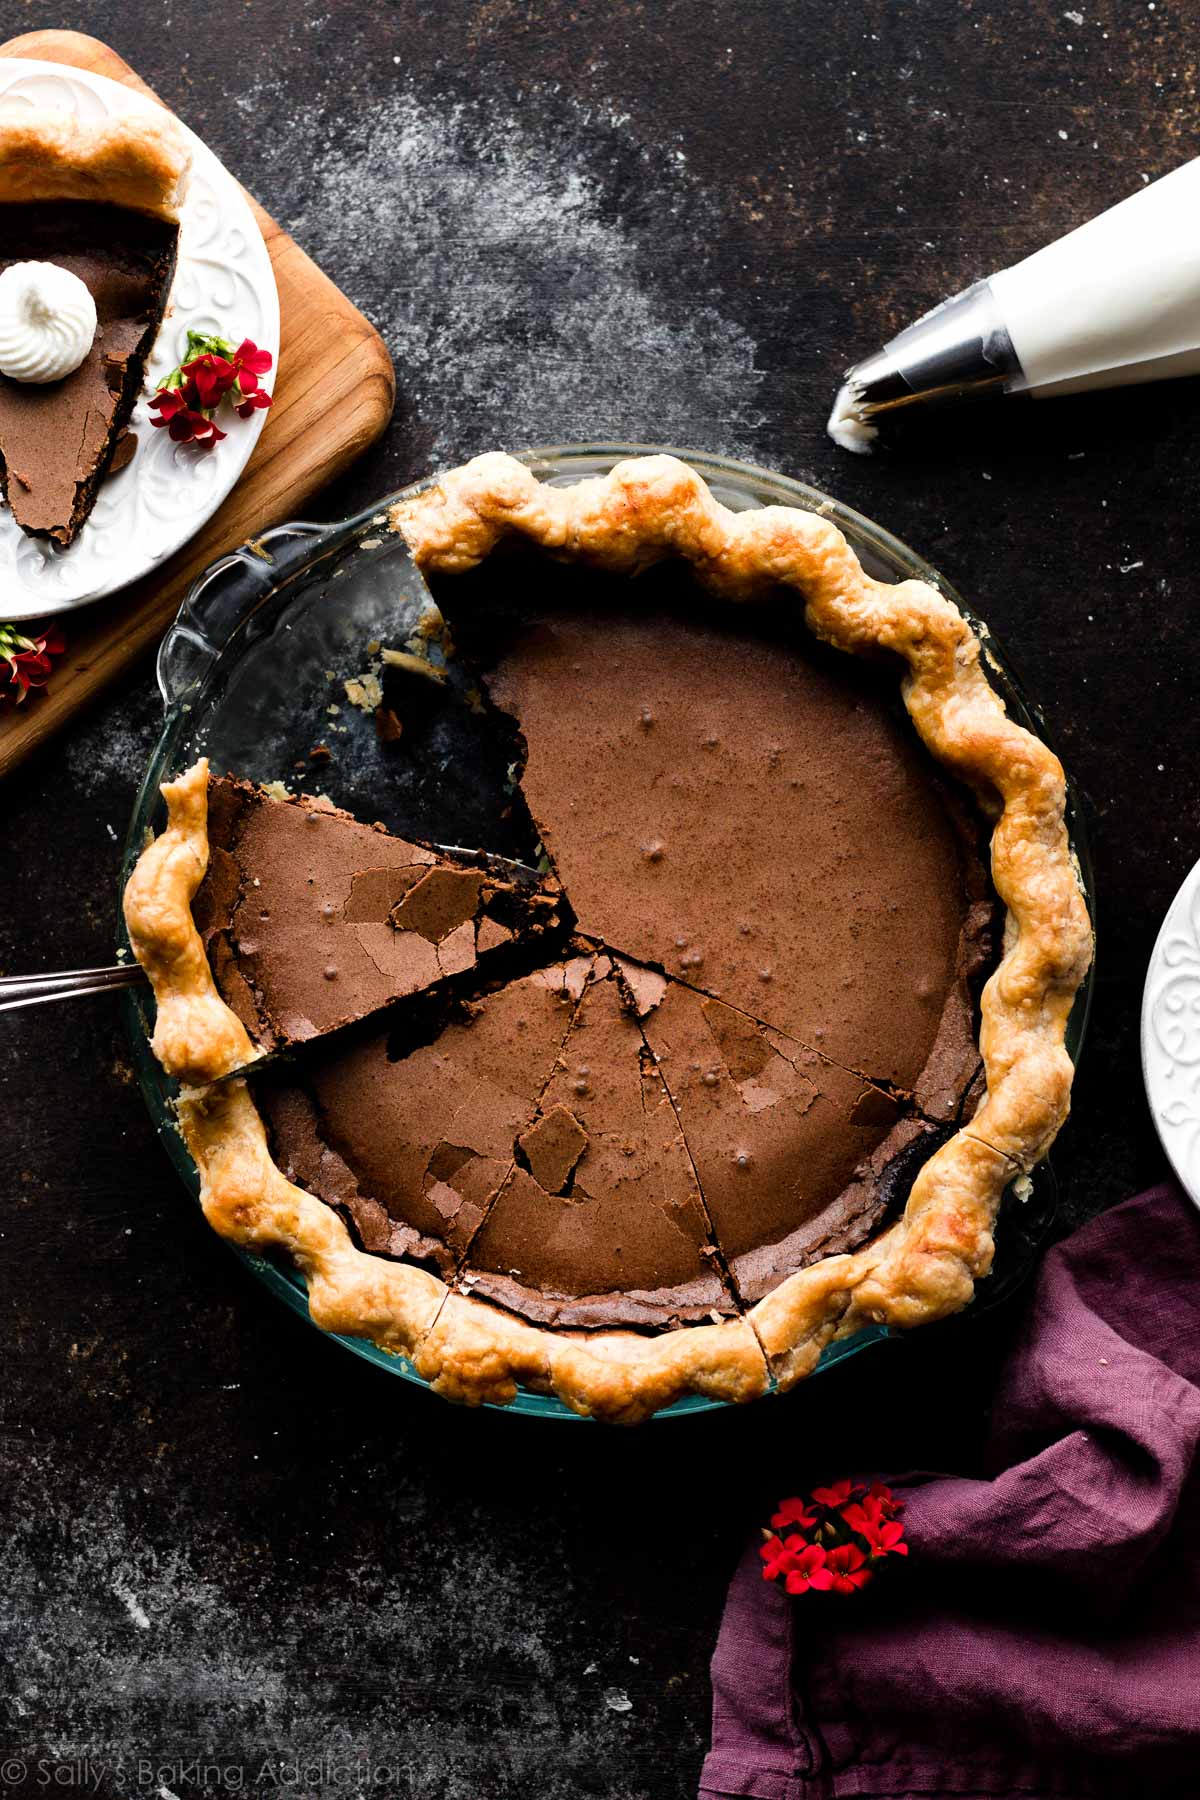
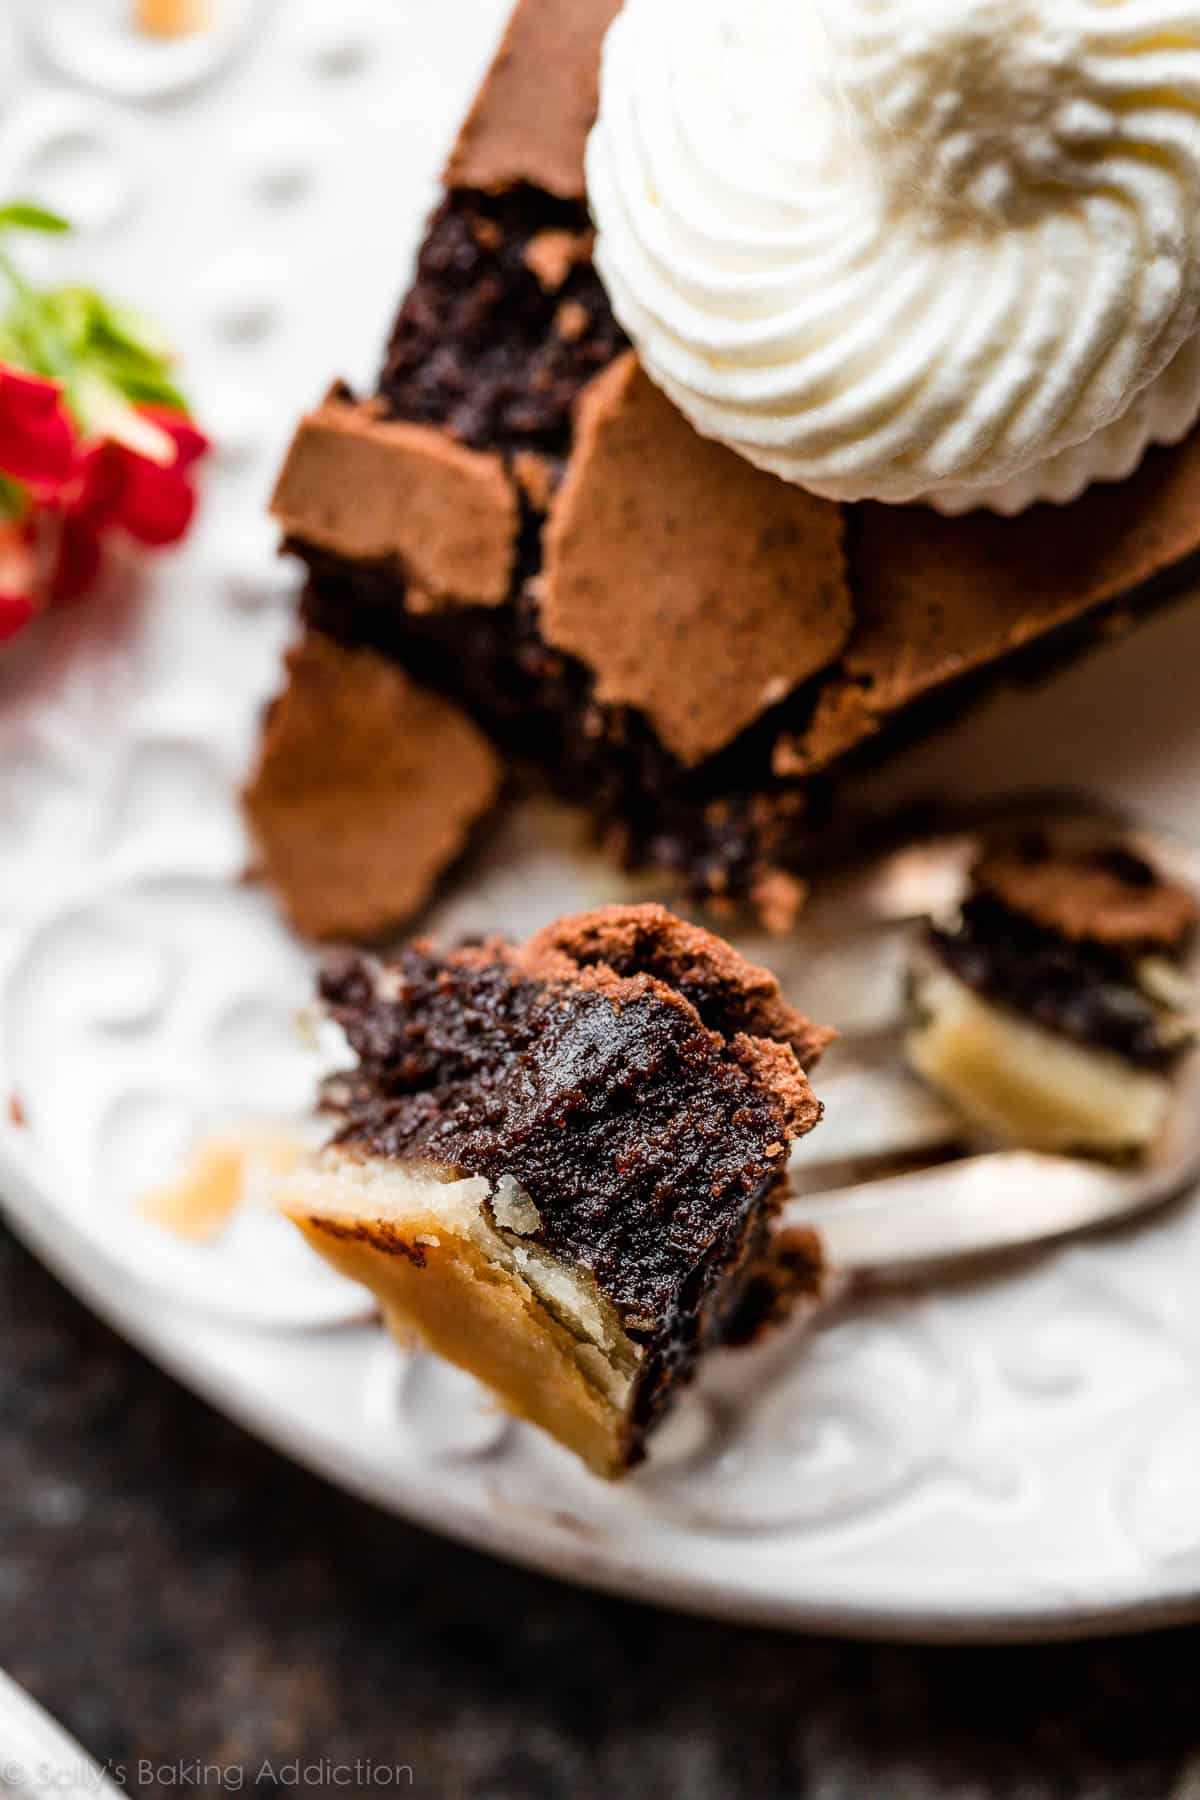
This unapologetically rich chocolate pie is a chess pie and fudge brownie hybrid. It rises like chocolate soufflé in the oven, then falls as it cools which creates a crackly meringue-like top. You’ll love this pie in homemade buttery pie crust and served with fresh whipped cream on top.
Diets beware.
This is A Brownie Pie & Chocolate Chess Pie Hybrid
You’re looking at part brownie/part chocolate chess pie. Chess pie is a custard pie and typically combines eggs, sugar, butter, flour, sometimes a little cornmeal, buttermilk, vinegar, and/or flavorings such as vanilla, lemon, or chocolate. I am, by no means, an expert on this Southern specialty but one of the best recipes I’ve tried (and a wonderful description of its origins) is over on The Kitchn. Using some of chess pie’s staple ingredients, I made a chocolate variation.
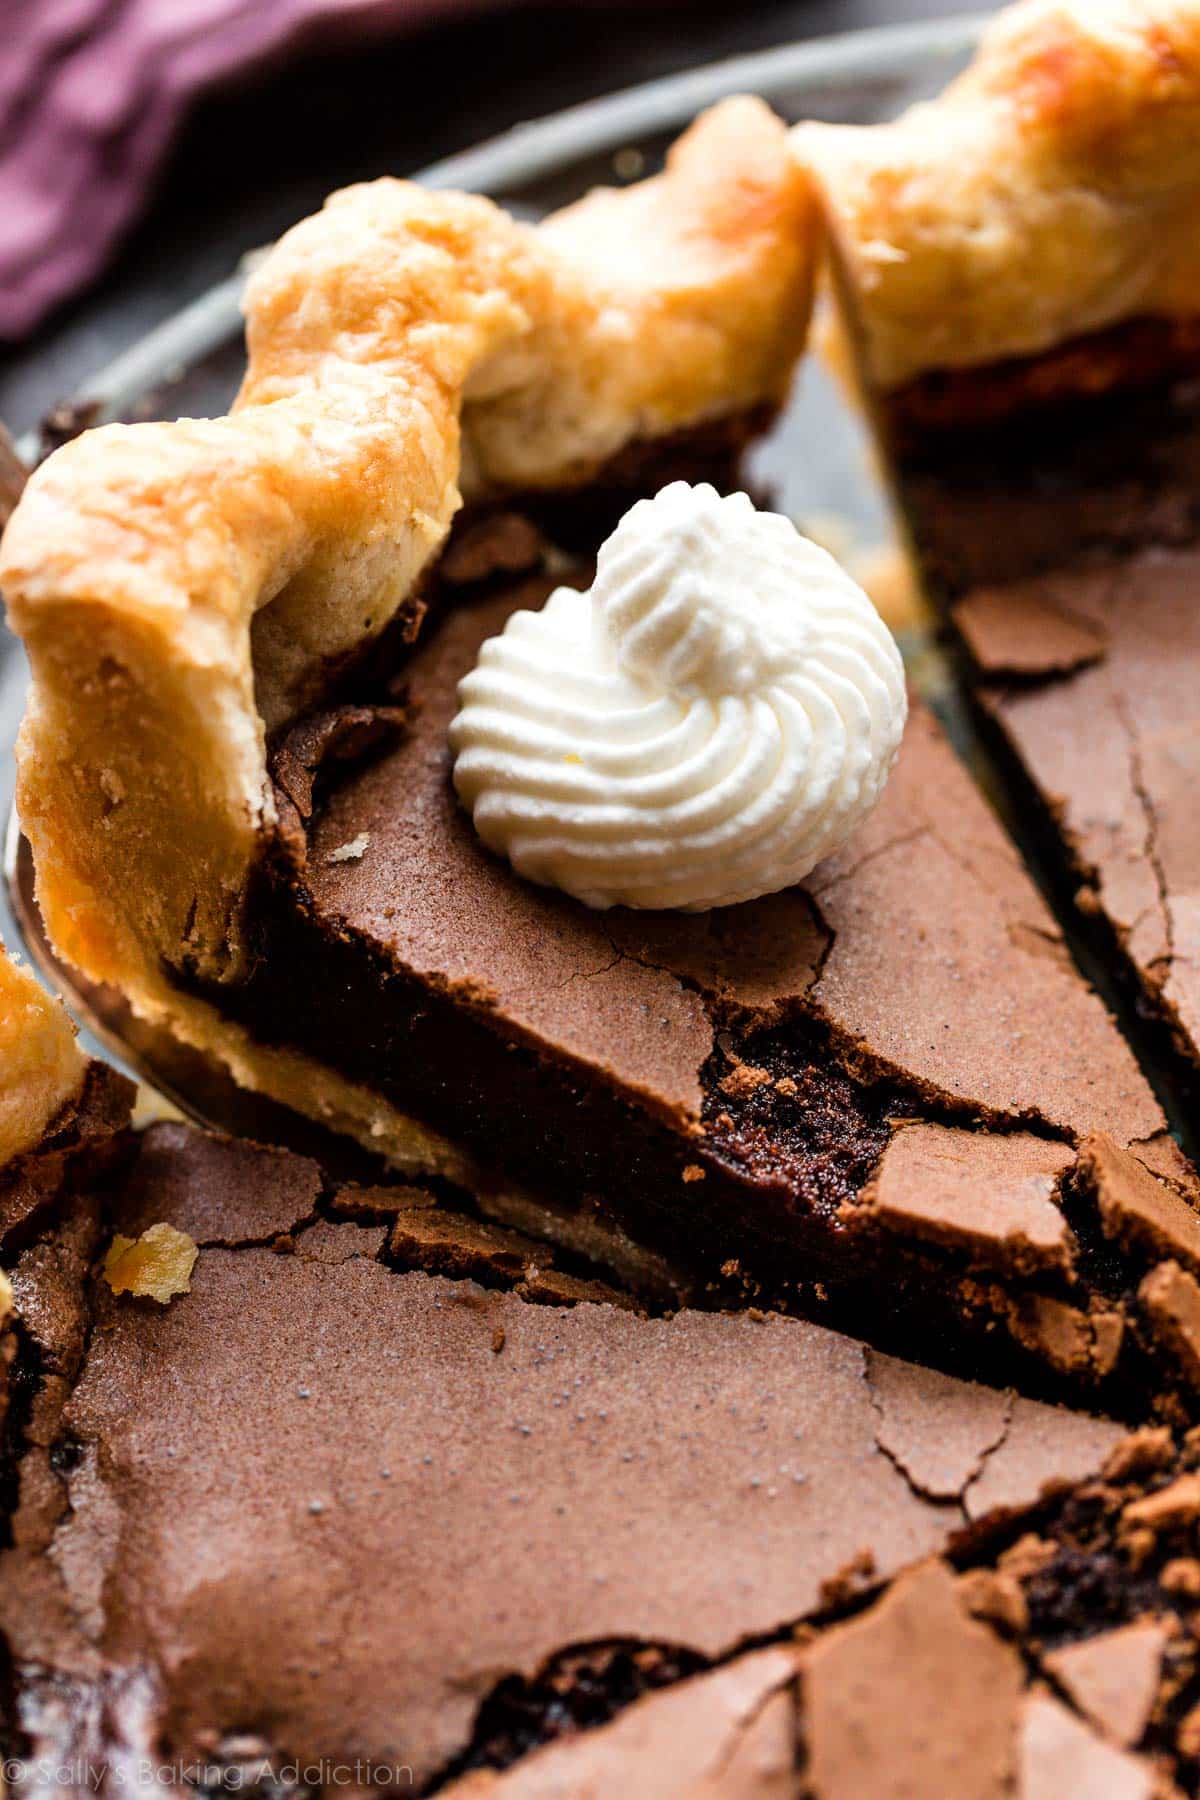
Though it’s totally cooked, the center tastes like brownie batter.
*It’s magical.*
One reader, Donna, commented: “Incredibly, decadently delish. I’d been looking for a chocolate brownie pie recipe and hadn’t found one that hit all the right notes until this one! ★★★★★”
One reader, Taryn, commented: “This was so easy and so ridiculously delicious. My entire family loved it! All the best parts of a brownie, a chocolate pie, and also a macaron? I don’t know how it’s all in there, but it is. Make it today! ★★★★★”
Tell Me About this Chocolate Pie:
- Thickness: Thin, but very rich. Any thicker and it would almost be too rich to eat.
- Texture: Fudge brownie filling that rises like a chocolate soufflé, then falls as the pie cools. The fallen top tastes like crinkly chocolate meringue. It’s utterly irresistible. It’s a bit different than the soft and chewy filling of this brownie pie and caramel turtle brownie pie.
- Ease: I’d say intermediate. You need to partially blind bake the pie crust, but mixing the ingredients together is pretty simple.
- Baking: Blind bake the crust at 375°F (190°C), then lower to 325°F (163°C) for the filling. A slightly lower oven temperature ensures the thin filling cooks evenly.
- Time: Homemade pie crust always requires extra effort and time, but you can use store-bought if you’re in a time crunch. The filling comes together quickly, but the pie needs to cool for a couple hours before slicing.
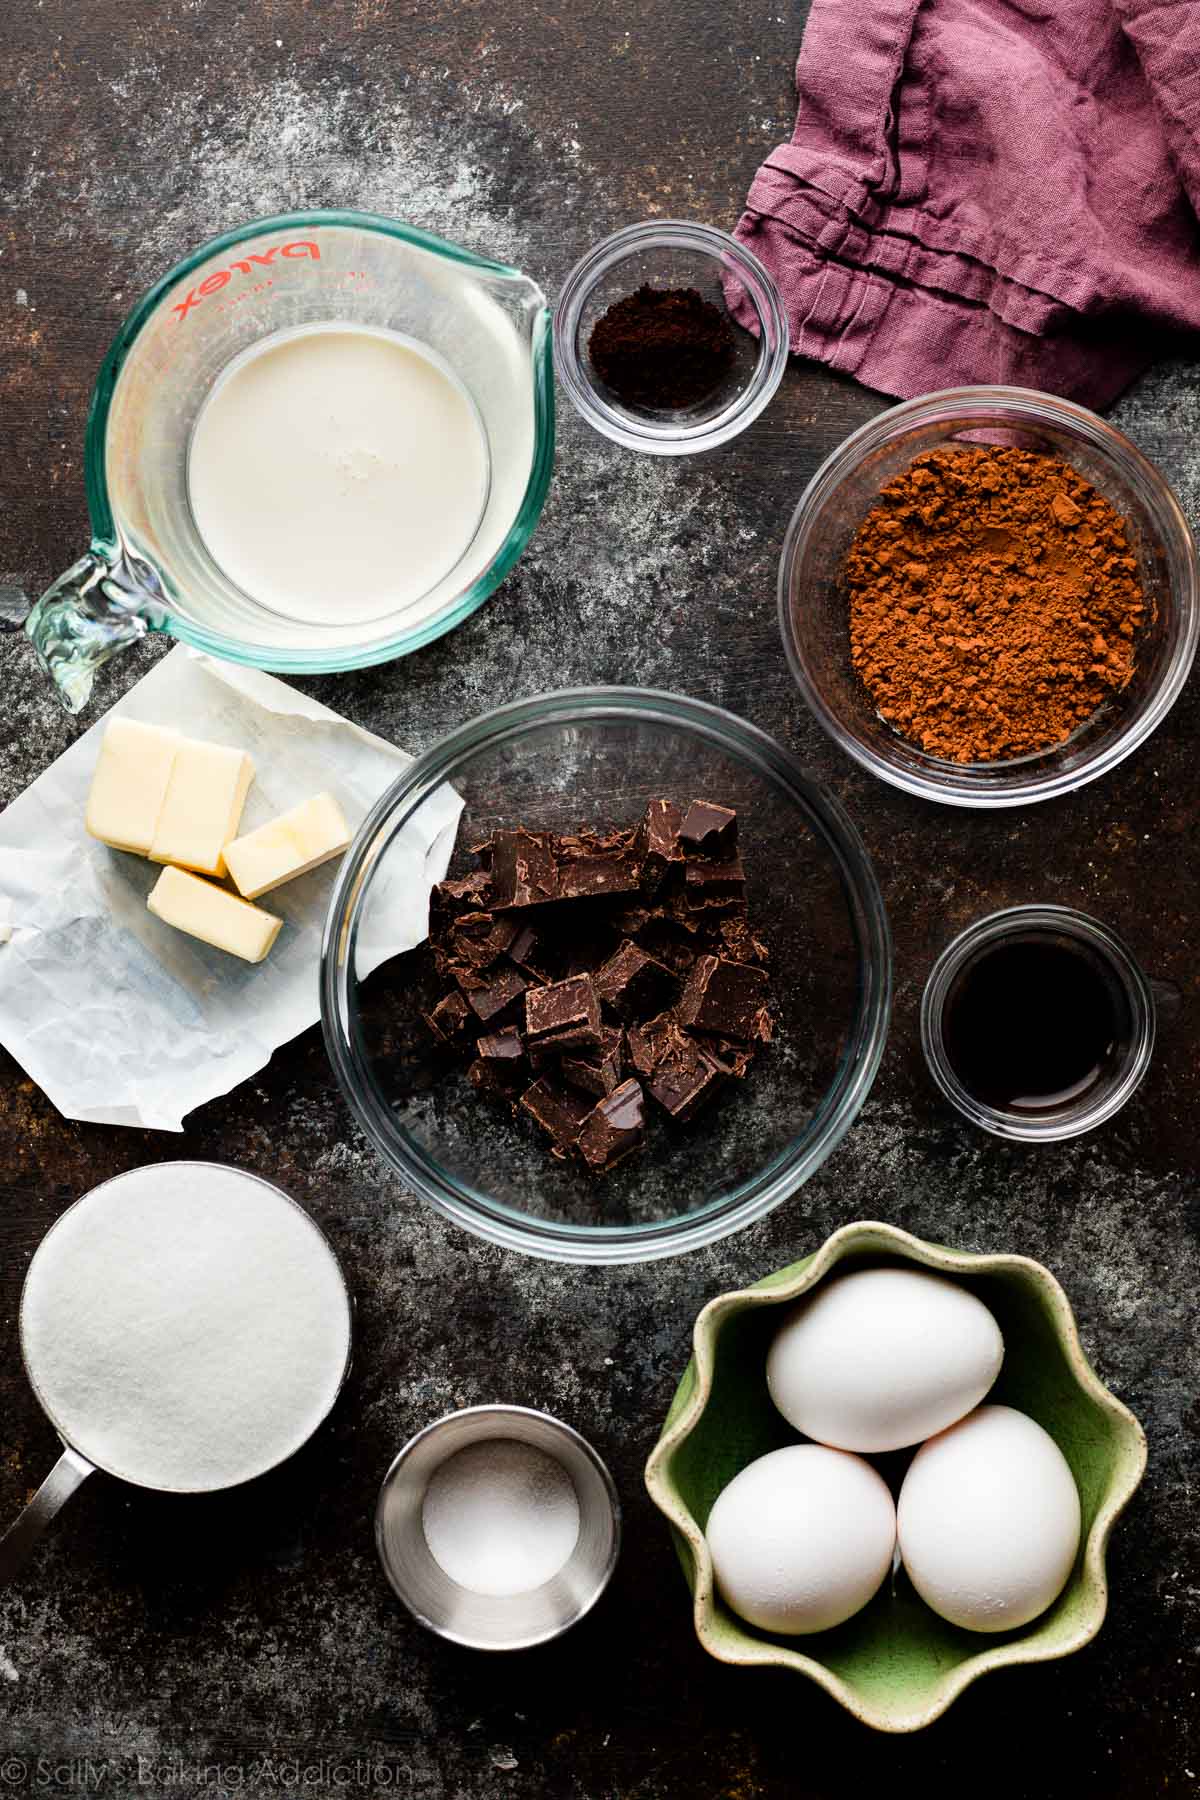
9 Ingredients You Need
- Chocolate: For deep chocolate flavor, I use both real chocolate and cocoa powder in this filling. Note that you only need 2 ounces of chocolate. Most baking chocolate is sold in 4 ounce bars, so you’ll only use half. I prefer Baker’s or Ghirardelli brands.
- Butter: Melt butter with the chocolate before adding to the other filling ingredients. This is how I start my chewy fudgy frosted brownies recipe, too.
- Sugar, Salt, & Vanilla: All add flavor.
- Cocoa Powder: Chess pie is often thickened with flour and/or cornmeal. Here we’ll use cocoa powder because it adds flavor too. Remember this post on dutch-process vs. natural cocoa powder? Since there’s no chemical leavening occurring, you can use either in this recipe. I really like this brand of dutch-process cocoa powder.
- Espresso Powder: Add espresso powder if you want to kick up the chocolate flavor like we do in marble loaf cake and chocolate zucchini bread. The pie tastes good without it, but better with it. You can find it in the coffee aisle at the grocery store or online.
- Heavy Cream: A lot of chess pie recipes call for evaporated milk, but I use heavy cream here. Heavy cream is convenient because you can top this pie with whipped cream. That being said, if you have a can of evaporated milk, use it instead.
- Eggs: The workhorse in this recipe, eggs add structure, stability, and texture. You need 3 eggs total. 2 whole eggs + 1 egg yolk for the filling, then save that last egg white for an egg wash. Brush the egg wash on the pie crust before blind baking. A quick egg wash promises a golden brown and shiny pie crust.
Pie Crust
You also need a pie crust shell. If you’re in a pinch, use store-bought. If you have a little more time on your hands, go for homemade. Nothing ever compares to flaky buttery pie crust and you can make it ahead of time. My pie crust recipe yields enough for 2 pies, which is convenient if you also want to make pumpkin pie this holiday season.
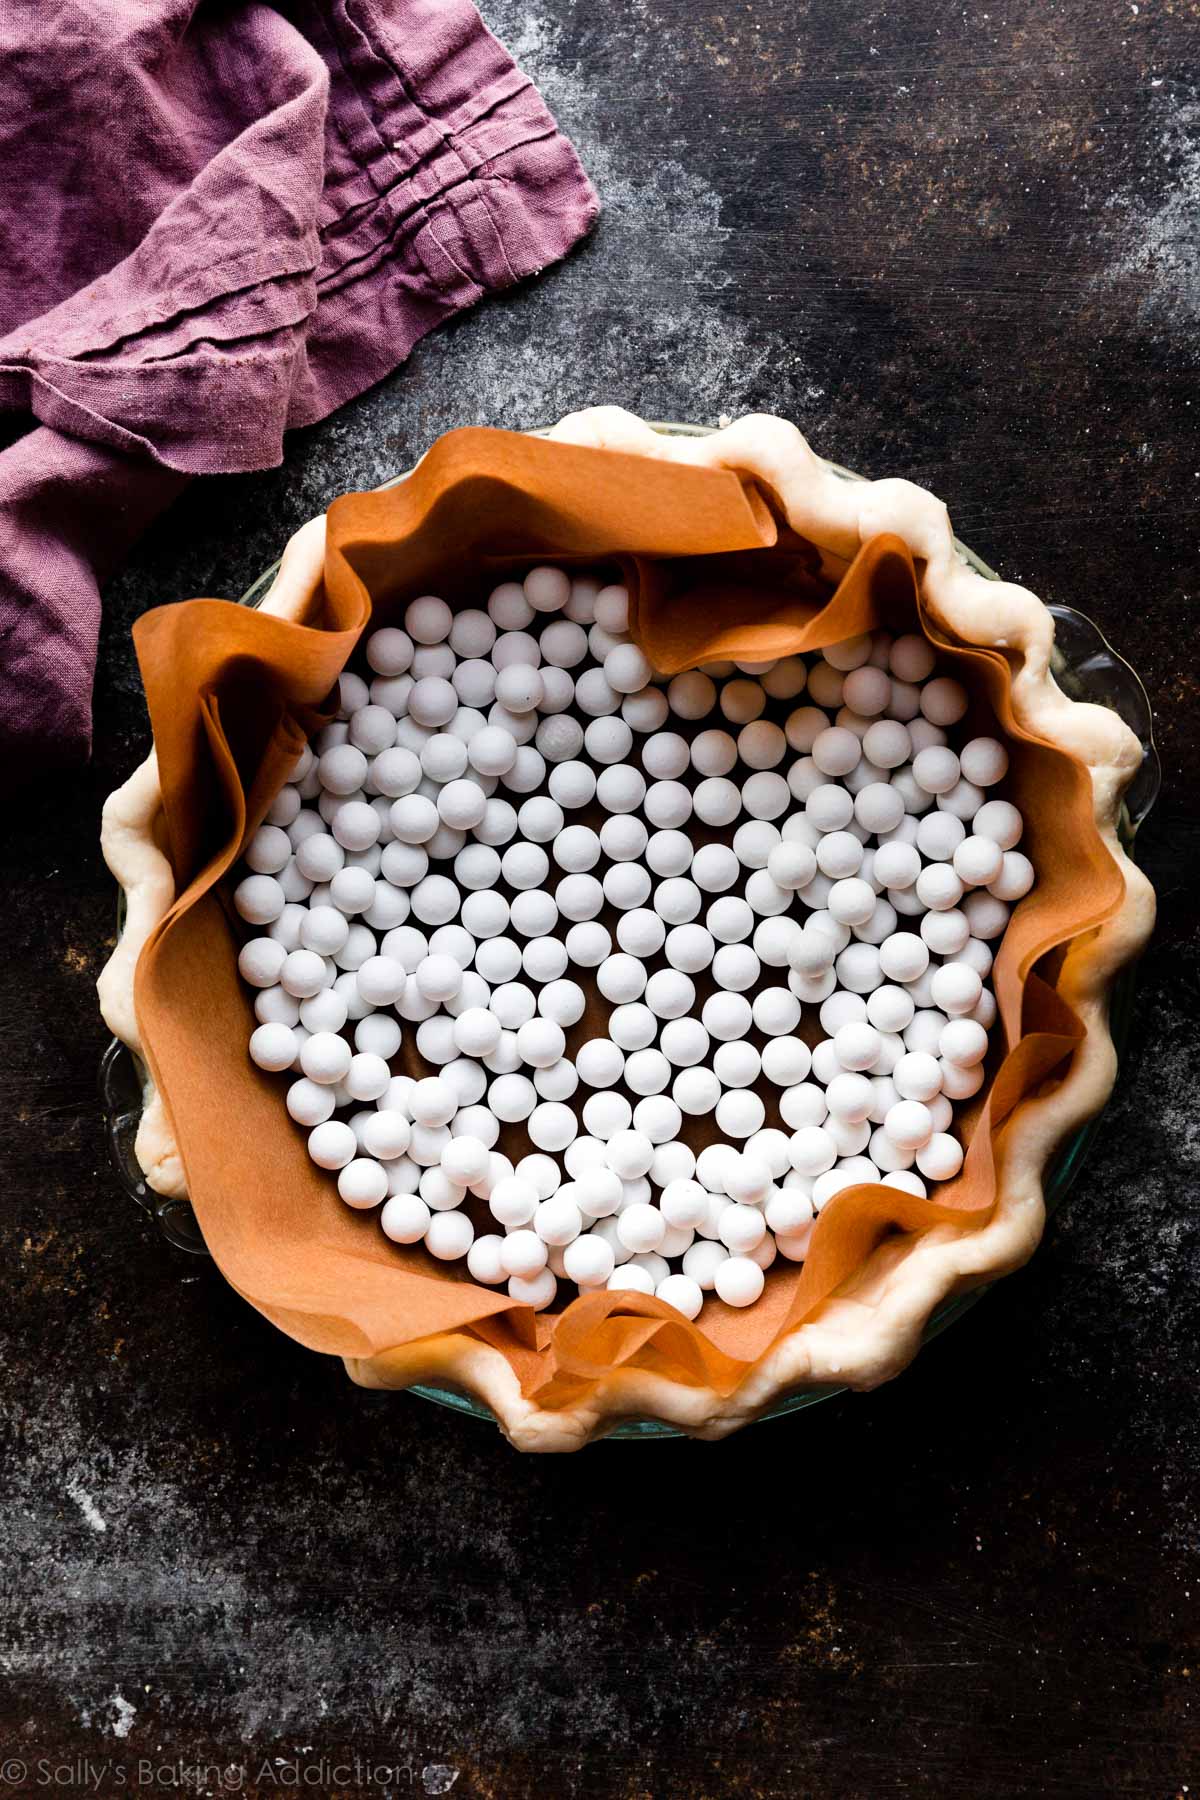
- Partially Blind Bake: Whether you use store-bought or homemade, you need to pre-bake the pie crust. The crust takes longer to bake than the filling, so it needs extra time in the oven. If you skip pre-baking, also known as blind baking, the crust tastes soggy. Roll out your cold pie dough, then fit into a 9-inch pie dish. Crimp or flute the pie crust around the edges. To prevent the pie dough from shrinking, chill for at least 30 minutes in the pie dish. Line with parchment paper and fill with pie weights (note: 2 packs of these pie weights is needed). Bake until the edges are lightly brown, about 15 minutes. Remove parchment/pie weights, then prick the crust with a fork. Bake crust for 8 more minutes. Fill with chocolate filling, then return to the oven to bake the whole pie.
We do this exact same process when we make quiche. If it’s helpful, I have an in-depth guide and video for How to Blind Bake Pie Crust and How to Crimp and Flute Pie Crust.
Step by Step Photos Below The Recipe!
Looking for something gluten free, but just as rich and fudgy? Try my flourless chocolate cake instead.
This recipe is part of Sally’s Pie Week, an annual tradition where I share a handful of new recipes that fit into the pie/crisp/tart category. Join the community below!
Print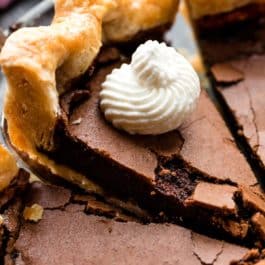
Magical Chocolate Pie (Chess Pie)
- Prep Time: 3 hours (includes pie crust)
- Cook Time: 1 hour, 15 minutes (includes blind bake)
- Total Time: 7 hours (includes cooling)
- Yield: one 9-inch pie
- Category: Dessert
- Method: Baking
- Cuisine: American
Description
This rich chocolate pie tastes like fudge brownies with a crackly meringue-like topping. To avoid a soggy crust, partially blind bake the dough as directed in the recipe below.
Ingredients
Crust
- 1 unbaked Buttery Flaky Pie Crust (what I used) or All Butter Pie Crust*
Egg Wash
- 1 large egg white, lightly beaten
Filling
- 1/4 cup (4 Tbsp; 56g) unsalted butter
- 2 ounces (56g) semi-sweet chocolate, finely chopped
- 1 cup (200g) granulated sugar
- 3 Tablespoons (16g) unsweetened natural or dutch-process cocoa powder
- 1 teaspoon espresso powder
- 1/4 teaspoon salt
- 1/4 cup (60ml) heavy cream
- 1 teaspoon pure vanilla extract
- 2 large eggs + 1 large egg yolk
- optional for serving: whipped cream
Instructions
- Pie crust: I like to make sure my pie dough is prepared before I begin making this chocolate pie. Make pie dough the night before because it needs to chill in the refrigerator for at least 2 hours before rolling out and blind baking (next step).
- Roll out the chilled pie dough: On a floured work surface, roll out one of the disks of chilled dough (use the 2nd pie crust for another recipe!). Turn the dough about a quarter turn after every few rolls until you have a circle 12 inches in diameter. Carefully place the dough into a 9-inch pie dish. Tuck it in with your fingers, making sure it is completely smooth. To make a lovely thick edge, I do not trim excess dough around the edges. Instead, fold the excess dough back over the edge and use your hands to mold the edge into a nice thick rim around the pie. Crimp the edges with a fork or use your fingers to flute the edges. Review my how to crimp and flute pie crust tutorial if you need extra help with this step.) Brush edges with egg wash/egg white. Carefully line the inside of the pie with two pieces of parchment paper, as shown in the photo below, then pour in the pie weights. Make sure the weights are evenly distributed around the pie dish. If it’s helpful, you can watch me do this exact step in my pecan praline pumpkin pie video tutorial. Chill the dough in the refrigerator or freezer for at least 30 minutes—this helps prevent the crust from shrinking. You can actually fill with pie weights before or after chilling, it doesn’t make a difference.
- Preheat oven to 375°F (190°C).
- Partially blind bake the crust: Bake the cold pie crust (with weights) for 15 minutes. Remove pie from the oven and carefully lift the parchment paper (with the weights) out of the pie. Prick holes all around the bottom crust with a fork. Return the pie crust to the oven and bake for 8 minutes to help set the bottom. Remove from the oven and set aside until step 7. You can pre-bake the crust up to 3 days ahead of time. Cover and store in the refrigerator (without weights) until ready to use.
- Reduce oven to 325°F (163°C).
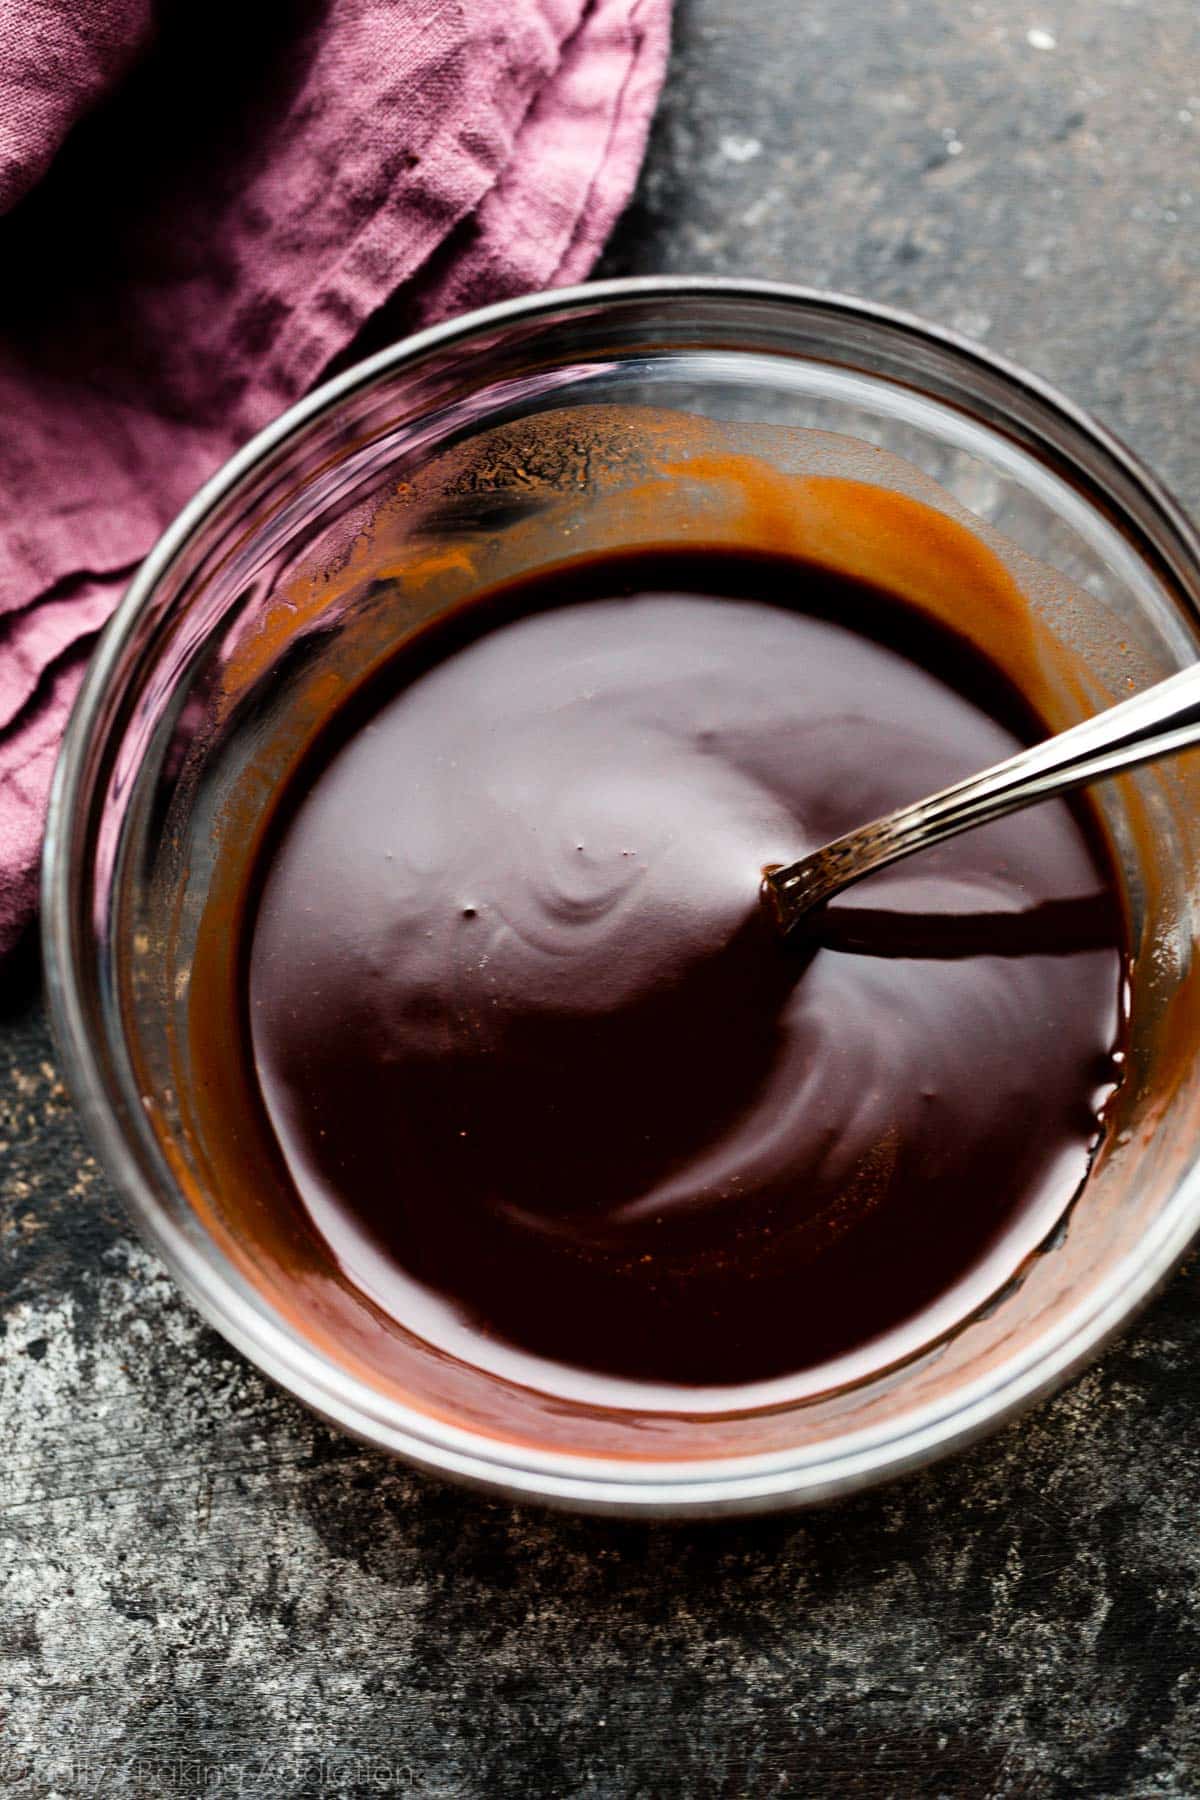
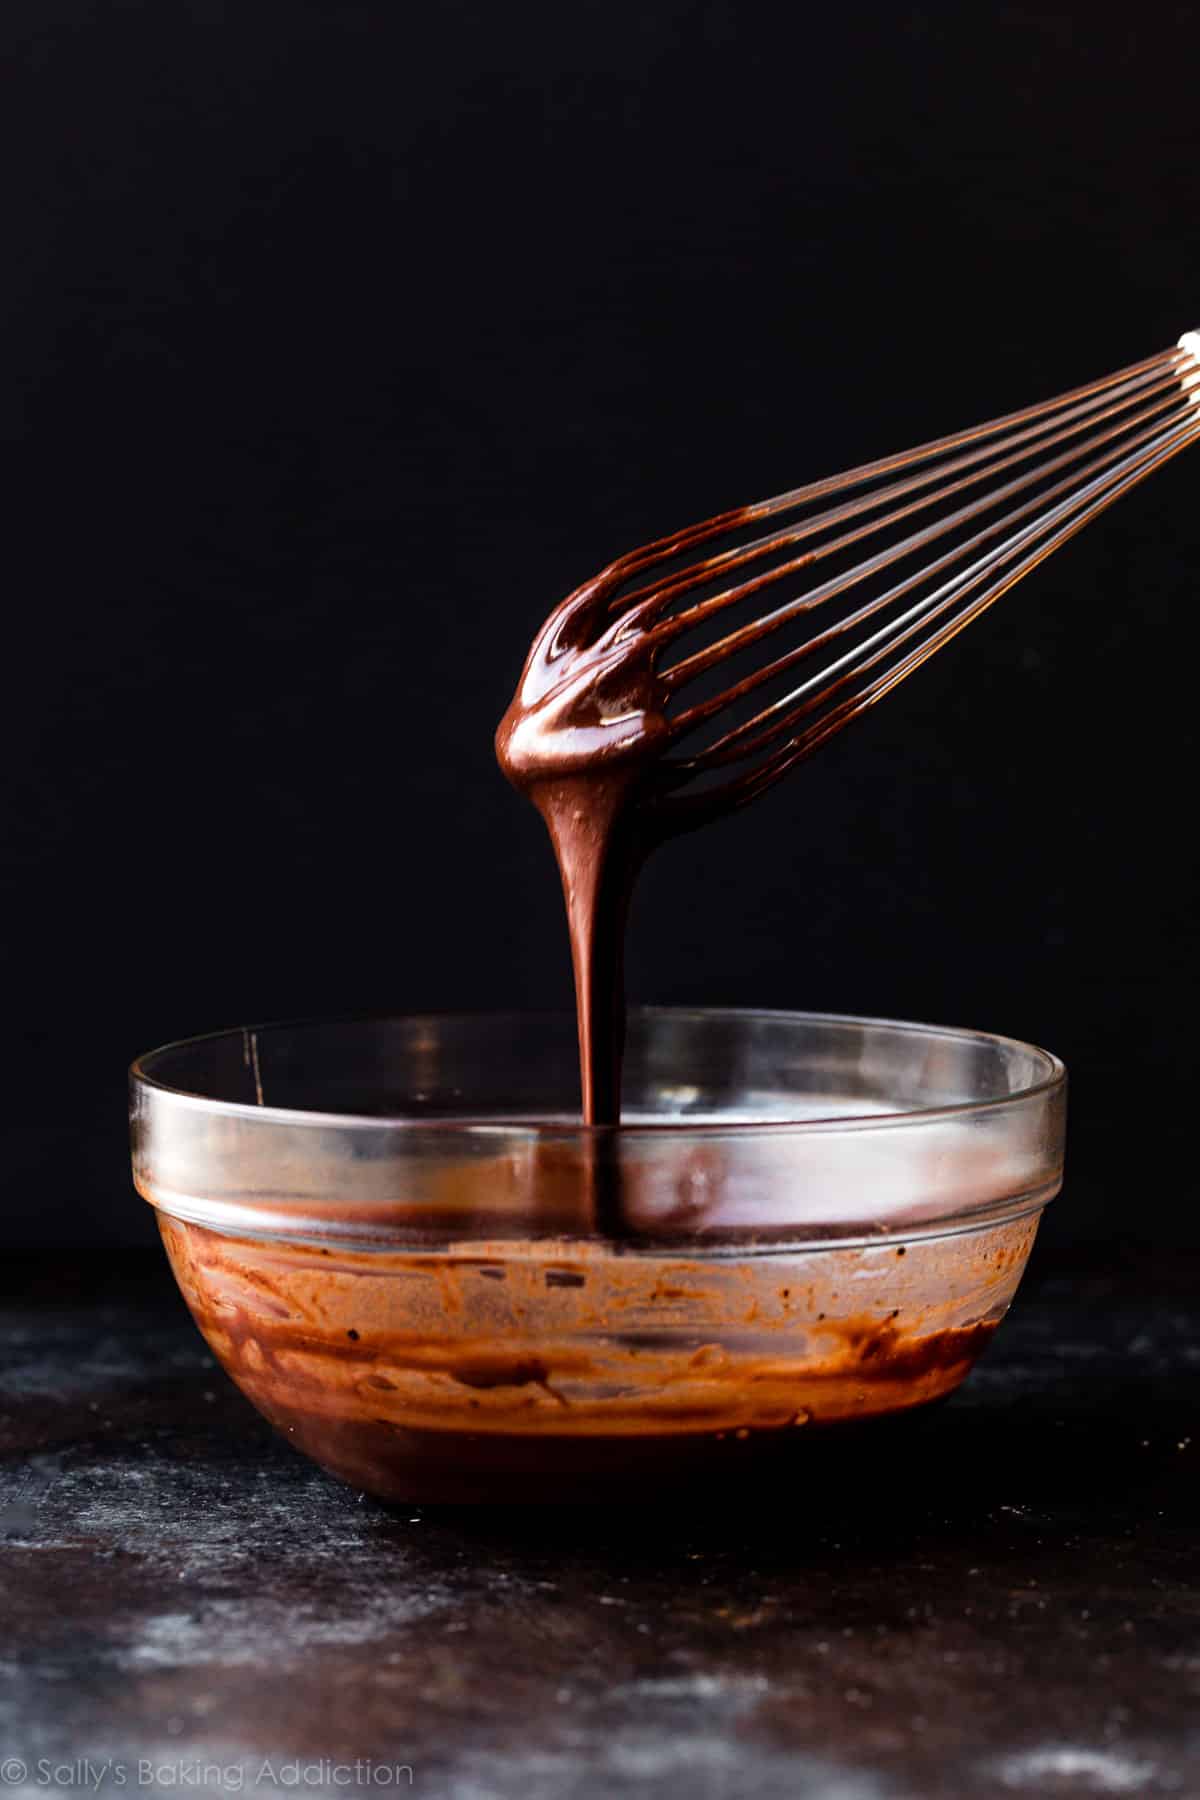
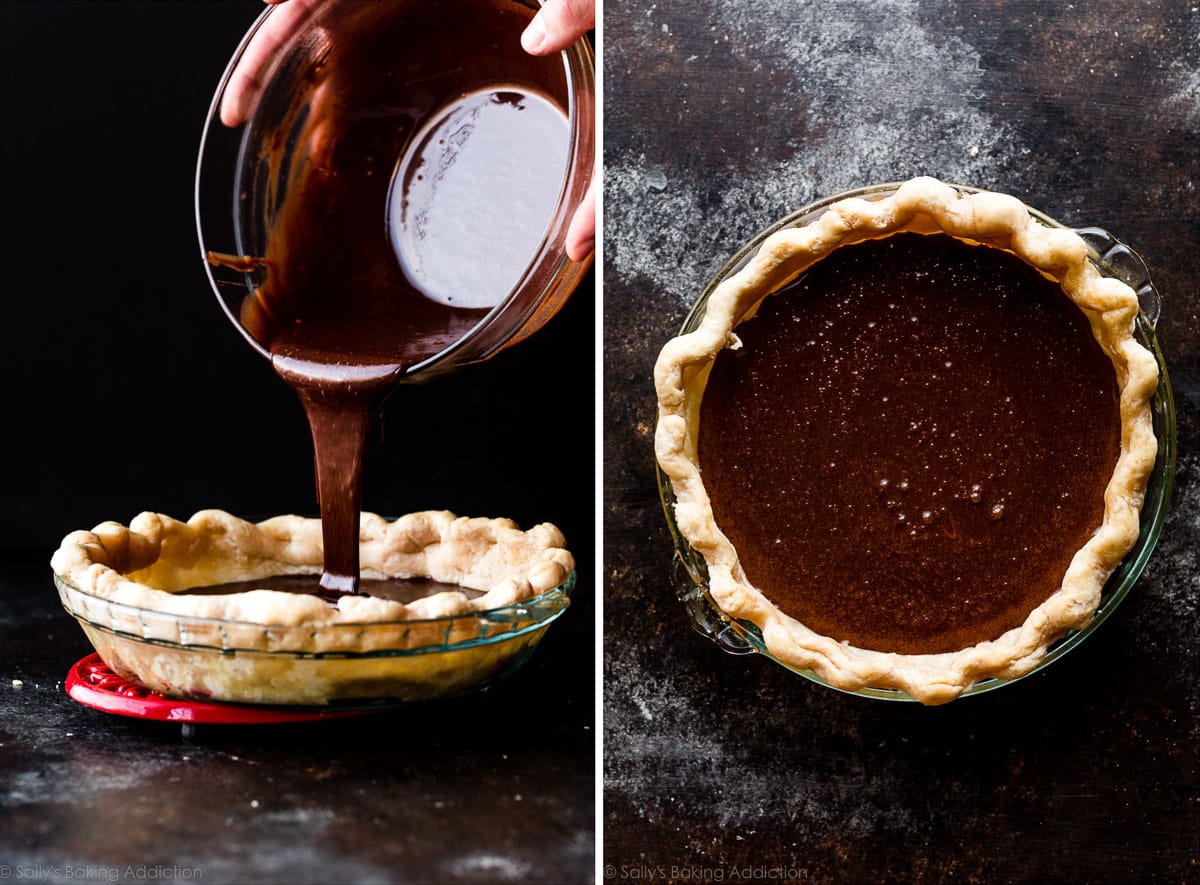
- For the filling: Cut the butter into pieces so it melts evenly. Place in a large heat-proof bowl or double boiler. Add chopped chocolate. Melt in 20 second increments in the microwave, stirring after each increment until completely melted and smooth. Set aside and let cool for 2-3 minutes. In a large bowl, whisk the sugar, cocoa powder, espresso powder, and salt together until combined. Whisk in the heavy cream, vanilla, 2 eggs, and 1 egg yolk. Finally, whisk in the cooled butter/chocolate.
- Bake: Pour filling into pre-baked pie crust (crust can still be warm). Bake for 50-55 minutes or until the center is no longer jiggly. It can still be a little sticky in the very center on top, just as long as it no longer jiggles when you lightly tap the pan. During bake time, if you find the edges of the pie crust are browning too quickly, apply a pie crust shield or a ring of aluminum foil to protect it.
- Remove finished pie from the oven. Place on a wire rack to cool completely or for at least 2 hours. The pie filling will sink and set as it cools.
- Garnish with whipped cream, if desired. (I used Wilton 8B piping tip in these photos.) Slice and serve.
- Cover and store leftover pie at room temperature for 1-2 days or in the refrigerator for 4-5 days.
Notes
- Make Ahead & Freezing Instructions: The pie dough can be prepared ahead of time and stored in the refrigerator for up to 5 days or in the freezer for up to 3 months. You can pre-bake the pie crust 3 days ahead of time (see step 4). You can prepare the filling 1 day ahead of time. Cover and store in the refrigerator, then bring to room temperature before pouring into pie crust and baking. You can also bake the pie 1-2 days before serving, though it’s best served the day of. If making ahead, store covered at room temperature for 1 day or in the refrigerator for 2 days. You can also freeze the baked and cooled pie for up to 3 months. Thaw in the refrigerator and bring to room temperature before serving. To reheat the whole pie, warm it in a 300°F (149°C) oven, covered, for 15-20 minutes.
- Special Tools (affiliate links): Rolling Pin | 9-inch Pie Dish | Parchment Paper | Pie Weights | Pastry Brush | Double Boiler (optional) | Glass Mixing Bowls | Whisk | Pie Crust Shield | Cooling Rack | Piping Bag (Reusable or Disposable) | Wilton 8B Piping Tip
- Pie Crust: Both linked pie crust recipes make 2 crusts. You only need 1 crust for this pie, so freeze the 2nd half for another use. If using store-bought pie dough, you still need to partially blind-bake it (steps 2, 3, and 4). If needed, you can use a graham cracker crust or Oreo cookie crust instead of traditional pie crust. Pre-bake the cookie crust at 350°F (177°C) for 10 minutes. No need for pie weights if using a cookie crust.
- Chocolate: Use pure chocolate baking bars. You can find them right next to the chocolate chips in the baking aisle. They are sold in 4 ounce bars, so you’ll only need half. I like Bakers or Ghirardelli brands. I use and recommend semi-sweet chocolate, but you can use bittersweet or unsweetened chocolate for a darker flavor.
- Espresso Powder: Espresso powder deepens the chocolate flavor. You can find it in the coffee aisle at the grocery store or online. You can skip it or use 2 teaspoons of instant coffee powder instead.
- Heavy Cream: Use heavy cream or heavy whipping cream. If desired, you can use 1/4 cup of evaporated milk instead. I don’t recommend any other substitutes.
To make the filling, the first step is to melt butter and chocolate together. I use the microwave, but you can use a double boiler instead.
As instructed in step 6, whisk the other filling ingredients together, then whisk in the melted chocolate/butter mixture.
This recipe requires a partially blind baked pie crust shell. Follow my detailed instructions above. My How to Blind Bake Pie Crust video and guide is helpful too. I use and recommend (affiliate link) these pie weights. You need 2 packs to fill a pie shell.
After partially blind baking, pour in the chocolate filling and bake.


Reader Comments and Reviews
My family LOVED THIS PIE ❤️ baked it for Christmas
It was perfect. Great recipe.
I made this yesterday, and the chocolate separated from theother filling ingredients while baking. I bake often, so I’m not sure where things went wrong. Any tips because I would love to try again!
Hi Tara, I’ve never had that happen before. Did you alter any of the ingredients? What type of chocolate and cocoa powder did you use?
This happened to me before too, I think because the eggs were too cold so didn’t mix well with the rest of the batter. Making sure the eggs are closer to room temperature, and also making sure to mix things in the exact order listed, fixed this for me.
Made this pie yesterday, for Thanksgiving dessert. I used a premade chocolate crust. It was absolutely delicious! Very rich, but also not too heavy. Will definitely make it again!
Hi Sally! This recipe is amazing, I made it once and it was perfect. I want to make this again and split the batter between two pies as a base layer, what cooking temp/time would you recommend?
Hi Julia, sounds delicious! It will really depend on the type of filling you plan on adding above. It will likely take some trial and error, but if you have a baked filling above, you can try “par-baking” the chocolate chess base layer for a few minutes before adding the top layer and finishing baking. If it’s an unbaked top layer, you can completely bake the chocolate chess layer through (bake time will be shorter than written since it’s a thinner layer) and then add the unbaked topping. Hope this helps, and please do let us know if you try anything out!
Hi Sally,
Would you recommend using a pie shield during and after the blind bake stage or just after when everything is cooking?
Hi Amanda, no need to use one during the pre-bake, but just when the entire pie is cooking (if you see the edges are starting to brown too quickly). Hope you enjoy the pie!
I made this pie for a potluck last night and it was a HIT! Two different people told me it tasted just like their grandmother’s chocolate chess pie used to taste. I did use a ready made shortbread crust. I didn’t pre-bake it and I used a foil guard around the tops of the shortbread crust to avoid burning it. Even with that it did get a little dark. I baked 50 minutes at 325 degrees and it was cooked perfectly. I also left out the espresso powder as I didn’t have any and I substituted 2-3 tbsp. of chocolate chips for the chocolate bar. My only regret was not making 2 of them because it was gone so quickly!
Sally, if I use a premade uncooked pie crust (I know, I know!), do you think the blind bake time would be the same?
Hi Cally, yes, blind bake time should be about the same. Enjoy!
Can you tell me how to adjust the filling amount and baking times for a 10 inch pie pan. I want to serve this for a party of 10. ( I will use your crust recipe- I know that I’ll have some leftover crust so nice it makes 2 nine inch crusts. ) Thanks!
Hi Chris, we haven’t tried scaling this pie for a 10-inch pie dish, so we’re unsure of the exact bake time. It should be just a bit longer. We hope it’s a hit!
Ever added pecans to this? I once had a chocolate chess pie with pecans and it was amazing – wondering if I could use this recipe to recreate it!
That sounds delicious, and I don’t see why it wouldn’t work!
I loved how easy this recipe is to make. The filling is Gluten Free and I had most of the ingredients in my kitchen. I used a frozen GF crust and par baked as recommended. I really like the crispy top and soft chocolaty goodness underneath. I heated for a few seconds in the microwave and per my husband’s birthday request, served with cool whip. I prefer real whipped cream…, but used the real cream version and it was good. Would definitely make it again and would make my own GF crust.
I just made this recipe after eyeballing for quite some time. My family is now requesting it weekly!! It was absolutely delicious! The worse part was waiting the 2 hours of cooling. I think next time I may only bake for 6 min after removing the weight, ours was a tiny bit tough to cut into. Of course the crust taste amazing! And I didn’t have pie weights so I used aluminum foil and rice, it worked perfectly. But I did order weights. Thank you Sally for another great recipe!!
This is a must make in our house any time we have pie!
I tried this on a whim to use up the other half of the pie crust dough I had made— baked for 47 minutes (I’m using an oven thermometer but still having a hard time dialing in exact temps so I think I was running at more like 330 degrees) and it came out perfect! Or maybe I shouldn’t say perfect… more like ridiculous. RIDICULOUSLY good. I wanted to try decorating well in advance, so used Sally’s not-too-sweet whipped frosting. I wondered if it would be too heavy a combination, but I think it turned out awesome! Thanks Sally!
One thing I’ve noticed— I’ve made this pie several times now and it always comes out delicious, but during the settling/cooling process, most times it gets one big crack. There also seems to wind up being more space between the top of the filling and the crust rim— like there’s too much crust exposed. Of course not major issues! But seeing as I bake it frequently, I’d love to know if it’s preventable. I think it has to do with bake time. Sally, do you have any thoughts on why the filling settles a little too low in the crust, and also cracks?
Hi Annika, We are glad you have been enjoying the recipe! This is completely normal. It will rise like chocolate soufflé in the oven, then falls as it cools which creates a crackly meringue-like top. Though it could have been over-baked if it was one giant crack towards the middle of the pie.
This pie is dangerously good, like I made it for Thanksgiving and half of it was gone before dinner good. It tastes just like brownie batter, but a little fancier and it is so easy to make!
Can I use a store bought refrigerated pie crust? If I do- do I still need to blind bake?
Yes you can, Jenny. You will still follow the blind baking steps.
This recipe was very easy to make. I used the all butter pie crust. I also cooked it about 10min less than suggested @325°. Overall a very good recipe and will make again.
Made this for the family for Sunday dessert and we all thought it was really good. I didn’t change anything from the recipe. Baked for 53 minutes. Fairly straight forward recipe that is a real winner! I would make it again.
I have the new Pillsbury mini pie shells and wanted to try this recipe with them for thanksgiving. They are made for a muffin tin size. Do you have any suggestions? I am mainly wondering if I need to blind bake the crust.
Hi Brittney, we’re sure that it could work as mini pies but we haven’t tested it so we’re unsure of the bake time needed. The crusts will be small enough that they shouldn’t need to be pre-baked but you can definitely pre-bake them if you’d like them a bit crispier. We’d say about 5-10 minutes at 375°F (191°C) and then continue with the filling. Let us know if you try it!
Sally,
Can I make this in a 9 inch tart pan instead of a pie?
Hi Elise, that’s likely not large enough since tart pans aren’t as deep as pie dishes. A 10-inch would be better, or just use a 9-inch pie dish.
Hi! Could I use black cocoa in this??
Hi Kelsea, since you can use either natural or Dutch process cocoa in this recipe, the black cocoa (Dutch process) should work just fine. The flavor will be darker. Enjoy!
I made this pie today, it’s very rich and fudgy! My husband gave it wonderful reviews. I’m wondering if I needed to bake it a little longer, I thought the filling was a little “wet”, but the topping was perfect.
This pie is magical and delicious! I love it and will make again!
So back to this pie…I am telling you, when you have to tell someone “You may want to add vanilla ice cream or whip cream to take the richness down a notch” you know that you have just met the chocolate pie lover’s idea of Utopia. I could only eat about 3, ok well, 17 bites. Way too rich for me. But for those of you who love chocolate, this recipe will not disappoint. I didn’t have expresso powder, but I did add a tad of cinnamon. My chocolate fiends, if you try it, you will be in heaven. I am not a sweets girl, I just make pies on the side for people I love and for some extra $$. I have had people tell me that they hated pie crust until they tried mine (which is Sally’s recipe). This the one that I hand out samples of because it gets the attention. So yummy! Thanks Sally!
Hi,
I just made the filling, and it’s fluffy- is that how it’s supposed to be?
Hi Booklover, The filling should be thick like brownie batter (see the photos after the recipe for a good visual).
Can I use chocolate chips instead of the chocolate bar?
We don’t recommend chocolate chips – see recipe notes for details!
Can I use espresso coffee grounds instead of espresso powder?
Hello! Espresso coffee grounds will leave a bitter taste and gritty texture. Espresso powder is like instant coffee – it will melt into liquid and add espresso flavor. You can leave it out if you don’t have any but it really takes it to the flavor next level!
Can I sub anything for the heavy cream? Buttermilk or half and half?
Hi Diana, The only substitute we’d recommend here would be 1/4 cup of evaporated milk in place of the 1/4 cup of heavy cream or heavy whipping cream. We haven’t successfully tested anything else, so best to stick with just these options.
It’s absolutely wonderful
Gonna make it again sometime
I made this pie and went of the “no jiggle” instructions around 45 min and the pie was not cooked through. The firm crackle brownie top makes it impossible to see a jiggle so go off of time! If you make this pie, I would ignore those instructions and make a tester pie ( which is easy because you’ll have two pie crusts) or just plan to refrigerate ahead of time so the temp will set the middle for certain. It is delicious though and I used Kenji Alt Lopezes pie crust recipe and it was amazing.
Sally, I love your recipes and you seem like you like the science part of baking. I would definitely look at Kenji at seriouseats.com. He systamatically tests and retests cooking and baking methods. One article explains why you should never use ceramic pie dishes.
*systematically
Can I double the batter recipe to use in a deep dish pie? If so, will I need to alter the baking temp? Thanks!
Hi Jessica, You can use your deep dish pie plate. How deep is it? We tested this pie in a 1.8 inch deep pie dish and it works wonderfully (without doubling).
I made it in a normal pie plate and it was VERY thin, almost like a tart. Not sure if something happened? It rose in the oven (higher than the edges of the crust) but deflated to about half an inch.
Hi Jessica, This is completely normal. It will rise like chocolate soufflé in the oven, then falls as it cools which creates a crackly meringue-like top.