Easy Soft Pretzel Rolls

Homemade soft pretzel rolls come together quickly with a few basic kitchen ingredients. For the best results, follow my step photos and detailed instructions. You’ll love this dinner roll version of soft pretzels!
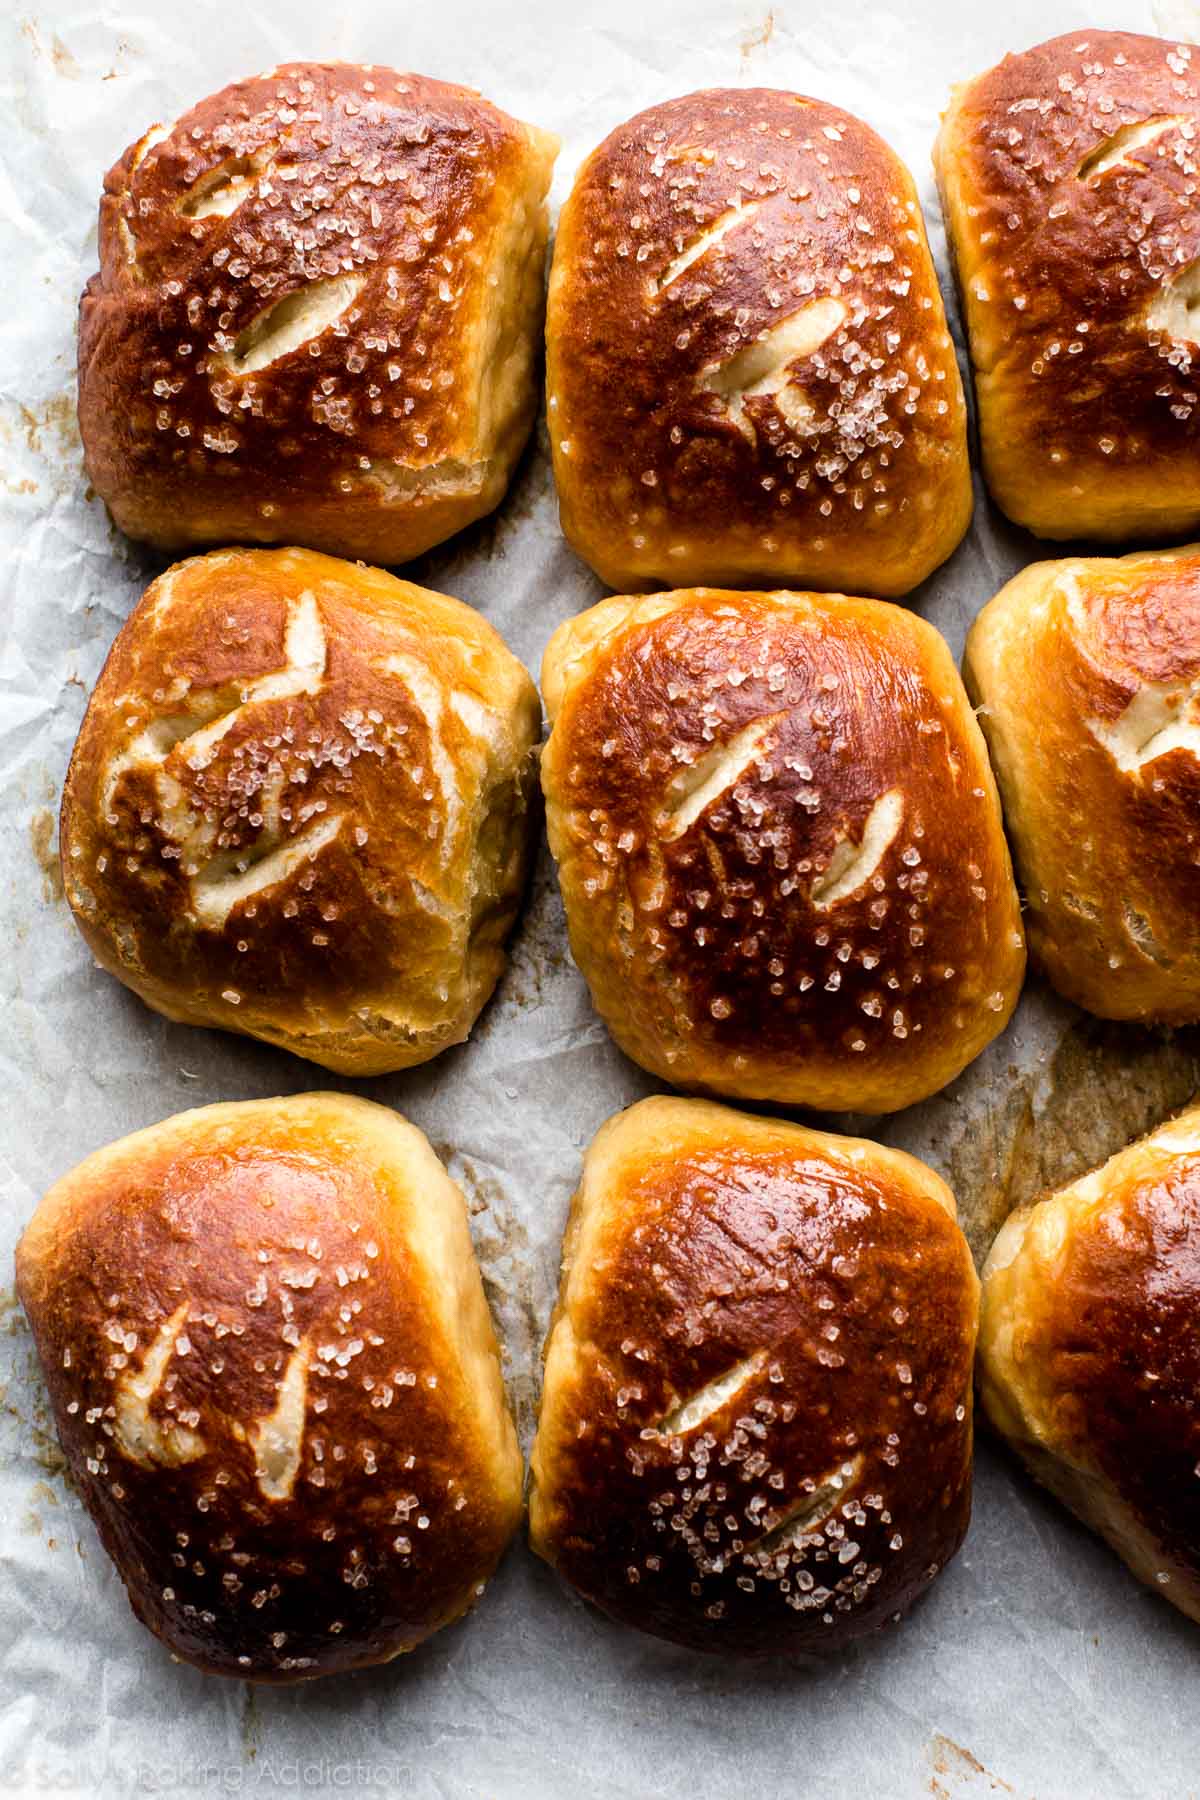
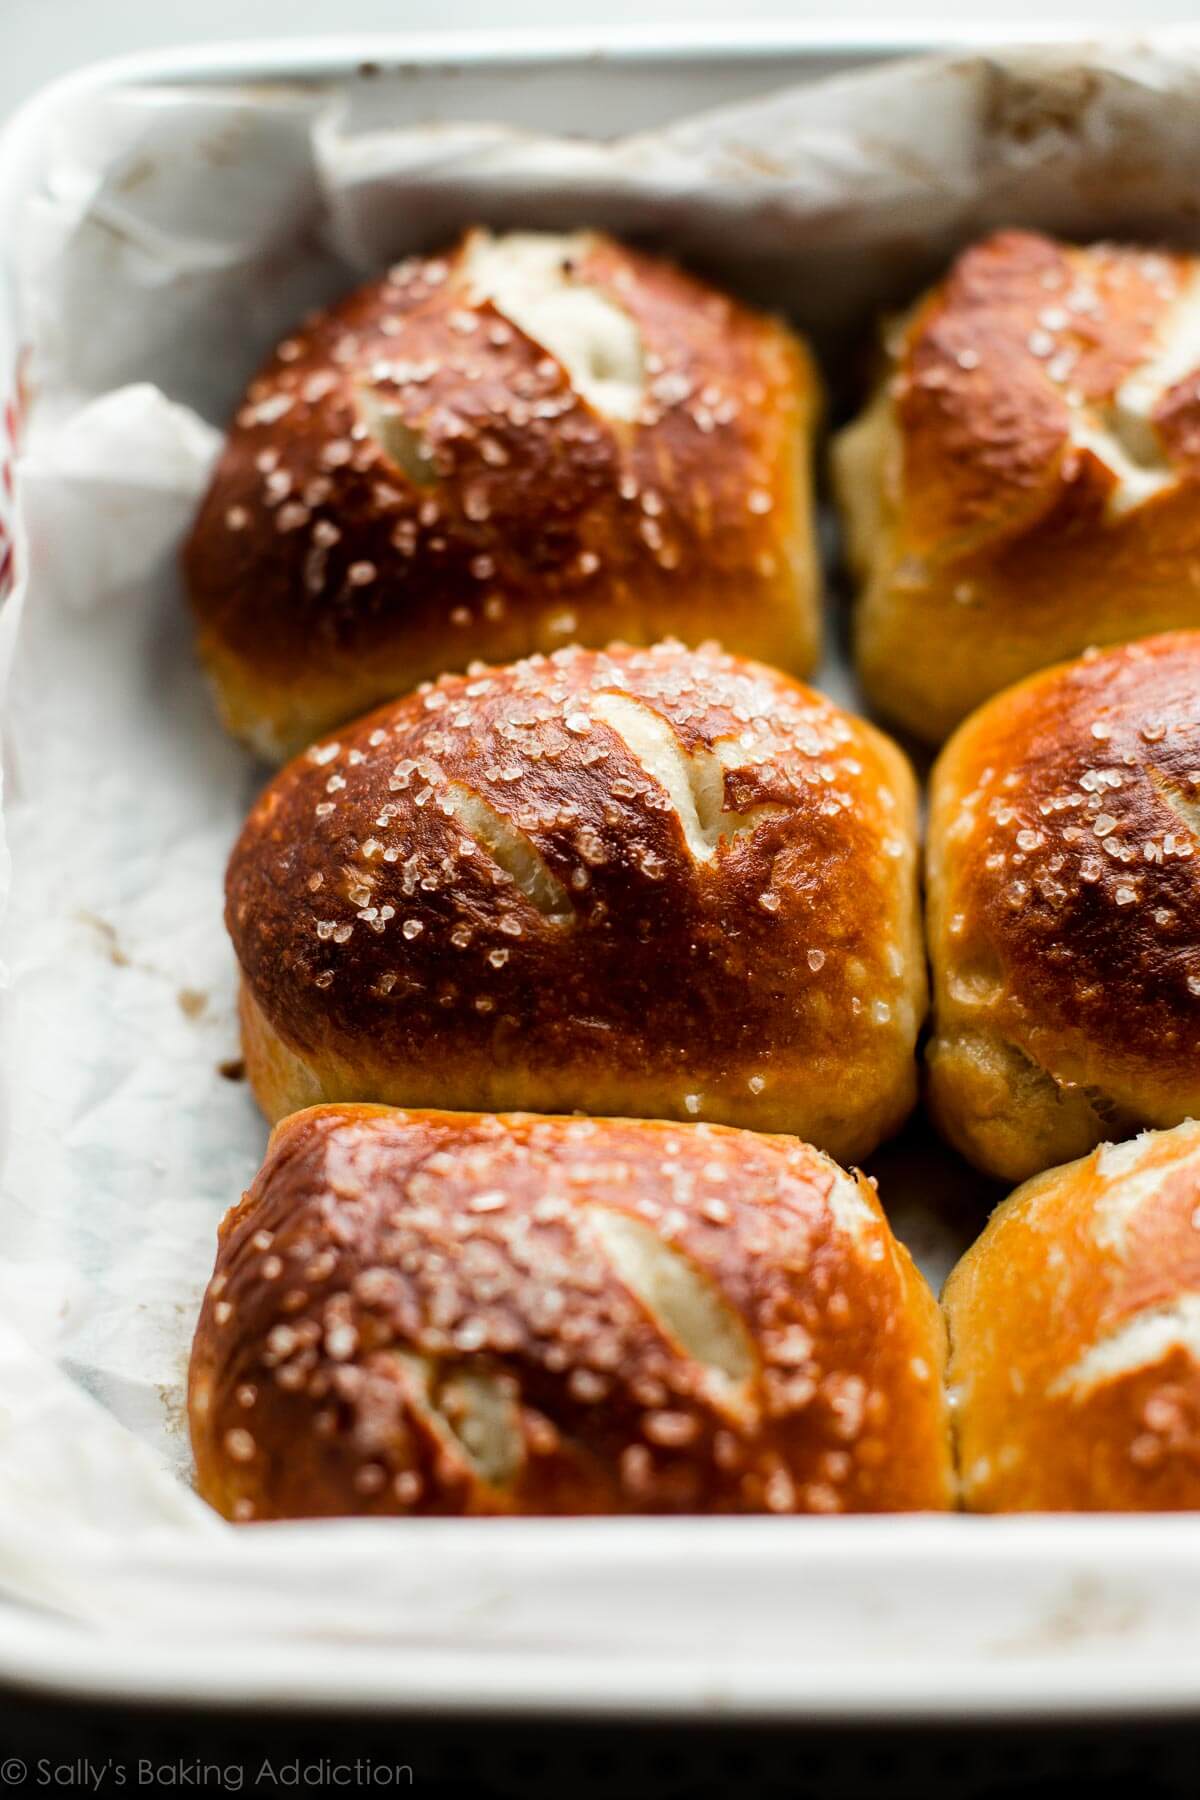
soft pretzel rolls after baking

Meet soft pretzel rolls, the mealtime-appropriate version of soft pretzels. Instead of shaping the dough into traditional pretzels, we simply craft the dough into balls. Like soft pretzel bites, but bigger! I know we all like the sounds of that. There’s a lot to cover today so let’s dive right in.

These Soft Pretzel Rolls Are:

  • Made with 7 basic ingredients
  • Extra chewy
  • Soft and fluffy in the centers
  • Easier than you think
  • Loaded with real pretzel flavor
  • Topped with crunchy coarse salt
  • Baked to golden brown perfection
soft pretzel rolls in a baking dish after baking
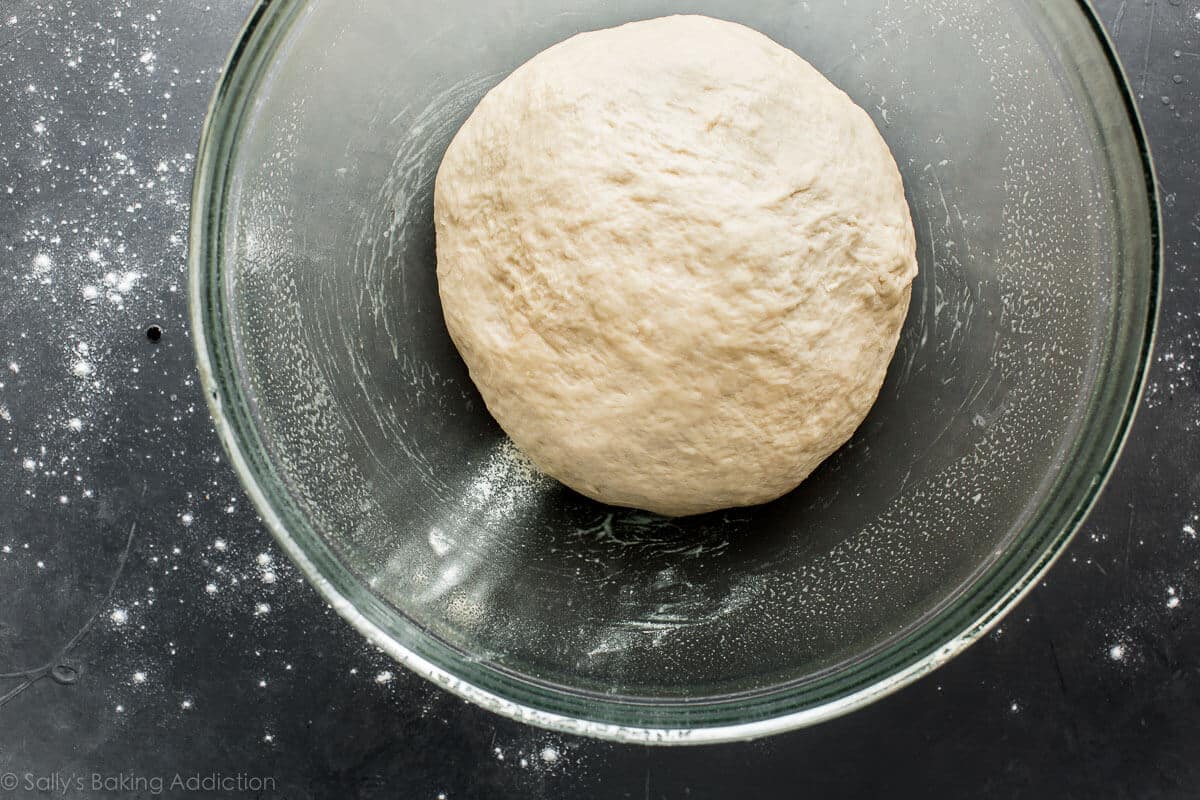
pretzel roll dough in a glass bowl before rising

Behind the Recipe

Are you familiar with my soft pretzels recipe? Itโ€™s a completely un-intimidating approach to making pretzels from scratch. If you have zero skill in the kitchen, you can make homemade soft pretzels. I even turned this recipe into soft pretzel knots and jalapeรฑo cheddar soft pretzels, too. But for soft pretzel rolls, we skip the twisting/shaping and form the dough into balls. Much easier.

To make soft pretzel rolls, we use the exact same dough that we use to make soft pretzels. This simple dough comes together with incredibly basic ingredients like water, yeast, butter, brown sugar, salt, and flour. Separate, they’re awesome. Together? Soft pretzels!

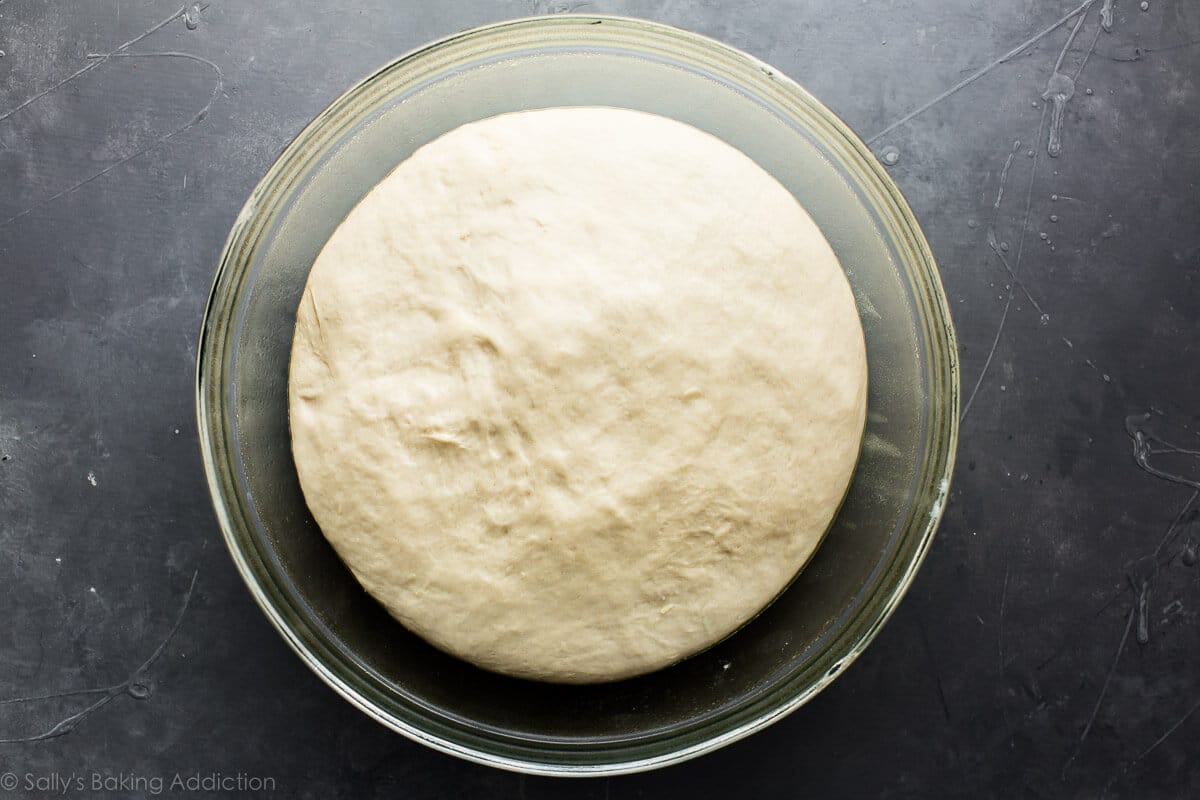
The primary difference between the two is that today’s rolls require a little extra rise time. We want the rolls to be fluffier than regular soft pretzels, so we give the dough a few extra minutes to restโ€”it’ll nearly double in size. See the photo of dough above and the one right below? There’s about 1 hour between the two photosโ€”some great rise there.

pretzel roll dough in a glass bowl after rising

Overview: How to Make Soft Pretzel Rolls

  1. Make the dough. See my How to Knead Dough video tutorial if you need extra help with that step.
  2. Let the dough rise for an hour. Or until doubled in size, as pictured above.
  3. Punch down the dough. This helps get rid of any air bubbles.
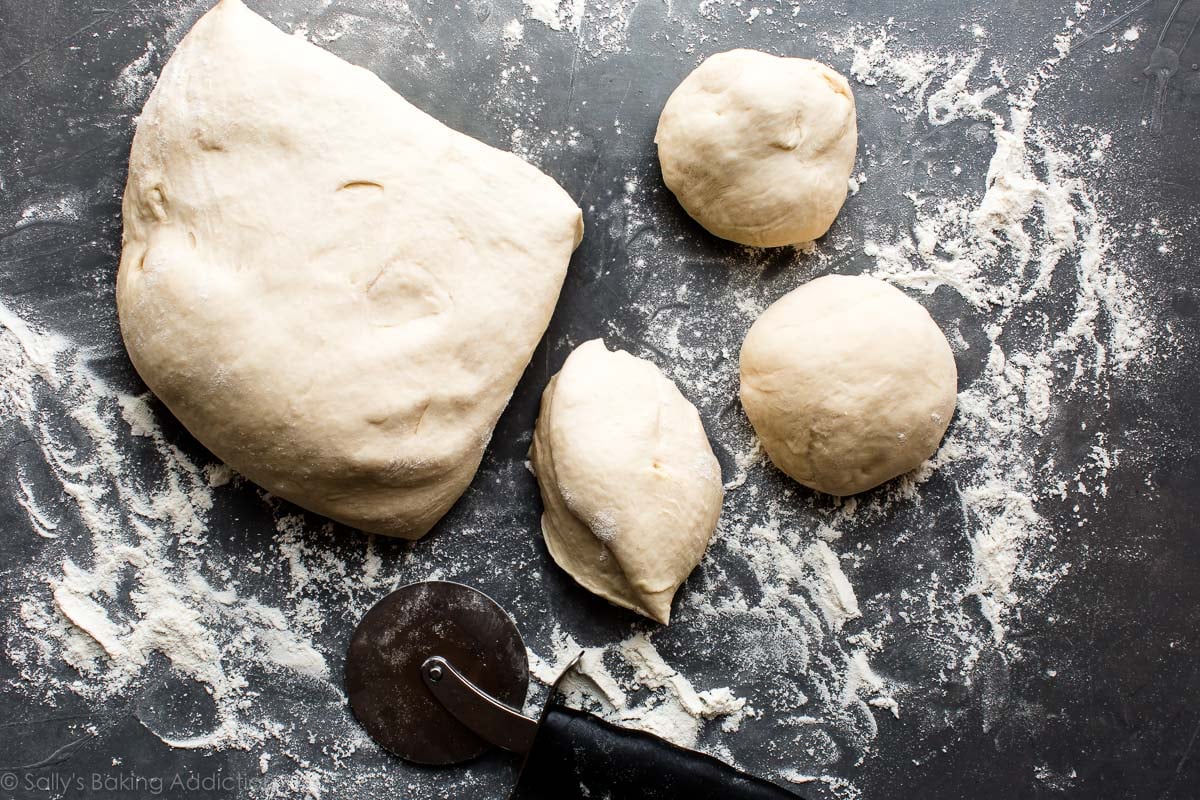
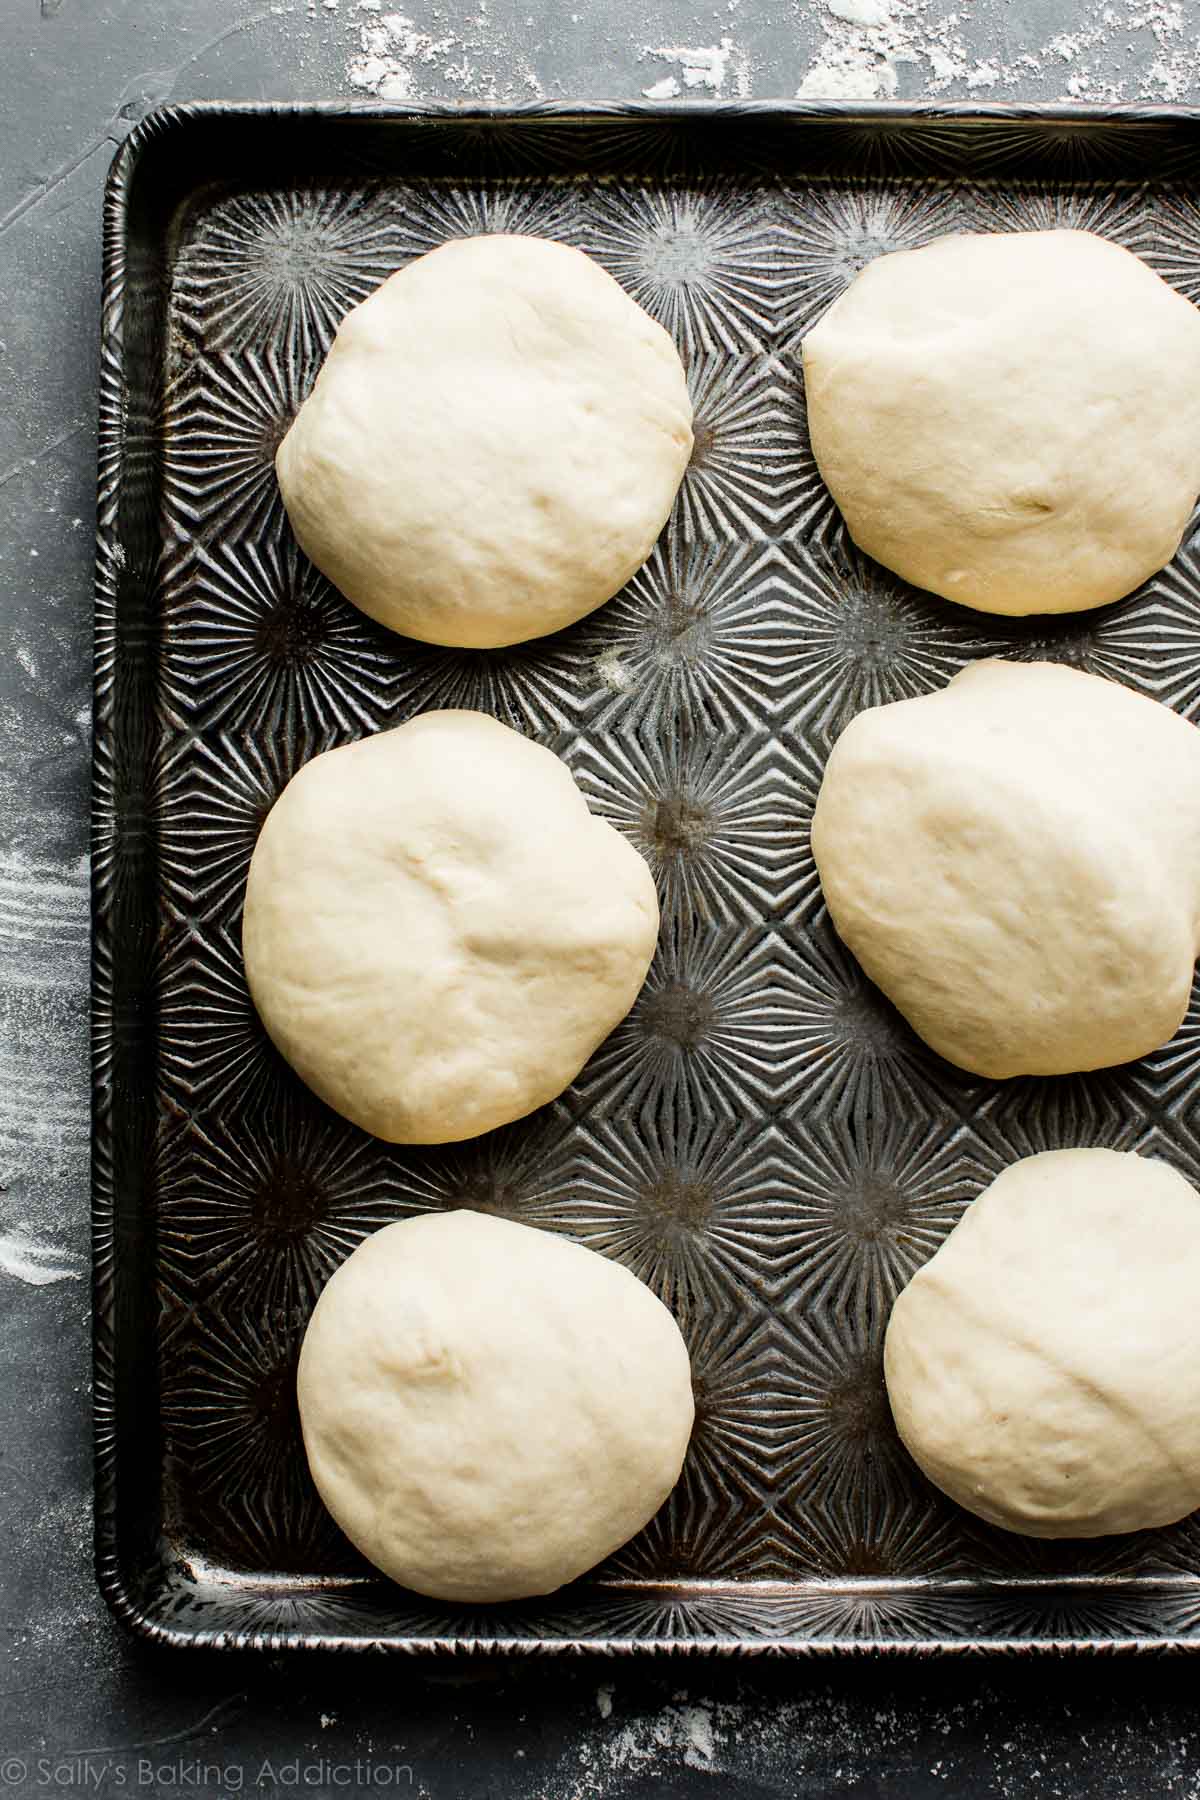
  4. Divide the dough to form the rolls. Aim for roughly 1/3 cup of dough each, which will yield about 12 rolls. Shape into balls.
  5. Give the rolls a baking soda bath. See below for more details.
  6. Place rolls into prepared baking pan. I like to bake the rolls squished together in a baking pan because they hold their shape much better. You can, however, separate them on a large baking sheet.
  7. Score the tops of each roll & top with butter and coarse sea salt.
  8. Bake until golden brown.
pretzel roll dough cut into dough chunks for rolls
pretzel roll dough shaped into rolls on a baking sheet
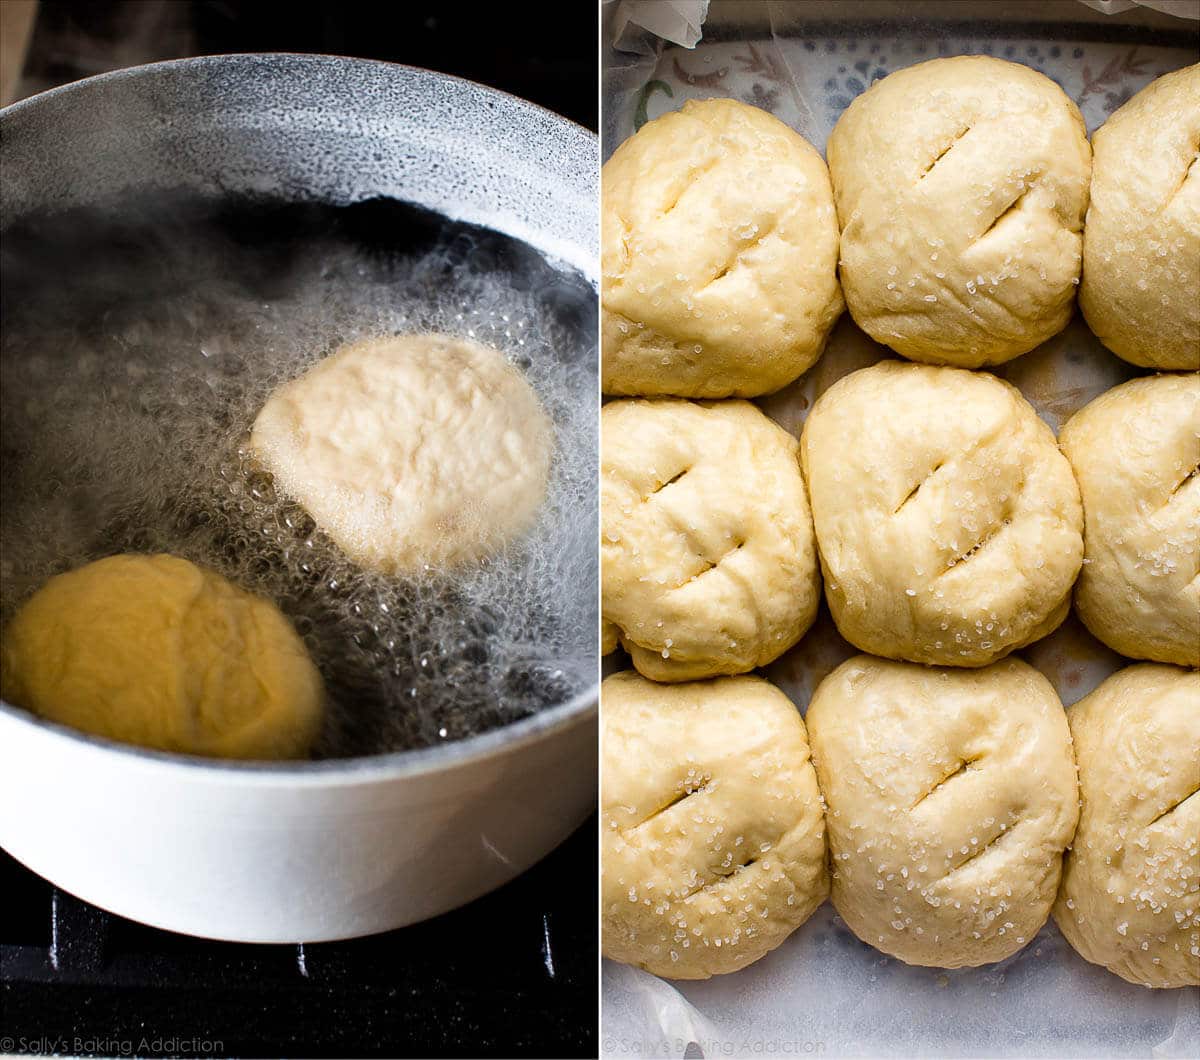
2 images of pretzel rolls in a baking soda bath in a pot on the stove and pretzel rolls with slits before baking

Baking Soda Bath

Each step is important but the baking soda bath is imperative. Why? It’s what gives pretzels that iconic flavor and chewy exterior, plus it locks in the super soft center and helps deepen the golden brown color on the exterior. Save time and get the water boiling as you’re shaping the dough into balls. Then drop each dough ball into the boiling water + baking soda for a quick soak. Worth it!

The rolls look wrinkly after boiling but if foods like sloppy joes + baked beans + messy casseroles teach us anything about life, it’s this: appearances can be pretty deceiving. Soon enough, those pale wrinkly buns will transform into buttery + salty + golden brown delights.
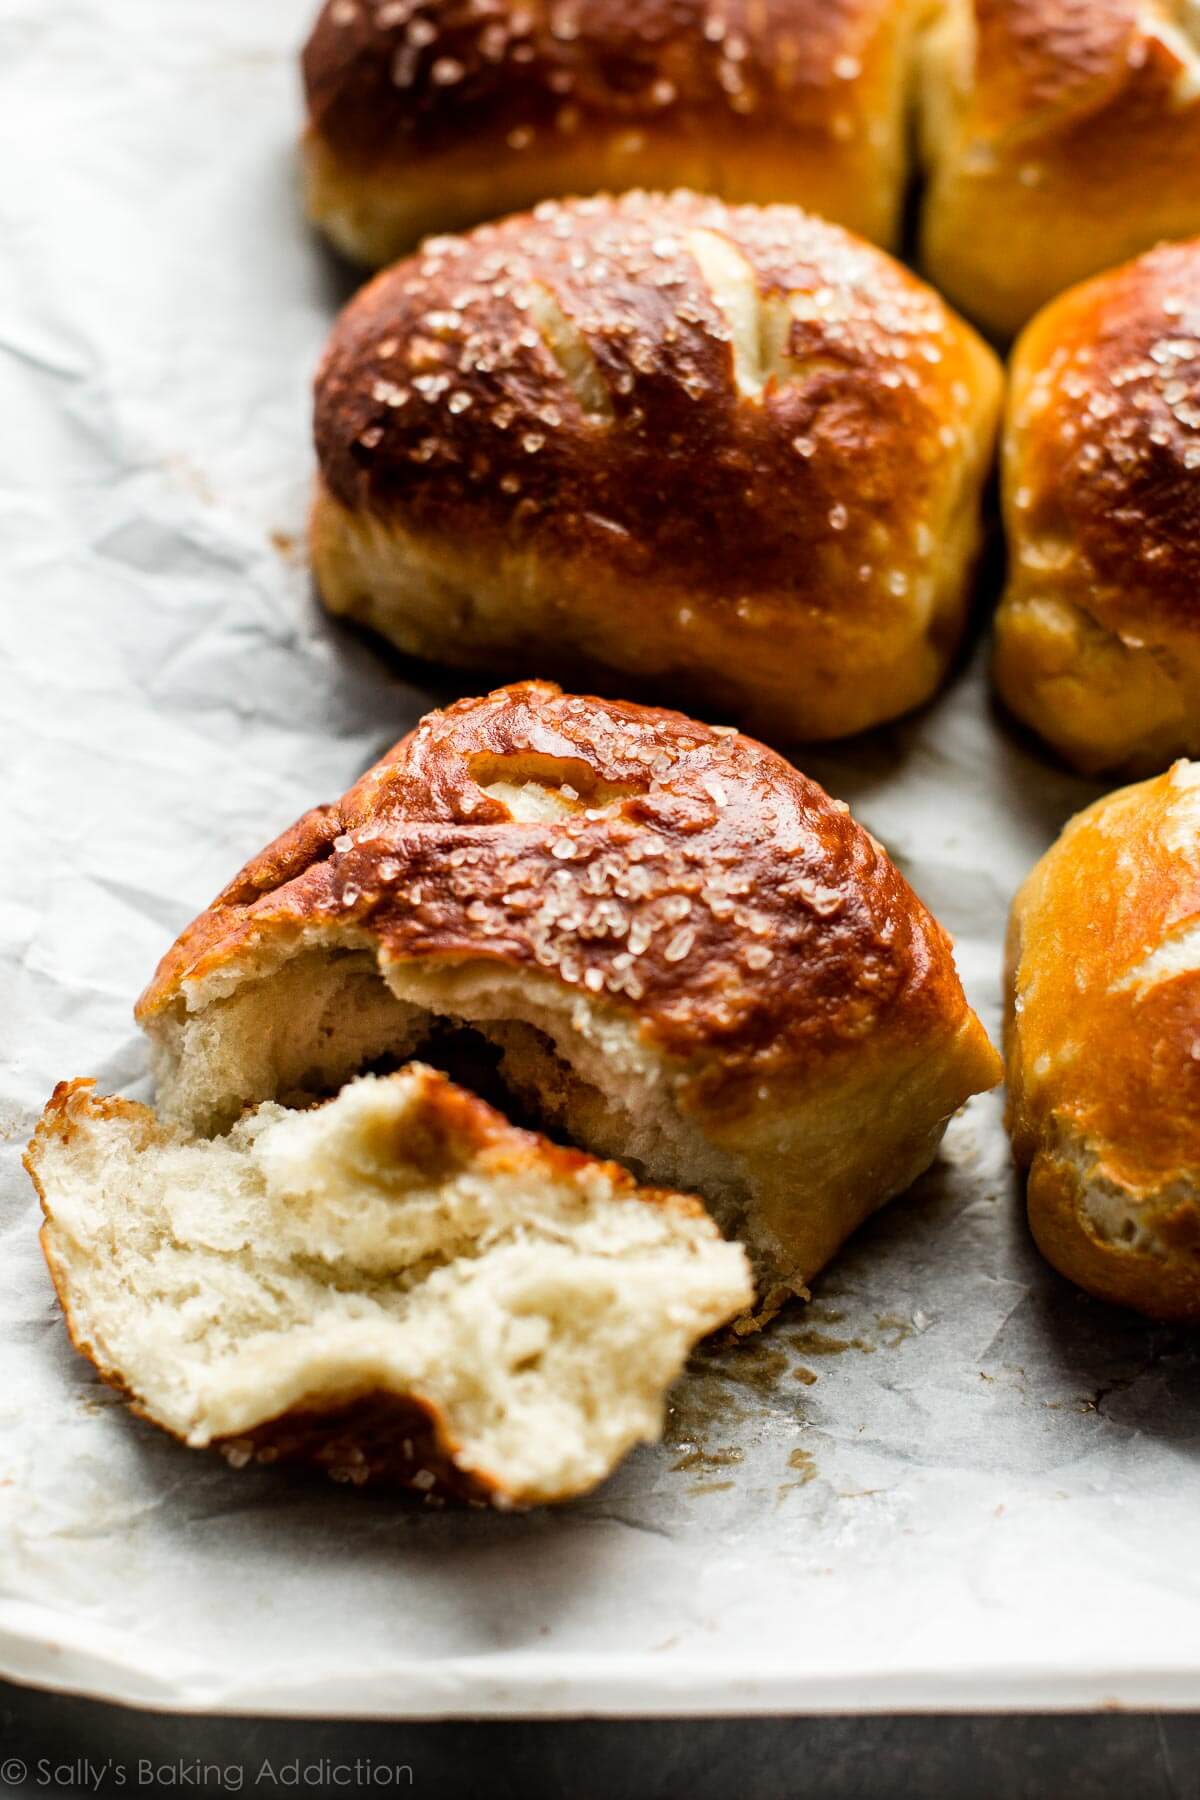
soft pretzel rolls

3 Success Tips for Homemade Pretzel Rolls

  1. Score the tops of the rolls. Use a sharp knife to do this once the rolls come out of the baking soda bath. Scoring the tops allows the rolls to expand and the centers to cook all the way through since they’re thicker rolls.
  2. Brush with melted butter and sprinkle with coarse salt. This gives the rolls that delicious bakery-style flavor.
  3. Bake until golden brown. The deeper the color, the better the flavor.

Make-Ahead Tip

If you are making pretzel rolls in advance, do not top them with coarse salt before baking. The salt draws the moisture out of the pretzel rolls, and once youโ€™ve placed the baked and cooled pretzel rolls in an airtight container or bag, it doesnโ€™t take long before youโ€™ll notice water droplets forming inside and the pretzel rolls become soggy and wrinkled. Yuck!

If you wonโ€™t be serving the pretzel rolls the same day you bake them, omit the salt-topping step. Bake as directed, then allow to cool completely before placing them in an airtight container, and store at room temperature. When you are ready to serve them, place the pretzel rolls on a baking sheet and brush them lightly with melted butter, then sprinkle with coarse salt. Bake them in a 350ยฐF (177ยฐC) oven for 5โ€“10 minutes, or until warmed.

Same goes for freezing homemade soft pretzel rolls: wait to top with salt until youโ€™re ready to serve them. Cool the unsalted baked pretzel rolls completely, then freeze in an airtight freezer-safe container or zip-top bag for up to 3 months. To reheat, brush frozen pretzels (no need to thaw) with melted butter and sprinkle with coarse salt, then bake at 350ยฐF (177ยฐC) for 20 minutes or until warmed through.

What to Serve With Pretzel Rolls

The most delicious ways to eat these pretzel rolls? Enjoy them with beer cheese dip or garlic and bacon spinach dip, as buns for ham & swiss sandwiches, with soup (like minestrone soup or creamy chicken noodle soup), as a side with walnut crusted chicken, with a swipe of homemade honey butter, or straight from the pan. They’re big, soft, fluffy, and pretzel-y!

Print
clock clock iconcutlery cutlery iconflag flag iconfolder folder iconinstagram instagram iconpinterest pinterest iconfacebook facebook iconprint print iconsquares squares iconheart heart iconheart solid heart solid icon
soft pretzel rolls after baking

Easy Pretzel Rolls

4.9 from 99 reviews
  • Author: Sally
  • Prep Time: 1 hour, 30 minutes
  • Cook Time: 25 minutes
  • Total Time: 2 hours
  • Yield: 12 rolls
  • Category: Bread
  • Method: Baking
  • Cuisine: American
Save Recipe

Description

Making easy pretzel rolls from scratch is simpler than you think. Follow this easy and approachable way to make them at home!


Ingredients

  • 1ย and 1/2 cups (360ml)ย warm water (lukewarmโ€”no need to take temperature but around 100ยฐF (38ยฐC) is great)
  • 2ย and 1/4 teaspoons (7g)ย instantย orย active dry yeastย (1ย standard packet)
  • 1/4 cup (4 Tablespoons; 56g) unsalted butter, divided
  • 1 teaspoon salt
  • 1 Tablespoon brown sugar
  • 3 and 3/4โ€“4 cups (469โ€“500g) all-purpose flour (spooned & leveled), plus more for workย surface
  • coarse sea salt for sprinkling

Baking Soda Bath

  • 1/2 cup (120g) baking soda
  • 9 cups (2,160ml) water


Instructions

  1. Whisk yeast and warm water together. Allow to sit for 1 minute. Meanwhile, melt 1 Tablespoon of butter (reserve the rest for step 7). Whisk in salt, brown sugar, and melted butter. Slowly add 3 cups of flour, 1 cup at a time. Mix with a wooden spoon or dough hook attached to a stand mixer until dough is thick. Add 3/4 cup more flour until the dough is no longer sticky. If it is still sticky, add 1/4โ€“1/2 cup more, as needed. Poke the dough with your fingerโ€”if it bounces back, it is ready to knead.
  2. Knead the dough: Keep the dough in the mixer and beat for an additional 5 full minutes, or knead by hand on a lightly floured surface for 5 full minutes. (If youโ€™re new to bread-baking, my How to Knead Dough video tutorial can help here.) If the dough becomes too sticky during the kneading process, sprinkle 1 teaspoon of flour at a time on the dough or on the work surface/in the bowl to make a soft, slightly tacky dough. Do not add more flour than you need because you do not want a dry dough. After kneading, the dough should still feel a little soft. Poke it with your fingerโ€”if it slowly bounces back, your dough is ready to rise. You can also do a โ€œwindowpane testโ€ to see if your dough has been kneaded long enough: tear off a small (roughly golfball-size) piece of dough and gently stretch it out until itโ€™s thin enough for light to pass through it. Hold it up to a window or light. Does light pass through the stretched dough without the dough tearing first? If so, your dough has been kneaded long enough and is ready to rise. If not, keep kneading until it passes the windowpane test.
  3. Rise: Place in a large greased bowl, cover tightly with plastic wrap, and allow to rise in a warm environment for 1 hour or until nearly doubled in size. (Tip: I preheat my oven to 200ยฐF (93ยฐC), turn it off, place the dough inside and shut the oven. This is the warm environment.)
  4. Once risen, punch down dough to release any air bubbles. Turn out onto a lightly floured surface and, with a sharp knife or pizza cutter, cut dough into 1/3-cup (about 75g) sections. You should have about 12 pieces. Shape into balls.
  5. Preheat oven to 400ยฐF (204ยฐC). Line a baking sheet with parchment paper or silicone baking mat OR line a 9×13 baking pan with parchment paper (I use a baking pan). Set aside.
  6. Bring baking soda and 9 cups of water to a boil in a large pot. Drop 1โ€“2 pretzel rolls into the boiling water for 20โ€“30 seconds. Any longer than that and your pretzels will have a metallic taste. Using a slotted spatula, lift the pretzel roll out of the water and allow excess water to drip off. Place pretzel rolls onto prepared baking sheet or close together in the baking pan. Using a sharp knife, score a couple slits into the top of each.
  7. Melt the remaining butter. Lightly brush each roll with melted butter and sprinkle with coarse sea salt.
  8. Bake for 22โ€“26 minutes or until deep golden brown on all sides.
  9. Remove from the oven and serve warm. Pretzel rolls may be stored in an airtight container or zip-top bag for up to 3 days (they lose a little softness over time).

Notes

  1. Make Ahead Instructions: If planning to freeze baked pretzel rolls, do not top them with coarse salt before baking. Cool completely, then freeze in an airtight freezer-safe container or zip-top bag for up to 3 months. To reheat, brush frozen pretzel rolls (no need to thaw) with melted butter and sprinkle with coarse salt, then bake at 350ยฐF (177ยฐC) for 20 minutes or until warmed through, or microwave until warm. The prepared pretzel dough can be covered and refrigerated for up to one day or frozen in an airtight container for 2โ€“3 months. Thaw frozen dough in the refrigerator overnight. Bring to room temperature, then continue with step 3.
  2. Special Tools (affiliate links): Stand Mixer or Glass Mixing Bowl and Wooden Spoon | Baking Sheets | Silicone Baking Mats or Parchment Paper | Large Pot | Slotted Spatula | Pastry Brush | Coarse Sea Salt
  3. Reference my Baking with Yeast Guide for answers to common yeast FAQs.

overhead image of soft pretzel rolls
sally mckenney headshot purple shirt.
About the Author

Sally McKenney

Sally McKenney is a baker, food photographer, and New York Times best-selling author. Her kitchen-tested recipes and step-by-step tutorials have given millions of readers the knowledge and confidence to bake from scratch. Sallyโ€™s work has been featured on TODAY, Good Morning America, Taste of Home, People, and more.

Read More

Reader Comments and Reviews

  1. Randi says:
    October 23, 2025

    Wow! So easy and delicious. We put grilled mortadella, melted swiss, Dijon and arugula and theyโ€™re truly AHMAZING!
    I made two separate batches but baked them all close together on a cookie sheet. Got about 15 in each batch! Canโ€™t wait to try different ways to eat them!


  2. Lara says:
    October 15, 2025

    Sadly it didnโ€™t work for me. The dough was too wet and didnโ€™t come together with the amount of the flour stated in the recipe. The buns turned out small and very dense

  3. Cait says:
    October 14, 2025

    Hi! I made these and they tasted delicious, but the crust was a little different than I imagined. It didn’t come out glossy and shiny like yours, it almost ended up looking like craquelin. I’m pretty sure I followed the recipe exactly. Any idea what could have caused that?

    Thanks for a great recipe!

    1. Trina @ Sally's Baking says:
      October 14, 2025

      Hi Cait! The baking soda bath is responsible for the brown crust, so donโ€™t skip that part! Also make sure you are scoring the tops of each roll before baking (or try scoring them a bit deeper next time if you already are). This should help with the cracks on the tops.

  4. Katelyn Cumby says:
    September 9, 2025

    Question?! I am wanting to use your recipe for a large scale event. Have you scaled these up before? If so, how many times? I will be making close to 400 sliders.

    1. Trina @ Sally's Baking says:
      September 9, 2025

      Hi Katelyn! As home bakers, we’ve never tried to scale this recipe up. We usually advise to make separate batches instead of multiplying recipes, but let us know what you try!

  5. Autumn Horst says:
    August 14, 2025

    These are amazing!!! Fast and easy to make. I love making Sallyโ€™s recipes because they almost always turn out great. I use this recipe and make 6 buns instead of 12 so they are larger for sandwiches. This week weโ€™ve used them for chicken salad, cheeseburgers, and pulled pork. I do the same baking time. I also press them flat after shaping so they are more of a flat bun. Highly recommended this recipe!

    1. Catrina says:
      October 22, 2025

      Hi Sally,
      Why all purpose flour and not bread flour?

      1. Lexi @ Sally's Baking says:
        October 22, 2025

        Hi Catrina, all-purpose flour produces a slightly sturdier roll, but you can use the same amount of bread flour instead for a chewier roll.

  6. Mechelle W. says:
    August 8, 2025

    Mine are in the oven now! Canโ€™t wait to have a nice juicy cheeseburger tonight! My only thing that will hopefully work out is my oven is broke and only goes to 375 and will shut off if I go higher! I need a new oven because they donโ€™t make the part to fix it anymore! We will see how it works out.

  7. Jared Doucet says:
    July 29, 2025

    Is there no second rise after forming balls?

    1. Trina @ Sally's Baking says:
      July 29, 2025

      Correct!

  8. Claudes says:
    June 30, 2025

    Just pulled these out of the oven and they look and smell great! I added 100g of sourdough discard and ended up getting 14 buns out of it. Shaped them for hotdogs so looking forward to throwing a few on the grill later.

  9. Christie says:
    May 24, 2025

    I’ve been hearing your name for awhile now, and have now made a few of your recipes, and every single one has been totally on point! Like absolutely perfect! I did the red velvet cookies months ago, terrific. The upgraded German chocolate cake for my partner’s birthday, phenomenal!(I barely even eat sweets anymore, but had a slice and it was absolutely amazing). Last night I made these pretzel rolls for him(he’s partial to soft pretzels) and I just tried a sandwich with one, and your recipe, oven times, and video on kneading and testing for doneness were absolutely perfect. You’re helping me to become a baker, and I can’t thank you enough!

    1. Michelle @ Sally's Baking says:
      May 24, 2025

      Thank you so much for sharing this, Christie!

  10. Julia says:
    April 17, 2025

    I have made these rolls before and they were a hit. Iโ€™m wanting to make a double batch now and wondering what adjustments should be made to double or is it a true doubling of all ingredients? Thanks!

    1. Trina @ Sally's Baking says:
      April 17, 2025

      Hi Julia! For best results we would make two batches of dough instead of doubling.

  11. Shari says:
    March 30, 2025

    These turned out great ! Sooo pleased. Thank you.

  12. Aileen says:
    March 19, 2025

    Once again, a delicious recipe and so simple. The family raved about these Pretzel rolls and will definitely be added to dinner meals.
    Thank you for such wonderful recipes and thorough, easy to follow instructions.

  13. Heather says:
    March 9, 2025

    Beautiful rolls. Great directions. Delicious. The only direction I didnโ€™t follow was brushing โ€œlightlyโ€ with butter.

  14. Susie Dahl says:
    March 7, 2025

    Is there any way to make your pretzel rolls using gluten free flour?
    I enjoy your recipes so much. If yeast is required, without glutinous flour I donโ€™t think it will stretch.

    1. Lexi @ Sally's Baking says:
      March 7, 2025

      Hi Susie, we haven’t tested this recipe with gluten-free flour, so we’re unsure of the results. If you do give it a try, please let us know how it goes!

  15. Gale says:
    March 7, 2025

    I made these for kemmelweck type rolls for thinly sliced roast beef, but used bread flour for a sturdier bun. Kemmelwecks are from western NY state – top w/caraway & salt before baking. This recipe does them proud – thank you…

  16. David Lenham says:
    February 13, 2025

    Hello and greetings from England! I’ve been baking these rolls at my granddaughter’s request and she says they are great the day after baking but thereafter they become very soggy. Any suggestions as to what I’m doing wrong would be much appreciated. Thanks, David

    1. Lexi @ Sally's Baking says:
      February 13, 2025

      Hi David, we’re so glad the pretzels are a hit! That can be normalโ€”to prevent them from taking on too much moisture overnight, try keeping the bag or storage container open a crack. This should help.

  17. HiAltitude says:
    February 7, 2025

    these came out FANTASTIC! made the recipe exactly as directed, although I never got windowpane level stretch I just went ahead. perfect and DELICIOUS! I used a tip from another recipe to roll the dough in my palms until a little more compressed to make them less fluffy, don’t know that that made a difference. But these were super good. I also froze them with the salt just after they had cooled, and found them perfect. A frozen roll in the microwave for 30 seconds= perfection!

  18. Dana Kurtz says:
    February 3, 2025

    The recipe was very easy and fun! I was trying to make burger pretzel buns, and mine were too โ€œdenseโ€ โ€ฆ more like a pretzel. Any suggestions?

    1. Lexi @ Sally's Baking says:
      February 4, 2025

      Hi Dana, Theyโ€™re supposed to be on the denser side, closer to pretzels, but will rise a bit in the oven. Also, be sure not to let the dough over-proof (rise), or shaped rolls/breads can easily deflate and become overly dense. Thanks for giving this one a try!

  19. Patti says:
    February 2, 2025

    I understand that I should not salt the pretzels before baking if I plan to serve them at a later date. Do I also skip brushing the pretzel rolls with butter before the initial baking? Thank you.

    1. Trina @ Sally's Baking says:
      February 2, 2025

      Hi Patti, we would still add the brush of butter before baking.

  20. Hannah says:
    January 30, 2025

    These were good, but mine didn’t have the pretzel texture or taste that I was expecting (unlike when I made your soft pretzels, which were delicious). The outsides were crunchier than I would have liked. Not sure where I went wrong!

  21. Melinda says:
    January 26, 2025

    My German husband was skeptical when he heard I was making these without using lye. These pretzel rolls are easy to make, delicious, and my husband is now a convert. Excellent recipe!

  22. Kd says:
    January 12, 2025

    I didnโ€™t realize how small they would be. I wanted them for burgers, but next time Iโ€™ll know.

  23. Cindy says:
    January 6, 2025

    This recipe is incredibly easy and so delicious! It’s a snowy day so I also made your lemon lavender scones. I love them both, but if I was forced to choose a favorite it would be these pretzel rolls all day long. They are so fluffy, the outside crunchy & I used Maldon salt on the tops. These are gift-worthy for friends & family. Thank you for sharing your recipes!

  24. Nicole says:
    December 17, 2024

    These were easy to make and they look really nice. Next time I might do an egg wash. My husband’s birthday is today, so I made these to go with some sausages he’s going to grill up. I made them with about 50% whole wheat since he’s into fiber. The problem that I ran into was that they stuck to my parchment paper. That has never happened to me before. It must have been the baking soda coating. Next time, I will spread a little butter onto the bottoms and the parchment paper itself. Maybe I will use a parchment paper that is a little thicker and more waxy. The type I used was a thinner, pre-cut variety.

  25. Greg says:
    November 25, 2024

    How can I scale this recipe to make 2 or 3 dozen?

    1. Trina @ Sally's Baking says:
      November 25, 2024

      Hi Greg! We recommend making two or three batches instead of multiplying this recipe. Happy baking!

  26. Jill says:
    November 16, 2024

    I appreciated the simplicity of this recipe yum! Simple with helpful tips (kneading & windows!). Thank you!