

This easy homemade bagels recipe proves that you can make deliciously chewy bagels in your own kitchen with only a few basic ingredients and baking tools! Watch the video tutorial before you get started.
Today I’m teaching you how to make homemade bagels with only a few basic ingredients and kitchen tools. Today you’re going to tackle any fears of yeast-bread baking—and I’m right here to guide you along! This recipe is such a fan favorite that I included it in my New York Times best-selling cookbook, Sally’s Baking 101.
Bagels, crème brûlée, soft pretzels, and French macarons. What do these foods have in common? Each seem really complicated to make at home. That’s why you’ll often find them on your baking bucket list. But secretly, they couldn’t be easier. Homemade bagels taste fresher, are cheaper, and you’ll earn the bragging rights for from-scratch baking. (P.S. Each of those recipes has a video tutorial!)
Bagels Require a Lean Dough
The first step is to make the bagel dough. You need only 5 ingredients:
- Warm Water: Liquid for the dough.
- Yeast: Allows the dough to rise. I recommend an instant or active dry yeast.
- Barley Malt Syrup or Sugar: Bakeries use barley malt syrup to sweeten the bagel dough—it can be a little difficult to find, but either white or brown sugar is a fine substitute.
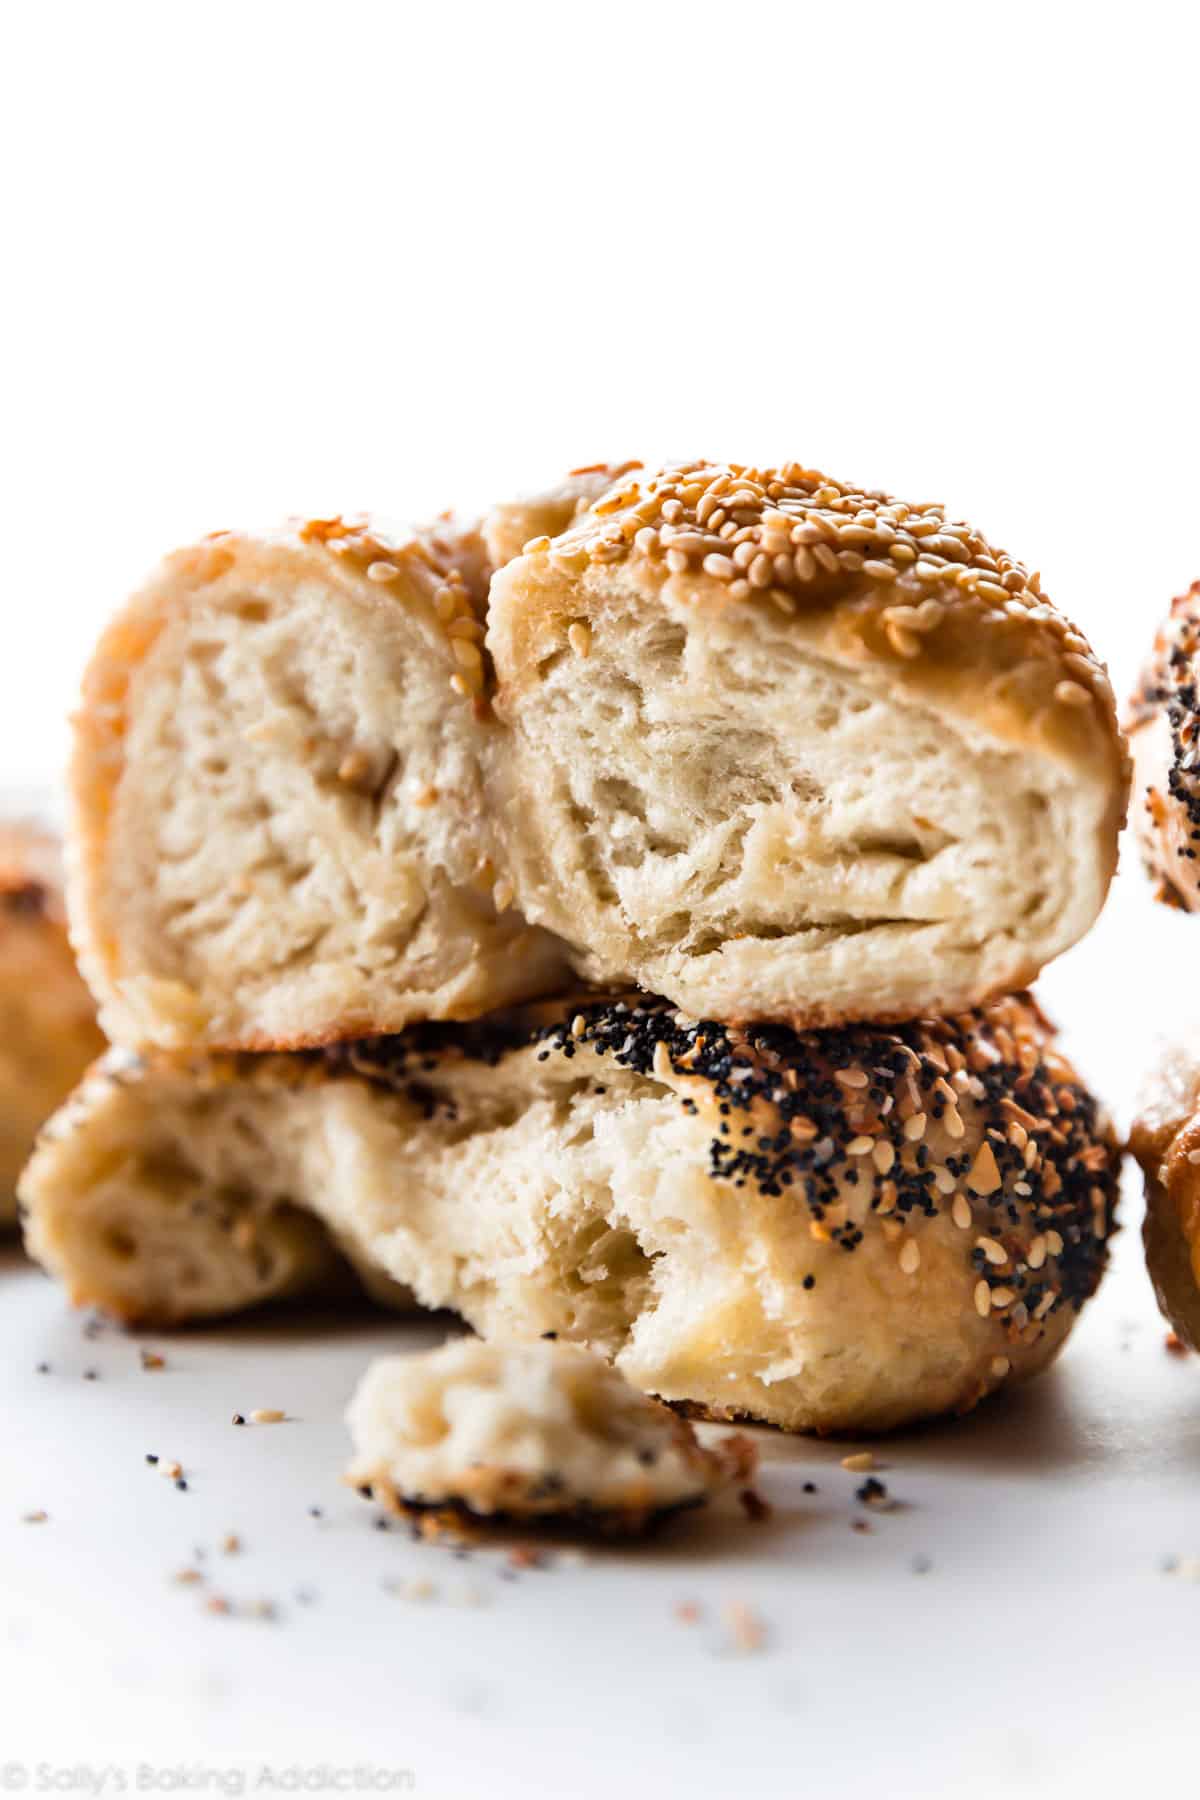
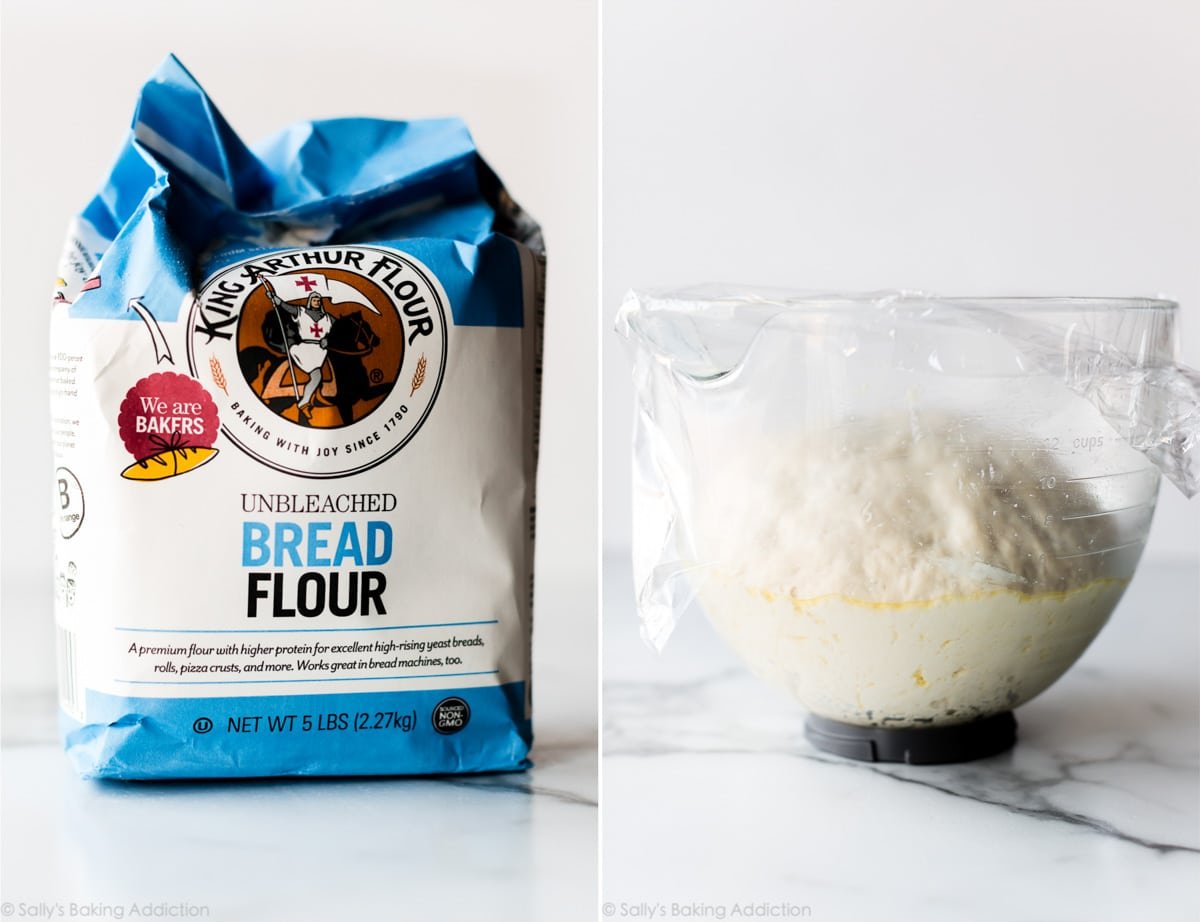
- Bread Flour: A high-protein flour is necessary for bagels. We want a dense and chewy texture, not soft and airy like cinnamon rolls. Bread flour is the only solution!
- Salt: Flavor.
Notice how there is no fat? This is called a lean dough. Lean dough is ideal for recipes like focaccia, pizza dough, artisan bread, and cranberry nut no-knead bread. Breads like dinner rolls and homemade breadsticks, and sweet bread, such as cinnamon rolls, include fat for richness and flavor.
You can prepare and knead the dough with a stand mixer or by hand. If you’d like a visual of how to knead the dough by hand, you can watch the full video tutorial in my post on How to Knead Dough.
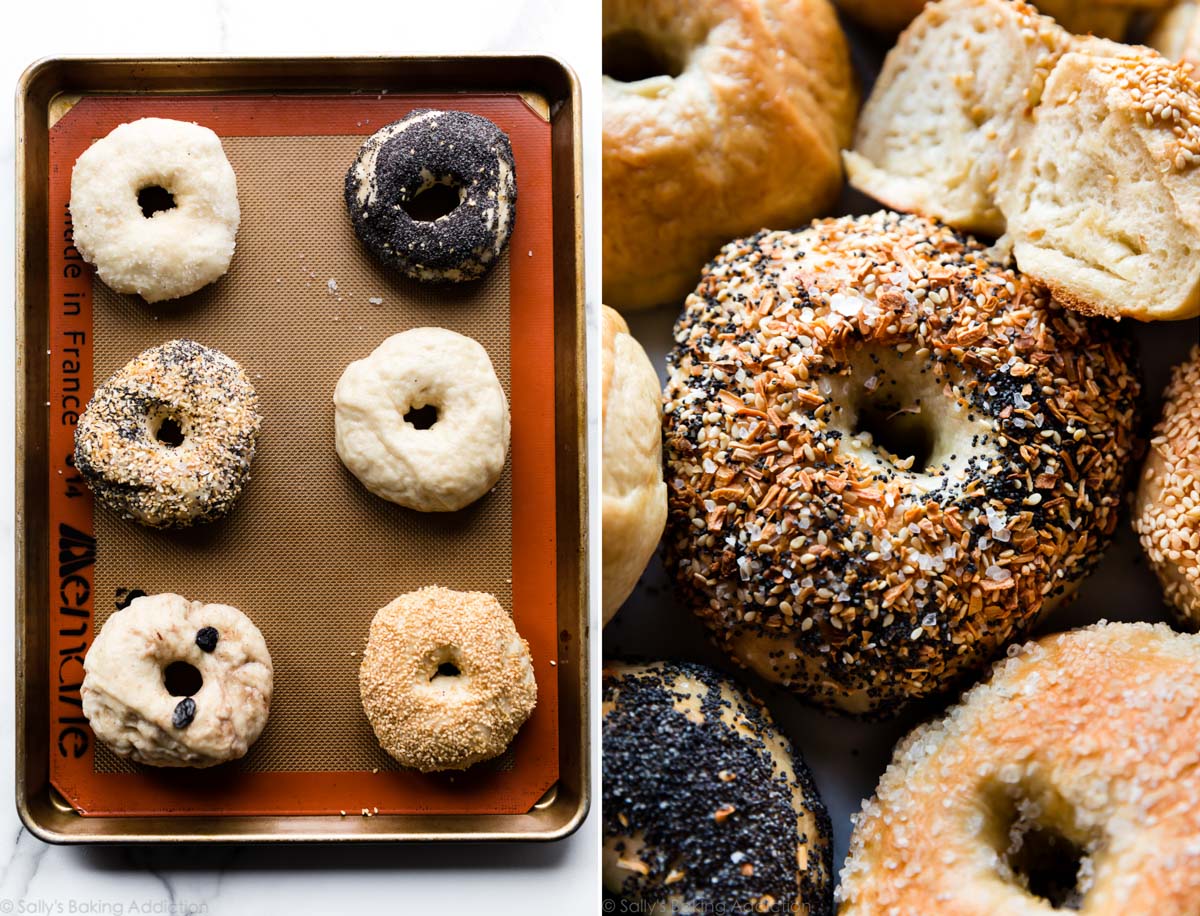
After the dough has been kneaded, let it rise for 60–90 minutes. Punch it down, then divide into 8 sections and shape into bagels.
How to Shape Bagels
Shaping bagels is easier than it looks. Poke your finger through the center of the ball of dough, then use 2 fingers to widen the hole to about 1.5–2 inches. That’s it! I don’t really do anything fancy and the bagels don’t need to be perfect. Mine never are!
Bagel Water Bath
Bagels must cook for 1 minute on each side in a pot of boiling water. This is actually the most important step in the whole recipe. Why?
- Boiling the bagels gives the bagel its beautiful shine. But looks aren’t everything—this shine is actually a result of the dough’s starches gelatinizing which creates a crisp, shiny coating. I learned this from Cooks Illustrated.
- Boiling bagels cooks the outer layer of dough, which guarantees they’ll hold their shape in the oven.
Add honey or barley malt syrup to the water bath. Why? The sugar adds extra caramelization and crisp. Brushing the boiled bagels with egg wash does the same. Don’t skip either!
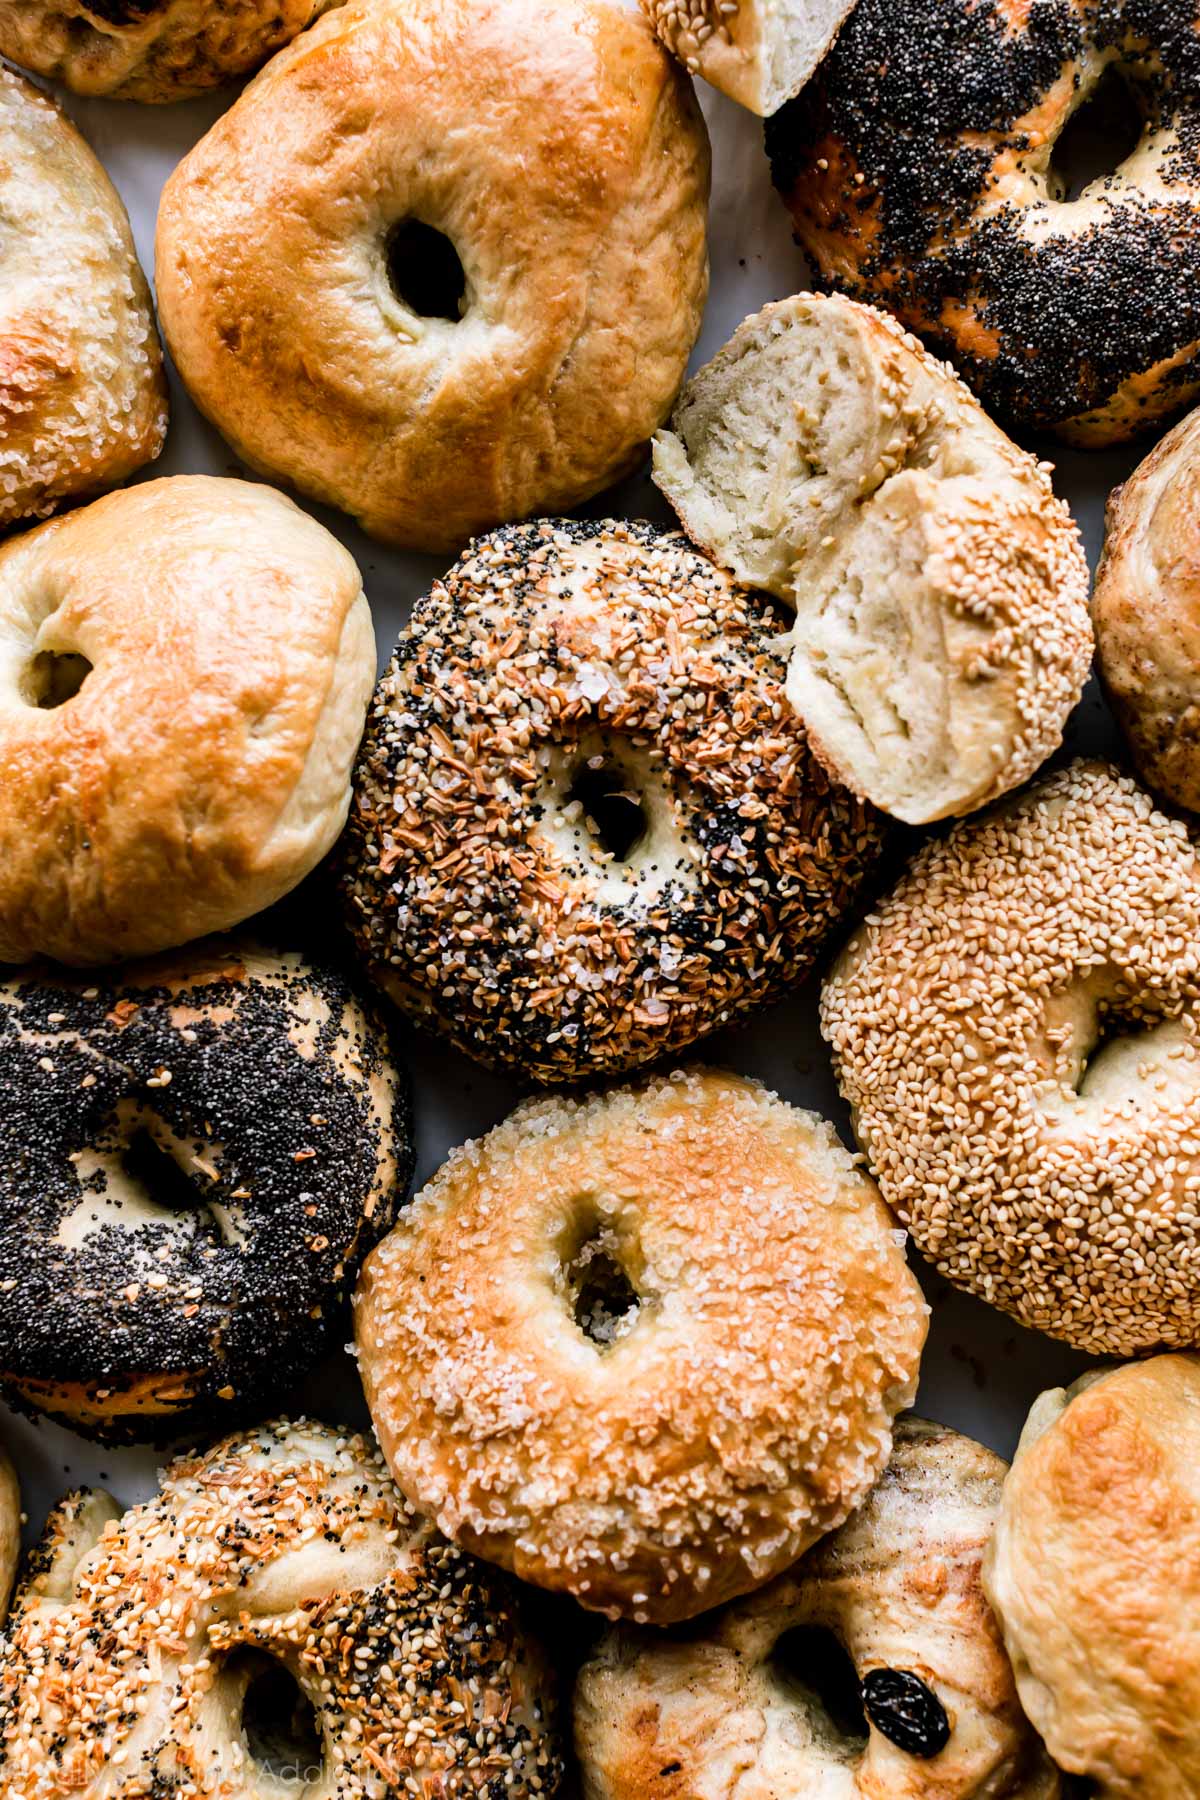
Homemade Bagel Varieties
- Plain Bagels: Follow the recipe below. These are excellent as the base for breakfast casserole.
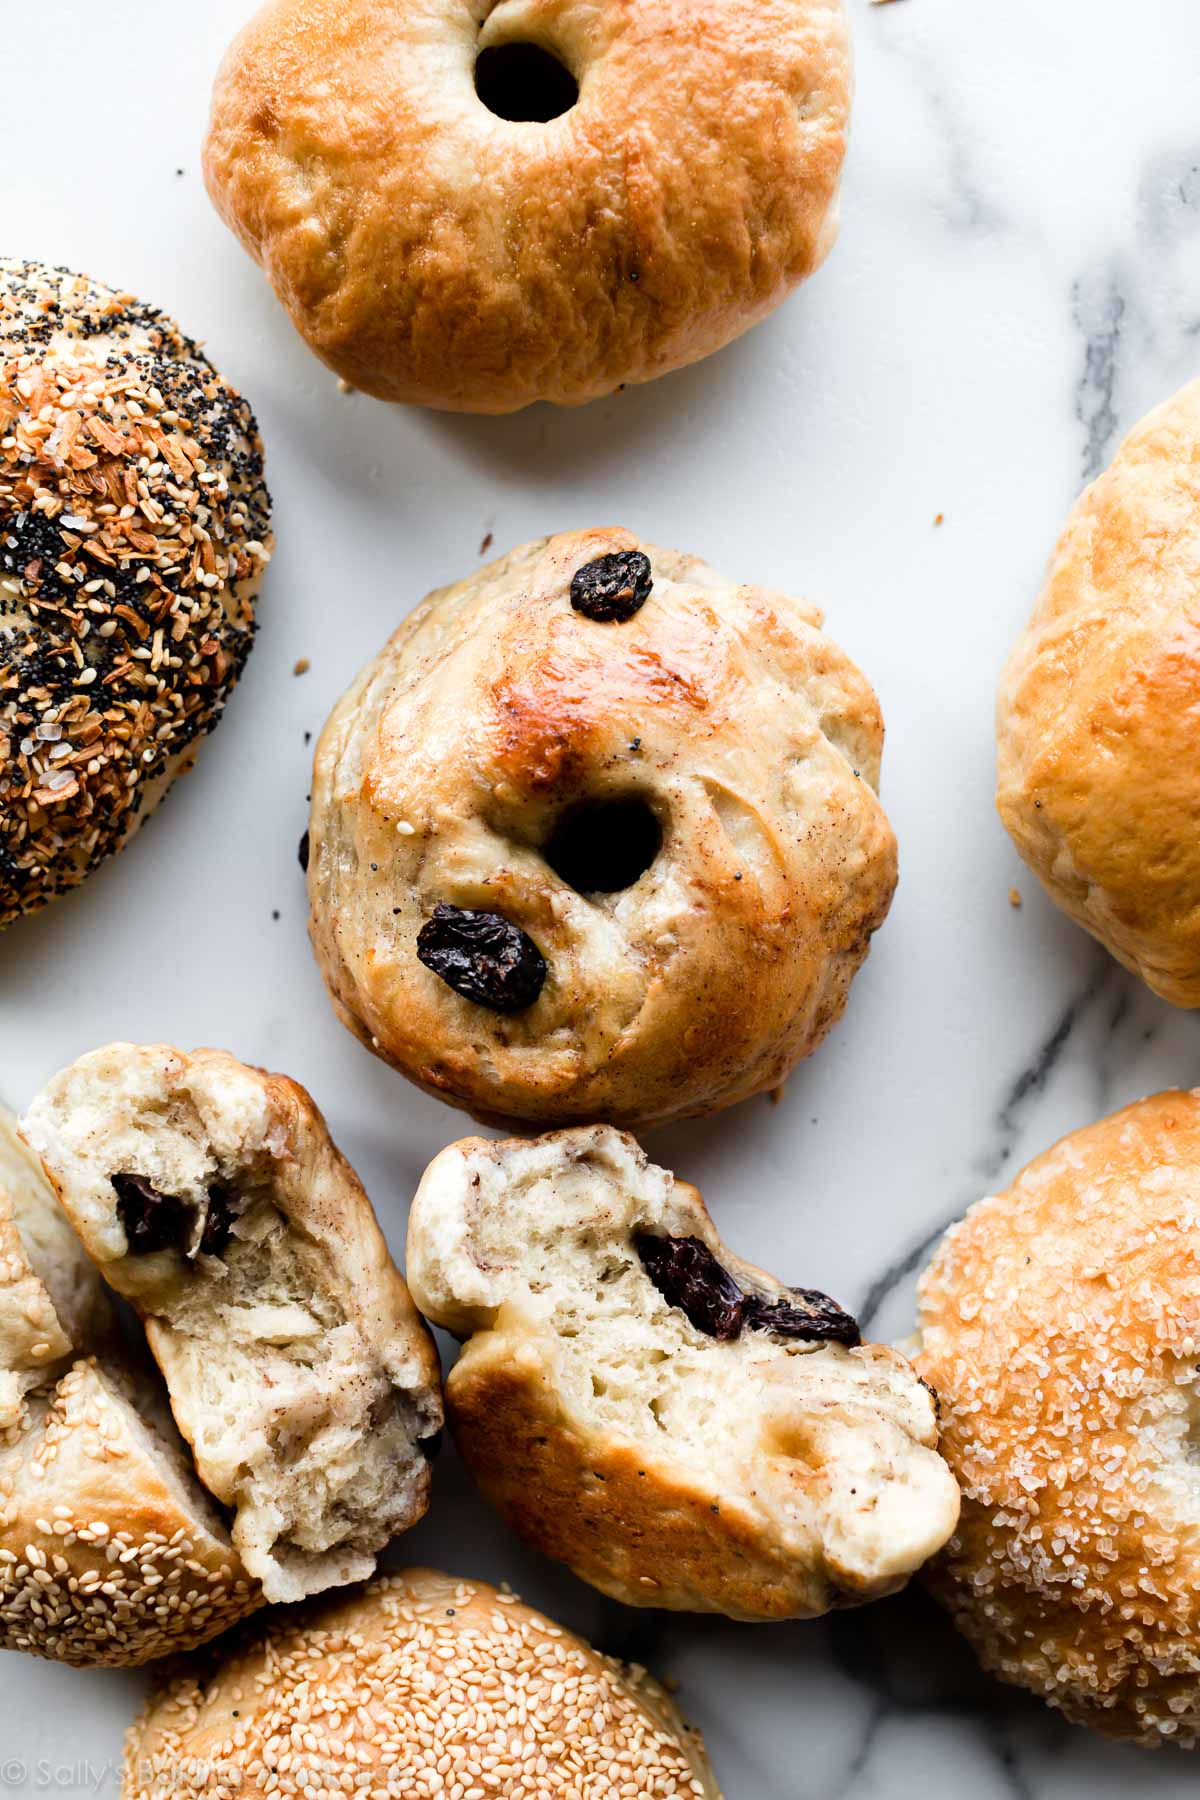
- Cinnamon Raisin Bagels: Follow my cinnamon raisin bagels recipe.
- Everything Bagels: Follow my everything bagels recipe.
- Blueberry Bagels: Follow my blueberry bagels recipe.
- Sesame Seed Bagels: Use 1/3 cup sesame seeds. After brushing with egg wash in step 9, top with or dunk each bagel into topping. Use more as needed.
- Poppy Seed Bagels: Use 1/3 cup poppy seeds. After brushing with egg wash in step 9, top with or dunk each bagel into topping. Use more as needed.
- Salt Bagels: Use 1/3 cup coarse sea salt. After brushing with egg wash in step 9, top with or dunk each bagel into topping. These are pretty salty, so feel free to go lighter on the salt.
- Cheese Bagels (Asiago, Cheddar, etc.): Add 1/2 cup of shredded cheese to the dough when you add the flour. After brushing with egg wash in step 9, sprinkle with extra cheese.
- Cinnamon Crunch Bagels: Add 1 teaspoon of cinnamon to the dough recipe below when you add the salt. Double the cinnamon crunch topping from cinnamon crunch bread. After brushing the bagels with the egg wash in step 9 below, spoon cinnamon crunch topping on each.
Some readers have used this bagel recipe to make whole wheat bagels by replacing half of the bread flour with whole wheat flour. I haven’t tried it, but I do use some whole wheat flour when making homemade English muffins, another breakfast staple!
Homemade Bagels Recipe
- Prep Time: 2 hours, 10 minutes
- Cook Time: 25 minutes
- Total Time: 3 hours
- Yield: 8 bagels
- Category: Bread
- Method: Baking
- Cuisine: American
Description
Make fresh bagels right at home with this tested dough recipe. Don’t skip the water bath and egg wash—both provide an extra chewy and golden brown crust. This recipe is also in my cookbook, Sally’s Baking 101.
Ingredients
- 1 and 1/2 cups (360g/ml) warm water (between 100–110°F/38–43°C)
- 2 and 3/4 teaspoons (8g) instant or active dry yeast*
- 1 Tablespoon barley malt syrup, granulated sugar, or brown sugar*
- 4 cups (520g) bread flour (spooned & leveled), plus more as needed*
- 2 teaspoons salt
- for coating the bowl: nonstick spray, butter, or oil
For Boiling & Topping
- 2 quarts (1.9L) water
- 1/4 cup (85g) barley malt syrup or honey
- egg wash: 1 egg white beaten with 1 Tablespoon water
Instructions
- Prepare the dough: In the bowl of a stand mixer fitted with a dough hook attachment, whisk the warm water, barley malt syrup/sugar, and yeast together. Cover and allow to sit for 5 minutes. *If you don’t have a stand mixer, use a large mixing bowl and mix the dough with a wooden spoon or silicone spatula in the next step.*
- Add the flour and salt, and beat on medium speed for 2 minutes, until the dough comes together and pulls away from the sides of the bowl. If it seems too sticky and clings to the sides of the bowl instead of forming a rough mass around the dough hook or spoon, add more flour, 1 Tablespoon at a time, and continue to mix until the dough pulls away from the sides of the bowl. The dough should be stiff and somewhat dry. If it is crumbly and breaks off in pieces, add more water, 1 teaspoon at a time, mixing well after each addition.
- Knead the dough: When the dough has reached the proper consistency, beat on low speed with the dough hook for an additional 6–7 minutes, or knead by hand on a lightly floured surface for 6–7 minutes, until the dough feels smooth, supple, and elastic. (If you’re new to bread-making, my How to Knead Dough video tutorial can help here.) If the dough becomes too sticky during the kneading process, sprinkle 1 teaspoon of flour at a time on the dough or on the work surface/in the bowl to make a soft, slightly tacky dough. Do not add more flour than you need because you do not want a dry dough. After kneading, the dough should still feel a little soft. Poke it with your finger—if it slowly bounces back, your dough is ready to rise. You can also do a “windowpane test” to see if your dough has been kneaded long enough: tear off a small (roughly golfball-size) piece of dough and gently stretch it out until it’s thin enough for light to pass through it. Hold it up to a window or light. Does light pass through the stretched dough without the dough tearing first? If so, your dough has been kneaded long enough and is ready to rise. If not, keep kneading until it passes the windowpane test.
- Lightly grease a large bowl with nonstick spray, butter, or oil. Place the dough in the bowl, turning it to coat all sides in the oil. Cover the bowl with plastic wrap or a clean kitchen towel. Allow the dough to rise at room temperature for 1.5–2 hours, or until doubled in size.
- Line two large baking sheets with parchment paper or silicone baking mats.
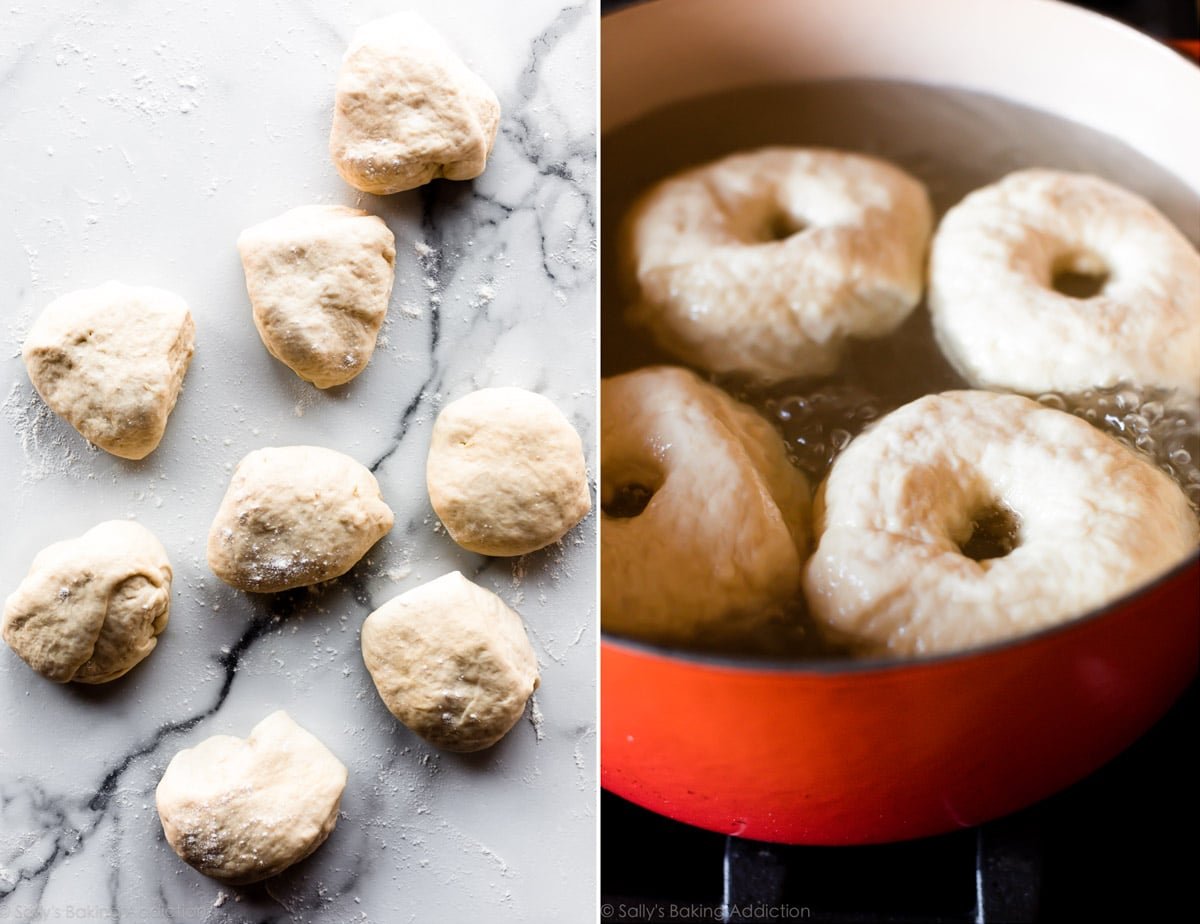
- Shape the bagels: When the dough is risen, punch it down to release the air. On a lightly floured surface, divide the dough into 8 equal pieces, about 4 ounces (113g) each. Shape each piece into a ball. Press your index finger through the center of each ball to make a hole, then stretch and widen the hole to about 1.5–2 inches in diameter. Arrange the shaped bagels on the prepared baking sheets. Loosely cover the shaped bagels with a kitchen towel or plastic wrap and let them rest for 5–10 minutes as you prepare the water bath.
- Preheat the oven to 425°F (218°C).
- Water bath: Fill a large, wide pot with 2 quarts (1.9L) of water. Whisk in the barley malt syrup or honey. Bring to a boil over high heat, then reduce heat to medium-high. Drop 2 or 3 bagels in at a time, making sure they have enough room to float around. Boil the bagels for 1 minute, then use a spatula to flip each bagel over and boil for 1 minute more. Using a slotted metal spatula, lift the bagels out of the water, letting the excess water drain off. Place the bagels back on the lined baking sheets. Repeat with remaining bagels.
- Using a pastry brush, brush the egg wash on top and around the sides of each bagel. If you’re adding toppings, dip the tops of the bagels into the toppings immediately after applying the egg wash.
- Bake for 20–25 minutes, rotating the pans halfway through, until the bagels are dark golden brown. Allow the bagels to cool on the baking sheets for 20 minutes, then transfer to a cooling rack to cool completely.
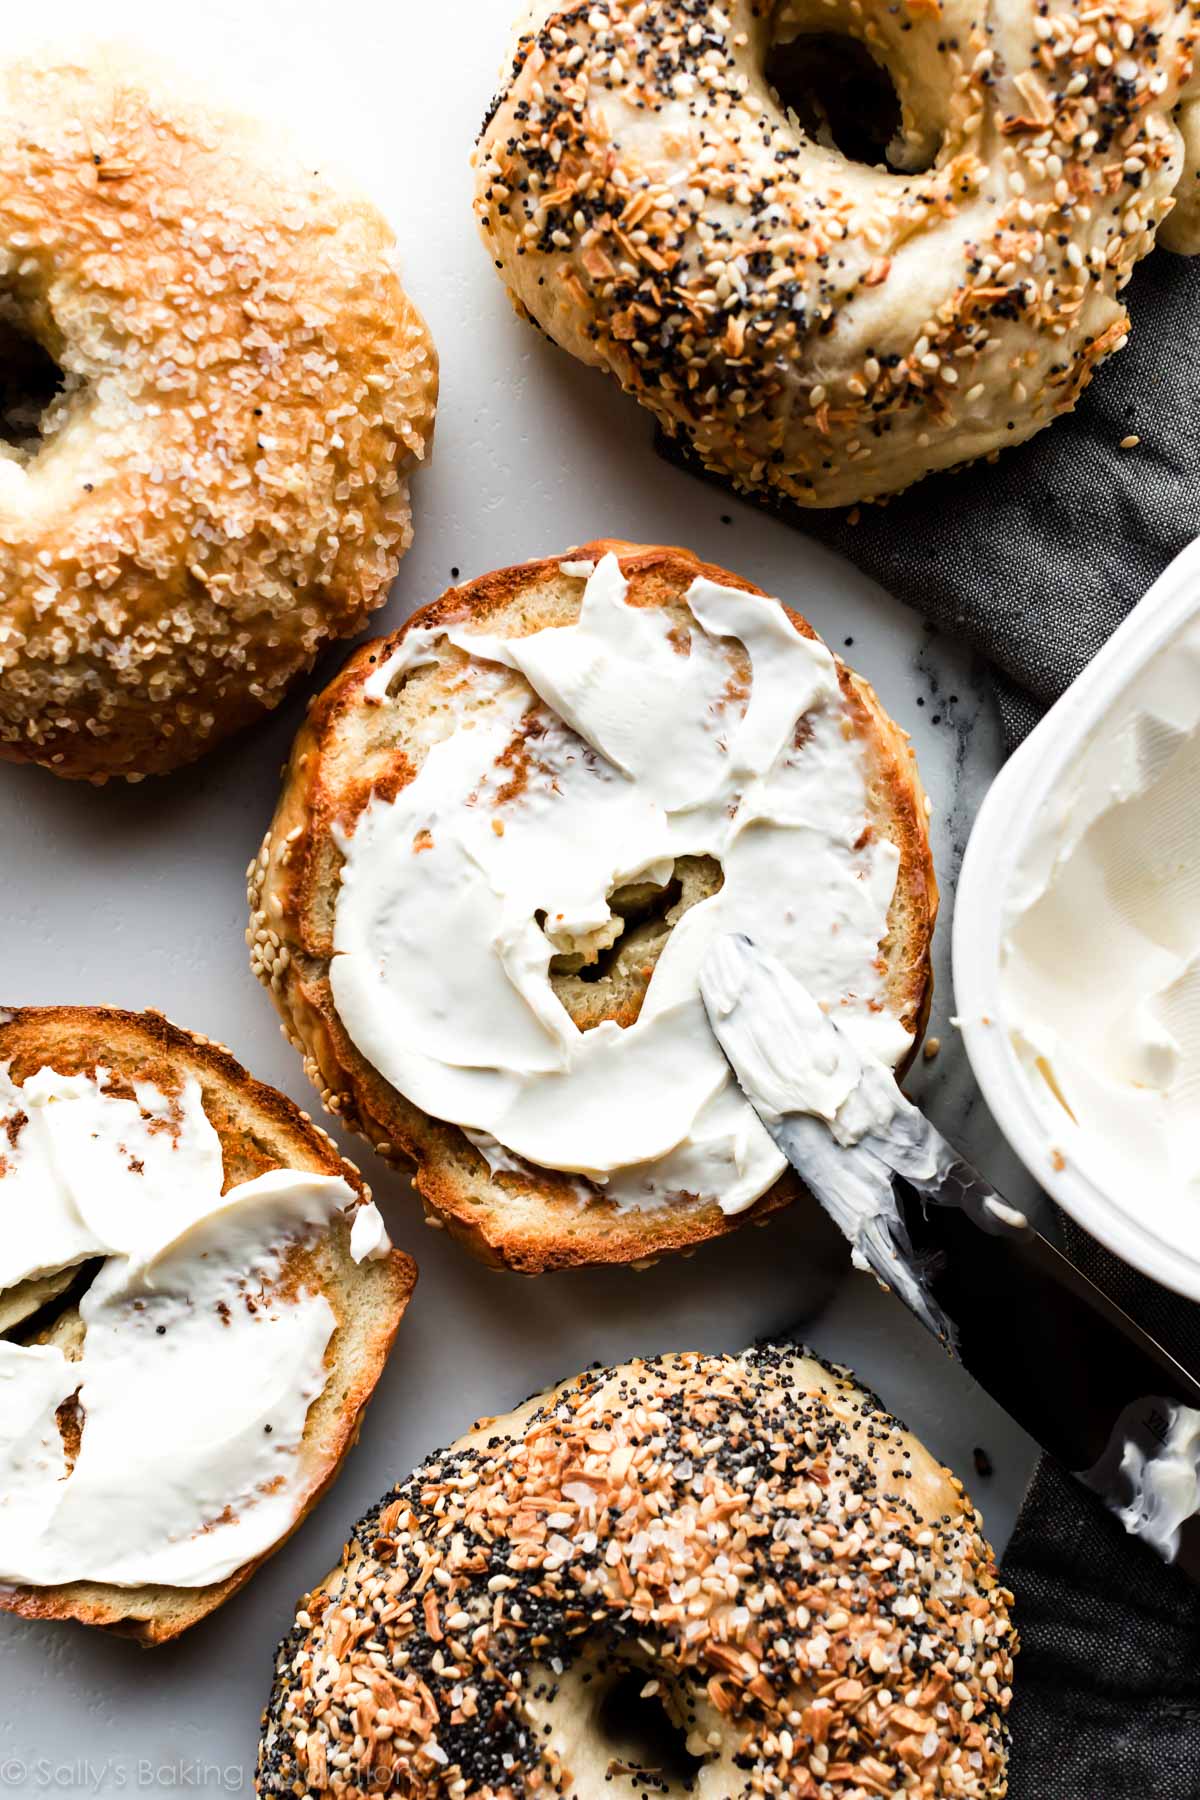
- Slice, toast, top, enjoy however you want! Cover leftover bagels tightly and store at room temperature for up to 4 days or in the refrigerator for up to 1 week.
Notes
- Overnight Make-Ahead Instructions: Prepare the dough through step 4, but allow the dough to rise overnight in the refrigerator instead of at room temperature. The slow rise gives the bagels wonderful flavor! In the morning, remove the dough from the refrigerator and let the dough rise for 45 minutes at room temperature. Continue with step 5. I don’t recommend shaping the bagels the night before as they may puff up too much overnight.
- Freezing Make-Ahead Instructions: Baked bagels freeze wonderfully! Freeze them for up to 3 months, thaw overnight in the refrigerator or at room temperature, then warm to your liking. You can also freeze the bagel dough. After punching down the dough in step 6, wrap the dough tightly in plastic wrap, then a layer of aluminum foil. Freeze for up to 3 months. Thaw overnight in the refrigerator, then punch the dough down again to release any air bubbles. Continue with the rest of step 6.
- Special Tools (affiliate links): Stand Mixer | Baking Sheets | Parchment Paper or Silicone Baking Mats | Large Pot (such as a 5- or 6-quart Dutch Oven) | Pastry Brush
- Yeast: Use instant or active dry yeast. If using active dry yeast, the rise time may be closer to 2 hours. 1 standard packet is about 2 and 1/4 teaspoons, so you will need a little more than 1 packet of yeast. Reference my Baking with Yeast Guide for answers to common yeast FAQs.
- Barley Malt Syrup: This ingredient can be a little hard to find, but truly gives bagels that traditional malty flavor we all know and love. Most natural food stores carry it. I offer alternatives such as brown sugar in the dough and honey in the water bath; I’ve made bagels with these alternatives AND with barley malt syrup and honestly love both versions.
- Bread Flour: Bagels require a high protein flour. Bread flour is a must. Here are all my recipes using bread flour if you want more recipes to use it up. All-purpose flour can be used in a pinch, but the bagels will taste flimsy and won’t be nearly as chewy.
- Bread Machine: Place the dough ingredients into the pan of the machine. Program the machine to dough or manual, then start. After 9–10 minutes, the dough will be quite stiff. Allow the machine to complete its cycle, then continue with the recipe.
- Bagel Varieties: See blog post above for various add-ins and toppings. Note that the toppings are added after the egg wash in step 9. Some readers have used this bagel recipe to make whole wheat bagels by replacing half of the bread flour with whole wheat flour. I haven’t tried it, but let me know if you do!
- Halve or Double: You can halve this dough recipe by simply halving all of the dough ingredients (do not halve the water or honey for the boiling step). No changes to the recipe instructions. For best taste and texture and to not overwhelm your mixer with excess heavy dough, I do not recommend doubling this dough recipe. Instead, make separate batches of dough.
- Adapted from a mix of recipes I’ve tried: King Arthur Flour, Cook’s Illustrated, and Complete Book of Breads


Reader Comments and Reviews
Hi! I made these bagels yesterday and turned out super tasty. However, this morning they were noticeably harder. Any tips for next time?
I should add, I stored them in a Ziplock freezer bag after making them.
Hi Megan, bagels are freshest on day one, but if covered tightly will last at room temperature for a few days or in the refrigerator for up to 1 week. You can wrap them individually to make sure they are really airtight. Toasting them will help, too!
Toasting helped! Thanks so much
The recipe was extremely simple to follow. I ran into two issues.
First, I don’t have a mixer, so I hand mixed it. After that I kneaded for 5 minutes, but only later did I see that one needs to do it for 10-15 minutes. Is that how much difference the mixer makes? I found that the dough is quite dry, so when creases form, they don’t seal. Is this a problem with the kneading?
Second, I used onion flakes and sesame and poppy seeds, but it seemed to me that the onion flakes were burning to a crisp before the bagel had a chance to be ready.
How do I do this better next time?
Hi Ram! Yes, the mixer does a much quicker job of kneading the dough than we can do by hand. How are you measuring your flour? Make sure to spoon and level (not scoop) to avoid packing in too much flour which would result in a dry dough. It’s normal for the onion bits to burn a bit, but you can leave them off next time if they seem to be a problem. Thank you for giving these a try!
Thanks. Yes, I was scooping and leveling. And I’d be grateful if you could provide a quick clarification on the kneading time. Once I got the flour and water mixed by hand and got it to the stage that (visually) looks like what you have in the video from the mixer, I spent 5 minutes kneading it. Is that too little?
Also, I really really would like to have onion flakes. I noticed that even at the 10 minute mark they had begun to burn. I read elsewhere that they soak the flakes, but at that intense heat, I can’t imagine the water to be retained for long.
Thank you so much for your prompt response.
If it looks like the right consistency matching the visual from the video, you can go with that! We haven’t tested soaking the onion flakes, but let us know how it goes if you do. Happy baking!
I love your website! Every recipe I have tried comes out amazing! I thoroughly enjoy your bagel recipe! I’m a bagel lover and never thought I could ever make them! I make them often and try different variations! The texture is unbelievable and so delicious for sandwiches and toasted as well! I also tried it with half whole wheat flour and half with bread flour…….results were perfect! Thank you for all your amazing recipes!
Hi! If I boil more than 2 quarts of water, do I need to increase the honey/barley malt syrup too so that the ratio is the same? 2 quarts is just far too low in the wide pot I have.
Hi Bailey, yes, we’d recommend scaling it up so the ratio is the same.
Hi Sally! I adore these bagels! First time I’ve ever attempted them. I’ve made at least 5 batches in the last 3 weeks. I love them and my husband does too. I have made them just as you instructed; rolling them into balls and twirling them around my fingers. When I plop them in the bath they are lovely and smooth. When I remove them, they are all bumpy. It certainly doesn’t affect the taste. Just the appearance. Am I being too picky or is there a remedy?
Hi Sue, We are so happy that you tried and enjoyed this recipe! The bumpy texture is completely normal for the outside – take a look at the above pictures in the post and you can see that they are not completely smooth.
I think I have been comparing them to the tasteless store bought ones. Mine do look like your picture! More rustic looking! I will now embrace the bumps!! ❤️
Hi there, before I attempt I’d lke to ask a substitution question.
At the moment I only have all purpose flour, Do you think kneading it longer to try and awaken more gluten will have any effect? Obviously i know it won’t be the same as buying bread flour, but in a pinch what are your thoughts?
Hi EC, all-purpose flour can be used in a pinch, but the bagels will taste flimsy and won’t be nearly as chewy (even with extra kneading). For best results, we recommend waiting until you have some bread flour if possible. Hope you enjoy the bagels!
*protip: I learned from an experienced bread maker that adding salt before kneading and rising can inhibit the rising process because the salt kills the yeast. if you add it right before you go to shape the dough and knead it in well, you create a little extra gluten from working the dough a second time and have already given the yeast a chance to do its thing without inhibiting it.
*protip 2: add the sugar to the yeast water mixture before you cover your bowl. the yeast will thank you. also, be advised that using water temp based on your home environment is essential for healthy yeast growth. my house is often very cold so I use warm water to activate my yeast. I also set my bowl of dough in a large empty stalk pot with the lid covering it on top of my stove with the oven on as low a temp as I can. the warmth helps the dough rise faster.
Hi! Greetings from Singapore! Can I use brown sugar in the water bath if I don’t have honey?
Hi Krupa, a few readers have used brown sugar in the boiling step. Let us know how it goes!
My bagels won’t smooth out no matter how much I work with them. When I roll them in a log, they fall apart as if the dough won’t come together once I’ve pulled a piece off to make a bagel. What am I doing wrong?
Hi Megan! We recommend taking a look at the video in the blog post above for a visual on how we shape the dough into bagels – it should help!
Hi. Greetings from Norway. Tried making bagels for the first time. Not everything is avalable in our stores here, so I had to impovice a little. But they turned out great. I love them. Favorite is with crean cheese and avocado salad. Yummy
I was in a baking kind of mode and my husband asked me for some homemade bagels. I had never made them before so I thought I’d give it a try. I am so glad I found this recipe. I followed it exactly and they came out perfect. Thank you!
Like most people, I really amped up my bread baking skills during the early days of the pandemic (March – June 2020). I finally got up the nerve to try to make my own bagels; after researching 10-12 recipes, yours had the easiest, most sensible instructions. I had great success with my first batch (4 everything & 4 sesame). I have tried a number of other recipes over the last year, but I keep coming back to THIS recipe because it is still the best one I have tried, and consistently delivers the correct bagel texture and taste. So, thank you!!
The one thing I do differently: instead of using sugar, brown sugar, or barley malt syrup, I use malt powder (from King Arthur Flour) in both the bagel dough, and in the water used to boil the bagels. This truly gives them that NYC bagel flavor!!
Hi, the first time I made these bagels they were perfect. I have made them twice since using bread flour and when I put the in the water they have sunk to the bottom and floated up to the top eventually. Any suggestions to what I have done wrong? Thanks
Hi Kay, your yeast may be inactive or the dough isn’t rising long enough. There should be enough air in the shaped bagels that they float. Try again with new yeast and let the dough rise a little longer in step 4.
Could this recipe use gluten free flour?
Hi Sharon, We haven’t tested these bagels with gluten free flour. Let us know if you try it!
Hi Sally! The few times I’ve made these, after I slice in half, I notice the inside texture to be a bit too chewy and lumpy. Is this an issue while cooking or while preparing the dough? Thanks!
Hi Bee, we’re happy to help troubleshoot. A few things that could help for next time…it’s your dough was over-proofed leading to the chewy texture. Try reducing the rise time next time. Also be careful kneading, as over-kneading can change the final texture. Bagels should be chewy, but if they seem almost wet on the inside, it’s possible they just needed some extra time in the oven to finish baking through. Hope this helps!
Bagel in Malaysia is very expensive. I tried to make it using your recipe and it was successful and the texture is similar to the one that we buy in the cold storage. TQVM. My family love it so much.
This may be a silly question but does it matter if I use a met bowl opposed to glass for the mixer?
Metal*
Either one will work just fine!
Hi Sally! I have 2 quick questions…
1. Does the way you shape your bagels affect the texture at all? For example, if I roll each portion into ribbons and connect the ends to make a circle, will that change the final texture?
2. Can I shape the bagels first and then let them rise?
Hi Elise, I missed your question last week. I’m happy to help. You can shape the bagels really any way that is most comfortable to you. I’ve shaped them the exact way you describe and it works perfectly fine with this recipe. I recommend letting the dough rise and then shaping the bagels. You’ll want to boil them shortly after shaping.
Hi, can i leave the dough for slow proofing in the refrigerator for more than 24 hrs? Or it is too long? tnks in adv! I love this recipe btw.
Hi Mae, It’s best to stick to about 12 hours if possible! A little longer would be okay, but we wouldn’t recommend more than 24 hours.
“Prepare the dough through step 4, but allow the dough to rise overnight in the refrigerator.”
Can you clarify if you mean to complete step 4 (60-90 min rise), then CONTINUE to let them rise overnight, or do you mean, at step 4, don’t do it and put the dough in the fridge, skipping the 60-90 min rise?
Hi Zack, happy to clarify. In step 4 you will let the dough rise overnight in the refrigerator instead of for 60-90 minutes at room temperature.
Hi Sally! These were amazing and so easy to make!! My family loooved them! Do you happen to have the nutrition facts for them? Calories….
Hi Mindy, We are so happy you enjoyed these bagels! We don’t usually include nutrition information as it can vary between different brands of the same ingredients. Plus, many recipes have ingredient substitutions or optional ingredients listed. However, there are many handy online calculators where you can plug in and customize your exact ingredients/brands. Readers have found this one especially helpful: https://recipes.sparkpeople.com/recipe-calculator.asp
Hi Sally,
We all adore your bagel recipe. I’ve done it four times already and the bagels are perfect! …especially since my grandfather was a professional bagel and kaiser roll baker.
I have a 6 quart Kitchen Aid stand mixer which is extremely sturdy. Do you think I should try kneading the dough in the bowl with the dough hook? For 2 minutes?
Thank you in advance for your reply.
Hi Sue! We also use Kitchen Aid stand mixers but still find this dough to be a little too heavy. You can certainly give it a try if you would like – let us know how it goes!
Hi, I just got an air fryer and have been trying to use this to alleviate heating up the whole house with the oven. Have you tried baking these in an air fryer instead of the oven, and would you recommend it?
Hi Serena, we’ve never tried it but let us know if you do!
I tried the air fryer and it worked great, 400° for 4-6 min on the first side and 2-4 min on the second side. I have the 7-qt GoWISE USA and could fit 4 in each batch. I hear all air fryers cook differently though so I’d suggest keeping a close eye on them.
Some help please. We followed the recipe to the tee except we did let our dough rounds proof for 20 minutes before putting in the boiling water with honey………like many other recipes. They looked great and were nice and poofy after coming out of the water……..maybe 2″ high. But when they came out of the oven, they were only about 1″ high. Difficult to even cut though they do taste great. Any suggestions? Possibly over proofed, rose and collapsed in oven?
Hi Alan! Yes, that sounds exactly correct. Over-proofed dough will collapse when baked. Try a slightly shorter rise time next time, or rising in a slightly cooler environment. Thank you so much for giving these a try!
Hiya,
My dough was really sticky which made it hard to shape as they kept sticking to my hands.
I always worry about adding more flour as the video showed yours being so much drier with the recipe amount?
Any ideas or should I just go with more flour?
Thanks!!
Hi Rebecca! There are a lot of variables that go into the consistency of dough, even down to the weather and humidity in the air. There’s nothing wrong with adding just a little more flour to bring the dough into a less sticky and knead-able consistency.
You can use a heating pad on the lowest setting to help your dough rise. Remember yo keep an eye on it
I had been using another bagel recipe, but this one sounded better. I tried it, but the texture was too dense. Maybe letting the dough rise at room temperature left too much to chance, since room temperature can vary depending on the season. I noticed that the dough was a bit too firm. Should I try proofing the dough in a “warm place” instead of room temp?
Hi Sally! Rising time can vary by room temperature – always let your dough rise until just about doubled in size. If your dough doesn’t seem to be rising quick enough, you can always try a warmer spot. This should help for next time. Our baking with yeast guide is a great resource as well. Happy baking!
Hi can I reduce the salt in these for a delicious tasting bagel or will it be bland?
Hi Pamela, the salt adds flavor, so we don’t recommend omitting it completely. You can try slightly reducing it, but keep in mind that it will change the final taste depending on how much you choose to omit. Hope you enjoy the bagels!
What is the name of the song in the video? It’s so catchy and danceable!
I made these 2 times (haven’t had time to make them again) and those times they came out delicious and beautiful, first I open them in half and then I toast them and they’re so delicious, you should definitely try this recipe !
Also, if I were to use All purpose flour (as I cant source bread flour where I live), what extra ingredients should I add to make it into the bread flour that you have recommended
Hi Preethi, you can use all-purpose flour in a pinch, but they won’t have that signature bagel taste. Some readers have recommended all-purpose flour + gluten as a substitute for bread flour, but we haven’t personally tried it and are unsure of amounts. Let us know if you test anything.