

With step-by-step pictures and plenty of helpful tips, learn how to make soft whole wheat bread with this easy-to-follow recipe. You can make this bread 100% whole wheat, or you can use a combination of whole wheat and bread flour for a slightly taller, fluffier loaf. It’s wonderfully soft and flavorful either way! If you’re new to working with yeast, reference my Baking with Yeast Guide for answers to common yeast FAQs.
One reader, Vicki, commented: “This recipe can make anyone love 100% whole wheat bread! I made it exactly as directed with 100% whole wheat and it was the softest and loveliest whole wheat bread I have ever eaten! I will be making this regularly in my house—so much better and healthier than store bought bread. Even people who think they don’t like whole wheat will like this. Thank you for sharing your recipe! ★★★★★“
I know there’s major convenience with store-bought bread, but I encourage you to try making it from scratch at least once. (You might be hooked after that!) This whole wheat bread takes a few hours, but most of the work is hands-off while the dough rises. Fresh-baked bread smells incredible and tastes even better—store-bought sandwich bread just can’t compare! Wait until you smell a slice popping up in the toaster.
Here’s Why You’ll Love This Whole Wheat Bread
- Chewy crust with soft texture inside
- Flavorful & hearty
- Lightly sweetened with honey
- Makes delicious toast and sandwiches, and can be used in recipes like French toast, breakfast casserole, & sausage and herb stuffing
- Easy to make ahead or freeze
- 8 simple ingredients
Behind the Recipe/Recipe Testing
There are usually 2 key problems when it comes to using 100% whole wheat flour in a bread recipe:
- Because of the bran layer of the wheat grain, bread using 100% whole wheat flour can taste bitter or sour. (Still, always make sure your whole wheat flour is fresh; it can become rancid if stored for too long.)
- Whole wheat flour doesn’t contain the same level of gluten as white flours. This missing gluten can produce a dense and/or flat loaf. Many whole wheat bread recipes call for the addition of vital wheat gluten to make up for it, but I don’t usually keep that in my kitchen… and you may not either.
I experienced both issues in my initial attempts at this recipe. I found that adding a little acid to the dough helped offset the bitterness, and introducing a preferment “sponge” helped give the loaves better flavor, as well as more height. Obviously whole wheat bread will never be as soft, tender, and chewy as white sandwich bread, but this one comes pretty close with my careful recipe & solutions.
Best Ingredients to Use in Whole Wheat Bread & Why:
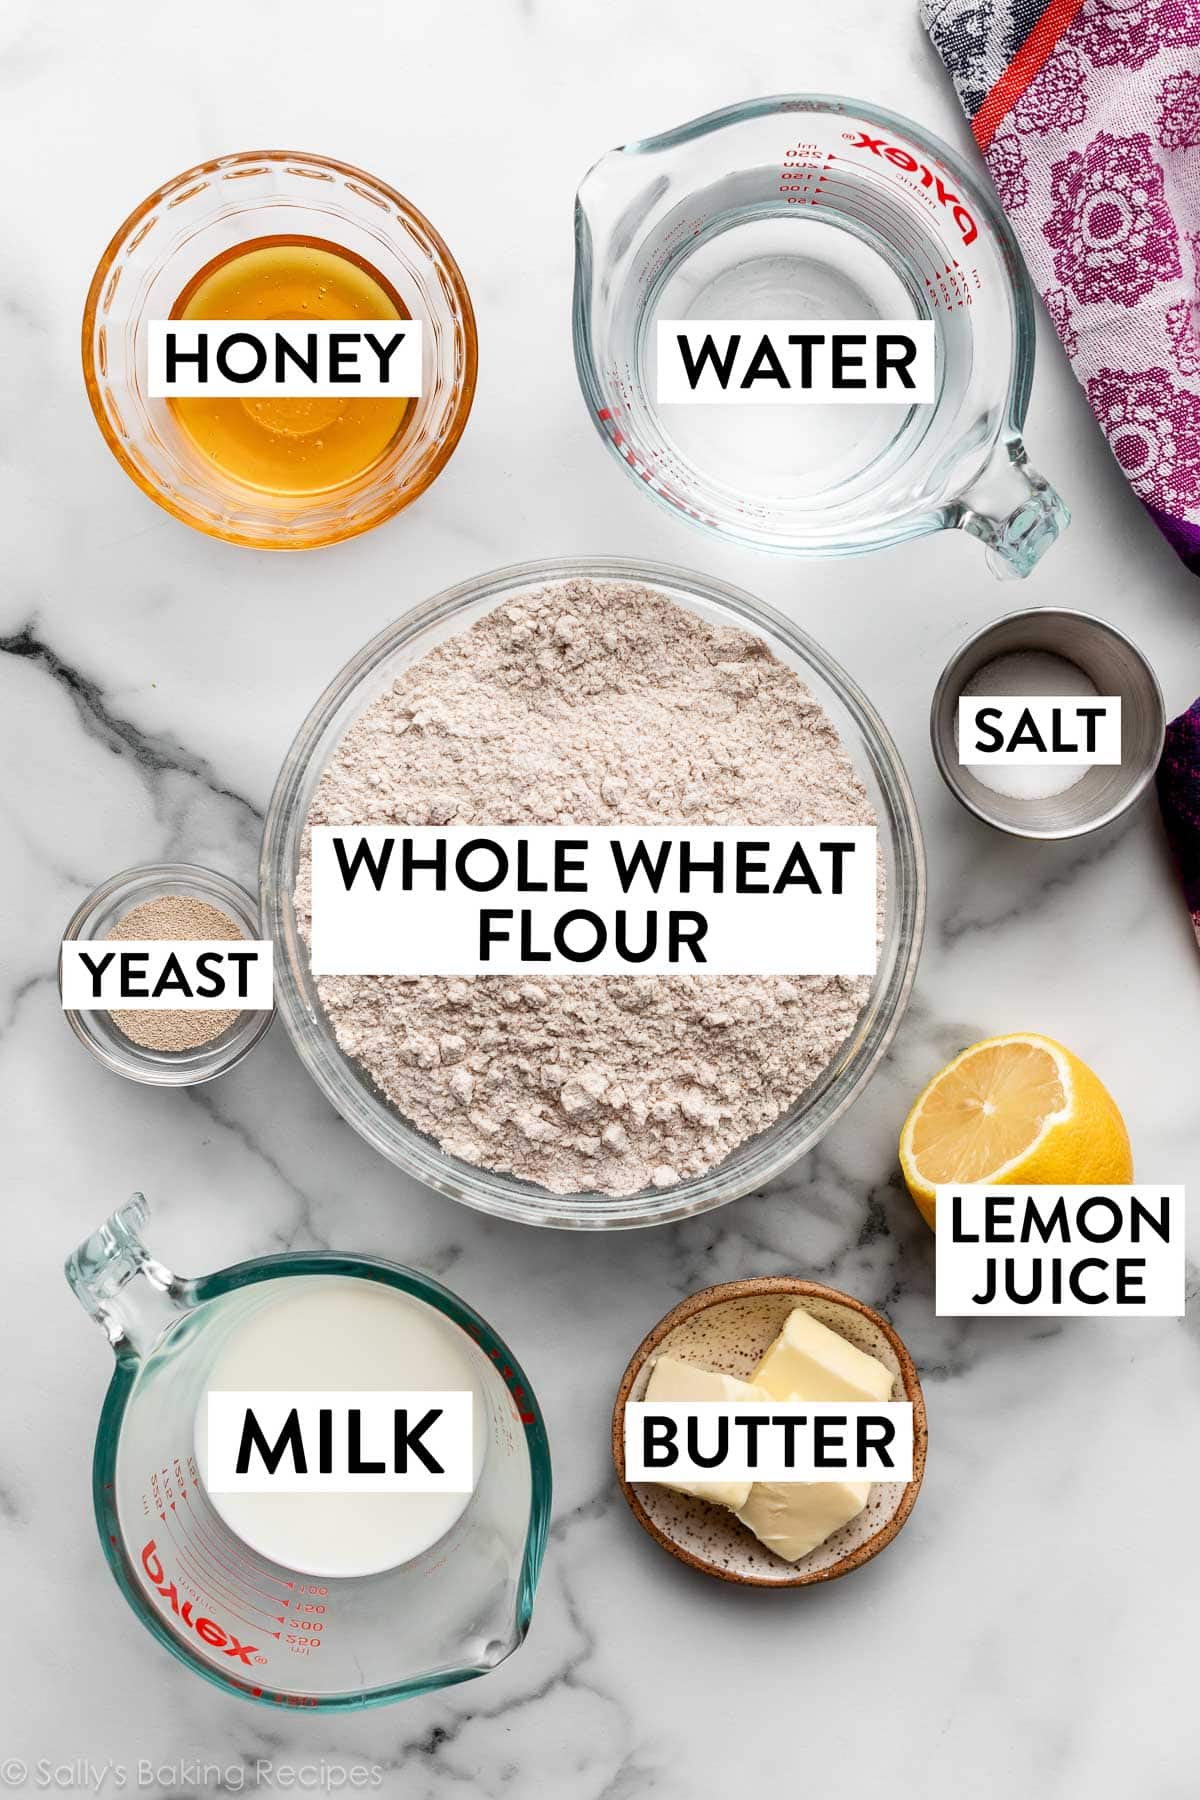
- Water: Warm liquid activates yeast. I use mostly water in this dough because we need a bread that has structure. Using all milk, like I do for my whole wheat dinner rolls, would yield a flimsy bread without much texture, which isn’t ideal for slicing as sandwich bread.
- Whole Milk: To yield a soft bread, you need fat in the dough, so make sure some of the liquid is milk. Low-fat or nondairy milk works too, but whole milk produces phenomenal texture and I highly recommend it.
- Yeast: You can use active dry yeast or instant yeast. If using active dry, the rise times will be a bit longer. I tested it with both.
- Honey: Honey feeds the yeast, increases its activity, and lightly sweetens the bread. In our testing, my team & I unanimously agreed honey was the tastier option over regular granulated and brown sugar. I also use a little honey when making whole wheat pizza dough. If you want, grab a little extra so you can make some homemade honey butter to enjoy on the warm slices of bread.
- Butter: Butter promises a flavorful loaf.
- Lemon Juice: This ingredient may seem strange, but it’s essential for preventing the bread from tasting too bitter. If you don’t have lemon juice, apple cider vinegar is a great substitute.
- Salt: You can’t make flavorful bread without salt!
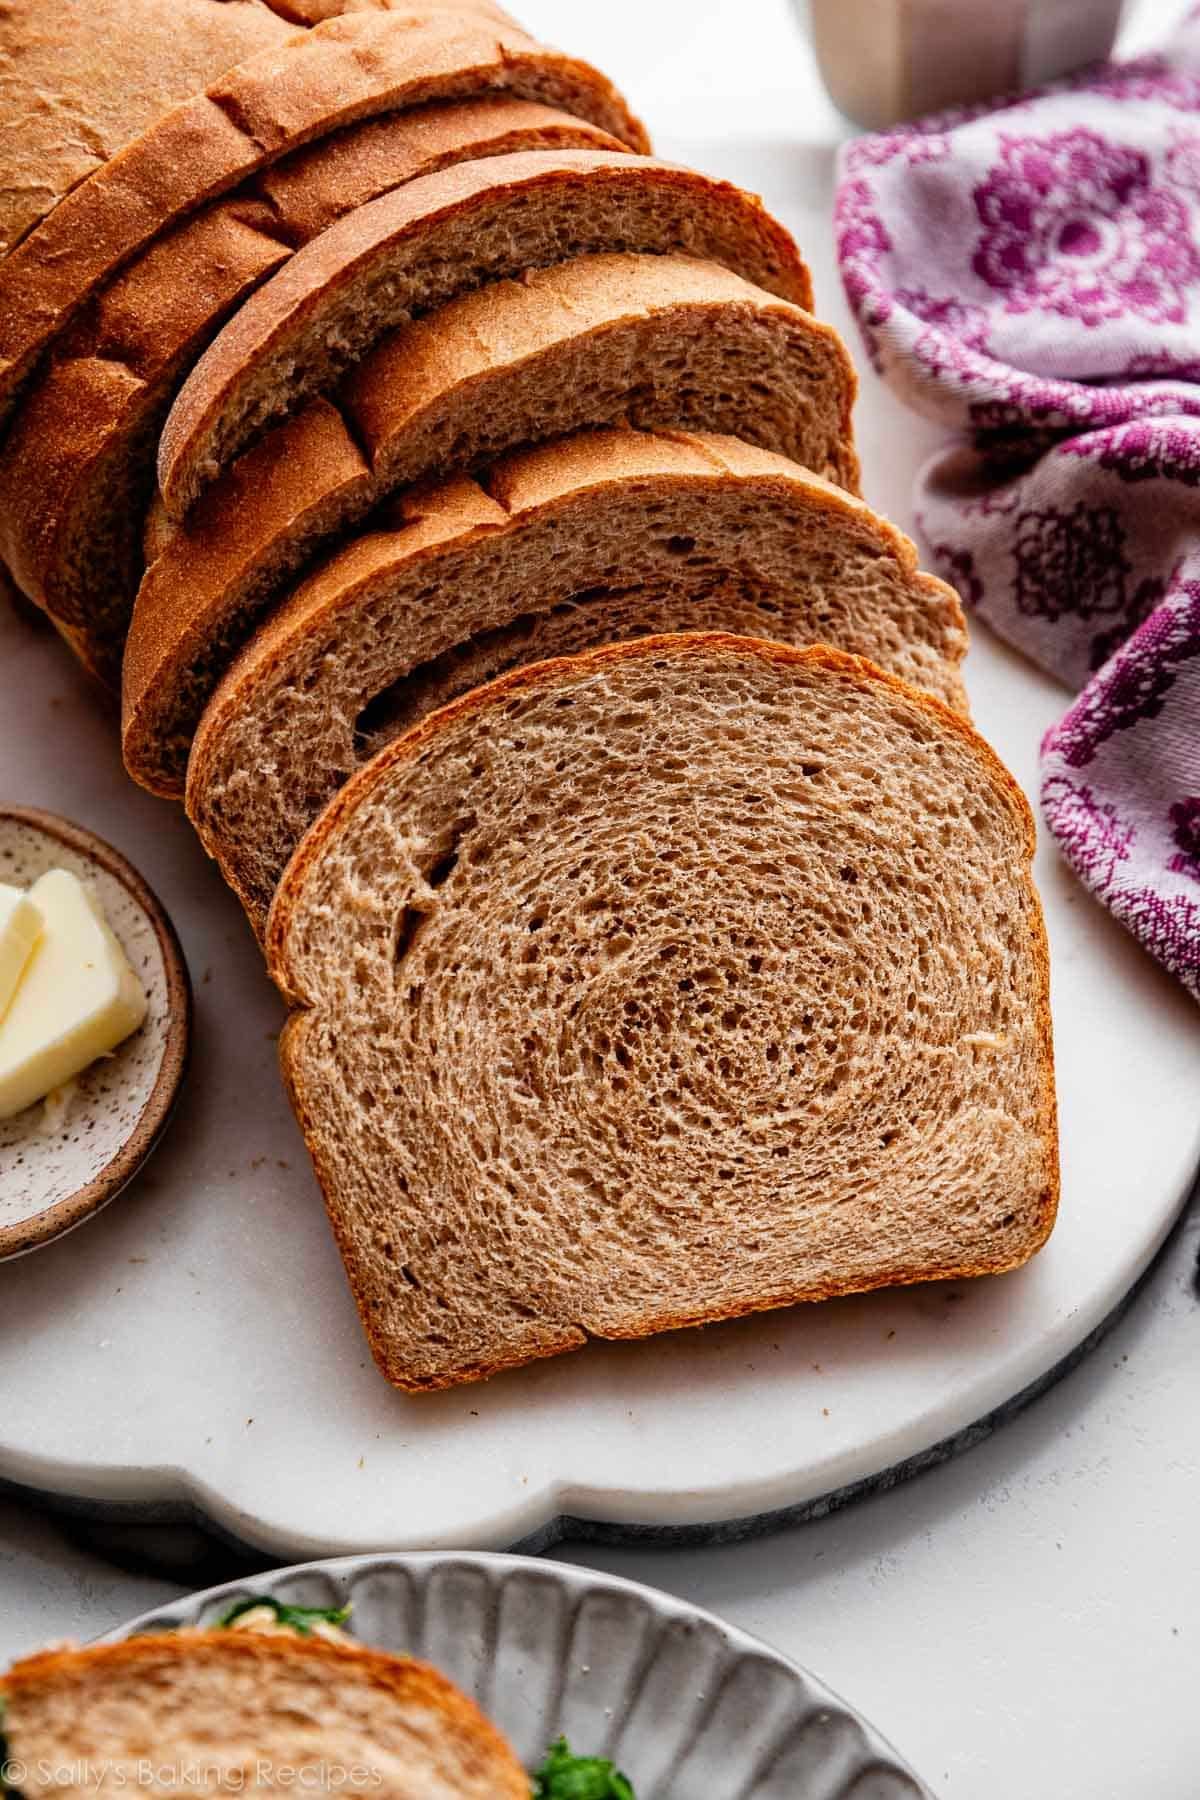
- Flour: You can use all whole wheat flour, or swap 1 cup of whole wheat flour for 1 cup of bread flour. The bread is soft either way, but a little bread flour yields a slightly taller, fluffier, and lighter loaf. We enjoy it both ways.
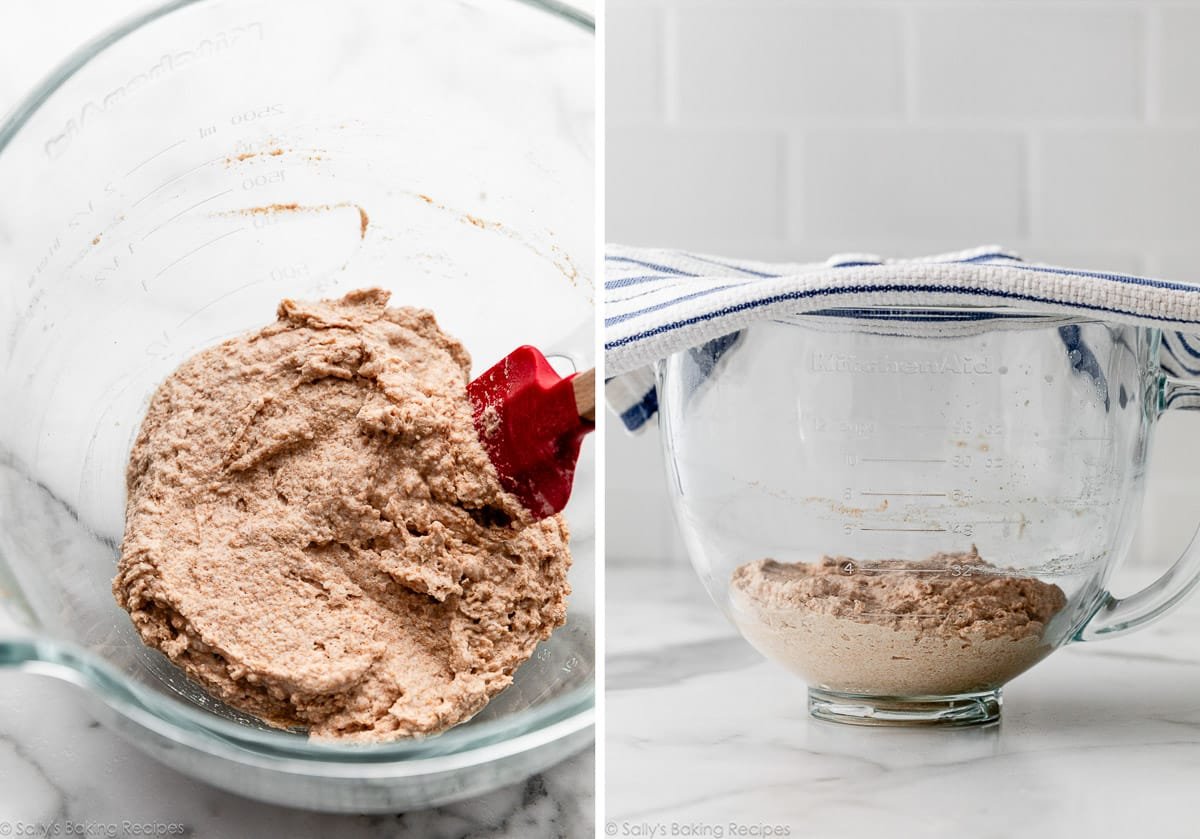
Start With Making the Sponge (It’s Easy)
For the sponge, you’ll use all of the liquid (both the water and milk) and yeast in the dough, plus some of the flour. Mix this all together with a spatula, cover it lightly, and let it double in size for about 60 to 90 minutes.
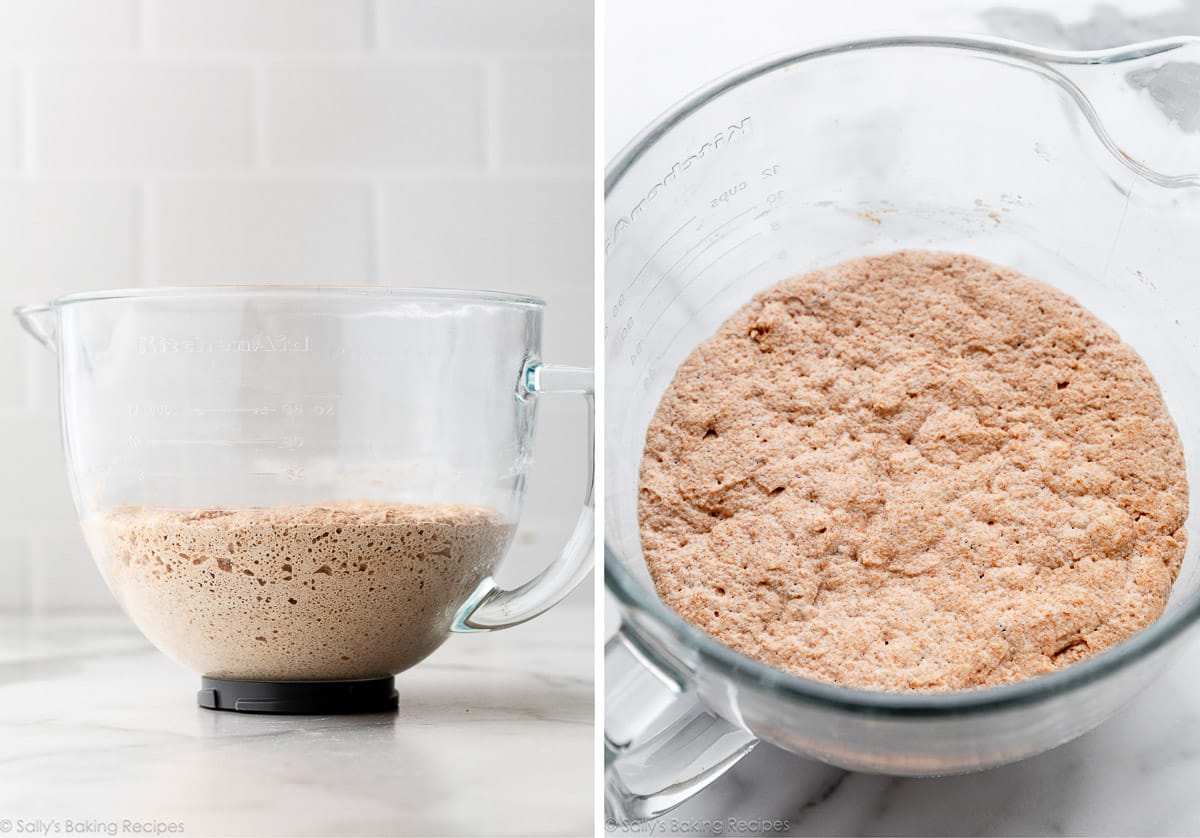
While this step does extend the total time of the recipe, the sponge is crucial for producing a more complex flavor, and gives the bread a lighter texture. By skipping this step, your bread will be a little flat. (In taste and appearance!)
Once the sponge doubles in size, add the remaining ingredients and begin mixing, which will deflate the air and make way for the final dough.
This is the sponge before rising:
This is the sponge after rising:
At this point, the process follows my sandwich bread pretty closely. You’ll knead the dough, and if you’re new to bread baking, my how to knead dough post and video can help. After kneading, let the dough rise twice. Lesson you’ll learn today: making a delicious whole wheat bread is not a race. We must have some patience here! (A hard ask when homemade bread is the reward…)
Step Photos to Help You
Make the dough: I recommend using a stand mixer with a dough hook attachment (most stand mixers are sold with it). If you don’t have a stand mixer, mix the dough together with a spatula or wooden spoon (and a little arm muscle!).
Knead the dough: You can continue beating the dough with the dough hook, or you can knead the dough by hand.
1st rise (about 2 hours): After you knead the dough, cover it and let it rise in a relatively warm spot. Whole wheat dough requires a slightly longer rise time than white sandwich bread because it’s weighed down with wheat germ and bran.
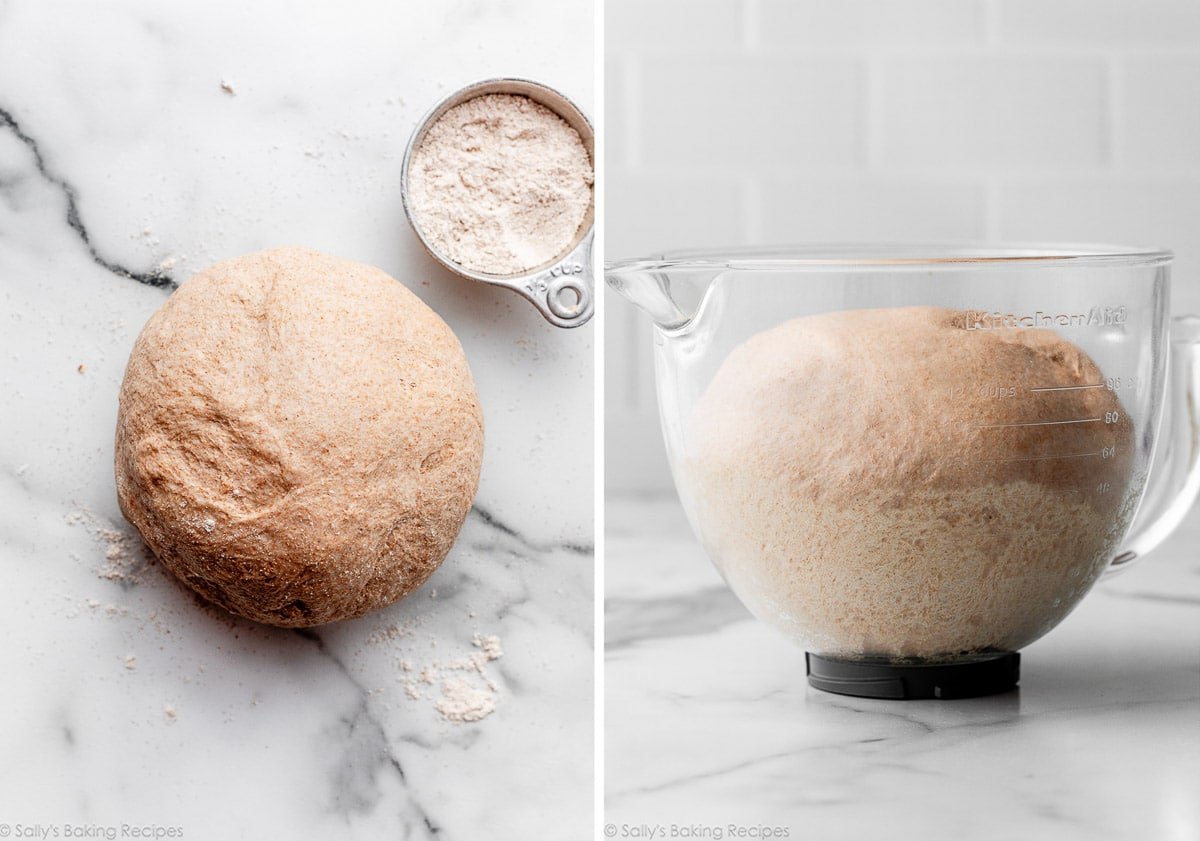
Once it has doubled in size, punch it down to release the air.
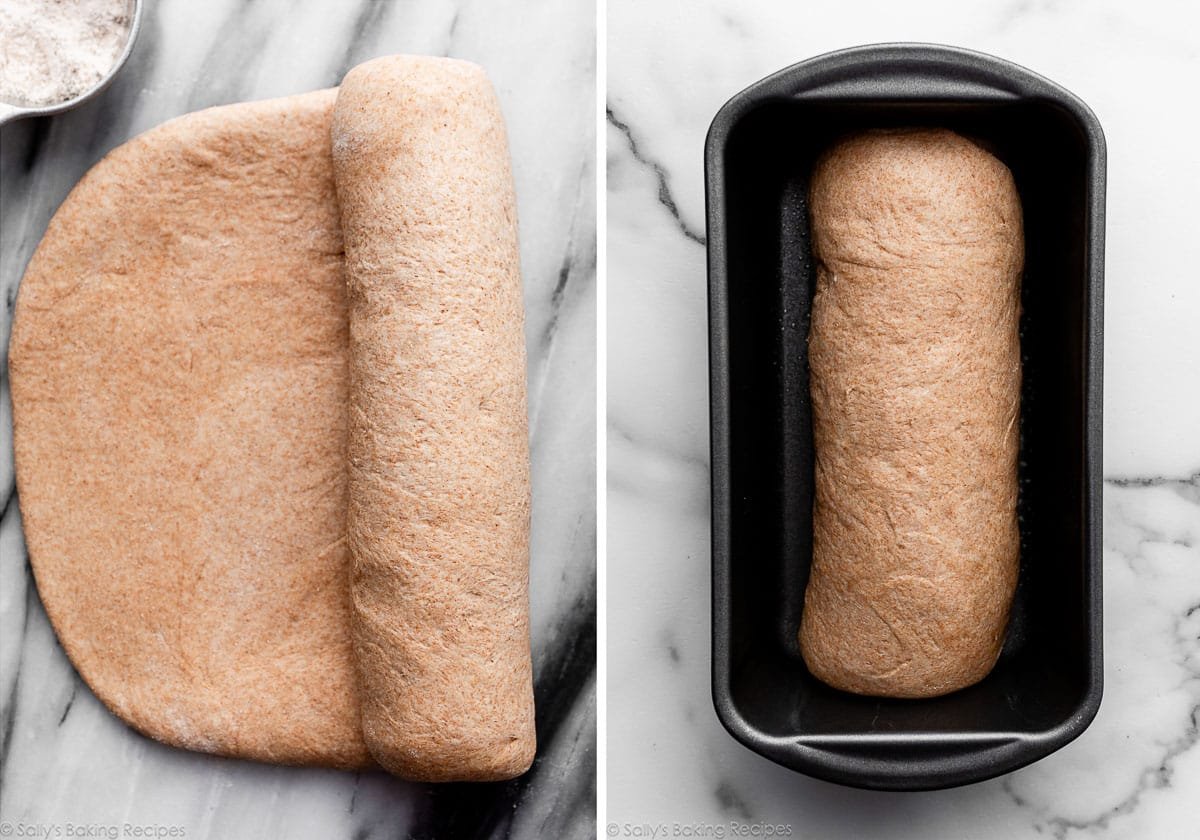
Roll it out into an 8×15-inch rectangle:
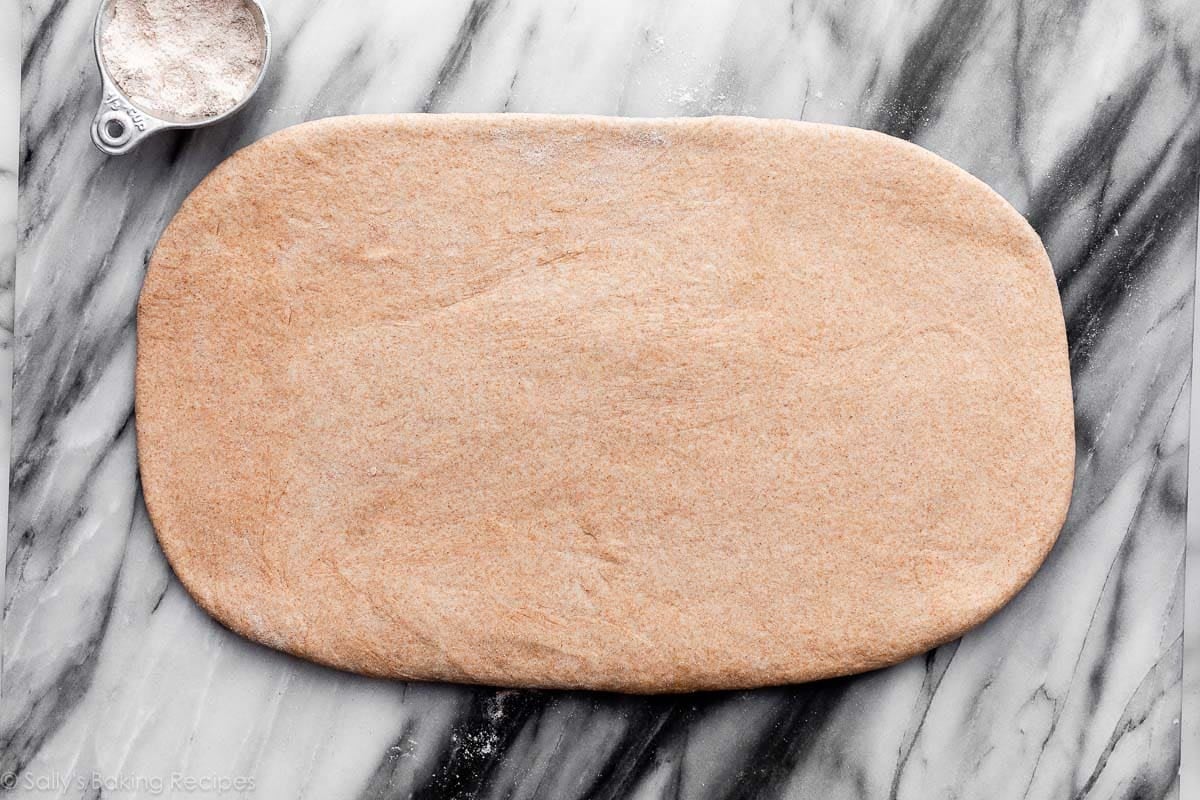
Roll it up tightly starting with the 8-inch side, so you have an 8-inch roll to fit into your greased 9×5-inch loaf pan. (Unlike cinnamon rolls, where you roll up the dough starting with the larger side.)
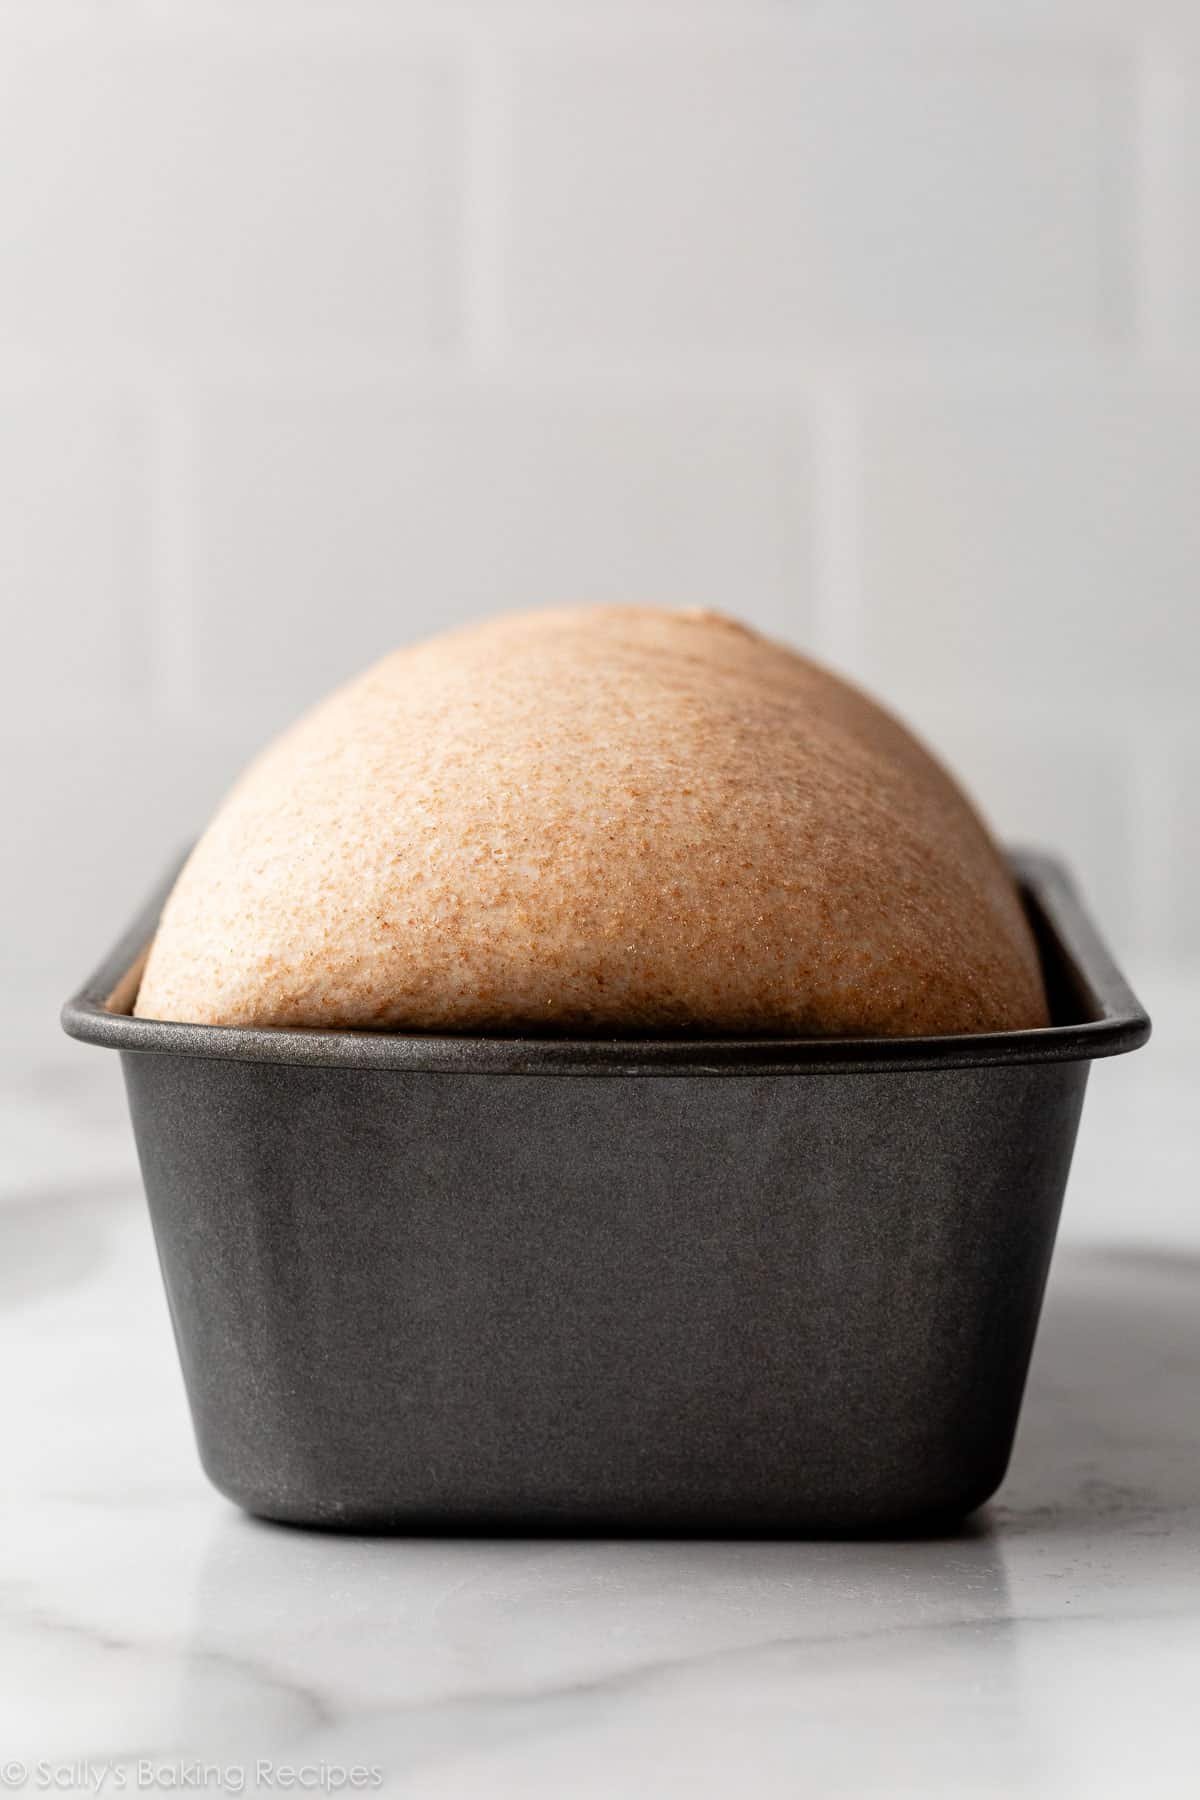
2nd rise (about 1 hour): Let it rise until it’s about an inch above the rim of the pan. Don’t rush this second rise, unless you want a flat loaf.
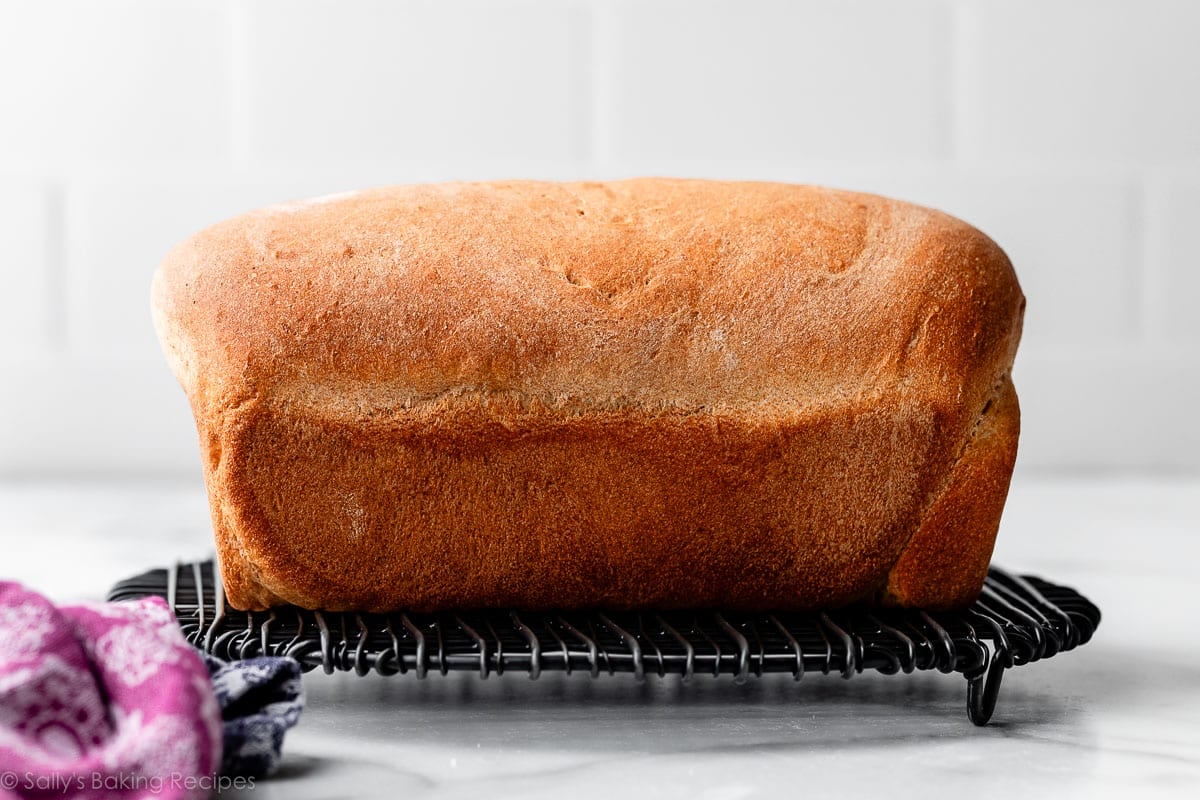
And bake! This whole wheat sandwich bread takes about 36–40 minutes in the oven.
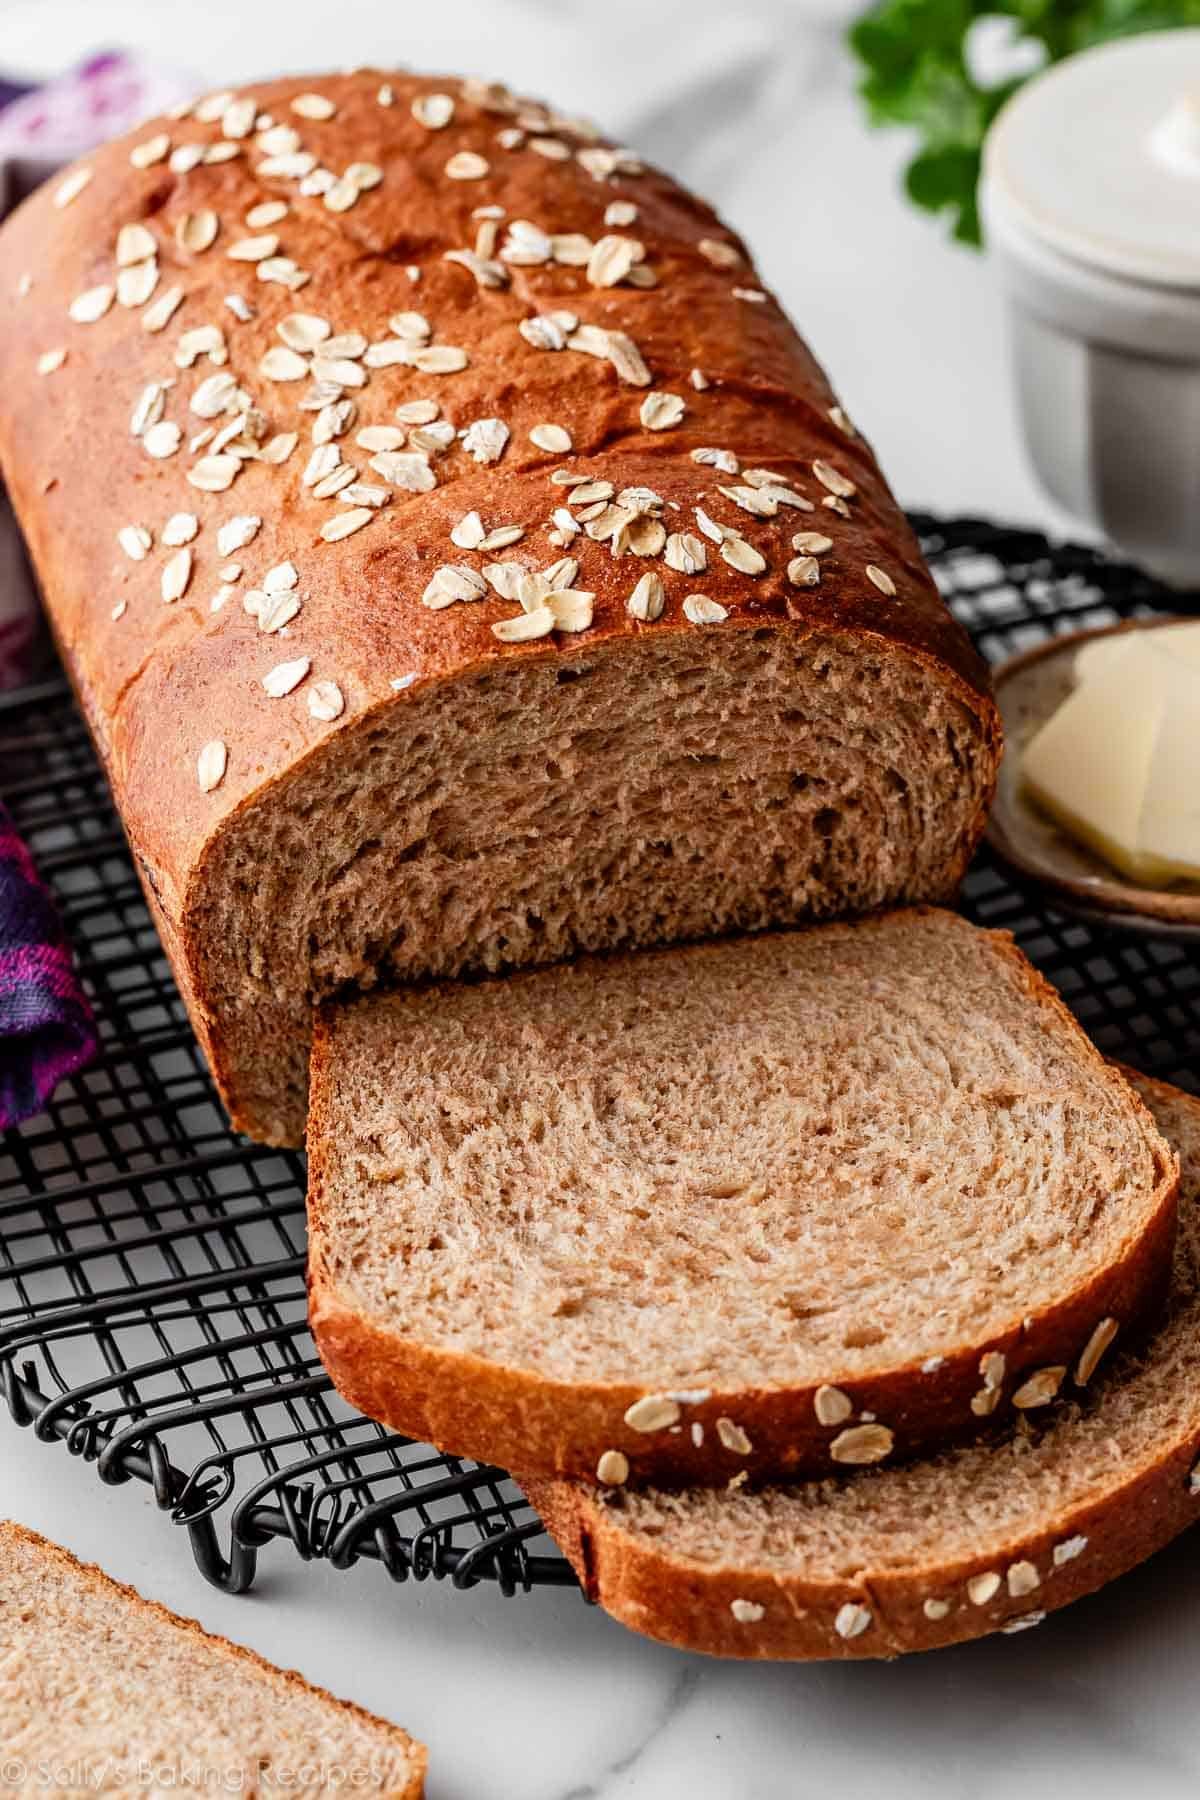
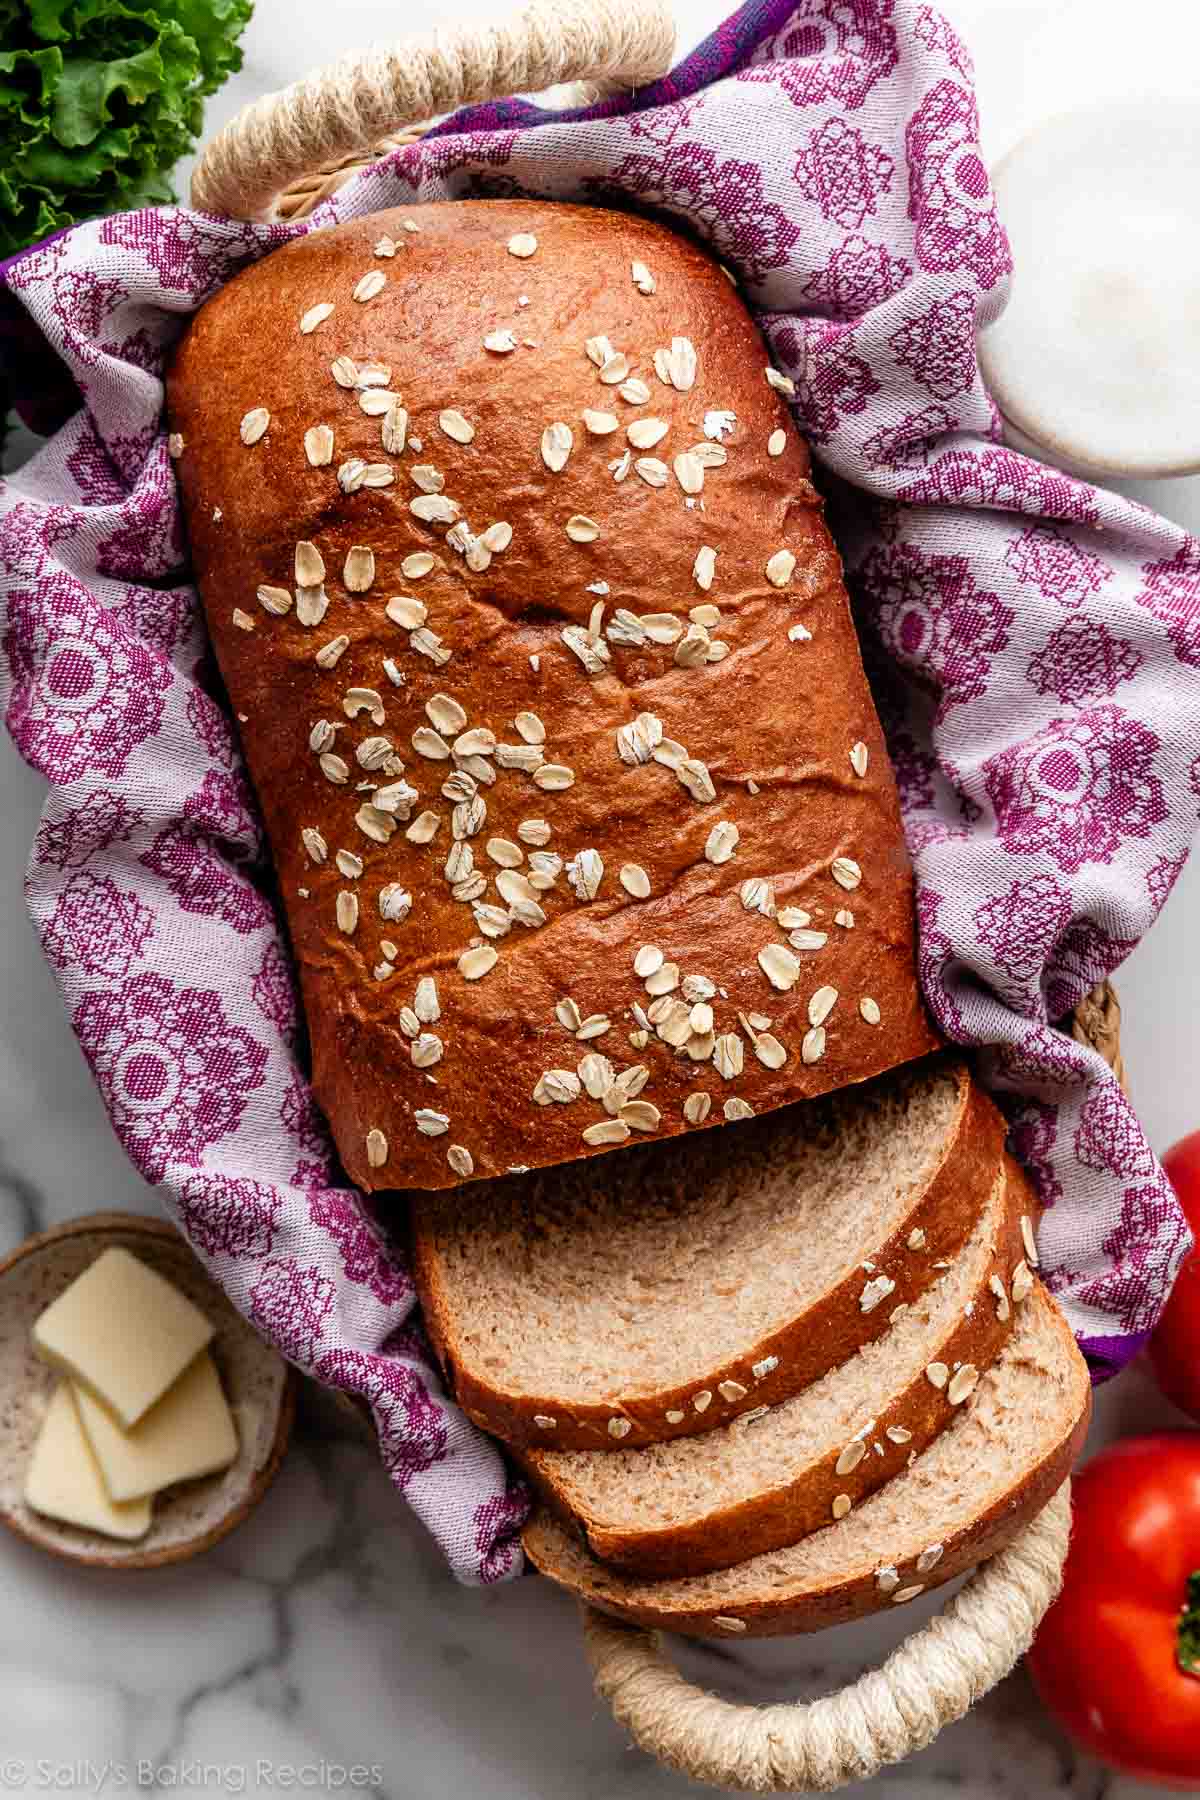
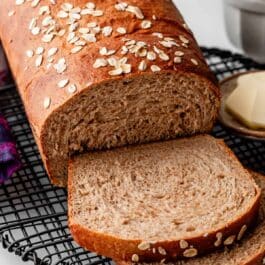
Before baking, feel free to top the bread with oats. You’ll need to brush beaten egg white on top of the dough before adding the oats, so they stick. The oat topping is optional.
Success Tips to Keep in Mind
- You can make this loaf of bread 100% whole wheat, or replace 1 cup (about 125–130g) of the whole wheat flour with bread flour for a lighter, taller, fluffier loaf. The directions remain the same.
- Knead the dough for a long time, at least 8 minutes. If you have a stand mixer, use it for this recipe. This is a heavy whole grain dough, so it requires a good amount of kneading to help produce a more elastic structure.
- When kneading, avoid adding too much flour; a slightly tacky and soft dough is OK.
- Use an instant-read thermometer to check the internal temperature of the baked bread. This guarantees you won’t under-bake or over-bake the bread. It’s an incredibly helpful baking tool! The bread is done when the center of the loaf is 195–200°F (90–93°C).
- If you’re new to working with yeast, please review my Baking with Yeast Guide where I include practical and easy-to-understand answers to many yeast FAQs.
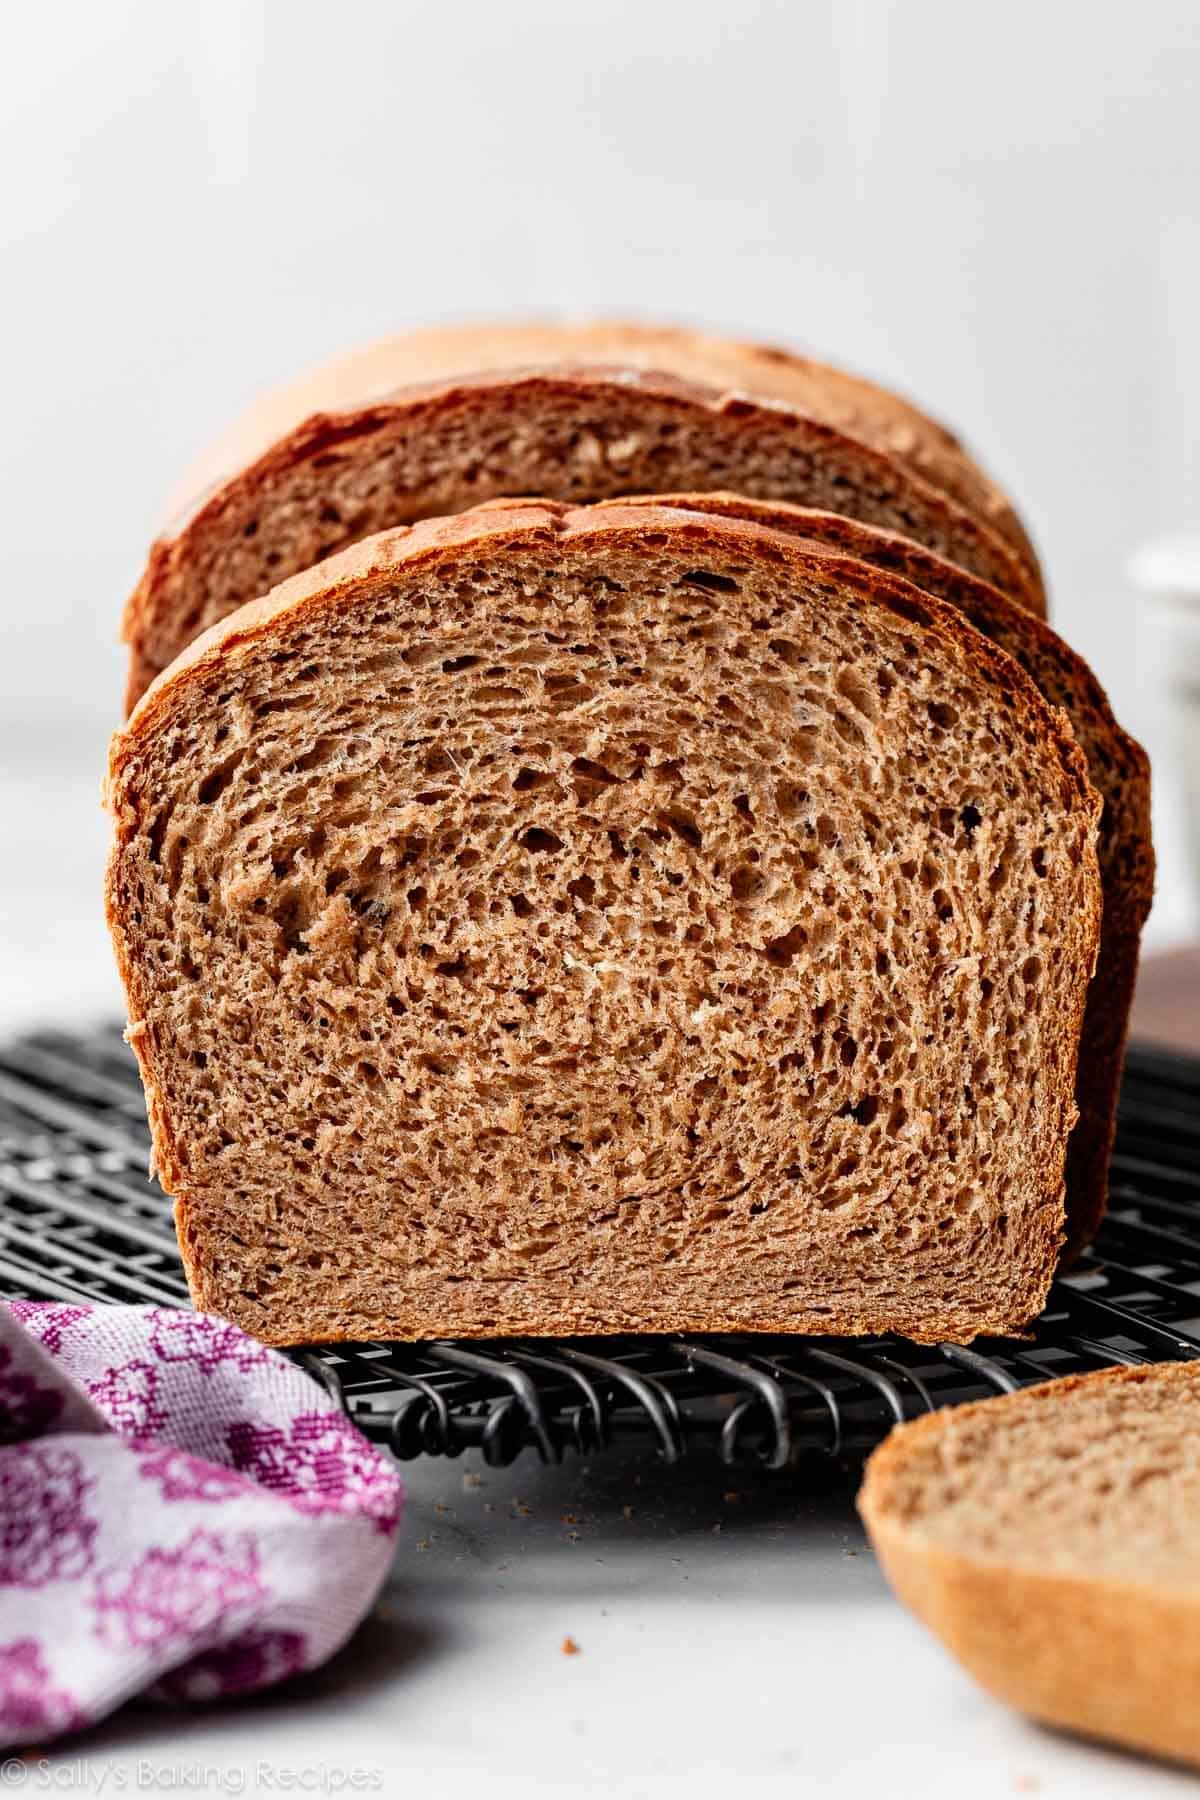
This whole wheat bread is phenomenal when sliced and served warm. The exterior is crisp and crusty, and the interior is hearty, yet soft.

Become a Bread Baker with My Approachable Recipes:
Whole Wheat Bread
- Prep Time: 4 hours, 30 minutes (includes sponge and rises)
- Cook Time: 38 minutes
- Total Time: 5 hours, 10 minutes
- Yield: 1 loaf
- Category: Bread
- Method: Baking
- Cuisine: American
Description
You need just 8 simple ingredients to make this whole wheat sandwich bread. It’s soft yet hearty and oh-so-flavorful, and store-bought sandwich bread just doesn’t compare! You can use 100% whole wheat flour, or you can swap in some bread flour for a taller, fluffier loaf. See recipe Notes for freezing and overnight instructions. You can also reference my Baking with Yeast Guide for answers to common yeast FAQs.
Ingredients
Sponge
- 1 cup (240ml) water, warmed to about 110°F (43°C)
- 1/3 cup (80ml) whole milk, warmed to about 110°F (43°C)
- 2 and 1/4 teaspoons (7g) active dry or instant yeast (1 standard packet)
- 2 cups (260g) whole wheat flour (spooned & leveled)
Dough
- 3 Tablespoons (63g) honey
- 3 Tablespoons (43g) unsalted butter, softened to room temperature
- 1 teaspoon fresh lemon juice (or apple cider vinegar)
- 1 and 1/3 cups (173g) whole wheat flour (spooned & leveled), plus more as needed
- 1 and 1/4 teaspoons salt
- optional oat topping: 1 beaten egg white + 1 Tablespoon whole oats
Instructions
- Prepare the sponge: In a large bowl or the bowl of your stand mixer, whisk the water, whole milk, and yeast together. Add the 2 cups (260g) flour and stir with a spatula or wooden spoon until a thick batter forms. Cover lightly and allow to double in size at room temperature, about 60–90 minutes. Sometimes this can take up to 2 hours. *I do not recommend a hand mixer for this dough because the dough is too thick and heavy.*
- Add the remaining dough ingredients including the honey, butter, lemon juice, remaining flour, and the salt. With a dough hook attachment, or using a spatula or wooden spoon (and some arm muscle!), beat on medium speed/mix until the dough comes together and pulls away from the sides of the bowl, about 3 minutes. If the dough seems too wet to a point where kneading (next step) would be impossible, beat in more flour 1 Tablespoon at a time until you have a workable dough, similar to the photos above. Dough should be soft and a little sticky, but still manageable to knead with lightly floured hands.
- Knead the dough: Keep the dough in the mixer and beat for an additional 8–10 full minutes, or knead by hand on a lightly floured surface for 8–10 full minutes. (If you’re new to bread-baking, my How to Knead Dough video tutorial can help here.) If the dough becomes too sticky during the kneading process, add 1 more Tablespoon of flour at a time to make a soft, slightly tacky dough. Do not add more flour than you need; you do not want a dry dough. After kneading, the dough should still feel a little soft. Poke it with your finger—if it slowly bounces back, your dough is ready to rise.
- 1st rise: Lightly grease a large bowl with oil or nonstick spray. Place the dough in the bowl, turning it to coat all sides in the oil. Cover the bowl and allow the dough to rise in a relatively warm environment for 1.5–2 hours or until about double in size. (For a tiny reduction in rise time, see my answer to Where Should Dough Rise? in my Baking With Yeast Guide.)
- Grease a 9×5-inch loaf pan.
- Shape the dough: When the dough is ready, punch it down to release the air. Lightly flour a work surface, your hands, and a rolling pin. Roll the dough out into a large rectangle, about 8×15 inches. It does not have to be perfect—in fact, it will probably be rounded on the edges. That’s ok! Roll it up into an 8-inch log and place in the prepared loaf pan.
- 2nd rise: Cover shaped loaf. Allow to rise until it’s about 1 inch above the top of the loaf pan, about 45–60 minutes.
- Adjust oven rack to a lower position and preheat oven to 350°F (177°C). It’s best to bake the bread towards the bottom of the oven so the top doesn’t burn.
- Optional oat topping: If you want to add the optional oat topping, add it right before baking the bread. With a pastry brush, brush the risen loaf with egg white, then sprinkle the oats on top.
- Bake the bread: Bake for 36–40 minutes, or until golden brown on top. If you notice the top browning too quickly, loosely tent the pan with aluminum foil. (I usually add it around the 20-minute mark.) To test for doneness, if you gently tap on the loaf, it should sound hollow. For a more accurate test, the bread is done when an instant-read thermometer reads the center of the loaf as 195–200°F (90–93°C). Remove from the oven and allow bread to cool for a few minutes in the pan on a cooling rack before removing the bread from the pan and slicing. Feel free to let it cool completely before slicing, too.
- Cover leftover bread tightly and store at room temperature for up to 1 week.
Notes
- Freezing Instructions: Prepare recipe through step 6. Place shaped loaf in a greased 9×5-inch loaf pan or disposable loaf pan, cover tightly, and freeze for up to 3 months. On the day you serve it, let the loaf thaw and rise for about 4–5 hours at room temperature. Bake as directed. You can also freeze the baked bread loaf. Allow the bread to cool completely, then freeze for up to 3 months. Thaw in the refrigerator or at room temperature, then reheat as desired.
- Overnight Instructions: Prepare the recipe through step 6. Cover the shaped loaf tightly and refrigerate for up to about 15 hours. At least 3 hours before you need the bread the next day, remove from the refrigerator, keep covered, and allow to rise on the counter for about 1–2 hours before baking. Alternatively, you can let the dough have its 1st rise in the refrigerator overnight. Prepare the dough through step 3, then cover the dough tightly and place in the refrigerator for up to 12 hours. Remove from the refrigerator and allow the dough to fully rise for 2 more hours. Continue with step 5.
- Special Tools (affiliate links): Stand Mixer or Large Glass Mixing Bowl with Wooden Spoon or Silicone Spatula | 9×5-inch Loaf Pan | Rolling Pin | Pastry Brush for optional topping | Instant-Read Thermometer | Wire Cooling Rack
- Milk: Low-fat or nondairy milk work here, but whole milk produces phenomenal texture and I highly recommend it.
- Yeast: I usually use instant yeast. You can use active dry yeast instead, with no changes to the preparation. Rise times will be slightly longer. Reference my Baking With Yeast Guide for answers to common yeast FAQs.
- Flour: Make sure your whole wheat flour is fresh. Check the date on the package, and don’t store it uncovered. Whole wheat flour can become rancid if stored for too long, and your bread will taste bitter. You can use all whole wheat flour in this recipe, or substitute 1 cup (130g) of bread flour for a slightly taller, fluffier loaf. You can use 1 cup of bread flour in the sponge in step 1 OR save it for the remaining dough in step 2. If using 1 cup (130g) of bread flour in step 2, you’ll also need the 1/3 cup (43g) of whole wheat flour.
- Honey: Honey produced the best tasting bread. In a pinch, you can use regular granulated sugar or brown sugar. But you will miss out on that honey flavor. I have not tested other sweeteners.
- Can I shape this into a round boule? No, this dough needs the structure of a loaf pan. Instead, you may like this no-knead seeded oat bread.
- Doubling this recipe: For best results, I recommend making two separate batches of dough. This is a big, heavy dough and the sponge will take a very long time to rise, and so will the kneading step. It’s best to make 2 separate doughs.
- Whole Wheat Rolls: I recommend my soft whole wheat dinner rolls recipe, or you can try my multigrain bread/rolls recipe instead.
- Adapted from Sandwich Bread and Whole Wheat Dinner Rolls


Reader Comments and Reviews
From the first time I used this recipe every time it has come out beautifully! I don’t have a stand mixer anymore, but I do know how to knead.
So incredibly simple and delicious.
You’ll make a baker of me yet!
I use this recipe often since it is a favorite. I add 2 tbls vital wheat gluten to help with the rise since I avoid white flour. It always turns out tender and soft. Perfect!
Now for your thoughts about substituting half of the wheat flour with dark rye flour.
Hi Emily, We haven’t tested this with rye flour (any amount of it), so we can’t confidently say for sure. The results will obviously vary. Let us know if you test anything.
I’ve been a follower of Sally’s baking for years and her recipes always come out perfectly. This bread recipe is perfect it just takes a really long time to make.
This bread taste awesome but it was a fail somewhat for me it did not rise much. I used fresh package of instant yeast the expiration date is next year. The water and milk was not heated over 110. Sponge it rested 2hrs 1rst and 2nd rise 3hrs each. 2nd rise would not come to top of pan.
When cooked it came just to top of pan. The loaf was dense but still taste good. What did I do wrong?
Hi Nanci, we’re happy to help troubleshoot. It sounds like your bread may have been over proofed. When the dough rises for too long, it can collapse when baking and lead to a shorter loaf. Was it possible your dough was over kneaded, too? (Here is more on How to Knead Dough.) Or if you used all whole-wheat flour (as opposed to the version with some bread flour), the bread will be a little denser and won’t rise quite as high. We hope this helps for next time!
Hi Lexi thank you for the help. I am not sure if it was overproofed I let ot rise for such long period of time because it didnt look like it was rising. I am going to try again replacing a cup with bread flour.
I had the opposite “problem”. I just took mine out of the oven. I am afraid it may have overproofed- I didn’t keep a close enough eye on it. I was about 4″” over the top of the pan!!!! Can’t wait to cut into it.
Used this recipe as a base with a few changes and it turned out great! Soft and springy texture with a tender crust and moist crumb; strong yeast flavor and aroma, slightly sweet. After making the sponge, I used equal parts whole wheat flour, dark rye, and raw wheat germ for the dough. I had to run an errand after kneading, so I threw the dough in the fridge for 3 hours. It had about doubled, so l let it rise another 20 or so minutes at room temp. Didn’t roll it out; just shaped it in hand and tossed it in an ungreased foil-lined pan for the second rise. Took about 80 minutes or so because the dough was still cool from the fridge. I’m pleased with the result. For the very best texture and flavor, follow the recipe exactly, but I found it forgiving with my substitutions.
Can this recipe be used to make hamburger and hot dog buns?
Hi Bonnie, You should be able to use this dough to make hamburger or hot dog buns, we’re unsure of the yield. Let us know if you try it!
Great whole wheat recipe and I’m a novice! Used KA white whole wheat flour and I did replace one cup with KA bread flour. I did find a large hole towards the top in the middle right under the crust while I was slicing. I’m no good at shaping so I’m sure it was my fault not knocking enough air out? Wil definitely make again!
Great recipe that includes making a sponge. I sub 120g of AP for some fluff. I have a hard time with loaf shaping to get a good crumb. Hopefully it’ll come with practice.