

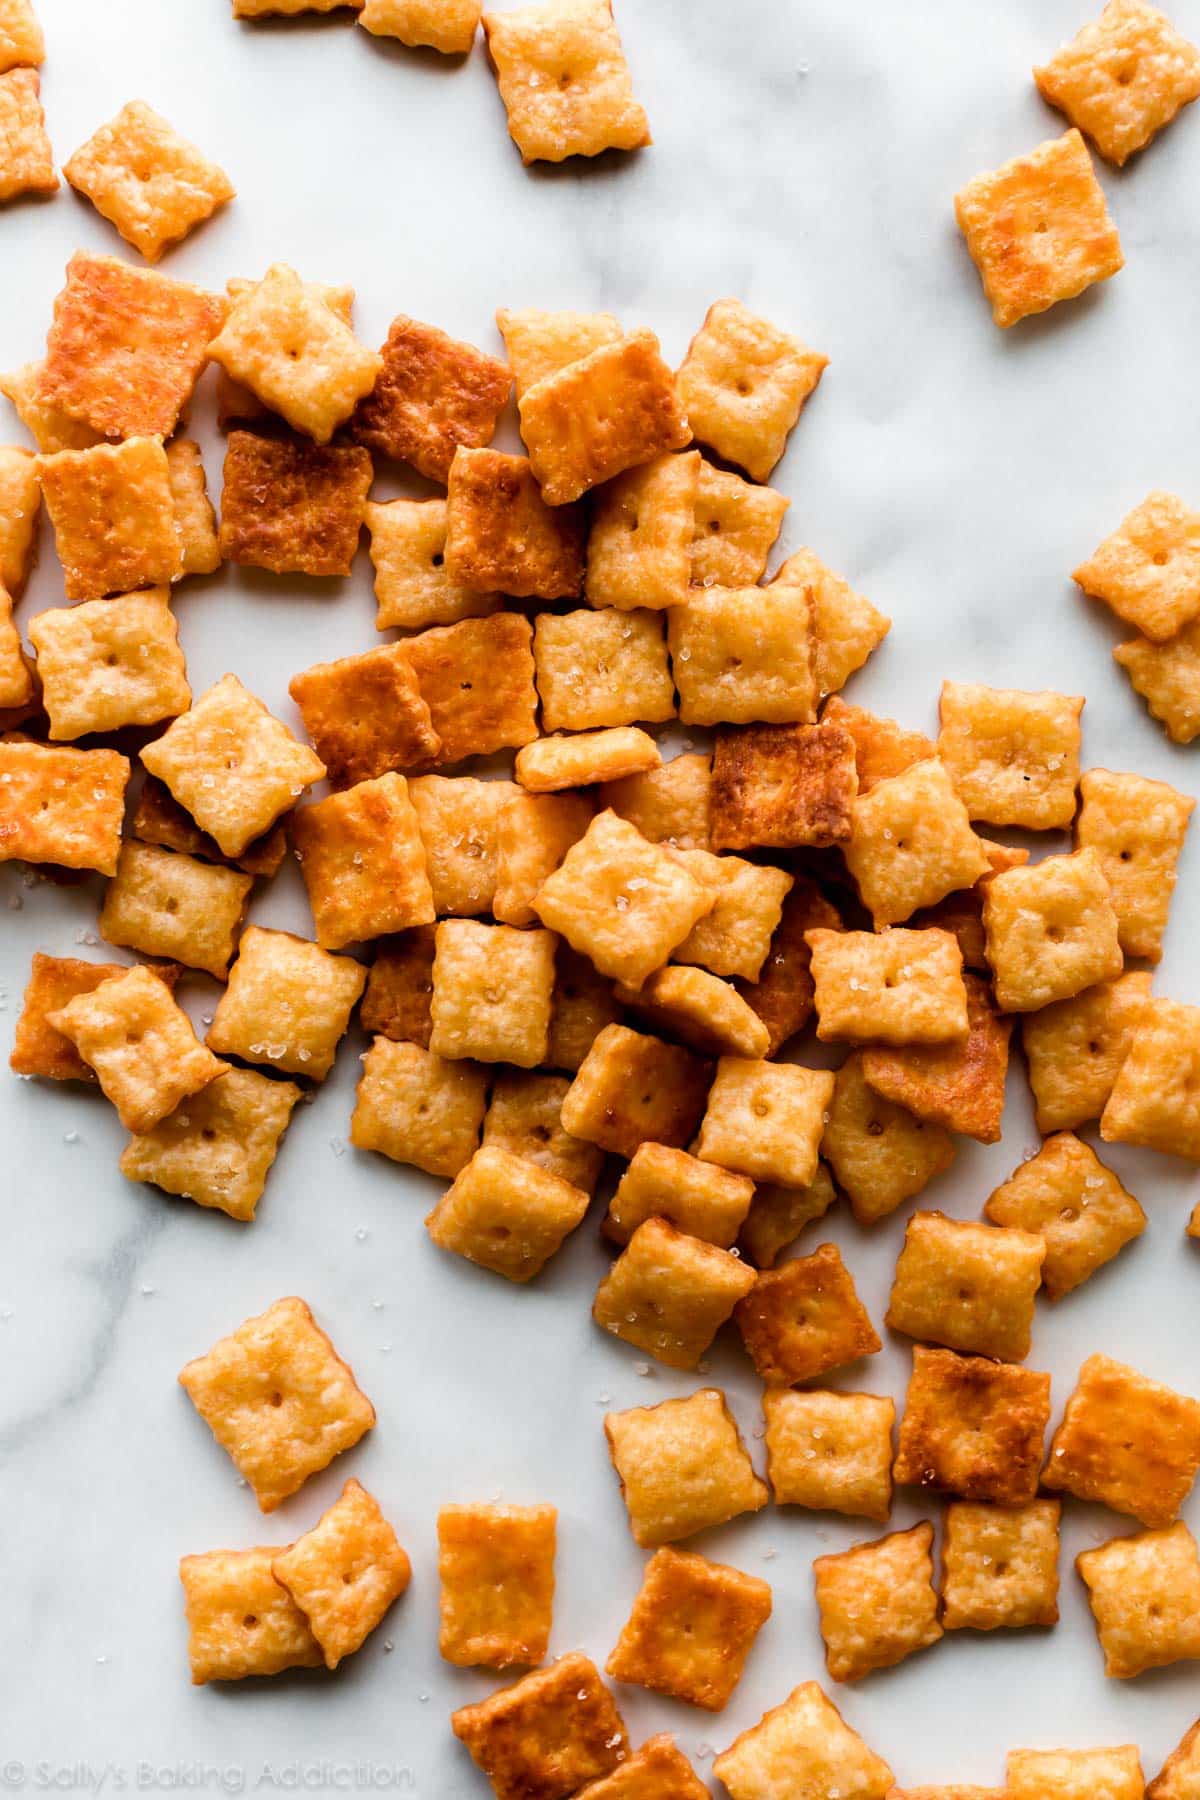
Make homemade cheese crackers with only 6 ingredients. These crisp crackers are a simple take-anywhere snack and have the most unbelievable salty, cheesy flavor. You’ll appreciate the straightforward instructions and quick baking time!
What’s on the menu today? CHEESE.
Store-bought crackers are obviously delicious—there’s no denying the lure of Cheese-Itz!
But did you know that you only need 6 ingredients to make cheese crackers at home? Using real cheese and zero added preservatives, you can make homemade cheese crackers with cheese, flour, cornstarch, salt, butter, and water. The dough comes together in a few minutes, then after about 45 minutes of chilling, roll it out, cut into squares, and bake for 16-20ish minutes. Yes, it’s that easy.
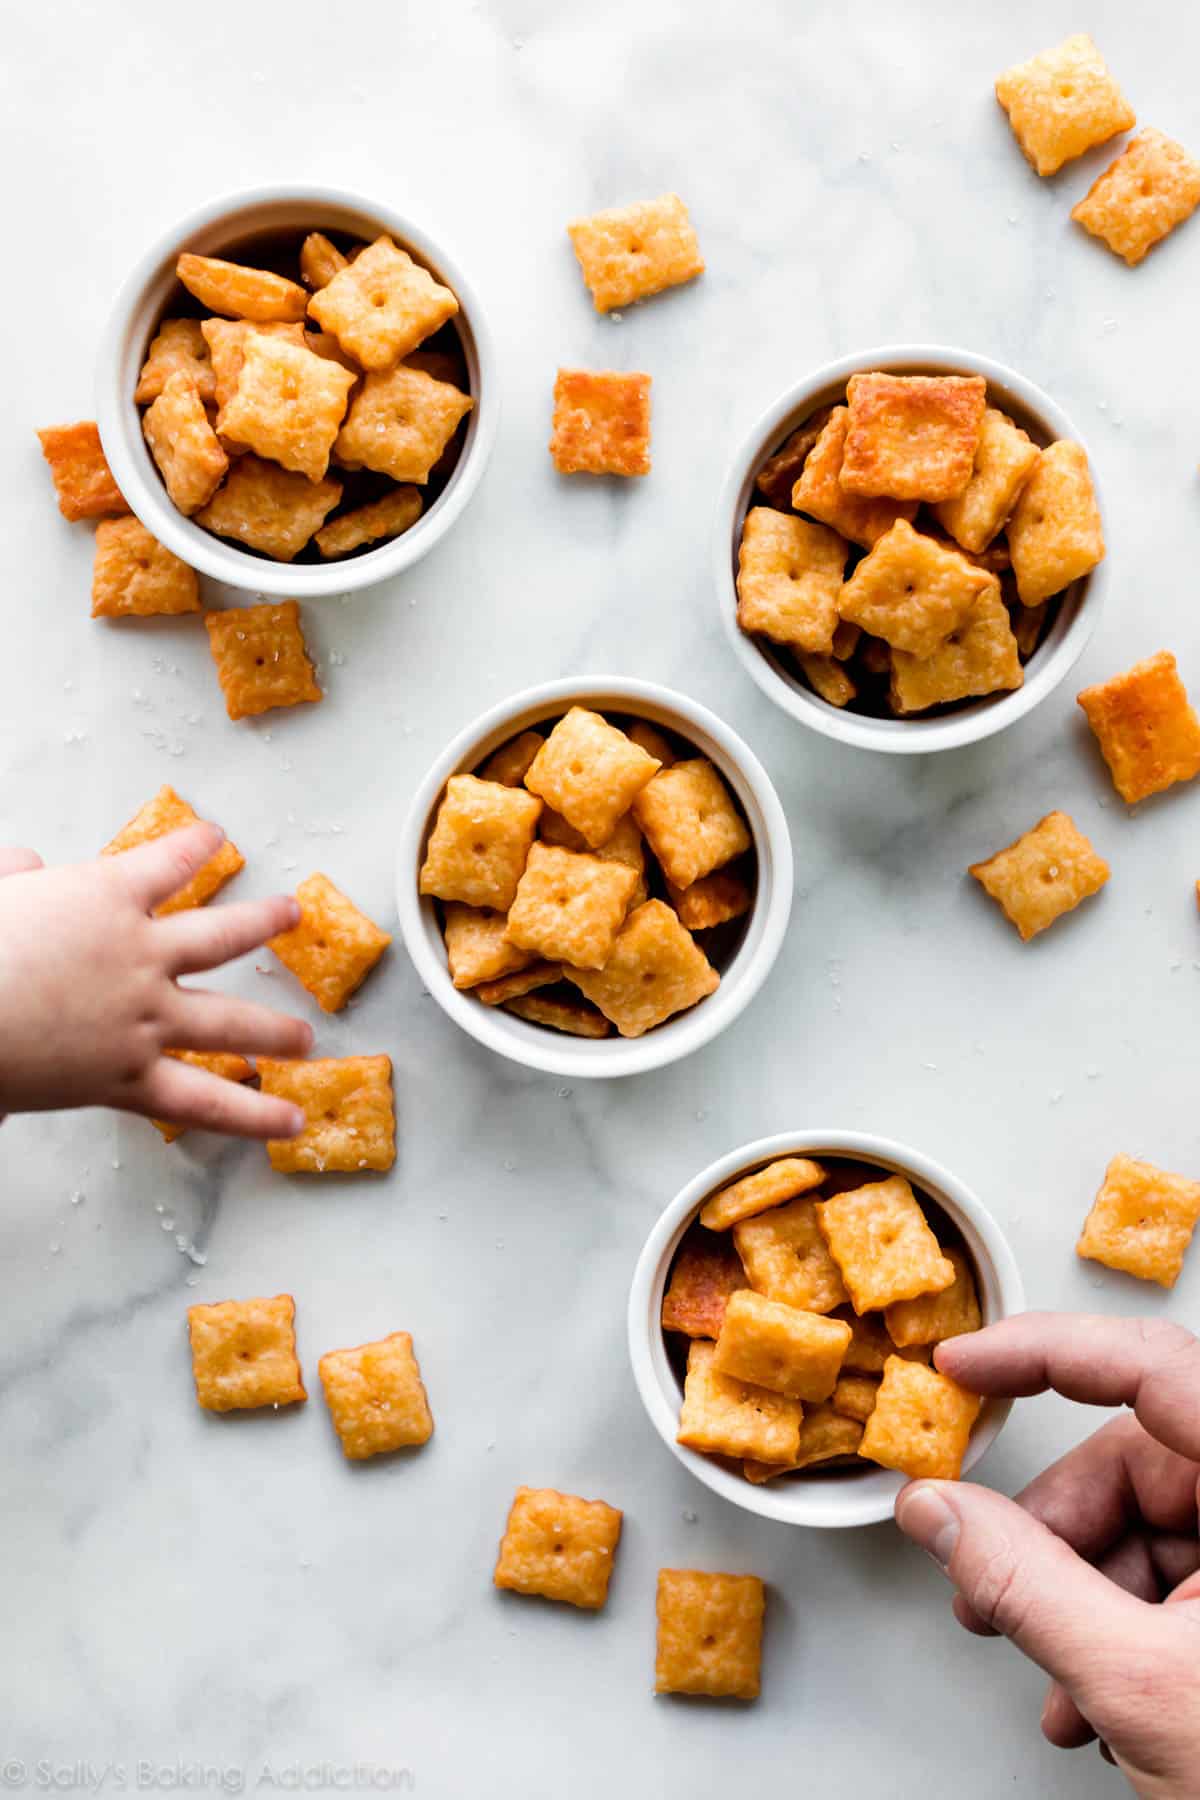
(My daughter makes her debut in my food photography!) 🙂
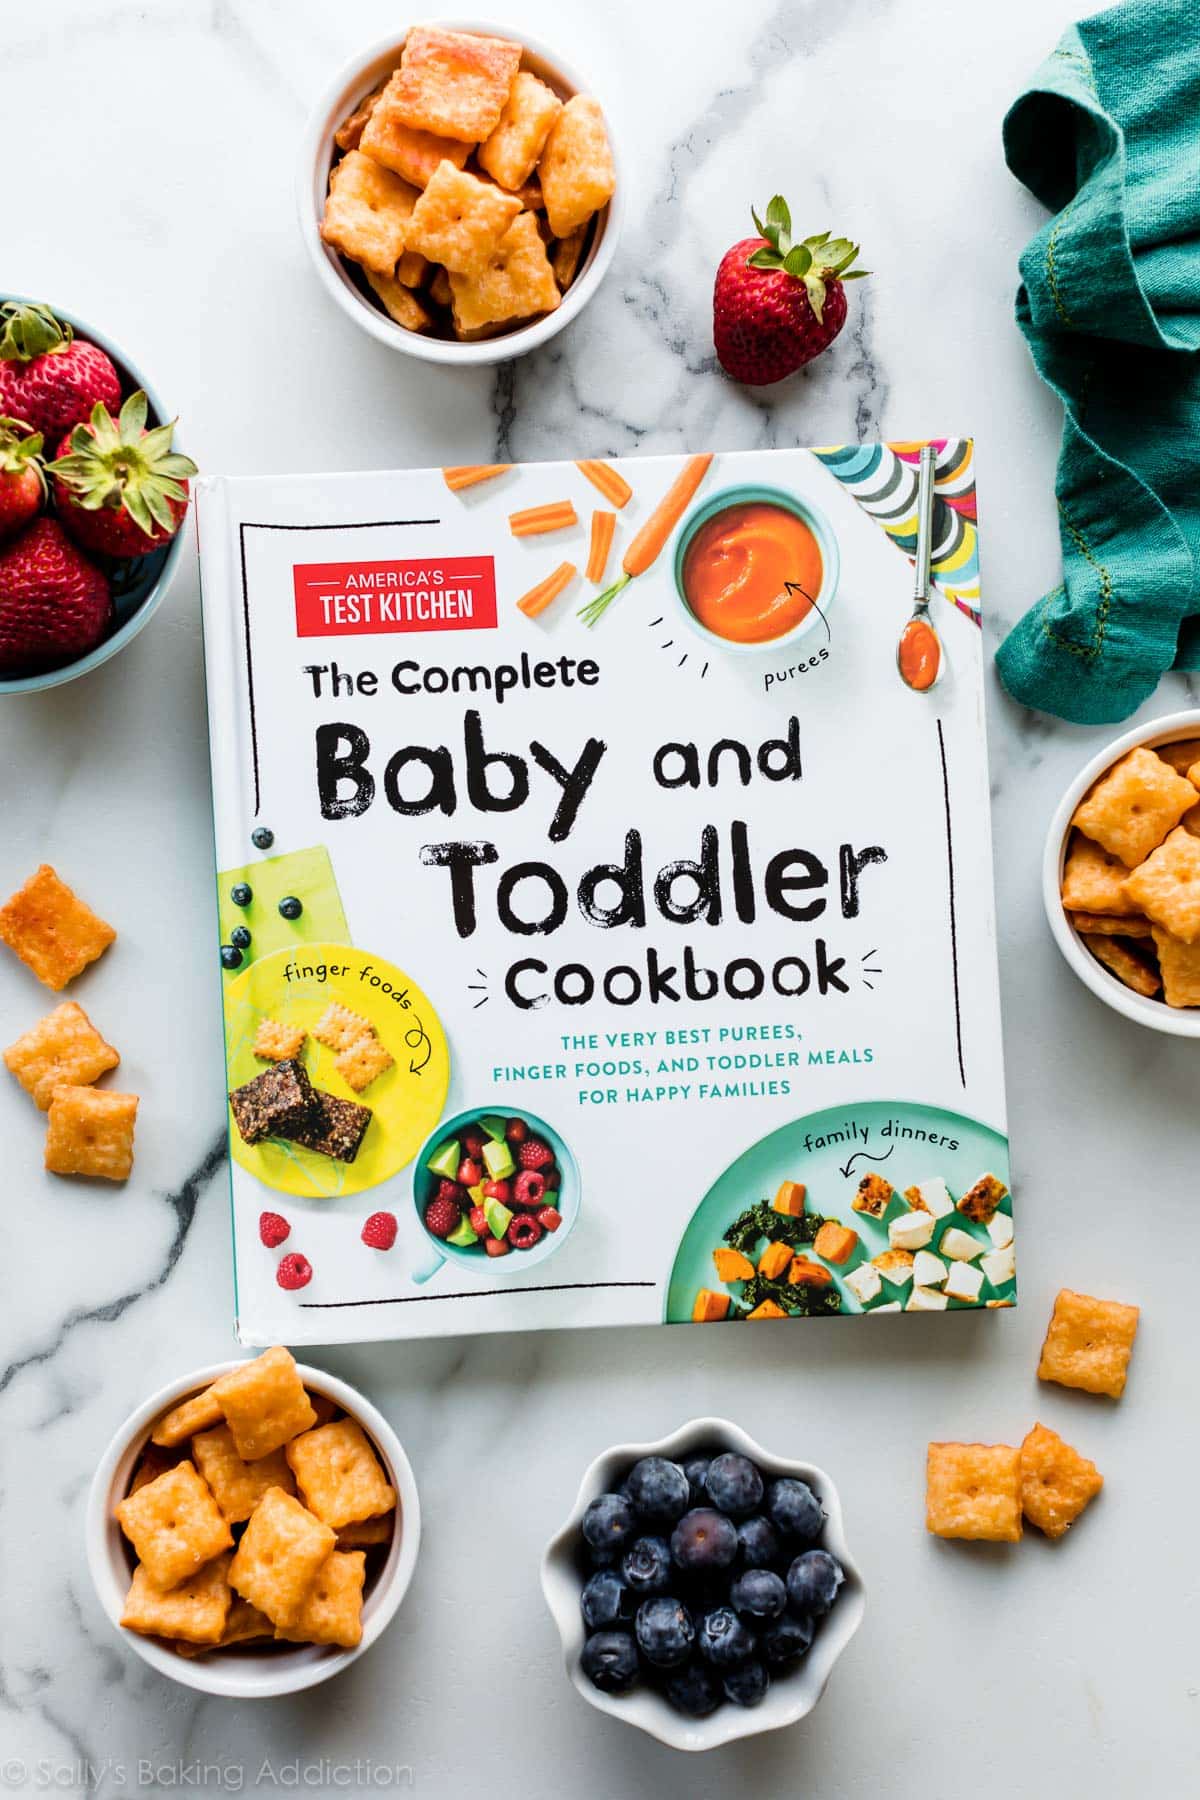
ATK’s Baby & Toddler Cookbook
This recipe comes straight from a new cookbook by America’s Test Kitchen called The Complete Baby and Toddler Cookbook. This book is packed with baby food recipes, toddler-friendly recipes, and family-loved EASY meals that have all been developed by test cooks with the guidance from a pediatric dietician and a pediatrician. The book starts with baby’s first single food purees, moving along to multiple food puree recipes, then 9+ month finger foods and recipes. There’s also 18+ month smoothies, dinner recipes that baby and toddler can enjoy, preschool lunches, and a chapter dedicated to cooking with kids. Here a list of what else I love and if you’re a parent or caregiver, I know you’ll appreciate these too:
- Highlights allergens at the beginning of each recipe
- Recipes organized by age
- Colorful photos of each recipe
- “Why this recipe works” snapshot for each
- Simple ingredient lists
- Tips for babies, tips for toddlers, and tips for “how your child can help”
If you’re a parent or caregiver, you have a lot on your mind—and I appreciate that this book offers dozens of homemade ideas, while encouraging the family to get in the kitchen. We’ve already tried the parmesan chicken cutlets, turkey veggie burgers, zucchini carrot fritters, peach spinach smoothie, and homemade cheese crackers. And I’ve already bought copies for 3 of my friends who are first time moms! This book gets my full support, especially for busy first-time parents. (While I was sent this cookbook, I’m not being paid to write this post—I genuinely LOVE the book.)
How to Make Homemade Cheese Crackers
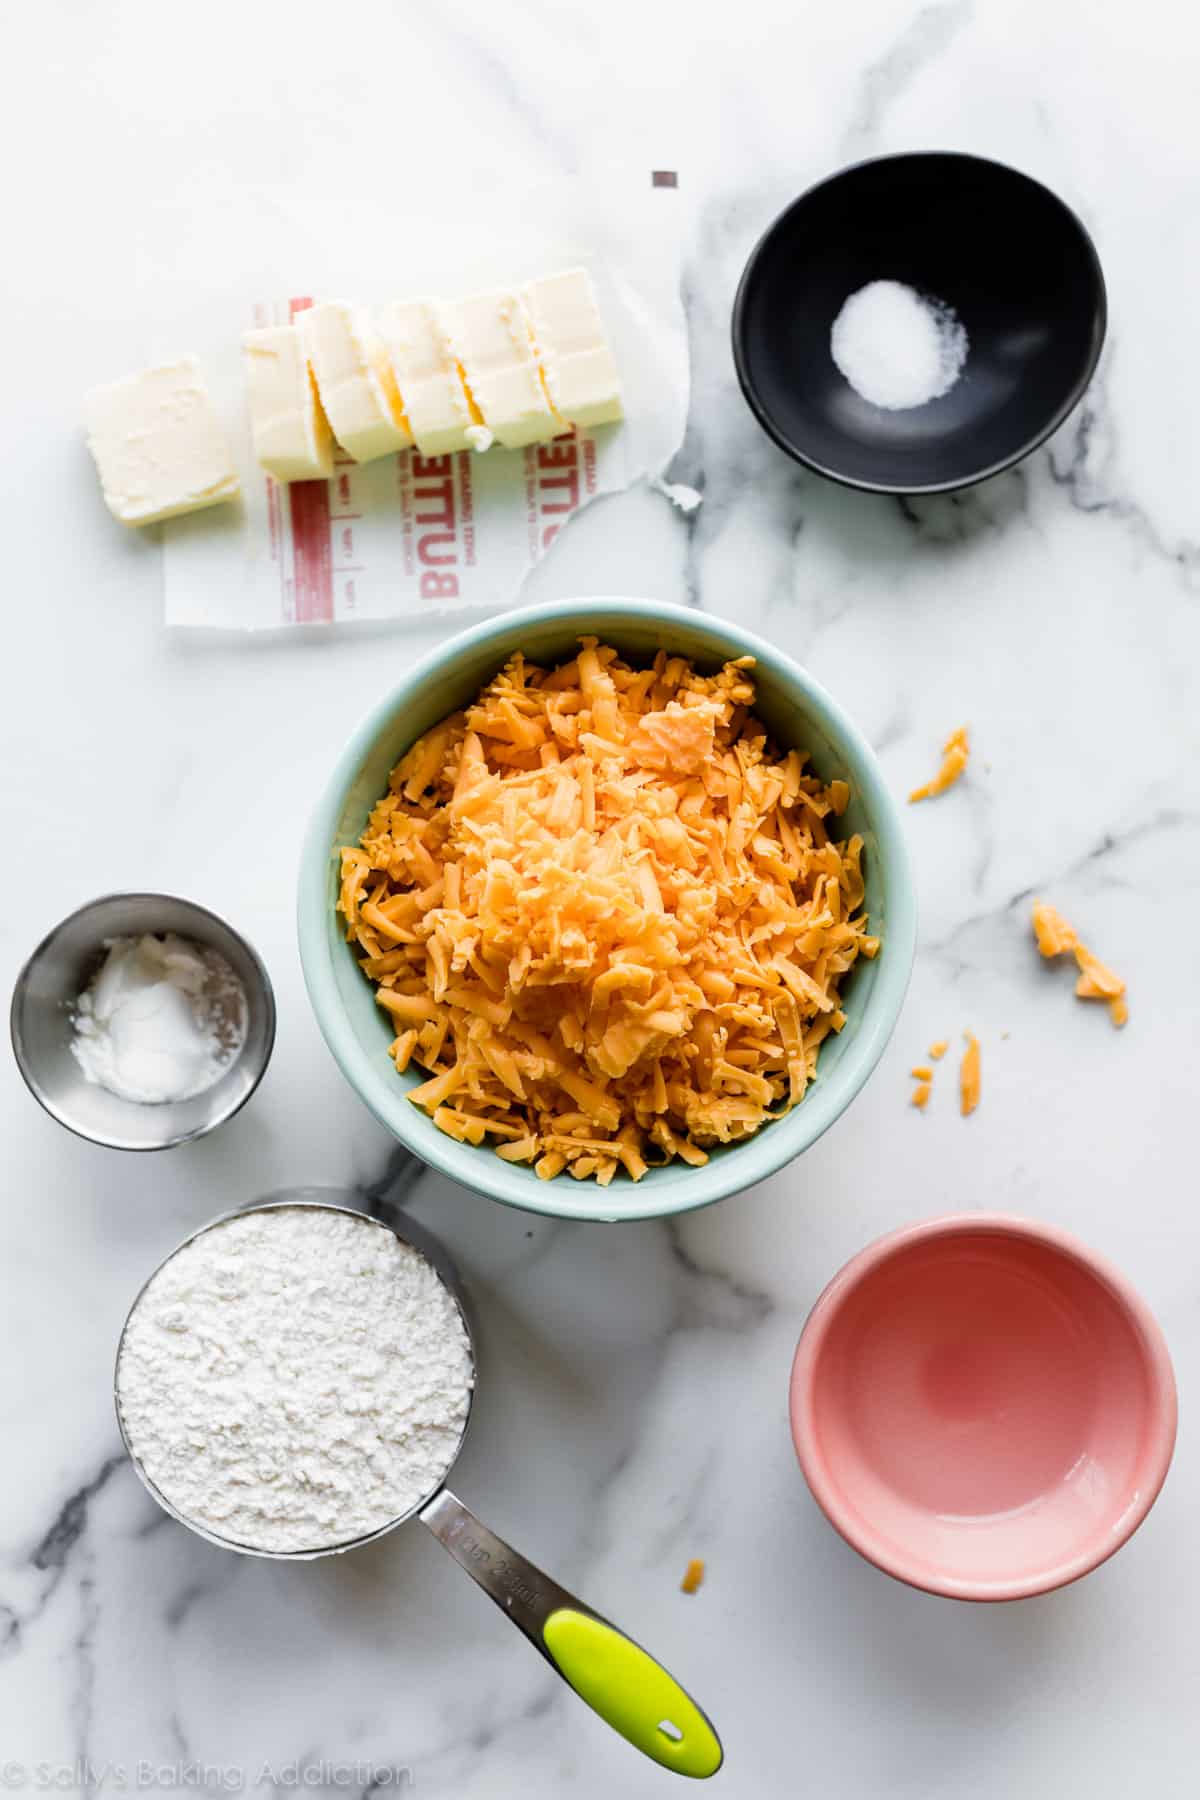
Turns out that homemade cheese crackers are surprisingly simple! My #1 tip is to use a block of real cheddar cheese that you freshly grate at home since it has more flavor than pre-shredded cheeses. I recommend a sharp yellow cheddar, but you can use mild or even white cheddar cheese. I doubled the recipe in the cookbook and the recipe below reflects that. It’s a very easy recipe to double or halve, depending how many mouths are hungry!
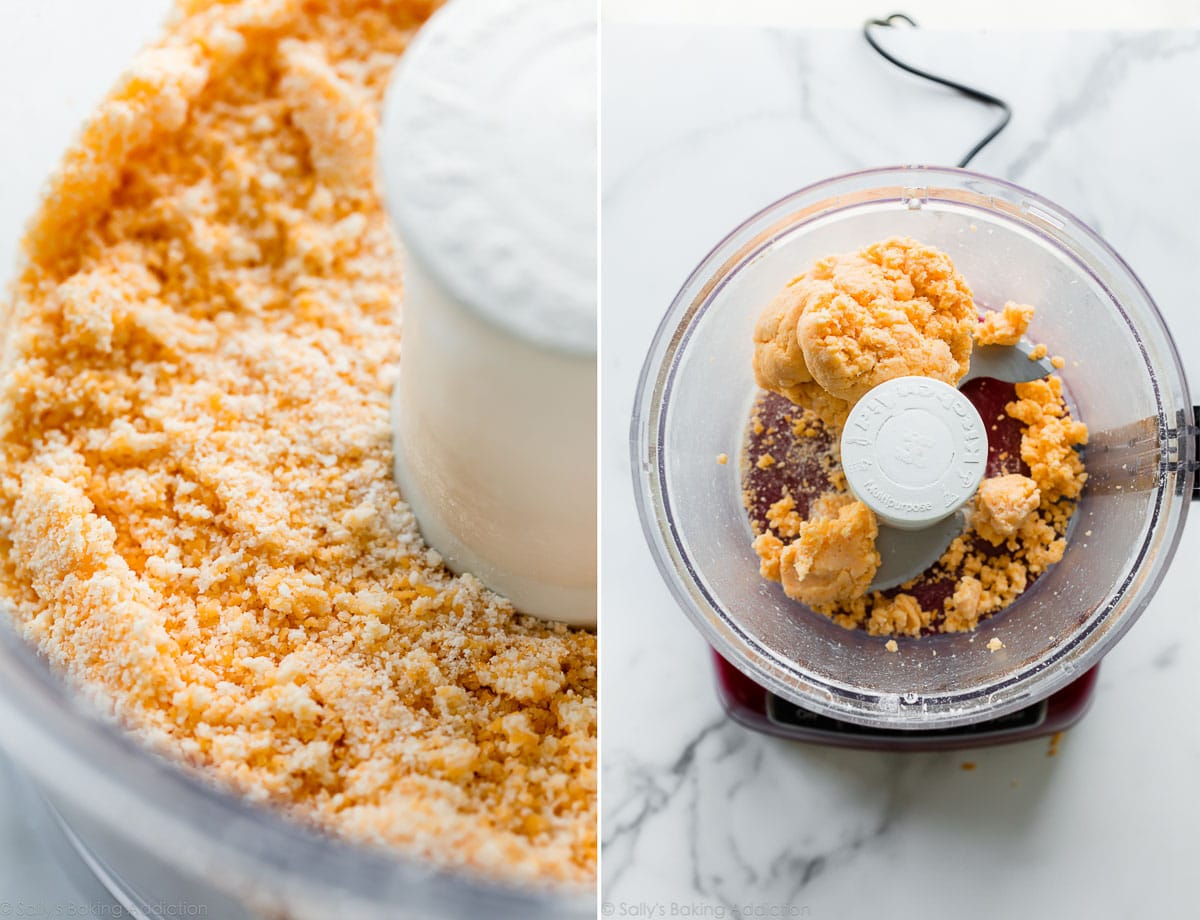
- Pulse ingredients together in food processor. Pulse the dry ingredients together, then pulse in the butter until the mixture resembles wet sand. Add cold water and pulse until the dough forms large clumps, pictured below.
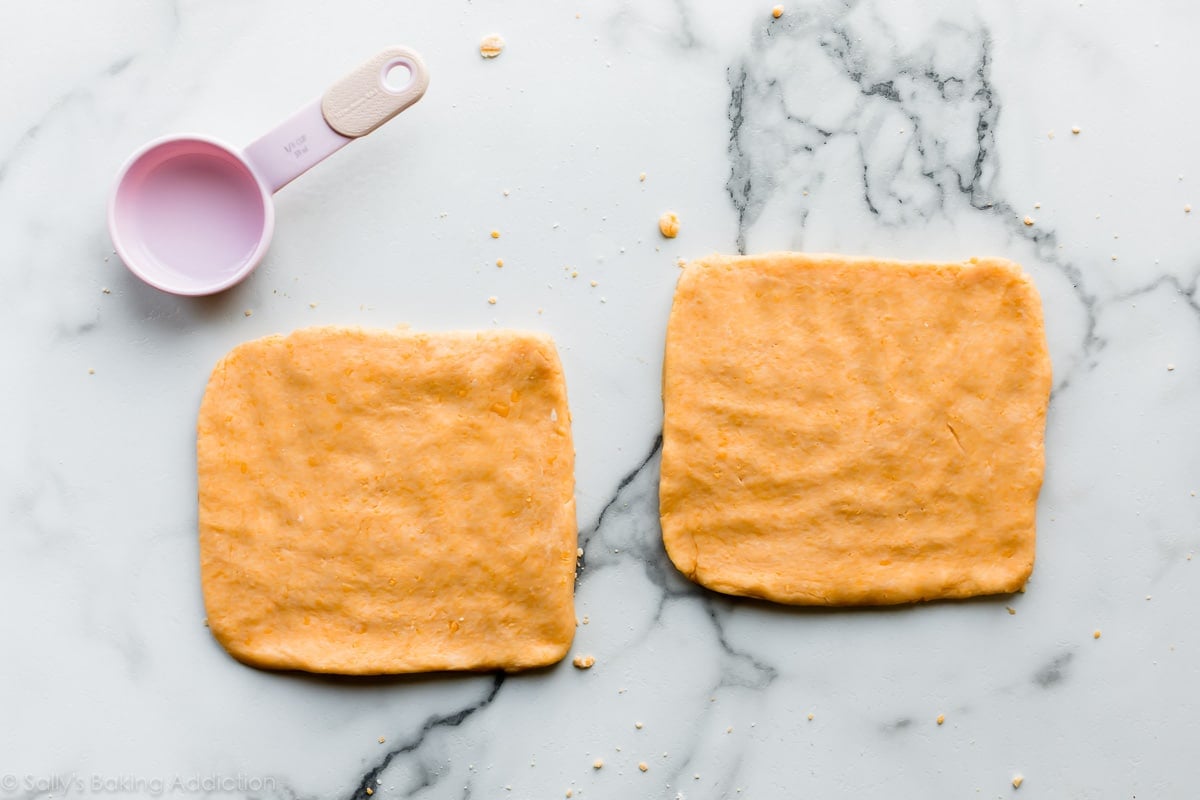
- Pat into a square. Pat the dough into a rough 6-inch square so that you can wrap it up and chill it. Since I doubled this recipe, I divided the dough in 2 and patted each into separate squares. Wrap each in plastic wrap.
- Chill for 45 minutes. Chill the wrapped doughs. Without chilling, the crackers lose their shape in the oven. You can chill the dough for up to 2 days.
- Roll out to 1/8 inch thick. Roll the chilled squares into thinner squares. They’re really easy to roll out since they chilled in a square shape.
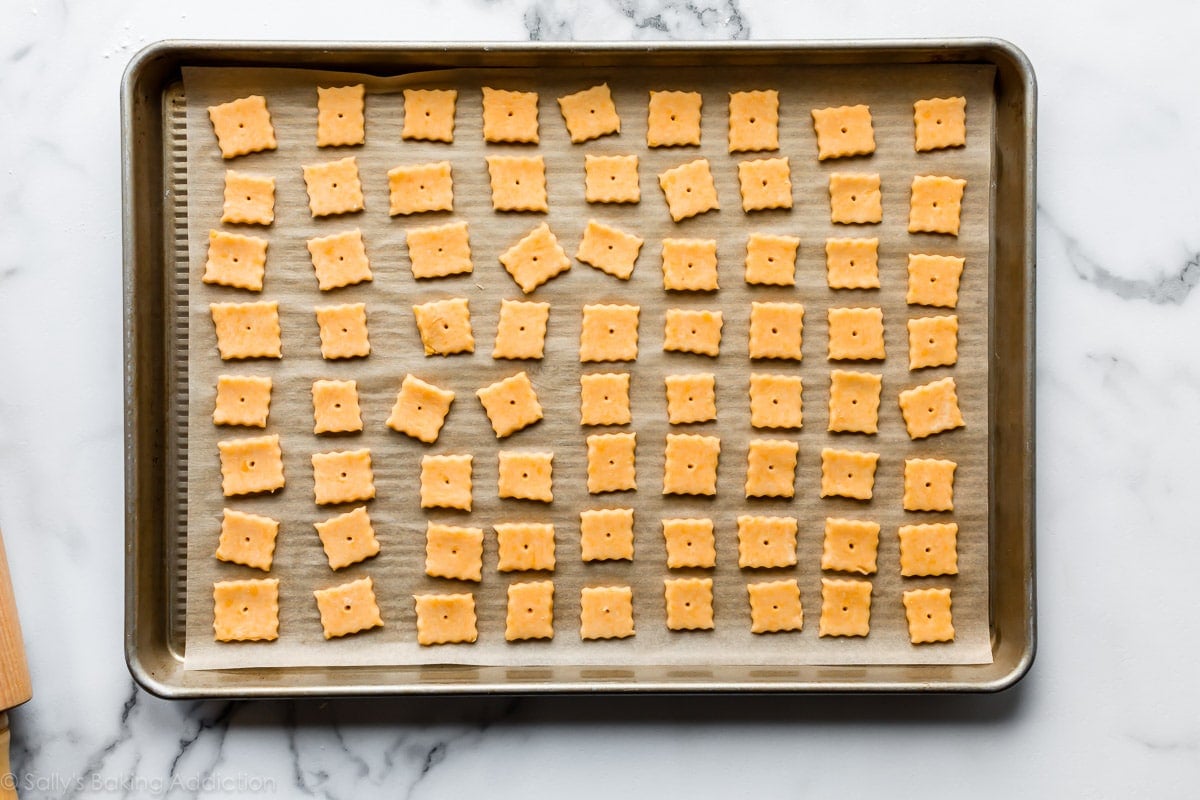
- Slice into 1 inch crackers. Using a pizza cutter, small sharp knife, or fluted pastry wheel, cut each square into 64 1-inch squares. I used a fluted pastry wheel to mimic the fluted edge of the store-bought version.
- Bake. Bake until golden brown around the edges, about 16-20 minutes.
A food processor is key to this recipe. I recommend this one or this one. Different price points, but both are great products and suitable for this recipe.
As I patted it into squares, I noticed the dough felt a little dry. Have a little extra cold water nearby to moisten your fingers if needed. After you pat the dough into 6-inch squares, wrap it up and refrigerate it for 45 minutes.
After refrigerating, roll each square out until it’s about 1/8 inch thick. Trim the sides so they’re straight, then cut into squares. I use a fluted pastry wheel.

If desired, poke a hole in the center of each square. Use a skewer or large toothpick.
Before baking, I topped the crackers with a little sea salt! These crackers are obviously not the healthiest snack, but I feel better serving them compared to the store-bought versions. I know exactly what’s in them and they certainly make a fun homemade treat.
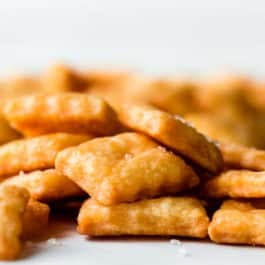
Are They Crunchy?
So, are these homemade cheese crackers crunchy? They can be, yes! I found that if I slightly extended the bake time to about 19-20 minutes, the crackers had a crunch comparable to the store-bought version. If you prefer a slightly softer cracker, stick with about 16 minutes. I personally loved the softer texture!
Keep in mind that since there’s no added preservatives, the crackers will soften up after a couple days. Store them in a loosely covered container to maintain some crunchiness. However, I’m not sure how much “storing” instructions you’ll need—I’m certain 1 batch won’t last more than an hour. These homemade crackers are truly addicting. I love this recipe for homemade artisan crackers, too!


More Homemade Snacks
- Homemade Soft Pretzels
- Soft Oatmeal Raisin Cookie Granola Bars
- Baked Sweet Potato Fries
- Honey Mustard Pretzel Pieces
- Dark Chocolate Sea Salt Almonds
- Homemade Caramel Corn
And for even more family friendly recipe ideas, be sure to check out this list of 30+ back to school recipes.
Homemade Cheese Crackers
- Prep Time: 1 hour
- Cook Time: 16 minutes
- Total Time: 1 hour, 30 minutes
- Yield: 128 small crackers
- Category: Snack
- Method: Baking
- Cuisine: American
Description
Make homemade cheese crackers with only 6 ingredients! Chilling the dough for 45 minutes is important– the crackers won’t hold their shape otherwise. You’ll appreciate the straightforward instructions and quick baking time!
Ingredients
- 6 ounces sharp yellow cheddar cheese, shredded (1 and 1/2 cups shredded)*
- 1 cup (125g) all-purpose flour (spooned & leveled)
- 1 and 1/2 teaspoons cornstarch
- 1/4 teaspoon salt
- 6 Tablespoons (85g) unsalted butter, cold and cut into 6 pieces
- 2 Tablespoons cold water
- optional: sea salt for sprinkling
Instructions
- Process cheddar cheese, flour, cornstarch, and salt together in a food processor until combined, about 30 seconds. Add butter and process until mixture resembles wet sand, about 20 seconds. Add water and pulse until dough forms large clumps, about 10 pulses.
- Transfer dough to a lightly floured work surface. Divide in half and pat each into a 6-inch square. (No need to use a rolling pin, just pat with hands.) If the dough feels dry, moisten your fingers with cold water. Carefully wrap each in plastic wrap and refrigerate until firm, about 45 minutes and up to 2 days.
- Preheat oven to 350°F (177°C). Line 2 large baking sheets with parchment paper or silicone baking mats.
- Unwrap each dough square. Place each on a lightly floured work surface and roll out into a 9-inch square. Doesn’t need to be perfect! Using a fluted pastry wheel, pizza cutter, or small sharp knife, trim dough into a neat 8 inch square. Slice square into 8 strips, each 1 inch wide, then make 8 perpendicular slices, each 1 inch wide. Each 8-inch square will have 64 squares (crackers).
- Place squares on prepared baking sheet. Use a skewer or large toothpick to poke a hole through the center of each. Lightly sprinkle with sea salt, if desired. Bake until golden brown around the edges, about 16-18 minutes, rotating the baking sheets halfway through baking. For crunchier crackers, bake for 20 minutes.
- Remove from the oven and cool completely on the baking sheet before serving.
- Store leftover crackers at room temperature for up to 1 week. If tightly sealed, they’ll lose their crunch. Feel free to keep the lid slightly ajar to maintain some crunchiness.
Notes
- Freezing Instructions: You can freeze the wrapped dough instead of refrigerating it in step 2. Freeze up to 3 months. Thaw in the refrigerator and bring to room temperature for 10 minutes before continuing with the recipe.
- Special Tools (affiliate links): Food Processor (I also own and love this one) | Baking Sheets | Silicone Baking Mats or Parchment Paper | Rolling Pin | Fluted Pastry Wheel or Pizza Cutter
- Cheese: Instead of classic yellow cheddar, white cheddar is a wonderful substitute. In fact, any medium-hard cheese is great. Avoid soft cheeses.
- I doubled the recipe found in the cookbook. Feel free to halve this recipe to yield less crackers or double the recipe for more. The original recipe (which is half of this one) calls for 1 teaspoon of cornstarch, but I found 2 teaspoons made the crackers too soft. I reduced the double recipe to 1 and 1/2 teaspoons.
Recipe reprinted in partnership with America’s Test Kitchen from The Complete Baby and Toddler Cookbook


Reader Comments and Reviews
I’m planning to make these with my grandson. From the comments, it seems that refrigerating the precooked dough after they are cut into the 1 inch crackers is important. How long do you recommend I refrigerate at that point before baking in oven? Thank you
Hi Deb, it’s best to refrigerate this dough after it’s prepared. I usually do not refrigerate the shape crackers before baking, but you certainly could for up to 1-2 days.
I have made these twice now, and love them. I’m glad I read the comments before I baked them. You really do need to put the cut out crackers back into the fridge before you bake them given the high butter content of the dough. I added some fresh grated Parmesan to the extra sharp cheddar, and also added a quarter teaspoon of cayenne pepper. The pepper does not make it hot, it just sort of makes the cheese flavor pop!
Have you tried baking them in an air fryer? Will that result in crispy crackers?
Hi Hawra, we haven’t tried making these in an air fryer, but let us know if you do!
Can I use Almond or Coconut flour?
Hi Ray, we don’t recommend it. Almond flour and coconut flour have very different baking properties than all-purpose flour, so it would take a bit of recipe testing to guarantee results. Best to stick with all-purpose flour here!
excellent recipe, thank you!
…substitute parmesan for cheddar and add two (2) teaspoons of garlic powder for a delicious garlic/parm variation.
What is the significance of the asterisk after the cheese and corn starch in the recipe? I am not finding it anywhere on the page. Thanks!
Hi Mandy! See the notes after the recipe for details on those two ingredients.
This is a very good recipe. For me it could use a little more cheese but I do like how it taste like a lighter verison of cheez-its. These would go good with soup or just by itself. Also great how its quick and easy. Thanks Sally.
Can I swap out flour for an alternative? Almond, cassava etc?
Never mind I tried cassava and it worked out great! Not as fluffy as with flour but same great taste.
Amazing flavour! I’ll be trying this recipe with different kinds of cheese just for fun. Thank you for sharing!
These crackers are easy to make and so much better than store bought. I use parmesan or cheddar, either one works. We also like to add just a touch of cayenne pepper for a little spice. It’s fantastic with tomato soup!
Holy smokes! I am amazed at how fantastic these are! Better than store-bought by a long way. I bought my first thing of Maldon salt recently, and I sprinkled that on the crackers before baking. I wasn’t sure how well it would stick given it just goes straight on the plain dough but it worked like gang busters. Absolutely delicious. I’m assuming that, like pie dough, this will freeze just fine. There really are only so many crackers I should shove into my maw in a two or three day period! It will give me something to look forward to.
They really do need to cool after they come out of the oven, so I’d tack on at least another 15 minutes to the start to finish time if you’re going to make them just before you’ll want them.
Also, at the stage where you add the water, I wasn’t getting “large clumps,” so I added one more tablespoon of water. Voila, I had clumps. I weighed both the flour and the butter, so who knows why mine wanted more water, but they’re fantastic so I’m not going to question it.
These are great! My husband was a little skeptical because he didn’t think they would be flavorful enough, but he ended up loving them. Nice easy instructions.
A very fun snack and even better activity with the kids. Thanks for sharing. We’ll be making them often!
I’ve made these twice now. Both times I used grated Parmesan cheese. My second batch was too crumbly and I’d refrigerated it overnight. When I found I couldn’t work with the dough, I broke it into pieces, put it into my food processor and added more water, which made the dough workable. I used my pasta maker to roll the dough. DELICIOUS! I will make these again and again!
Can they be made using parmesan?
TIA
Hi Gazel, I have only tested them with cheddar but if you have a block of parmesan that you grate yourself it should work. Please let me know if you try it!
I never ever comment on anything ever but I had to come and say that this is the BEST recipe! I made these for my fiancé and the whole house smells amazing. He looked at the container and just says “oh no I’m going to eat them all…”.
Thank you!!
Thank you so much for including grams and weight measurements, there are few things I like less than trying to measure out a cup of butter.
So I had some leftover that didn’t fit on my sheet, so I air fried them and OMG. 350 for 7 minutes and I think it’s even better than out of the oven!
Are there any substitutions available for cornstarch? Thanks!
Hi Sally! I am curious if you think I can wrap the dough in Bee’s wrap before putting it in the fridge. I don’t have saran wrap anymore. Thank you!
Made these for the first time and they were fantastic!! Some notes others might find helpful—
1. I left half the dough in the fridge overnight & made them the next day just fine.
2. No adverse effects from re-rolling the scraps. We wasted nothing!!
3. Definitely cook them the full 20 min.
4. We experimented with tiny animal shaped cookie cutters & they turned out perfectly. I chilled the dough again after cutting out the shapes before putting them in the oven.
When I saw how simple the ingredients list is for these, I knew right away I would love them! I just made (and devoured!) a batch with smoked cheddar and smoked paprika.. DELICIOUS!
I don’t often post reviews. Im a fairly experienced home baker but these days I’m looking for easier recipes to make with my toddler. I’m so happy I found this recipe. Not too many ingredients, my toddler was able to do most of the initial steps herself (with some help) she had so much fun! I halved the batch not being sure if she would like them but she ate half immediately. I used a mix of aged cheddar and gruyere. Thank you do much for the wonderful recipe!!
So good!!! Thank so much for the great recipe and easy-to-follow directions! Such a big hit in our house!
Hi, I was just wondering how long these will keep out on the counter do you think?
Store leftover crackers at room temperature for up to 1 week. If tightly sealed, they’ll lose their crunch. Feel free to keep the lid slightly ajar to maintain some crunchiness.
I absolutely loved these cheesy crackers. I am not a baker, and, with your simple recipe I can now make my own crackers. Thank you! I look forward to trying more recipes.
Hi Sally,
I have made several of your recipes and they have ALL been a Big Hit! Can I make the crackers gluten free? If so,
what flour or other ingredients would be suggested?
Hi Diana, I’m so happy you have been enjoying my recipes! I haven’t tested these crackers with gluten free flour but let me know if you try!
These crackers are amazing! I have changed out for almond flour and gluten free flour and work amazing! A huge hit in our house 😉
Hey Sally! I just made these crackers and I can’t believe how easy they were to do. I was afraid my little food processor was going to be too small but it was perfect for these. They really do taste like Cheez its! So good. My chip-chomping 6-year-old is going to devour these when he gets home. If I don’t eat them all myself first, haha. As always, thank you for sharing.
Flavor is good, but even will chilling the dough mine spread out all over the place making one giant cheese cracker I guess they got too warm when I was slicing them and I should have rechilled the dough. Thought it went pretty quickly, but the results indicate otherwise. Chill and chill again. Will try again.
Just perfect ! BUT… I need to double your recipe 😀
Hi Sally! Do you know if these would freeze well? Interested in making multiple batches for Christmas, but would need to freeze them since Christmas is still nearly four weeks away. Thoughts?
Yes you can definitely freeze the baked and cooled crackers. When they thaw, however, they won’t be as crunchy as they are fresh out of the oven.
Thanks Sally! Well then once thawed, I think popping back into the oven for a few minutes would crisp them up again.