


Have you tried homemade croissants yet?
Today I’m sharing a croissant variation. Am I allowed to admit that these are even better than the original? Ultra thin layers. Buttery crispness. Melted chocolate. Confectioners’ sugar dusting. Simple. Decadent. There’s absolutely nothing on earth better than a warm chocolate croissant unless that warm chocolate croissant was proudly handmade in your own kitchen.
You’ve come to the right place today. 🙂
I’m not going into specifics today since I typed a novel about croissants the other week. Rather, we’ll focus our attention on rolling the croissants with chocolate. We’re starting with the same exact croissant dough. I talk about this a lot in the croissants recipe, but it’s worth repeating: croissant dough must remain cold and requires a lot of resting. Because of all that rest, there’s a time commitment to making this pastry. Which is why croissants are a delicious weekend project!
You’ll complete steps 1-12 in the original croissants recipe. Things change when it’s time to shape the dough. Once your dough has finished the 2nd 4 hour rest, roll and shape it into a long 8×20-inch rectangle. Use your pizza cutter and slice the rectangle down the center to create two 4×20-inch rectangles. Then slice across 3x to create eight 4×5-inch rectangles.
So far, this is exactly what you do when you make the original croissants.
Instead of slicing each of those rectangles diagonally into triangles, you’ll cut them in half to create 16 smaller rectangles.
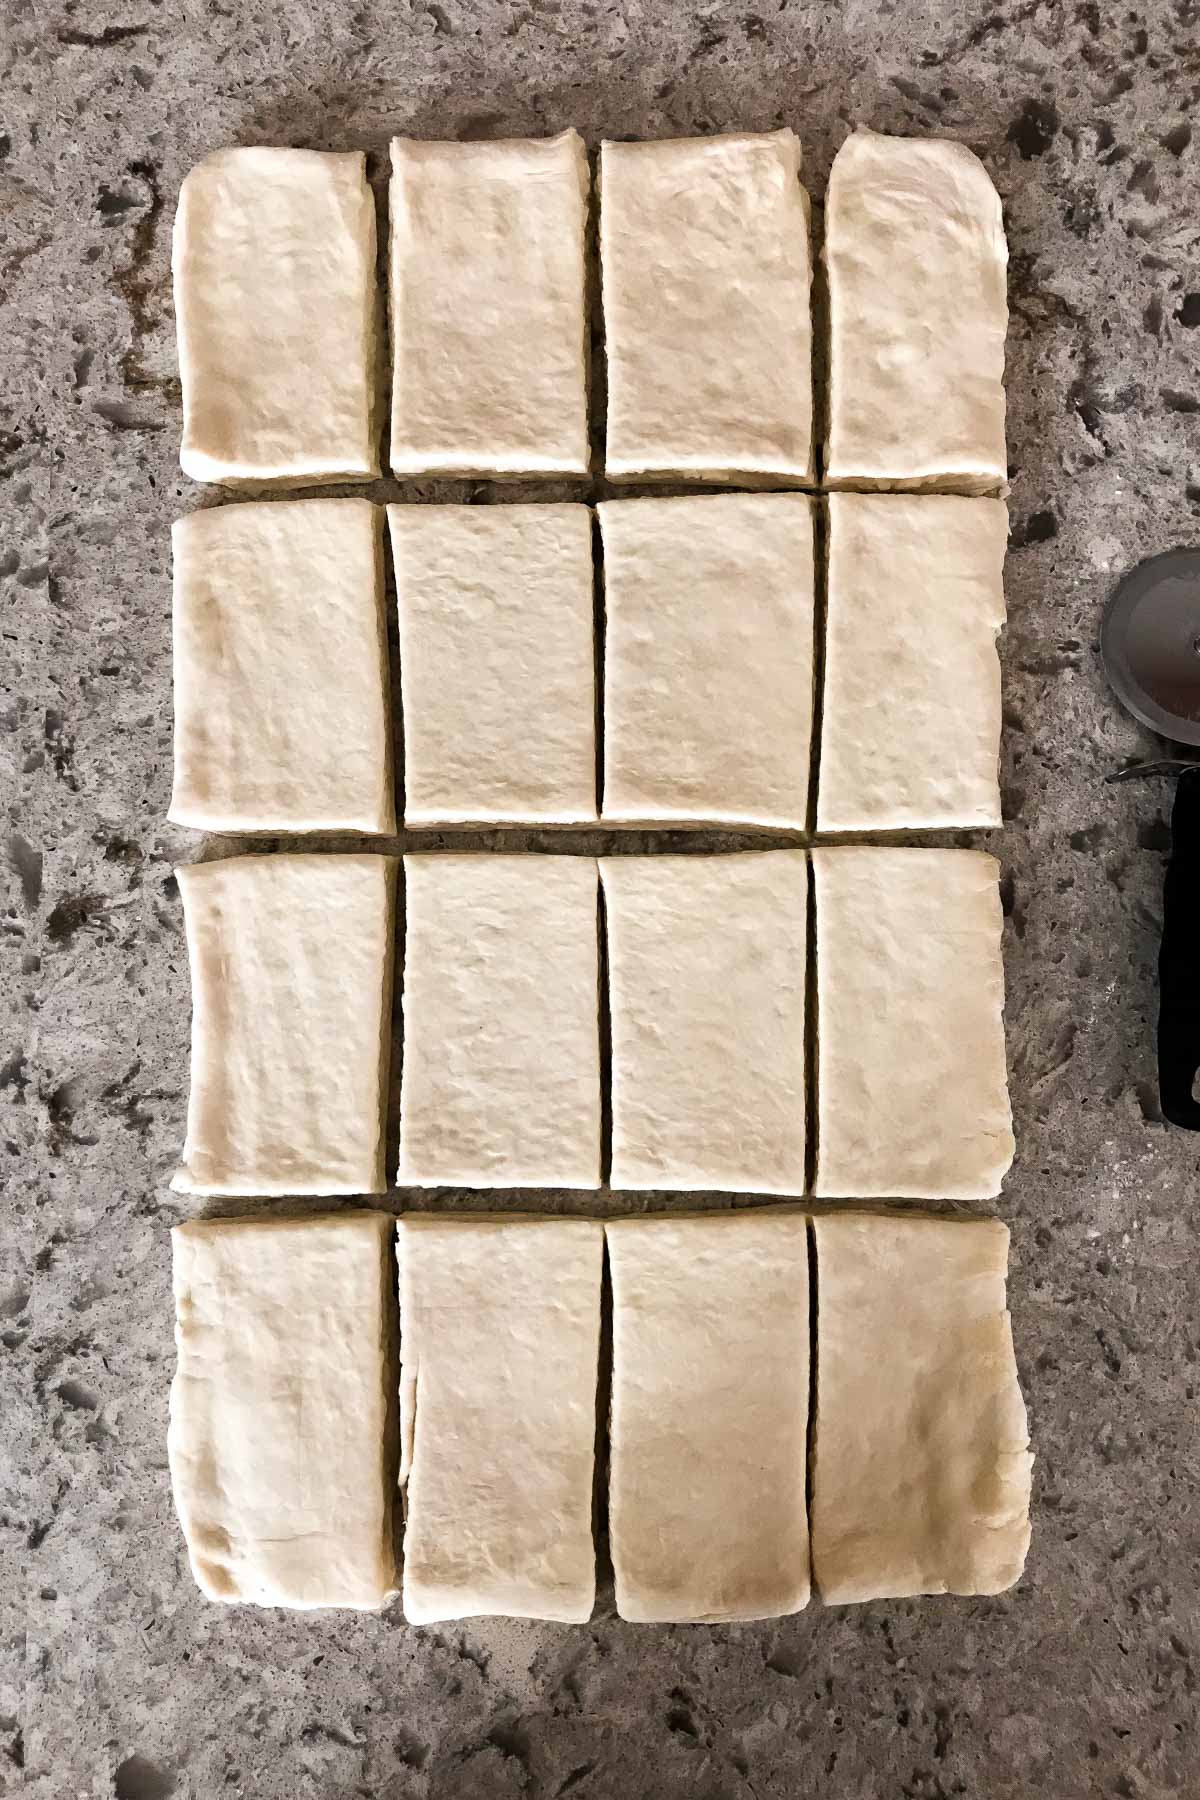
You could definitely keep the same triangle shape as we do with regular croissants, but the rectangle shape protects the chocolate from oozing out too much. And you can fit more chocolate inside. 🙂
Speaking of chocolate!

There are special conveniently sized chocolate batons you can purchase—just search the internet for chocolate batons—but I’d rather use the same chocolate I use for everything else: baking chocolate. I just buy it at the grocery store. You can use any brand of baking chocolate you like best, but I prefer the thinness of Ghirardelli’s baking bars. They slice thinly and neatly, fitting snug inside the croissant dough.
I like to use a darker chocolate like bittersweet or semi-sweet.
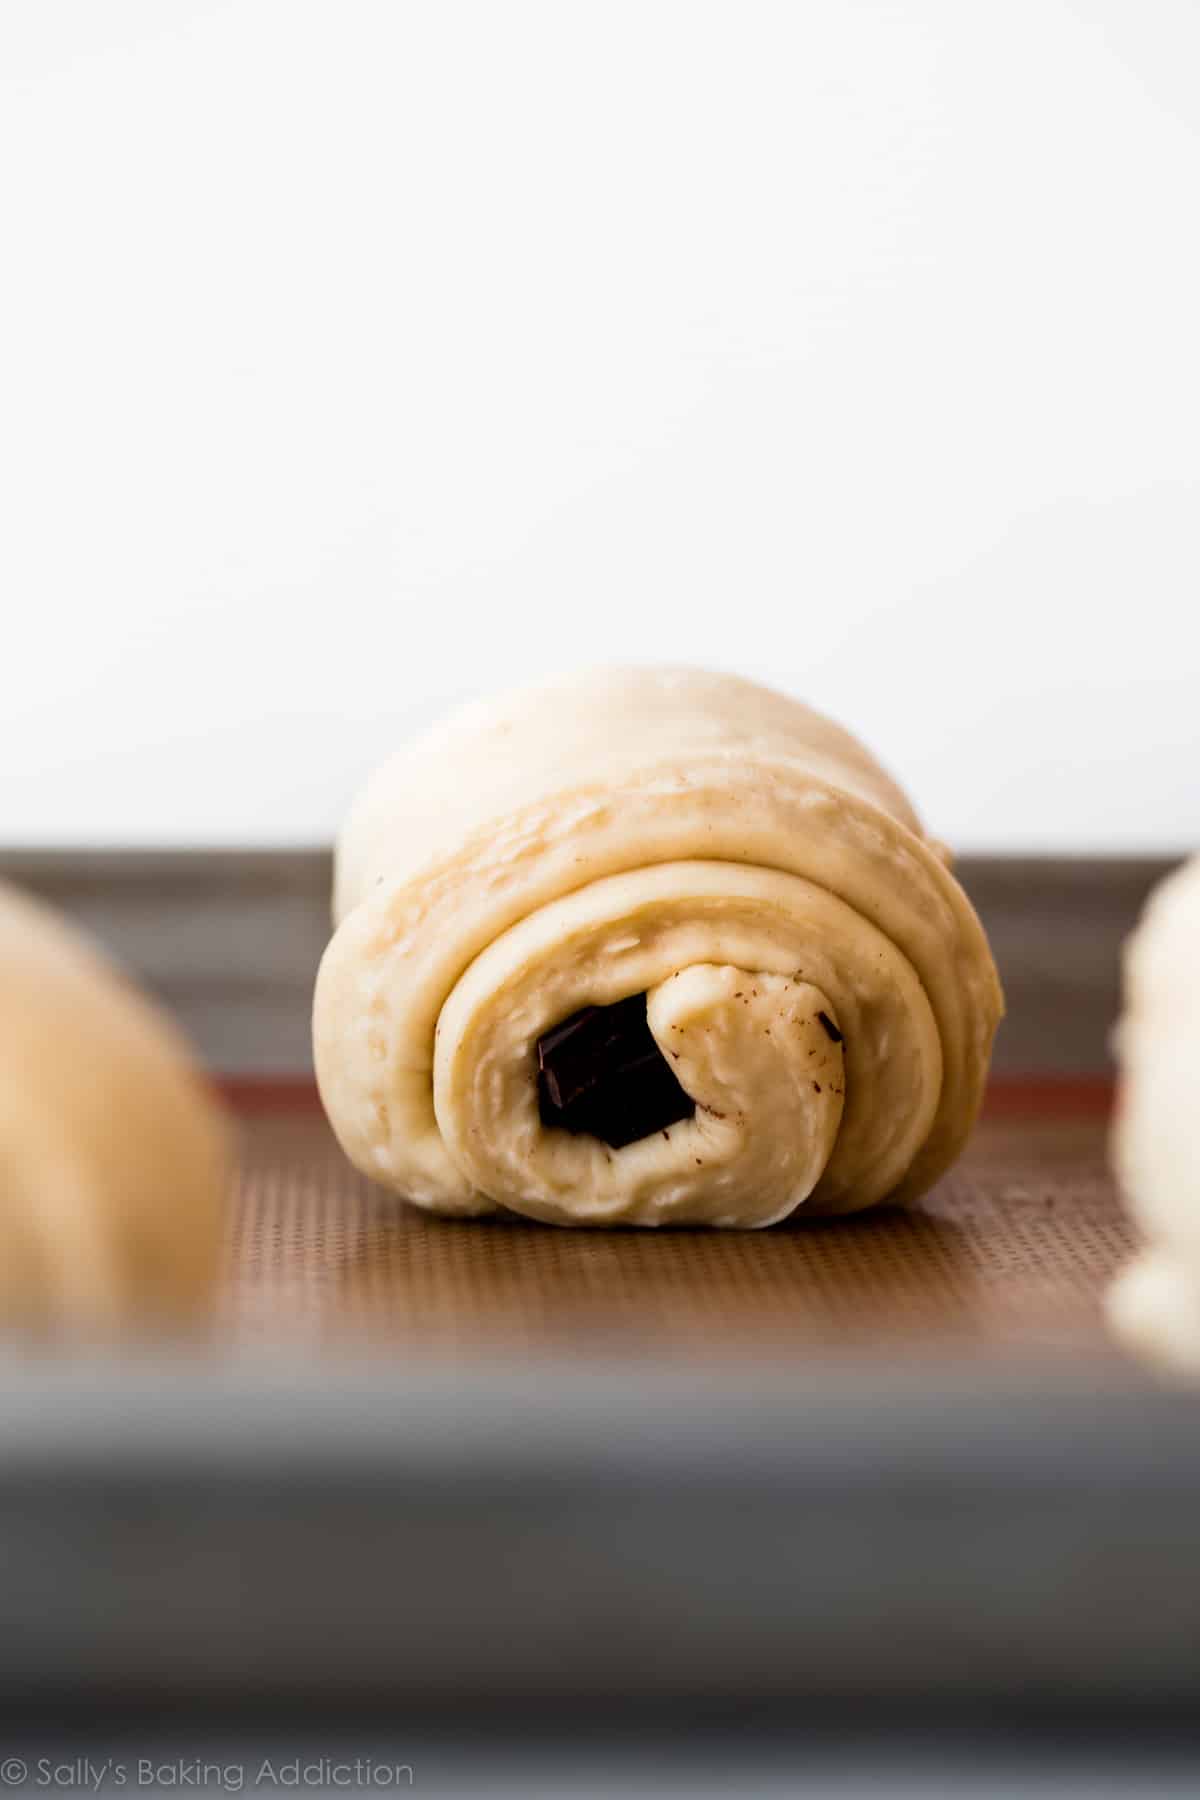
Now let’s roll up the chocolate croissants. Take each rectangle and gently stretch it out with your hands to be 8 inches long. Place a few pieces of chocolate at one end and roll it up tightly inside.
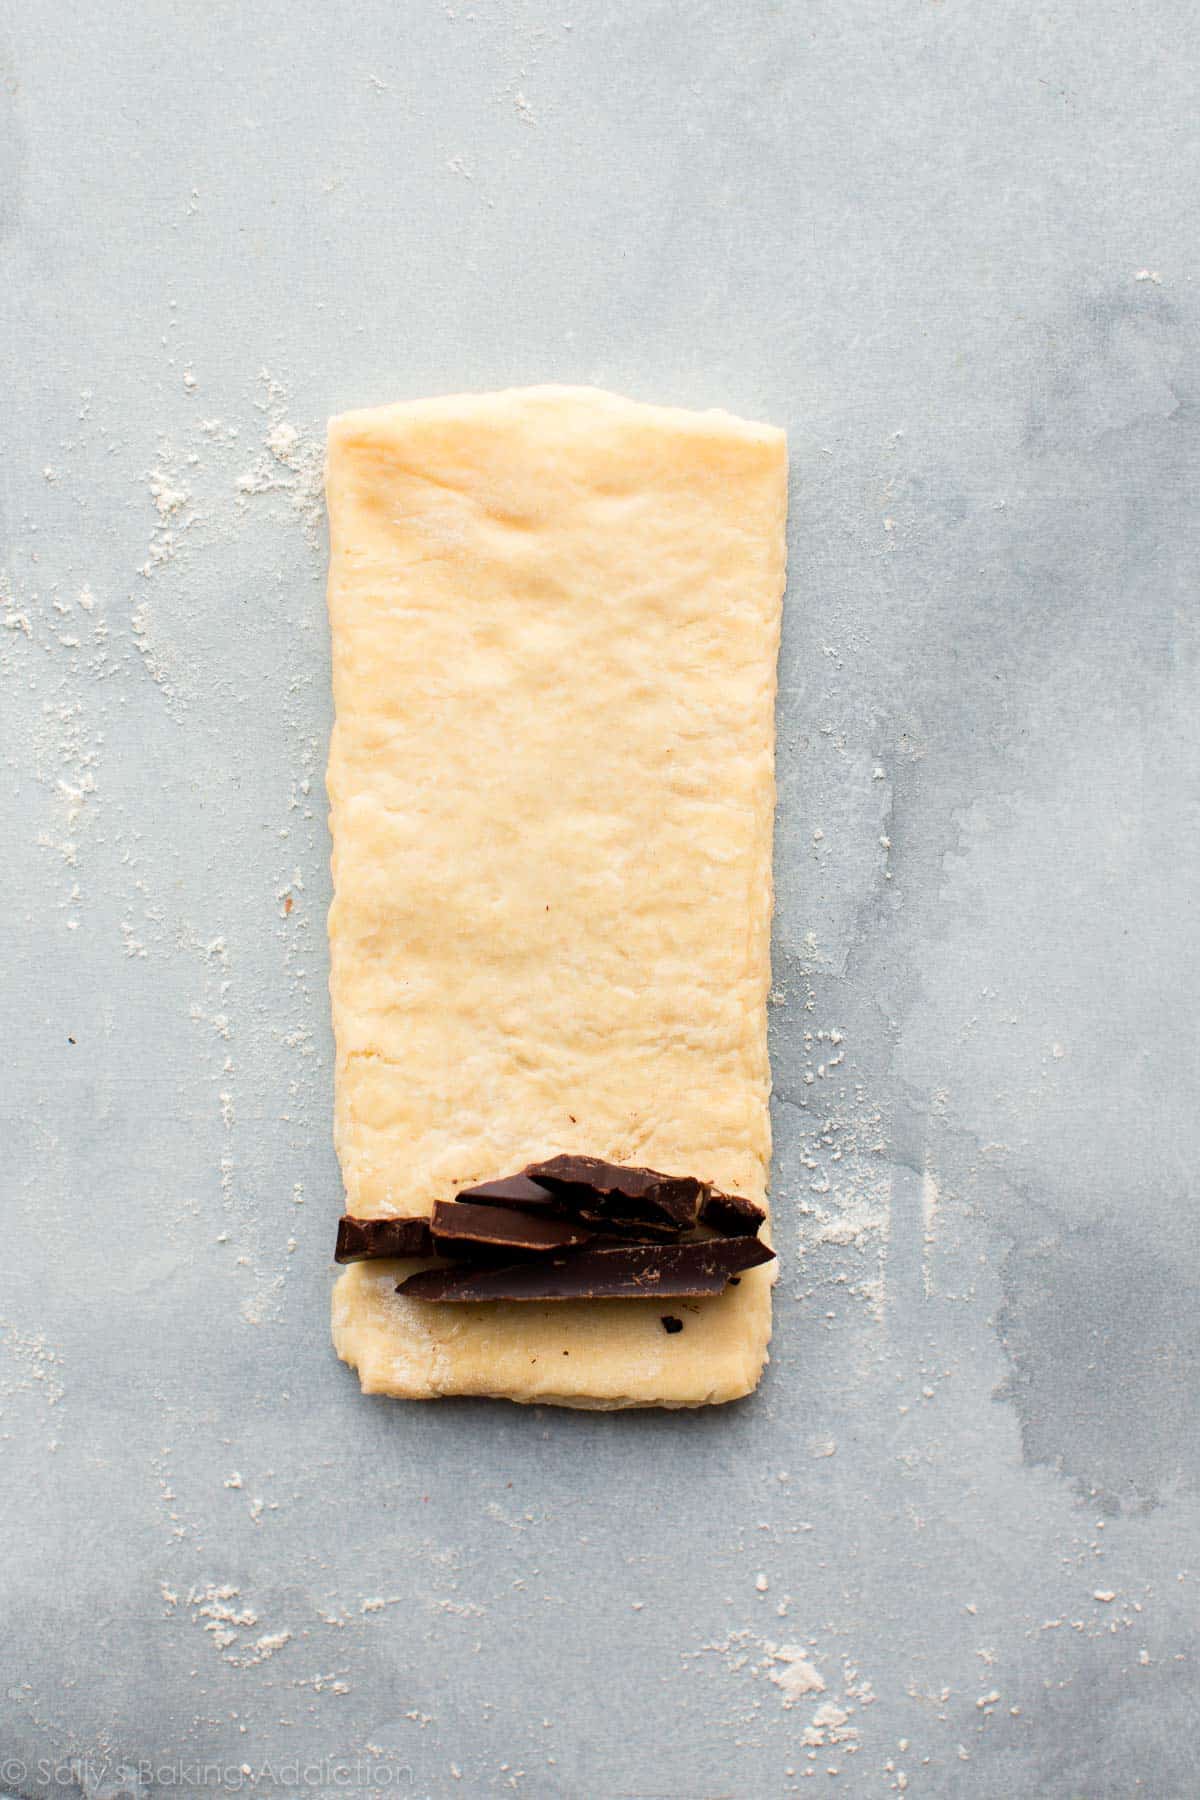
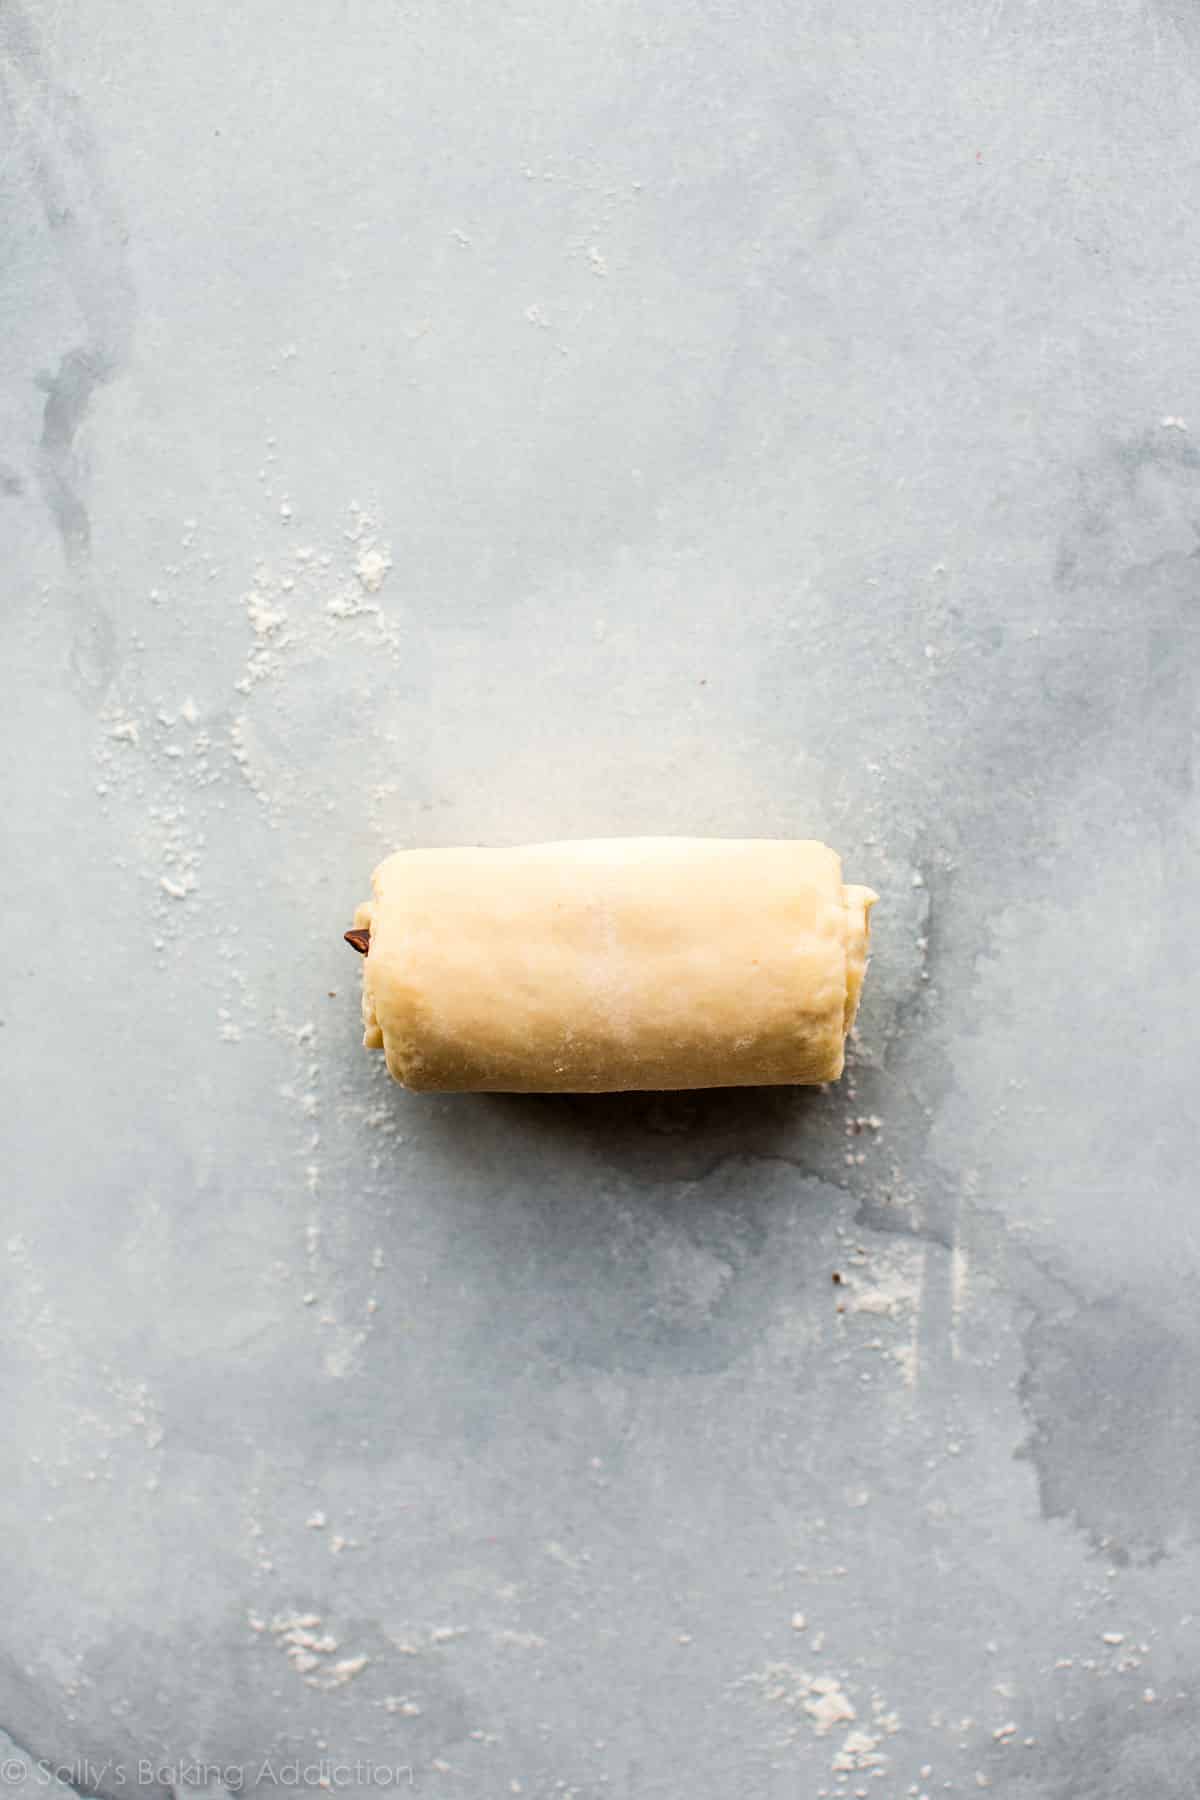
Like a little sleeping bag for chocolate!
We’re back to the original croissant recipe from here on out. Allow the shaped chocolate croissants to proof at room temperature for 1 hour, then continue in the refrigerator for another. I prefer the shaped chocolate croissants to be cold going in the oven because they won’t spread as much. The chocolate croissants will rise and proof at room temperature and continue to do so in the refrigerator.
After this time, they’ll be a little more puffy and ready to bake.
Brush them with an egg wash and 20 minutes later, you’ll understand the hype. Like I said before, there’s absolutely nothing better than a homemade fresh croissant filled with a river of melted chocolate. They’re golden brown with hundreds of crisp flaky layers (and that’s from a dough we laminated 3x!).
A snow shower of confectioners’ sugar is necessary.


Chocolate croissants, or pain au chocolat in French!
If you don’t feel *quite* ready to tackle croissants, you can also make a loaf of croissant bread with slightly shorter rest times and easier shaping. Or, if you’re ready for another challenge, try these homemade cruffins next!
Print
Homemade Chocolate Croissants (Pain au Chocolat)
- Prep Time: 12 hours, 45 minutes
- Cook Time: 20 minutes
- Total Time: 13 hours, 10 minutes
- Yield: 16 croissants
- Category: Pastries
- Method: Baking
- Cuisine: French
Description
Extra flaky and buttery homemade chocolate croissants (Pain au Chocolat) are incredible warm from the oven. Recreate this French bakery classic at home!
Ingredients
- 1/4 cup (4 Tbsp; 56g) unsalted butter, softened to room temperature
- 4 cups (500g) all-purpose flour (spooned & leveled), plus more for rolling/shaping
- 1/4 cup (50g) granulated sugar
- 2 teaspoons salt
- 1 Tablespoon active dry or instant yeast
- 1 and 1/2 cups (360ml) cold whole milk
- one 4-ounce bar (113g) semi-sweet or bittersweet chocolate, coarsely chopped
- optional: confectioners’ sugar for dusting
Butter Layer
- 1 and 1/2 cups (340g) unsalted butter, softened to room temperature
- 2 Tablespoons (16g) all-purpose flour
Egg Wash
- 1 large egg
- 2 Tablespoons (30ml) whole milk
Instructions
- Preliminary notes: I have lots of information to prepare you to make homemade chocolate croissants. A complete guide to making the croissant dough, with a video and step-by-step photographs, can be found in my original croissants recipe. That post will help you get through the first several steps. Additionally, you can see the post above for a visual for how the chocolate croissants are shaped, which begins in step 13 below. Make room in the refrigerator for a baking sheet. In step 6 and again in step 13, you will need room for 2 baking sheets.
- Make the dough: Cut the butter in four 1-Tablespoon slices and place in the bowl of an electric stand mixer fitted with the dough hook attachment (or you can use a handheld mixer or no mixer, but a stand mixer is ideal). Add the flour, sugar, salt, and yeast. Turn the mixer on low-medium speed to gently combine the ingredients for 1 minute. With the mixer running, slowly pour in the milk. Once all of the milk is added, turn the mixer up to medium speed and begin to knead the dough.
- Knead the dough: Keep the dough in the mixer and beat for an additional 5 full minutes, or knead by hand on a lightly floured surface for 5 full minutes. (If you’re new to bread-baking, my How to Knead Dough video tutorial can help here.) If the dough becomes too sticky during the kneading process, sprinkle 1 teaspoon of flour at a time on the dough or on the work surface/in the bowl to make a soft, slightly tacky dough. Do not add more flour than you need because you do not want a dry dough. After kneading, the dough should still feel a little soft. Poke it with your finger—if it slowly bounces back, your dough is ready to rest. You can also do a “windowpane test” to see if your dough has been kneaded long enough: tear off a small (roughly golfball-size) piece of dough and gently stretch it out until it’s thin enough for light to pass through it. Hold it up to a window or light. Does light pass through the stretched dough without the dough tearing first? If so, your dough has been kneaded long enough and is ready to rest. If not, keep kneading until it passes the windowpane test.
- Remove dough from the bowl and, with floured hands, work it into a ball. Place the dough on a lightly floured silicone baking mat lined, lightly floured parchment paper lined, or lightly floured baking sheet. (I recommend a silicone baking mat because you can roll the dough out in the next step directly on top and it won’t slide all over the counter.) Gently flatten the dough out, and cover with plastic wrap or aluminum foil. Place the entire baking sheet in the refrigerator and allow the covered dough to rest in the refrigerator for 30 minutes.
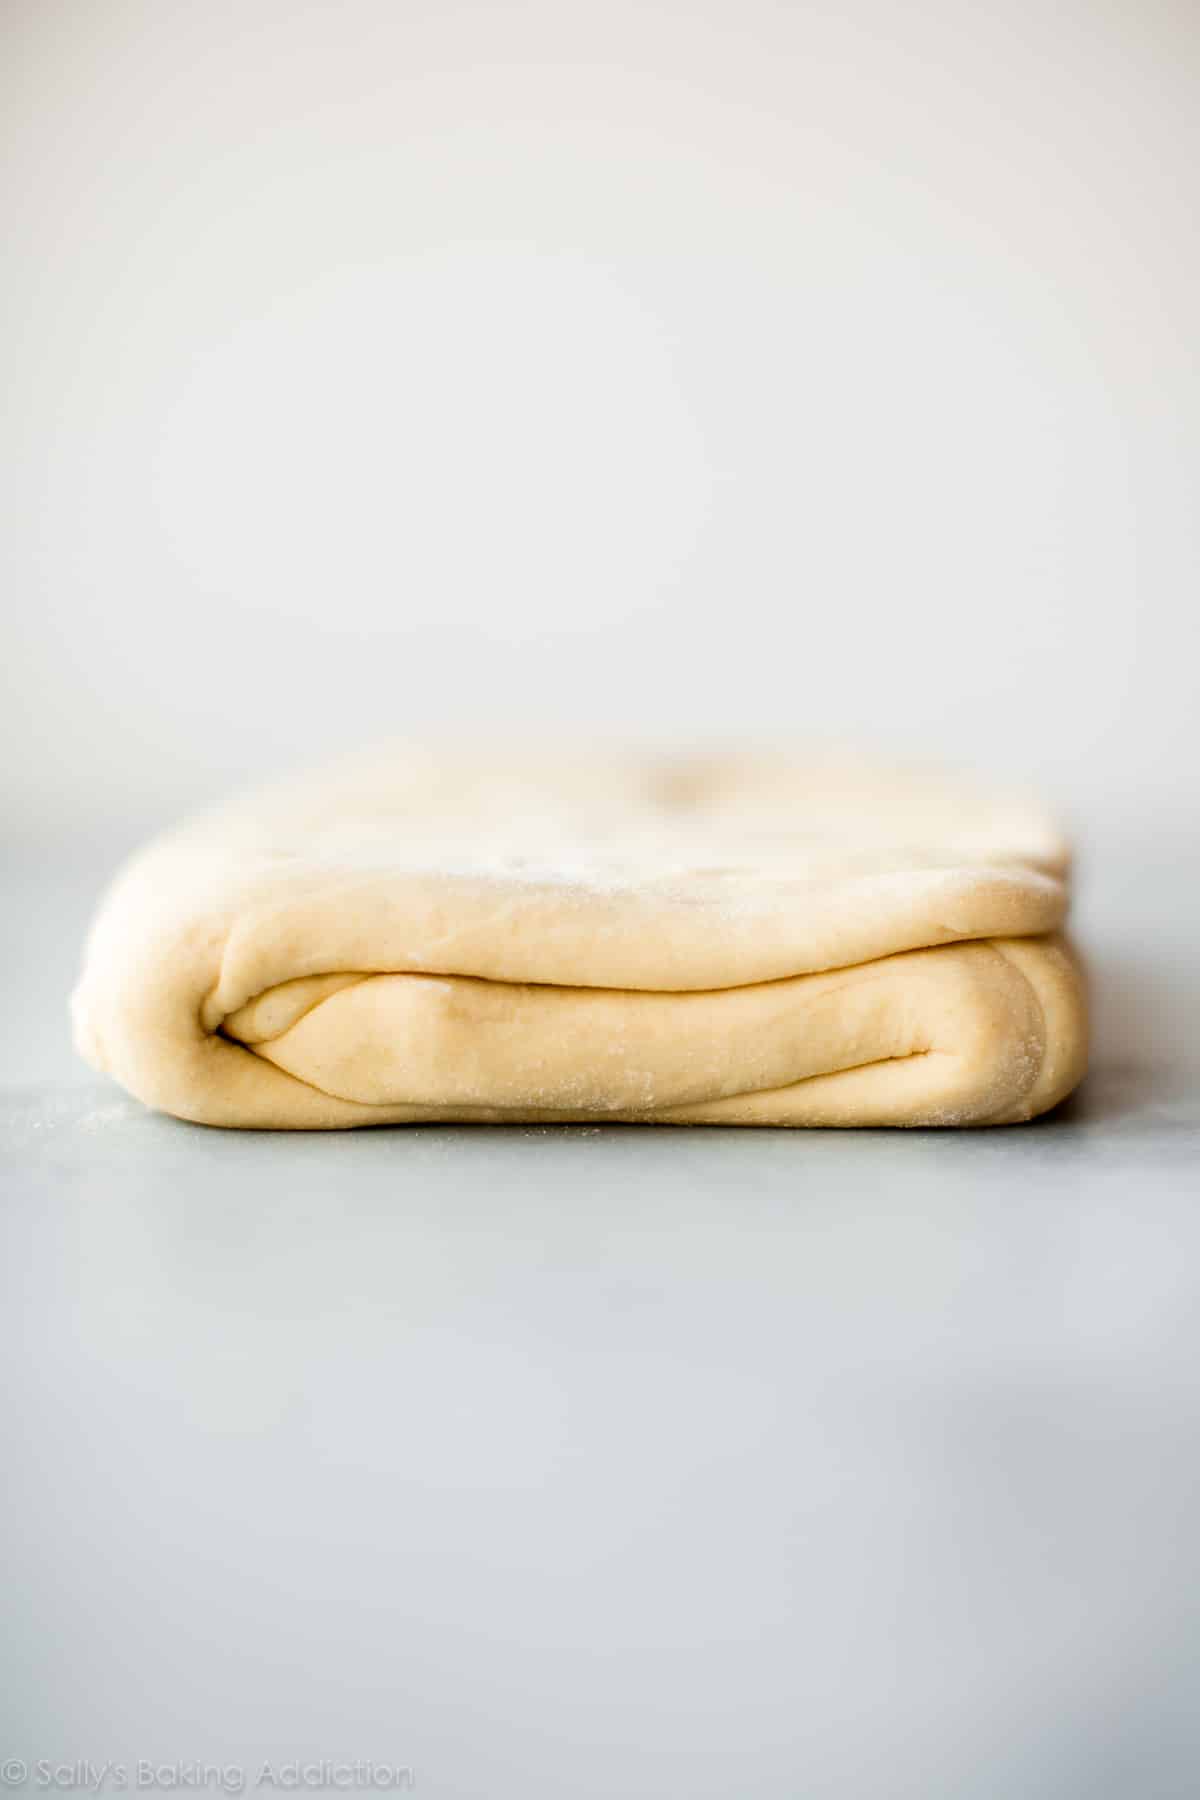
- Shape the dough: Remove the dough from the refrigerator. I like to keep the dough on the silicone baking mat when I’m rolling it in this step because the mat is nonstick and it’s a handy guide for the exact measurement. Begin flattening out the dough with your hands. You’re rolling it out into a rectangle in this step, so shaping it with your hands first helps the stretchy dough. Roll it into a 14×10-inch rectangle. The dough isn’t extremely cold after only 30 minutes in the refrigerator, so it will feel more like soft play-doh. Be precise with the measurement. The dough will want to be oval shaped, but keep working the edges with your hands and rolling pin until you have the correct size rectangle.
- Long rest: Place the rolled out dough back onto the baking sheet (this is why I prefer a silicone baking mat or parchment because you can easily transfer the dough). Cover the rolled out dough with plastic wrap or aluminum foil, place the entire baking sheet in the refrigerator and allow the covered dough to rest in the refrigerator for 4 hours or overnight. (Up to 24 hours is ok.)
- Butter layer (begin this 35 minutes before the next step so the butter can chill for 30 minutes): In a large bowl using a hand-held mixer or stand mixer fitted with a paddle or whisk attachment, beat the butter and flour together until smooth and combined. Transfer the mixture to a silicone baking mat lined or parchment paper lined baking sheet. (Silicone baking mat is preferred because you can easily peel the butter off in the next step.) Using a spoon or small spatula, smooth out into a 7×10-inch rectangle. Be as precise as you can with this measurement. Place the entire baking sheet in the refrigerator and chill the butter layer for 30 minutes. (No need to cover it for only 30 minutes.) You want the butter layer firm, but still pliable. If it gets too firm, let it sit out on the counter for a few minutes to gently soften. The more firm the butter layer is the more difficult it will be to laminate the dough in the next step.
- Laminate the dough: In this next step, you will be rolling out the dough into a large rectangle. Do this on a lightly floured counter instead of rolling out on your silicone baking mat. The counter is typically a little cooler (great for keeping the dough cold) and the silicone baking mat is smaller than the measurement you need. Remove both the dough and butter layers from the refrigerator. Place the butter layer in the center of the dough and fold each end of the dough over it. If the butter wasn’t an exact 7×10-inch rectangle, use a pizza cutter or sharp knife to even out the edges. Seal the dough edges over the butter layer as best you can with your fingers. On a lightly floured counter, roll the dough into a 10×20-inch rectangle. It’s best to roll back and forth with the shorter end of the dough facing you. Use your fingers if you need to. The dough is very cold, so it will take a lot of arm muscle to roll. Again, the dough will want to be oval shaped, but keep working it with your hands and rolling pin until you have the correct size rectangle. Fold the dough lengthwise into thirds as if you were folding a letter. This was the 1st turn.
- If the dough is now too warm to work with, place folded dough on the baking sheet, cover with plastic wrap or aluminum foil, and refrigerate for 30 minutes before the 2nd turn. I usually don’t have to.
- 2nd turn: Turn the dough so the short end is facing you. Roll the dough out once again into a 10×20-inch rectangle, then fold the dough lengthwise into thirds as if you were folding a letter. The dough must be refrigerated between the 2nd and 3rd turn because it has been worked with a lot by this point. Place the folded dough on the baking sheet, cover with plastic wrap or aluminum foil, and refrigerate for 30 minutes before the 3rd turn.
- 3rd turn: Roll the dough out once again into a 10×20-inch rectangle. Fold the dough lengthwise into thirds as if you were folding a letter.
- Long rest: Place the folded dough on the lined baking sheet, cover with plastic wrap or aluminum foil, and refrigerate for 4 hours or overnight. (Up to 24 hours is ok.)
- At the end of the next step, you’ll need 2 baking sheets lined with silicone baking mats or parchment paper. The dough is currently on a lined baking sheet in the refrigerator, so you already have 1 prepared!
- Shape the croissants: Remove the dough from the refrigerator. On a lightly floured counter, roll the dough out into an 8×20-inch rectangle. Use your fingers if you need to. Once again, the dough is very cold, so it will take a lot of arm muscle to roll. The dough will want to be oval shaped, but keep working it with your hands and rolling pin until you have the correct size rectangle. Using a pizza cutter or sharp knife, slice the dough in half vertically. Each skinny rectangle will be 4 inches wide. Then cut 3 even slices horizontally, yielding 8 4×5-inch rectangles. See photo above for a visual. Cut each rectangle in half lengthwise so you have 16 2×5-inch rectangles. Work with one rectangle at a time. Using your fingers or a rolling pin, stretch it to be about 8 inches long. Do this gently as you do not want to flatten the layers. Place a few small pieces of chocolate in a single layer at one end and tightly roll the dough up around the chocolate. Make sure the end is on the bottom. Repeat with remaining dough, placing the shaped croissants on 2 lined baking sheets, 8 per sheet. Loosely cover with plastic wrap or aluminum foil and allow to rest at room temperature (no warmer! I suggest just keeping on the counter) for 1 hour, then place in the refrigerator to rest for 1 hour or up to 12 hours. (Or freeze, see freezing instructions. I prefer the shaped croissants to be cold going into the oven.
- Preheat oven to 400°F (204°C).
- Egg wash: Whisk the egg wash ingredients together. Remove the croissants from the refrigerator. Brush each lightly with egg wash.
- Bake the croissants: Bake until croissants are golden brown, about 20 minutes. Rotate the pans halfway through baking. If croissants show signs of darkening too quickly, reduce the oven to 375°F (190°C).
- Remove chocolate croissants from the oven and place on a wire rack to cool for a few minutes before serving. They will slightly deflate as they cool. If desired, dust with confectioners’ sugar before serving.
- Croissants taste best the same day they’re baked. Cover any leftover croissants and store at room temperature for a few days or in the refrigerator for up to 1 week. You can also freeze for up to 3 months, then thaw on the counter or overnight in the refrigerator. Warm up to your liking.
Notes
- Make Ahead Instructions: Croissants are perfect for getting started ahead of time. The dough can rest for 4 hours or overnight in step 5 and again in step 11. You can also freeze the dough after the 3rd turn in the lamination process (after step 10). Instead of the 4 hour rest in the refrigerator in step 11, wrap the dough tightly in plastic wrap or aluminum foil, place in a freezer zipped-top bag, and freeze for up to 3 months. Thaw in the refrigerator and continue with step 12. You can also freeze the shaped croissants after they rest for 1 hour at room temperature in step 13. (Before placing in the refrigerator.) Cover them tightly and freeze for up to 1 month. Thaw completely in the refrigerator, then bake as directed.
- Special Tools (affiliate links): Stand Mixer (preferred), Hand Mixer, or Glass Mixing Bowl with Wooden Spoon / Silicone Spatula | Rolling Pin | Pizza Cutter | Pastry Brush | Silicone Baking Mat or Parchment Paper | Baking Sheet | Cooling Rack
- Yeast: I use and recommend Red Star Platinum, an instant yeast. Reference my Baking with Yeast Guide for answers to common yeast FAQs.
- Chocolate: You can find 4 ounce chocolate baking bars in the baking aisle. I recommend using Ghirardelli brand because the bars are thin and the thin pieces roll up neatly in the croissant dough. I use bittersweet chocolate, but you can use milk chocolate, semi-sweet, or darker chocolate.
- Keep Dough Cold: Make sure the dough is ALWAYS cold. If it warms up too much, stop what you’re doing and place the dough back in the refrigerator for 20 minutes.
- Floured Surface: Lightly flour the work surface, your hands, the dough, and the rolling pin as you work.
- Air Bubbles: If there are air bubbles in your dough, pop them with your fingers or a toothpick, then lightly flour where you popped the air bubble.
- Croissants for Brunch: I recommend starting the recipe the day before in the early afternoon. Complete steps 1-10, then let the laminated dough have a long rest in the refrigerator overnight (step 11). Begin step 13 2-3 hours before brunch.
- Dough adapted from Joy of Baking, Food & Wine, and Epicurious


Reader Comments and Reviews
Hi Sally!
Do I use half of all the ingredients to make 8 croissants?
For best success, we highly recommend making the recipe as written and freezing the extra croissants. (Always nice to have some on hand!) If you really want to halve the recipe, the dimensions should be halved too.
This was an incredible experience! The recipe was so easy to follow, I’ve made croissants in the past by watching a YouTube video but they failed. I didn’t have much hope going into this, but I wanted to try anyways since it’s been a few years since the previous batch. When it came to laminating the dough, the butter was too cold and was breaking as I was rolling it out. Instantly my heart sank and I thought I had screwed it up, but I kept going. After the second turn, I had butter breaking through the dough, but I still continued. I decided I would turn the dough 2 more times. I don’t remember what step I was at, but I had so little hope, so I decided to pray over my dough. (I know, it’s a silly thing to pray about, but God knows I have my reasons) so that’s exactly what I did. I believe entirely that God worked a miracle through my croissants today, because I’m currently sitting in front of a batch of warm, flakey, buttery, delicious croissants. They’re better than any I’ve ever had, because these are God’s croissants. Praise the Lord, and thanks be to Sally’s baking addiction for a lovely recipe that brings warmth into my home!
These turned out amazing! My first time making croissants or any kind of laminated dough. The step by step instructions and photos were so helpful. I also referenced the video of how to make croissants from another recipe of Sally’s. The only thing was that my croissants burned a little on the bottom, but after researching online it seems like I need to use a pan that is a lighter color and not so dark (I used dark metal pans). But the flavor, the flaky layers, everything was fantastic! And I live in a hot climate so I was worried it wouldn’t work. I had to do a lot of rushing the dough back into the fridge to make sure it didn’t get too hot. Overall, fantastic! Thank you so much for this recipe!
I loved this recipe a lot
They turned out great!
However, after I added the milk the dough got a little watery
Did I do anything wrong?
I use morsels just for the ease and they taste great, however after the cool they are back to feeling like morsels when you eat them. Definitely not smooth, but still tasty.
Over the past year I have made this numerous times and they never fail!! I have used different types of chocolate for the filling, however I used butterscotch one time and it elevated it even more and the compliments I got were great. I have added 2tbsp of coaco to the flour and made chocolate dough. Added cinnamon into the butter layer, and every time has been amazing. Today I am adding rose petals and vanilla to the dough and using white chocolate. Really hope its good. Thank you!
Flaky & delicious! Easy to follow.
Can I use chocolate morsels/chips rather than baking chocolate?
Hi Jen! Chocolate chips contain stabilizers, so they don’t melt smoothly. For the best texture, we would stick with baking chocolate/chocolate bars.
How would you alter this fine recipe to make chocolate ALMOND croissants?
Hi Anne! We haven’t tested an almond croissant yet, but let us know if you do any experimenting or find a recipe you love.
These came out great! They look and taste phenomenal so I will definitely be making these again. I opted to do a milk wash vs egg/milk wash on half of the croissants due to allergies and they still came out perfect!
I wish I could upload a photo of how these came out. I’ve never made croissants before, never even made anything with yeast before! Alas, my five-years-old son is a chocolate croissant lover and orders them when we go to coffee shops, so I decided to give this a shot. They turned out so pretty, flaky, airy, buttery, and so much better than from a franchise coffee place! This recipe was thorough, yet still easy to follow.
Do I need to proof the yeast before I put it in the dough? I always get nervous when recipes don’t have me proof it.
Hi Monica, we don’t in this particular recipe, although you certainly could if you prefer. Hope you enjoy this recipe!
Wonderful recipe – this is my third time making laminated dough. The only hiccup I experienced was during the shaping process. Roll out the dough to an 8×20 rectangle – cut vertically down the center. When it came to making 3 cuts horizontally, yielding 8 squares…I just couldn’t wrap my head around it. I am a very visual learner! I ended up with 12 squares at the end of this debacle. This is entirely user error – normally I’ll reference the videos however this recipe slightly differs from the classic croissants. Even with an unconventional cut, the pastry turned out wonderfully and all of my friends are overly impressed with my mediocre baking skills! Trust the process folks, and practice makes perfect!
You can math it! You should have 8 rectangles at that point (four on each side), so you just need to divide the length by 4 = cut every 5 inches. Then you cut each of those in half (2.5”) for 16 rectangles. I hope that helps!
We finally ate those for breakfast this morning and it was the best chocolate croissants we’ve ever eaten! Best croissants even! A friend of us is coming this afternoon with their friends from France who are visiting and one of them is a French pâtissier… Worst timing haha We’ll see what he thinks of them!
Cindy, how did it turn out with the French pâtissier? I’m hoping he loved them! I’m about to try this for the first time but Sally’s research and instructions are so thorough I’m sure they will turn out great.
thank you so so so so much for this wonderful recipe! it’s so thorough and easy to follow. it helped me realize that i can do difficult things if i just put my mind to it and follow the instructions! you made my parisian dreams come true <3
I had to make a french food for my french class and that gave me the perfect excuse to make these! Everyone was impressed with how long they took and I even bribed my french teacher with one . They were so good and everyone should try making them!
These turned out GREAT!!!!! I started out at 375 from the get go and added a couple more min to the cook time. No problem with dark bottoms. Dough was flaky. Tasted SO good.
I want to try this recipie, but I need to make it for a school project, and time-wise, I would have to make them on the weekend, then bring them into school on Wednesday. Would you suggest freezing/refridgerating the dough, then baking them the night before, or bake them on the weekend and refridgerate/freeze them until that Wednesday? Or would neither of these techniques work? Thanks!
Hi Levi, see the notes section for make ahead instructions. We hope you enjoy them!
Hi Sally- I am new to your site, and recently added my name to your subscriber list. I was wondering if there’s anyway you could do a video/instruction on how to make Almond Bear Claws, please? Thanks for so many great recipes.
Hi Margaret, we’re thrilled you came across our website! We don’t have a recipe for bear claws at this time, but you might try making them with the dough from these homemade glazed doughnuts. Or you might try searching for a bear claw recipe online with lots of positive reader reviews. Let us know if you find one you love!
Hi, it is not named a Chocolate croissant. It doesn’t look like a crescent (like a croissant does) and It is called a Pain au chocolat because it looks like a loaf of bread with chocolate filling. Please respect the French tradition by calling it by its traditional name.
if you translate in english, its chocolate croissant.. her website is in ENGLISH!! if you want to write pain au chocolat, then make your own baking website!!! please respect other people’s websites and work geez
Hello! I made this recipe for my french class assignment. They were delicious, and turned out golden brown and flaky, but the insides would not bake well. I even used tin foil over the dough for about 15-20 minutes, but it would not give. Any suggestions?
Hi Susan, if you try the recipe again, you can slightly lower the oven temperature to 375°F (191°C). Still cover them with foil, but by lowering the oven temperature, it should help the croissants bake a little more evenly.
I have been having similar results 🙁 butter keeps melting out of the dough. Internal structure is dense NOT airy.
It was awesome. Thanks for such a wonderful recipe.
You have such helpful recipes, and I so appreciated the step-by-step instructions! They’ve come out so well! Do you think this recipe would double well? If I keep the 2 doughs separate once I start rolling out to the right size? Thanks!
Hi Bri, for best results (and to prevent over or under mixing), we recommend making two separate batches rather than doubling. So glad you enjoyed this recipe!
These are amazing! Just ate one from the oven, so good! I have a question regarding the texture of my dough – I am sure it is pilot error…just not sure where I went wrong. On the last roll out after the long rest before shaping, the edges of my dough cracked. It seemed dry – but not sure what I may have done. The dough rested overnight so it was very cold this morning. Any help on why that may have happened? They were still delicious, just didn’t look as supple as your do in the video. Any advice would be appreciated! Thanks
Hi Beth, I don’t think you’re necessarily doing anything wrong. Was the dough after the last roll covered tightly? Perhaps it was exposed to a little air that dried out the edges. It’s happened to me before, too.
I may have left the wrap too loose, thank you for getting back to me. They were still delicious, I just took some out of the freezer (I froze half the batch) to bake this morning. Delicious!
I’ve made this recipe so many times now. It is absolutely amazing! I love the step by step instructions. Do you have an almond croissant recipe you love? That’s next on my list of things I would like to make this month.
Hi Sally! thanks for another winner. Do you think i could add in some almond paste instead of chocolate for almond croissants?
We haven’t tried making these with almond paste, but let us know if you do!
I am a novice and this recipe was easy to follow and the croissants tasted like they came straight from a fancy bakery. This was actually the first time I baked from scratch with AMAZING results!! I used white chocolate morales in some and semi sweet in others. My daughter invited me to bake these with her and now I’m hooked. So I have made 3 batches thus far. One my last batch I was squeezed for time and did the 2nd and 3rd lamination without the 15 chill break in-between and they definitely did not turn out as light and flaky, but the flavor was still fabulous!!
Thank you so much for teaching this old dog new tricks. I can’t wait to bake more goodies!!!
I made these by hand (no stand mixer) and boy I thought for sure it would never turn out. Then I actually misread the directions as 14×20 not 14×10 and had to cut the dough and stack on top of each other before adding the butter layer! Wow it was so difficult. But they came out AMAZING! My boyfriend loved them and there’s none left the next day. Really glad I didn’t give up on this recipe and will try again once I get a stand mixer
If freezing prior to baking, after they’ve been shaped, do you put the egg wash on after defrosting? Or can you put the egg wash on prior to freezing?
Hi Mary, we would put the egg wash on after defrosting. Enjoy!
It’s definitely a weekend project that being said, I followed the instructions and it came out perfectly
A hit with the family!! The steps were clear and easy to make. It just takes time for the resting. I’ll be making these for gifts every Christmas now.
These are phenomenal- beautiful and delicious. I now make these every year for Christmas. I make them ahead and freeze the shaped pastries raw. On Christmas Eve, I thaw them overnight in the fridge. Then on Christmas morning, all I have to do is brush with egg wash and bake- and just like that we have warm fresh pastries.