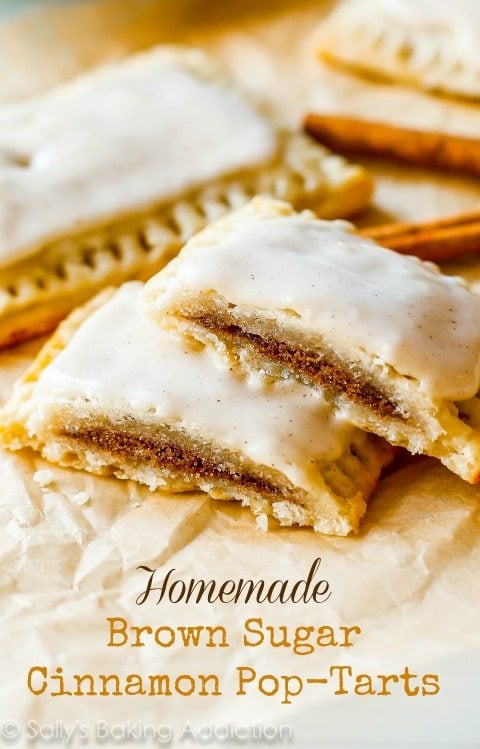
If you like pop-tarts, you will love my Homemade Frosted Brown Sugar Cinnamon Pop-Tarts. 100% from scratch. The frosting “sets” after an hour making them identical to the originals.
Hi! (I’m currently wiping pop-tart crumbs off my keyboard.)
I made a homemade version of my all-time favorite high school snack food. My high school vending machines never had anything interesting (mixed nuts, stale granola bars) but it did supply pop-tarts. In only one flavor. The BEST flavor in the entire world.
Frosted Brown Sugar Cinnamon—the toaster pastry putting all other toaster pastries to shame. The food of which heaven is made. Although chocolate pop tarts are a close second! Unwrapping those silver wrappers is the sound of angels singing. Right?
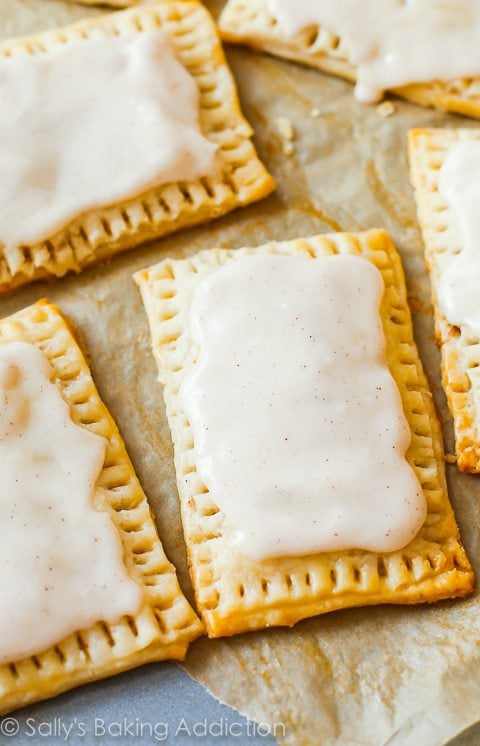
It’s been way too long since I tasted one of life’s greatest pleasures, so I set out to make my own. None of the unrecognizable ingredients, all of the cinnamon goodness. And frosting. So much frosting. And brown sugar!!! Sweet, sweet brown sugar. (By the way…if you love brown sugar as much as I do, you must give these brown sugar cookies a try as well.)
Can ya tell I’m a little excited?!
I’m going to be honest. Making pop-tarts at home, 100% from scratch, isn’t the easiest. It’s not impossible, nor should this recipe intimidate you – but you have to take your time, read all of the instructions before beginning, and be patient. There are lots of steps, but I have about 1 billion photos to walk you through it. I feel the same way about croissants… a labor of love, but totally worth it!
I highly suggest reading each step and viewing each photo before beginning.

Alright pop-tart lovers, here are my Homemade Brown Sugar Cinnamon Pop-Tarts. With pictures of the process and the full recipe written out towards the bottom.
(just keep scrolling, just keep scrolling…)

First step. Homemade pie crust is what you use as the pastry. My homemade pie crust is simple. Nothing fancy or intimidating. My buttery pie crust uses both shortening and butter to obtain optimum flakiness and tenderness. These fats must be COLD.
You also need very cold ice water.
Why the emphasis on temperature here? Keeping your pastry dough as cold as possible prevents the fat from melting. If the butter melts before baking, you lose the flakiness of the pie crust. When the lumps of fat melt in the oven as the pop-tarts bake, their steam helps to separate the crust into multiple flaky layers. Warm fats and water will lend a hard, crunchy crust instead of the nice flaky crust you want for the pop-tarts.
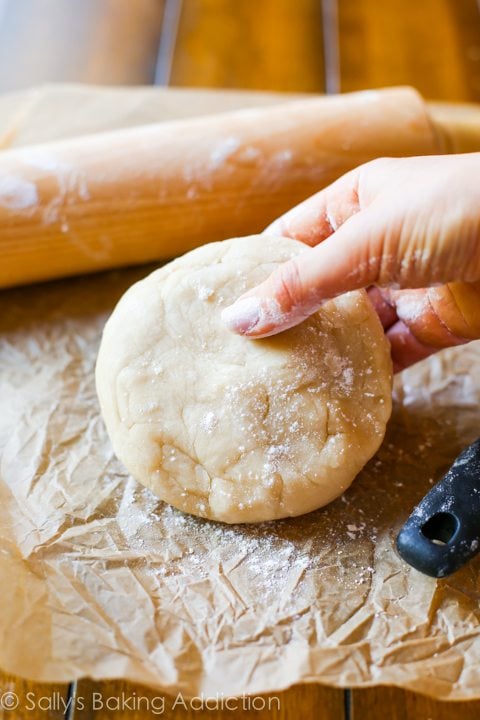
After the two discs of dough have chilled as described in the recipe below, remove one from the fridge and let it come to room temperature for about 15 minutes. This makes rolling out the dough much easier.
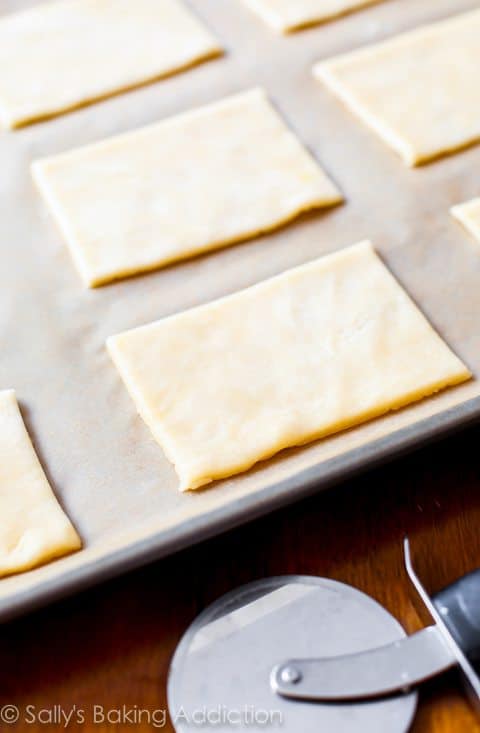
Roll disc into a rectangle about 1/8 of an inch thick—about 9×12 inches in total size. Trim off the sides of this rectangle as needed. Cut dough into three even sections, then cut each section into three sections. Does that make any sense?
Use a pizza cutter for ease; it’s the easiest tool to use in this process. You’ll end up with 9 rectangles, each 3×4 inches. These will be the bottoms of your homemade pop-tarts.
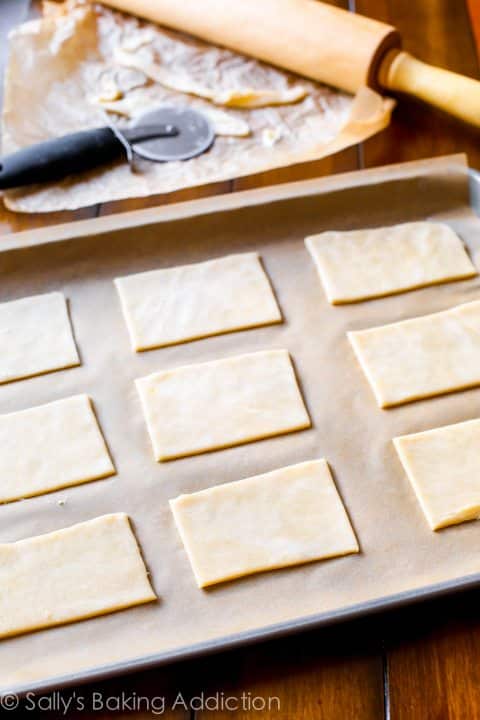
Place each rectangle onto a baking sheet lined with parchment paper or a silicone baking mat. Place the baking sheet in the fridge and repeat with the second half of dough.
Always keep the pastry dough chilled as you are working.
Roll 2nd disc out into a rectangle and cut into 9 even rectangles like you did with the first half of the dough. These nine rectangles will be the tops of your homemade pop-tarts. Place the baking sheet into the refrigerator as you make the brown sugar cinnamon filling.
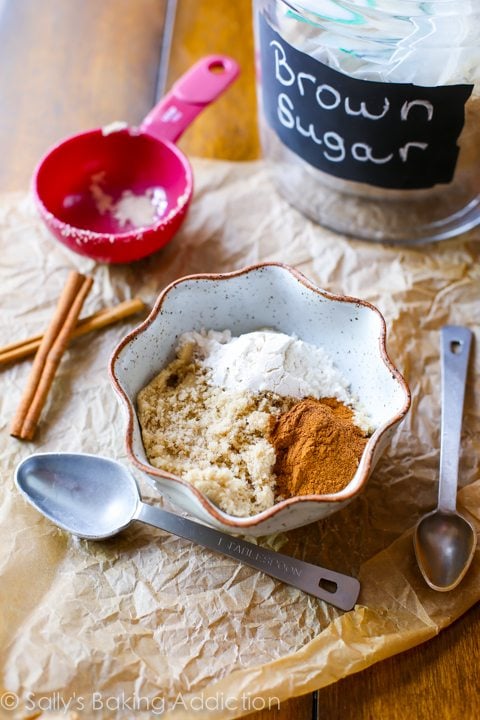
The filling! This is the best little filling to ever come out of my kitchen. I say that because brown sugar is my favorite ingredient to use in baking.
The homemade brown sugar cinnamon pop-tart filling is made with lots of cinnamon, lots of brown sugar, a touch of flour. That’s all, just 3 ingredients.
Mix it up with a fork, or even better—your fingers. Messy recipes are the best recipes.
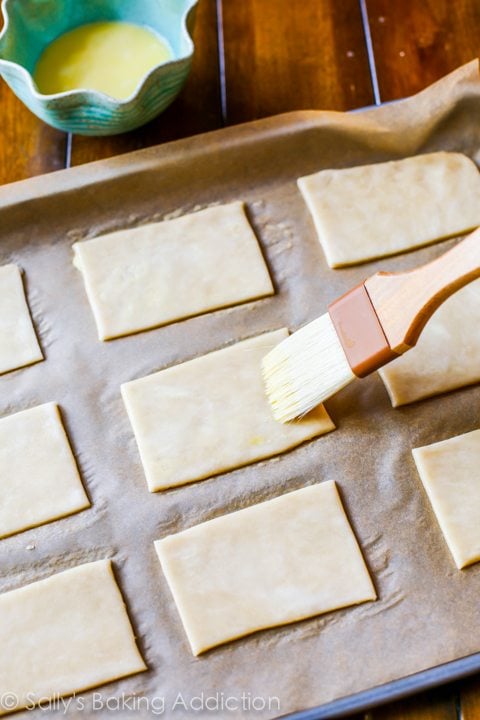
Before filling the homemade pop-tarts, you have to brush the bottoms with a little egg wash. This helps the filling “melt” down and stick to the bottom. We’ll also brush the tops of the pop-tarts with the egg wash.
My egg wash = 1 beaten egg, 2 teaspoons milk.
(Thanks for the new pastry brush, Jaclyn!)
A few more steps.
Place 1 heaping Tablespoon of filling onto each rectangle. I used the back of my measuring spoon to spread it around. Leave about a 1/4 inch border around the rectangle. Brush the rectangle “tops” of the pop-tarts with egg wash. Place on top of the filled bottoms, egg wash side down. Poke holes in the tops of each pastry to allow the steam to escape. This helps get your pop-tart pasty nice and flaky. I used a toothpick to poke 8 holes in each.
Seal the edges by crimping with a fork.
Now, place the ready-to-bake pop-tarts in the refrigerator. Let the pop-tarts rest before baking. This firms up the pastry, since it has been out at room temperature for so long at this point. Chill for 20 minutes as your oven preheats. Once chilled, brush tops with egg wash. This egg wash will give your pastry that beautiful golden sheen.
Now it’s time to bake, then frost. A visual of these steps:

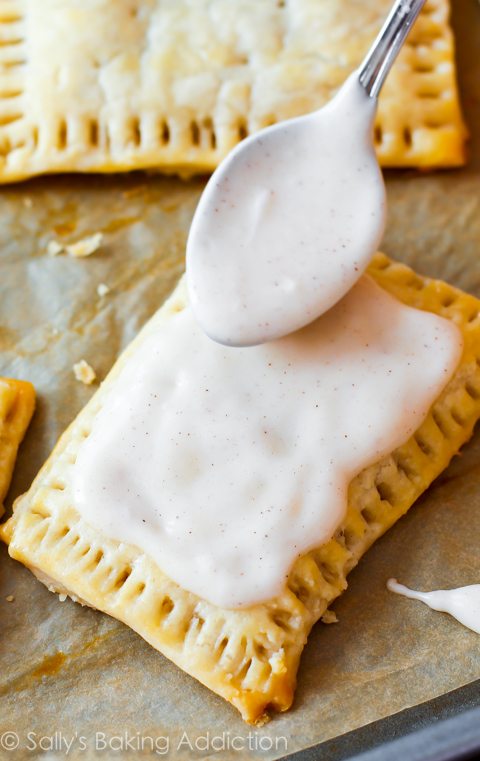
The frosting is so simple. It’s more of a glaze, less of a frosting.
Just a few ingredients including confectioners’ sugar, vanilla, cinnamon, and milk. Whisk until slightly thick, but still a little runny. Use a knife or the back of a spoon to spread on top of each homemade pop-tart.
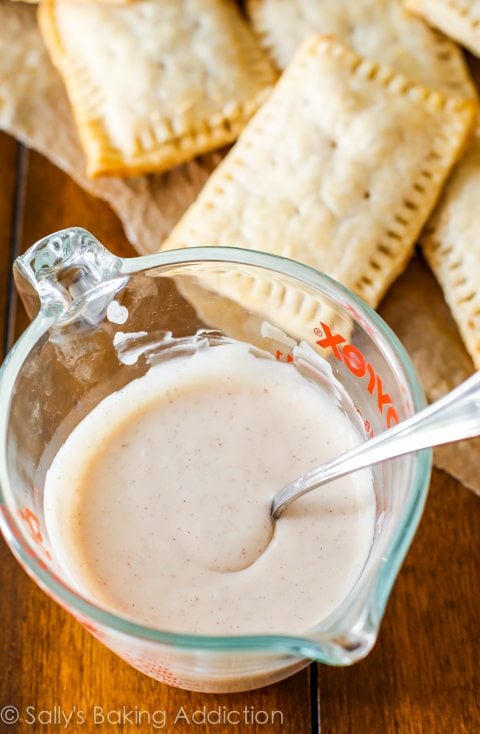
The pop-tarts are finally ready to eat. 🙂
I told you, this isn’t the easiest of my recipes, but it sure as heck isn’t the most difficult. I really want you to try these! My homemade pop-tarts taste just like the original, but 10x better. I can’t believe I just typed that. But seriously! You don’t get a flaky, slightly crumbly crust with store-bought pop-tarts. You just get… crumbles. You know what I’m taking about? And you get about twice the amount of filling with my homemade version.
The frosting isn’t an exact copycat because there aren’t any preservatives, brown food dyes, or strange things, but it’s absolutely incredible paired with the warm homemade pastry and brown sugar cinnamon filling. The frosting takes about 1 hour to set. We actually loved these homemade pop-tarts the next day. The frosting slightly hardened, making them taste much more like the originals.
Did you make it down this far? Enjoy this recipe, everyone!
Print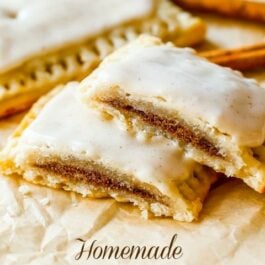
Homemade Frosted Brown Sugar Cinnamon Pop Tarts
- Prep Time: 3 hours
- Cook Time: 25 minutes
- Total Time: 3 hours, 30 minutes
- Yield: 9 pop-tarts
- Category: Pastries
- Method: Baking
- Cuisine: American
Description
If you like brown sugar cinnamon Pop-Tarts, you will love my homemade frosted brown sugar cinnamon pop-tarts recipe! They taste one million times better and are made completely from scratch with REAL ingredients. I encourage you to read this entire recipe before beginning, as well as viewing the step-by-step photos to help guide you. Plan ahead, the pastry must chill for some time.
Ingredients
Pastry*
- 2 and 1/2 cups (313g) all-purpose flour (spooned & leveled)
- 1 teaspoon salt
- 6 Tablespoons (85g) unsalted butter, chilled and cubed
- 2/3 cup (130g) vegetable shortening, chilled
- 1/2 cup (120ml) ice water
Filling*
- 1/2 cup (100g) packed dark or light brown sugar
- 2 teaspoons ground cinnamon
- 1 tablespoon (8g) all-purpose flour
- egg wash: 1 large egg mixed with 2 teaspoons milk
Glaze
- 3/4 cup confectioners’ sugar (90g), sifted
- 1 Tablespoon (15ml) milk, plus more as needed
- 1/2 teaspoon ground cinnamon
- 1/4 teaspoon pure vanilla extract
Instructions
- For the pastry: This is the same recipe as my homemade pie crust. See step-by-step photos in the pie crust post if you need visuals for making the pastry. I usually make the pastry the night before. First, mix the flour and salt together in a large bowl. Add cold unsalted butter and shortening. Using a pastry cutter or two forks, cut the butter and shortening until the mixture resembles coarse meal (pea-sized crumbles with a few larger bits of fat is OK). Measure 1/2 cup of water in a glass. Add ice. Stir it around. Slowly drizzle in the very cold water 1 Tablespoon at a time, stirring with a large spatula after every Tablespoon of water that you add. Do not add any more water than you need to. Stop adding water when the dough begins to clump.
- Roll out the dough on a floured work surface. The dough should come together easily and should not feel overly sticky. Form the dough into a ball. Divide in half. Flatten each half into 1-inch thick discs using your hands. Wrap each tightly in plastic wrap. Refrigerate for at least 2 hours (or up to 5 days or in the freezer for up to 3 months).
- Assemble the pop-tarts: Remove 1 chilled dough disc from the refrigerator and allow it to sit at room temperature for 15 minutes. This will help make the dough easier to roll and work with. Keep the other disc in the refrigerator. After 15 minutes, place disc onto a lightly floured work surface, and roll it into a rectangle about 1/8 inch thick and 9×12-inches in size. Trim the sides as needed. Always be gentle with your pastry dough. You don’t want it to tear. Cut each piece of dough into thirds and each third into thirds again. You will end up with 9 rectangles, each measuring 3×4 inches. Use a ruler to help make this process easier and more accurate.
- Place each of the 9 rectangles onto a baking sheet lined with parchment paper or a silicone baking mat. The pop-tarts will not spread in the oven much, so you may place them relatively near one another. Place the baking sheet in the fridge. Roll 2nd disc out into a rectangle and cut into 9 even rectangles like you did with the first half of the dough. These nine rectangles will be the tops of your homemade pop-tarts. Place the baking sheet into the refrigerator as you make the brown sugar cinnamon filling.
- Make the filling: Mix the brown sugar, cinnamon, and flour together in a small bowl. Set aside. Remove 1 baking sheet of rectangles from the refrigerator. Brush egg wash over the entire surface of each rectangle. These will be the bottoms of your pop-tarts and the egg wash will help glue the lid on. Place a heaping Tablespoon of the prepared brown sugar filling into the center of each rectangle, spread it around, leaving around 1/4 inch of space on the edges. Brush the second baking sheet of rectangles with egg wash, then place each rectangle on top of the filling-topped rectangles, egg wash side down. Use your fingertips to press firmly around the pocket of filling, sealing the dough well on all sides.
- Poke holes in the tops of each filled pastry to allow the steam to escape. This helps get your pop-tart pastry nice and flaky. I used a toothpick to poke 8 holes in each. Seal the edges by crimping with a fork, to prevent the sides from opening as the pop-tarts bake. Refrigerate the filled pop-tarts uncovered for at least 20 minutes and up to 1 hour. This chilling let the pop-tarts rest before baking. It also firms up the pastry, since it has been out at room temperature for so long at this point.
- Preheat oven to 350°F (177°C). Once unbaked pop-tarts have chilled for 20 minutes, remove from the refrigerator and brush the tops with the remaining egg wash. This egg wash will give your pastry that beautiful golden sheen. Bake for about 22-28 minutes or until they’re golden brown, rotating the pan halfway through baking. Let the baked pop-tarts cool on the pan for about 5 minutes, then transfer to a wire rack to cool completely before glazing.
- Make the glaze: Whisk all of the glaze ingredients together in a medium bowl until it reaches a spreading consistency. You want a thick glaze, but not too thick that it is hard to spread. Add another teaspoon or two of milk if needed. Use a spoon or knife to glaze each pop-tart. The glaze will slightly harden in about an hour, if you prefer to wait that long.
- Store pop-tarts in an airtight container at room temperature for 3 days or in the refrigerator for 6 days. To reheat, bake in a 350°F (177°C) oven for 10 minutes.
Notes
- Freezing Instructions: Baked and unglazed pop-tarts freeze well, up to 3 months. Thaw and reheat as directed in step 9. I am unsure about reheating in a toaster.
- Special Tools (affiliate links): Glass Mixing Bowls | Pastry Cutter | Rubber Spatula | Rolling Pin | Pizza Cutter | Baking Sheet | Silicone Baking Mat or Parchment Paper | Pastry Brush | Whisk
- Pastry: I’m sure store-bought pastry would be fine, but this homemade version creates that unique flaky, slightly crunchy yet tender texture you know and love from regular pop-tarts. I prefer shortening in my pie crust and pastry dough recipe for the best texture. Feel free to use your own favorite pie crust recipe that uses all butter if you prefer. Butter can not be replaced for shortening in this particular pastry recipe.
- Filling: Get creative! Use your favorite fillings instead of brown sugar cinnamon. Like jam, Nutella, etc.
- Adapted from King Arthur Flour.


Made this for my kiddos while money was tight, 3 of 5 loved them! My other 2 aren’t fans of BS&C lol…
They are great, thanks for the recipe!
These are delicious! The only bummer is all that work for only nine treats (I must have rolled mine too think—I only got
6-1/2. But worth it!
I made this recipe tonight for my husband as a father’s day treat. I tweaked the fillings to make his favorite pop tart that we can no longer find. Maple bacon it was sooooo good. And I’ve never been good at making pie crust but your recipe was easy and was the best crust I’ve ever had. Thank you so much for posting this ❤️
Would puff pastry work?
Hi Kristy! It would, but you’d have a totally different pastry on your hands. For pop tart tasting treats, stick with pie crust.
Hi Sally, any reason why I can’t freeze the *unbaked* pop tarts (without the egg wash on top), then thaw a bit, add egg wash and bake later? I’m thinking the fresh baked element really adds to the experience. Thanks!
That should work, Mel! Let me know if you try it!
I have never made pie crust, but I decided to make this recipe exactly as you described. I was a bit frustrated with the rolling out bit (it kept sticking to the rolling pin, & my husband suggested put a LOT more flour on the rolling pin, & it worked), then I measured them incorrectly & cut one batch wrong, so the bottoms weren’t fitting the tops…but all in all, I am thrilled with the outcome. Just happy as can be. THIS is an accomplishment for me. THANK YOU for pretty precise instructions, & a really delicious breakfast treat.
I’m so happy you decided it was time to try pie crust! This is such a fun recipe for your first time! Can’t wait to hear what you try next 🙂
Hi Sally,
We are planning to bring these to a Thanksgiving party (my daughter is sooo excited), so I need at least double the yield.
Can these be cut into smaller rectangles? or do we need to double the dough, etc.
thanks!!
p.s. your recipes are always so delish:)
Hi Priya! Thank you! Both ways work. You can cut the rectangles smaller or make a double batch.
Deliciousness! My children and I ate these up in 2 days. I selfishly thought about hiding them because they were going so fast (I love food)! Going to make these again today! Just wanted to say thank you for posting this recipe. `
These were awesome. Don’t know if I can go back to store bought pop tarts ever again! Can’t wait to try another combo. I’m thinking blueberry lemon next. Thanks for another wonderful recipe.
Hello Sally! 🙂
I have been scouring the Internet looking for a” Cinnamon” Pop-Tart Recipe and found your site. I made them yesterday and they were FANTASTIC!!!!
I made a pie crust the night before and used it for a Pumpkin Pie, but had quite a bit left over and stored it in the fridge. Found this recipe and knew I had to make THESE POP TARTS – – the husband loves, loves, loves the Cinnamon Pop-Tarts. I was out of shortening (I am the same as you – – I love using both shortening and butter) and had to use all butter instead. They still came out Great!!
I made half with the Brown Sugar Cinnamon, and I had some Strawberry Preserves on hand and made the other half with that. I drizzled the Icing in a zig-zag pattern from corner to corner. With his first bite, I heard and saw the flaky – amazing “crunch” as he bit into the delicate pastry layers!!!! I made mine smaller and rolled a little thinner, so they ended up being like “puff pastry” hand-held pastries!! (Note: I didn’t have enough pie crust dough left-over to make them bigger…ha.) The husband ate 5 in one-sitting…lol.
I plan on making Blueberry Pop-Tart pastries, Cherry filled, I am going to attempt to make Mince Meat filling, Nutella Pastries, Chocolate Cream, Pumpkin Pie Pastries, and got to make some Apple Pie filling pastries also. Making them smaller and arranging on a beautiful holiday platter would be perfect for a “get together” for the holiday’s along with some Coffee, Cocoa, Hot Tea, Eggnog, etc.. I’ll have a platter of these to add along with my Christmas Cookies and Treats for the Holiday’s! (***Can drizzle them with red, and green vegetable dye Icing along with the white – ha!)
Thanks SO MUCH for this recipe!!!! It was PERFECT.
Angela M.
Look at you and all your flavor ideas!! I absolutely love your enthusiasm and I’m inspired to make these again with a new flavor. I LOVED reading this comment today, thank you!
Is it okay to refrigerate the dough cut into pieces overnight? Thanks
Sure is!
I live in Germany and have been CRAVING brown sugar pop tarts for three years! I made them to your recipe (except I had to make the brown sugar myself too with white sugar and molasses) and they were delicious, they were better than out of the box!!…and they looked beautiful too!
A thousand thanks for posting this recipe, I can now stop with this craving, and think about other things! Lol
Sally, I just made these, and they are wonderful! This was the flavor that always got eaten first when I was growing up (4 kids), and the strawberry and cherry would be left to linger much longer. It turns out that in my husband’s house, it was just the opposite! Since he didn’t like the original, I wasn’t sure what he’d think of these, but he loved them. As I was making them, I thought that it might be better to just take the easy route and roll up brown sugar-cinnamon with pie scraps, but I was wrong. These are definitely worth making, and I’ve frozen the rest so we can have one fresh every morning. Delicious! Thanks for posting these and thanks for giving King Arthur Flour credit (I love them too).
I just made these today and I swear to you they’re the best thing I ever made. I only wish I hadn’t made them so small by mistake, I want to eat all of them at once! I will never buy my pop tarts again. Thank you so much for this recipe!
I just made these for breakfast this morning and they were delicious! Tasted just like my all-time favorite pop-tart. The only thing is that I guess I didn’t poke adequate holes in some of them because the pastry kind of blew up, but the taste was still all there and I got a good picture of the rest of them. Thanks for the recipe!
These are AMAZING! When you first posted this recipe, I thought “Those look good. Maybe I’ll try to make them one day.” After I tried my first ever cinnamon & brown sugar Pop-Tart I thought, “Oh my gosh! These are so good! I just HAVE to try Sally’s recipe now! I bet hers are a 100x better!” So after panicking over the fact that I didn’t have vegetable shortening, waiting weeks until we went grocery shopping, and begging my mom for Crisco….I finally made these. And I made them on a hot, humid day. Also, me and pastry dough don’t get along quite well. Oh and I had barely any parchment paper. So after I sliced awful, unproportioned rectangles, placed them on a buttered baking sheet in hopes that would be okay, and watching the dough melt on the pan…I popped my sorry excuses for pop-tarts in the oven and prayed like crazy they wouldn’t stick to the pan. (Thankfully, they didn’t stick!) When they came out and I tried one, I thought, “Well, they’re not the prettiest of the bunch….but Sally did an awesome job coming up with this recipe!” Then I made my glaze, and for some reason, it came out a lot browner than yours in the picture. I’m guessing my proportions were off, but it was still super tasty! Thanks again for providing me with a perfect recipe! 🙂
Just made these and my kids LOVED them! Thank you for this wonderful recipe!
Love your recipe!! Can’t wait to make them. There is just one thing in your ingredients list that is NOT natural and that is the vegetable shortening (a.k.a., Crisco). Sadly, that is made of hydrogenated and partially hydrogenated oils, nothing natural about those. Thanks for the all butter recommendation. My pie crust recipe is always yummy and flaky with just butter! I’ll let you know how it turns out! 🙂
Made these tonight because my husband loves PPP tarts. I never buy them from the store because of all the preservatives and additives they contain. These where AMAZING!!!! So much better than your traditional Pop tart. Definatly keeping this recipe!
I live in Israel and we don’t have pop tarts here. We always bring back a few boxes after visiting the States. I baked these yesterday and we were all speechless! So much better than store bought! A dream com true… So good!
Like many others I LOVED the brown sugar cinnamon pop tarts as a kid and my kids love them too. So when I found this I was very excited. I made up the pastry dough and then life got in the way. I finally got back to making them and they turned out GREAT even my husband said to make them again. When I ate one I was actually brought back to another wonderful childhood memory. I remember when my mom used to make pies she would take all the leftover pie crust and make us kids “Cinnamon pies” and it really reminded me of those. My daughter has now requested Lemon and Chocolate pop tarts but some of the other flavors people have suggested sound really good too!
I made these yesterday and they came out great! A little rough looking but I was still proud. Thanks for sharing! 🙂
I made these using applesauce and butter for the fat part of the crust. Until I tasted them, I had doubts because I could smell the applesauce. They turned out phenomenal. Even my 4 yo kept coming back. He requested strawberry for the nect batch. Any recommendations for the filling?
Hi Alexis. Strawberry jam works– I like to mix it (around 2/3 cup) with a teaspoon of cornstarch that has been mixed with warm water and simmer on the stovetop. this makes the filling thick and set.
started the prep work for these tonight and I’m so excited about serving them tomorrow night! Question- if I were to fill some with jam or jelly, would you still recommend the egg wash?
Yep! The egg wash gives the pop-tarts their beautifully browned, shiny outside. But if you don’t really care about that, you can leave it out. But you will still need it for adhering the top and bottom crust.
I made these tonight and I think I’ve died and gone to heaven… absolutely fantastic and about 1000 times better than a pop tart! I can’t wait for my kids to get up for breakfast LOL
Wow! As cinnamon pop tars were a childhood favorite of mine, I had to try this recipe. I did, and dang! They are incredible! Almost too good, though, honestly. I need to find a dumbed-down version to replicate the chalky crust; these are like eating magnificent little pies! Thanks for sharing!
I made these today and they turned out so good! Absolutely delicious! Thanks for the recipe!
These were fantastic!! I was nervous when they came out of the oven and looked so plain, I didn’t think they’d taste as good as yours looked, but once I got the glaze on there… so good!! I made these as an anniversary celebration tomorrow with my husband (3 months :D) but I had to sneak a taste at one to “make sure they came out okay” 😉 Which of course they did! Thanks for sharing!
Love these! They taste phenomenal! One thing I did different was add a quarter cup of white and brown sugar and a dash of vanilla to the dough to make these taste awesome through every bite!
I made these tonight and used all butter since I didn’t have shortening. They are amazing and my husband will be the happiest man alive when he gets home from work tomorrow morning!