

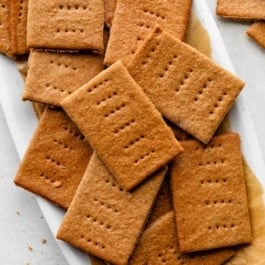
These homemade graham crackers are crisp, lightly sweet, buttery, and packed with warm honey and cinnamon flavor. They’re delicious all on their own, but they’re especially wonderful for s’mores, icebox cake, pie crusts, cheesecake crusts, and snacking. If you’ve only ever had store-bought graham crackers, you’re in for a treat because homemade graham crackers have a deeper flavor, a more delicate crisp texture, and an unmistakably fresh taste!
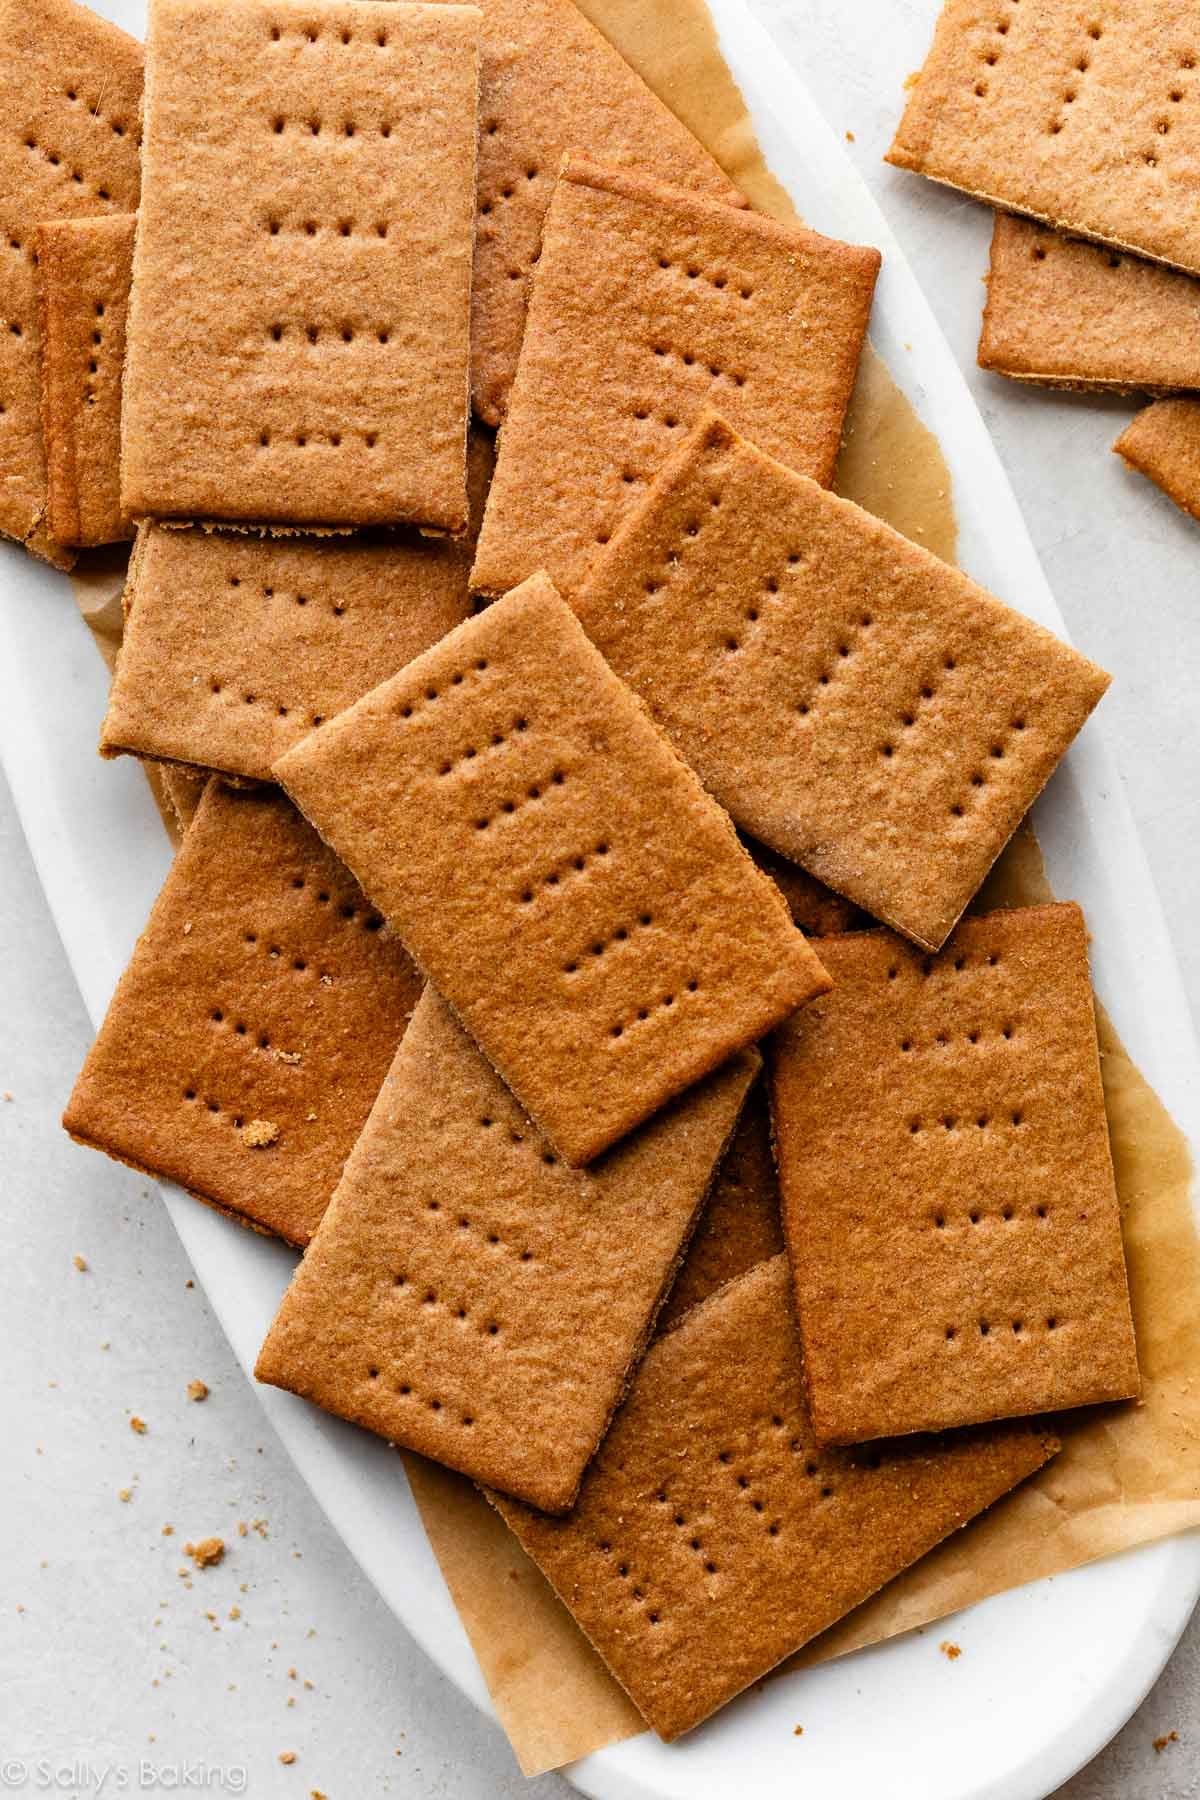
If you’ve ever wondered whether homemade graham crackers are worth making, the answer is an enthusiastic yes! They’re made from basic pantry ingredients, the dough comes together quickly, and the finished crackers taste much fresher than the store-bought variety.
Why You’ll Love These Homemade Graham Crackers
After testing several versions, this recipe strikes the perfect balance between crisp, buttery, and sturdy. Here’s why it works:
- Better than store-bought: Butter makes all the difference when it comes to flavor. Store-bought graham crackers are typically made with oil, so the buttery flavor comes from artificial flavoring. You’ll love that you know exactly what’s in these homemade graham crackers… and that means no artificial flavoring or added preservatives.
- Rich honey flavor: Honey sweetens the dough while providing the classic graham cracker taste.
- Perfectly crisp texture: They bake up crisp enough to snap cleanly, without being hard.
- Made with simple ingredients: Nothing fancy here—just baking staples. No need to hunt for specialty “graham flour,” either; we use a mix of whole wheat flour and all-purpose flour.
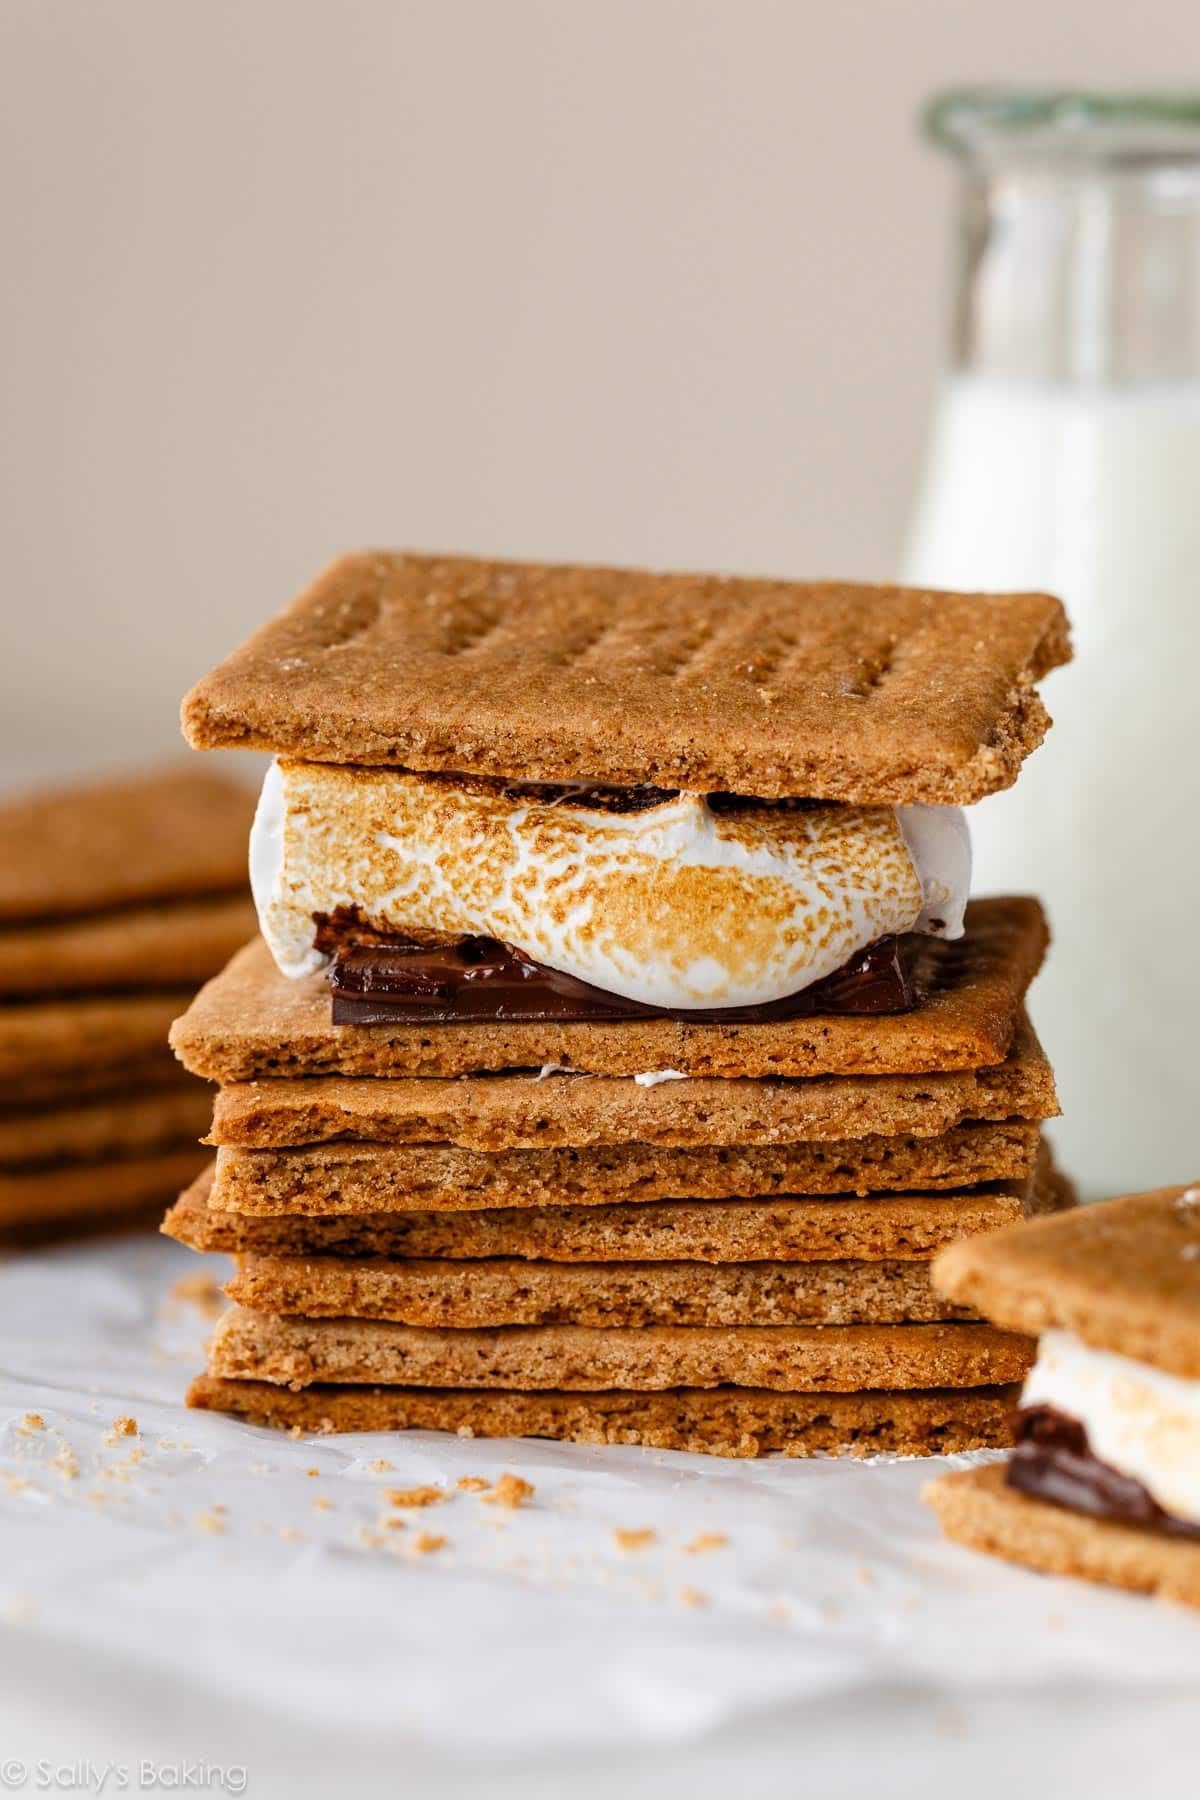
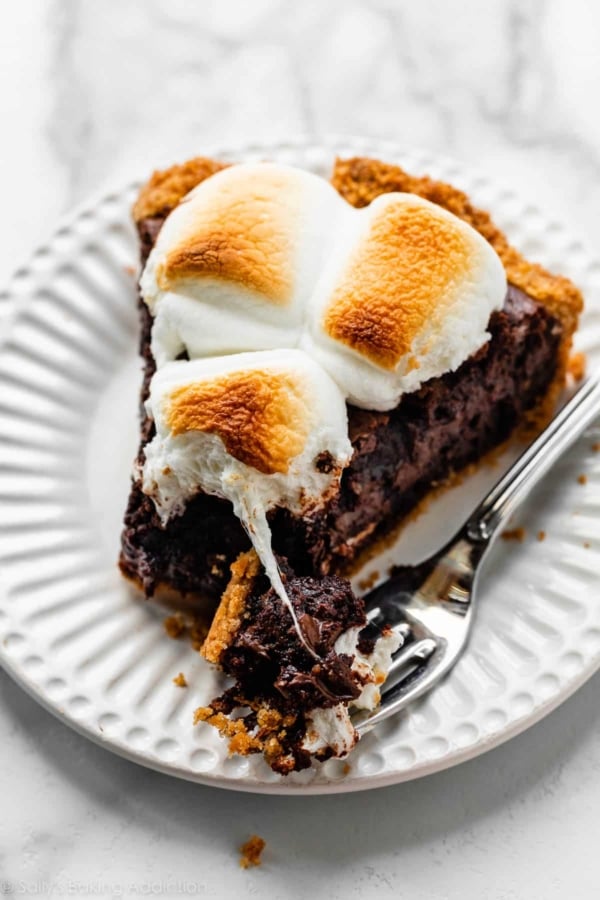
- So many uses: Crush them for pie crusts, layer them into icebox cakes, or sandwich them with chocolate and toasted marshmallows for s’mores!
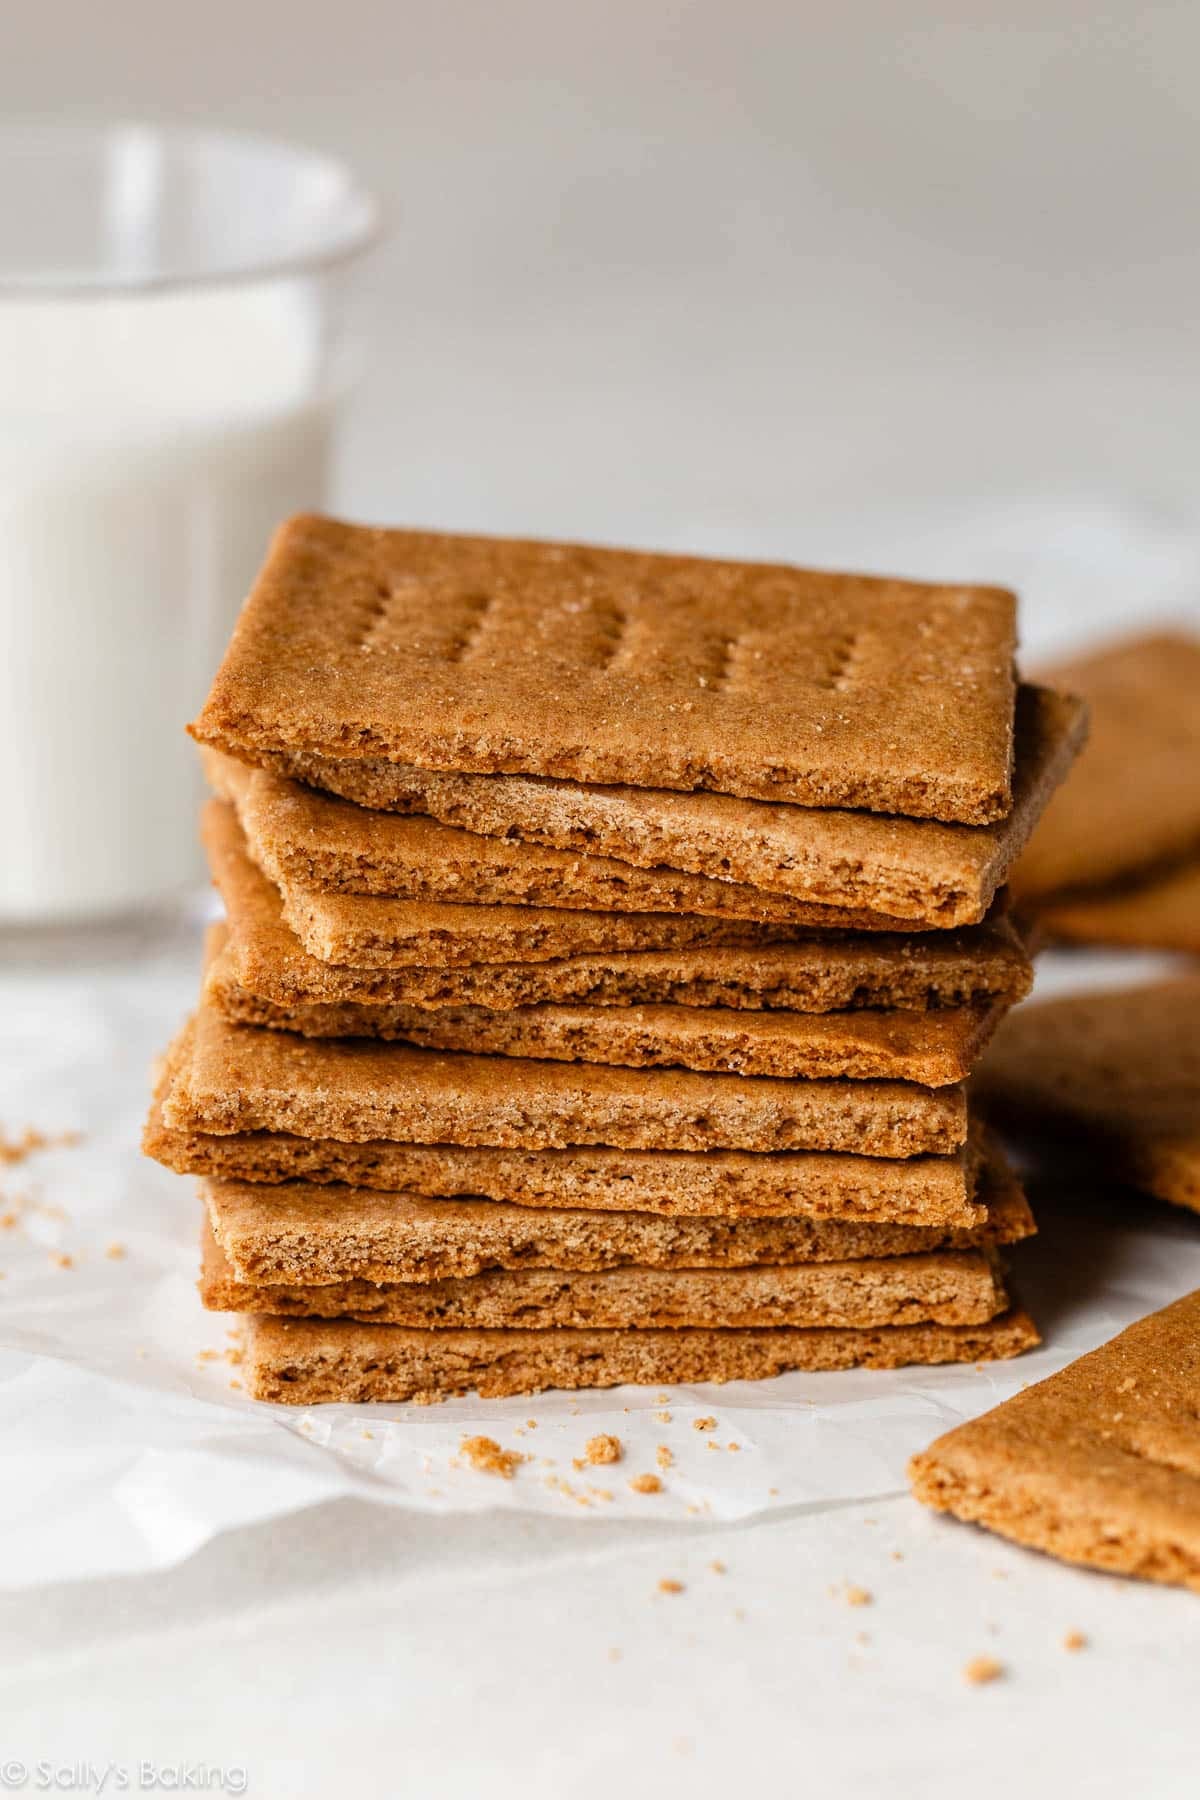
What Is Graham Flour? Traditional graham crackers were originally made with graham flour, a coarsely ground, unrefined whole wheat flour. Today’s commercial graham crackers often use a blend of whole wheat flour and refined flour, which creates a lighter texture while maintaining that signature graham flavor.
This recipe follows the same approach by combining whole wheat flour for classic graham flavor with all-purpose flour for a lighter, crisp texture. The combination creates homemade graham crackers that taste nostalgic without requiring specialty graham flour!
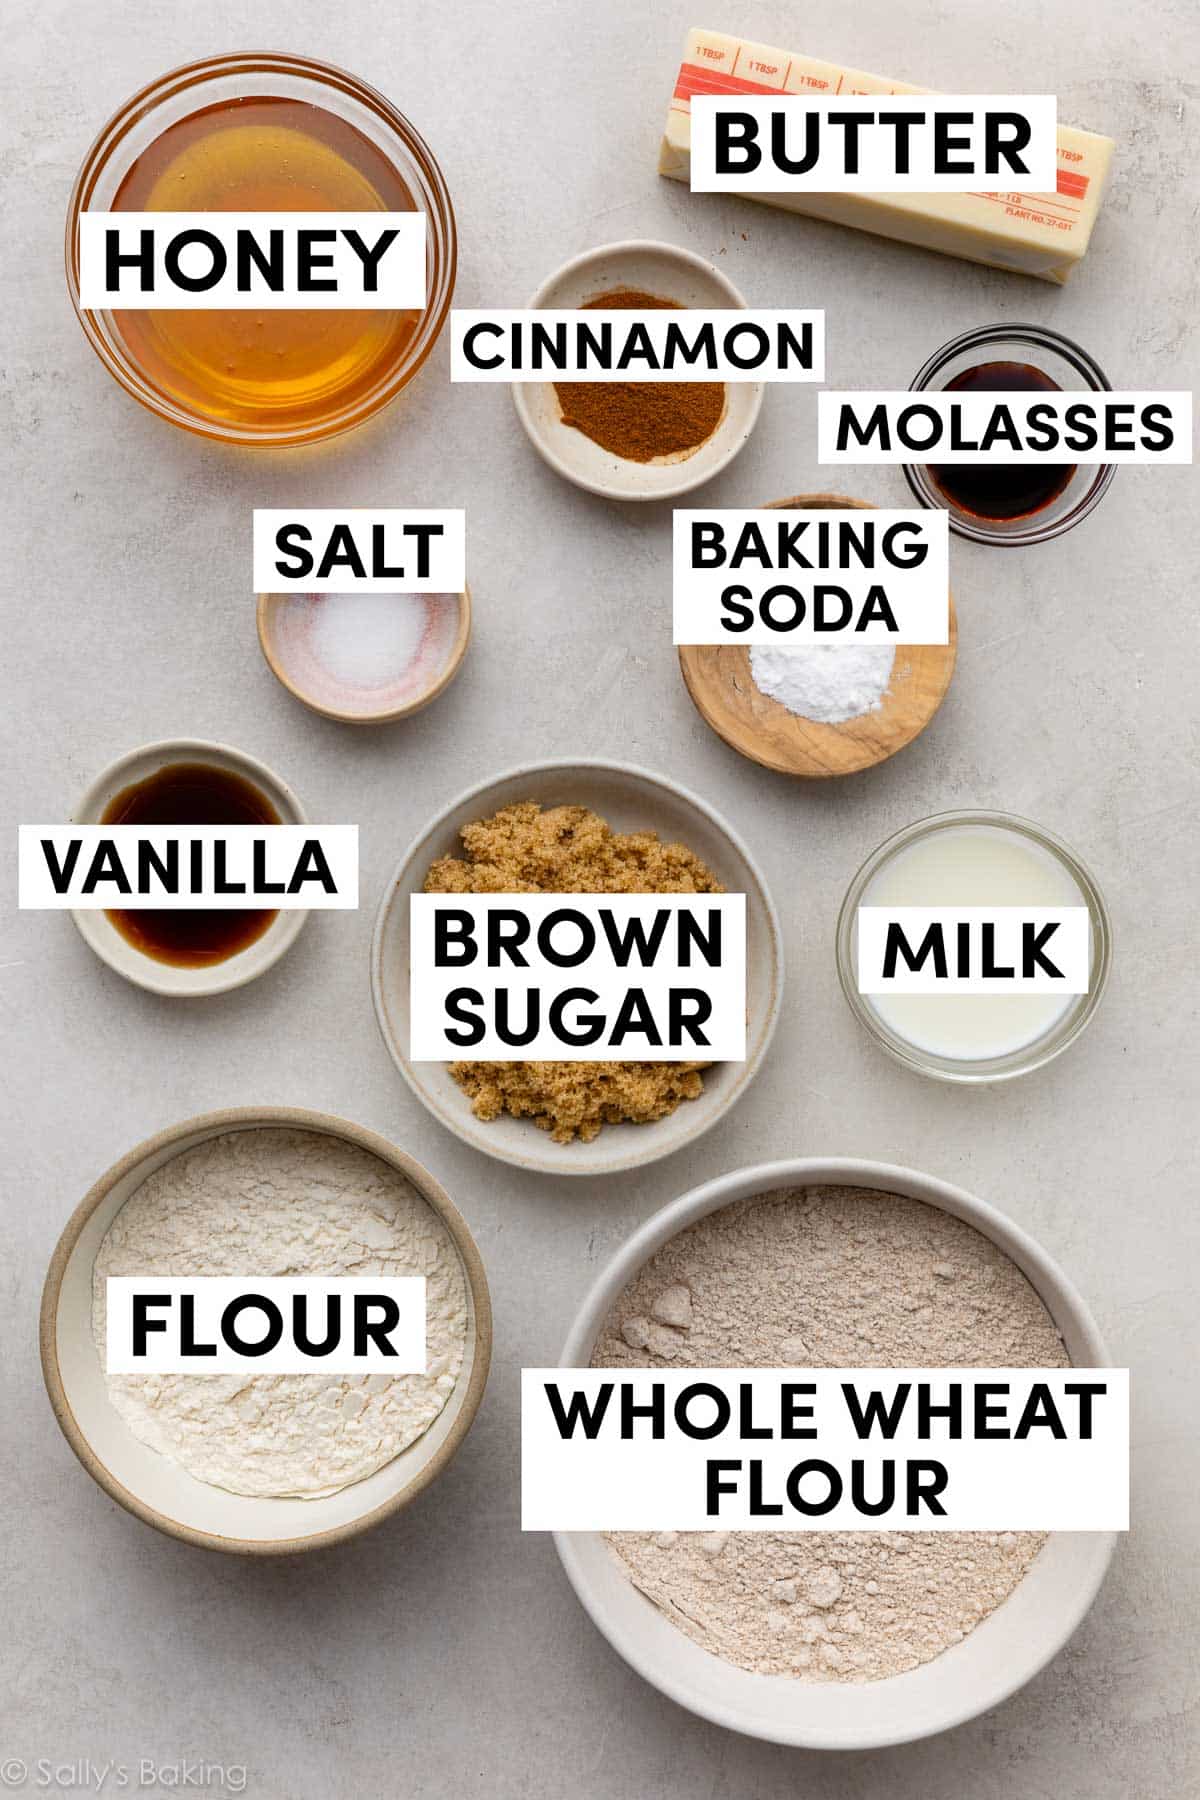
Ingredients You Need & Why
- Whole Wheat Flour: Provides the characteristic whole-grain graham flavor.
- All-Purpose Flour: Keeps the crackers crisp and prevents them from becoming too dense.
- Baking Soda: Helps the crackers rise just enough.
- Salt: To enhance and balance all the flavors.
- Cinnamon: Adds flavor without overpowering the honey.
- Butter: Creaming softened butter with the brown sugar creates a smooth dough that’s easy to roll without cracking and bakes into perfectly crisp, snappy crackers. If it’s helpful, watch my video tutorial on how to cream butter and sugar.
- Brown Sugar: Adds moisture and subtle caramel flavor.
- Honey: Sweetens and provides that unmistakable honey-kissed flavor graham crackers are known for.
- Molasses: You only need a small amount, but it truly makes for the best flavor. If you don’t have any, you can leave it out.
- Vanilla: Rounds out all the other flavors.
- Milk: Brings the dough together while keeping it easy to roll without cracking. You can use any milk, dairy or nondairy.
How to Make Homemade Graham Crackers
The dough comes together just like making dough for cut-out sugar cookies. Whisk together dry ingredients, cream together butter and sugar, add the rest of the ingredients, and combine wet + dry. You’ll have a thick dough:
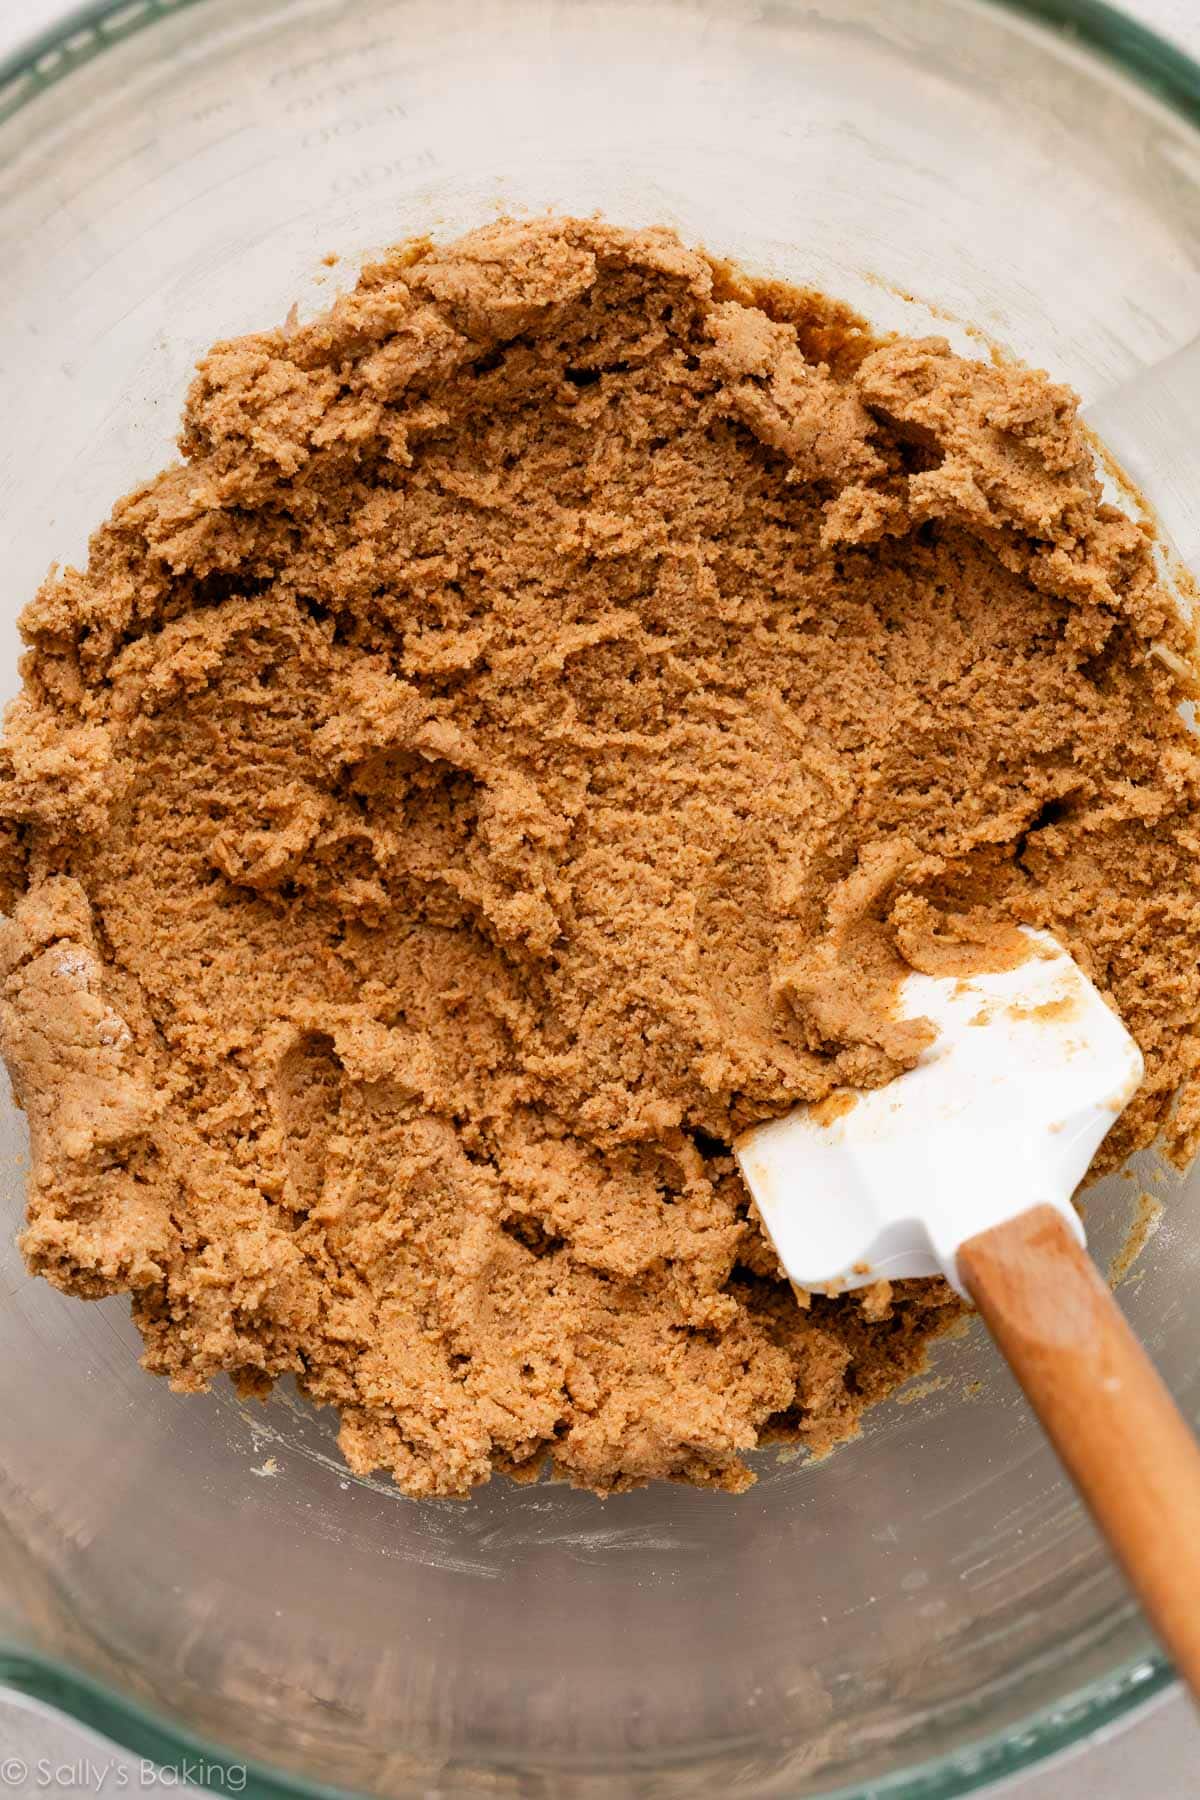
Divide it in half, and shape each piece of dough into a flattened square.
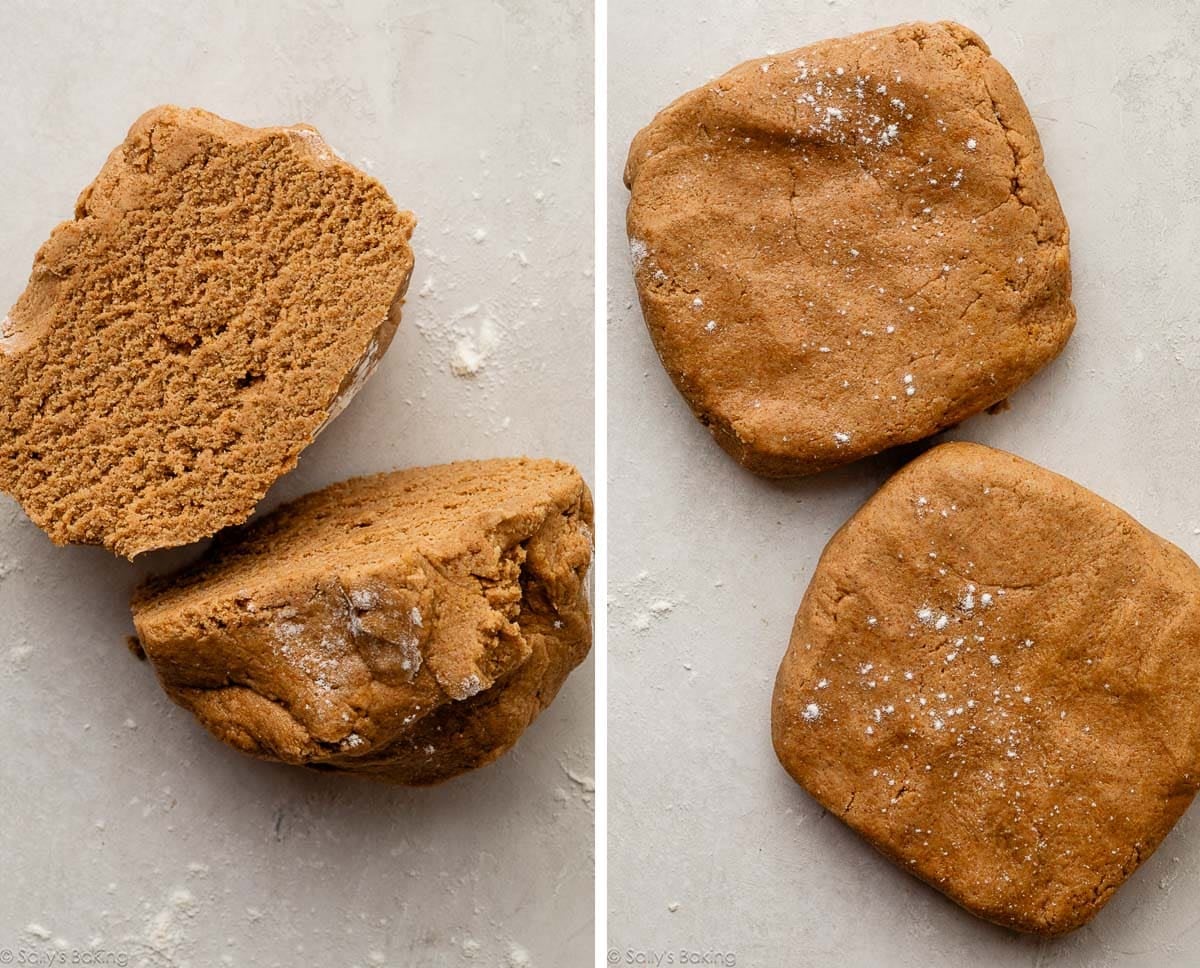
We flatten pie crust dough into a disc before refrigerating, but we roll pie crust into a circle. For rolling this graham cracker dough into a rectangle, starting with a square instead of a disc makes it easier to achieve the desired rectangle shape. (Trust us, we’ve made these dozens of times at this point and a square-shaped dough helps with the rolling step!)
Wrap each square portion of dough tightly and refrigerate briefly—about 1 hour.
Success Tips for Shaping Homemade Graham Crackers
Remove both wrapped dough squares from the refrigerator. Place a silicone baking mat on the counter (to prevent the parchment from sliding around) and a sheet of parchment paper on top of it. Lightly flour the parchment paper, place one of the dough squares on top, lightly flour the dough, and place a second sheet of parchment on top.
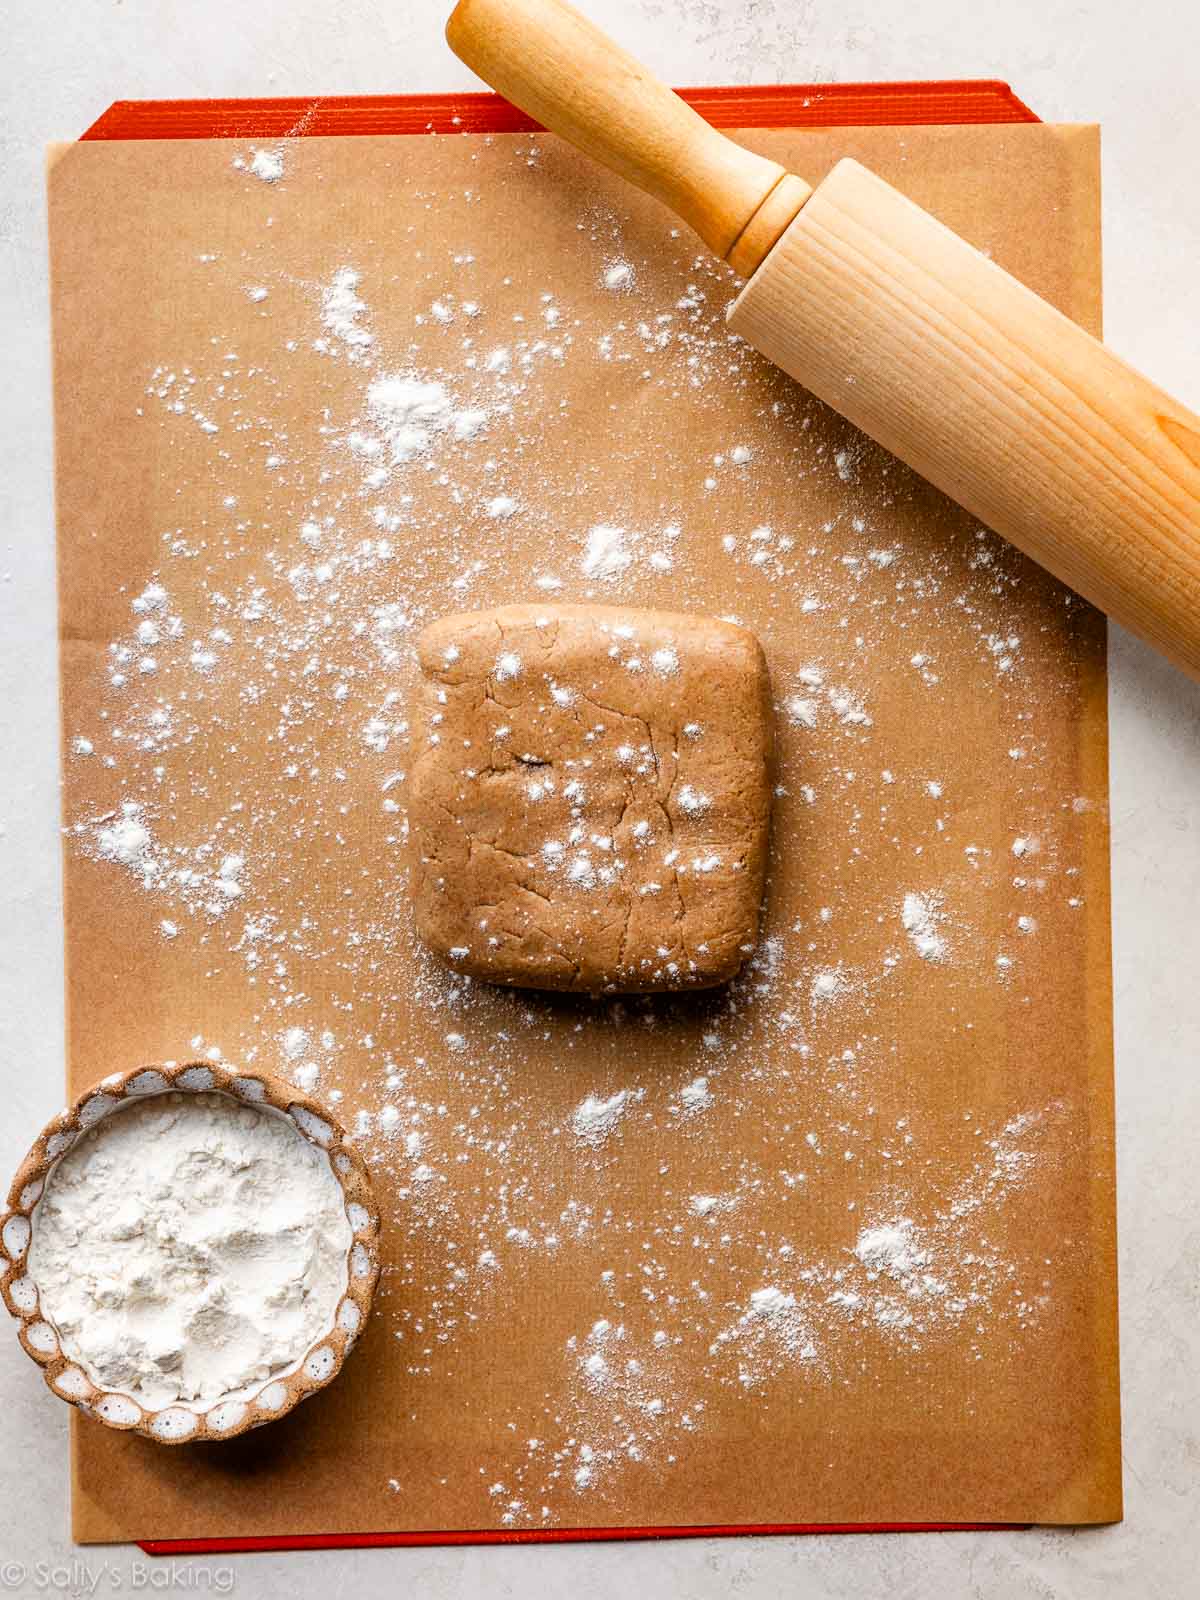
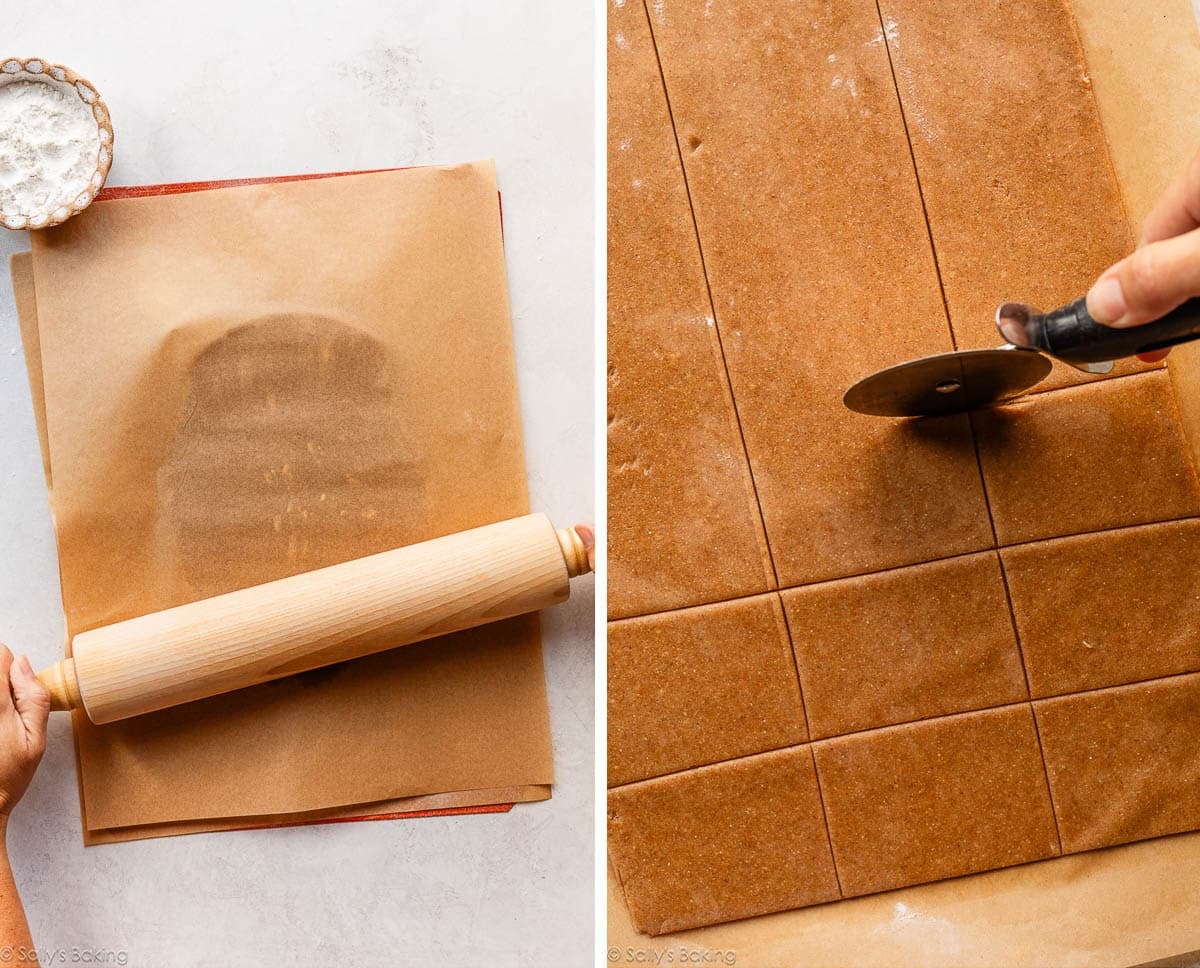
Roll out the dough between the sheets of parchment into a rectangle that’s evenly 1/8 inch thick. It takes a bit of arm strength at first, but gets easier as you go along and the dough softens up. Work slowly and be patient with it.
Occasionally peel off the parchment and re-flour as needed.
The size of the rectangle doesn’t matter but the thickness does (and making sure it’s evenly thick, not thinner or thicker in some places). Aim for 1/8-inch thickness (just over 3mm).
The thinner you roll the dough, the crisper the crackers will be.
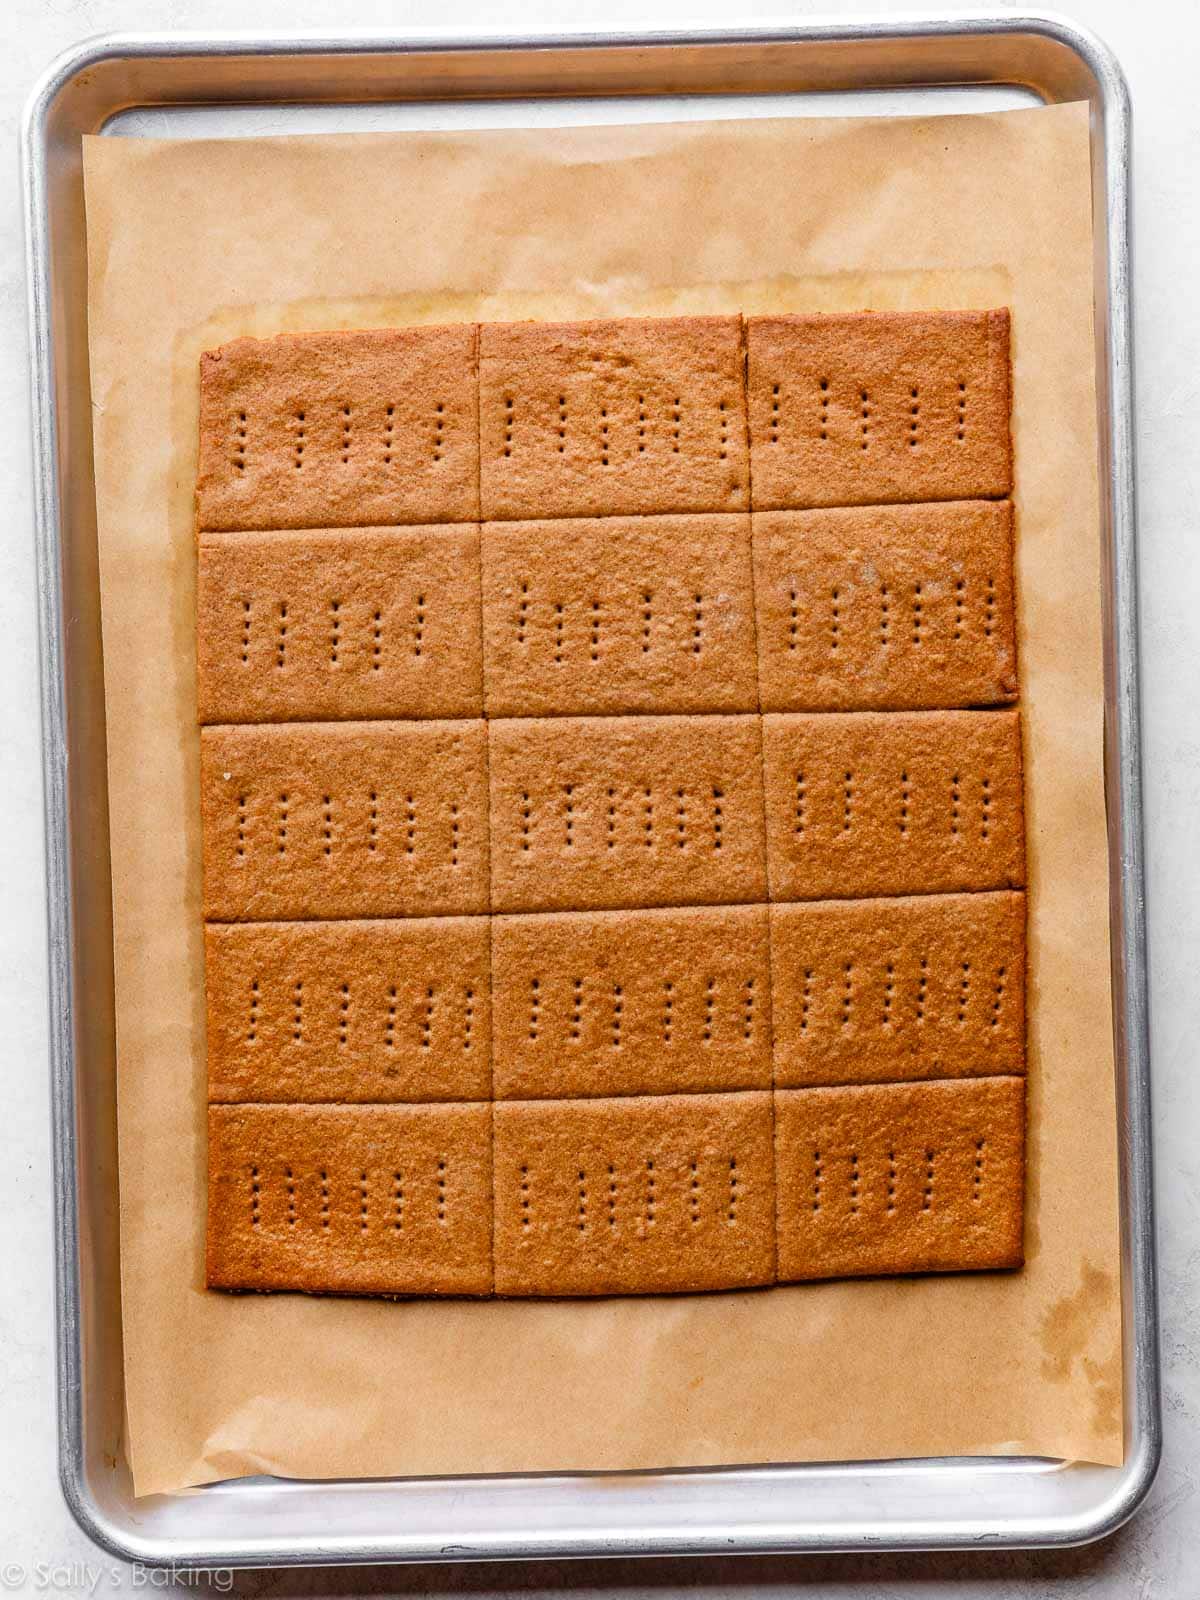
Trim the edges as needed and use a pizza cutter or sharp knife to cut the dough into rectangles or squares.
Tip: While not required, a sturdy ruler is a very helpful tool for straight edges and evenly sized graham crackers. You can even use the edge of the ruler to score the dough, and then cut along the scored lines with your knife or pizza cutter.
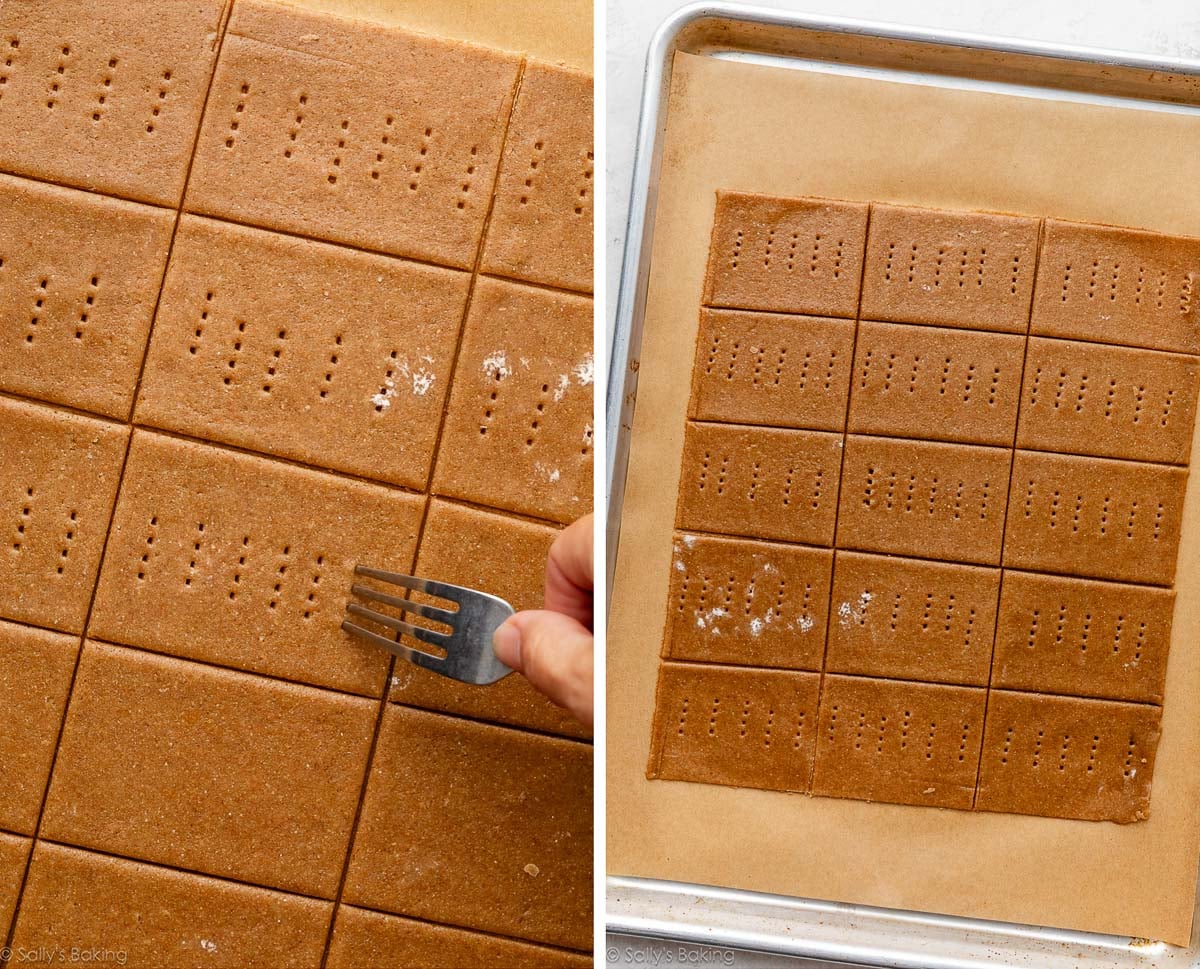
Dock each graham cracker several times with a fork to keep them from puffing up too much in the oven.
Transfer the dough, still on the bottom sheet of parchment paper, to a baking sheet and place it in the refrigerator for about 20 minutes while you preheat the oven. This helps ensure they don’t over-spread in the oven. In fact, the graham crackers shouldn’t spread much at all!
Repeat with the second piece of dough, and then bake both batches.
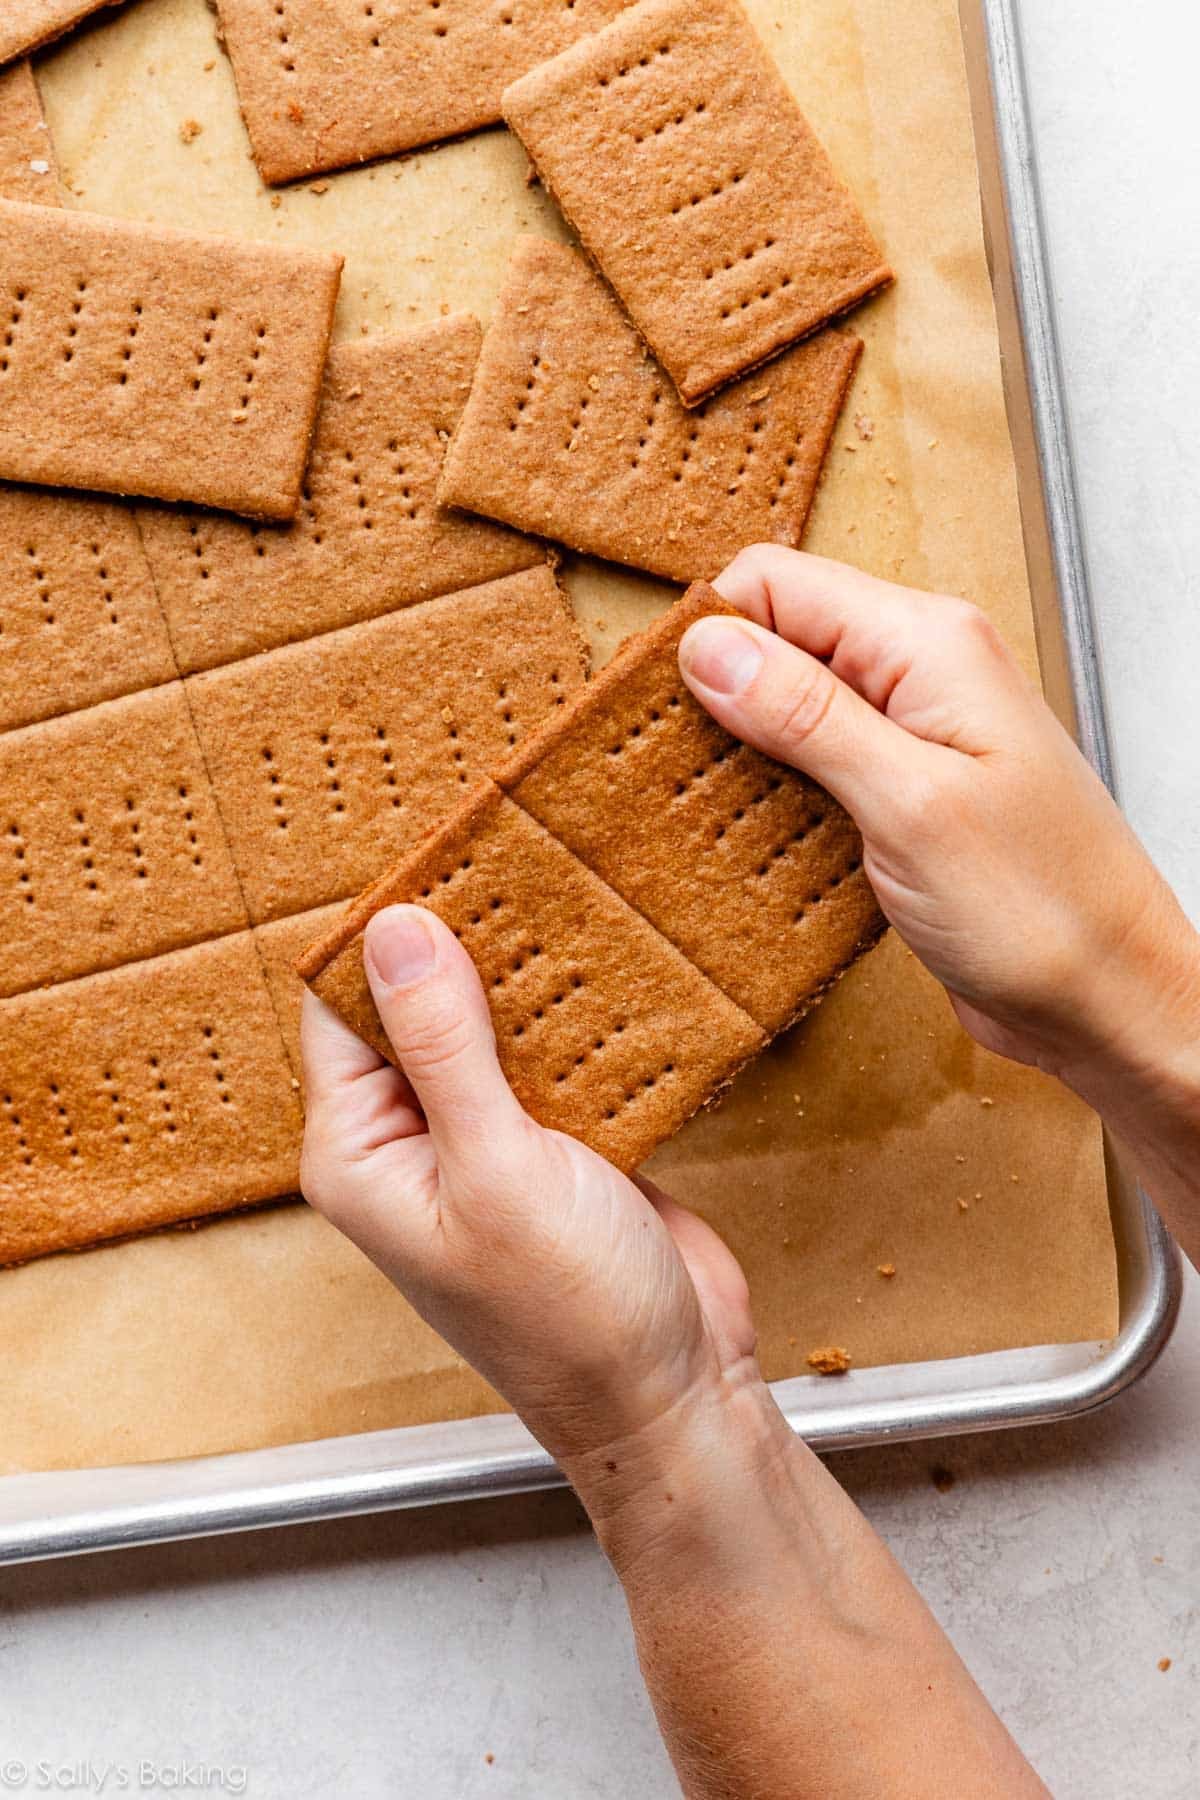
Once cool, use a sharp knife to cut the graham crackers apart along their seams.
Can I Make Them Softer or Crisper?
For crispier graham crackers, roll the dough slightly thinner and bake an extra minute or two.
For slightly softer crackers, roll them just a bit thicker and reduce the baking time slightly. You can also let them cool completely on the baking sheet rather than transferring them to a cooling rack.
Flavor Variations
Once you’ve mastered the classic recipe, try changing it up:
- Add a pinch of cardamom or ginger with the cinnamon.
- Add orange zest for a bright citrus twist.
- Dip cooled crackers halfway into melted chocolate and let set.
- For cinnamon-sugar graham crackers: Before baking, brush VERY lightly with water and then sprinkle with a mixture of cinnamon and granulated sugar. (This version was especially popular with kids!)
Best Uses for Homemade Graham Crackers
Besides eating them straight from the cooling rack, use them in recipes like:
- Graham cracker crust (reduce the melted butter in that recipe to 4 Tbsp/56g)
- S’mores (if you have the time and energy, pair with homemade marshmallows!)
- Banana pudding
- Key lime pie bars
- No-bake icebox cakes, like this easy berry icebox cake, s’mores icebox cake, or blueberry lemon icebox cake
- No-churn peach cheesecake ice cream
- Spread with peanut butter, Nutella, homemade marshmallow creme, chocolate buttercream, or vanilla buttercream
How to Store Homemade Graham Crackers
Store cooled graham crackers in an airtight container at room temperature for up to 1 week. If they lose a little crispness after several days (or after freezing and thawing), bake them in a 300°F (150°C) oven for about 5 minutes and cool completely.
Yes, with one minor adjustment—reduce the melted butter in the crust. We tested them in our go-to graham cracker crust, and discovered that because these homemade graham crackers are made with butter (and store-bought ones are not), the crust was overly greasy and didn’t hold shape well (the edges slipped down the sides of the pie dish as it baked). You still need *some* butter to bind the crumbs together. By reducing the melted butter in the graham cracker crust from 6 Tbsp (85g) to 4 Tbsp (56g), we achieved a perfect graham cracker crust made with homemade graham crackers.
Yes, but the bake time may slightly change. They will likely need less time, as they will bake separated on the baking sheet, as opposed to all together in a slab.
Yes. After freezing and thawing, the graham crackers will lose some crispness. You can re-crisp them in a 300°F oven for 5–10 minutes and cool completely. You can also freeze the dough. After dividing the dough in half, flattening into squares, and wrapping, place the wrapped dough in a freezer-safe container or bag, and freeze for up to 3 months. Thaw in the refrigerator overnight.
It depends on the size you cut them, and how much dough you trim from the edges after rolling, but you should get 24–32 graham crackers. One rolled-out portion of dough usually cuts nicely into either 12, 15, or 16 rectangles, and this recipe makes two portions of dough. If it’s helpful, the dough (all together) weighs about 600g.
Homemade graham crackers is one of those recipes that’s surprisingly satisfying to make from scratch. Whether you’re making classic s’mores around a campfire or simply enjoying one as a snack, these honey-sweet crackers are far more flavorful than anything you’ll find in a box!
Print


Homemade Graham Crackers
- Prep Time: 1 hour, 45 minutes
- Cook Time: 16 minutes
- Total Time: 2 hours
- Yield: 24-32 graham crackers, depending on size
- Category: Dessert
- Method: Baking
- Cuisine: American
Description
These homemade graham crackers are crisp, buttery, and lightly sweet with classic honey and cinnamon flavor. Made with simple pantry ingredients, they’re perfect for snacking, s’mores, pie crusts, cheesecake crusts, and icebox cakes. See recipe Note for extra tips, and how to use them to make a graham cracker crust.
Ingredients
- 1 and 1/2 cups (195g) whole wheat flour (spooned & leveled)
- 2/3 cup (83g) all-purpose flour (spooned & leveled)
- 1/2 teaspoon baking soda
- 1/2 teaspoon salt
- 1 teaspoon ground cinnamon
- 8 Tablespoons (113g) unsalted butter, softened to room temperature
- 1/3 cup (67g) packed light or dark brown sugar
- 1/3 cup (113g/80ml) honey
- 1 teaspoon (7g/5ml) molasses (optional)
- 1 teaspoon pure vanilla extract
- 1 and 1/2 Tablespoons (23g/ml) milk, at room temperature (any kind, dairy or nondairy)
Instructions
- Make the dough: In a medium bowl, whisk the whole wheat flour, all-purpose flour, baking soda, salt, and cinnamon together. Set aside.
- In a large bowl using a handheld or a stand mixer fitted with a paddle attachment, beat the butter and brown sugar together on medium-high speed until the mixture is light and creamy, about 3 minutes. Add the honey, molasses, and vanilla and beat on medium-high speed until combined. Scrape down the sides and bottom of the bowl and beat again as needed to combine.
- Add the milk and the dry ingredients to the wet ingredients and mix on low speed until combined. The dough should be soft.
- Divide the dough in half and shape each portion into a flattened square. Wrap each square tightly in plastic wrap and refrigerate for at least 1 hour and up to 2 days.
- Shape the dough: If the dough has chilled for longer than 1 hour, let it sit at room temperature for about 20 minutes before rolling so it can soften slightly. Working with 1 portion of dough at a time, place a silicone baking mat on your work surface (to keep the parchment from sliding around), then place a lightly floured sheet of parchment paper on top. Place the dough on the parchment, lightly flour the top of the dough, and cover with a second sheet of parchment. Roll into a rectangle that’s evenly 1/8-inch thick.
- Remove the top sheet of parchment. Trim the edges if desired, then use a pizza cutter or sharp knife to cut the dough into evenly sized rectangles or squares. Cut all the way through the dough, but don’t separate the pieces—leave them together as one slab. Use a fork to dock each cracker several times. Transfer the parchment with the cut dough onto a baking sheet. Repeat steps 5 and 6 with the second square of dough.
- Refrigerate both baking sheets (or stack the slabs of dough on top of each other, separated by parchment) for 20 minutes while you preheat the oven. Chilling helps prevent spreading; the crackers should spread very little in the oven.
- Preheat the oven to 350°F (177°C).
- Bake for about 16 minutes, rotating the pan(s) halfway through. The crackers are done when they are lightly browned around the edges and appear dry on top.
- Allow the crackers to cool on the baking sheet for 5–10 minutes before transferring to a cooling rack to cool completely. They will continue to crisp considerably as they cool.
- Once completely cool, use a sharp knife to cut along the seams to separate the graham crackers. Store cooled graham crackers in an airtight container at room temperature for up to 1 week.
Notes
- Make Ahead & Freezing: You can make the dough ahead of time, through step 4, and refrigerate the wrapped squares for up to 2 days. Homemade graham crackers freeze well for up to 3 months. Layer between sheets of parchment paper in a freezer-safe container or bag. To thaw, thaw in the refrigerator or at room temperature. You can also freeze the dough (before rolling it out) for up to 3 months. Prepare the dough through step 4, and place both wrapped squares in a freezer-safe container, and freeze. Thaw the wrapped dough in the refrigerator overnight, then bring to room temperature for about 1 hour. Continue with step 5. If the crackers lose some crispness after freezing (or after several days at room temperature), bake them in a 300°F (150°C) oven for about 5 minutes and cool completely.
- Special Tools (affiliate links): Whisk | Electric Mixer (Handheld or Stand Mixer) | Silicone Spatula | Silicone Baking Mat | Parchment Paper | Wooden Rolling Pin or Adjustable Rolling Pin | Pizza Cutter | Baking Sheets | Cooling Rack
- Using These for Graham Cracker Crust: Because these crackers contain butter (unlike most store-bought graham crackers), reduce the melted butter in my graham cracker crust recipe from 6 Tablespoons (85g) to 4 Tablespoons (56g). This prevents the crust from becoming greasy while still holding together beautifully. All other instructions remain the same.
- Rolling Tip: Don’t worry if the dough seems thinner than cookie dough when you roll it out. That’s exactly what you want. Roll the dough to an even 1/8-inch thickness for classic crisp graham crackers with a satisfying snap. For softer, thicker crackers, roll the dough out a little thicker.
- Cookie Cutters: Instead of cutting the dough into squares or rectangles and baking in a slab, you can cut the dough with cookie cutters as if you were making sugar cookies. Because the crackers will bake individually rather than together as one slab, they may need less time in the oven.
- Yield: This recipe makes about 24–32 graham crackers, depending on how large you cut them.
- Molasses: Optional, but highly recommended for the richest graham cracker flavor.
- For Cinnamon-Sugar Graham Crackers: Before baking, lightly brush the tops with water, then sprinkle with a mixture of 3 Tablespoons (37g) granulated sugar and 1/2 teaspoon ground cinnamon. You likely won’t use all of it, depending on how generously you sprinkle.
Recipe adapted from learning homemade graham cracker basics from King Arthur Baking & The Kitchn
Nutrition
- Serving Size: 4 crackers
- Calories: 291
- Sugar: 19.9 g
- Sodium: 228 mg
- Fat: 12.2 g
- Carbohydrates: 44.2 g
- Protein: 4.3 g
- Cholesterol: 30.6 mg













Reader Comments and Reviews
I really didn’t give these a fair try because my whole wheat flour was expired, so I’m not sure if that affected the taste or not.
They were very hard to roll out and 16 minutes was too short because after they cooled they are still quite soft. Kinda a fun trial and error though.
I made the graham crackers gluten free! They tasted great, but they were way too crumbly. Not sure if this was the recipe’s fault. According to the other comments, probably not.
These graban crackers turned out so lovely! We made s’mores out of them, which my mom said were the best she’d ever tasted!
Loved the crunch, and the flavor. That optional touch of molasses MADE this recipe pop. I’d never made graham crackers before, but I ended up making this twice.
I never would have thought to make them from scratch before! They came together really easily and the recipe instructions are clear. They do need to be rolled very thin to come out like the store bought thin ones for s’mores. Half of my batch I rolled too thick and they came out soft like gingerbread cookies (still delicious though). I would make them again for s’mores!
Turned out well and had a really nice flavor!!
So delicious! I think I didn’t roll it quite thin enough, so when we used it for s’mores the ratio of graham to marshmallow to chocolate was off a little but that’s my fault. The taste is both familiar graham but also elevated and stronger.
These were good, but I think because of the thickness/bake time mine came out more like a cookie? They were softer than I would have liked, but have made for a great crust
These were hard to roll out and cut into the right shape–nothing wrong with the instructions, just way more work than they’re worth in my opinion. They tasted good but I don’t think I’ll make them again, when I could just buy graham crackers. One possible modification is to make the sheet without scoring it, and cut it into rectangles when it’s hot out of the oven
Easy and good! We used lucky charms marshmallows that were already a smaller size. The broil setting on our oven unfortunately cooked the first batch a little too much but the second batch came out great once we figured out a better time limit to set on it.
Not as crispy as I would have liked but I just couldn’t roll them thin enough. They do taste good, especially dipped in chocolate!
So yummy! The dough worked really well with cookie cutters.
The instructions for these homemade graham crackers are clear, and I appreciate Sally’s attention to how to navigate the rolling process for such a delicate, finicky dough. We ultimately enjoyed the flavor of these crackers, though I am curious how they might taste with actual graham flour!
Super easy and smells wonderful
Sally’s recipes never fail me and these graham crackers are no exception. I’ll be surprised if they last more than a day with my family.
I made these for college children, and they went wild over them.
The recipe was easy and delicious.
I never would have thought to make homemade graham crackers but these were easy and so delicious!
First time making graham crackers and we are fans! Pretty easy recipe to put together
So good!!!
Sooo, I just took them out of the oven and I have to hide them from my daughter… they are so good and so easy to make!
Holy smokes these are good! My first thought was “why do I need to make graham crackers”? But I did and they were easy and delicious! The crackers stayed crisp in a zip-lock bag for 4 days which is all the longer they lasted in our house. I’ll make them again!
These were surprisingly simple but look so fancy!! Everyone devoured them
Awesome graham crackers.
Very easy recipe, and tasty, my toddlers love them! Will likely make them again.
These are really good! I was skeptical making them and even when they came out of the oven I wondered, but oh my, with a bit of butter on them they are out of this world!!
Turned out delicious! I wasn’t too careful with the shapes when I cut them, since I planned to crush them up to use as a cheesecake crust. Yum!
This was fun! I struggled to roll evenly and nicely but the flavor and texture were just right!
Due to allergies, I made these with tiger nut flour, arrowroot, agave and maple sugar. They were quite good. And I look forward to using them in a graham cracker crust recipe soon.
These are delicious! I can’t believe the difference between store bought and these! My husband loves them. He’s known for his cheesecakes and has asked that I make these for his crusts. We’re already planning s’mores parties with homemade marshmallows.
These look amazing! Do you think there’s a substitute that would work for someone with a honey allergy? Thank you!
Hi Hattie, one reader reported using agave in the place of honey here with success. We haven’t tested it ourselves, but let us know if you try!
Outstanding recipe. I used 100% whole wheat AP flour from Janie’s Mill which is a regional grower and miller and doubled the cinnamon to accommodate a serious hankering. The sparkle sugar was around from another project, but looked and tasted great. If this recipe catches on, Mondelez and Keebler are in trouble these are really good and not much harder than going to the grocery store.