

Use this page to learn how to blind bake a pie crust, whether that’s fully blind-baking before adding a no-bake filling, or partially baking (par-baking) the crust before returning to the oven with a filling. Many pie recipes require par-baking pie crust and this tutorial provides step-by-step instructions, as well as a helpful video tutorial and plenty of success tips.
I originally published this tutorial in 2018 and have since added new photos, a video tutorial, and a few more success tips.
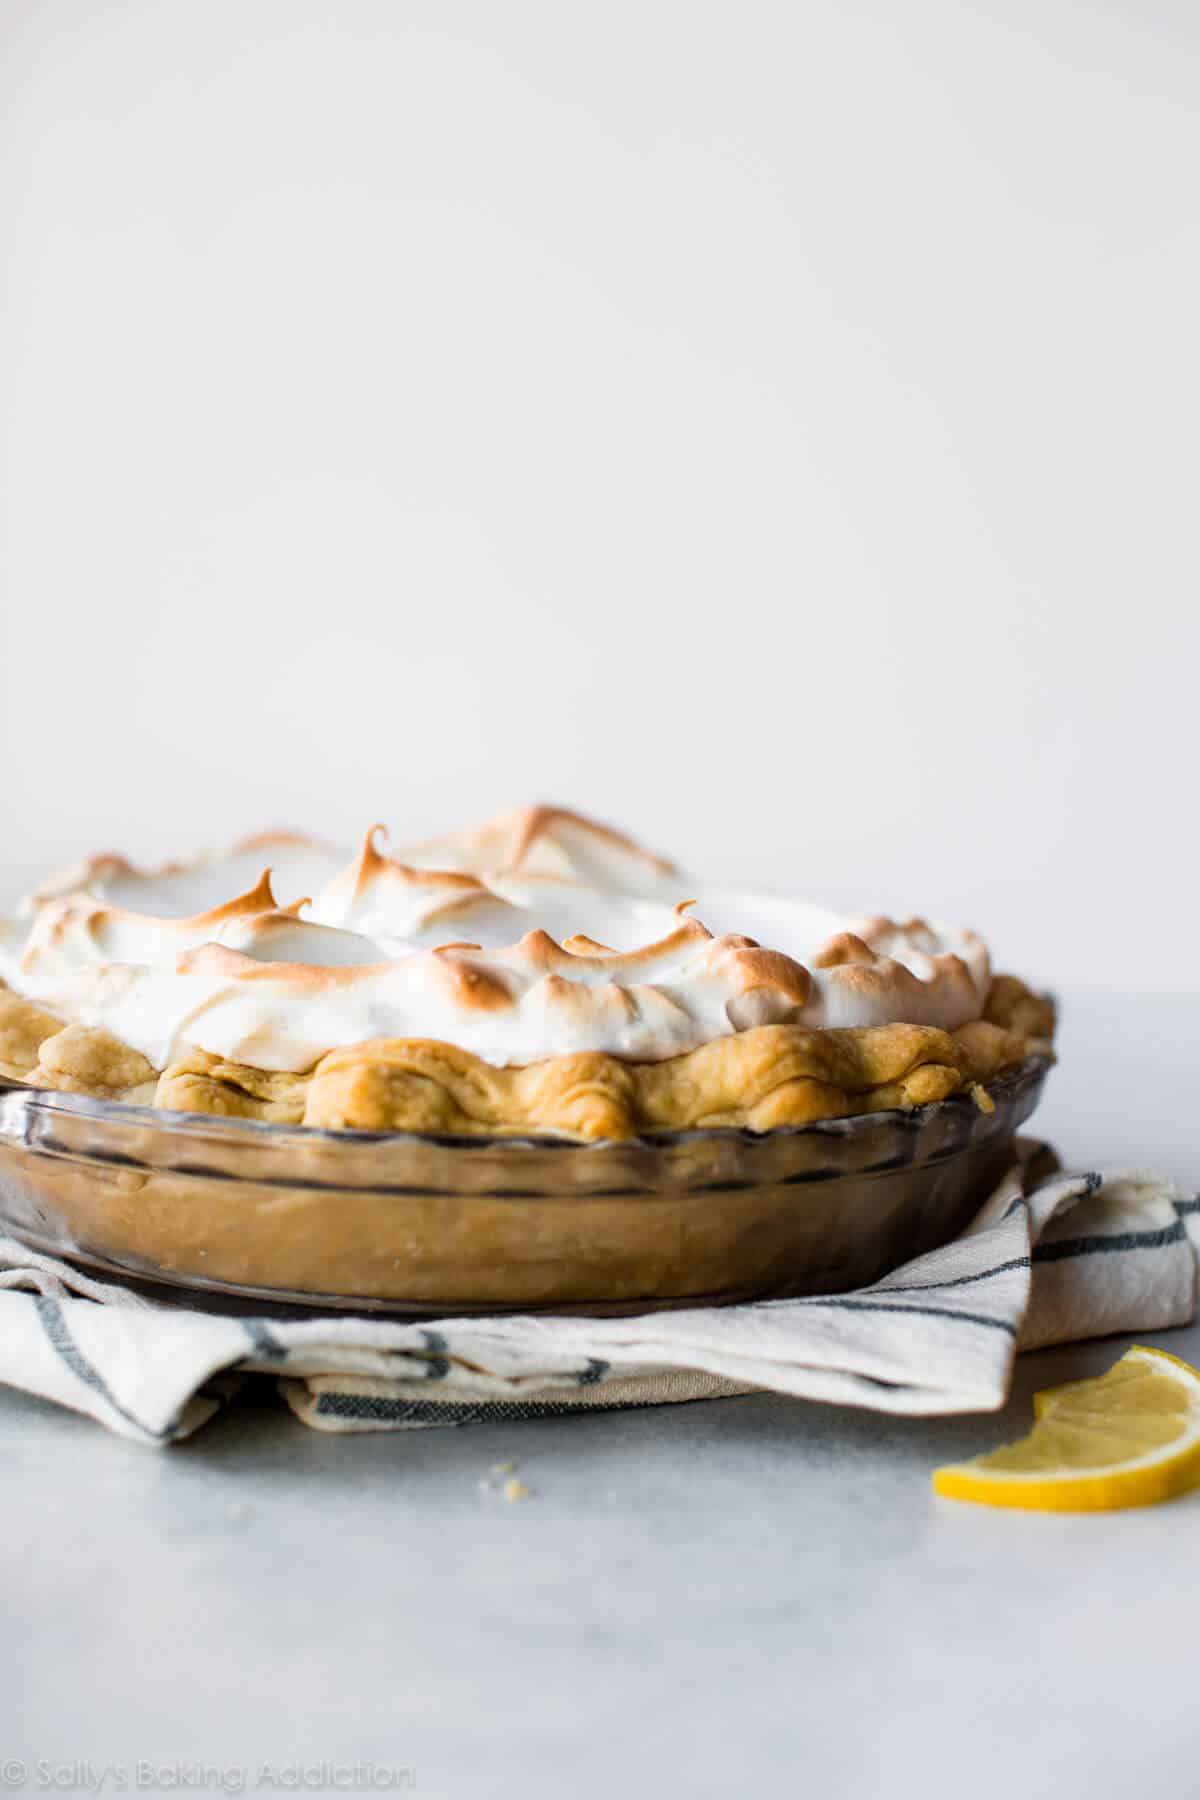
Par-baking (which can also be called blind baking) is an integral step in many pie recipes and a basic baking technique to have in your back pocket. Classic recipes such as coconut cream pie, pumpkin pie, and lemon meringue pie require some sort of blind baking.
Par-baking pie crust sounds pretty intimidating, especially if you’re already nervous about making pie from scratch. I’m here to tell you (and show you!) that blind baking pie crust is simple, and I have a few tips to help guarantee success.
Why Par-Bake?
Why would you bake pie crust without a filling? There are a few instances, actually. You need a par-baked or fully baked crust if you’re making quiche, no-bake pie, custard pie, cream pie, pudding pie, or simply want an extra-crisp pie crust. If you’re making a pie that doesn’t require a baked filling, you still need a baked crust. Or if you’re baking a pie with a liquid-y filling that sets quickly in the oven, like pumpkin pie, your crust may need a baking headstart.
One reader, Marylou, commented: “I made 2 par-baked crusts for pumpkin pies. They turned out perfectly. Well worth the extra step. No mushy bottom crust! ★★★★★“
Fully Blind Baked vs. Partially Baked
If your pie recipe calls for a baked pie shell, such as butterscotch pie, you need to fully bake it. But some recipes require a partially baked pie crust and those recipes will typically include “pre-baking,” “partially baking,” or “par-baking” the crust in the instructions. I’ll show you both methods below.
Whether you’re fully blind baking or partially blind baking pie crust, the process is exactly the same; it’s the bake time that differs. Fully baked pie crusts bake for longer than partially baked pie crusts.
- Fully blind bake a pie crust if you’re making no-bake pie like coconut cream pie.
- Partially bake a pie crust if your crust needs longer in the oven than the pie filling, such as brownie pie or quiche. And if you want an extra-crisp pie crust for your apple pie, you can partially blind bake the crust before adding the filling.
How to Par-Bake Pie Crust
While the idea of baking pie crust is quite simple, there’s more to it than just throwing pie dough in a pie dish and baking.
Here’s our problem: As the pie dough bakes, the fat melts. This causes the pie crust to shrink down the sides of the pie dish. And as the fat melts, it creates steam. Steam is both good and bad. It creates DELICIOUS layers and flakes, but also causes the pie dough to puff up when there’s no heavy filling weighing it down.
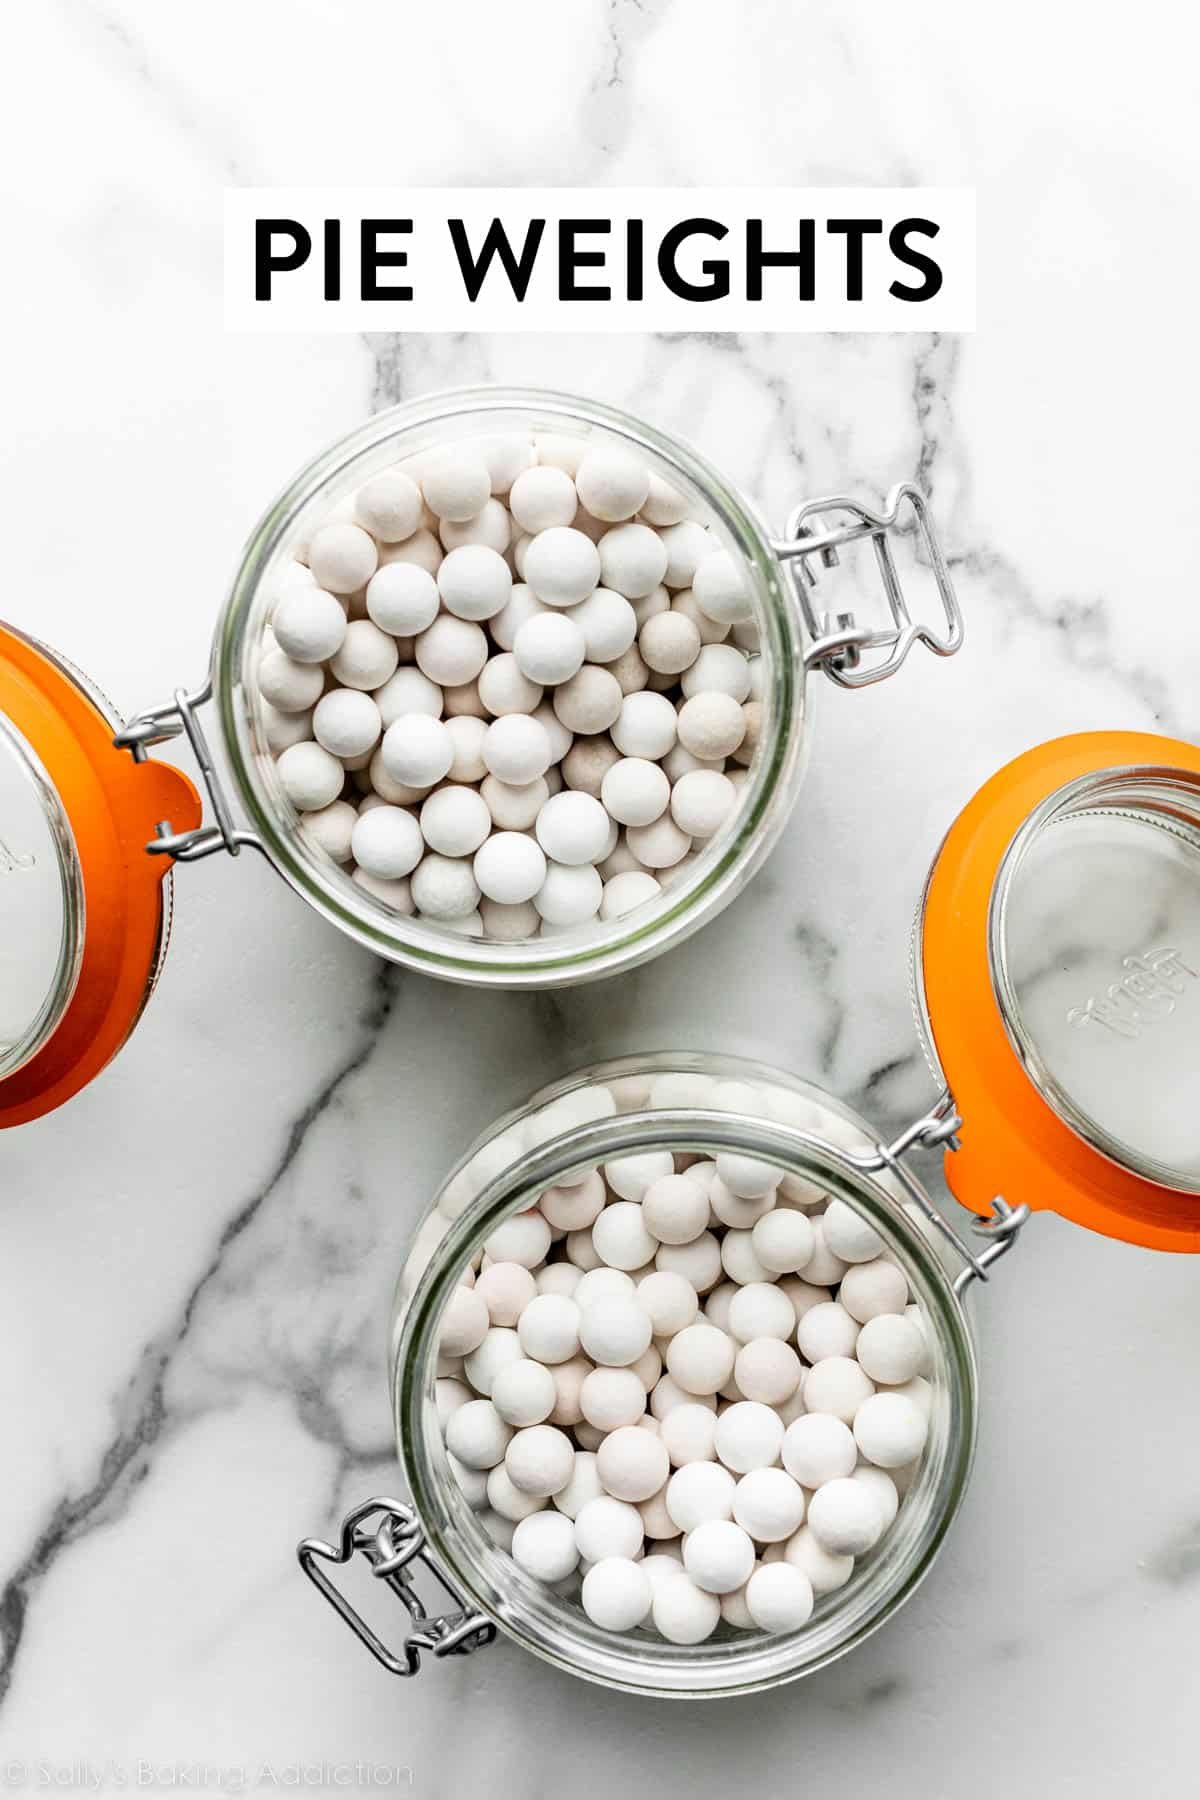
Here’s our answer: Weigh down the pie crust with something so it doesn’t puff up in the center or shrink down the sides. Carefully line the pie dough with parchment paper first, then add some weight. You can purchase special pie weights or you can use dry beans. I’ve also seen the use of granulated sugar and even pennies. I just stick to pie weights. Note: 2 packs of these pie weights is definitely needed!
You’ll bake the pie crust with pie weights until the edges set, or lightly brown, which is about 15 minutes.
One reader, J.D., commented: “Finally had a pie crust that didn’t shrink or melt down the sides. Great instructions, thank you! ★★★★★“
Because it’s covered with weights, the bottom of the pie crust doesn’t cook. You have to return it to the oven after the edges have set. But first, dock it with a fork:
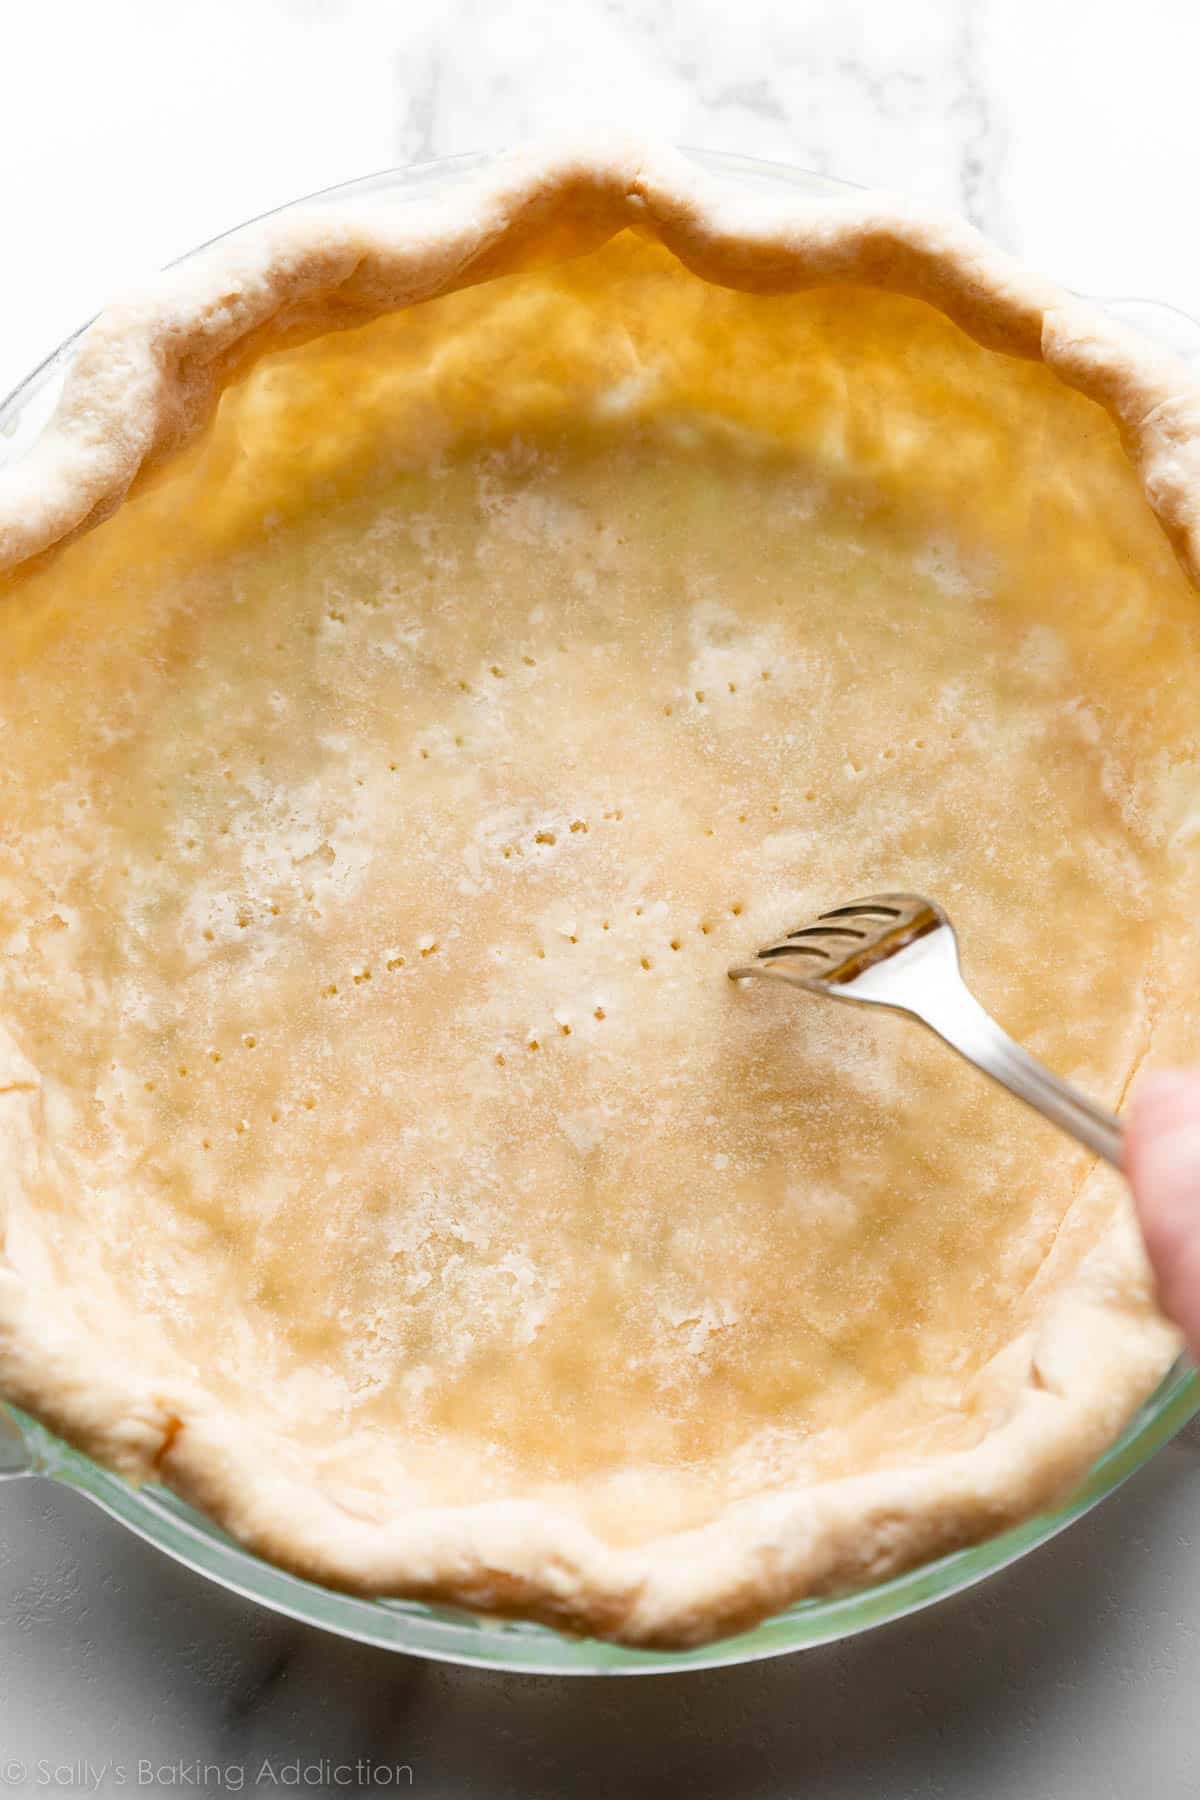
How to Dock Pie Crust
Once the crust is brown around the edges, carefully remove the parchment paper + weights, then let the crust cook a little longer on its own. The amount of time the “weight-free” pie crust bakes depends on if you need a partially baked crust or a fully baked crust.
Before returning to the oven without the weights, you need to prick the bottom crust with a fork to prevent it from puffing up. Pricking holes in pie crust is also called “docking” the pie crust.
Some bakers skip the pie weights and just dock the pie crust from the beginning, but I’ve never had luck this way. The sides of my pie crust still shrink down. So I always use pie weights, remove them after the edges begin to turn brown, dock the crust with a fork, then return it to the oven so the bottom cooks.
How Long Does the Pie Crust Bake After Removing the Weights?
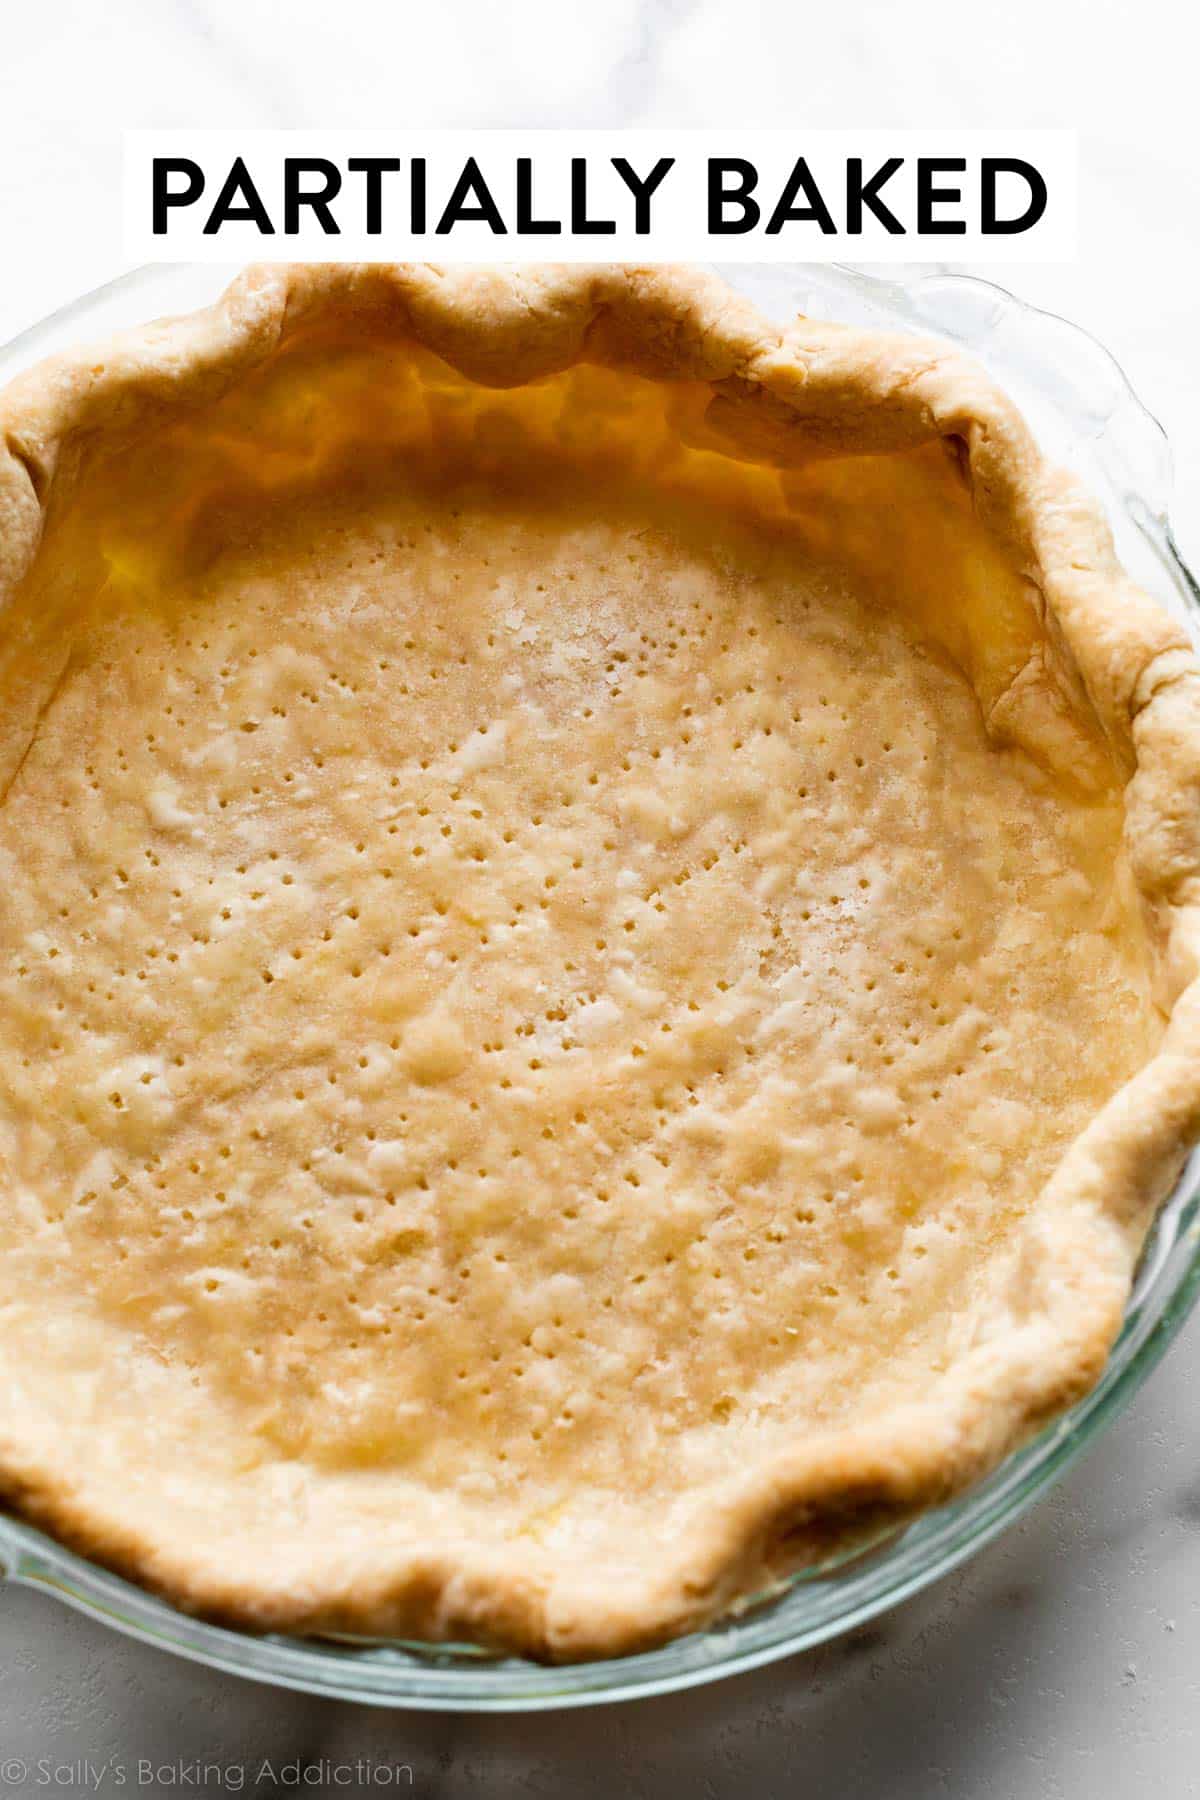
The remaining oven time depends on whether you want a partially blind baked pie crust or a fully blind baked pie crust. For a partially baked pie crust, bake until the bottom just begins to brown, usually about 7–8 more minutes. To fully bake a pie crust, bake until the bottom and edges are browned and cooked through, about 15 more minutes.
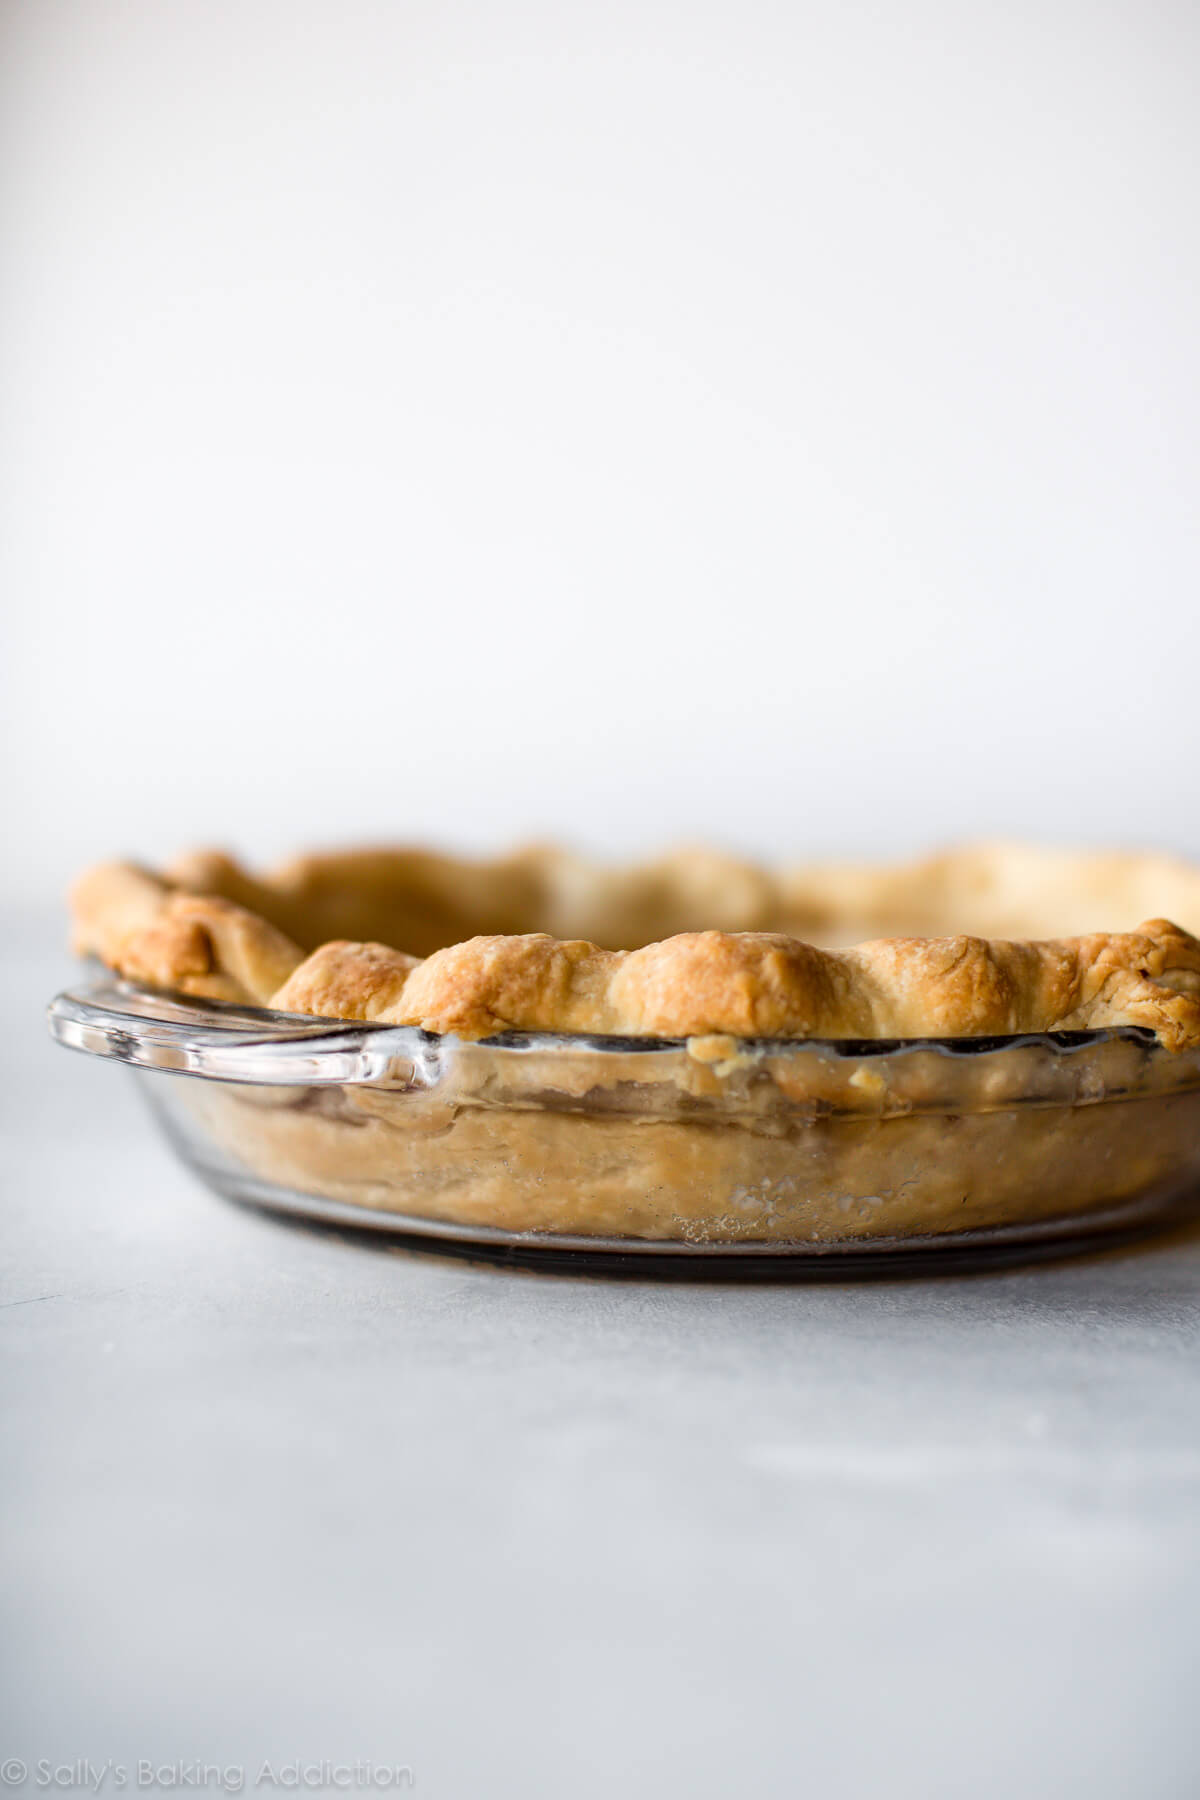
Partially baked means your crust is just barely brown and the pie will return to the oven with a filling:
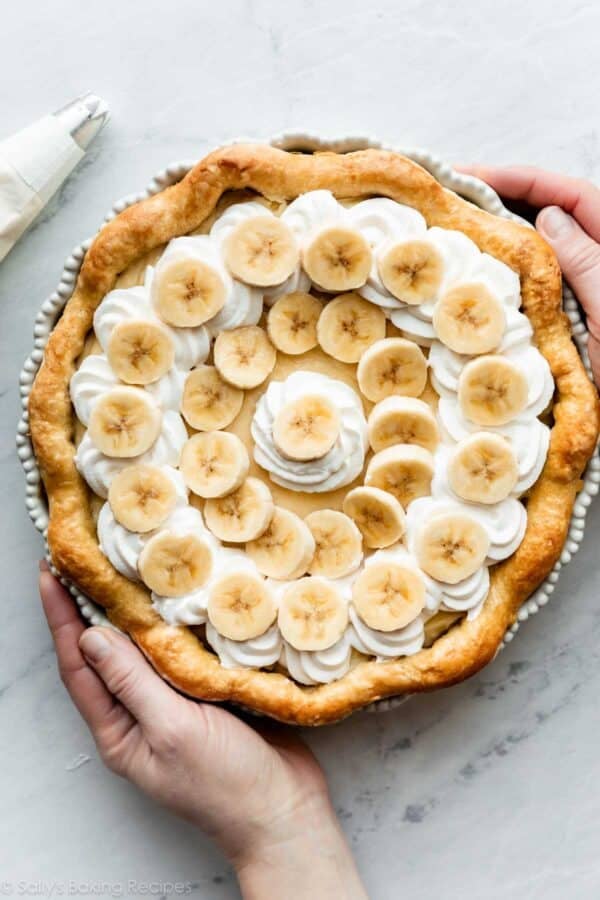
Fully baked means your pie dough is 100% cooked and ready for a no-bake filling:
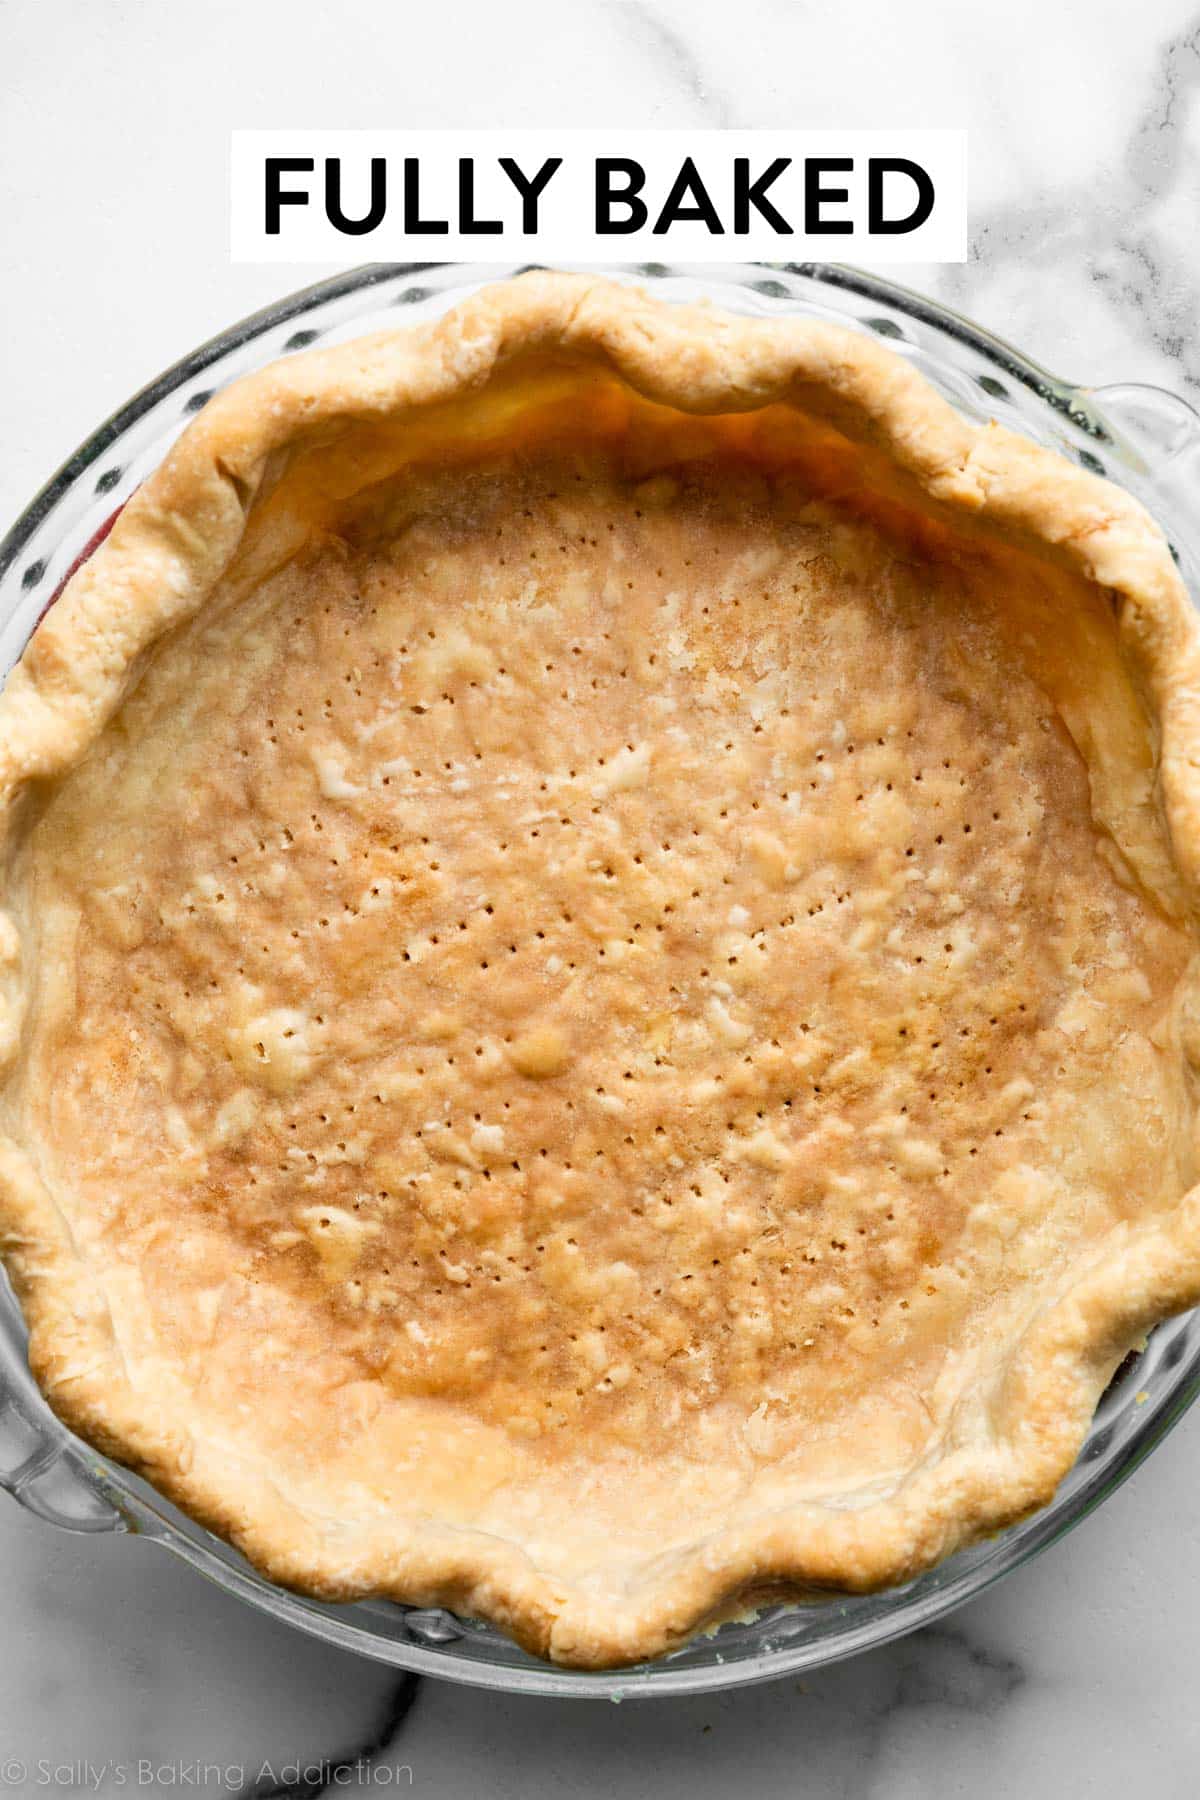
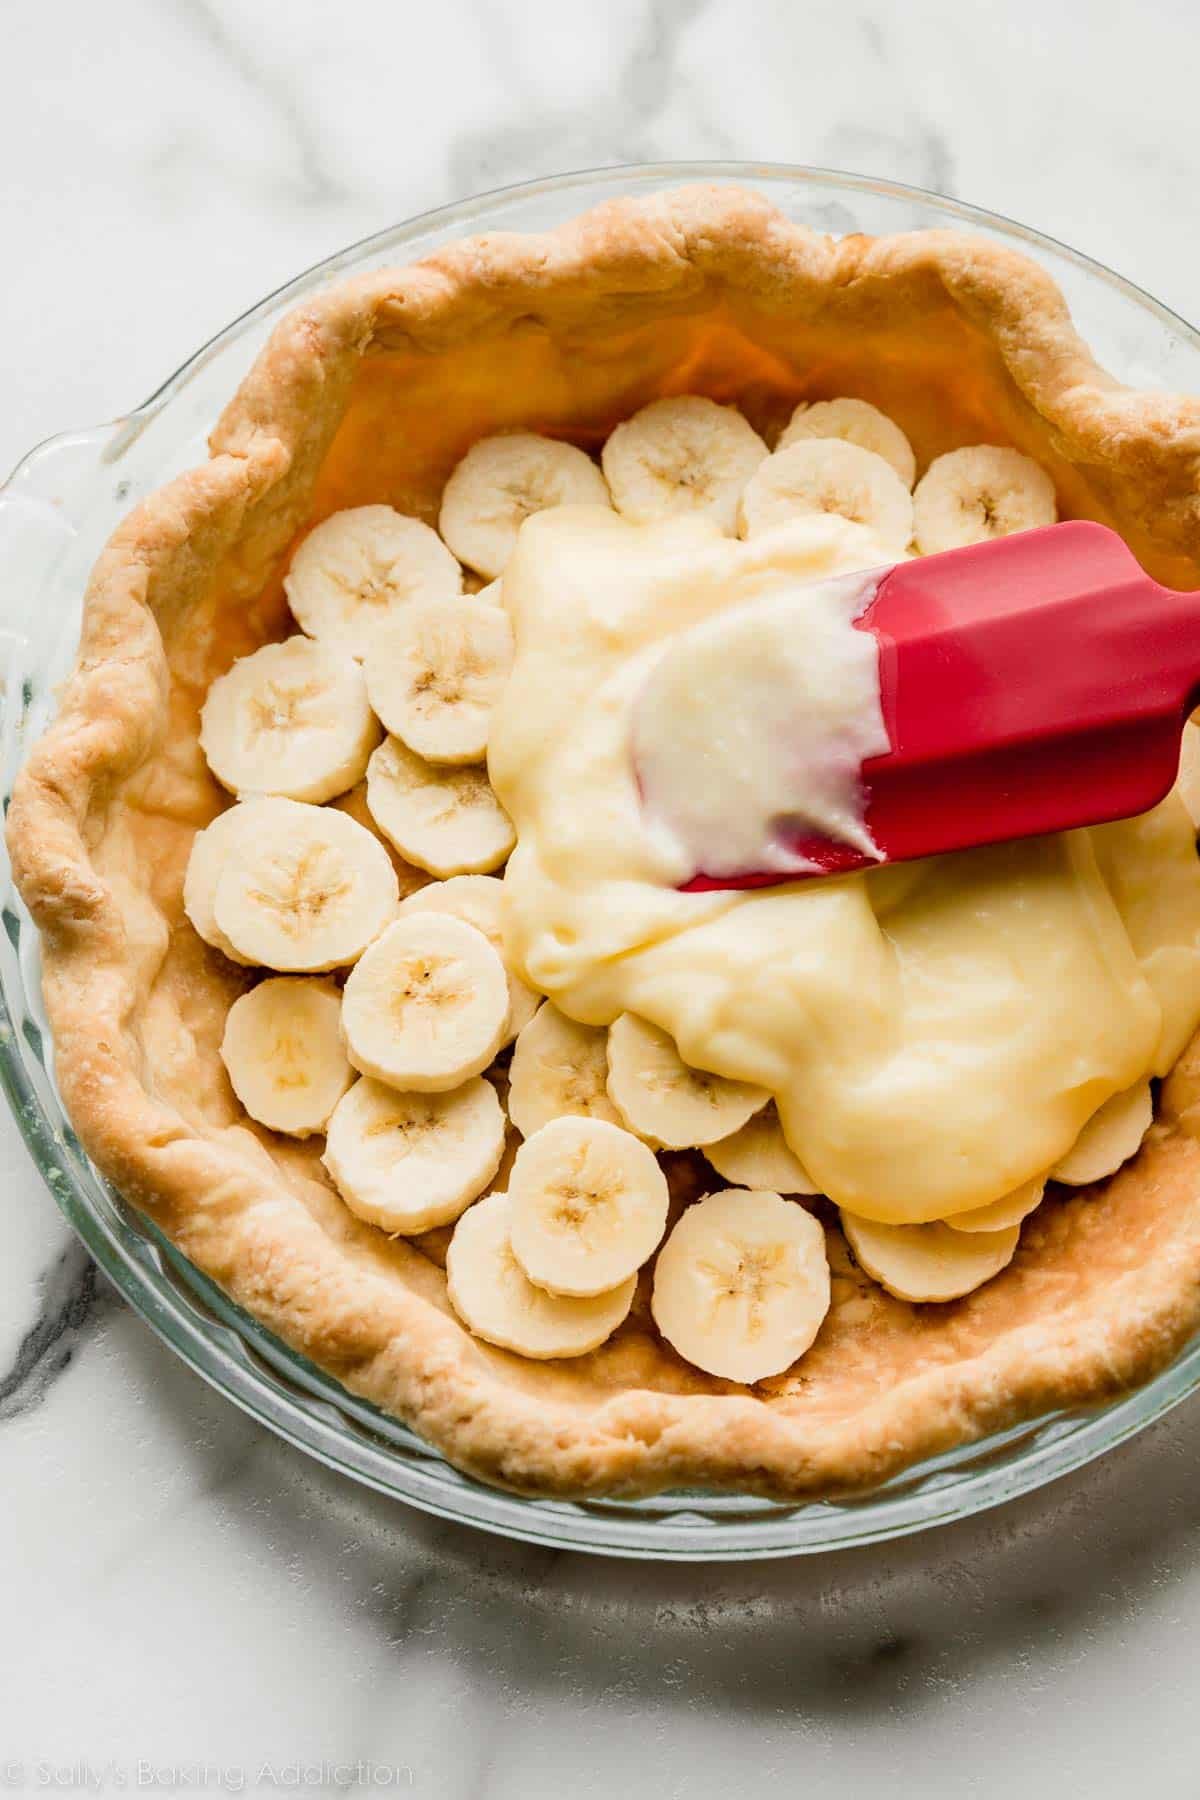
Like banana cream pie:
FAQ: Do I Need to Par-Bake a Store-Bought Pie Crust?
If your recipe calls for a baked or par-baked pie crust, and you are using store-bought pie dough, you still need to par-bake it. For example, if using store-bought crust in this brownie pie recipe, you still need to follow the par-baking instructions in that recipe (which are the same instructions you find below).
FAQ: Can I Add an Egg Wash?
Many pie recipes call for brushing the crust with an egg wash, and typically the recipes will tell you when to do that. If you aren’t sure when, and you need to par-bake the crust, you can brush the crust’s edges with an egg wash after par-baking with pie weights, and before returning to the oven to bake without the weights. This is what we do for my chai pumpkin meringue pie recipe. An egg wash is 1 egg beaten with 1 Tablespoon of milk or water. Use a pastry brush.
FAQ: How Can I Apply a Top Crust to Par-Baked Bottom Crust?
Blind-baking is usually required for custard-type pies, where there generally isn’t a top crust. Adding a top crust, such as lattice pie crust or other beautiful pie crust designs is possible though. I’ve always found Erin McDowell’s tutorial for this helpful. A lot of it is tucking the top dough edges under the par-baked bottom crust edge, and then crimping the pie crust edges together.
How to Prevent Pie Crust From Shrinking
Pie weights prevent the bottom crust from puffing up and help prevent the sides from shrinking down, but up until recently, I still had trouble with the sides losing shape. It was so frustrating. I played around with some techniques and now my pie crusts never shrink. I have a nice thick crust with a beautifully fluted or crimped shape around the pie dish. And you can too!
2 TRICKS THAT HELP:
- Make sure you chill your pie shell before par-baking.
- Make sure you have a thick crust on the sides using my “dough strip” technique.
Chilling the pie shell before par-baking doesn’t need much explanation, so let me show you how I create thick edges.
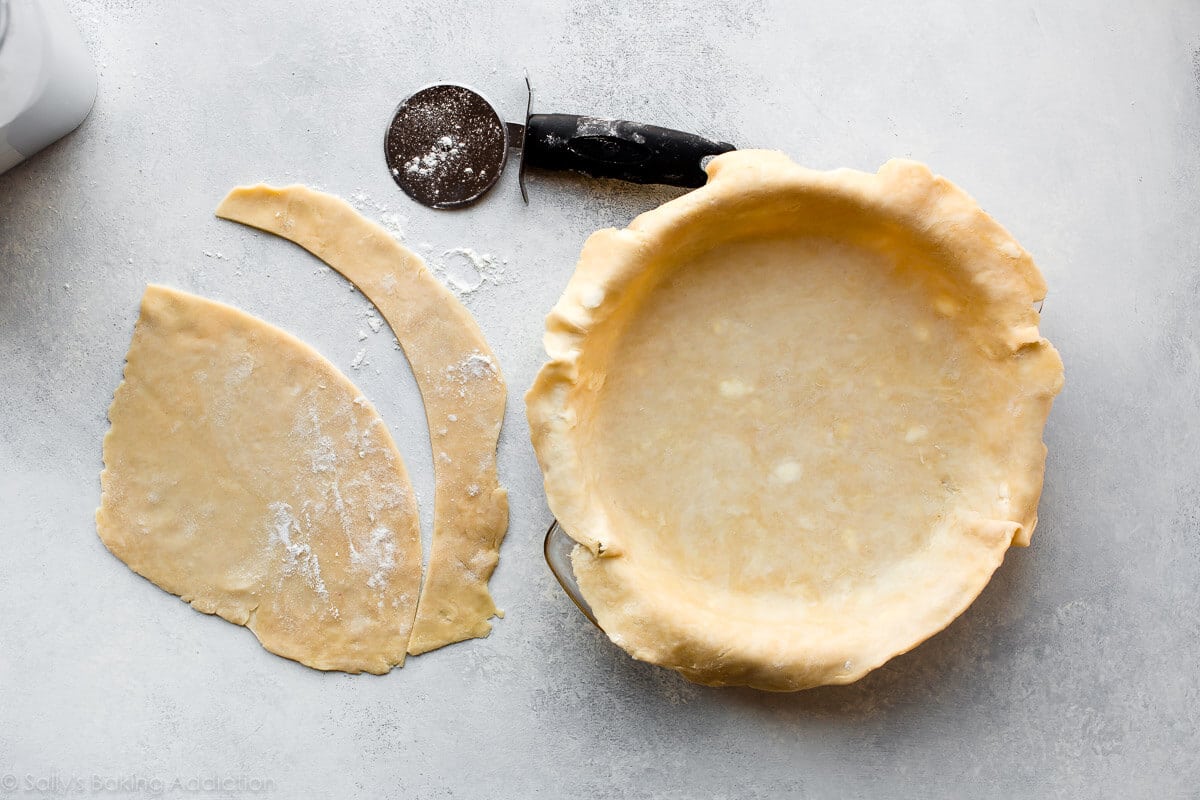
DOUGH STRIP TECHNIQUE
Roll out your pie crust dough and fill your pie dish. Grab some extra pie dough, cut into strips, and meld the strips around the edges.
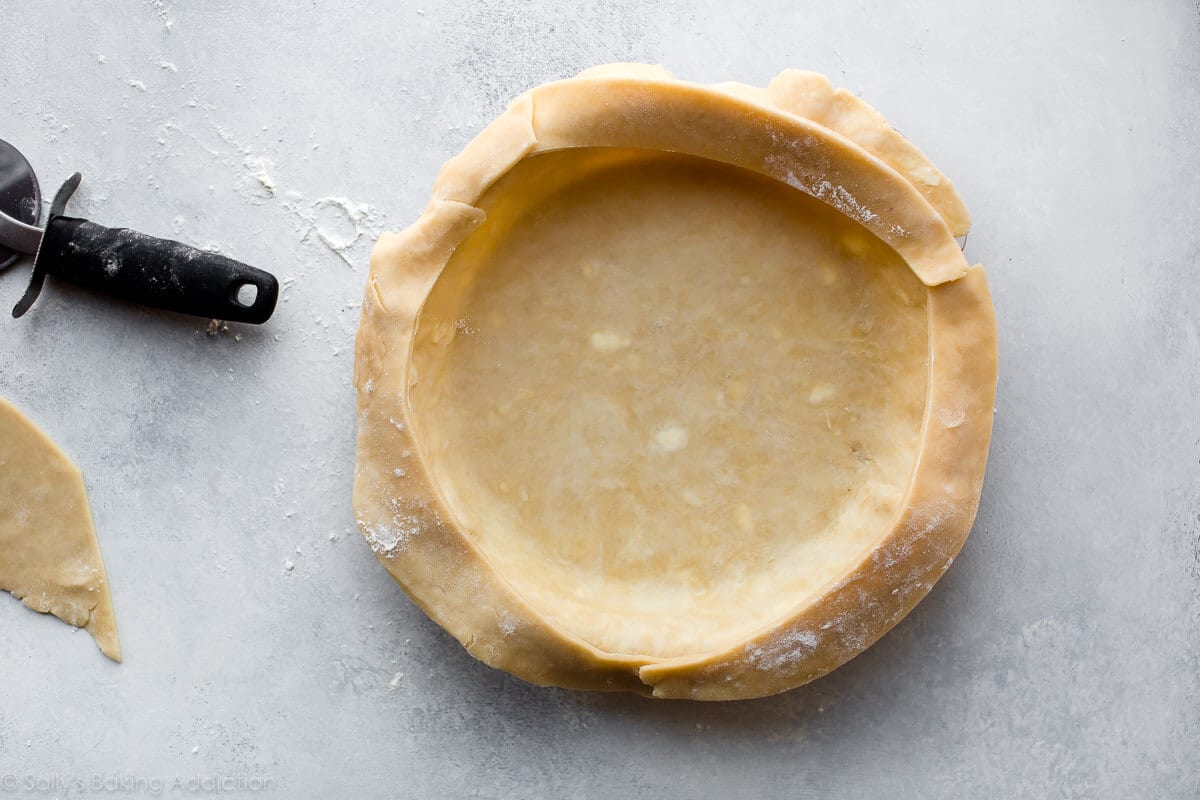
Use your fingers to work the extra strips of dough into the edges.
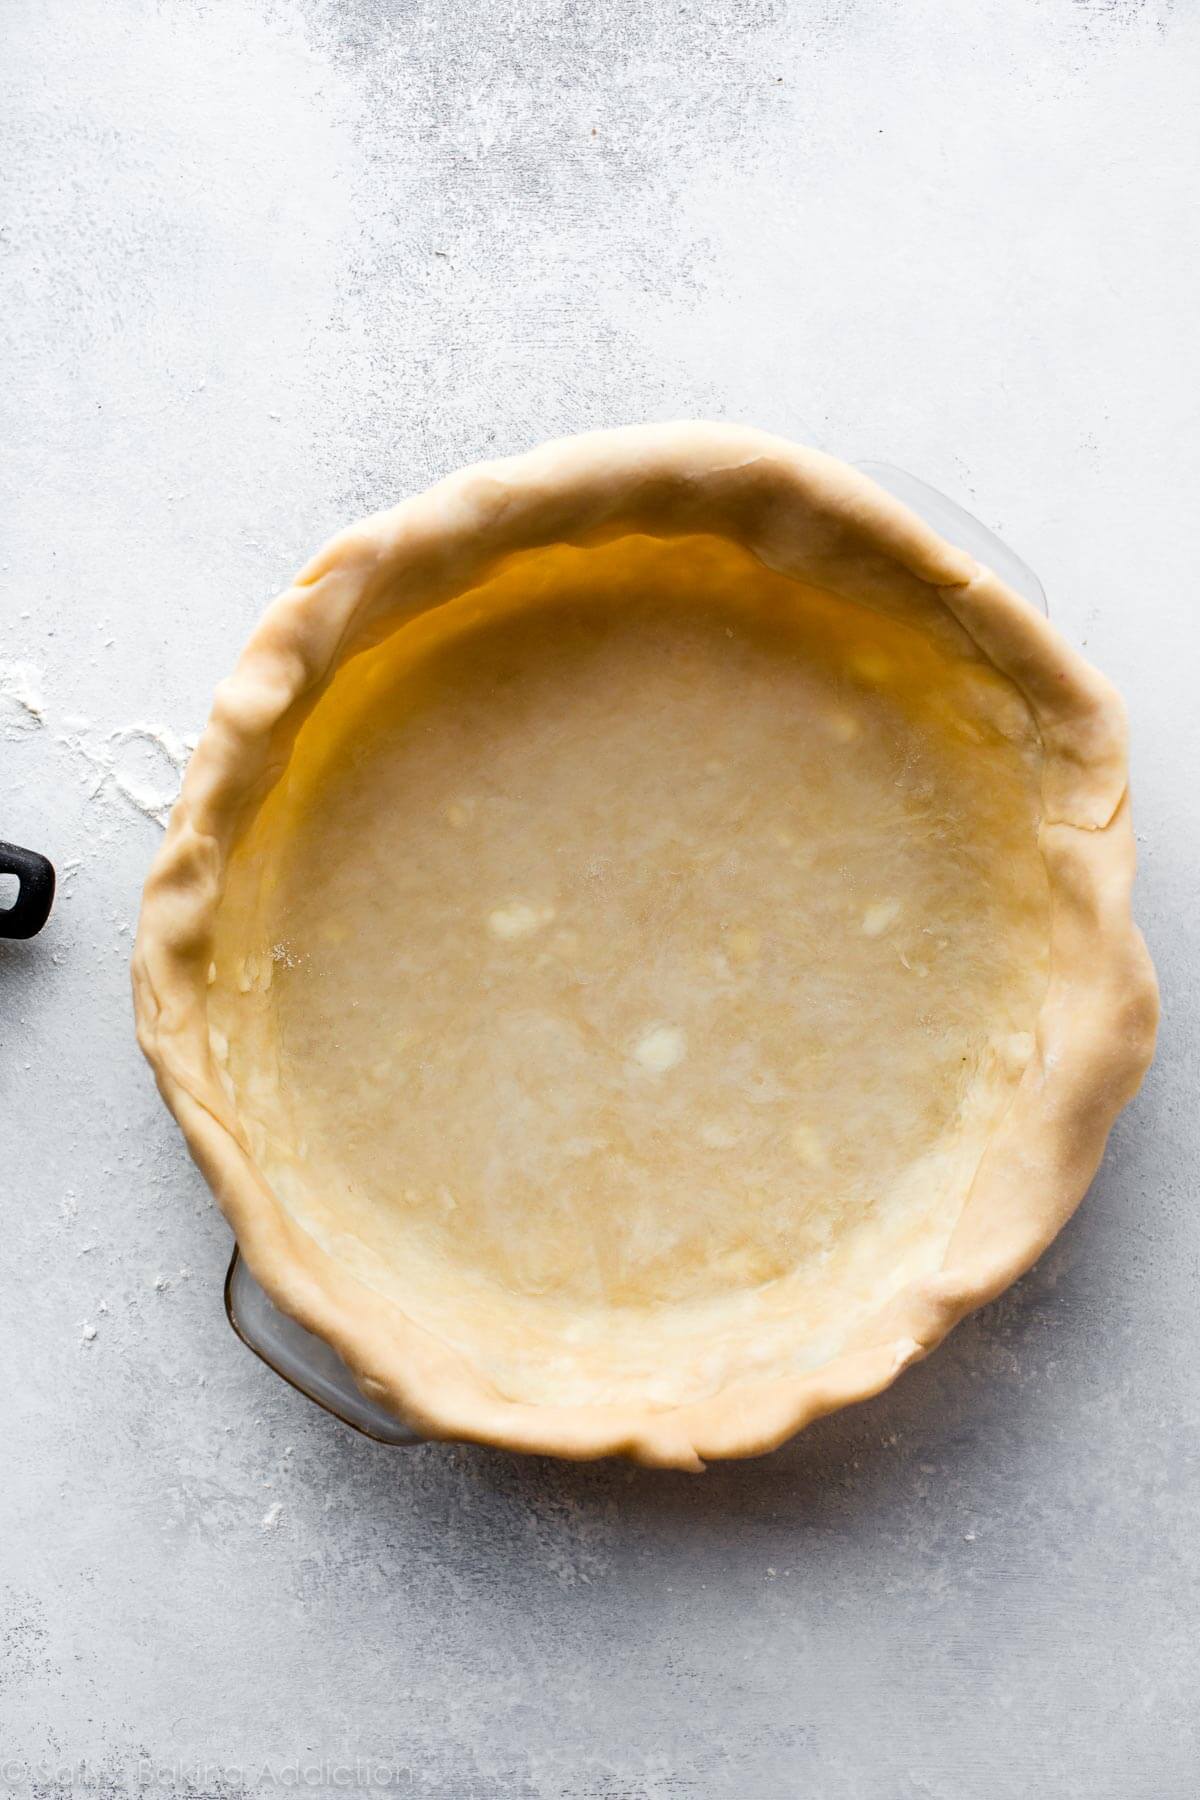
Now it’s all 1 uniform crust with extra thick and sturdy edges. My dough strip technique uses about 1 and 1/2 pie crusts. No big deal since my pie crust recipe makes 2 crusts. You’ll have 1/2 pie crust leftover for the next time you need dough scraps.
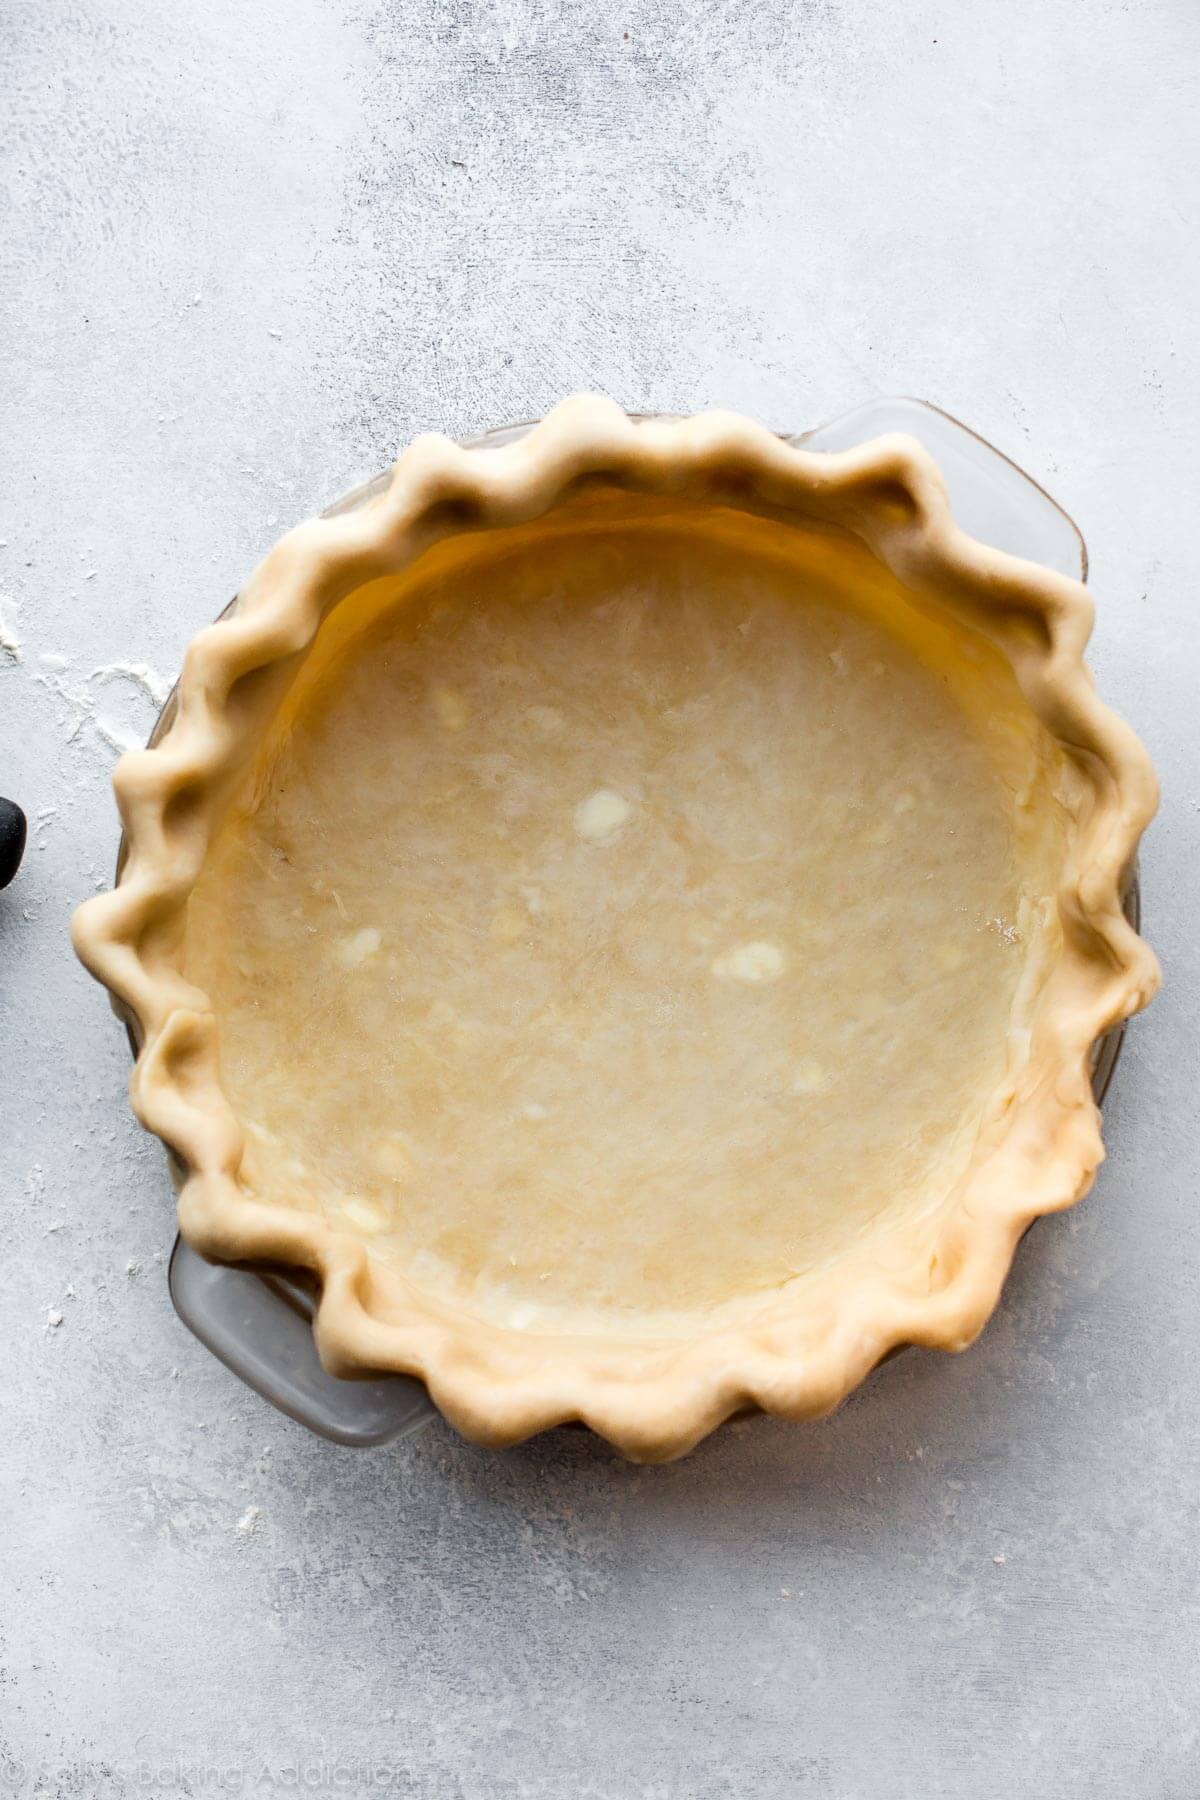
If you need extra help with the shaping, review my how to crimp and flute pie crust tutorial.
One reader, Shannon, commented: “FINALLY—my crust didn’t shrink on the sides or lose its shape! This was always my problem—and it was so frustrating—until I tried the dough strip technique. THANK YOU! ★★★★★“
That was a lot of information thrown at you, but I promise it’s manageable! And if you need it, I also have a list of my top 10 pie baking tools.
Print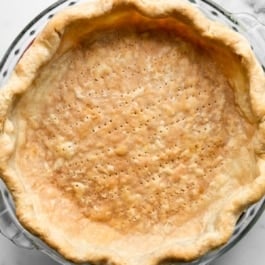
Description
Use this tutorial to learn how to blind bake a pie crust, whether that’s fully blind-baking before adding a no-bake filling, or partially baking (par-baking) the crust before returning to the oven with a filling.
Ingredients
- pie dough such as homemade pie crust (recipe makes 2 crusts)
- pie weights (you need 2 packs)
- all-purpose flour, as needed for rolling out dough
Instructions
- Make the pie dough: Prepare and chill your pie dough for at least 2 hours. If using the linked recipe, prepare pie crust through step 5.
- Roll out the chilled pie dough: On a floured work surface, roll out one of the discs of chilled dough (keep the other one in the refrigerator until you need it). Turn the dough about a quarter turn after every few rolls until you have a circle 12 inches in diameter. Carefully place the dough into a 9-inch pie dish. Tuck it in with your fingers, making sure it is completely smooth.
- Dough strip technique: This step is optional, but will help prevent the sides from shrinking down as well as promise a thick and sturdy crust. Remove the 2nd pie dough disc from the refrigerator. Roll out the same way you rolled out the first one. Using a pizza cutter, slice rounded 1- or 2-inch strips, and arrange around the edges. Use your fingers to meld the dough together. What you’re basically doing here is adding another layer of crust to just the edges. Crimp or flute the pie crust edges. They should be nice and thick now. Wrap up any leftover pie dough to use for next time. Freeze it for up to 3 months.
- Refrigerate: Chill the shaped, unbaked pie crust in the refrigerator for at least 30 minutes and up to 5 days. Or freeze for up to 3 months. Cover the pie crust with plastic wrap if chilling for longer than 30 minutes or if you’re freezing it. If you freeze it, let it thaw for a couple hours in the refrigerator before continuing.
- While the crust is chilling, preheat oven to 375°F (190°C).
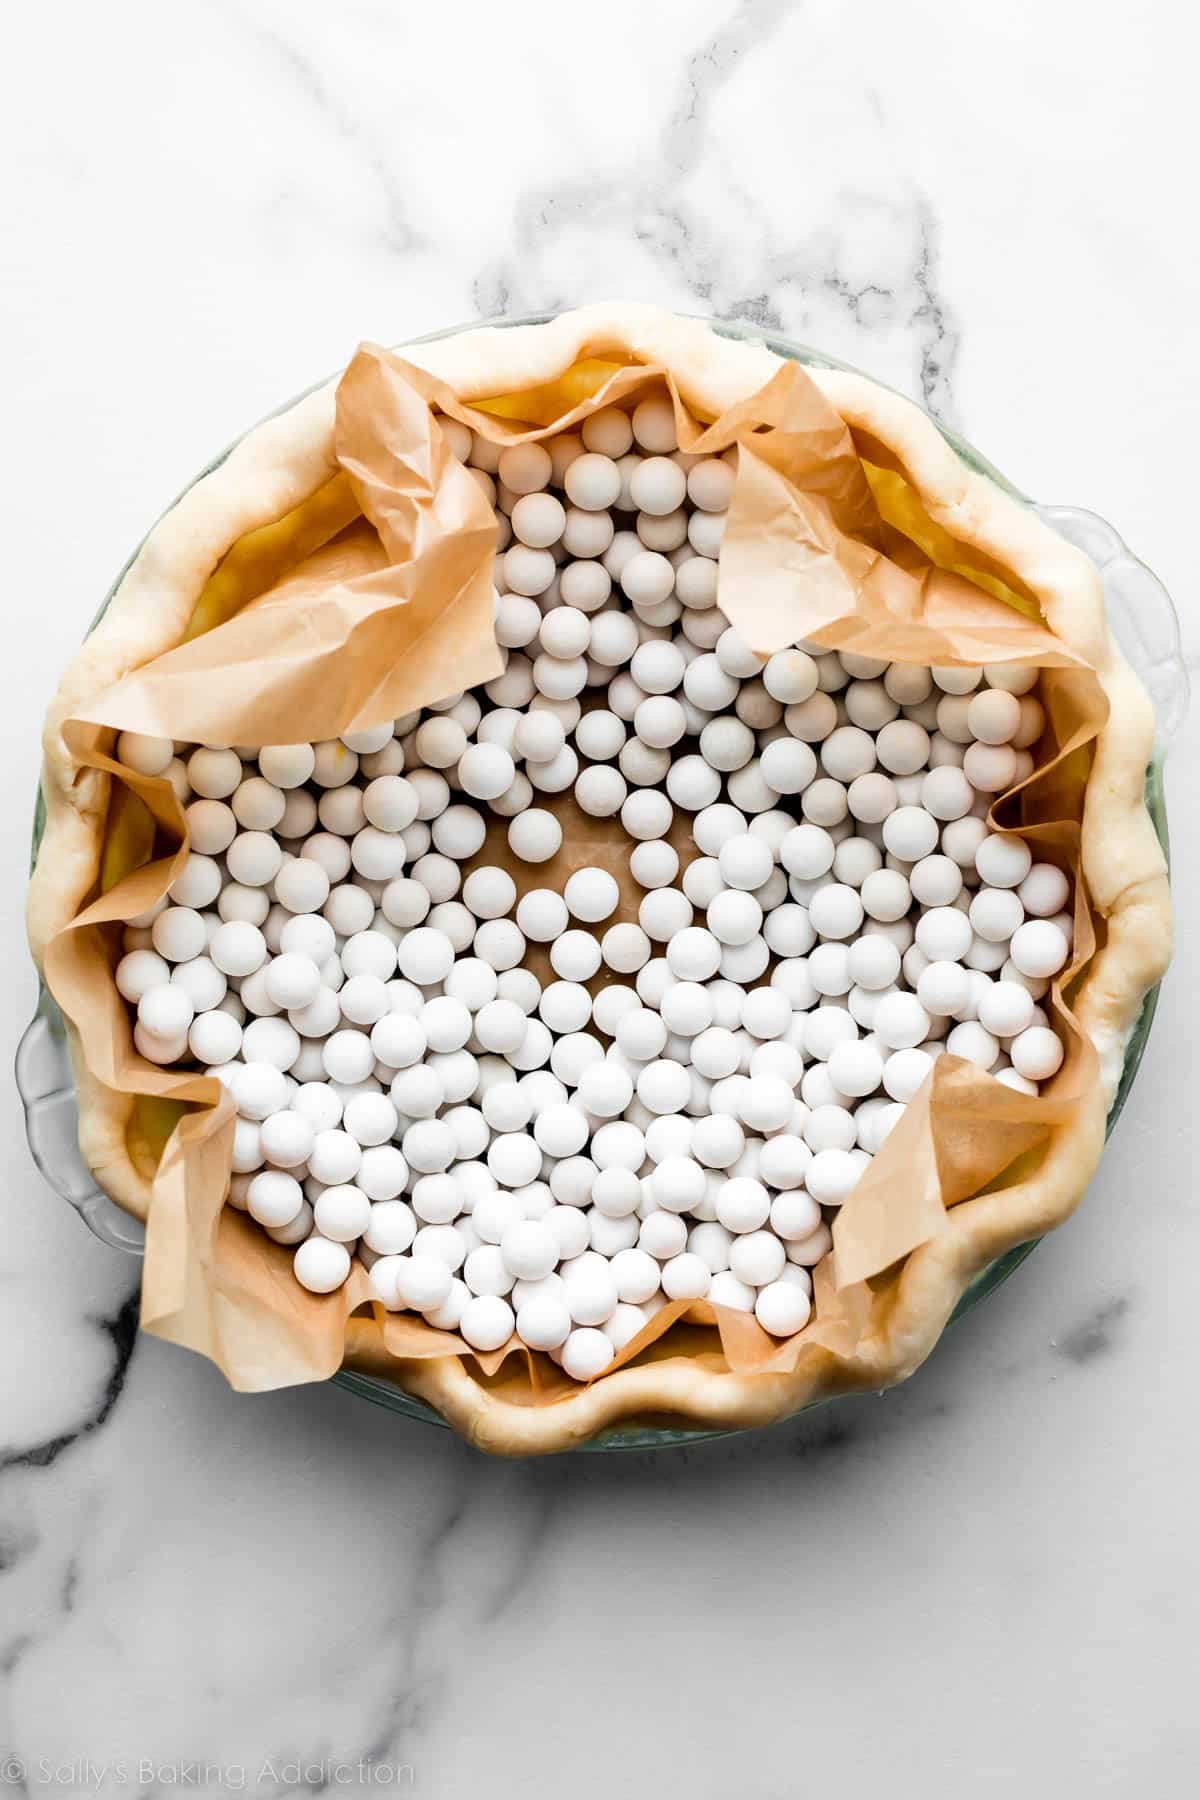
- Fill with weights: Line the chilled pie crust with parchment paper. (Crunch up the parchment paper first so that you can easily shape it into the crust.) Fill with pie weights or dried beans. I like to push the weights up against the sides of the pie crust to help ensure the sides don’t shrink down.
- Bake: Bake until the edges of the crust are starting to brown and appear set, about 15–16 minutes. Remove pie from the oven and carefully lift the parchment paper (with the weights) out of the pie. With a fork, prick holes all over the bottom crust. Return the pie crust to the oven.
- If you need a fully baked pie crust, bake until the bottom crust is golden brown, about 14–15 minutes longer. For a partially baked pie crust (if you’re baking the pie once it is filled, like a quiche), bake until the bottom crust is just beginning to brown, about 7–8 minutes.
- If you’re making a no-bake pie, let the baked crust cool completely before adding the filling unless your pie recipe states otherwise. For pies that will go back in the oven, like quiche or pumpkin pie, the crust can still be warm when you add the filling. (Again, unless your recipe states otherwise.)
Notes
- Make Ahead Instructions: You can make pie dough and freeze it for up to 3 months. See my pie crust recipe for details. If you want to shape the pie dough ahead of time, see step 4 above.
- Special Tools (affiliate links): Rolling Pin | 9-inch Pie Dish | Pizza Cutter | Pie Weights
- Egg Wash: Many pie recipes call for brushing the crust with an egg wash and, typically, your pie recipe will tell you when to do that. If you aren’t sure when, and you need to par-bake the crust, you can brush the crust’s edges with an egg wash after par-baking with pie weights (step 7), and before returning to the oven to bake without the weights (step 8). An egg wash is 1 egg beaten with 1 Tablespoon of milk or water. Use a pastry brush.
- How Can I Apply a Top Crust to Par-Baked Bottom Crust? Blind-baking is usually required for custard-type pies, where there generally isn’t a top crust. Adding a top crust, such as lattice pie crust or other beautiful pie crust designs is possible, though. I’ve always found Erin McDowell’s tutorial for this helpful. A lot of it is tucking the top dough edges under the par-baked bottom crust edge, and then crimping the pie crust edges.


Reader Comments and Reviews
In a fan oven, would I pre-heat to 180 instead of 190? I don’t have a non-fan option. Thanks.
Hi Gudrun, If you do use convection/fan settings for baking, lower your temperature by 25 degrees F and keep in mind that things may still take less time to bake. It should be about 176 degrees Celsius.
I am wondering…after I par-bake and add my pumpkin filling can I add the foil to the edges in the first part of baking it and take it off the last 20min?? My edges burned and want to try again. You are my go to for all my baking recipes. Thank you for sharing your talent with us.
Hi Beth, you can try that. We usually wait until the edges start getting too brown to use a pie shield or strips of aluminum foil.
I went through this recipe which could be a novel, and never found step by step instructions on how long to bake the crust the first time. Much too long in dialogue and who has pie weights? This is not the recipe I will use and I am not certain this site is for me as it looks like every recipe is paragraph after paragraph. Less is more.
Hi Joyce, you can find the baking instructions in the recipe card above this comments section. Next time, you can use the “jump to recipe” button at the top of the page. Thanks for your feedback.
Hi! Do you have to par-bake a store bought FROZEN pie crust if you’re making your pumpkin pie? Also, do you use egg wash?
Hi Anne, you’ll want to thaw the crust before using it in the pumpkin pie. After thawing, yes, you’ll want to par-bake it as indicated in the recipe.
I made a cherry pie but pre baked the crust WAY TOO much. 20 minutes then poked with a fork and did another 8 minutes. When it came time to make the pie the crust all fell off in the oven and filled the house with smoke. Did that extra 4 minutes really do me in?
Hi Scott, We don’t par-bake the crust when we make our cherry pie. Once the filling in in the crust the whole pie bakes long enough to bake the crust. If your recipe stated to bake your filled pie, that could have been the problem.
For the first time in my life I’ve successfully baked pie crust! Sally, thanks for all the tips. I think where I’d gone wrong in the past was not ensuring everything stayed nice and cold. And using a mix of butter & shortening. I’ll never use another recipe!
How long a bar baked crust be keep in the freezer?
Hi Becky, you can freeze it for up to 3 months.
Hi, can I freeze par-baked pie crust for later use?
Hi Regina, yes, you can. Let it cool completely and then wrap tightly and freeze for up to 3 months.
I love your recipes and how clearly you explain each step. Thank you for Finally answering my question about how many pie weights are needed for the pie – 3/4 Full!. I have often wondered……just the bottom? half-way up? all the way? but never had a clear answer. Thank you so much for clearing this up for me. Now I know!
You don’t show what temperature you should bake the pie crust at
Hi Walter, see step 5: While the crust is chilling, preheat oven to 375°F (190°C).
What do you do if you are using frozen pie crust?
Hi Barbara, you can thaw the crust and then proceed with the instructions on how to par-bake the pie crust for your specific recipe.
hands up who has made this a couple times and has once forgotten the parchment paper before the dried beans!!!! ME!!! 🙁
I’M OKAY –
poured them out after 15 mins and got the rest of them out gently with a spoon…
putting parchment on the shopping list, I was out anyways.
I love this recipe but I still have one issue. I put my glass pie pan on a sheet pan before putting it in the oven. My crust is not as crisp as I’d like, is this due to the sheet pan? Also, many recipes say 425 for oven temp to par bake. Your recipe says 375. Thoughts?
Hi Sue, yes, baking the pie on a sheet pan is the cause of the crust not crisping enough. The sheet pan blocks the heat from below, so the bottom of the crust is not getting as much as it should. An easy fix for next time!
Hi, Sally! I’m a big fan of your pie dough recipe. I noticed you prick holes after the dough has spent 15 minutes in the oven. Is there a reason why?
My grandma always pricked it just before putting it in the oven, so I’m wondering.
Hi Marie-Michele, Some bakers skip the pie weights and just dock the pie crust from the beginning, but we’ve never had luck this way. The sides ofour pie crust still shrink down. So we always use pie weights, remove them after the edges begin to turn brown, dock the crust with a fork, then return it to the oven so the bottom cooks.
What temperature do you par bake the pastry????
Hi Shannon, see step 5: “While the crust is chilling, preheat oven to 375°F (190°C).”
I’ve been making pies for years. The crust recipe I used to use always tasted great and was easy to work with. My problem always occurred during baking. The fluted/crimped edge would never hold its shape and it was very frustrating. I tried the dough strip technique for the triple berry pie recently… and finally! All my hard work in making the crust look pretty paid off and kept its shape in the oven. I did the math and made 1.5x your crust recipe, since the pie would need a bottom and top crust, plus the extra for the dough strips. This worked perfectly! Thank you so much for these tips/instructions.
Hi Shannon, so glad to hear this worked for you!!
I am still learning even though I am ancient. I am trying your lemon meringue pie recipe
Hi Sally, I have gotten to be a pretty good intermediate baker/cook, with help from the internet. I just wanted to say how much I enjoy your videos and recipes. You have such a nice way of presenting ALL of the steps and tricks/tips that some of us might not have heard of, yet without sounding like you are talking to a 4 year old. I love your style and you are such a big help and inspiration!
Thanks so much for writing this comment, Susan! We’re so glad you find the tutorials helpful and are enjoying the recipes!
Hi there, do you have a recommendation about which oven shelf to par-bake the pie crust on?
Your Lemon Meringue Pie recipe states that the Lemon Meringue Pie should be baked on the bottom shelf (at that time, it’s the partially-baked pie crust, the lemon filling, and the french meringue).
Prior to that, when par-baking the pie crust, should I be doing it on the bottom shelf as well—or should that step take place on a middle shelf?
Thanks!
Hi Nick, we usually bake on the center rack, unless otherwise stated in the recipe. Happy baking!
Recipe was great but my pie crusts don’t brown. Your recipe didn’t call for egg wash and yours seemed to brown
well according to your pictures. What do you suggest?
Hi Debra, see section in blog post “FAQ: Can I Add an Egg Wash?” for more details on when/how to add an egg wash. You could also try moving your pie a rack closer to the heating element for more browning.
Hi again, I have another question for y’all!
So I tried the “dough strip” technique and unfortunately my crust ended up falling off in the oven haha. I’m guessing maybe I added too much and it was too heavy and/or I didn’t adhere the additional dough onto the base dough well enough?
Curious if y’all have experienced this issue before.
Thanks!
Hi Nick! Sounds like it wasn’t adhered well enough. Too much flour can prevent it from adhering, so make sure not to add too much flour when handling the rolled out dough.
Very rich. Based on other comments, I think people need to learn to weigh the flour. Mine was perfect, although very tender with 6 tablespoons of water. I omitted the sugar as I was using 1 crust for a quiche. I’ll try it with sugar another time. Thanks!
Hi there, question for you! Whenever I get to the point where I remove the parchment paper and weights, underneath is like a sea of melted butter. Any idea what I might be doing wrong? I’m curious both about how to avoid it and remedial steps I can take if it happens. I feel like it suggests that my fat wasn’t cold enough before going into the oven, but I’m following all the tips to keep everything cold at each stage of the process. Any advice would be much appreciated!
Hi Nick, If the butter/fat chunks are a little too big, the melted butter will create holes in the crust. Try working in the fats just a little bit more next time.
Thanks for getting back to me! Oh wow honestly I think that very well may be the issue. I was previously cutting the fat with just my hands (pressing the cubed fat into flat sheets)—but I definitely was left with quite large flat sheets of fat still.
Most recently I did change it up and try Sally’s method of using the pastry cutter to cut the fat and it definitely created more of the pea-sized bits of fat throughout. I’m excited to roll it out and try baking it today.
Thanks again!
These instructions on blind baking and par baking pie crusts is thorough and impeccable. I am saving this to share with my young granddaughter who loves to bake.
LOVE your recipes Sally! I’m making a pie that uses a pre baked crust. I put fresh sliced peaches on the bottom of the cooked shell. Should I do the egg wash trick after the initial baking to avoid a soggy crust?
Hi CDS, we can’t speak to other recipes, but typically the recipes will tell you if you need an egg-wash. You can brush the crust’s edges with an egg wash after par-baking with pie weights, and before returning to the oven to bake without the weights.
I had difficulty with the dough strip method. I’m sure I must have done something wrong. I worked the strips into the edges as instructed. Made too much dough? When I par-baked some of the edging fell over the side and into the oven floor. I should have baked the crust longer too, I believe, because the added dough that didn’t fall over the sides and into the oven floor was doughy and not flaky crisp. Could you tell me where my mistakes may have been? Thank you for your recipes, they are my go-to’s.
Hi Pamela, It does sound like the outer crust could have just been too much dough. If you try it again, make your strips a little smaller and keep them on top of your pie pan, rather than larger than the pan, so they don’t fall off.
Thanks for easy to follow recipe for this blind bake crust!
can you reuse the beans another time as weights?
Absolutely!
Where do you buy these ceramic pie weights. I haven’t been able to find them
We’ve seen them in the baking supplies sections of grocery stores and craft stores. Amazon also has them!
Thank you, Sally for wonderful sugar cookies recipe and now blind baking pie shell – your info is always reliable!
I absolutely love the taste of your pie crust and have made it several times. I like to par bake it for quiche. However, every time I try to take the parchment and pie weights out, the crust is stuck to the parchment in several places and breaks and then I patch work it back together for the second bake. It always tastes great regardless, just wondering what I could be doing wrong. Thanks!
Hi Shivani! This is normal, just be very careful and gentle when removing the parchment with weights to avoid tearing.