

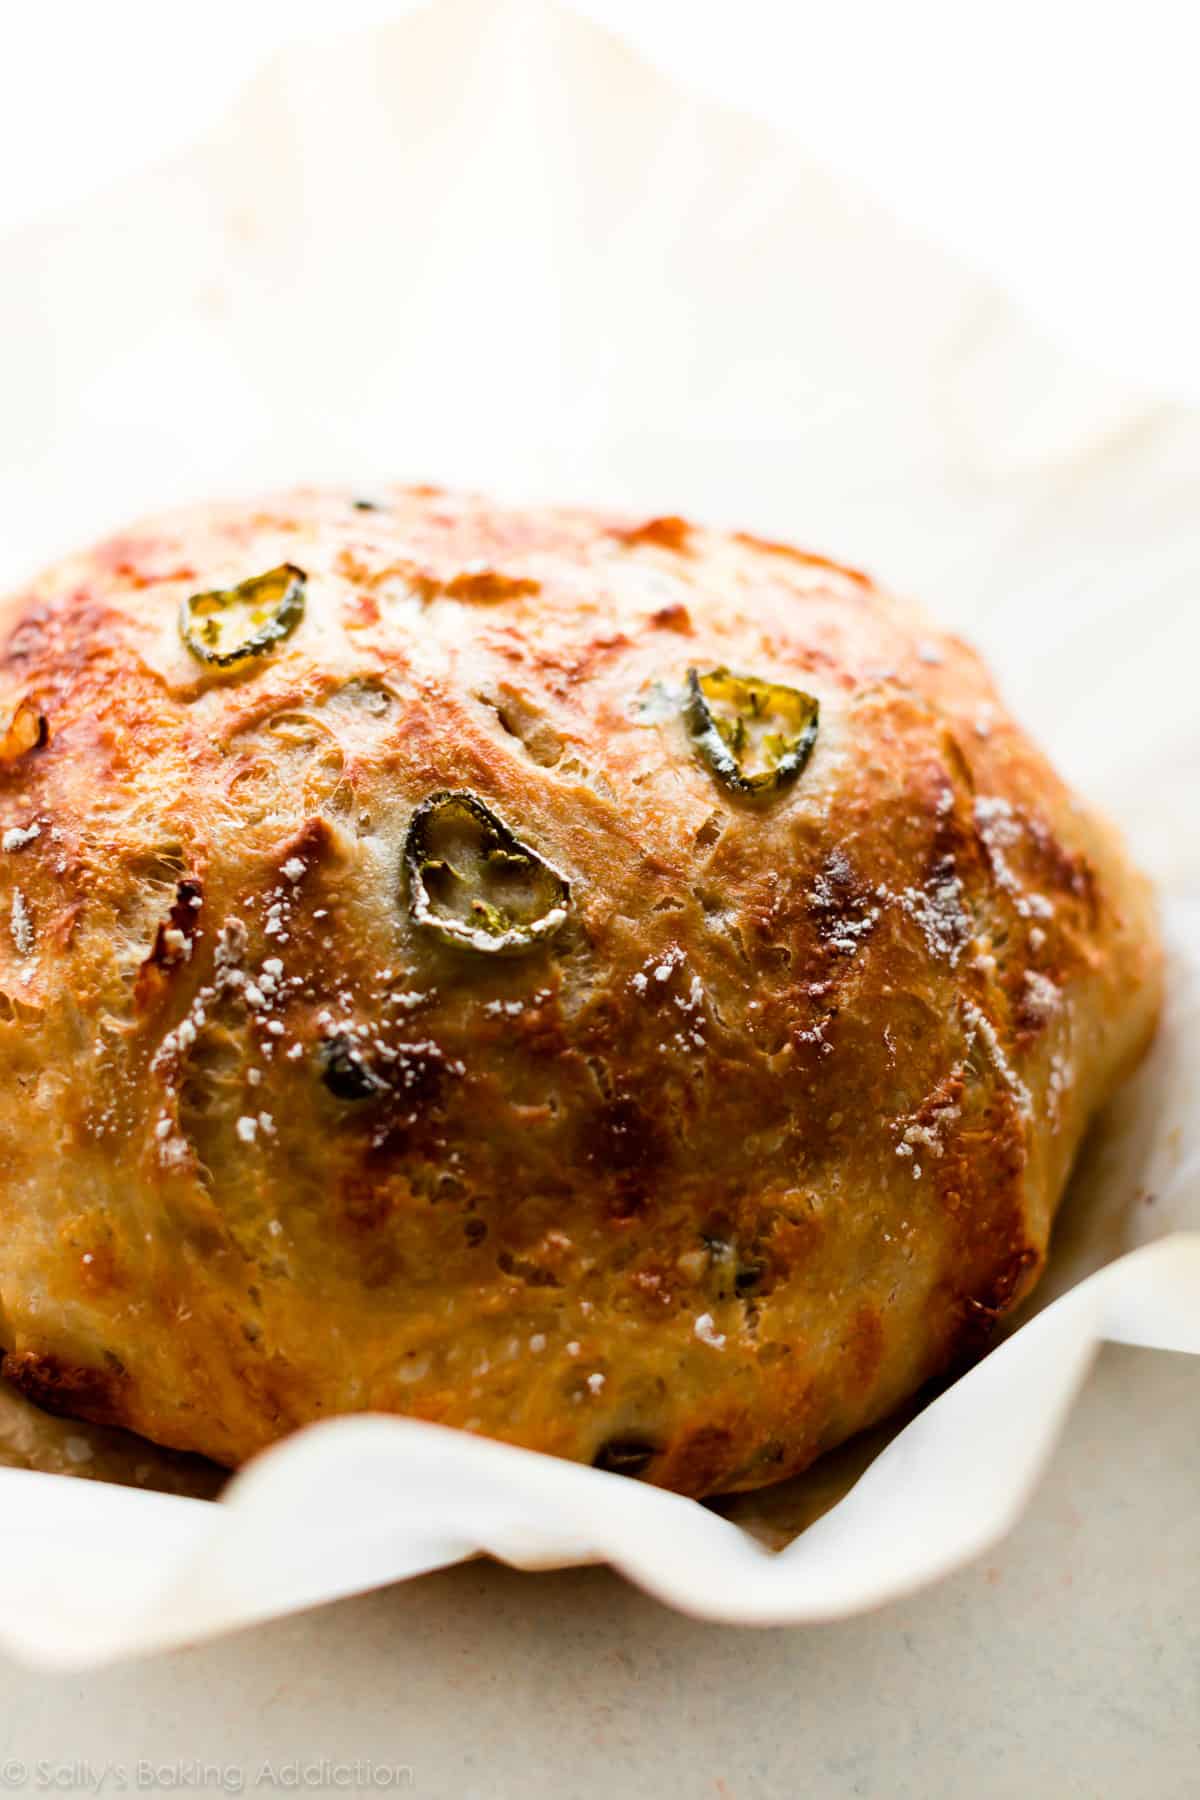
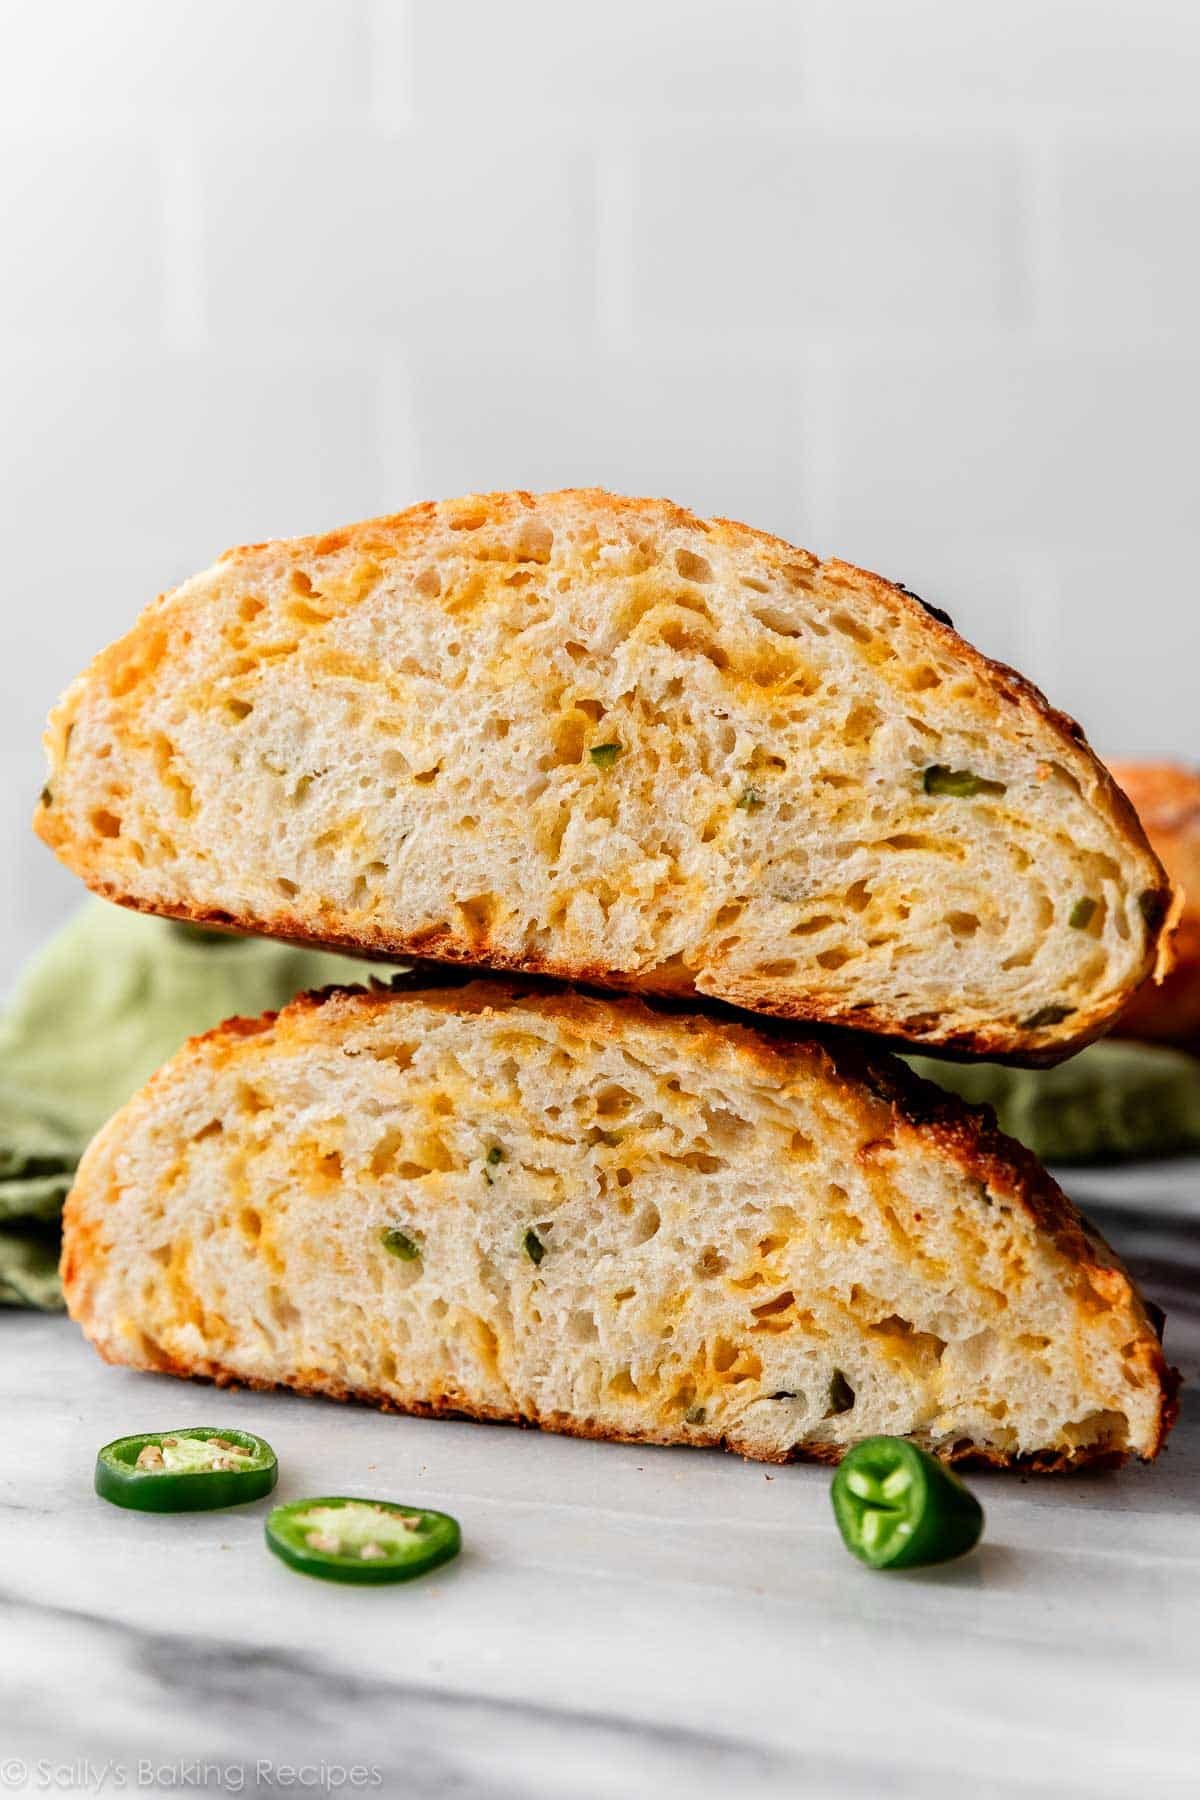
Homemade bakery-style bread has never been easier. This super crusty no knead jalapeño cheddar bread is baked in a dutch oven and requires practically zero hands-on work from you!
I originally published this recipe in 2018 and have since added new photos and a video tutorial, as well as simplified instructions.
One reader, Tina, commented: “One of my favorite bread recipes from you. I’ve made it multiple times over the the past couple of years. Every time it comes out crusty and delicious! The honey butter recipe pairs perfectly with this bread. In fact, I have the dough resting on my counter right now. Can’t wait to eat it! ★★★★★“
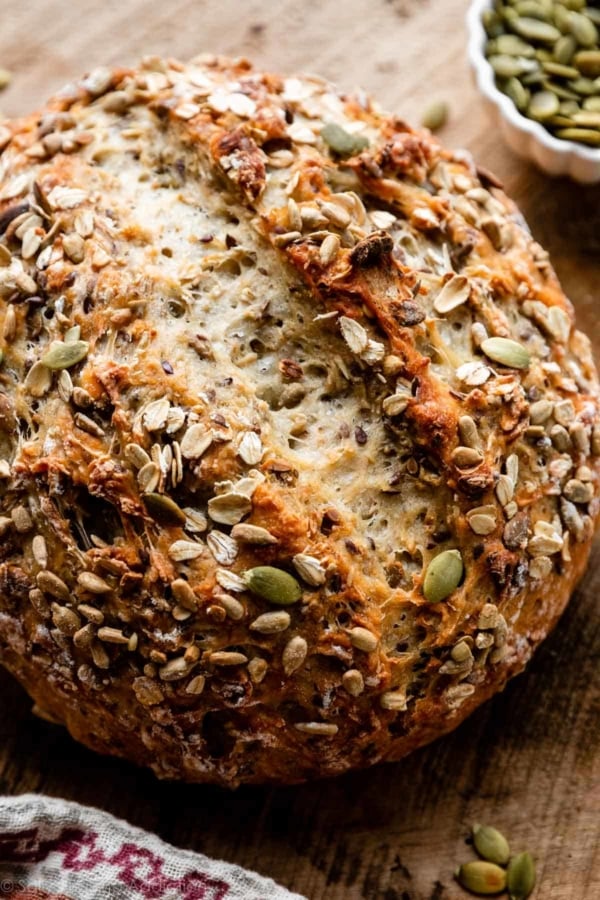
After sharing this cranberry nut no-knead bread, many readers asked for another flavor variation. Since then, I’ve also published no-knead olive bread, super seeded oat bread, this “plain” homemade artisan bread (anything but plain, so flavorful!), no-knead asiago-crusted skillet bread, crusty no-knead pizza bread, and today’s jalapeño cheddar bread. I’ve actually had today’s recipe published for a few years, and just added some new photos and simpler instructions.
Grab some spicy jalapeños, a block of sharp cheddar, and lots of self control.
What comes to mind when you think of homemade bread? Unless you’re a seasoned baker, it sounds a little scary, right? This recipe will completely change that thought. You can make bakery-style bread at home and besides stirring the ingredients together, the process requires zero work from you.

How to Make Jalapeño Cheddar No-Knead Bread
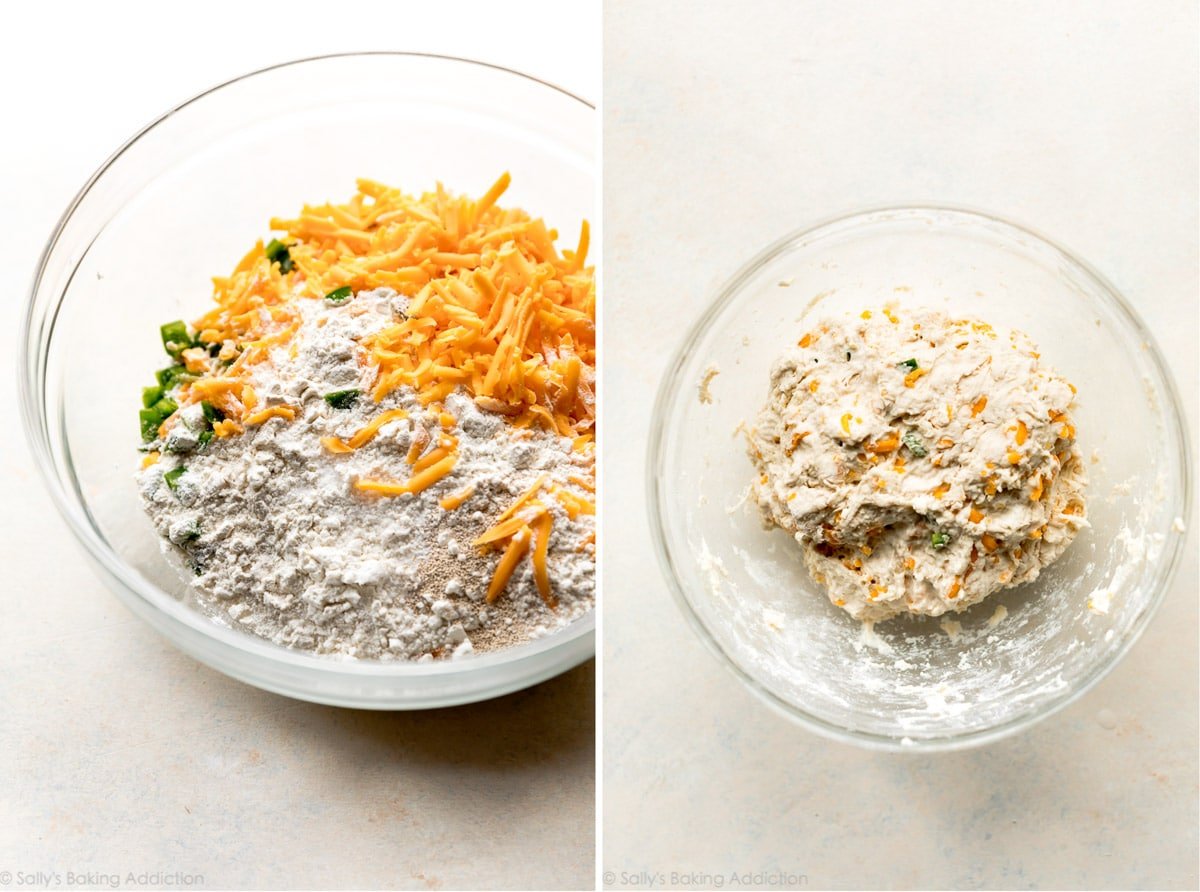
- Stir 6 ingredients together including flour, yeast, salt, cheddar cheese, chopped jalapeño, and water. Don’t even break out your mixer.
- Shape into a ball and leave it alone for a day.
- Score an X on top of the dough, let it rest, and then bake it in a dutch oven to obtain a super crisp crust.
- Eat it.
That’s all. This no knead, professional-bread-at-home method has swarmed the internet and kitchens all over the world. It originally came from Jim Lahey of Sullivan Street Bakery in NYC. It’s all very basic ingredients, but the method was groundbreaking and includes an 18 hour rise time. This overnight rest gives the dough a chance to ferment. Just set the dough on your counter and forget about it. The magic happens when you’re not looking! Forget how to knead dough; you don’t need to worry about that!
Let’s Talk Jalapeño & Cheddar
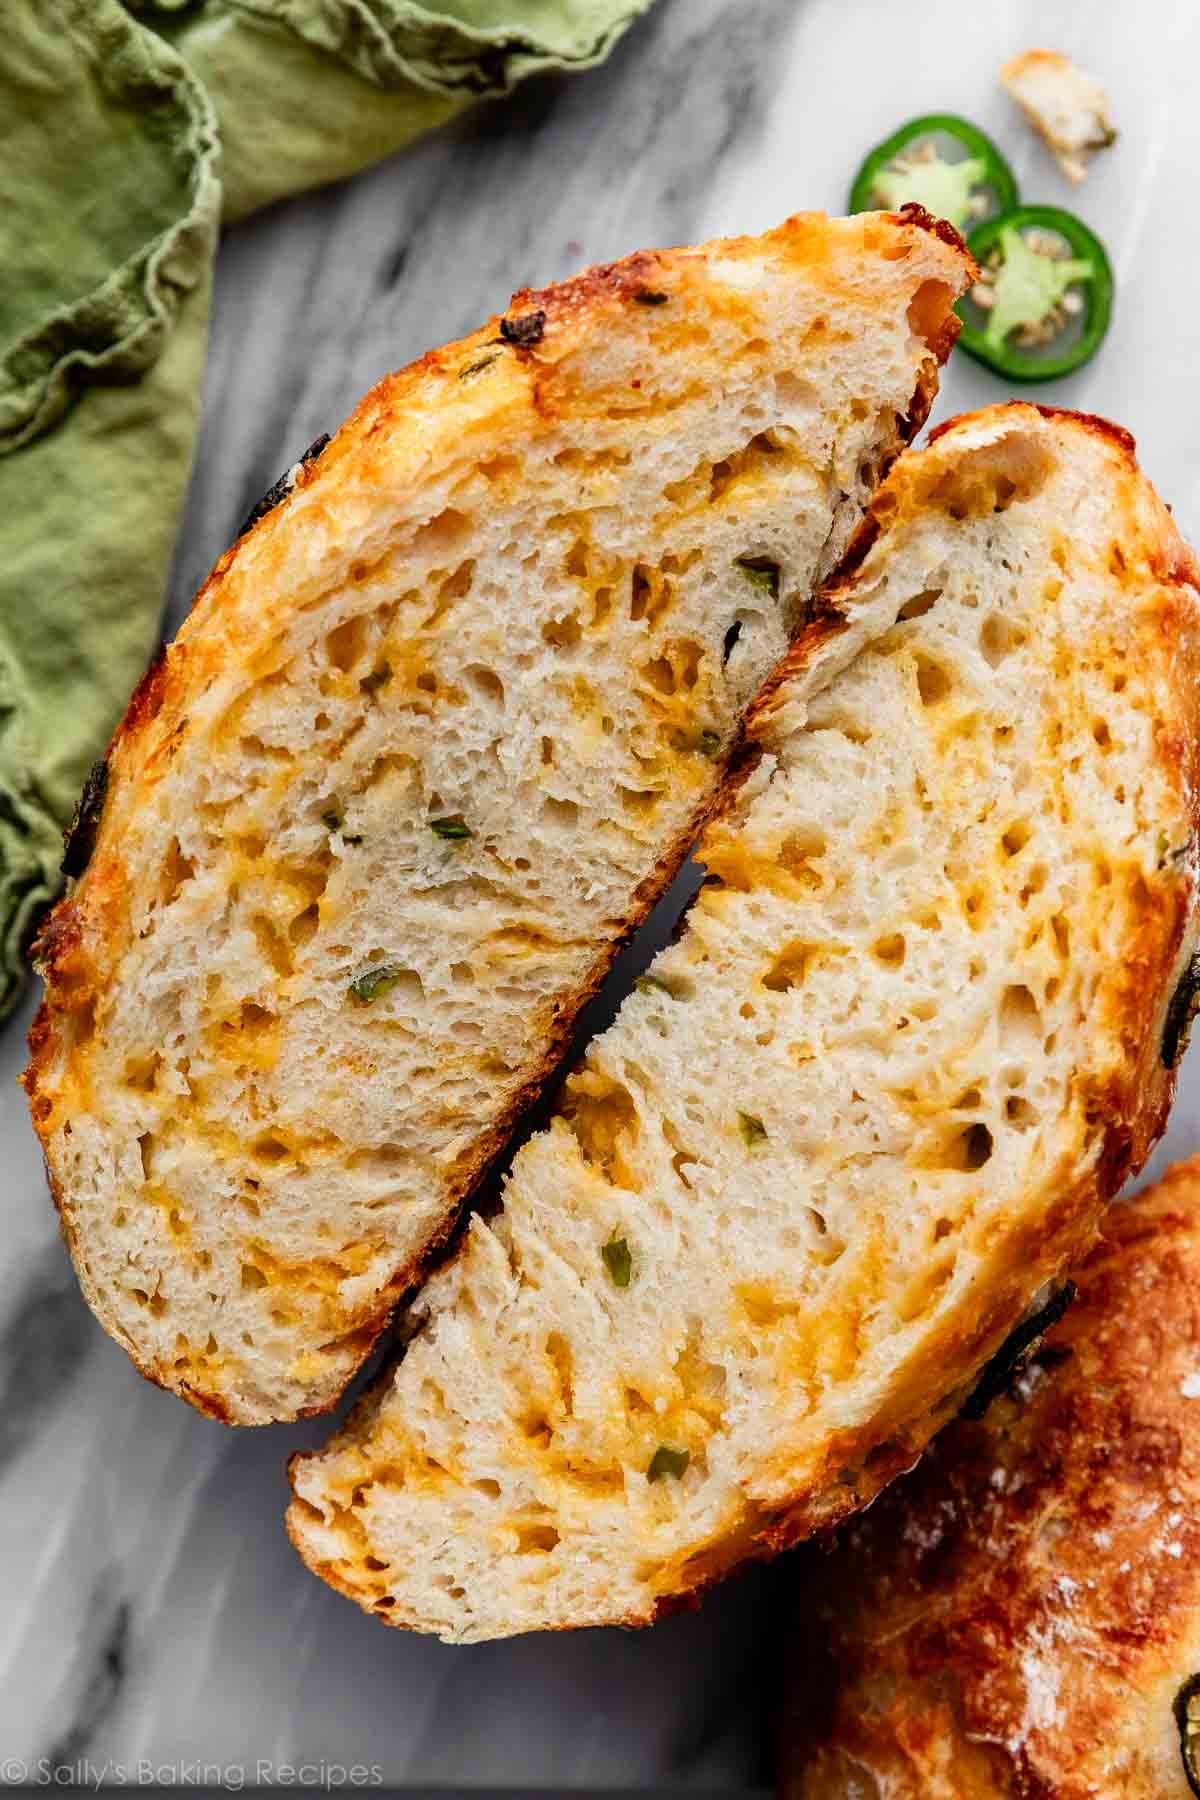
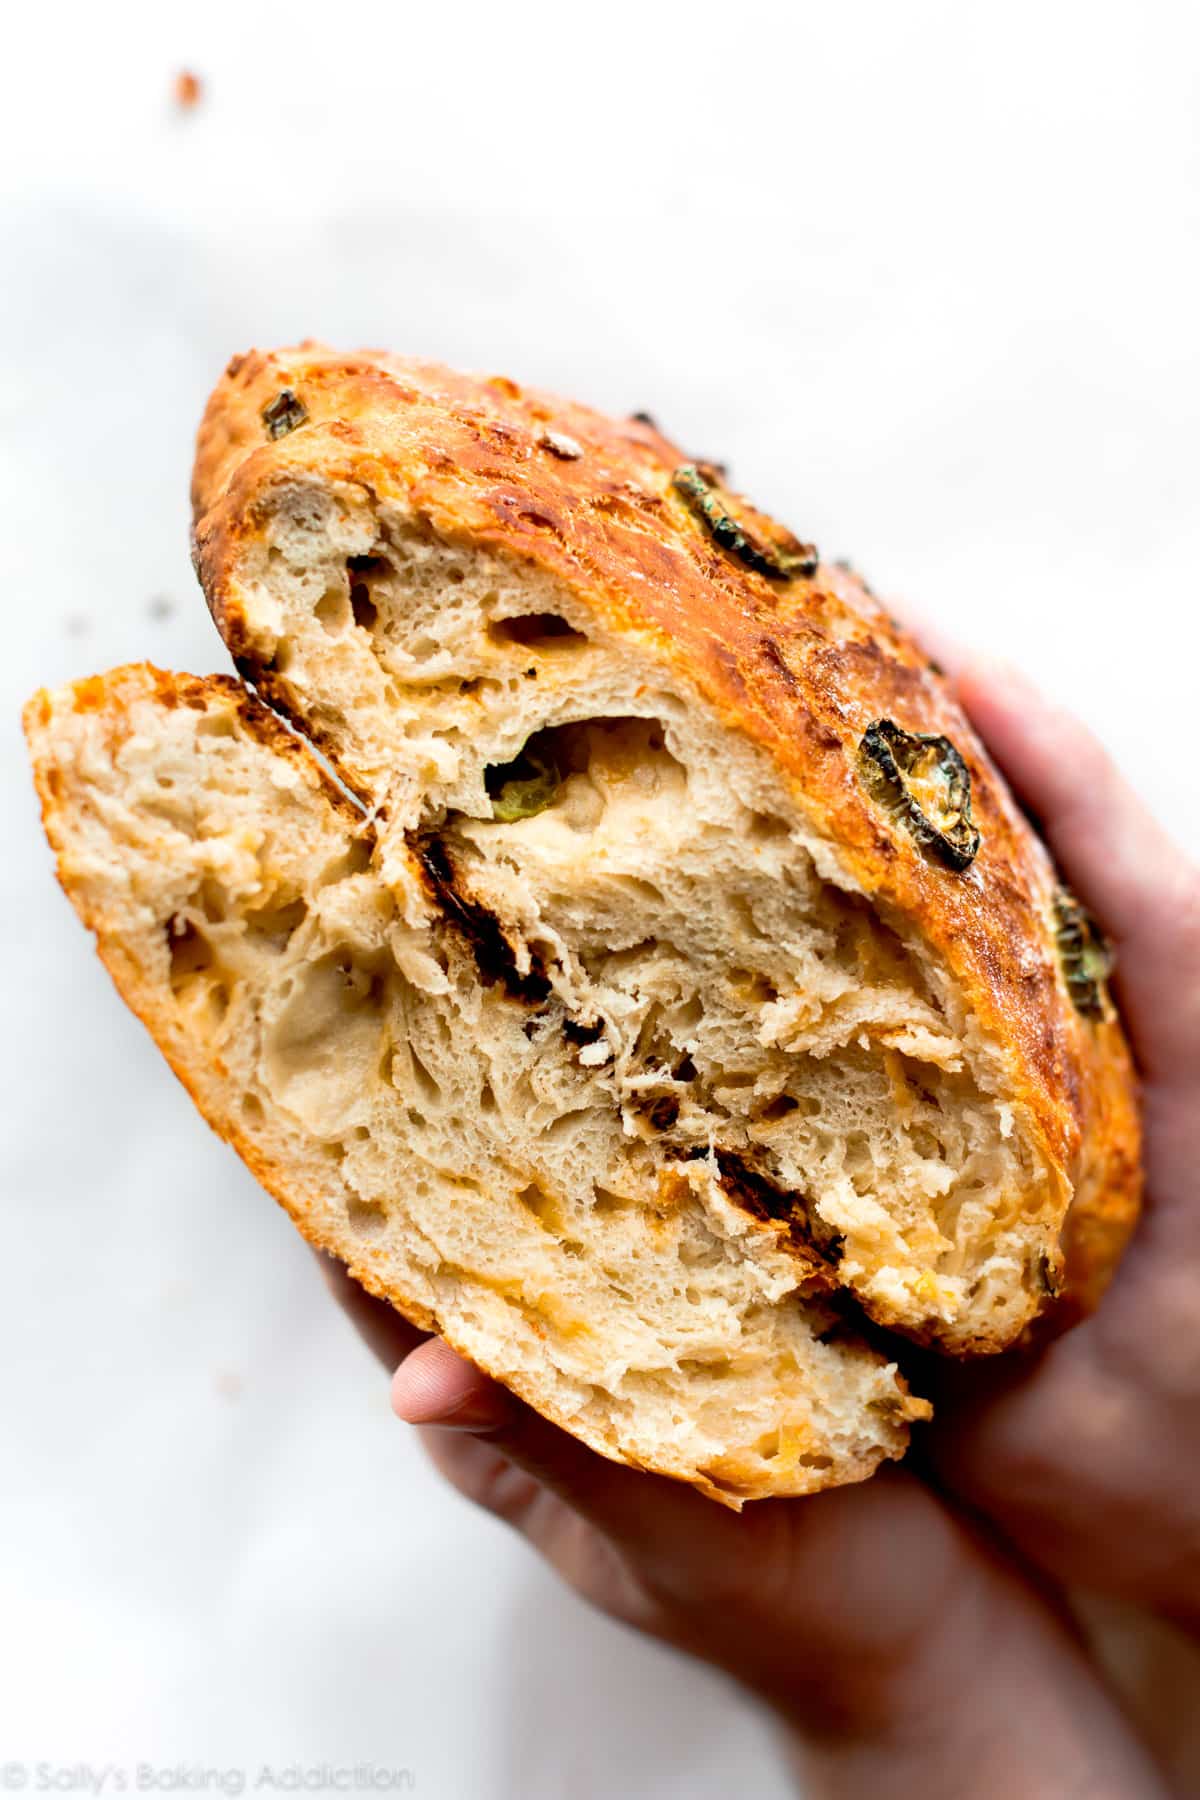
The bread’s base flavor comes from the fermentation over the 18 hour period. But to shake things up and make this a fancy-tasting specialty bread, add 1 diced jalapeño and some sharp cheddar cheese.
- Is this jalapeño cheddar bread spicy? Sort of. I can tolerate a little spice and I LOVE this bread. The pieces of dough without jalapeño helps to cool off your mouth. Feel free to adjust the amount of jalapeño based on your heat tolerance. And if you love this combination, make my jalapeño cheddar soft pretzels next.
- What is the best cheese to use? For the best flavor and texture, I recommend using a block of cheddar cheese and grating it at home with a box grater (affiliate link to the one I use and love), instead of purchasing a bag of the pre-shredded stuff. I recommend this if you’re making my homemade cheese bread, too.
What to Expect with This No Knead Dough
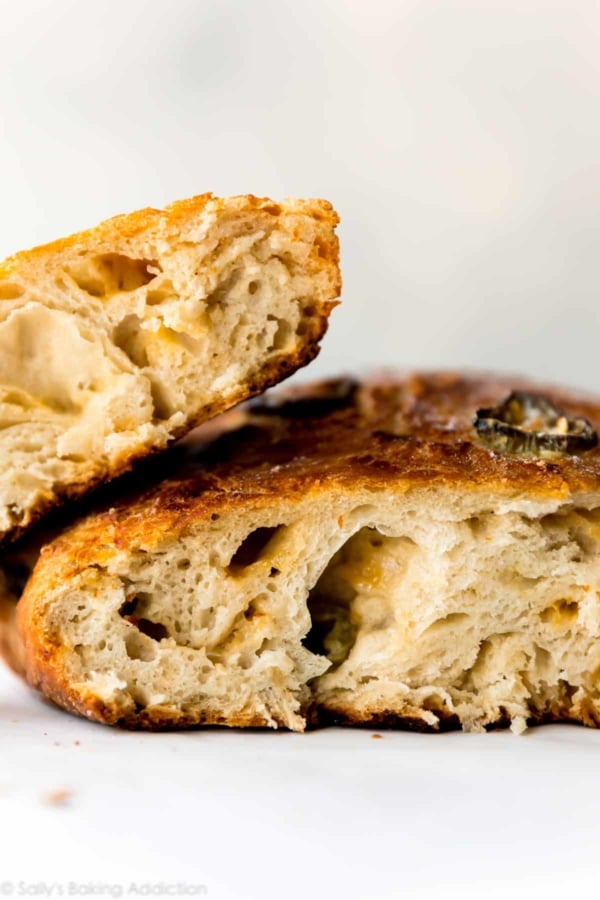
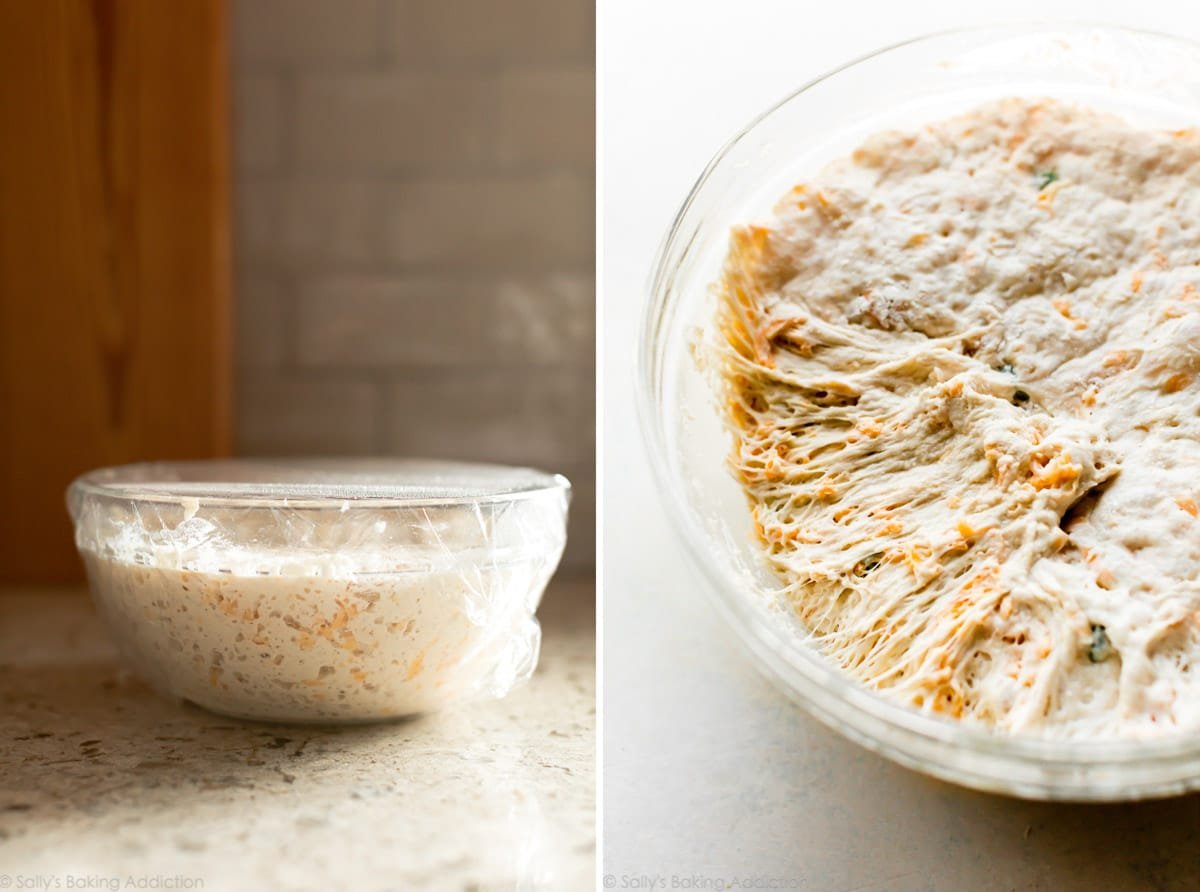
- Bubbles: The dough will rise for 12-18 hours and be very bubbly when it’s done.
- Strands: As you pull the risen dough off the sides of the bowl, you’ll notice a network of strands forming. See photo above. These strands are a good thing and will produce the chewiest bread ever.
- Stickiness: This will be a super sticky dough. It will stick to your hands, but that’s nothing a quick wash can’t fix!
You can expect the same in my artisan homemade bread dough, too.
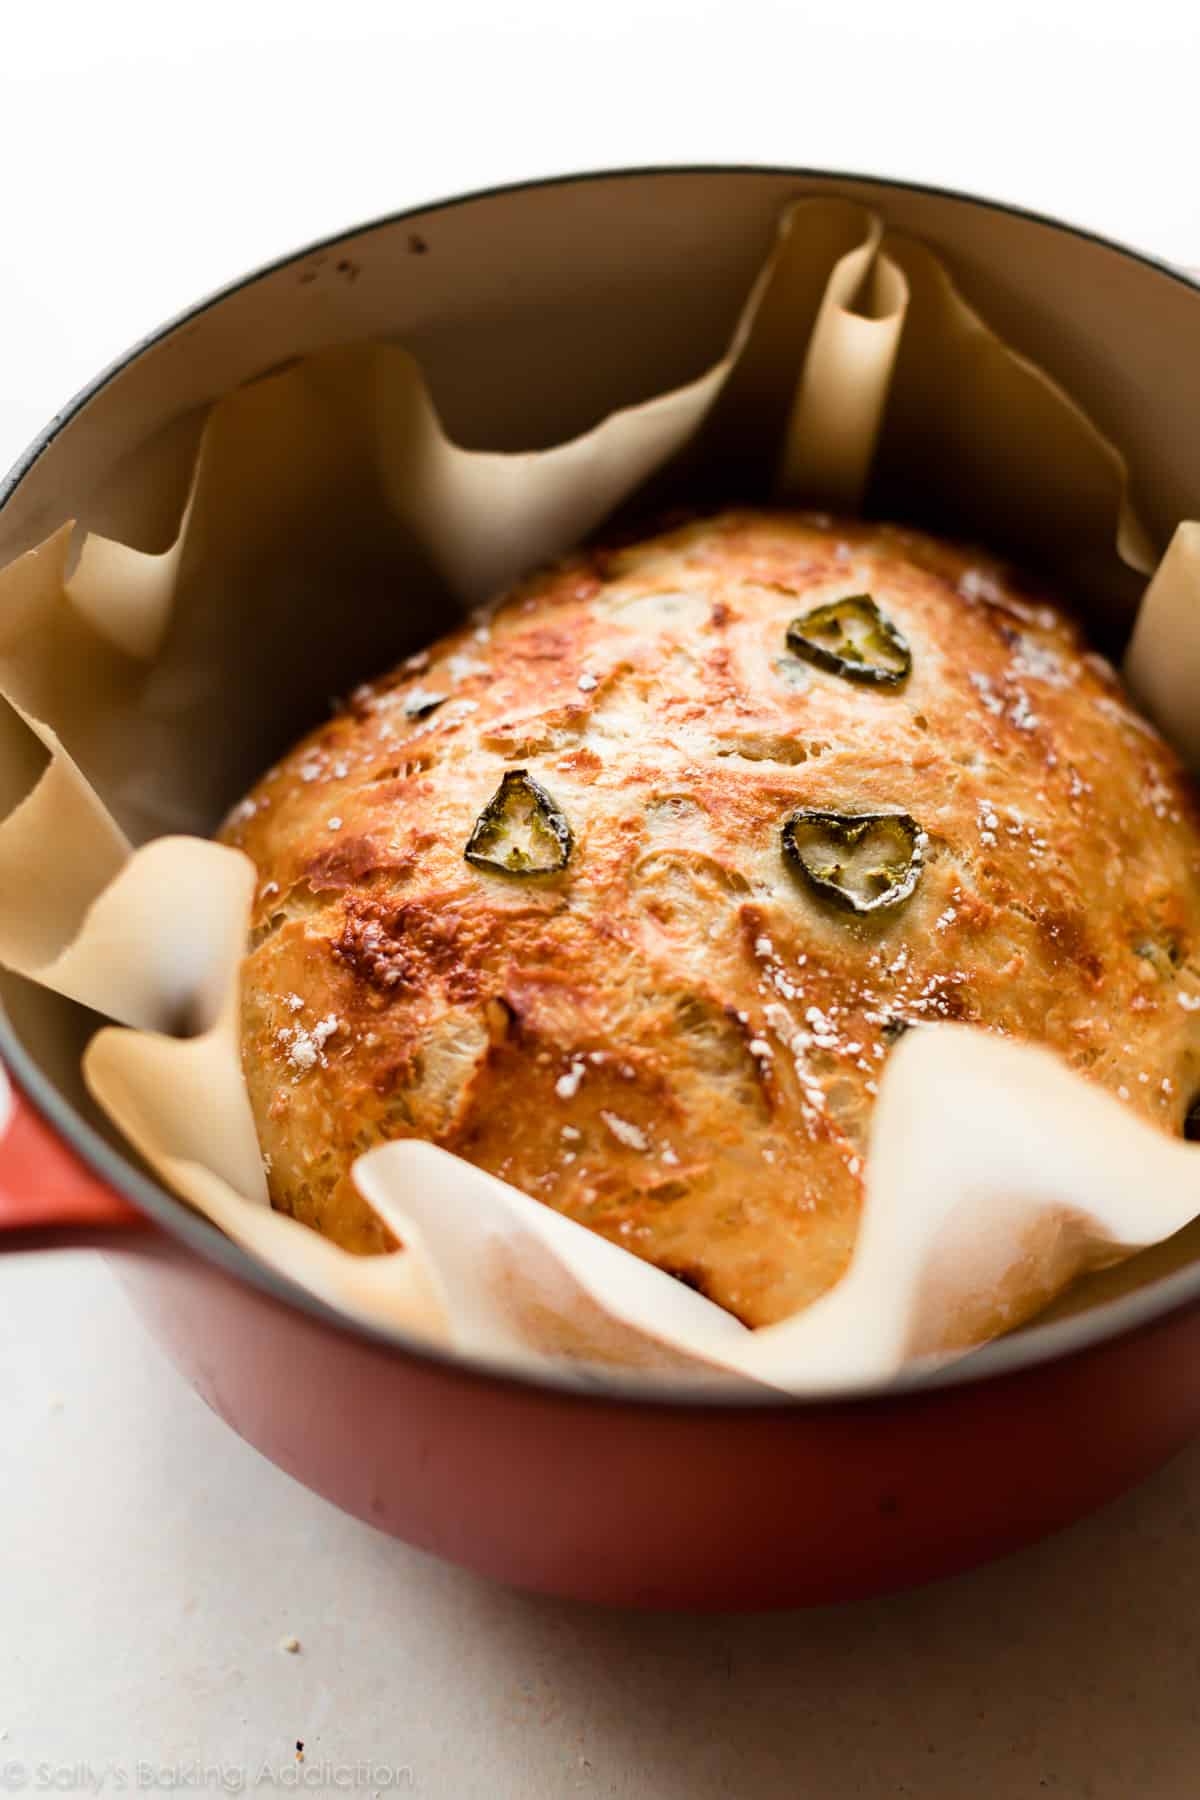
Bake the no knead bread at a very high oven temperature, which will produce a golden brown and crisp crust. The crisp on this crust is unparalleled to any bread I’ve ever baked.
No Dutch Oven? No Problem.
While baking the bread in a dutch oven is key to this bread’s texture, you can get around it. Instead, place the rounded dough on a parchment paper lined or generously floured nonstick baking pan. (No need to preheat the pan in the oven like you do the dutch oven.) Score the bread as noted in step 3 below. Preheat the oven (same oven temperature). After the oven is preheated, place scored dough/baking pan on the center rack. Then place a shallow metal or cast iron baking pan or skillet (I usually use a metal 9×13-inch baking pan; do not use glass) on the bottom oven rack. Carefully and quickly pour 3-4 cups of boiling water into it, and then quickly shut the oven door to trap the steam inside. The steam helps create a crispier crust. Bake for about 30 minutes. For a more accurate test, the bread is done when an instant read thermometer reads the center of the loaf as 195°F (90°C).
What to Serve with Jalapeño Cheddar Bread
Between dips, spreads, and main dishes, here are some serving suggestions for jalapeño cheese bread.
- Slather slices with homemade honey butter
- Tear apart pieces and dip in garlic & bacon spinach dip
- Serve alongside slow cooker chicken chili, creamy chicken noodle soup, or crab soup
- Dipped into your favorite hummus
- With a big bowl of mac & cheese
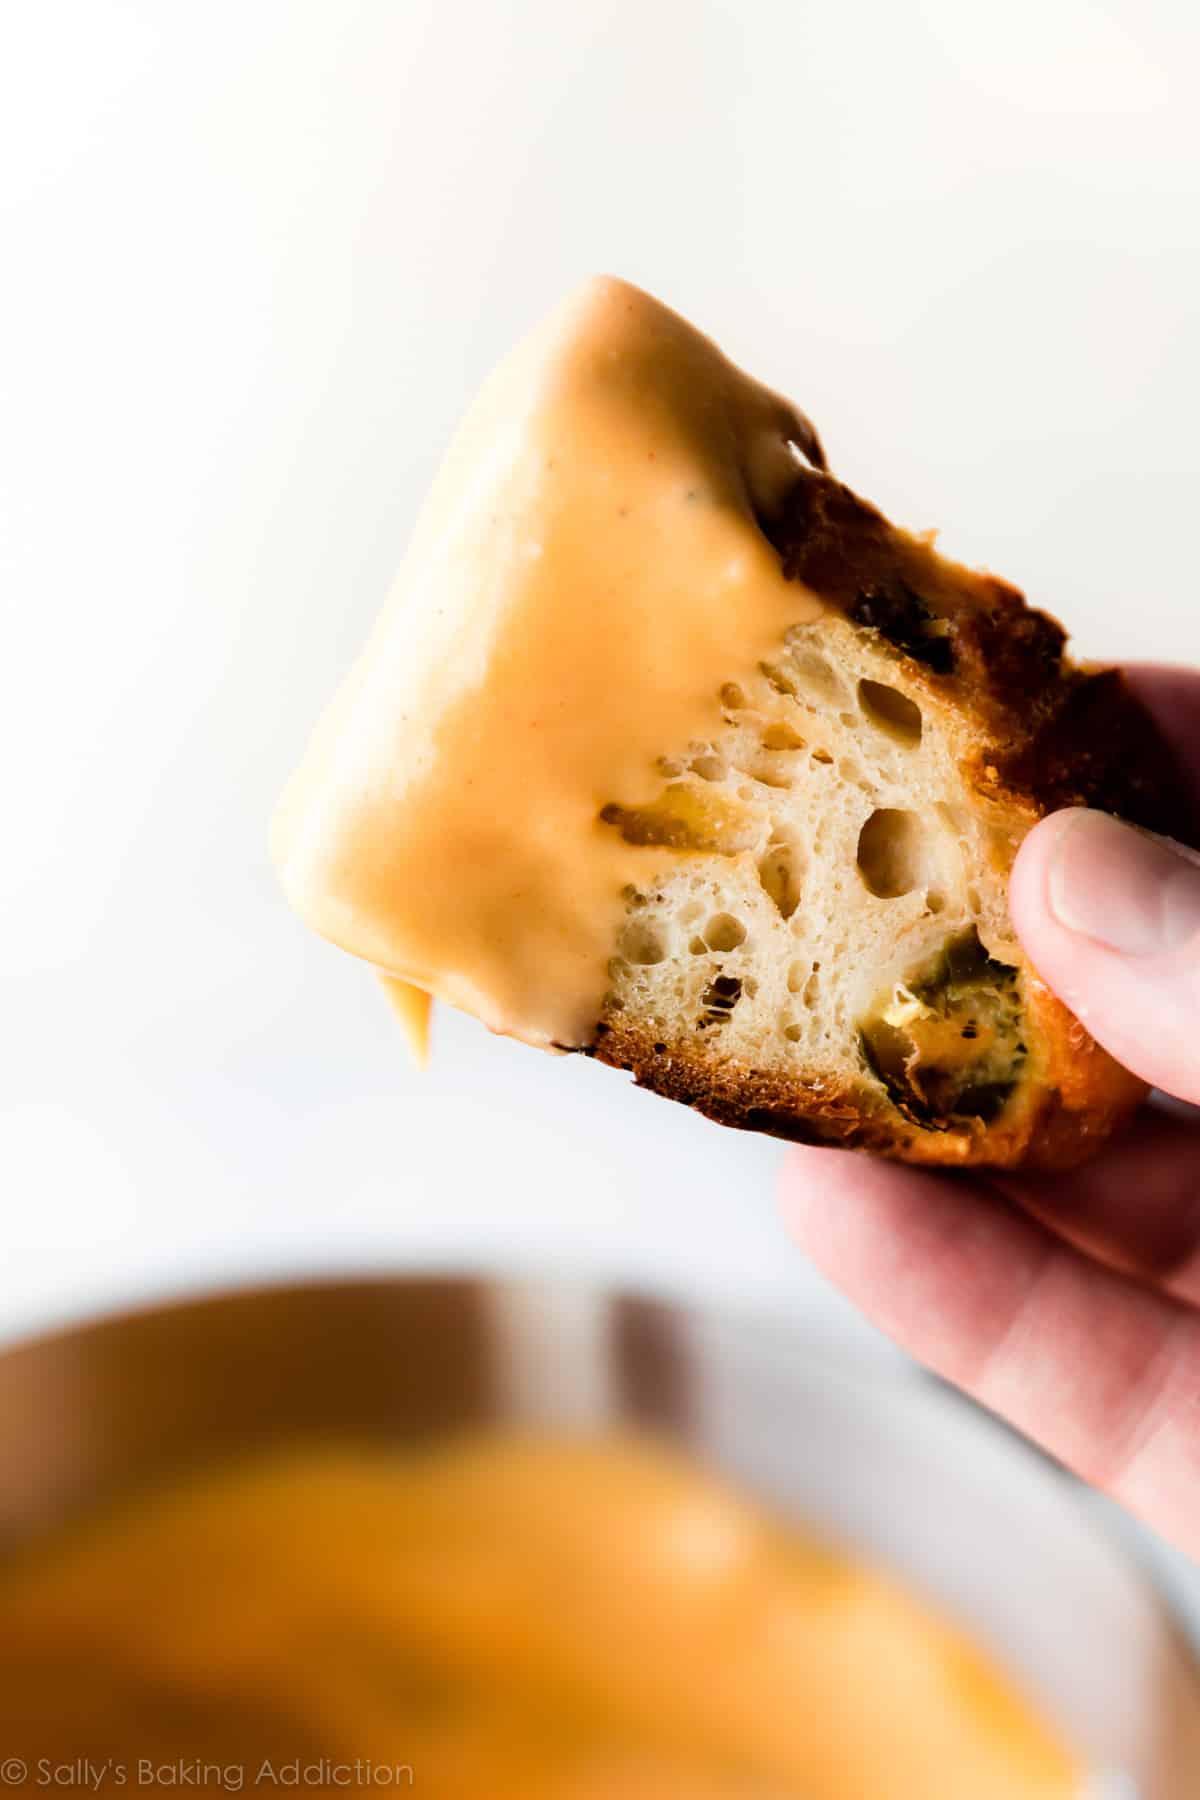
- Dunk those slices in spicy nacho cheese sauce! This is what I usually use for soft pretzel bites.
Honestly, just break out the warm loaf, a good hunk of cheese, and a bottle of wine. You’re all set for a satisfying snack!
Print
No Knead Jalapeño Cheddar Bread
- Prep Time: 20 minutes
- Cook Time: 35 minutes
- Total Time: 20 hours
- Yield: 1 loaf; 10-12 servings
- Category: Bread
- Method: Baking
- Cuisine: American
Description
Homemade bakery-style bread has never been easier. This super crusty no knead jalapeño cheddar bread is baked in a dutch oven and requires practically zero hands-on work from you! If you’re new to working with yeast, reference my Baking with Yeast Guide for answers to common yeast FAQs.
Ingredients
- 3 cups + 2 Tablespoons (390g) all-purpose flour (spooned & leveled), plus more for hands
- 2 teaspoons coarse sea salt (I find the flavor lacking using regular table salt)
- 1/2 teaspoon instant or active-dry yeast
- 1 jalapeño, diced
- 1 cup (125g) shredded cheddar cheese
- 1 and 1/2 cups (360ml) warm water (about 95°F (35°C))
Instructions
- *No need to grease the bowl, and do not use a mixer in this step because the dough is too sticky for a mixer.* Stir the first 5 ingredients together in a large bowl, and then stir in the warm water. The dough will be pretty sticky but if it’s extremely wet, add another 2 Tablespoons of flour. Gently shape the dough into a ball as best you can. Cover tightly. Set on the counter at room temperature (honestly any normal room temperature is fine!) and allow to rise for 12-18 hours. The dough will double in size, stick to the sides of the bowl, and have a lot of air bubbles.
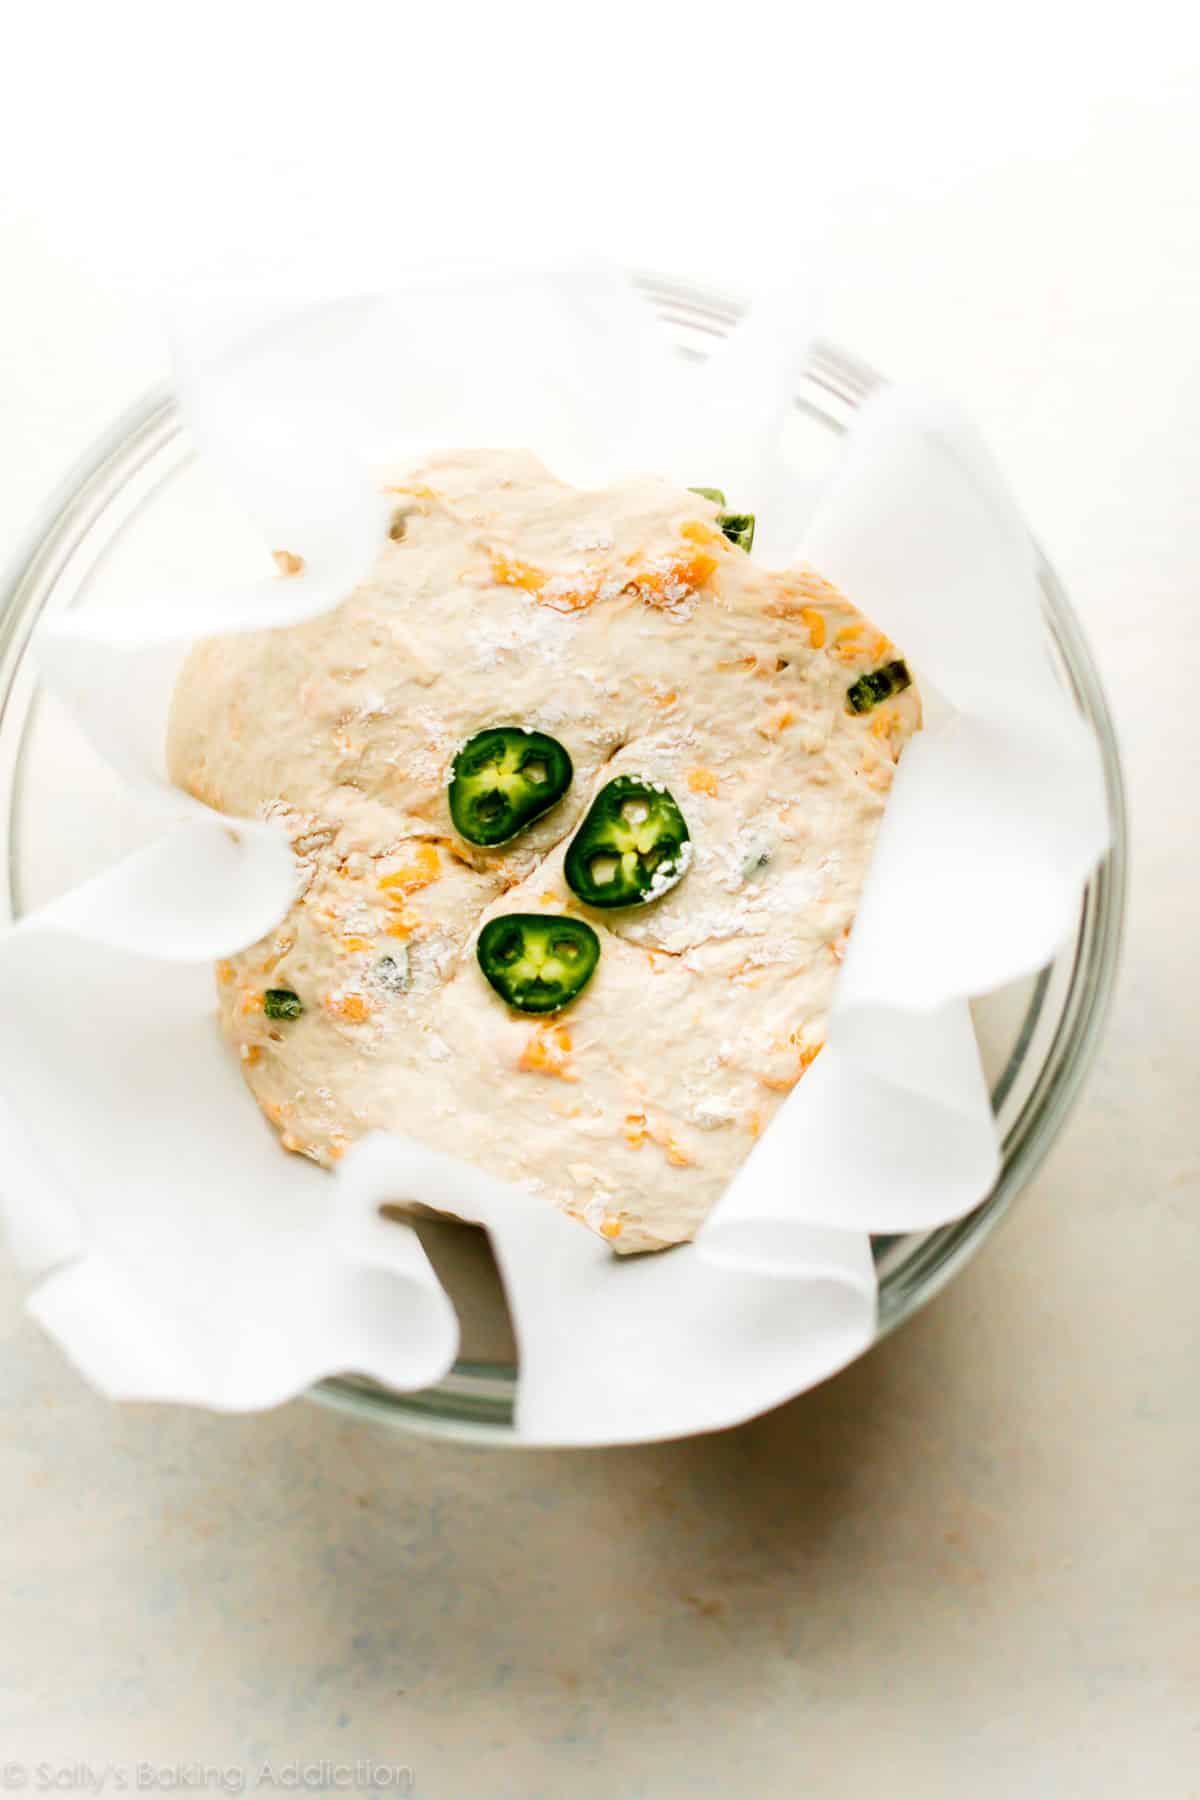
- Turn the dough out onto a lightly floured work surface and, using lightly floured hands, shape into a ball as best you can. Doesn’t have to be perfect. Transfer dough to a large piece of parchment paper, a piece large enough to fit inside your dutch oven and one that is safe under high oven heat. (I use this parchment and it’s never been an issue.) Place the ball of dough + parchment inside a bowl so the dough doesn’t spread out as it rests. See photo above.
- Using a very sharp knife or bread lame (you could even use kitchen shears), gently score an X into the top. Cover dough lightly with plastic wrap or a clean kitchen towel and let it rest for 30 minutes.
- During this 30 minutes, preheat the oven to 475°F (246°C). (Yes, very hot!) Place your dutch oven with the lid OR heavy duty pot inside for 30 minutes so that it’s extremely hot before the dough is placed inside. After 30 minutes, remove the dutch oven from the oven and carefully place the dough inside by lifting it up with the parchment paper and sticking it all—parchment paper included—inside the pot. Cover with the lid.
- Bake for 25 minutes with the lid on. Carefully remove the lid and continue baking for 8-10 more minutes until the bread is golden brown. How to test for doneness: Give the warm bread a light tap. If it sounds hollow, it’s done. For a more accurate test, the bread is done when an instant read thermometer reads the center of the loaf as 195°F (90°C).
- Remove pot from the oven, carefully remove the bread from the pot, and allow to cool on a wire cooling rack for 20 minutes before slicing.
- Cover and store leftover bread at room temperature for up to 2-3 days or in the refrigerator for up to 1 week.
Notes
- Make Ahead & Freezing Instructions: The dough takes up to 18 hours to rise, so this is a wonderful recipe to begin 1 day ahead of time. You can also bake the bread, allow it to cool, and freeze for up to 3 months. Thaw in the refrigerator and allow to come to room temperature before serving. You can also freeze the dough. Complete the recipe through step 2. Wrap in plastic wrap and place in a freezer-friendly container. To bake, allow dough to thaw completely at room temperature and then continue with step 3 and the rest of the recipe instructions.
- Special Tools (affiliate links): Box Grater | Glass Mixing Bowls | Wooden Spoon | Dutch Oven | Parchment Paper | Bread Lame | Instant Read Thermometer | Cooling Rack
- Dutch Oven: Use a 6 quart or larger dutch oven or any large oven-safe pot with an oven-safe lid. If your dutch oven is smaller than 6 quarts, you can halve the recipe (instructions remain the same, just halve each ingredient) or make the recipe as directed in step 1, shape the dough into 2 balls in step 2, and bake them one at a time in your smaller dutch oven. While the 2nd dough waits, lightly cover and keep at room temperature. The bake times in the recipe above (25 mins and then 8-10 mins) will both be a little shorter for smaller loaves.
- No dutch oven? See post above for alternative.
- Yeast: If you don’t have instant yeast, you can use active-dry. I’ve never had a problem using active dry yeast in this recipe—and with no other changes needed. Works wonderfully!
- Bread Flour or Whole Wheat Flour: I use all-purpose flour here since it’s more readily available to most bakers. However, I love baking bread with bread flour and it can definitely be substituted with no other changes needed to the recipe. You can also substitute 1 cup of the flour for whole wheat flour. Do not use all whole wheat flour, as the bread will taste quite dense and heavy.
- Parchment Paper: If your parchment paper can only be heated to a certain temperature, bake the bread at that temperature. Bake the bread a little longer to compensate for the lower temperature.
- Reference my Baking with Yeast Guide for answers to common yeast FAQs.
- Recipe adapted from Red Star Yeast, method originally from Jim Lahey.


Reader Comments and Reviews
Absolutely loved this recipe. One small problem. I baked it exactly as you said in your recipe but after letting it cool, I’ve found it wasn’t quite done. Is it okay to put back in the oven for a few more minutes?
Hi Karen, you can certainly try placing the baked loaf back into the oven for a few minutes. If you have an instant read thermometer, yeast doughs/bread is done when it reads the center of the loaf/pan/bread as 195°F(90°C). So glad you enjoyed the bread!
Very good. This bread recipe is so different for me. The fact that the dough is so sticky and hard to work with had me really worried about the final product. I added a 1/2 tsp of garlic and onion powder to it because my husband and I like that additional flavor. The final product is very good. It is not a high-rise loaf type, but the flavor is so good. I love the spiciness of the jalapenos and the taste of the cheddar cheese. My husband said that I should make this again. The next time I do I am going to modify my sourdough loaf to this flavor. Very good and I would recommend.
1/2 teaspoon of the active yeast? That seems like so little?
Hi Ann! This slow-rise method of bread making doesn’t require much yeast. Let us know if you give it a try!
Hi Sally. I’m about to make this recipe, but have one question. Should I remove the seeds before dicing the pepper?
Hi Sue, if you like extra spice, you can leave the seeds in.
Excellent, easy bread! I just made it- yummm! I used half bread flour and half A/P. I also used one jalapeno and one fresno pepper, and topped with rinsed pickled jalapeno slices. For me, next time I will try it with more chopped peppers, but hands down it’s a winner! Thanks Sally!!!
I just made this for the first time. First time making bread ever. This was so easy and delicious! Will definitely be making this again as well as trying out new flavors.
Jalapeno cheddar bread from our local grocery store is my brother’s favorite, so I surprised him by making this homemade version so it was ready when he arrived home for Christmas. It was an immediate hit! Super easy and forgiving recipe (it was so cold in the house I was worried the bread wouldn’t rise, but it worked great). I doubled the jalapeno since we like a bit of spice and I might even add a 3rd next time I make it – so delicious! As always, Sally’s never lets me down – thank you! 🙂
Hi Sally! I haven’t made this recipe yet, but it has inspired me to buy a cast iron Dutch oven – something I’ve been putting off for too long. Will the size of the pot make a difference in the baking time? Thanks for sharing your passion with us!
Hi Jana, size of the Dutch oven will impact the baking time a bit. 6 qt or higher is ideal for this recipe, but if using a smaller size, you will want to divide the dough into smaller portions and the bake time will be a bit shorter. Hope you enjoy this recipe!
Our family loves this bread! It so simple to make. I’ve been in a pinch not having 12-18 hours to let it sit and have baked it 8 hours after throwing it together AND it’s still fabulous! This is my go to bread recipe. We love how crusty it gets in the Dutch oven. All of Sally’s recipes are excellent! Thank you for all your hard work perfecting these recipes, Sally! You’re the best!
This bread is absolutely our favorite! Everyone loves this bread! I make this so often for my husband, friends and family. I bought and dutch oven and I use it so often. This is my go to bread and it is so very simple to make. It comes out perfect every time. Thank you Sally for sharing these simple recipes! Love it!
This bread is an epic. Sumptuous
I faced a problem …the baking paper stuck to the bottom of the bread and we couldn’t get rid of it..
I dont have access to the same parchment paper you are using..
Can u please suggest something else which would not stick..
But the recipe wass perfect
Grateful to you always Sally
Hi Prerna, you can try dusting your parchment with flour or cornmeal. Or, if using the option to bake on a baking sheet, you can use a silicone baking mat. You can also try lowering your oven temperature a bit and baking for a bit longer to prevent the parchment from burning to the bottom of your bread. Glad you enjoyed this recipe!
Can I make this into break apart rolls? Easier for a group to tear hunks off. I was thinking I could just drop equal-ish sized pieces into the dutch oven. What do you suggest? Thanks & i love your recipes!
Hi Syl, we haven’t tested this bread as rolls so we’re unsure how they would work as you describe. However, you might like these pizza pull apart rolls instead — you could use cheddar in the middle and top with more cheddar and jalapenos. Let us know what you try!
Questing regarding the quantity of jalapeños – is this forgiving if “too many” are added?
We’ve been growing a hot pepper none of us can remember the name of, but we’ve been calling them white jalapeños. They’re a little smaller than store variety jalapeños, plus my husband loves them, so I’m thinking about dicing up 3 or 4 of them, and am wondering if that would be “too much” for the bread?
Hi Alex, Feel free to add a bit more to adjust the amount of spice based on your heat tolerance.
Can you use Jared jalapeños drained and dried ?
Absolutely!
This recipe looks amazing. I’ve made no knead dutch oven bread before but never with jalapeño and cheddar cheese. I’m excited to try your recipe but before I do I have a question. I have dietary restrictions that severely limit my sodium intake. I couldn’t find the nutrition facts for your recipe on this page. Is it there and I just missed it? Any info you can share would be greatly appreciated.
Hi Debbie, We don’t usually include nutrition information as it can vary between different brands of the same ingredients. Plus, many recipes have ingredient substitutions or optional ingredients listed. However, there are many handy online calculators where you can plug in and customize your exact ingredients/brands. Readers have found this one especially helpful: https://www.verywellfit.com/recipe-nutrition-analyzer-4157076
I wanted to love this recipe so much and Lord knows it *smells* delish. However, my bread turned into a flat, undercooked greasy mess, I questioned how I could be so far off. For goodness sake, I weighed all the ingredients!
Decided to look up another recipe and THAT WAS THE PROBLEM! Same salt, yeast, cheese, chiles. But the weights are incorrect as listed:
Flour:
You have listed “3 cups + 2 Tablespoons (390g)”
Alternate recipes: “3 cups + 2 tablespoons unbleached all-purpose flour (450 g)”
Water:
You have listed “1 and 1/2 cups (360ml) warm water”
Alternate recipes: “1 1/2 cups water (315 ml)”
I am going to guess the folks who enjoyed this delectable bread used cup measures instead of weight. Please consider changing the recipe so other bakers aren’t sad like me. 🙂
Hi Monica, we’d be happy to help troubleshoot this recipe–so sorry to hear it turned out badly for you! 1 cup (US cup) of flour weighs about 120-125g. We use 125g as our measurement for 1 cup of flour. 1 Tablespoon of flour weighs about 8g. So (125×3) + (8×2) = 391g. For the water, 1 cup of water = 236.6ml. 236.6×1.5 = 355, which we rounded to 360ml. I’m not sure what website is using those other measurements, but those look off to us. Maybe they’re measuring with imperial cups?
Hi!
Can I double this recipe for one large loaf or would I need to bake two separate loafs? Also, can I use bread flour? Using active dry yeast.
Thanks
Hi Heidi! We recommend making two loaves. You can use bread flour in place of all-purpose flour here. No other changes to the recipe needed. Enjoy!
Hi! I did a quick review of the comments and didn’t find any answers to my question, so here it is: Would bread flour be ok for this recipe? I’m imagining so, but wanted an expert’s opinion. Thanks so much in advance!
Hi Amanda, yes, you can use bread flour in place of all-purpose flour here. No other changes to the recipe needed. Enjoy!
Thank you for your prompt reply! I made the bread today as directed: Perfection! Thanks, too, for introducing me to working successfully with yeast; I still get excited every time the dough doubles in size! The bagels are a near-weekly affair in our household, the cinnamon rolls and giant cake are Mmmm!, your Apple Cinnamon Babka is Delish!, the Honey Wheat English Muffins are waay better than store-bought and the Chocolate Croissants were FUN! 5 stars to Sally and her team!
Thank you so much for making and trusting our recipes, Linda!
Sally’s is The Best!! The cheese is ok unrefrigerated for 18 hours? Thank you.
Hi Linda! Yes, it will be fine in the bread. Let us know if you give it a try 🙂
I can’t thank you enough for sharing this recipe, your insight, and special notes. In the last few days I made your No Knead Rustic and the No Knead Jalapeno breads. Having never made a bread I was nervous, but both turned out absolutely AMAZING. You are wonderful for sharing your knowledge and talent with others. Truly, thank you.
I have made bread a handful of times in my life, and DAYUMMM, I am over the moon with this recipe. The end product was beautiful, and ridiculously edible. I didn’t use shredded cheese, I ended up finely dicing some random left over cheese ends I had in the fridge. I didn’t think it was going to work out because I didn’t put a tight cover over the dough as it rose (Just a tea towel), and it was a bit cold in the house, and I left it to rise for well over 18 hours, more like 24. It really didn’t rise very much compared to your picture. I also didn’t have a dutch oven either. So I ended up doing the water trick, and heated up a cast iron pan I had lying around and transferred the bread to the pan and tossed it in the oven. I baked it for around 25/30 minutes. As far as I can tell, with my untrained eye, it came out perfectly. Much to my surprise. The crust was PERFECT, all those little diced cheese bits showed up like little polka dot morsels all over the bread. The texture was on point. I would of had no problem buying a loaf like that at a farmers market. I am extremely pleased, and a bit proud (lol) Thank you (and Jim Lahey) so much for such a forgiving, and awesome recipe. Next time I plan on getting the dough to rise correctly, the bread was a bit dense, but not to bad. Can’t wait to see what it’s like when it’s a bit more fluffy!
What is the point in putting a cross on this bread? I understand putting it on other breads but not on this bread as it goes back together, jalapenos are put on the mark, and is barely seen if seen on the finished bread.
Hi Kai, it helps air escape while the bread bakes. Hope you enjoy this recipe!
I just made this bread this morning. I used a whole poblano pepper chopped and blotted with a paper towel. I used extra sharp cheddar cheese and a teaspoon of powdered garlic. It turned out beautifully!
This bread is so incredibly easy and absolutely delicious! It is so quick to pull together during the week and bake off the next day, and the texture and flavor are outstanding. I love your simple “no knead” breads that don’t require pulling out the mixer. Definitely a favorite!
Super delicious! I would bake for a little less time, since the bottom of the bread started to taste a little burnt in parts, but other than that, it was so good! It tastes best if you eat it the morning after and the jalapeno flavor is more enhanced.
Sorry this bread is way to salty and did not rise much at all.
This is my very favorite bread to make. We love it toasted with cream cheese. Next time I’m going to swap out the jalapeños and cheddar for shredded parmesan and roasted garlic. YummO!
This bread is absolutely delicious!!!
Can you substitute gluten free flour?
Hi Vicki, We haven’t tested this bread with high gluten flour so can’t say for sure. Let us know if you give it a try!
I made this bread before and it was great. Today I made it and it didn’t brown at all.
Help!!!
i LOVE this bread, as well as the similar artisan bread. i really wanted to make this and didn’t have the perfect ingredients on hand, so i used a jalepeno-sized handful of diced canned hatch chiles and a cup of shredded mexican cheese. came out PERFECT and probably a little less heat than the jalepenos would provide, which is perfect for me! I’ll be making this again for sure.